
 Secure Shell (SSH) keys are essential for ensuring secure communication between clients and servers. They offer a robust authentication method that is more secure than traditional passwords.
This article will guide you through generating SSH keys on Windows using Bitvise and PuTTY, two popular SSH client applications.
Generating SSH Keys with Bitvise
Bitvise is a powerful SSH client for Windows that provides a graphical interface for key generation and other functionalities. Follow these steps to generate SSH keys using Bitvise.
Download and Install Bitvise
Visit the Bitvise website and download the SSH client installer.
Run the installer and follow the prompts to install Bitvise.
Open Bitvise SSH Client
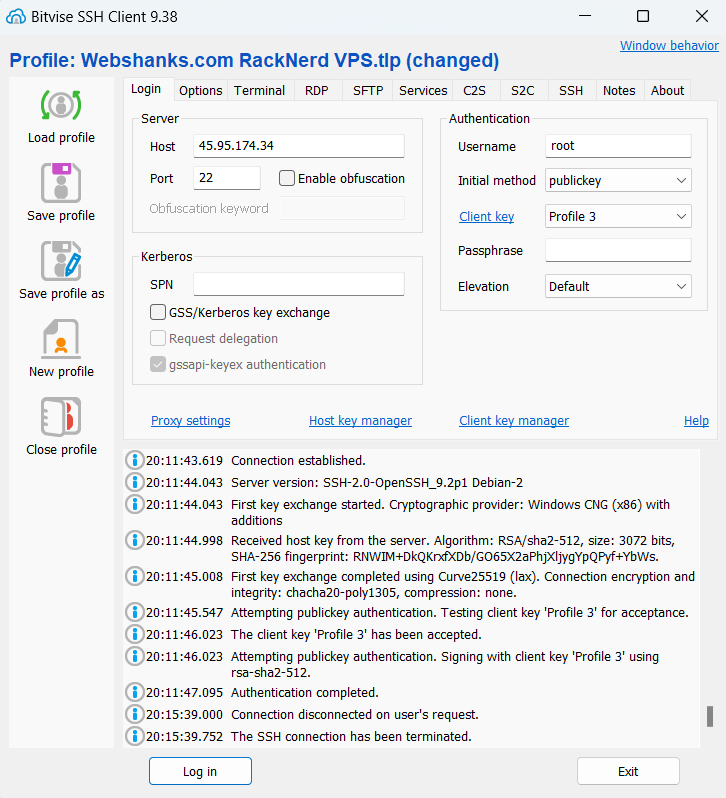
Launch the Bitvise SSH Client from the Start menu or desktop shortcut.
Generate SSH Keys
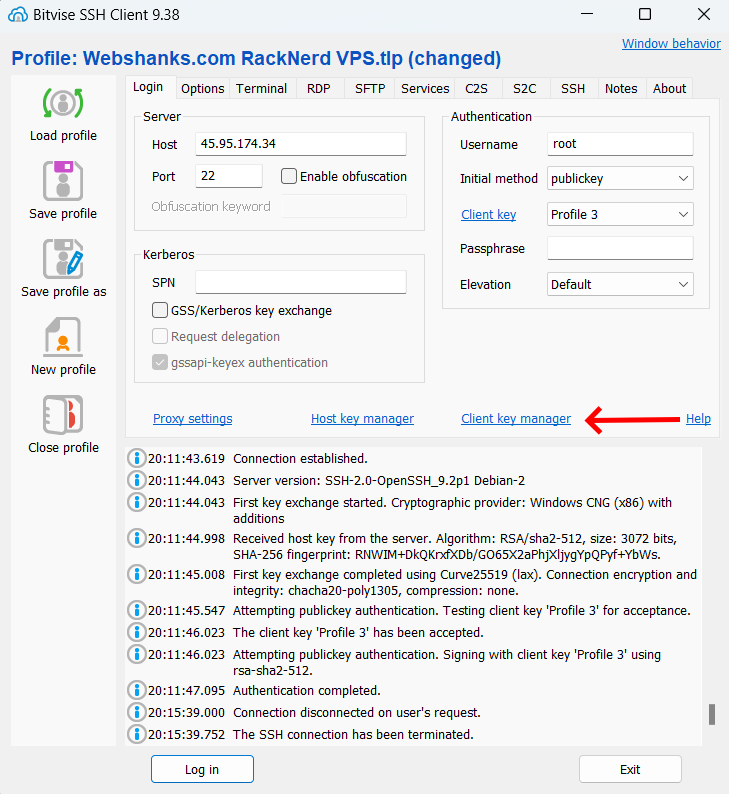
In the Bitvise SSH Client window, click on the Client key manager button located on the main interface.
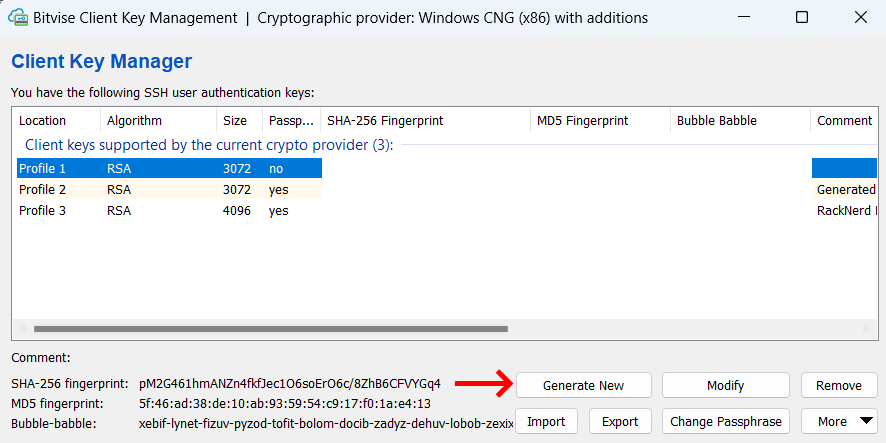
In the Client Key Manager window, click the Generate New button.
Choose the key type (RSA is commonly used) and the key size (2048-bit or 4096-bit for stronger security).
Optionally, you can provide a key comment for easier identification and a passphrase for additional security.
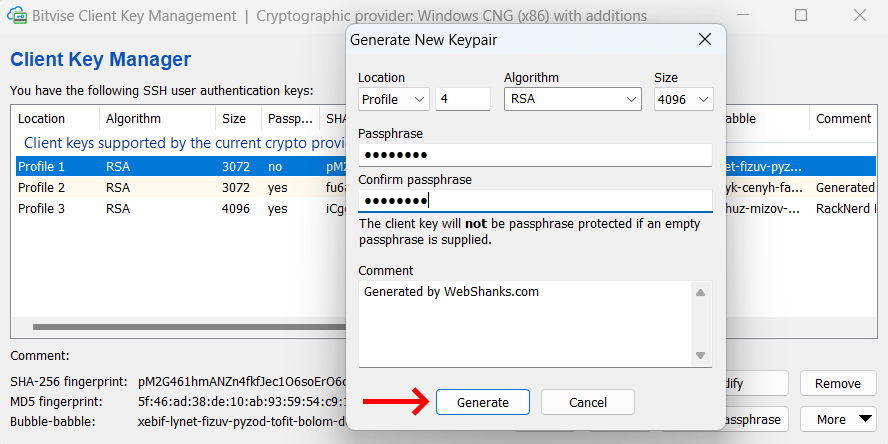
Click Generate to create the key pair.
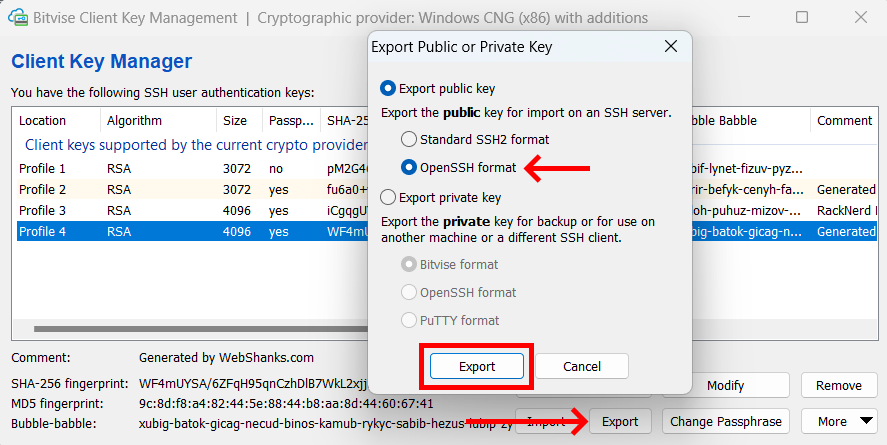
Export the public key because we will upload it on our server. Be sure to choose OpenSSH format. Also, export your private key and store both in a safe place.
We need to copy the public key for use on the SSH server.
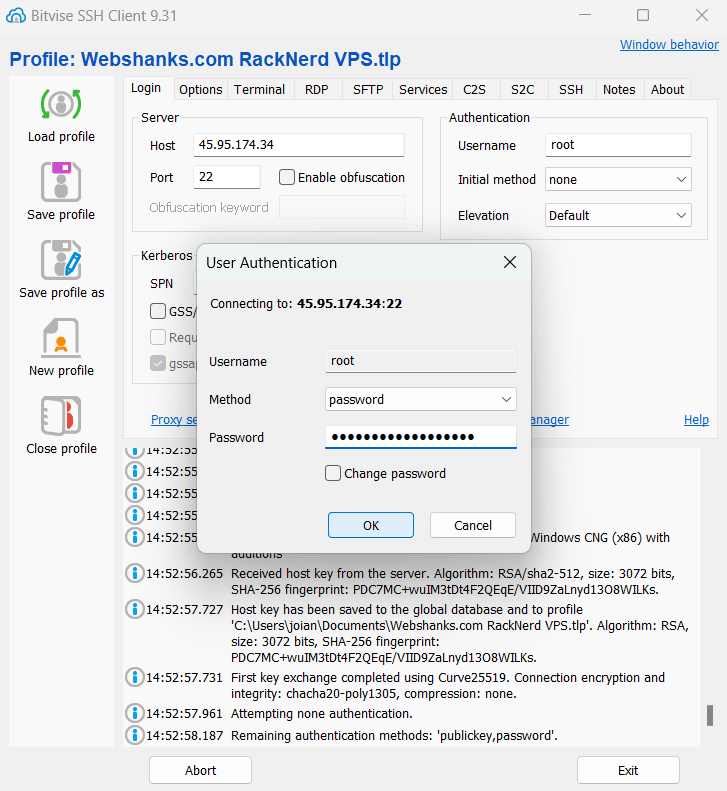
To do that, login to your server using root.
Create ssh Directory and Authorized_keys File
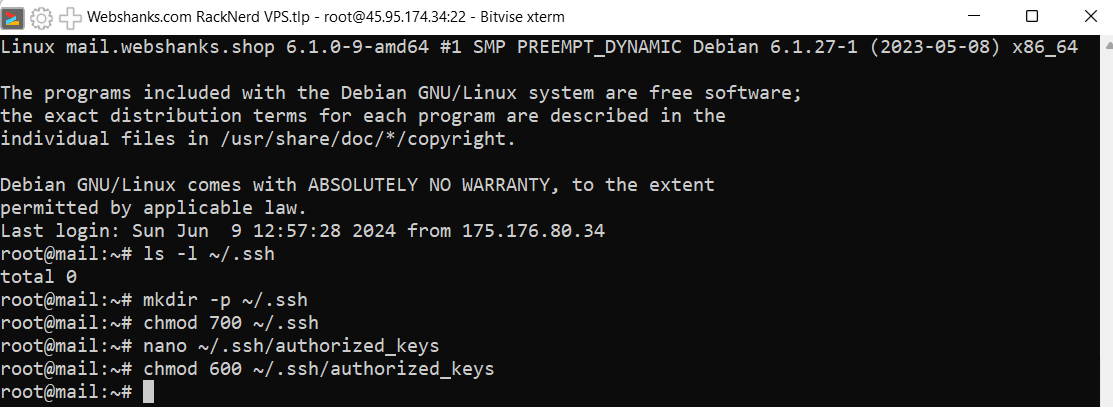
Run the command to check the list under the ssh directory.
ls -l ~/.ssh
If the list returns 0, we need to create ssh directory.
 To create the .ssh directory and the authorized_keys file in order to copy your public SSH key, follow these steps:
Run the following command to create the .ssh directory in your home directory if it does not already exist.
mkdir -p ~/.ssh
It’s important to set the correct permissions for the .ssh directory to ensure security.
chmod 700 ~/.ssh
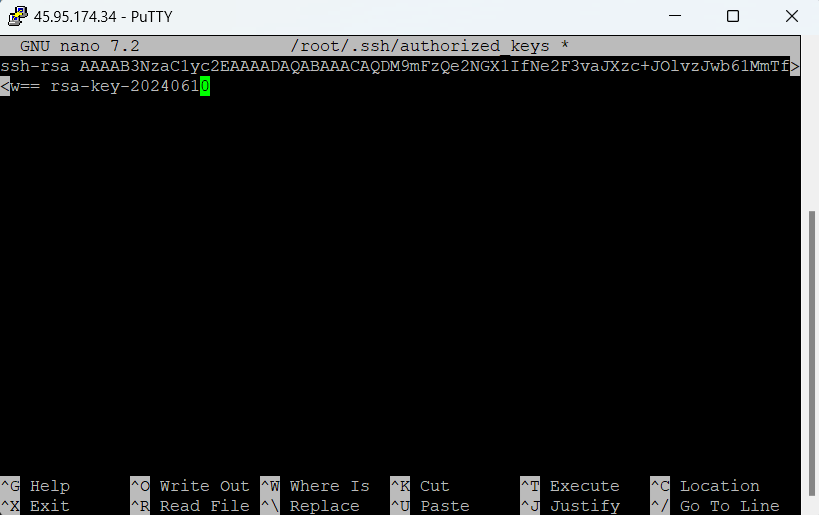
Create or update the authorized_keys file: You can now create or update the authorized_keys file by adding your public key.
nano ~/.ssh/authorized_keys
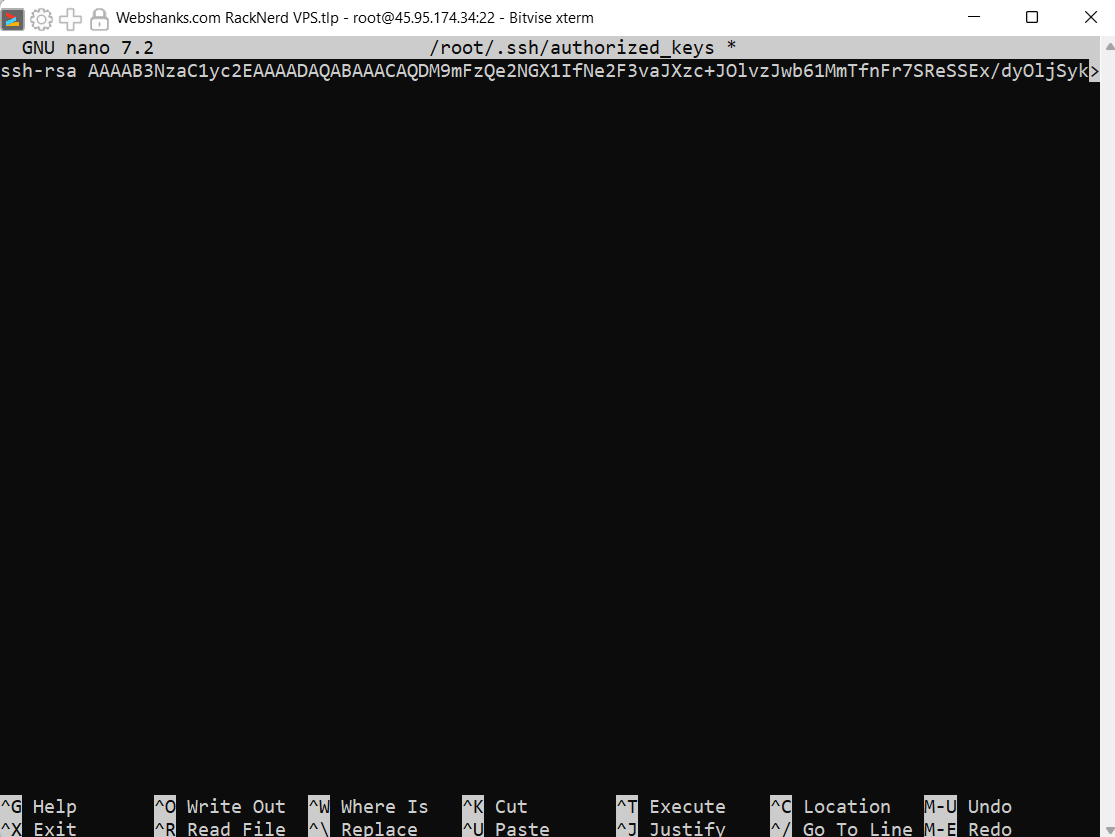
After pasting your public key, save the file and exit the text editor.
Run the following command to set the correct permissions for the authorized_keys file.
chmod 600 ~/.ssh/authorized_keys
Here is a summary of the commands you would run on the remote server:
Ensure the permissions are set correctly by listing the details of the .ssh directory.
ls -ld ~/.ssh
ls -l ~/.ssh/authorized_keys
You should be able to get drwx on ssh directory and rw on authorized_keys.

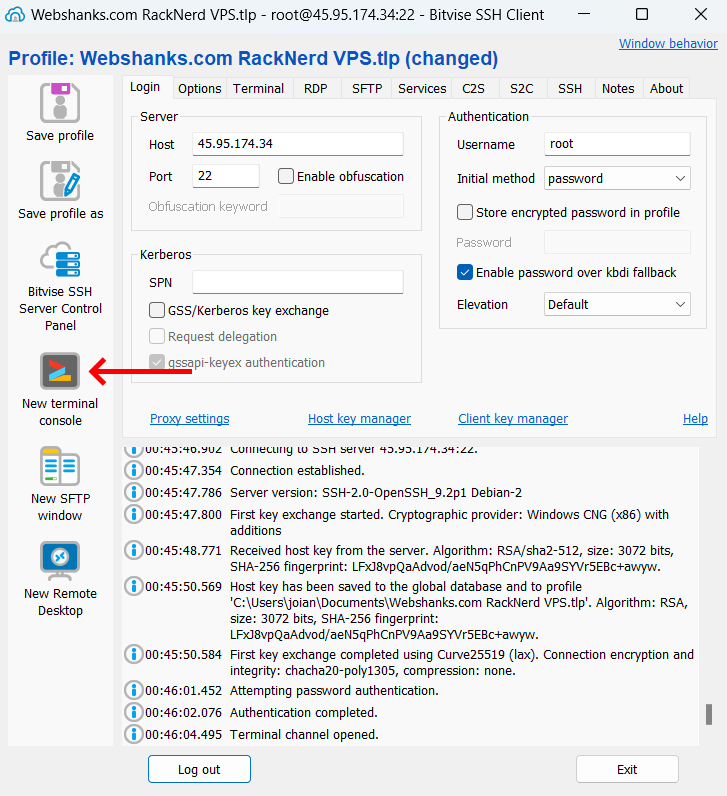
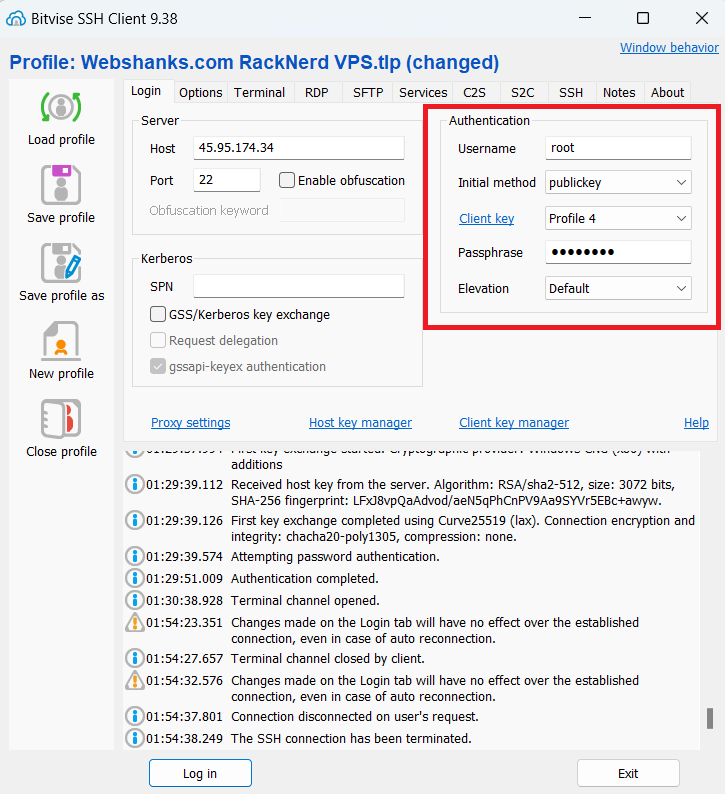
Login to Your Server with SSH Keys
Now let’s try to login using our ssh keys.
First logout to your Bitvise connection.
Use the following authentication:
- Username: root
- Initial method: publickey
- Client key: Profile name of your ssh keys
- Passphrase: Enter your passphrase or set to empty if you did not have created one
- Elevation: Default
Disable Password Authentication
Finally, we will disable root/password login.
Disabling password authentication on your server ensures that only users with SSH keys can access it, significantly enhancing security.
Here are the steps to disable password authentication on your server:
Edit the SSH daemon configuration file (sshd_config). You can use a text editor like nano or vim.
nano /etc/ssh/sshd_config
- Look for the line that contains PasswordAuthentication.
- If it is commented out (preceded by a #), uncomment it by removing the #.
- Change the value to no to disable password authentication
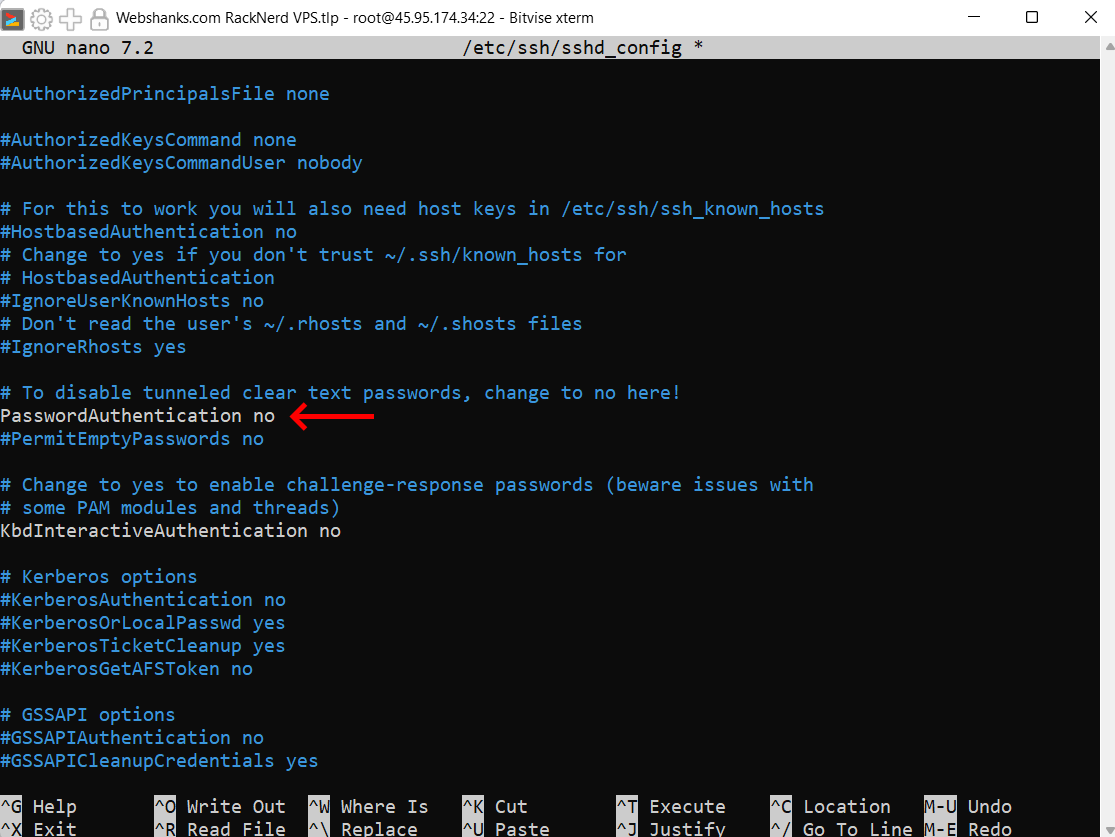
In nano, press Ctrl+X, then Y, and then Enter to save and exit.
Apply the changes by restarting the SSH service.
systemctl restart ssh
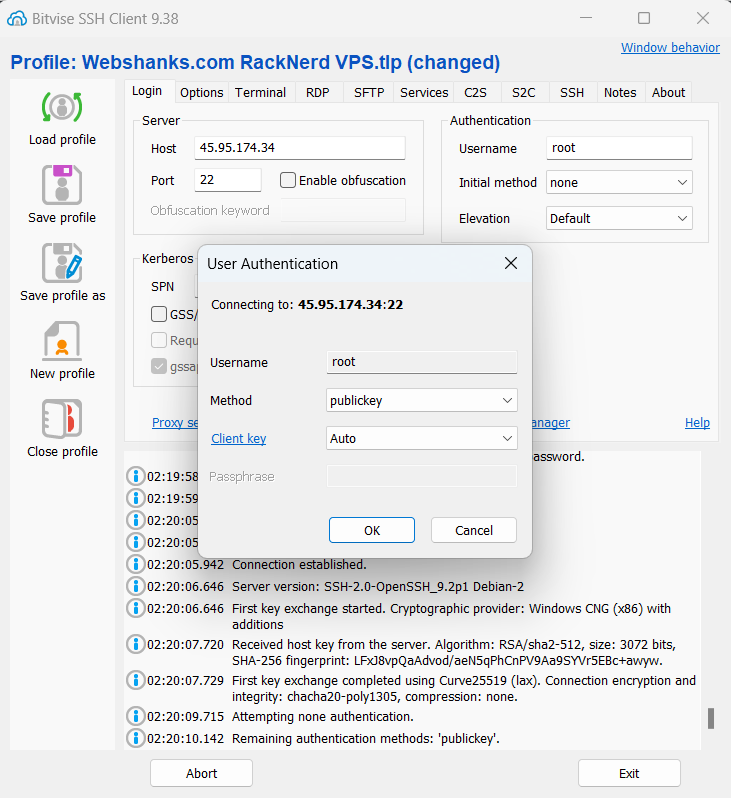
It’s a good idea to open a new terminal session and try logging in with a password to ensure that password authentication is indeed disabled.
Important Considerations
Ensure SSH Key Authentication Works: Before disabling password authentication, make sure you can log in using SSH keys. Otherwise, you might lock yourself out of the server.
Backup Configuration: Always back up the original sshd_config file before making any changes. You can copy it with:
sudo cp /etc/ssh/sshd_config /etc/ssh/sshd_config.bak
Generating SSH Keys with PuTTY
PuTTY is another widely used SSH client for Windows that comes with a key generation tool called PuTTYgen.
Follow these steps to generate SSH keys using PuTTY:
Download and Install PuTTY
Visit the PuTTY website and download the installer package.
Run the installer and follow the prompts to install PuTTY and PuTTYgen.
Launch PuTTYgen from the Start menu or desktop shortcut.
Generate SSH Keys
In the PuTTYgen window, ensure the RSA option is selected (you can also choose other types like EdDSA or ECDSA).
Set the number of bits in the generated key (2048 or 4096 for stronger security).
Click Generate and move your mouse over the blank area to generate randomness.
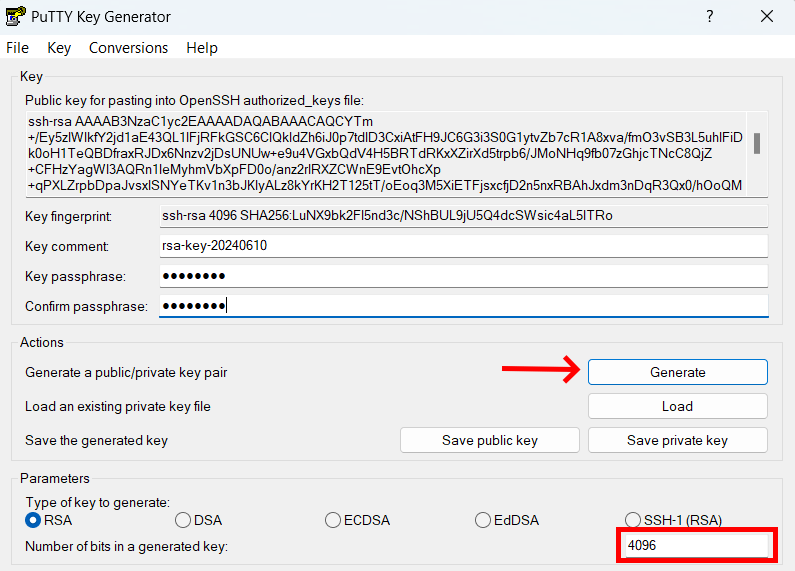
Once the key is generated, you can add a key comment and passphrase.
Click Save private key to store the private key securely on your computer.
Copy the public key displayed at the top of the PuTTYgen window for use on the SSH server.
nano ~/.ssh/authorized_keys
Use the SSH Keys
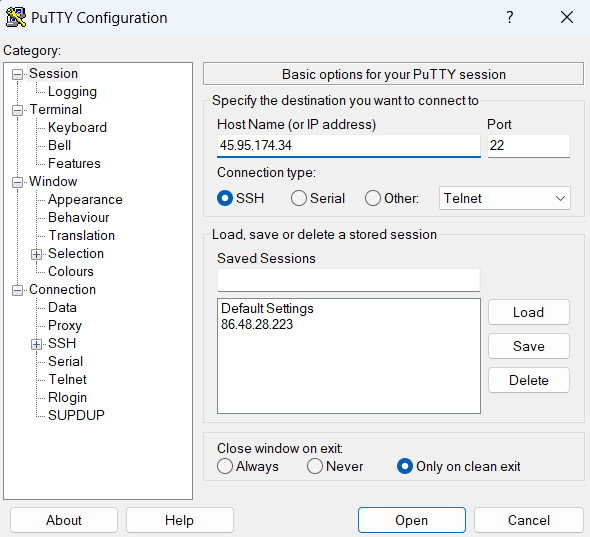
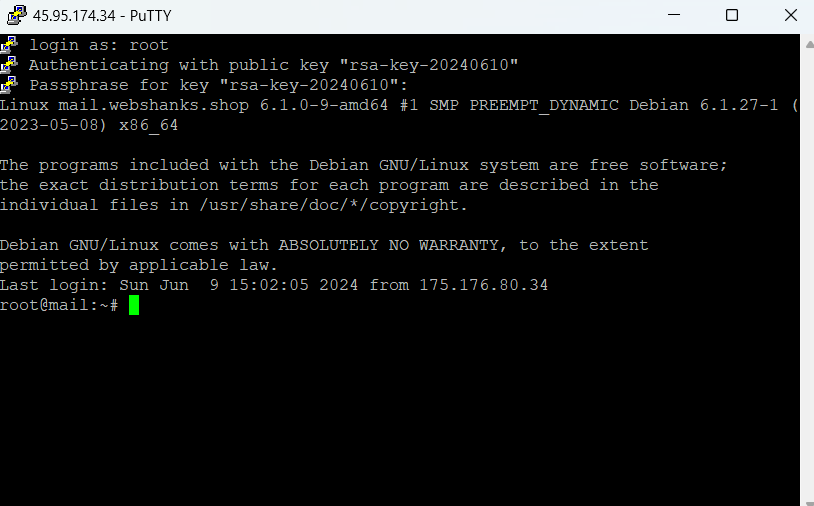
Close your PuTTY session and login using the keys generated.
Use PuTTY to connect to the server.
Configure the connection with the private key under Connection > SSH > Auth > Credentials.
Browse the location where you saved your private key and click Open.
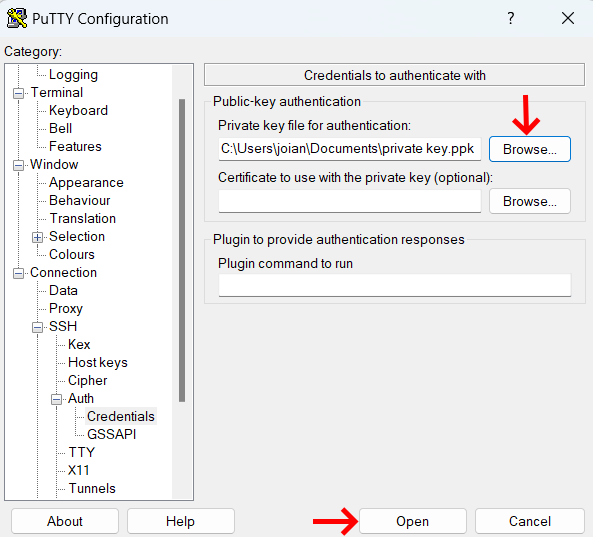
You will be asked for your username and passphrase if any.
You can now disable password authentication.
nano /etc/ssh/sshd_config
Find PasswordAuthentication and set it to no.
systemctl restart ssh
FAQs
What is an SSH key?
An SSH key is a pair of cryptographic keys used to authenticate and secure communication between a client and a server.
Why should I use SSH keys instead of passwords?
SSH keys are more secure than passwords as they are resistant to brute-force attacks and phishing. They provide a higher level of security through public-key cryptography.
If you are running email servers or hosting multiple websites, you need to use SSH key authentication.
What is the difference between Bitvise and PuTTY?
Both Bitvise and PuTTY are SSH clients for Windows, but Bitvise offers a more comprehensive graphical interface with additional features, whereas PuTTY is lightweight and comes with a dedicated key generation tool called PuTTYgen.
How do I secure my private key?
Store your private key in a secure location, use a strong passphrase, and set appropriate permissions to prevent unauthorized access.
Can I use the same SSH key for multiple servers?
Yes, you can use the same SSH key for multiple servers by copying the public key to each server’s ~/.ssh/authorized_keys file.
Conclusion
Generating SSH keys on Windows using Bitvise and PuTTY is a straightforward process that significantly enhances the security of your SSH connections.
Whether you choose Bitvise for its rich interface or PuTTY for its simplicity, both tools offer reliable methods for generating and managing SSH keys.