 Setting up a mail server using Docker Mailserver can streamline the process and make maintenance easier. In this guide, I’ll walk you through the step-by-step process of setting up a Docker Mailserver so that you can use it as an SMTP server to send and receive emails.
Docker Mailserver is free and open source.
Prerequisites
Before proceeding, ensure you have the following prerequisites:
- A server or virtual machine running Docker. Use RackNerd or Contabo for a default open Port 25 (SMTP), 465 (SMTPS), and 587 (Submission).
- A registered domain name with access to DNS settings. Use Namecheap.
Docker Mailserver Recommended System Requirements
- 1 vCore
- 2GB RAM (No ClamAV)
- Swap enabled for the container
Step 1. Get a VPS with Open Port 25
Signup with RackNerd VPS. Also check out VPS with open ports 25, 465 and 587.
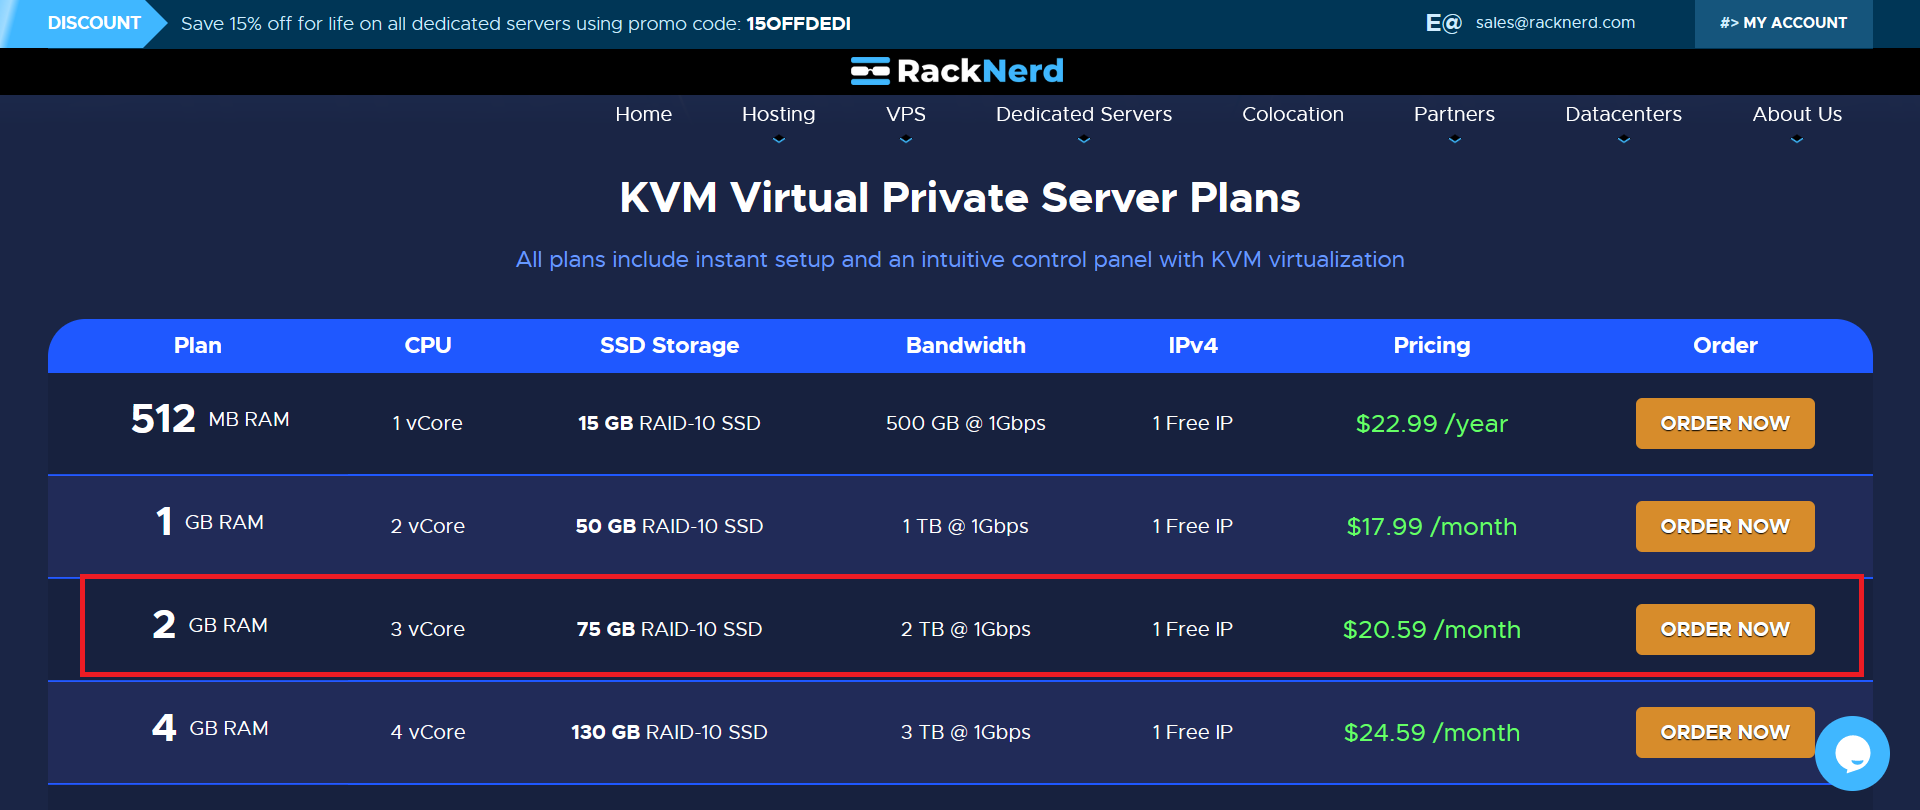
Get at least 2GB RAM. If you want to enable ClamAV, get 4GB RAM or more.
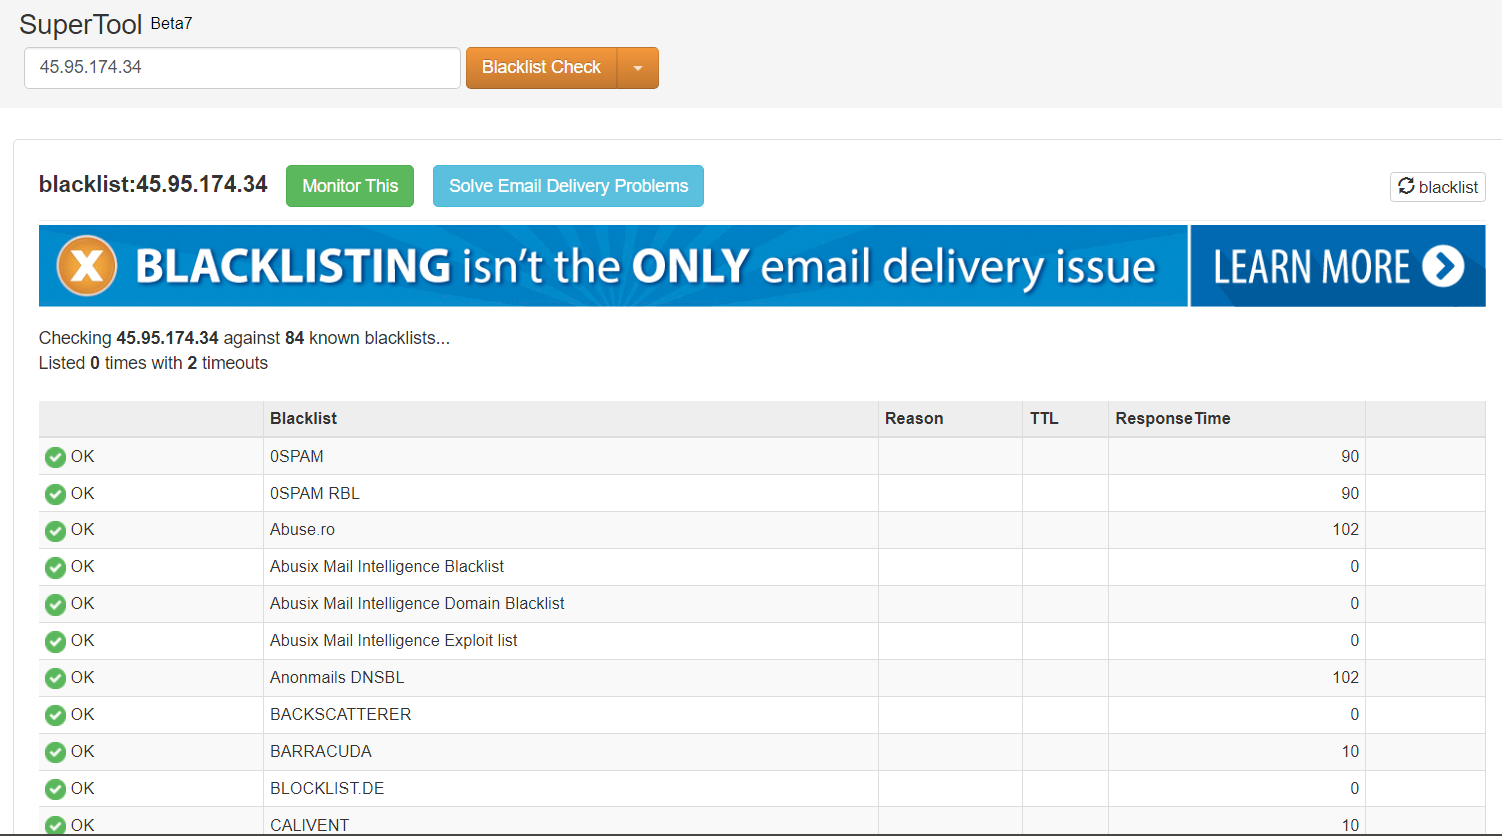
Then check your IP for blacklist.
Contact RackNerd support to get a free IPv6. Then enable IPv6 on /etc/sysctl.conf. By default IPv6 is disabled.

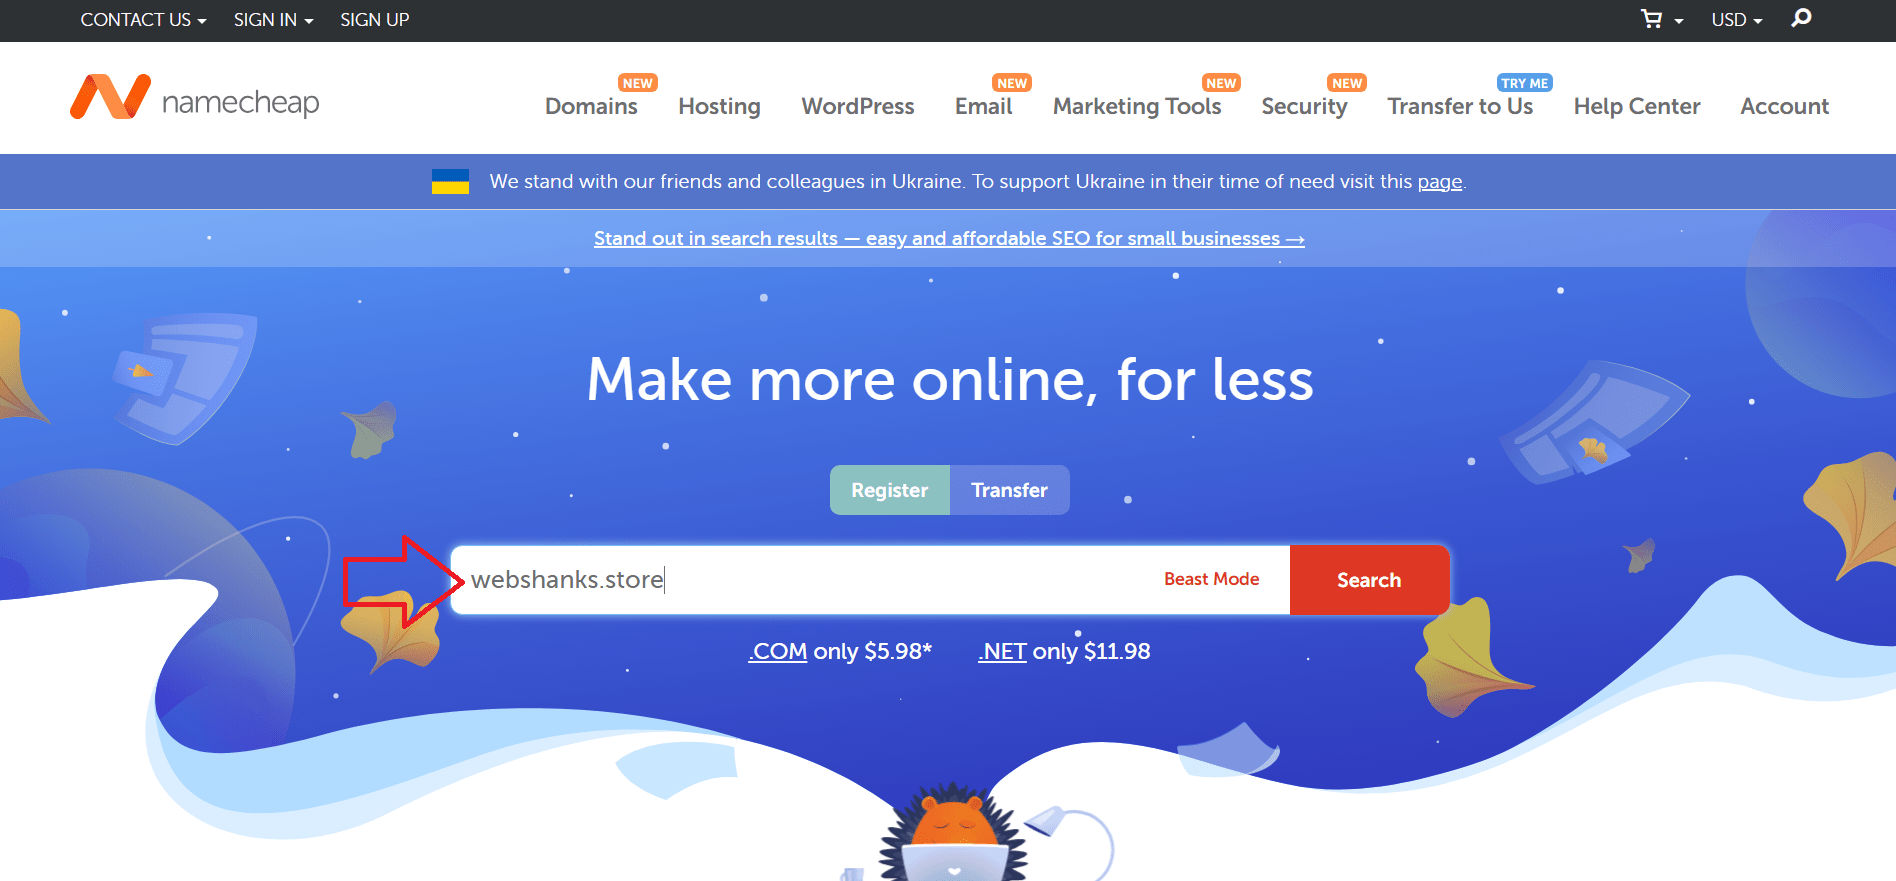
Step 2. Get a Domain
Go to Namecheap and register a domain.
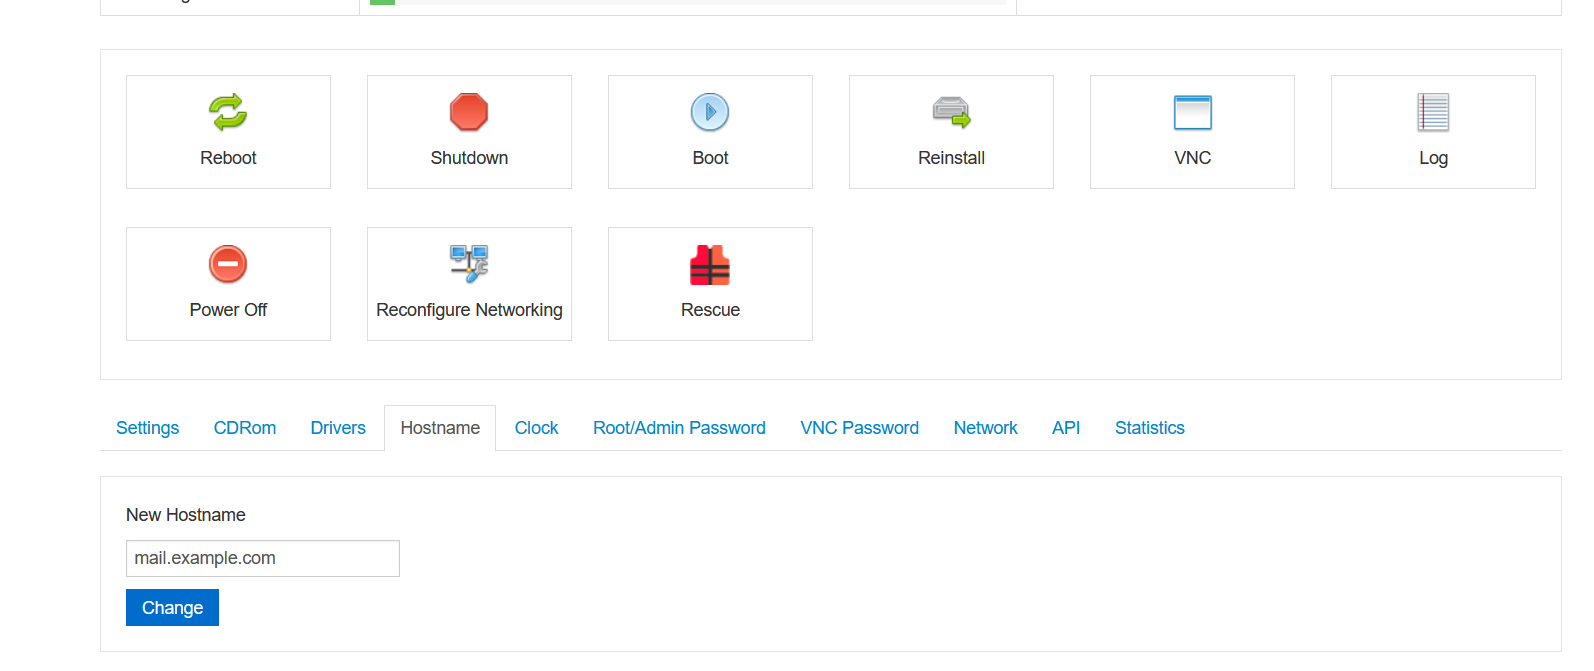
Step 3. Set Hostname, DNS Records (A, MX), and Reverse DNS
Login to your RackNerd VPS control panel and set your Hostname.
Then go to Namecheap and create an A record and an MX record.
| Host | Record | Value |
| @ | A | Server IP |
| A | Server IP | |
| @ | MX | mail.example.com priority 10 |
Reverse DNS is handled by RackNerd. Contact their support to set it to your hostname for both IPv4 and IPv6.
Step 4: Install Docker
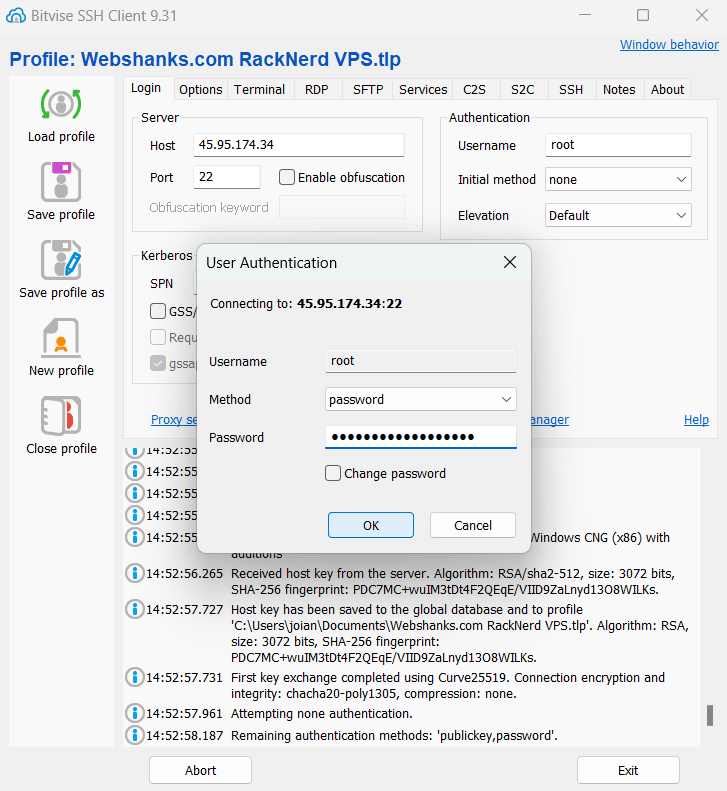
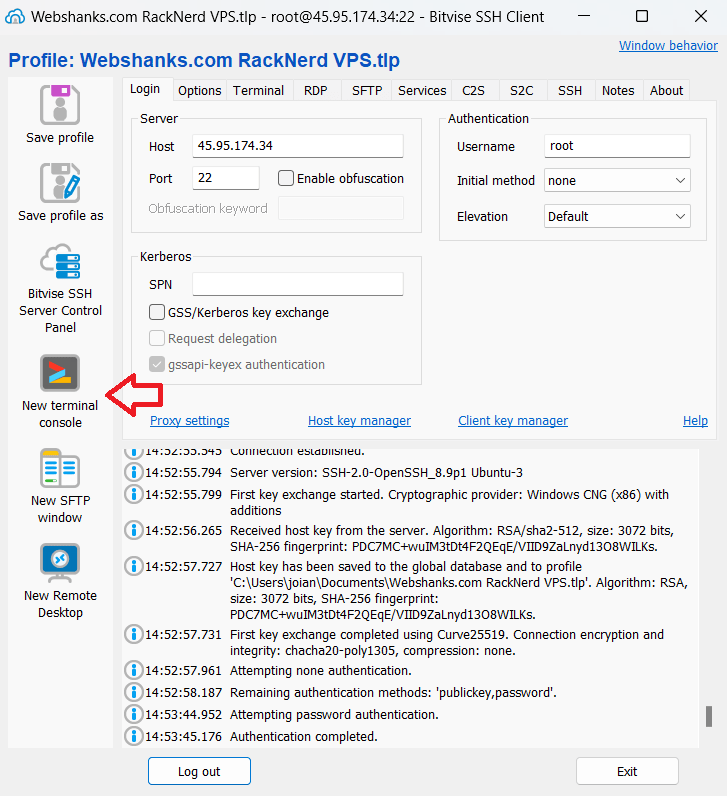
Login to your server using Bitvise or your preferred SSH client.
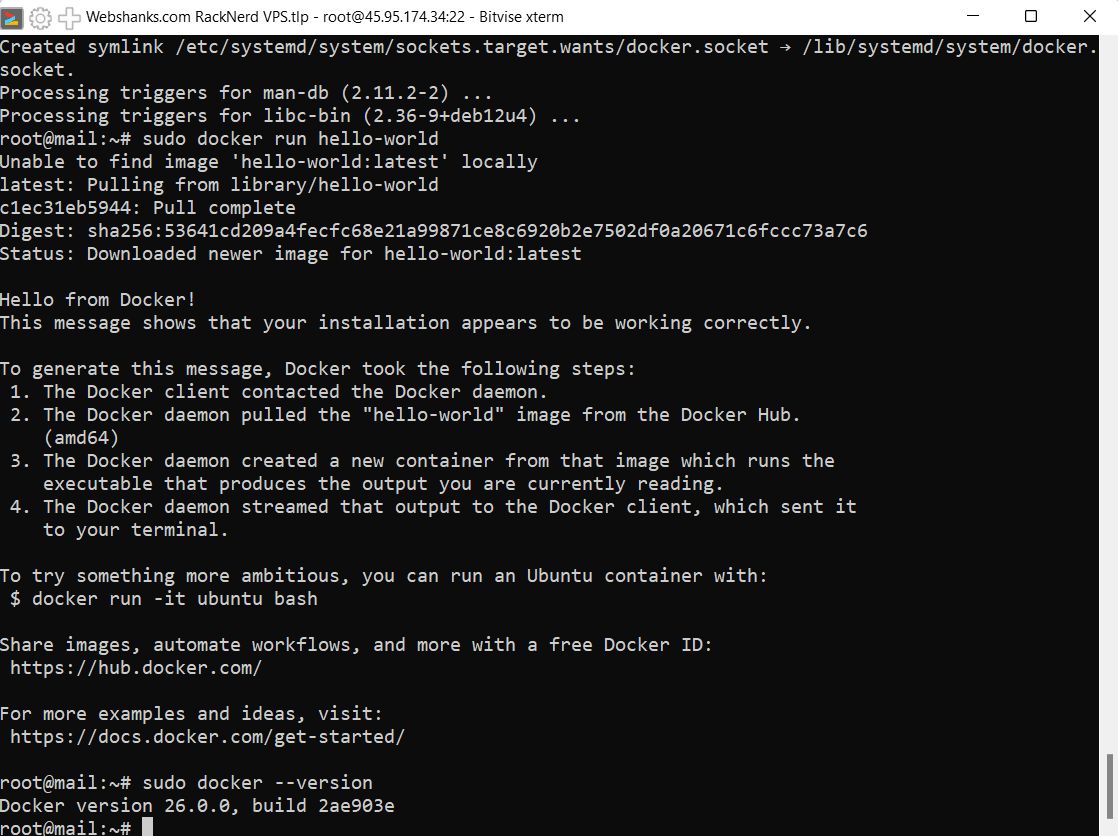
If Docker is not already installed on your system, follow the official Docker installation guide for your operating system. You can also follow my complete guide in installing Docker on Debian 12 for easy installation.
Step 5. Acquire and Configure Necessary Files
We need to run the following commands to get compose.yaml and mailserver.env files.
DMS_GITHUB_URL="https://raw.githubusercontent.com/docker-mailserver/docker-mailserver/master"
wget "${DMS_GITHUB_URL}/compose.yaml"
wget "${DMS_GITHUB_URL}/mailserver.env"
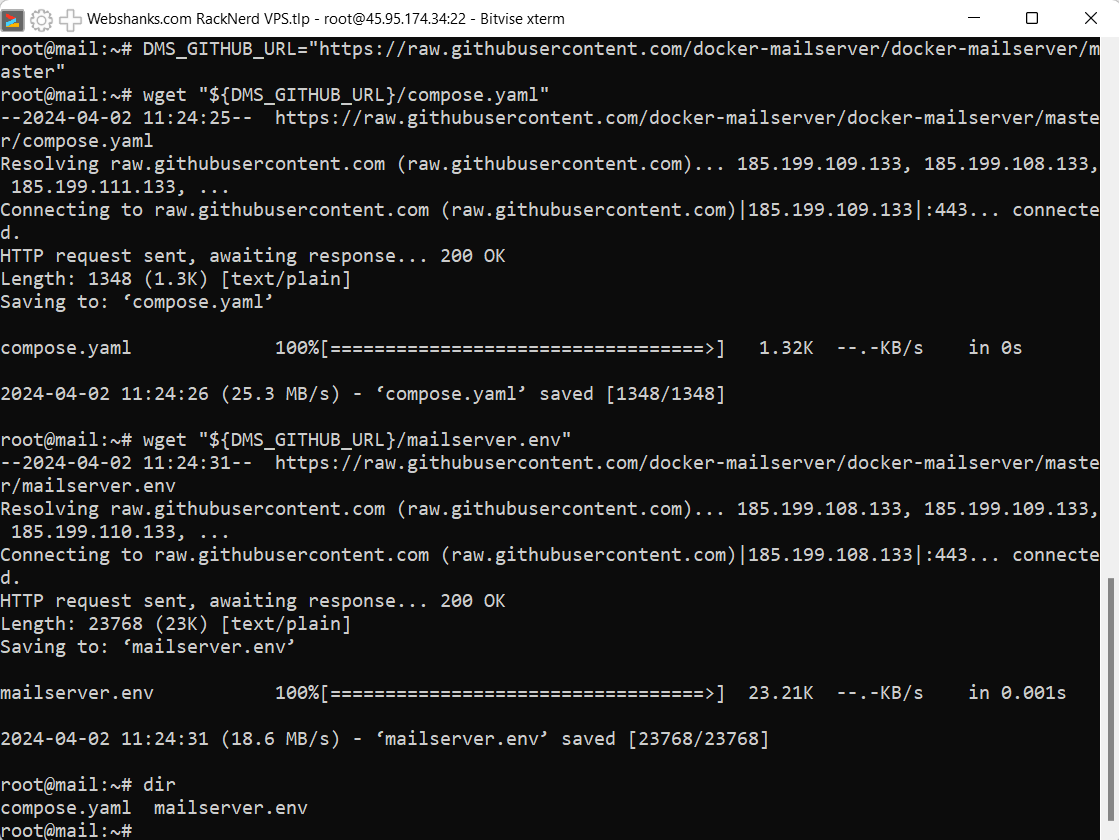
Now you should have a compose.yaml and mailserver.env files.
We need to edit compose.yaml file to set our hostname. Use your favorite editor.
nano compose.yaml
Change the value for mail.example.com to your own hostname. My hostname is mail.webshanks.shop.
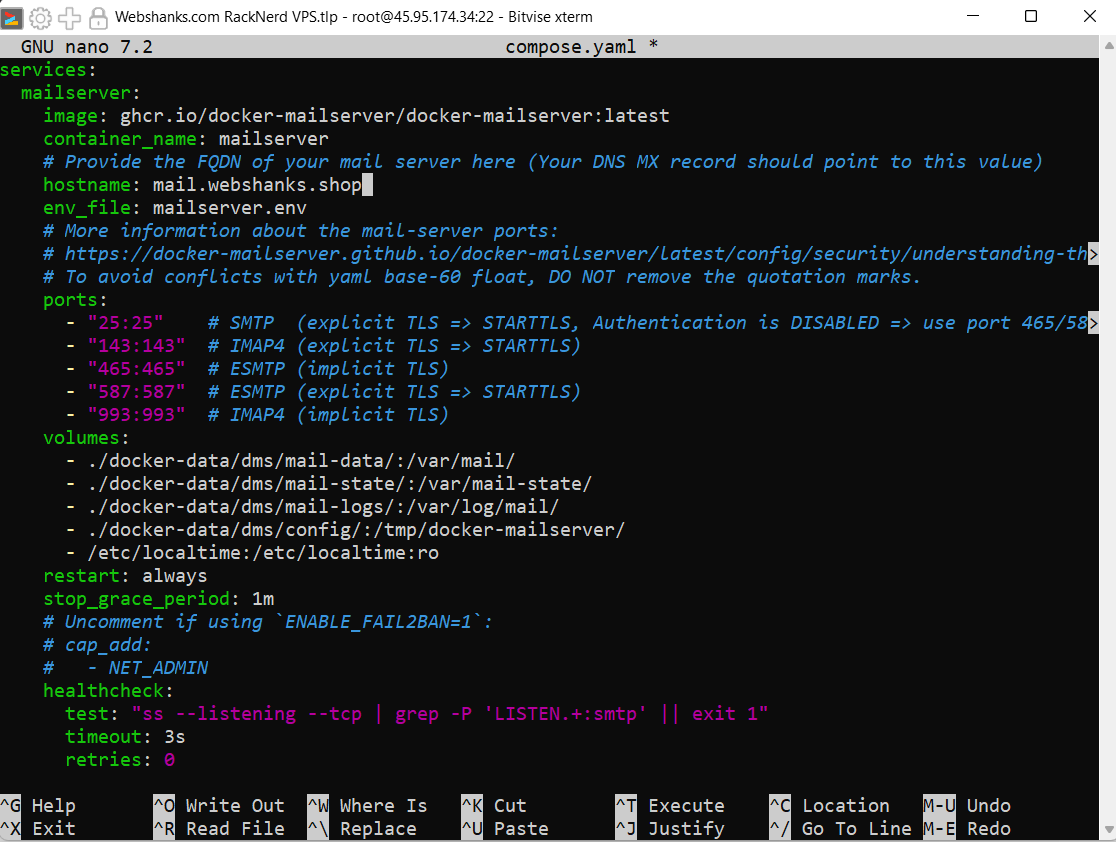
To save, click ctrl + X and choose Y and hit Enter.
Raw file:
services:
mailserver:
image: ghcr.io/docker-mailserver/docker-mailserver:latest
container_name: mailserver
# Provide the FQDN of your mail server here (Your DNS MX record should point to this value)
hostname: mail.webshanks.shop
env_file: mailserver.env
# More information about the mail-server ports:
# https://docker-mailserver.github.io/docker-mailserver/latest/config/security/understanding-th>
# To avoid conflicts with yaml base-60 float, DO NOT remove the quotation marks.
ports:
- "25:25" # SMTP (explicit TLS => STARTTLS, Authentication is DISABLED => use port 465/58>
- "143:143" # IMAP4 (explicit TLS => STARTTLS)
- "465:465" # ESMTP (implicit TLS)
- "587:587" # ESMTP (explicit TLS => STARTTLS)
- "993:993" # IMAP4 (implicit TLS)
volumes:
- ./docker-data/dms/mail-data/:/var/mail/
- ./docker-data/dms/mail-state/:/var/mail-state/
- ./docker-data/dms/mail-logs/:/var/log/mail/
- ./docker-data/dms/config/:/tmp/docker-mailserver/
- /etc/localtime:/etc/localtime:ro
restart: always
stop_grace_period: 1m
# Uncomment if using `ENABLE_FAIL2BAN=1`:
# cap_add:
# - NET_ADMIN
healthcheck:
test: "ss --listening --tcp | grep -P 'LISTEN.+:smtp' || exit 1"
timeout: 3s
retries: 0
For mailserver.env file, you can enable ClamAV by setting it to 1 but be sure to have at least 4GB of memory.
Step 6: Get the Mail Server Up and Running
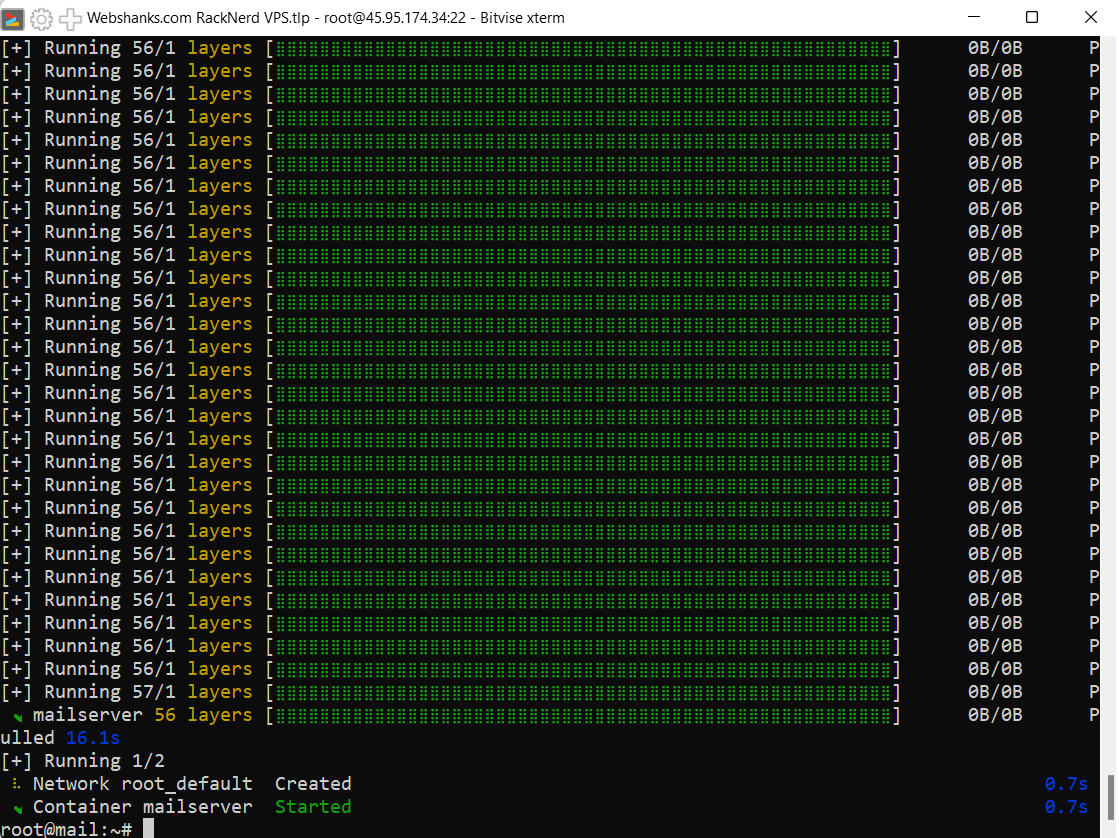
Let’s start our Docker Mailserver by running the following command:
docker compose up -d

You should be able to get a result like this.
Step 7: Create an Email Address
It’s time to create an email server so that we can get DKIM keys later on. Be sure to replace the email below with your own email address.
docker exec -ti mailserver setup email add [email protected]
The mailserver is your container name found in compose.yaml. Once you run the command it will require you to enter a password for your email.

Then run the following command to get the DKIM key.
docker exec -ti mailserver setup config dkim
The key is found here:
docker-data/dms/config/opendkim/keys/example.com/mail.txt
Use Bitvise SFTP to retrieve the file.
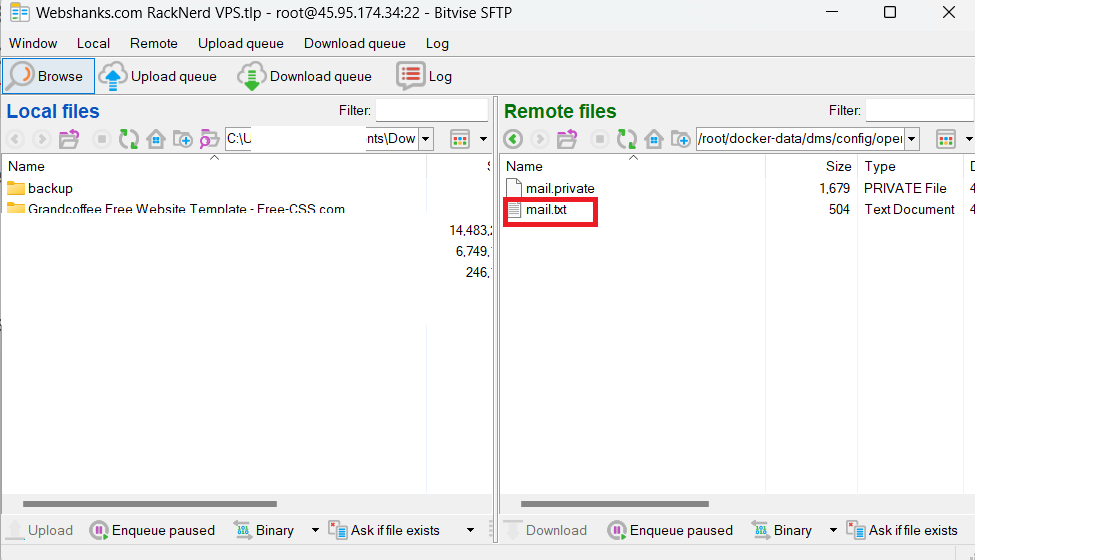
The mail.txt file will look like this:

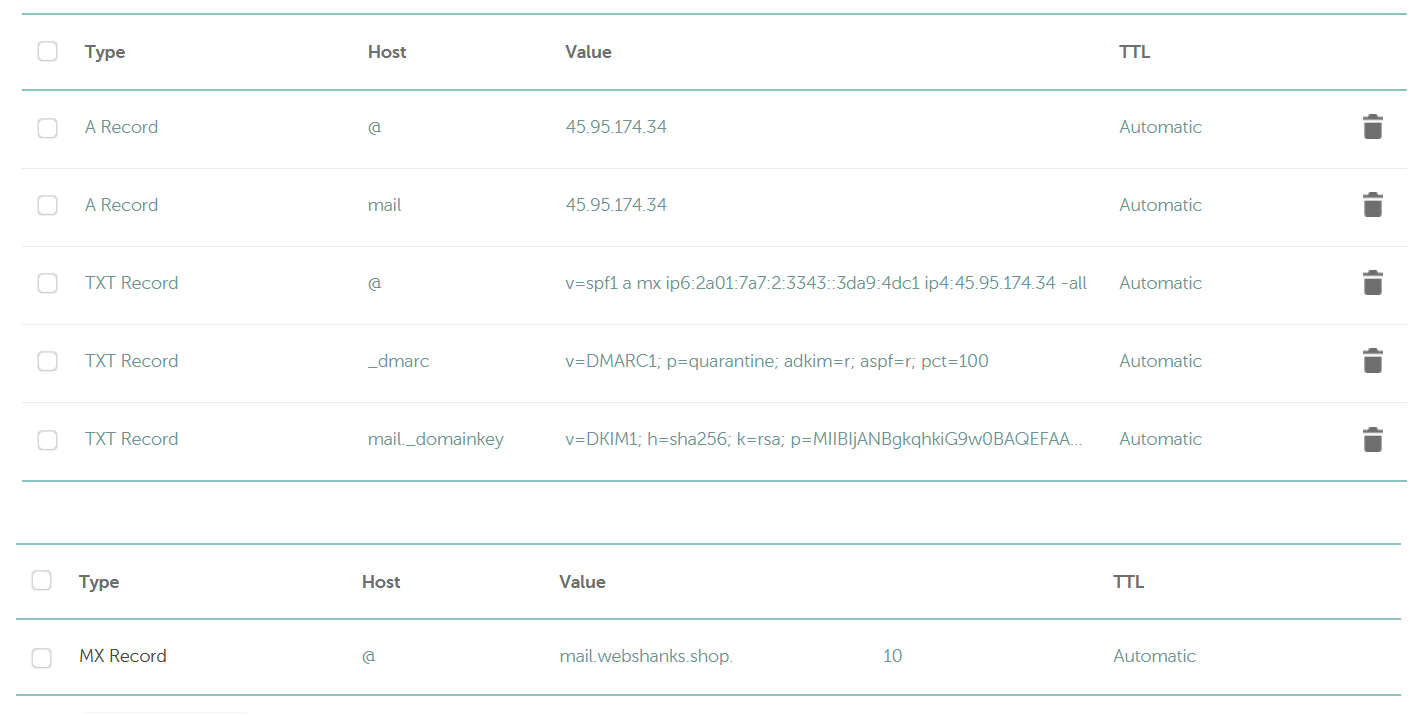
Now we have the DKIM key and we will add this to our DNS records. Do not include parenthesis and quotation marks.
Then add the SPF and DMARC records. Be sure to replace the respective IPs with your own.
| Host | Record | Value |
| @ | TXT | v=spf1 a mx ip6:2a01:7a7:2:3343::3da9:4dc1 ip4:45.95.174.34 -all |
| _dmarc | TXT | v=DMARC1; p=quarantine; adkim=r; aspf=r; pct=100 |
This is now your complete DNS records for your Docker Mailserver.
Step 8: Get an SSL Certificate for Mail Hostname
Now we need to secure our mail hostname with SSL. We will use Let’s Encrypt.
Let’s issue a certificate using the following commands:
Be sure to change the mail hostname with your own.
docker run --rm -it \
-v "${PWD}/docker-data/certbot/certs/:/etc/letsencrypt/" \
-v "${PWD}/docker-data/certbot/logs/:/var/log/letsencrypt/" \
-p 80:80 \
certbot/certbot certonly --standalone -d mail.webshanks.shop
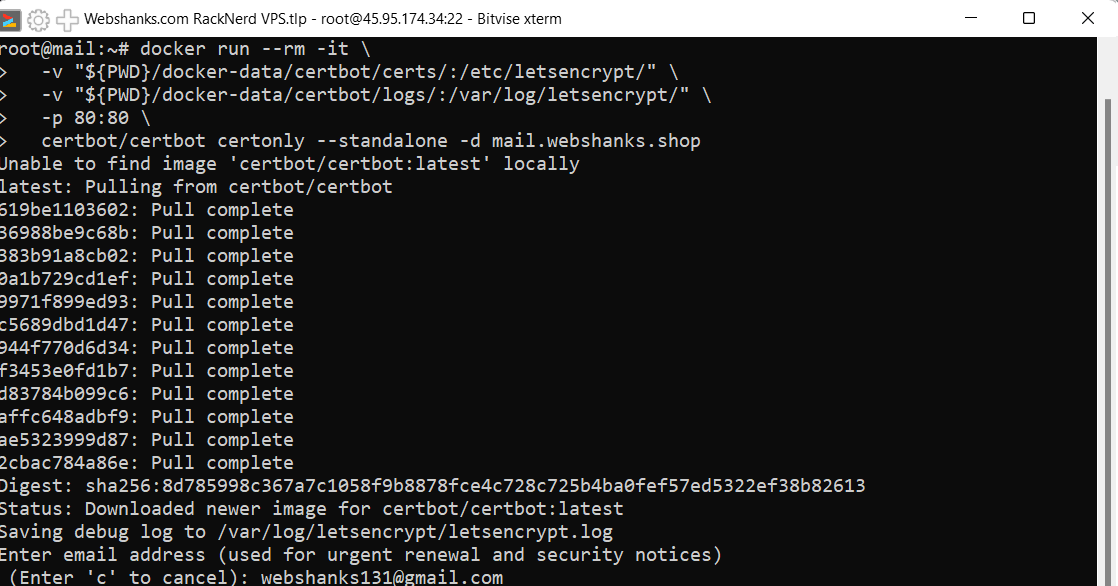
You will be asked for an email address.
Enter email address (used for urgent renewal and security notices)
(Enter ‘c’ to cancel):
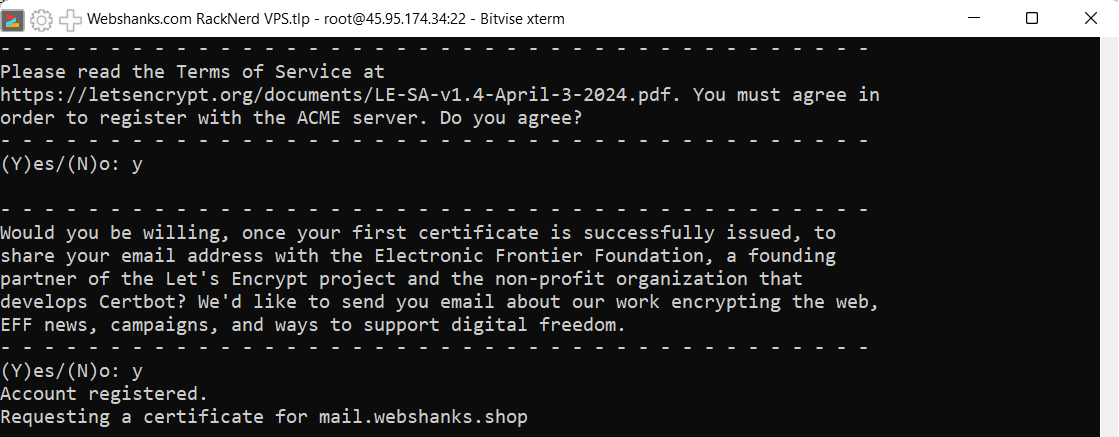
Then you need to agree to a terms of service. Just choose Y.
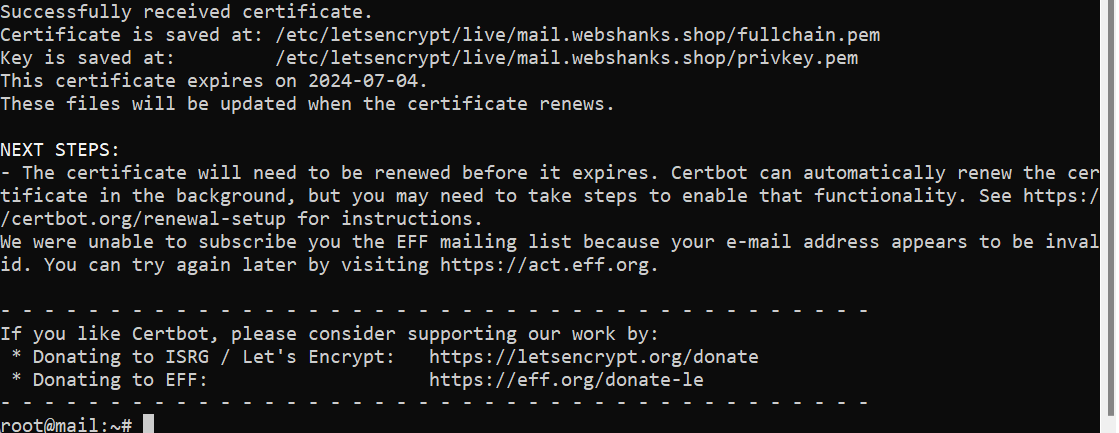
The certificate will expire in 90 days. Renew the certificate before it expires using the command:
docker run --rm -it \
-v "${PWD}/docker-data/certbot/certs/:/etc/letsencrypt/" \
-v "${PWD}/docker-data/certbot/logs/:/var/log/letsencrypt/" \
-p 80:80 \
-p 443:443 \
certbot/certbot renew
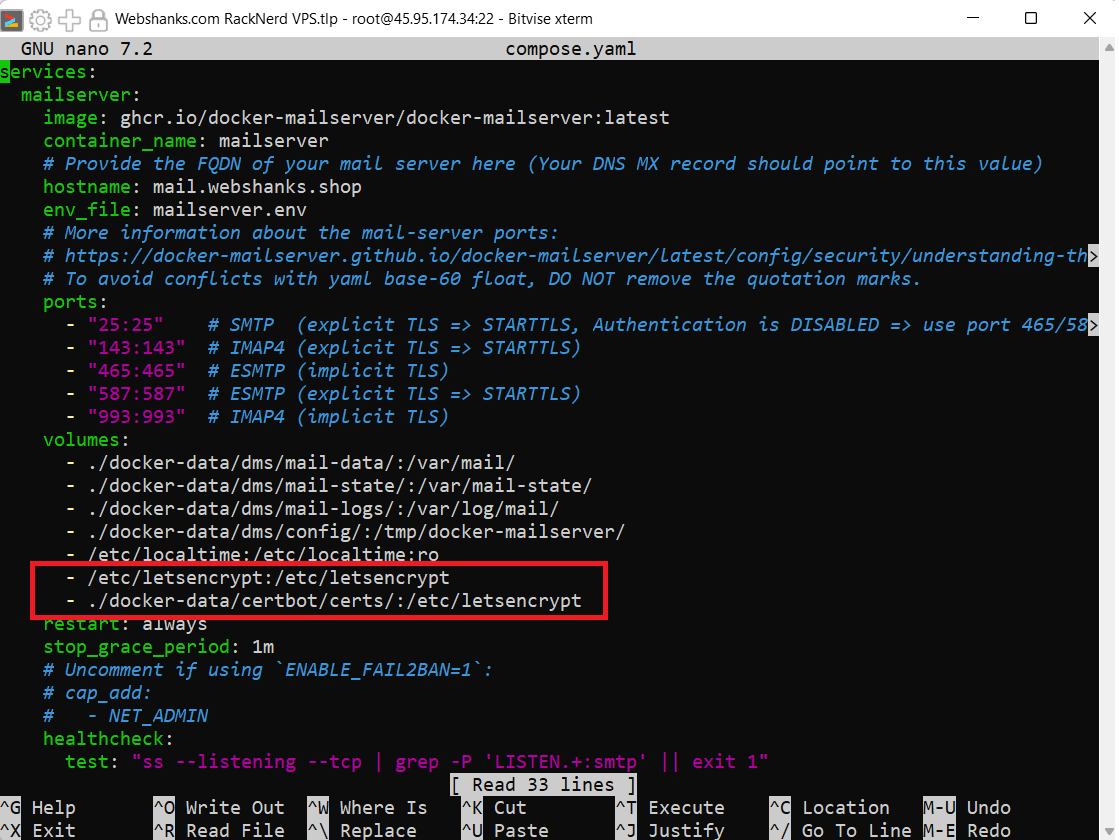
Now we will add some lines in compose.yaml and mailserver.env files.
Add these lines to compose.yaml under volumes:
– /etc/letsencrypt:/etc/letsencrypt
– ./docker-data/certbot/certs/:/etc/letsencrypt
nano compose.yaml
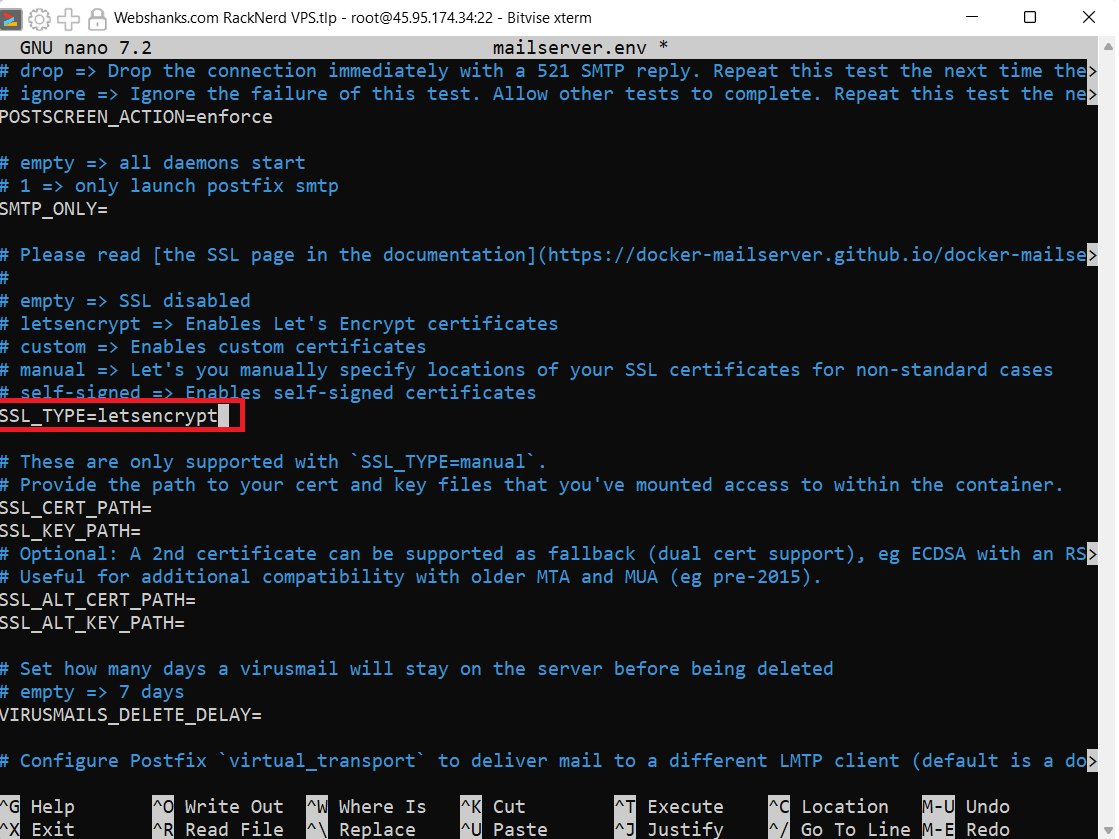
Add this line to mailserver.env file:
SSL_TYPE=letsencrypt
nano mailserver.env
Once we issue an SSL certificate for our mail hostname let’s start the daemon so that the changes we made on compose.yaml and mailserver.env will take effect.
docker compose up -d

Step 9. Configure Email Client to Use Docker Mailserver Relay
So now we have configured our Docker Mailserver, we need to use it on an email client or your favorite cold email outreach tool.
Docker Mailserver has no graphical interface or webmail, unlike CyberPanel, mailcow, and iRedMail.
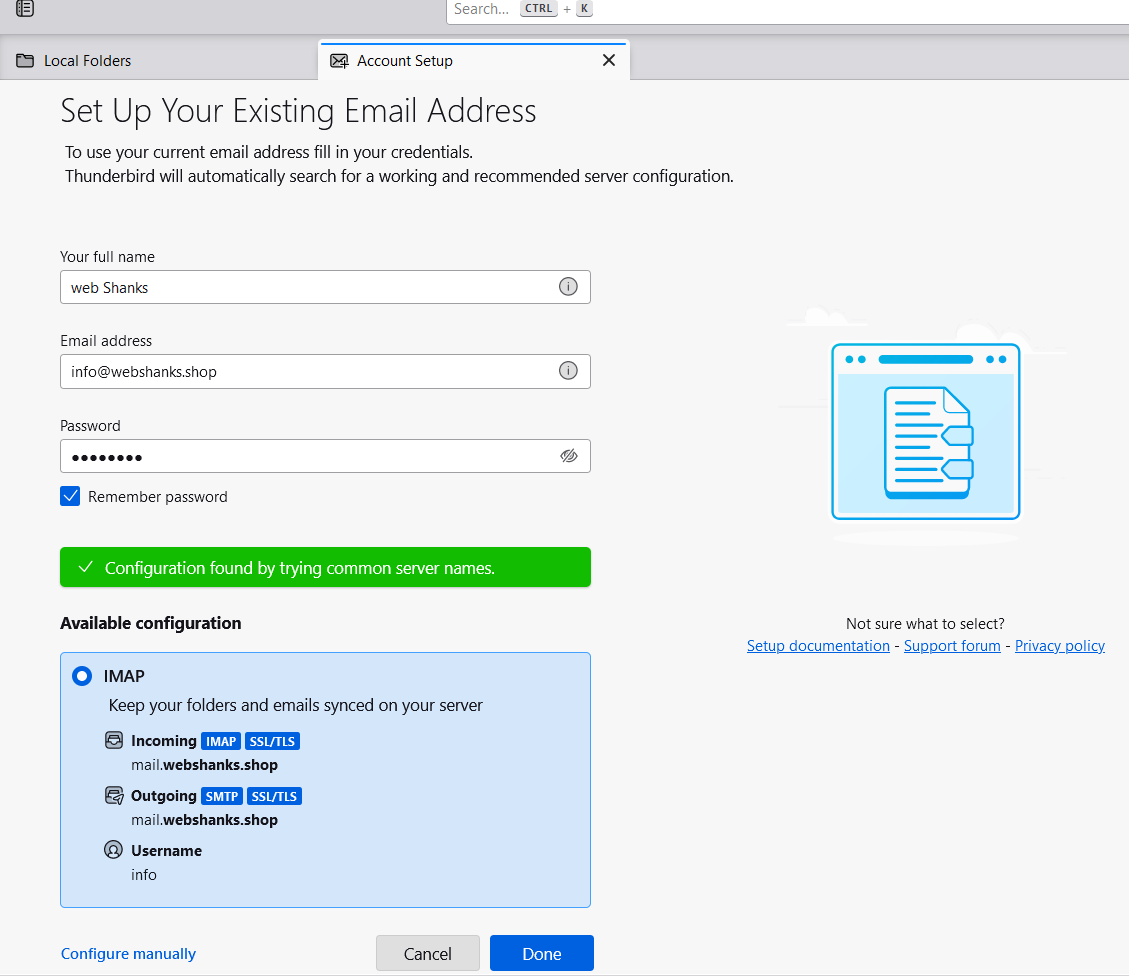
I will be using Thunderbird.
Enter your full name, the email address you created during setting up the mail server, and your password.
If you want to manually add IMAP and SMTP settings for other email clients, use these configurations:
IMAP
- Incoming Mail Server: mail.yourdomain.com
- Port: 993
- Username: Your full email address
- Password: The password you set in CyberPanel
- Connection: TLS
SMTP
- Outgoing Mail Server: mail.yourdomain.com
- Port: 587
- Username: Your full email address
- Password: The password you set in CyberPanel
- Connection: STARTTLS
Step 10. Test Docker Mailserver
Now we’ve reached this far, it’s time to test our Docker Mailserver. We will test it on Mail-Tester. Let’s see how it will perform.
Go to Mail-Tester and copy the test recipient.
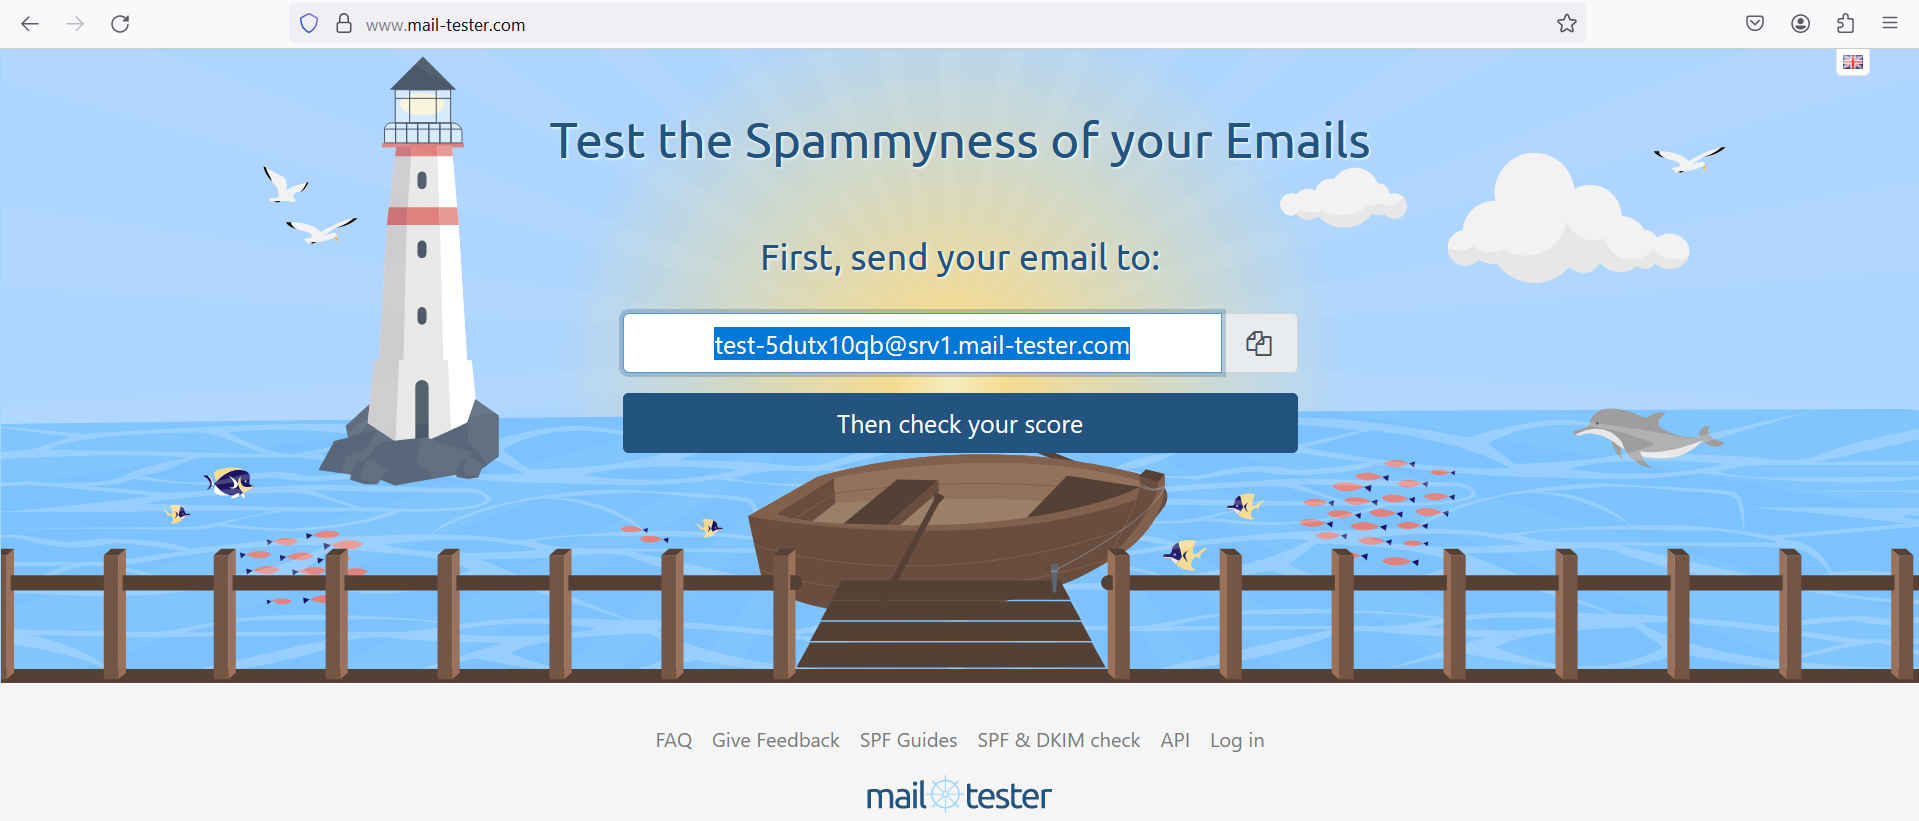
Then let’s send a test email.

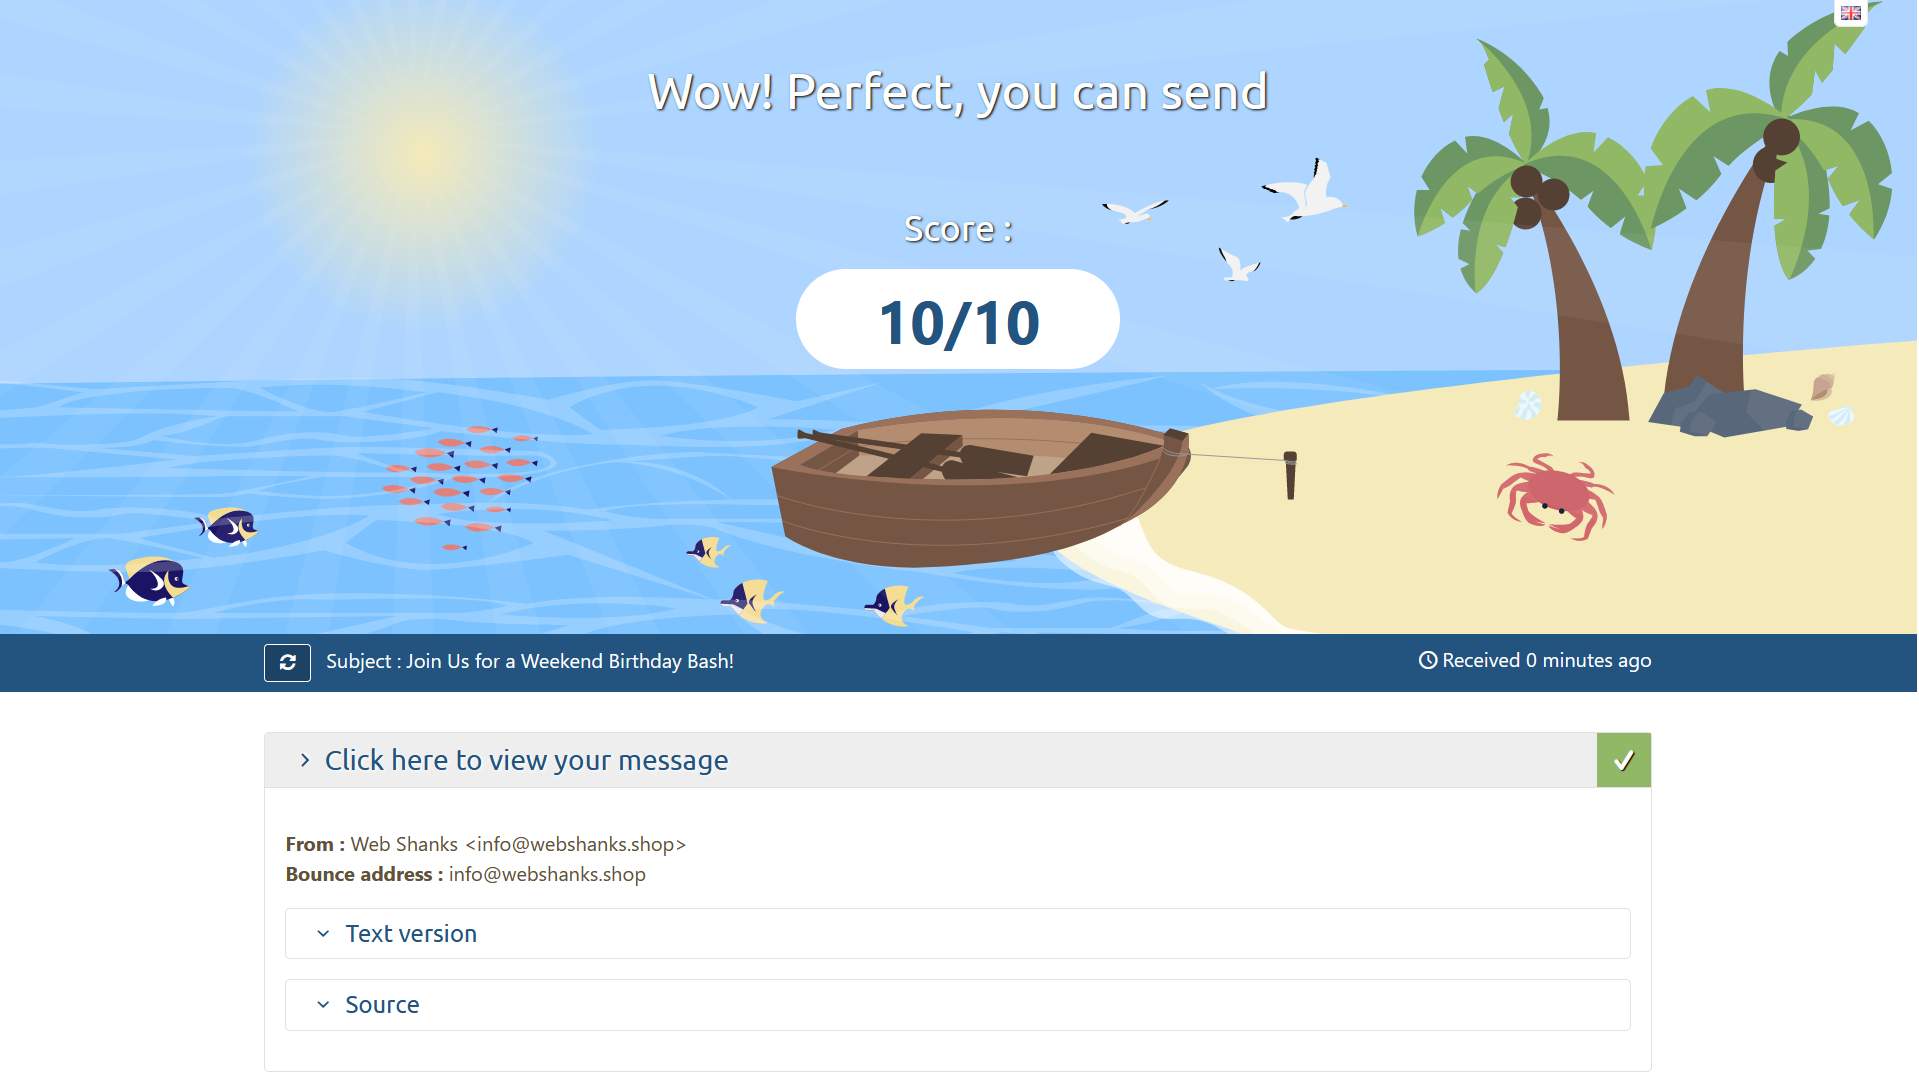
Then the results!
Let’s use another tool to test our SMTP relay.
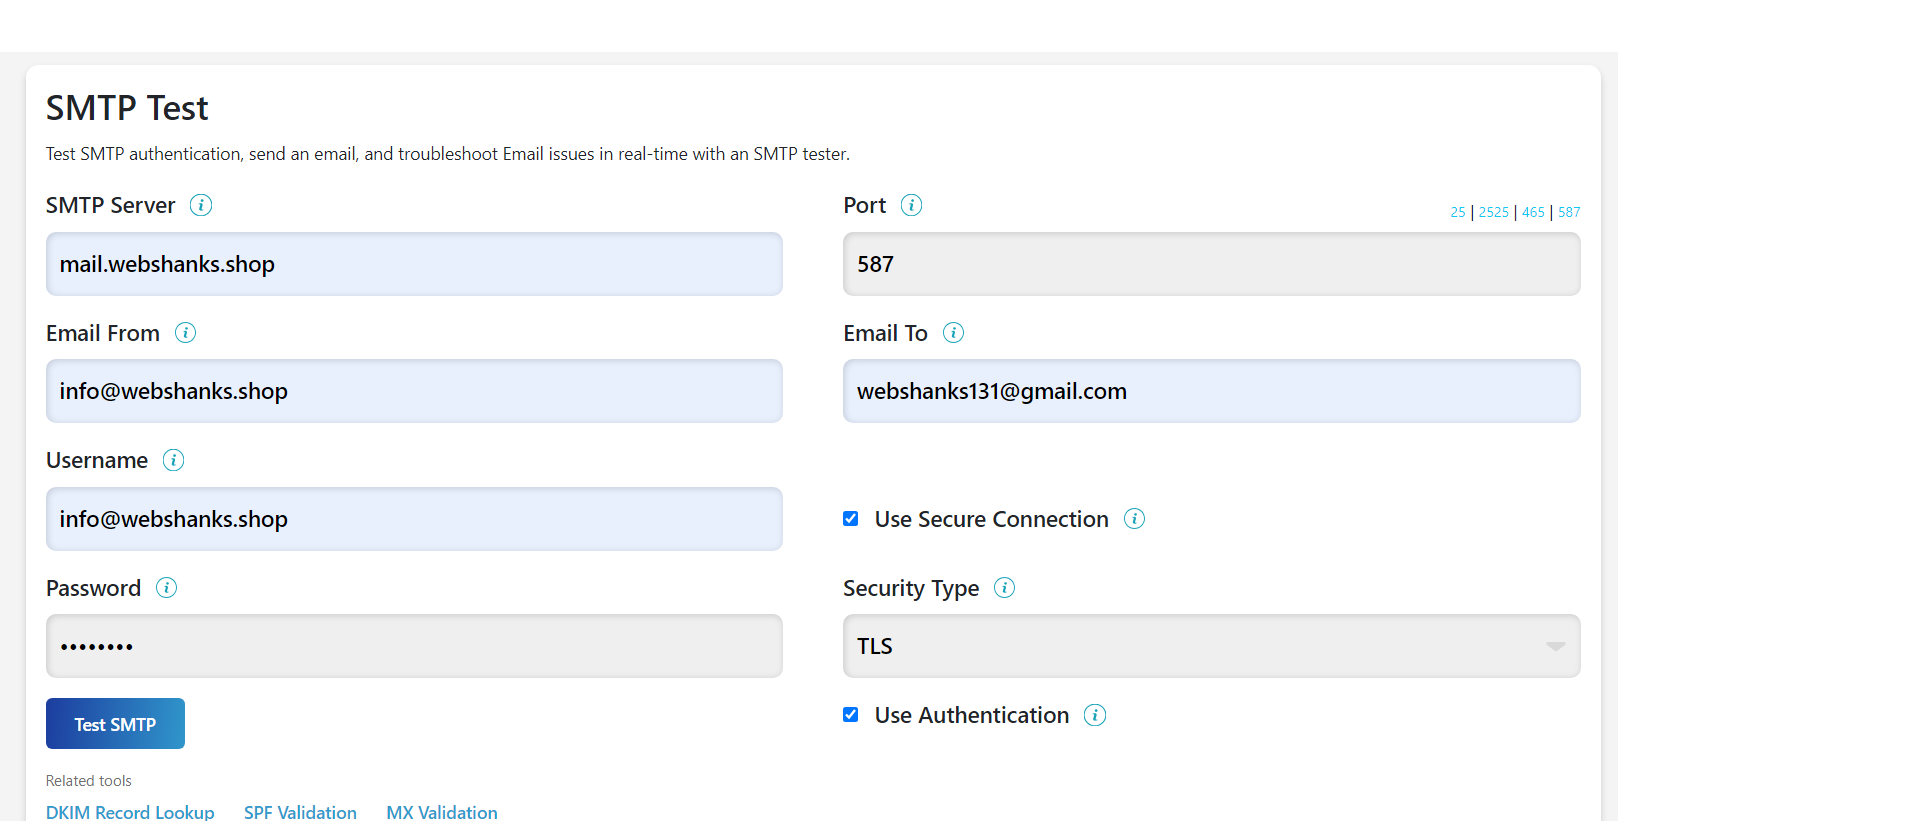
This will send a test email to the recipient.
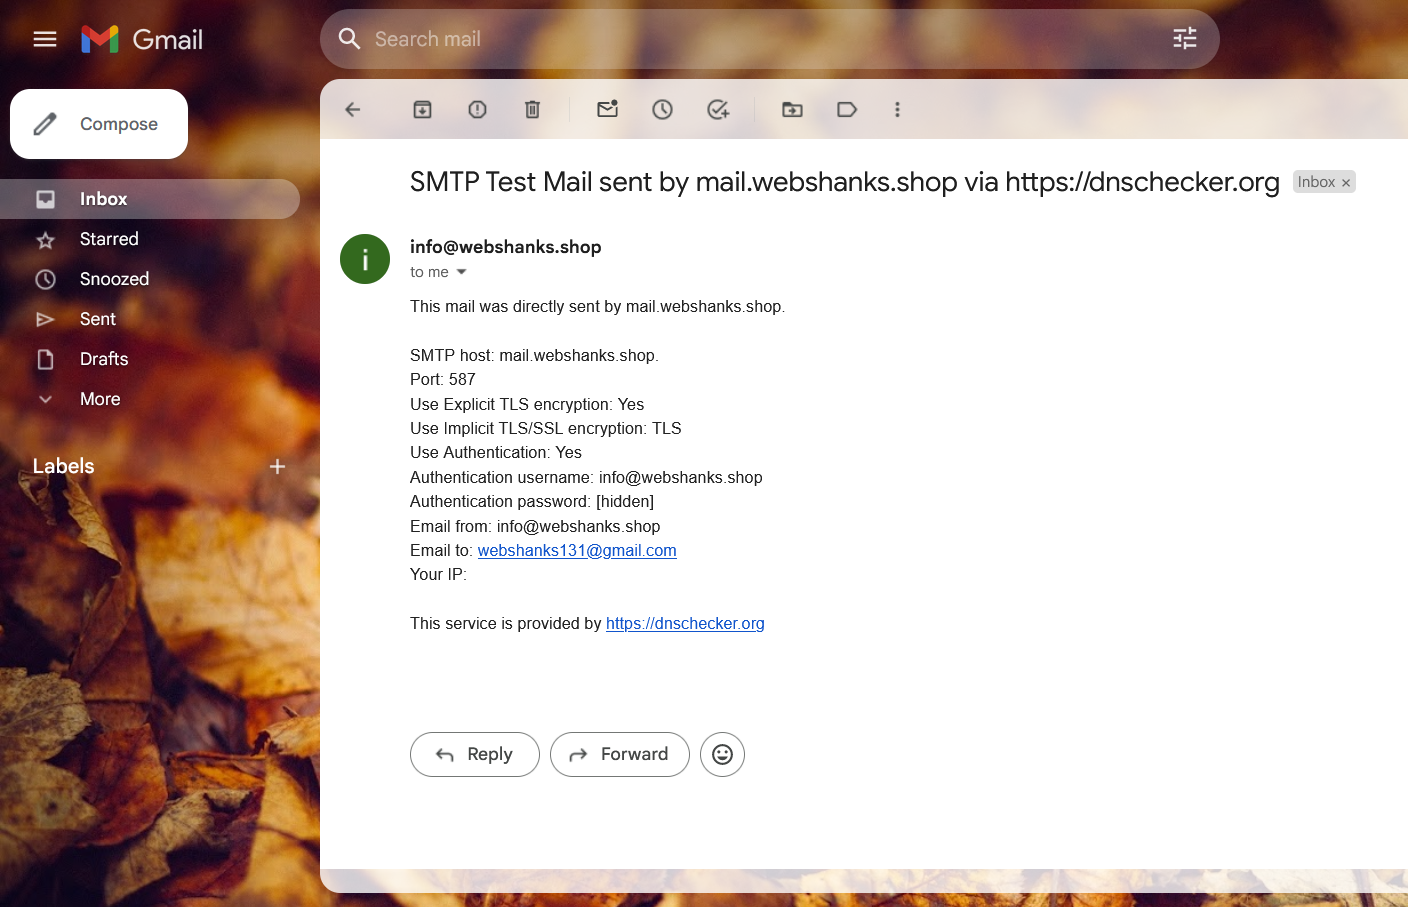
Success! We now have a running Docker Mailserver.
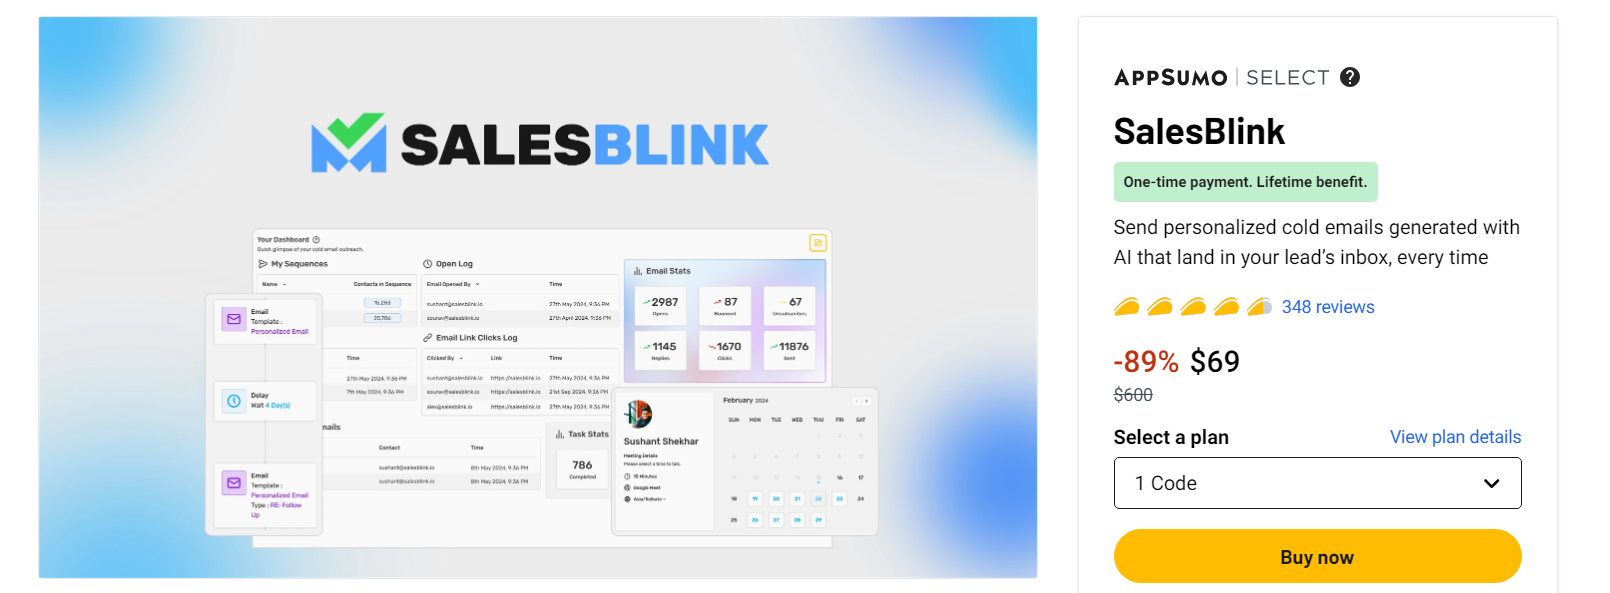
Step 11. Warmup Your Emails
Now you have your Docker Mailserver up and running, it’s time to warmup your emails with a warmup service. You can use SalesBlink for unlimited email warmup. If you want to send emails to Outlook, you can use Warmup Inbox – they have warmups for Outlook.
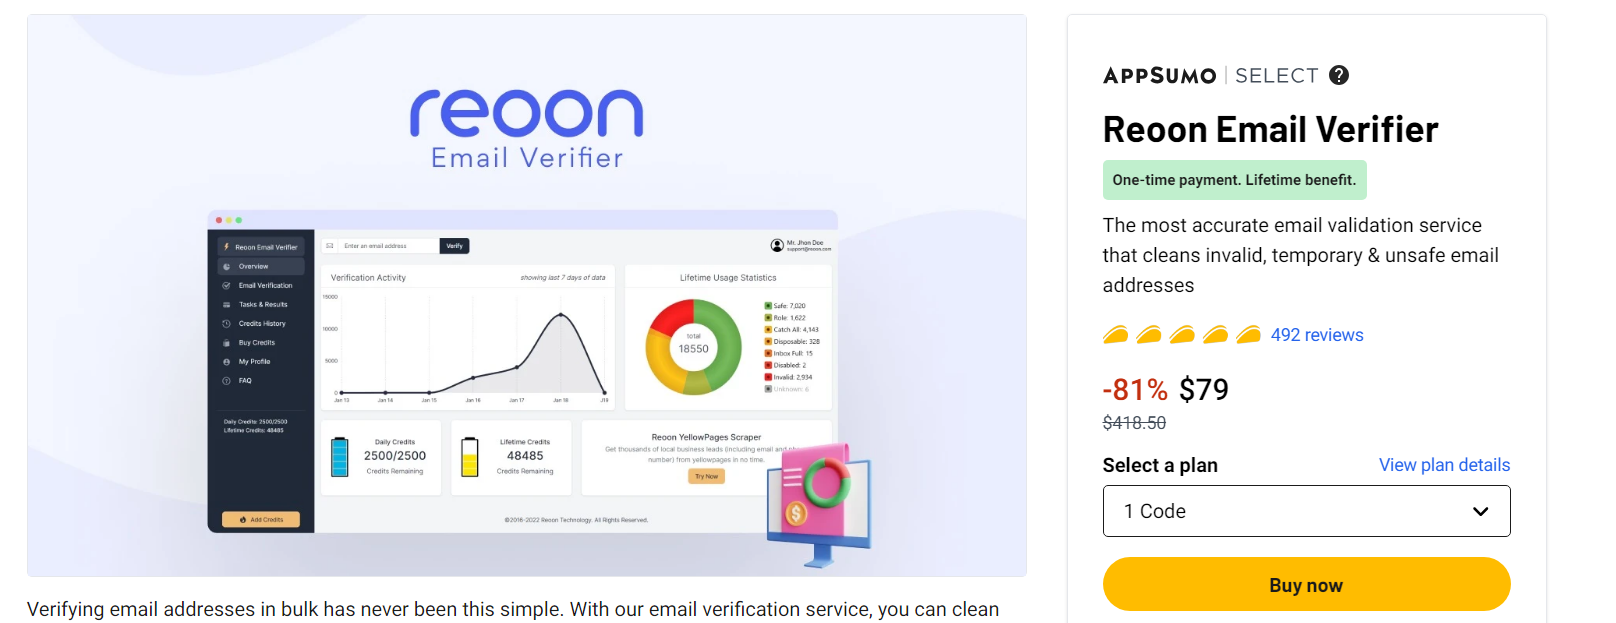
Be sure to verify your leads first before sending them in bulk to clean non-existing emails. Try Reoon Email Verifier.
Frequently Asked Questions
How do I add another mailbox?
Run the commands:
docker compose up -d
docker exec -ti mailserver setup email add [email protected]
Replace the email address with the email you want to add.
How to update Docker Mailserver?
You can run the following commands:
docker compose pull
docker compose down
docker compose up -d
Can Docker Mailserver handle large volumes of email traffic effectively?
Yes, Docker Mailserver can handle large volumes of email traffic effectively, provided that it is properly configured and scaled according to the workload.
What security measures should be implemented when configuring Docker Mailserver?
If you have big server RAM, you should enable ClamAV. You should also set SpamAssassin and Fail2Ban to 1.
How does Docker Mailserver compare to CyberPanel, mailcow, and iRedMail?
Docker Mailserver provides flexibility and scalability through containerization, allowing users to customize their mail server components efficiently.
CyberPanel offers an all-in-one hosting control panel with integrated email features and performance optimization for websites and email servers.
Meanwhile, mailcow and iRedmail offer turnkey solutions with comprehensive email management capabilities and varying levels of community and professional support.
Conclusion
Setting up a Docker mail server provides a flexible and scalable solution for managing your email infrastructure. By following the steps outlined in this guide and configuring your Docker containers appropriately, you can have a reliable mail server up and running in no time.
Remember to regularly monitor your mail server for performance and security considerations, and stay updated with the latest patches and updates for your Docker images and software components.
Hello,
That’s look so easy to install !
Can we add any email from different domain names so easily ? Real ?
Yes you can.
Certbot failed to authenticate some domains (authenticator: standalone). The Certificate Authority reported these problems:
Domain: mailserver.domain.fr
Type: dns
Detail: DNS problem: NXDOMAIN looking up A for mailserver.domain.fr – check that a DNS record exists for this domain; DNS problem: NXDOMAIN looking up AAAA for mailserver.domain.fr – check that a DNS record exists for this domain
Hint: The Certificate Authority failed to download the challenge files from the temporary standalone webserver started by Certbot on port 80. Ensure that the listed domains point to this machine and that it can accept inbound connections from the internet.
I found this for opening PORT 80: sudo python3 -m http.server 80
It’s ok now with this toolq https://portchecker.co/check-it
But same problem with CERTBOT…
Your DNS is not yet propagated.
Certbot failed to authenticate some domains (authenticator: standalone). The Certificate Authority reported these problems:
Domain: mailserver.domain.fr
Type: dns
Detail: DNS problem: NXDOMAIN looking up A for mailserver.domain.fr – check that a DNS record exists for this domain; DNS problem: NXDOMAIN looking up AAAA for mailserver.domain.fr – check that a DNS record exists for this domain
Hint: The Certificate Authority failed to download the challenge files from the temporary standalone webserver started by Certbot on port 80. Ensure that the listed domains point to this machine and that it can accept inbound connections from the internet.
I found this commande for opening port 80: sudo python3 -m http.server 80
Thank you for the steps you provided. I am trying to follow them in order. However, the email I added as info is currently not working, and when I check it through Thunderbird, I cannot perform any actions. Since I cannot control the DNS settings myself, I am unsure of the steps to take. When I check my domain address through an application, it indicates that the DNS name server is missing and some configurations have not been completed. I have made these settings manually on my server, but now I need guidance on how to resolve this situation or alternative solutions.
Hi, excellent tut and is working like a charm. Do you plan to write a tutorial on how to ad virtual mail boxes in a database?
Hello, congratulations on your guides—they are always very precise and easy to understand.
I have installed Mailserver on my Raspberry Pi, and it is working correctly. I manage my domains with Nginx Proxy Manager and would like to use it instead of Let’s Encrypt for certificates.
How can I do this?
Work like magic. Thank you for the clear explaination i have a question.
If a domain already have a certificate i don’t need to get another certificate for it roghtt?
i will just go ahead and add
– /etc/letsencrypt:/etc/letsencrypt
– ./docker-data/certbot/certs/:/etc/letsencrypt
and
SSL_TYPE=letsencrypt
to it will it work still?