 The List-Unsubscribe header is used in email messages to provide recipients with a way to easily unsubscribe from mailing lists. Adding this header to your email can enhance the user experience and help you comply with email marketing best practices.
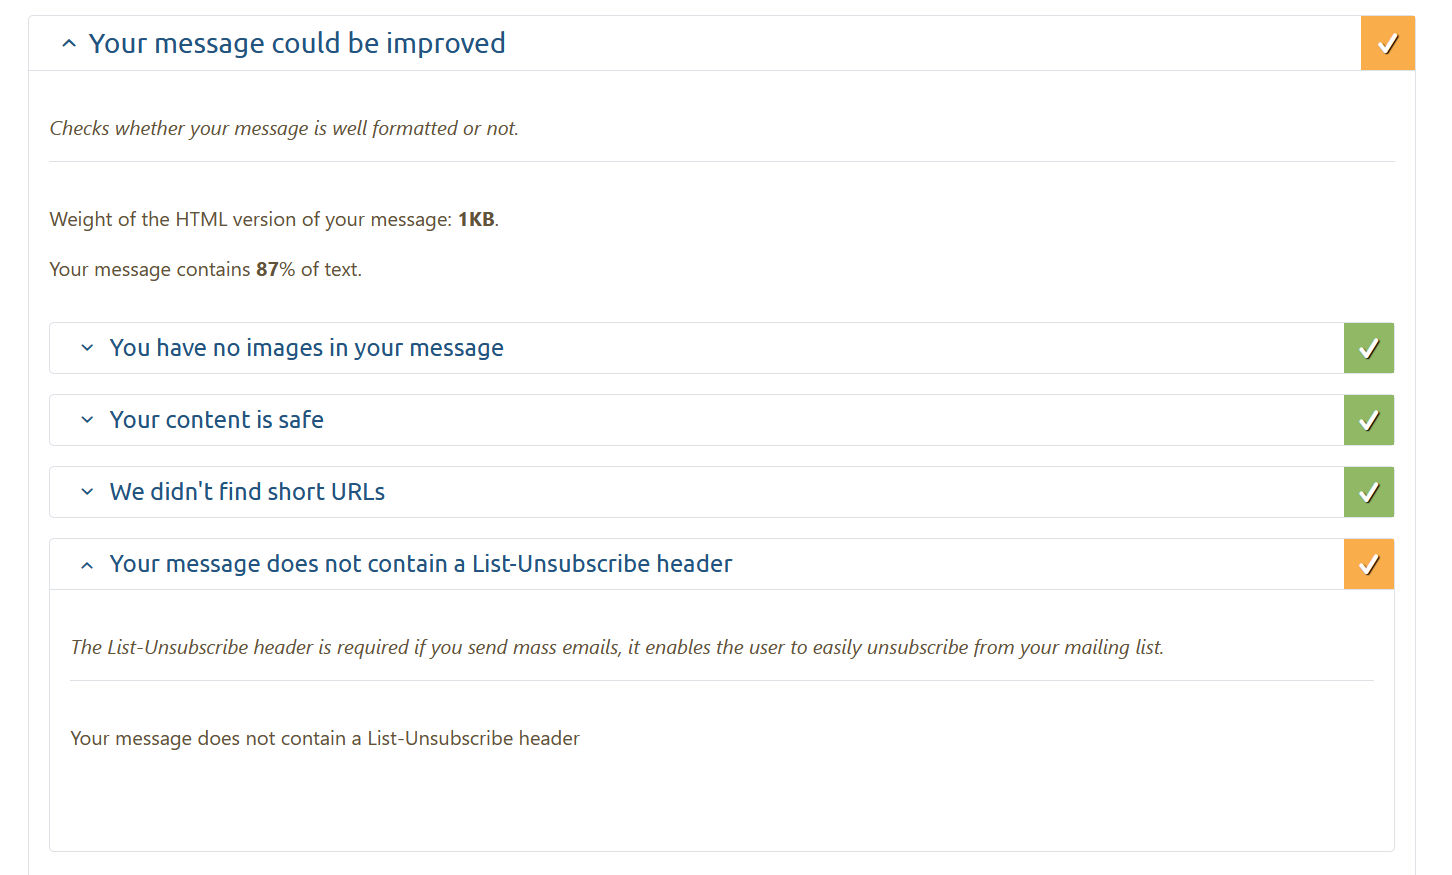
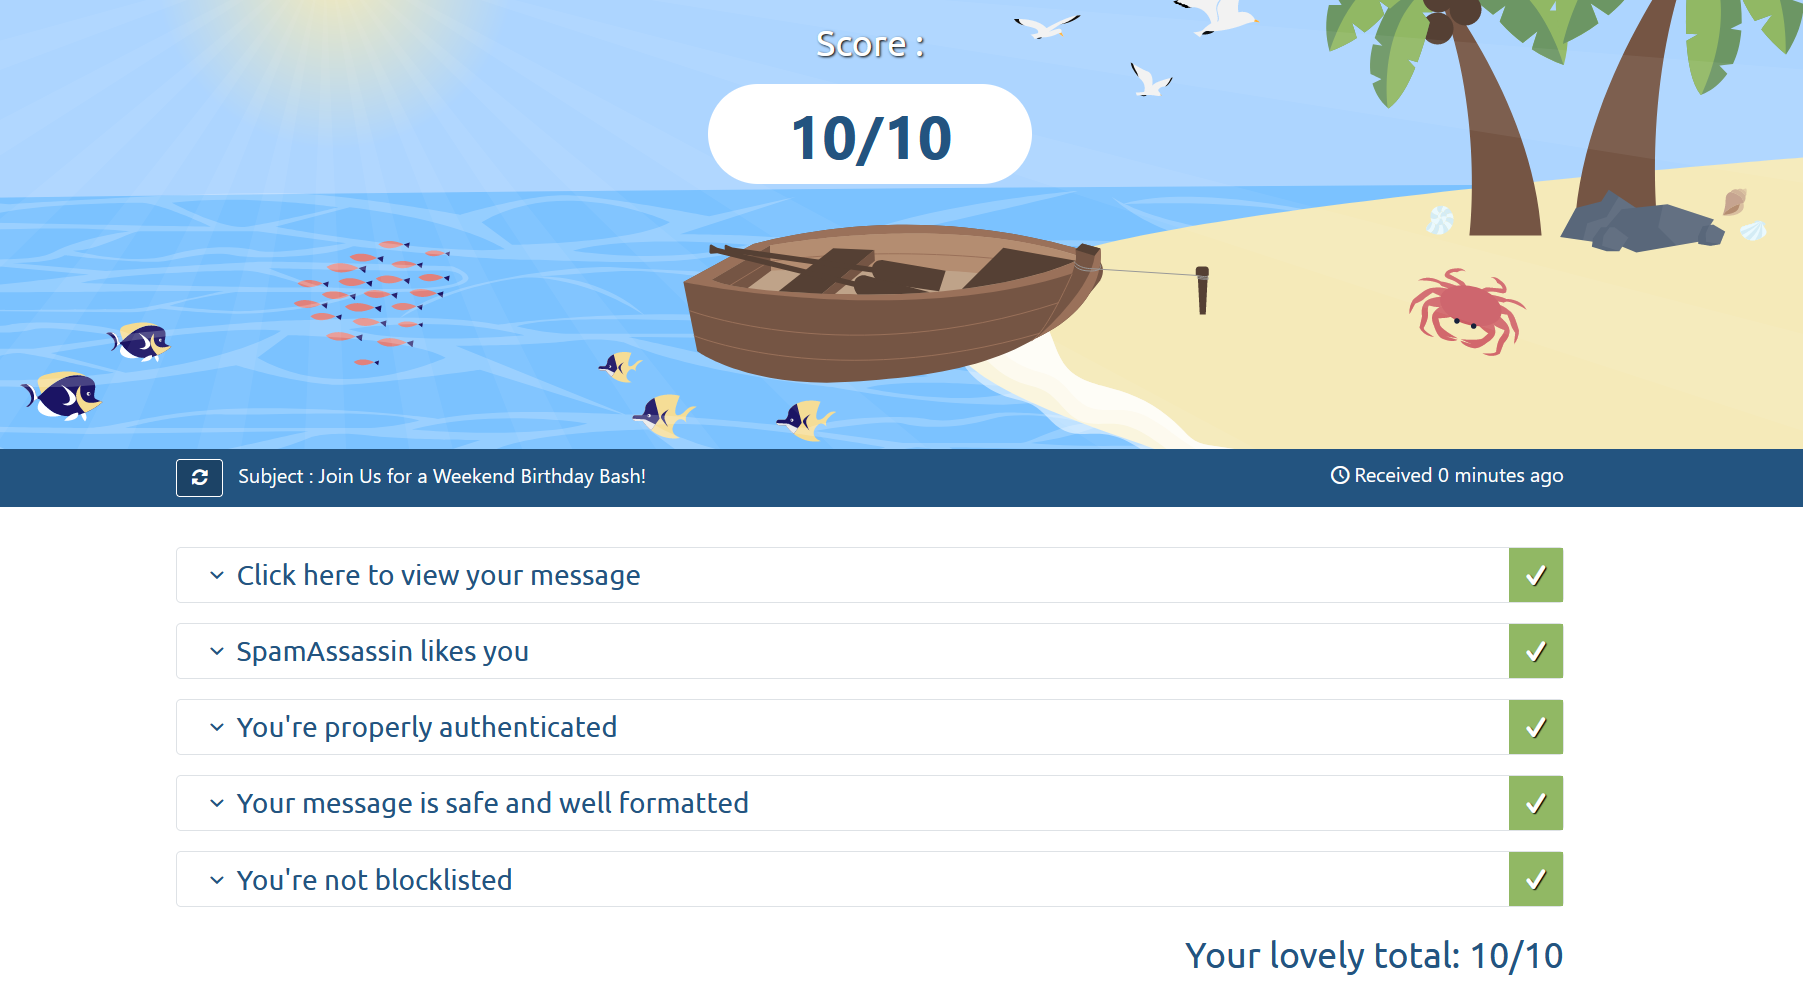
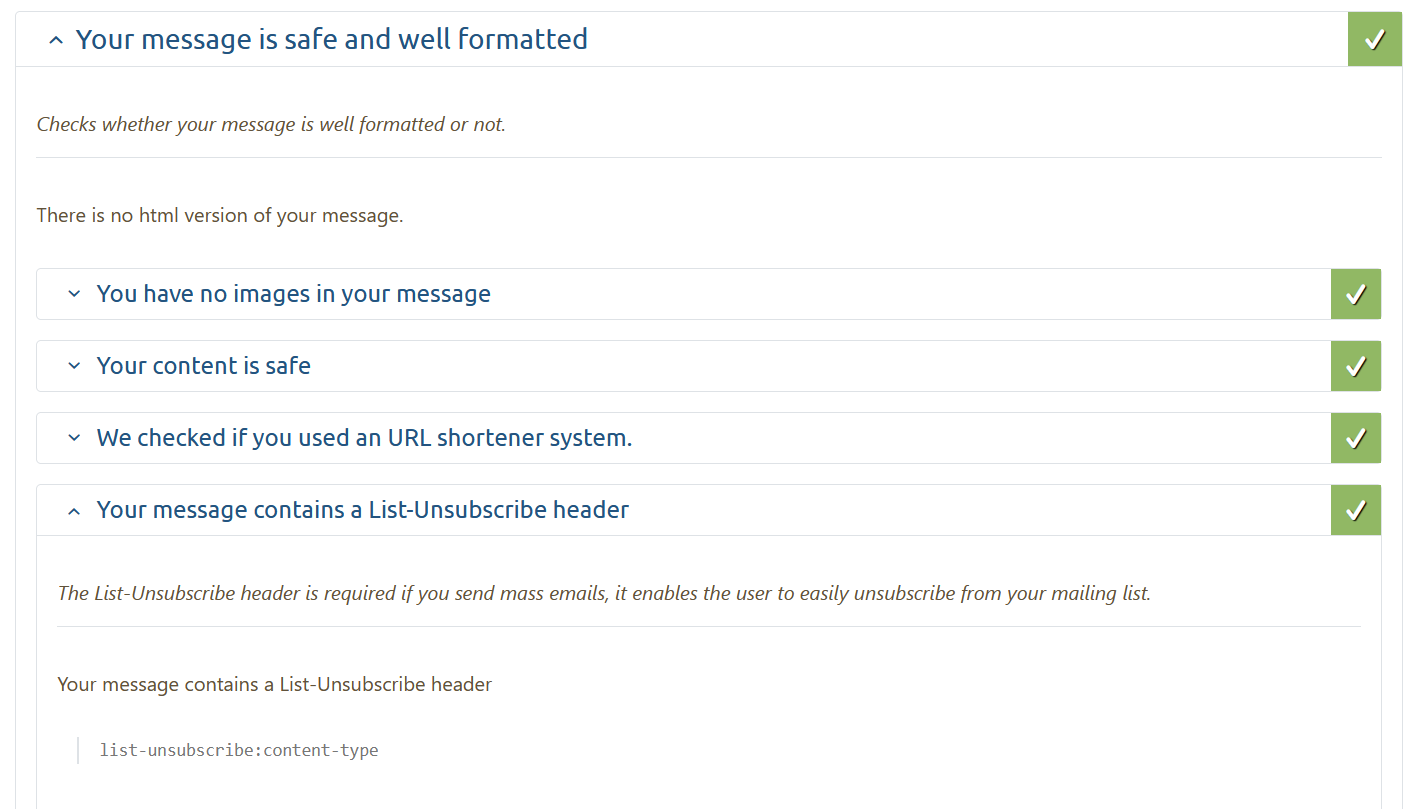
If you follow my email server tutorials, you see that I’ve managed to get a 10/10 Mail Tester score. However, I haven’t achieve an All Green results because the email I sent does not contain a List-Unsubscribe header.
If you are sending mass emails, this tutorial might be helpful.
How to add List-Unsubscribe Header
Here’s how you can add the List-Unsubscribe header to your email:
Adding a List-Unsubscribe header to outgoing emails in Postfix involves modifying the email headers as they pass through the MTA (Mail Transfer Agent).
Here’s a step-by-step guide to accomplish this:
Before starting, be sure you have a root access to your server.
Step 1. Edit Postfix Configuration:
Start by editing the Postfix configuration file. This file is typically located at /etc/postfix/main.cf.
nano /etc/postfix/main.cf
Add the following lines at the end.
header_checks = regexp:/etc/postfix/list_unsub_header

Use ctrl + X and choose Y to save.
Step 2. Add Custom Header Checks
You’ll need to define a list_unsub_header file where you’ll specify the custom headers. If you don’t have one already, create a file called list_unsub_header.
nano /etc/postfix/list_unsub_header
Step 3. Specify Custom Header
In the list_unsub_header file, add a line to specify the custom header you want to add:
/^Content-Transfer-Encoding:/i PREPEND List-Unsubscribe: mailto:<sender-email-address>?subject=unsubscribe>"
Be sure to change sender-email-address to your email address.

Once you’ve added the custom header definition, save the file and exit the text editor.
You need to apply the changes and reload the Postfix service for the changes to take effect.
reboot
Step 4. Test
Send a test email and inspect the headers to verify that the List-Unsubscribe header is added as expected.
That’s it! You’ve successfully configured Postfix to add a List-Unsubscribe header to outgoing emails. Make sure to adjust the configuration according to your specific requirements and server setup.
Take note you can only use this method with Postfix.
Always ensure that your email complies with applicable email marketing laws, such as the CAN-SPAM Act in the United States or the General Data Protection Regulation (GDPR) in Europe.
Don’t just send mass email right away. For best practice, warmup your emails once you get a 10/10 mail tester with all green checks to start building reputation.
Including a clear and easy way to unsubscribe is a good practice for maintaining a positive relationship with your email recipients.