 In my previous tutorial, I built an SMTP server using CyberPanel and RackNerd VPS. Today, I’ll show you how to add multiple domains to your STMP without the need for another VPS or IP address. Yes, we’ll do it on one server alone.
Adding multiple email domains in CyberPanel involves creating and managing email accounts for different domains on your server. Here’s a general guide on adding multiple email domains in CyberPanel.
Prerequisites
Before you start adding multiple email domains in CyberPanel, ensure that you have the following prerequisites in place:
1. CyberPanel Installed
Make sure that CyberPanel is properly installed and configured on your server.
Note: Before setting up the CyberPanel email server, your VPS must have a port 25 open.
2. SMTP Feature Properly Configured
You should have configured CyberPanel email server and it can send and receive emails.
3. Domain Registration and DNS Control
Ensure that the domains you want to add are registered and that you have control over their DNS settings. You may need to update DNS records to properly configure email for the added domains. I can recommend Namecheap for registering your domains.
How to Add Multiple Email Domains in CyberPanel
Before anything else, the domain I used to setup an email server on CyberPanel is webshanks.store. So my MX record is mail.webshanks.store. I will use this as an mx server for the new domain/s I’ll be creating.
Step 1. Access CyberPanel
Log in to your CyberPanel dashboard using your credentials.
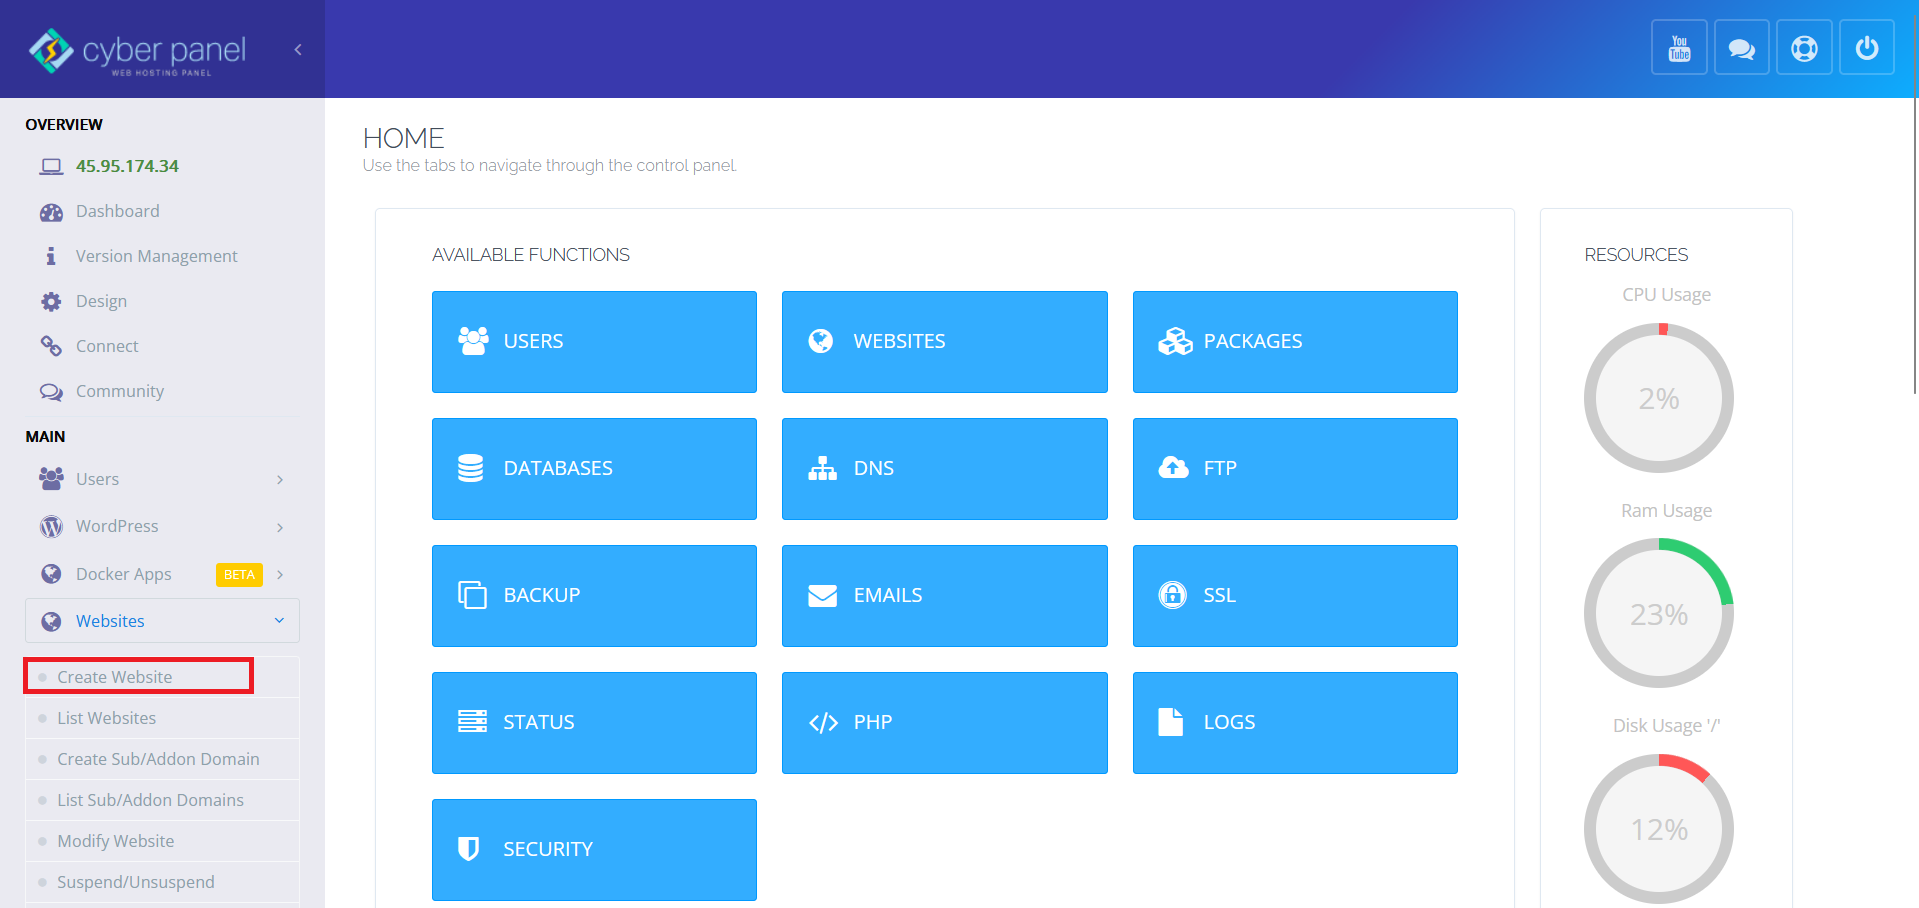
Step 2. Add a Website
Navigate to Websites and click Create Website.
The existing domain I used in CyberPanel is webshanks.store. I will add a new domain I own called webshanks.shop.
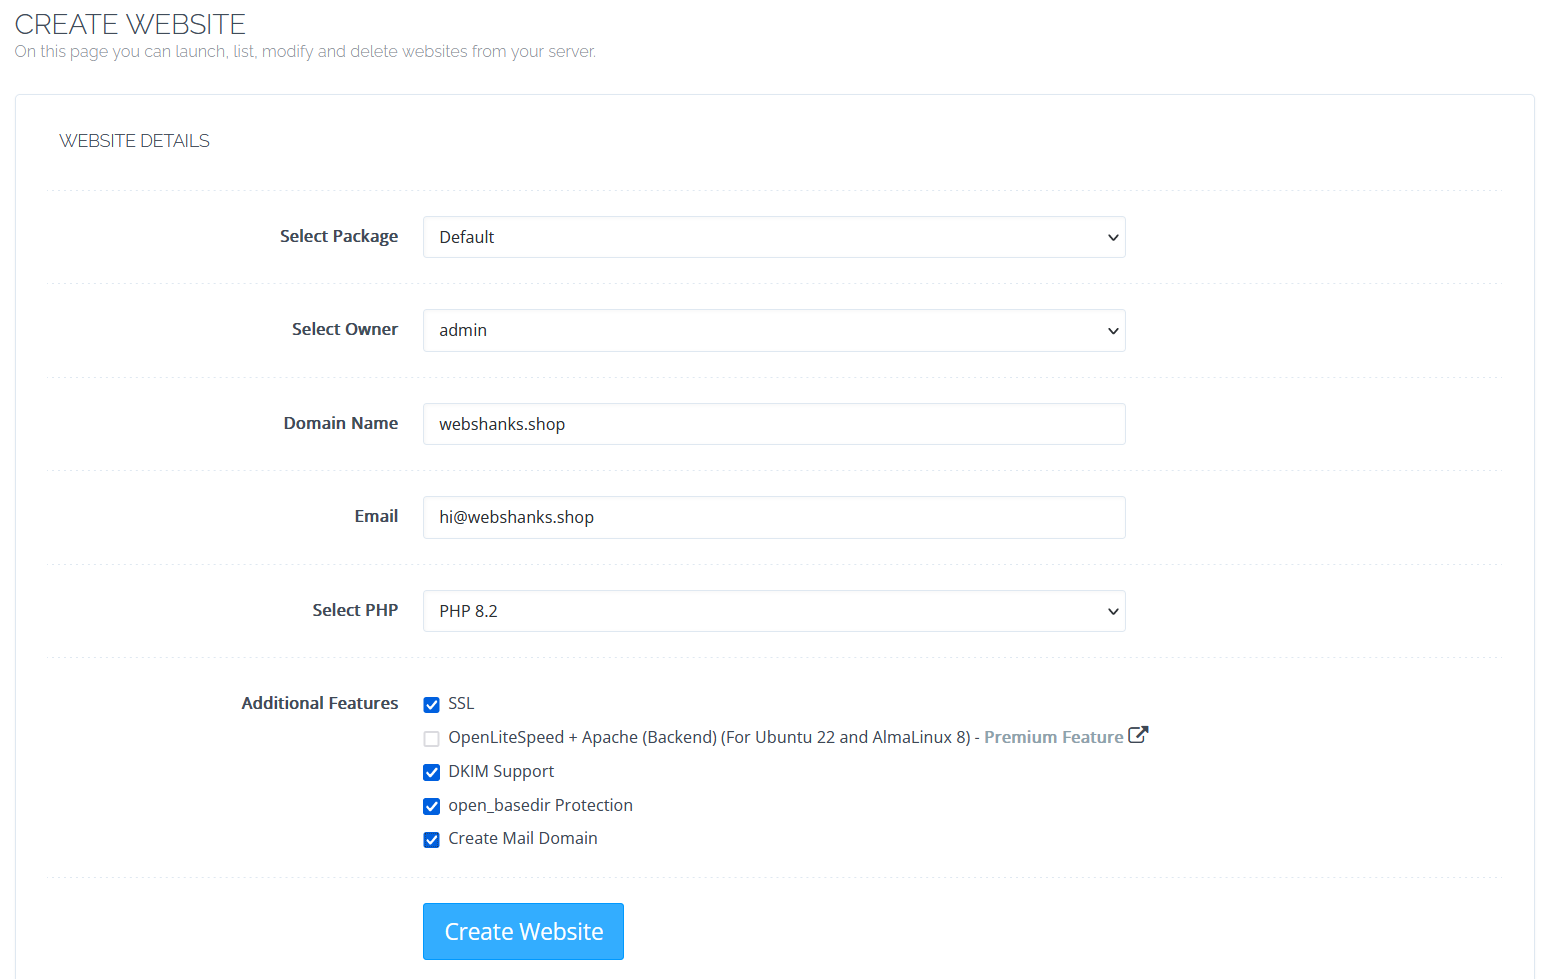
Check SSL, DKIM Support, open_basedir Protection, and Create Mail Domain. Then click Create Website.
Then go to Cloudflare and add your new domain.
Just choose the Free plan.
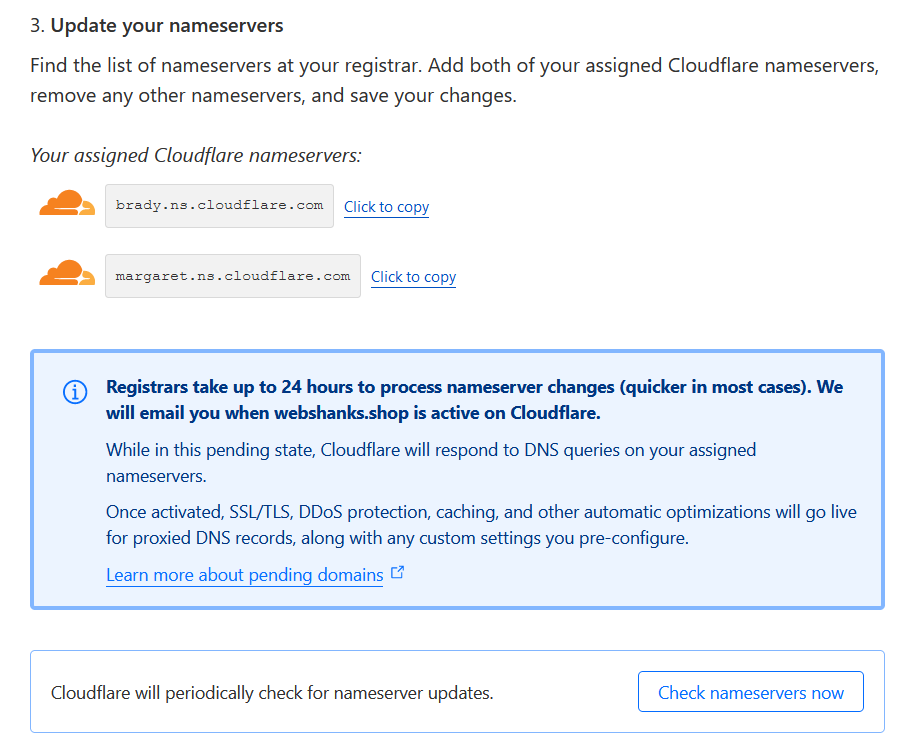
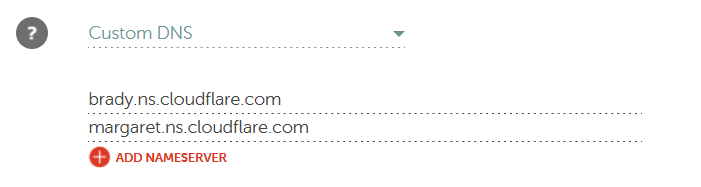
Update the nameservers on Namecheap.
Use custom DNS and add the Cloudflare nameservers.
Wait for at least 24 hours for the DNS to fully propagate.
Step 3. Create an Email Account
Look for the Email section in the CyberPanel dashboard. This section is where you manage your email accounts. Just click Create Email.
When prompted, enter the details for the new email domain. This typically includes the domain name and other relevant settings. Make sure to enter the correct domain name for the email accounts you want to create.

Step 4. Setup DNS Records
Now it’s time to setup DNS on Cloudflare.
After adding the new domain, you may need to verify or update DNS records for the domain to ensure proper email delivery. CyberPanel may provide you with the necessary DNS records or guide you on how to set them up.
Go to DNS > Cloudflare. Click Sync Local Records to Cloudflare.
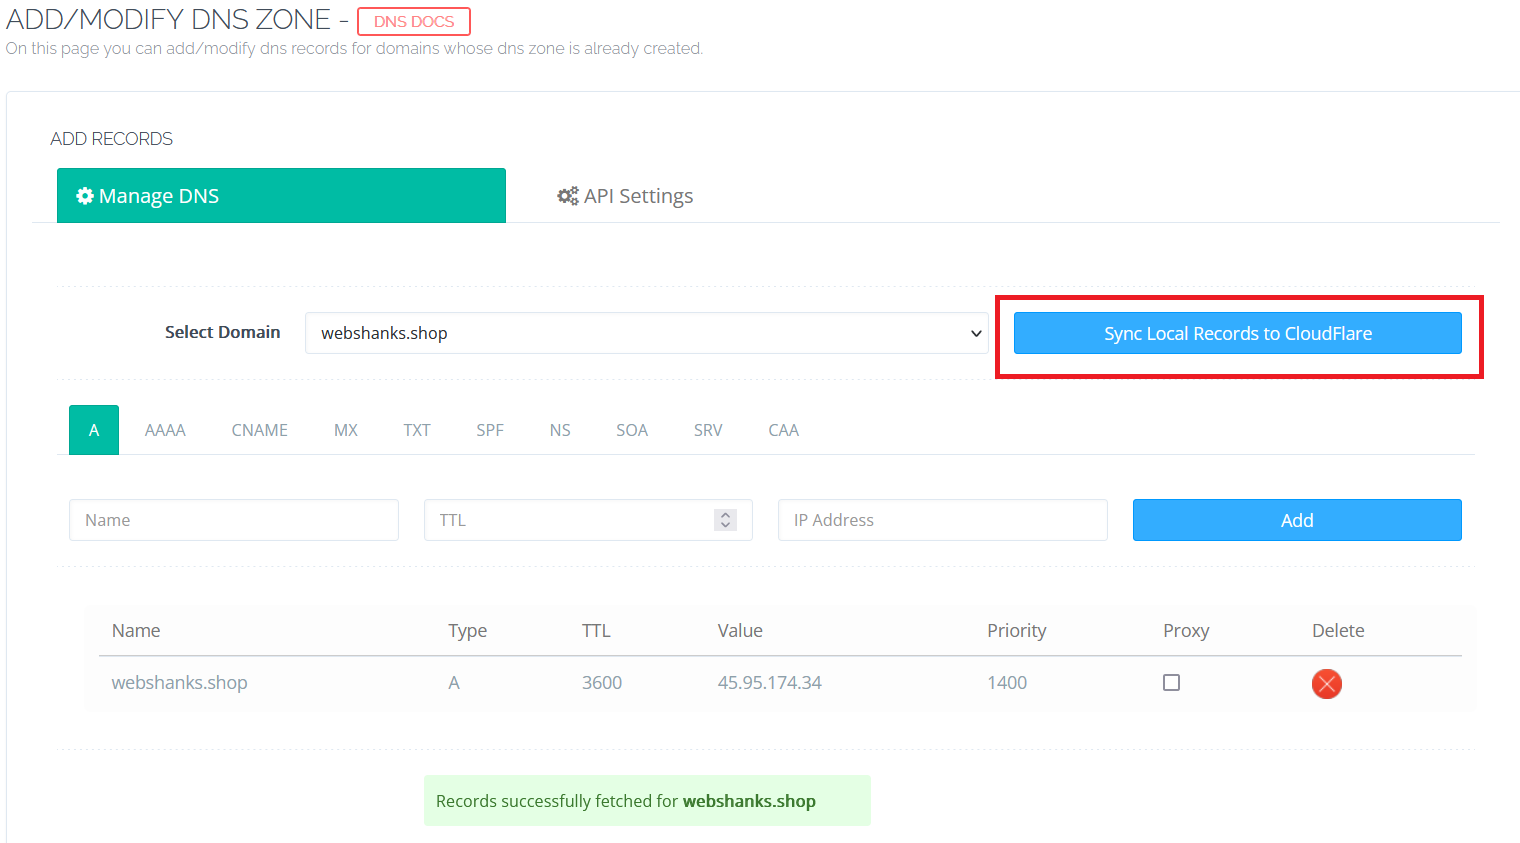
Let’s go to Cloudflare and cleanup the DNS. We will be using our mail server which is mail.webshanks.store.
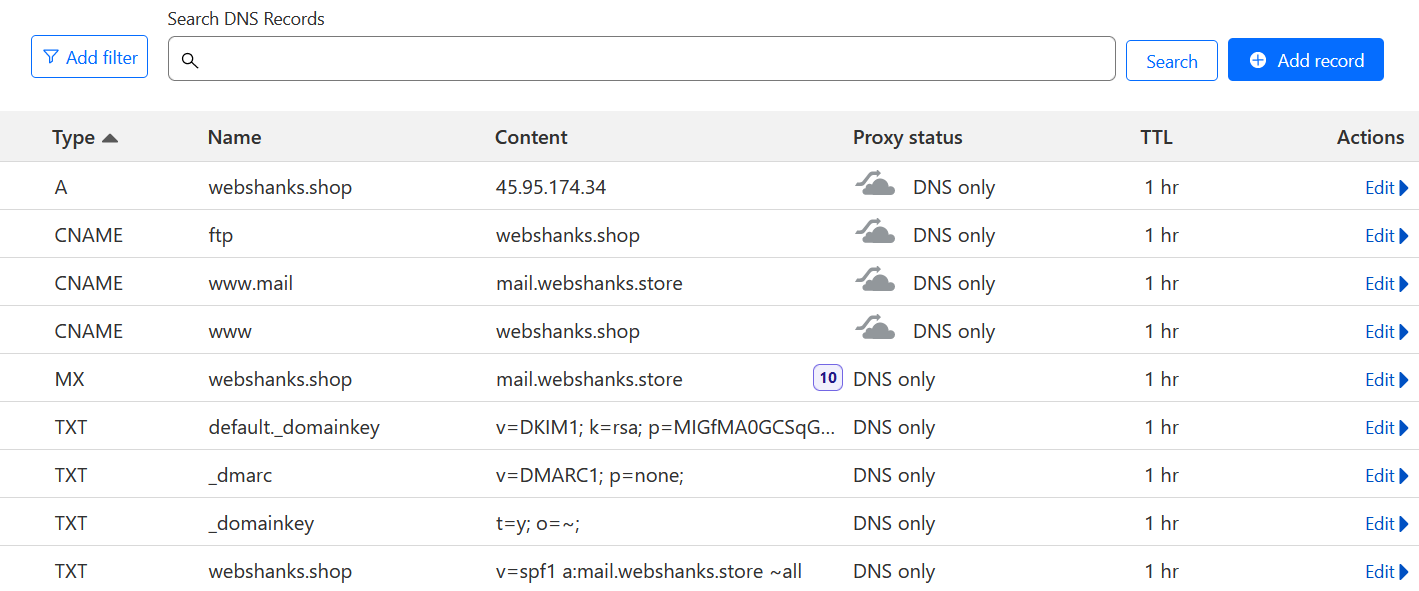
This should your DNS will look like.
Step 5. Send a Test Email
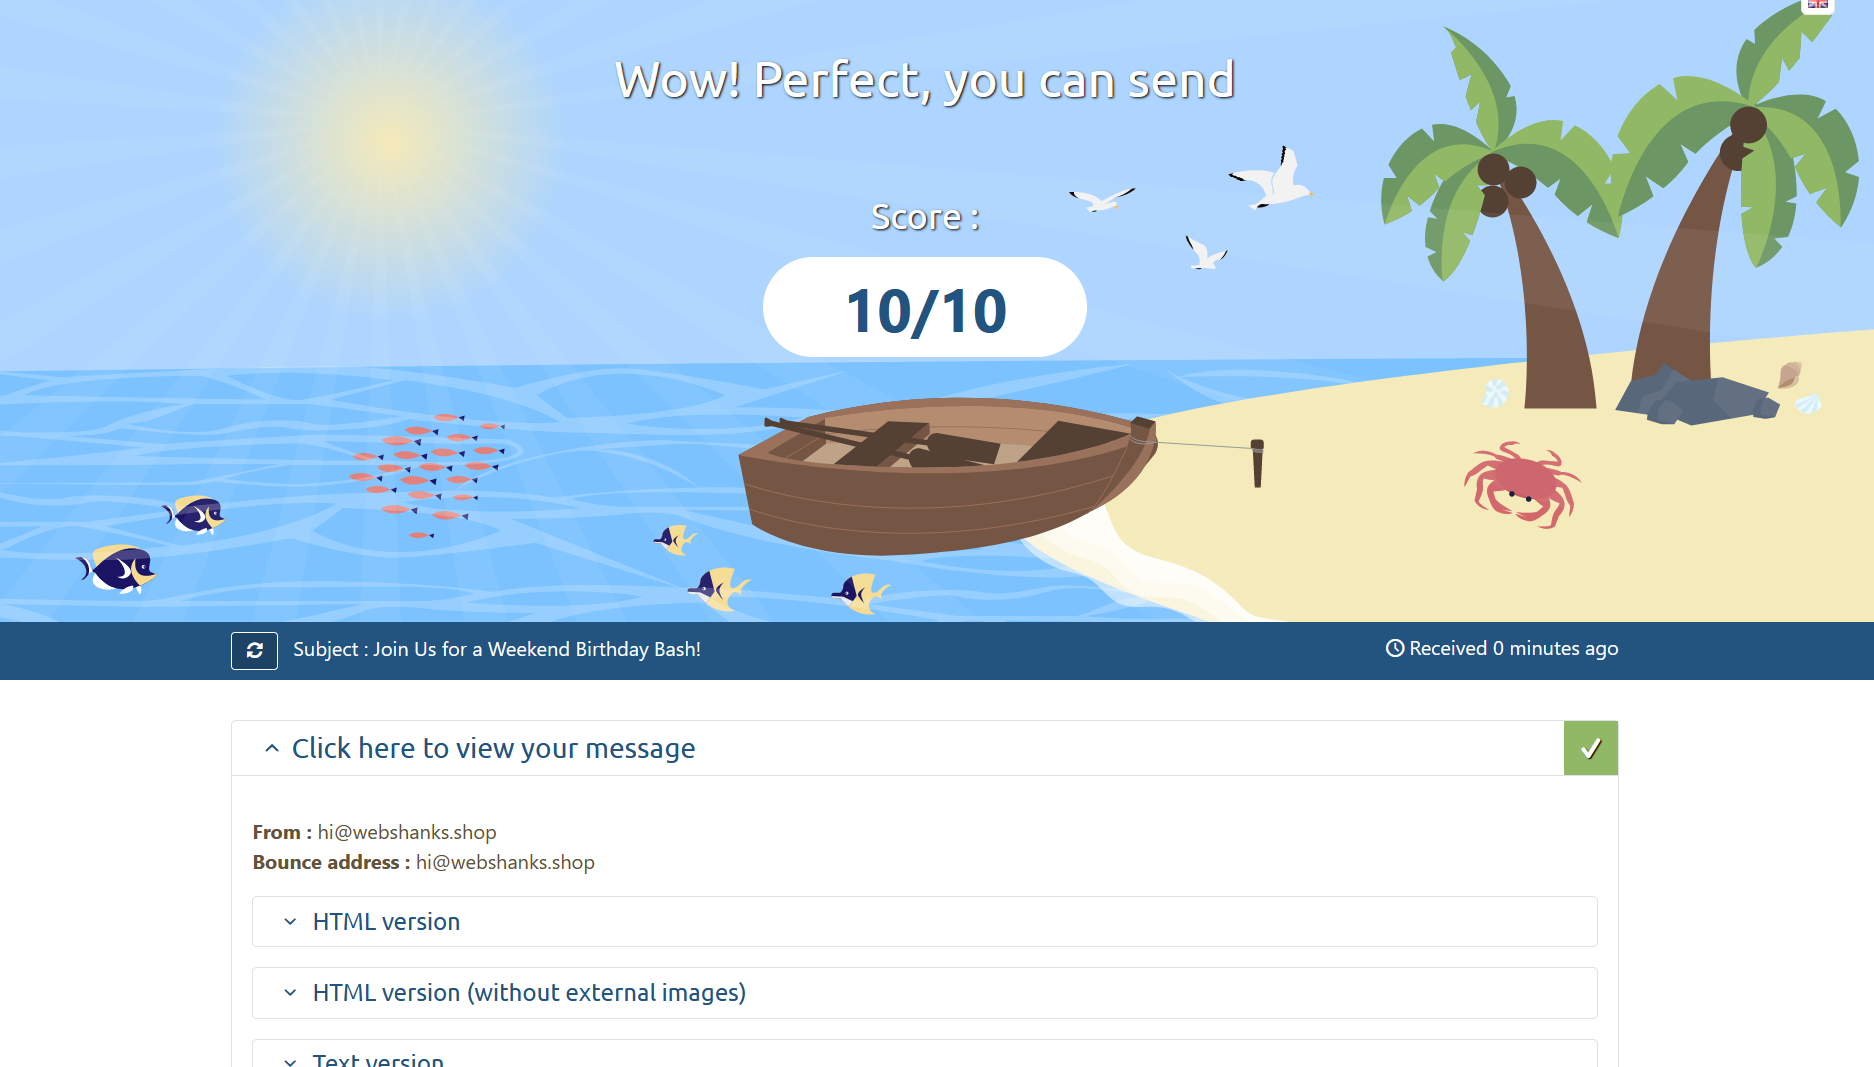
We will send a test email on Mail-Tester to see if we can send emails.
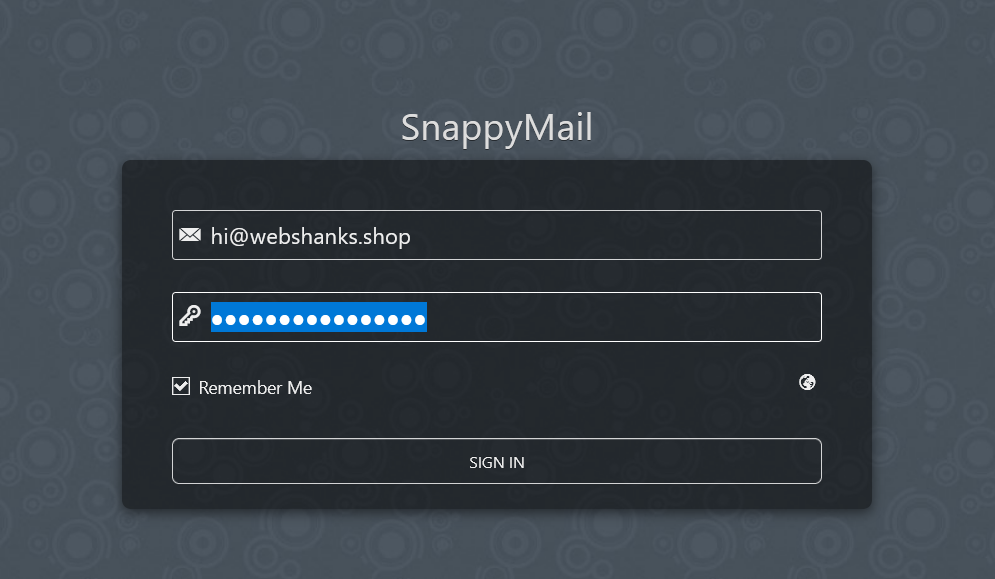
Login to your webmail using the email you’ve just created.
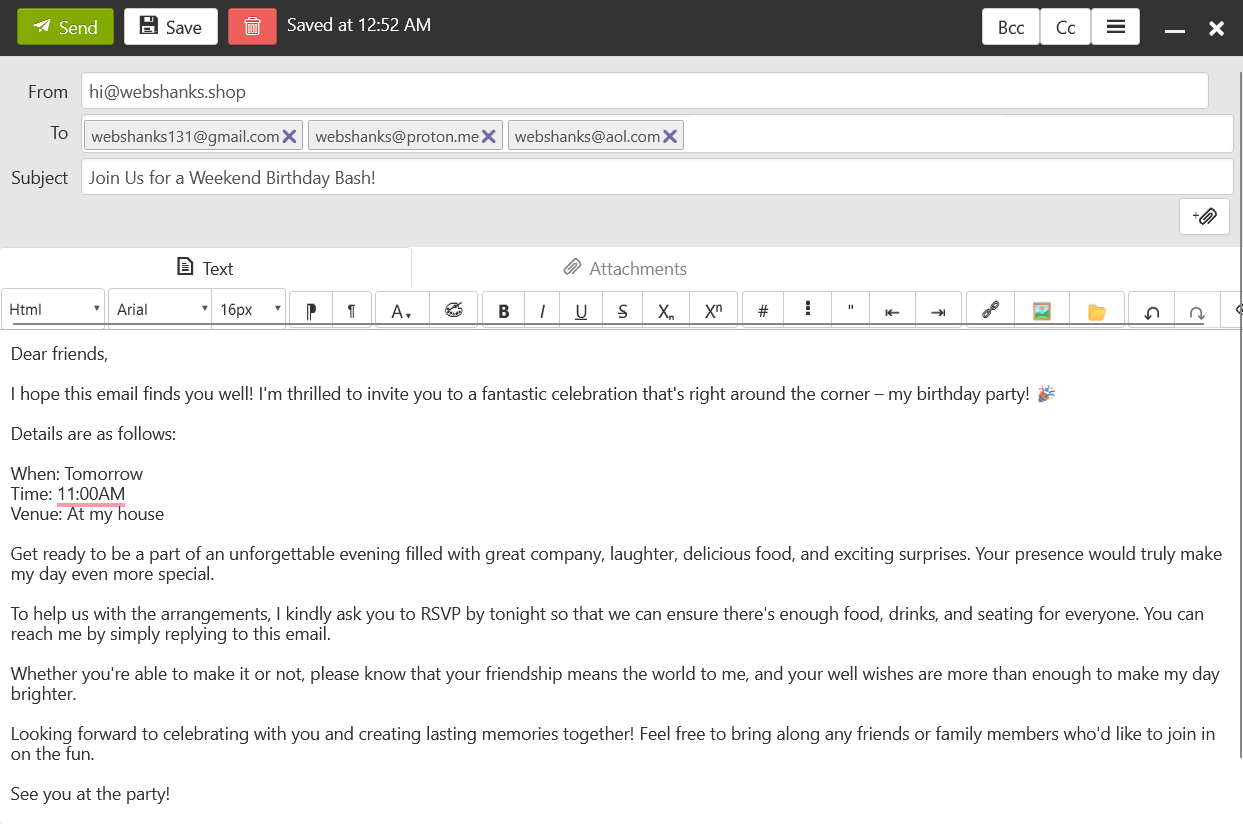
I am using an email template to send an email to Mail-Tester.
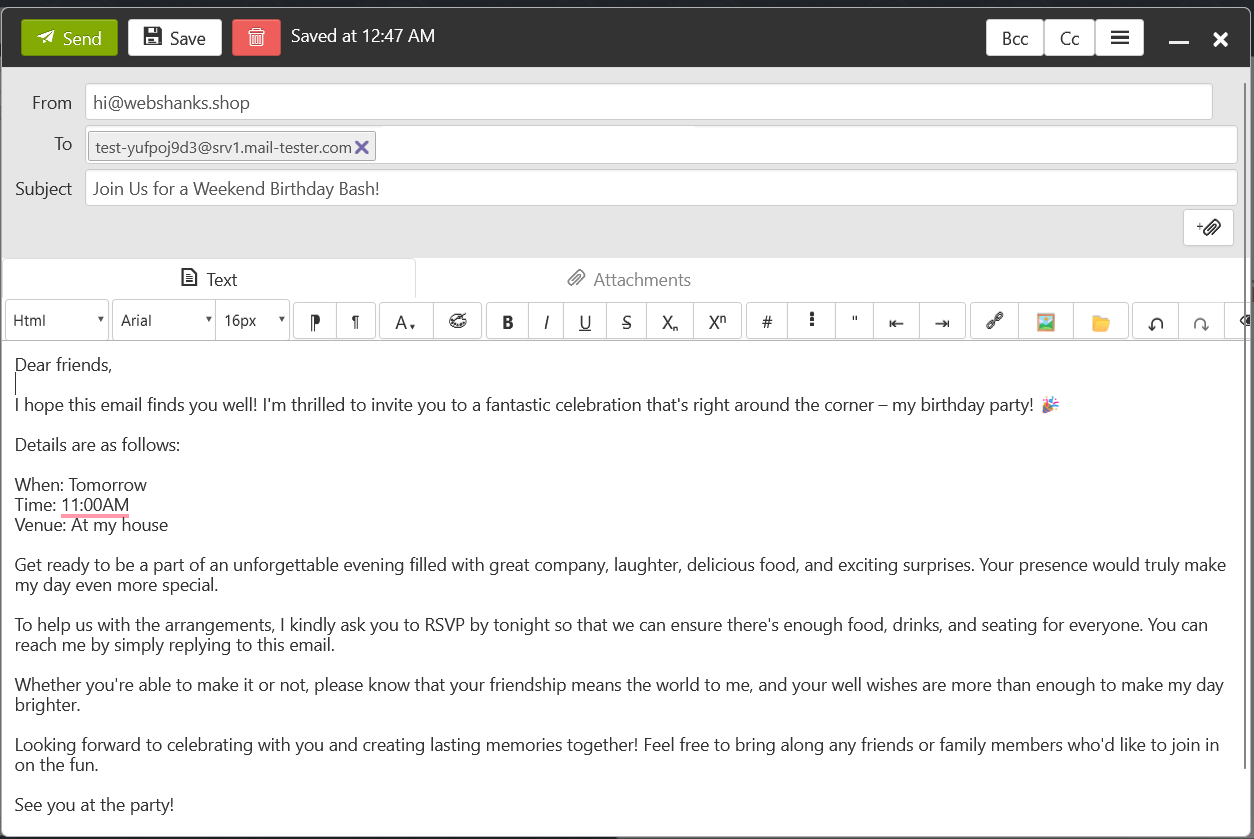
We got a 10/10!!!
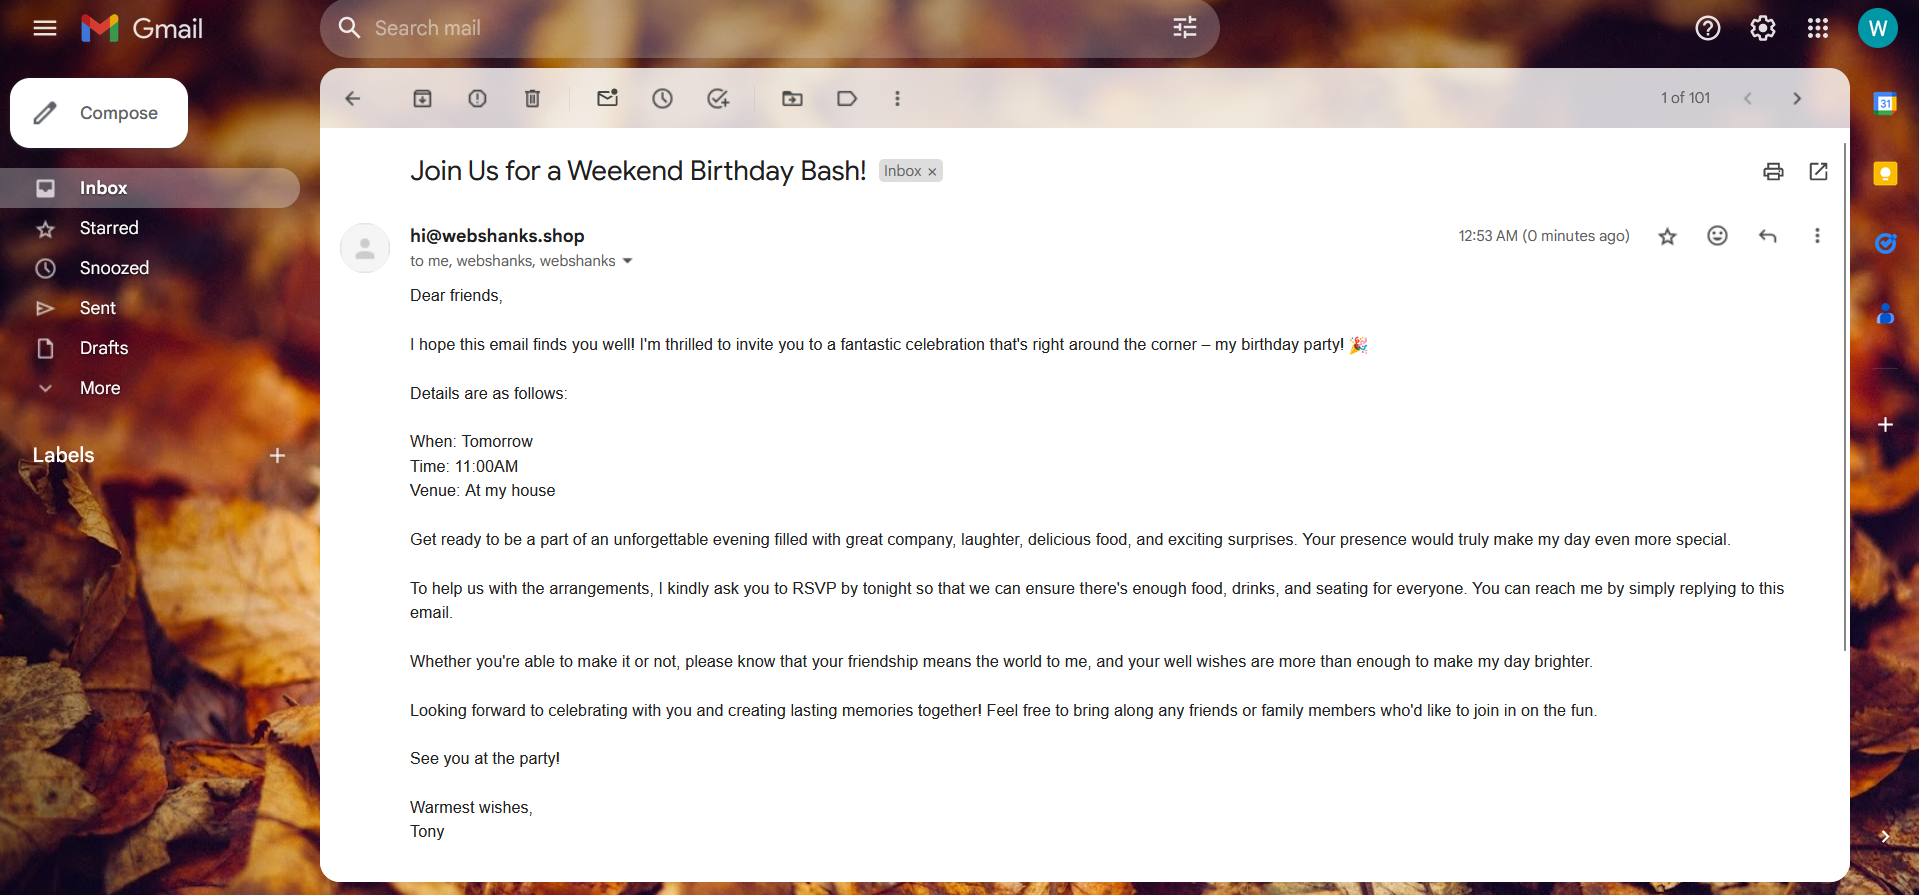
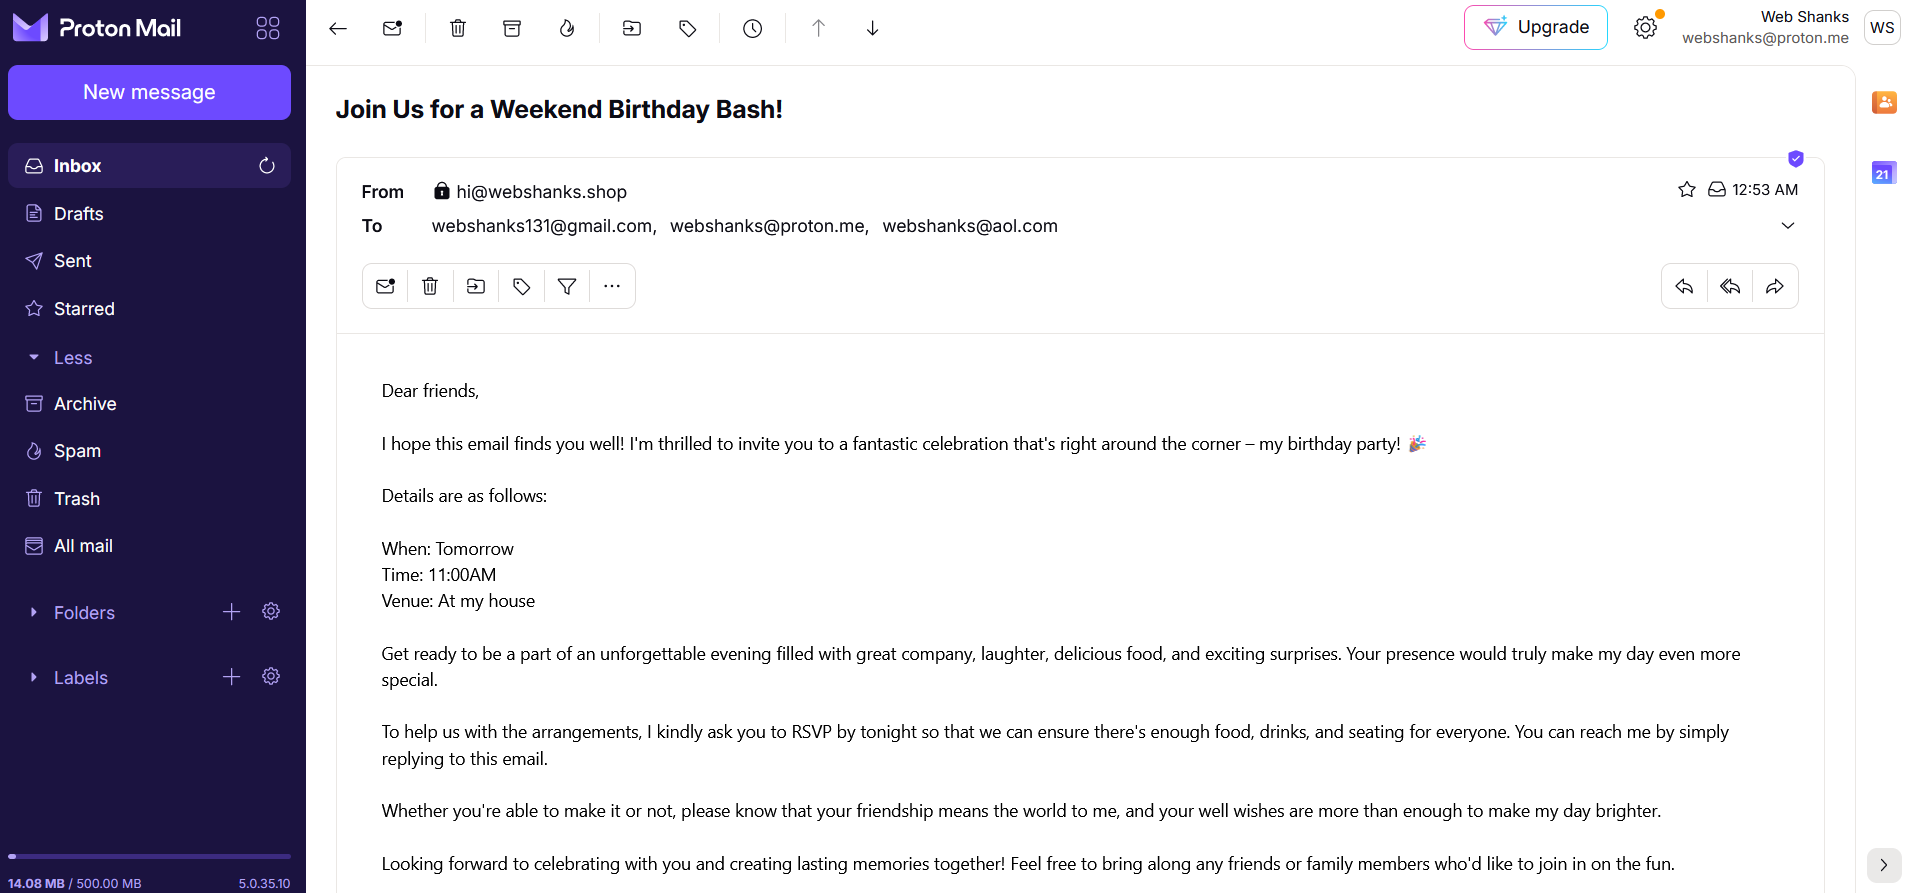
Now let’s send a test email to Gmail, Proton Mail, and AOL Mail.
And we received it directly to Gmail and Proton Mail’s inboxes.
But with no luck, AOL Mail email went to spam.
Well, as I’ve always promoted here on my blog, you should warmup your emails to build a reputation. In cold email marketing, patience is key!
If you have more domains to add, repeat the process for each additional domain. Make sure to follow the same steps for adding the domain and creating email accounts.
Step 6. Configure Email Clients
After setting up email accounts, users can configure their email clients (such as Outlook, Thunderbird, etc.) with the provided email settings.
Use the following SMTP and IMAP settings to configure your email clients.
For SMTP
- SMTP server: mail.webshanks.store (replace with your domain)
- Username: Your email address
- Password: Your email address password
- Port: 587
- Connection: STARTTLS/TLS
For IMAP
- IMAP server: mail.webshanks.store (replace with your domain)
- Username: Your email address
- Password: Your email address password
- Port: 993
- Connection: STARTTLS/TLS
You can also plug these settings into your warmup services.
Step 7. Warmup Your Emails
Warming up emails is essential to build a positive reputation with email service providers and avoid being marked as spam. You can use services like Success.ai or Warmup Inbox for this purpose.
Remember that warming up emails is a gradual process, and rushing it can negatively impact your email deliverability. Be patient and follow the guidelines provided by the warming-up service you choose.
Watch on YouTube
Conclusion
Successfully managing multiple email domains in CyberPanel involves creating domains, configuring DNS records, and setting up email clients. You can also check out how I added multiple email domains on Cloudron.
Additionally, the crucial step of warming up emails ensures a positive sender reputation and optimal deliverability. Services like Success.ai or Warmup Inbox can assist in this process by providing tools to gradually increase email sending volumes while monitoring key metrics.
By following these steps and adhering to best practices, you can enhance your email infrastructure’s efficiency and maintain a positive relationship with email service providers.
Remember to approach both email domain management and warming up systematically for the best results.
Did I miss something? Write it in the comment section below.