 Cloudron is a powerful platform that simplifies the deployment and management of web applications, including email services.
If you need to manage multiple domains within your Cloudron instance, setting up multiple domains for email hosting is a crucial step.
This guide will walk you through the process of adding and configuring multiple domains on Cloudron for email services.
Prerequisites
Before you begin, make sure you have the following:
- A Cloudron instance already set up and running. Follow this guide on how to install Cloudron.
- Admin access to your Cloudron instance.
Multi Domain Email Server Setup: Add Multiple Email Domains on Cloudron with Single IP Address
Step 1: Log in to Cloudron
Open your web browser and navigate to the URL of your Cloudron instance. Log in using your admin credentials.
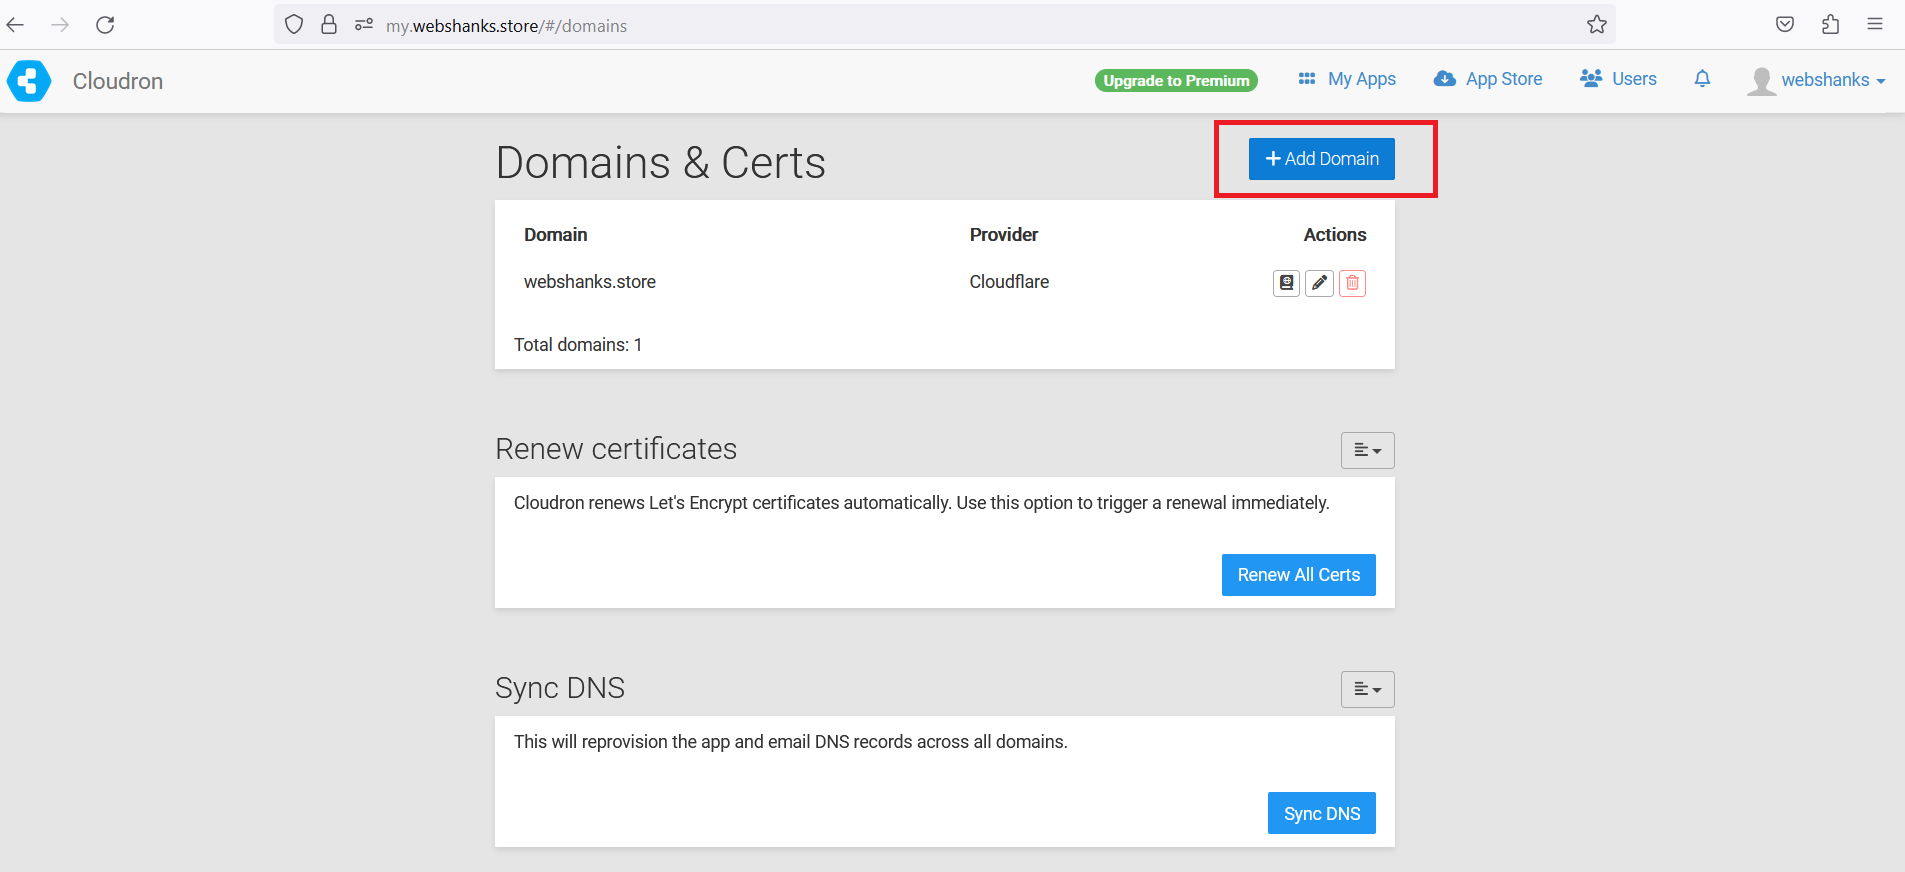
Step 2: Add a New Domain
1. From your Cloudron Dashboard, navigate to your username and click Domains and Certs.
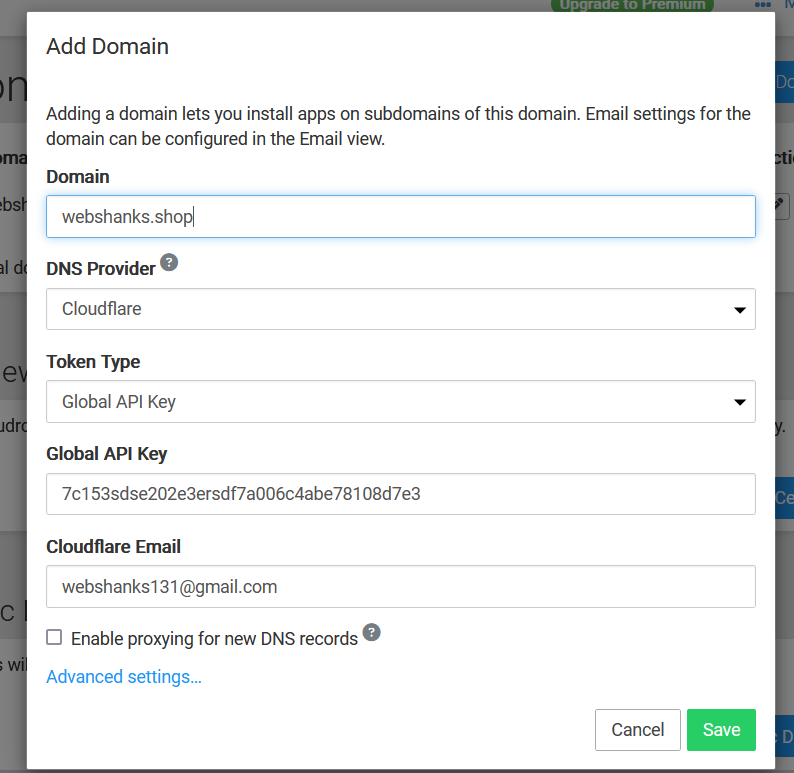
2. Click the Add Domain button. Stay put as you will need to add your domain to Cloudflare.
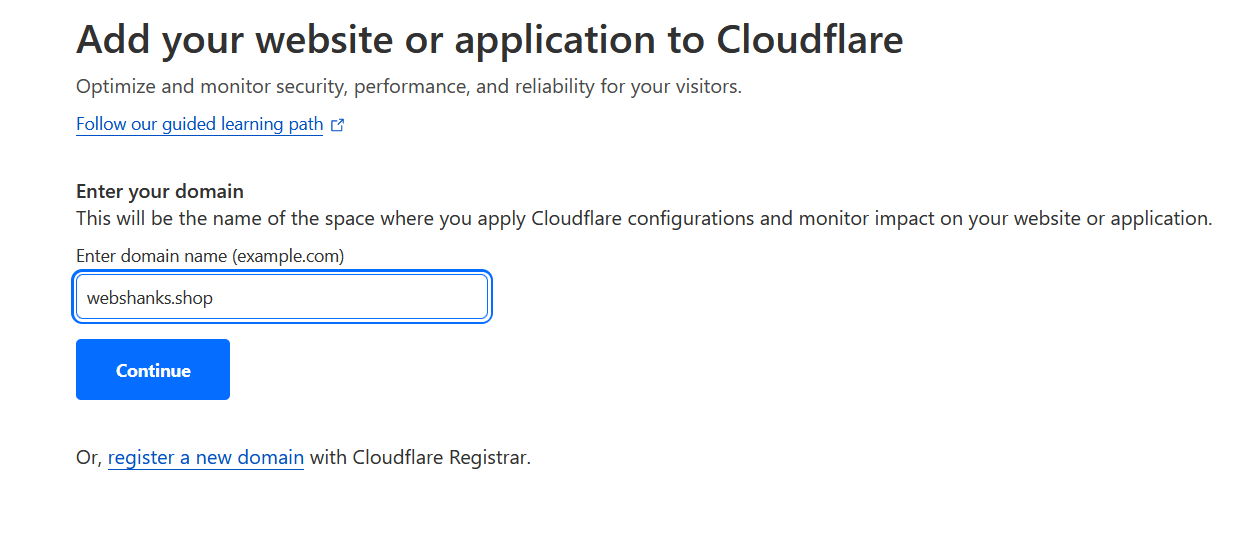
3. Go to Cloudflare and add your domain.
4. Add Cloudflare’s Nameservers to Namecheap. (Every domain registrars have different ways on adding nameservers. Check their knowledgebase or contact their support.)
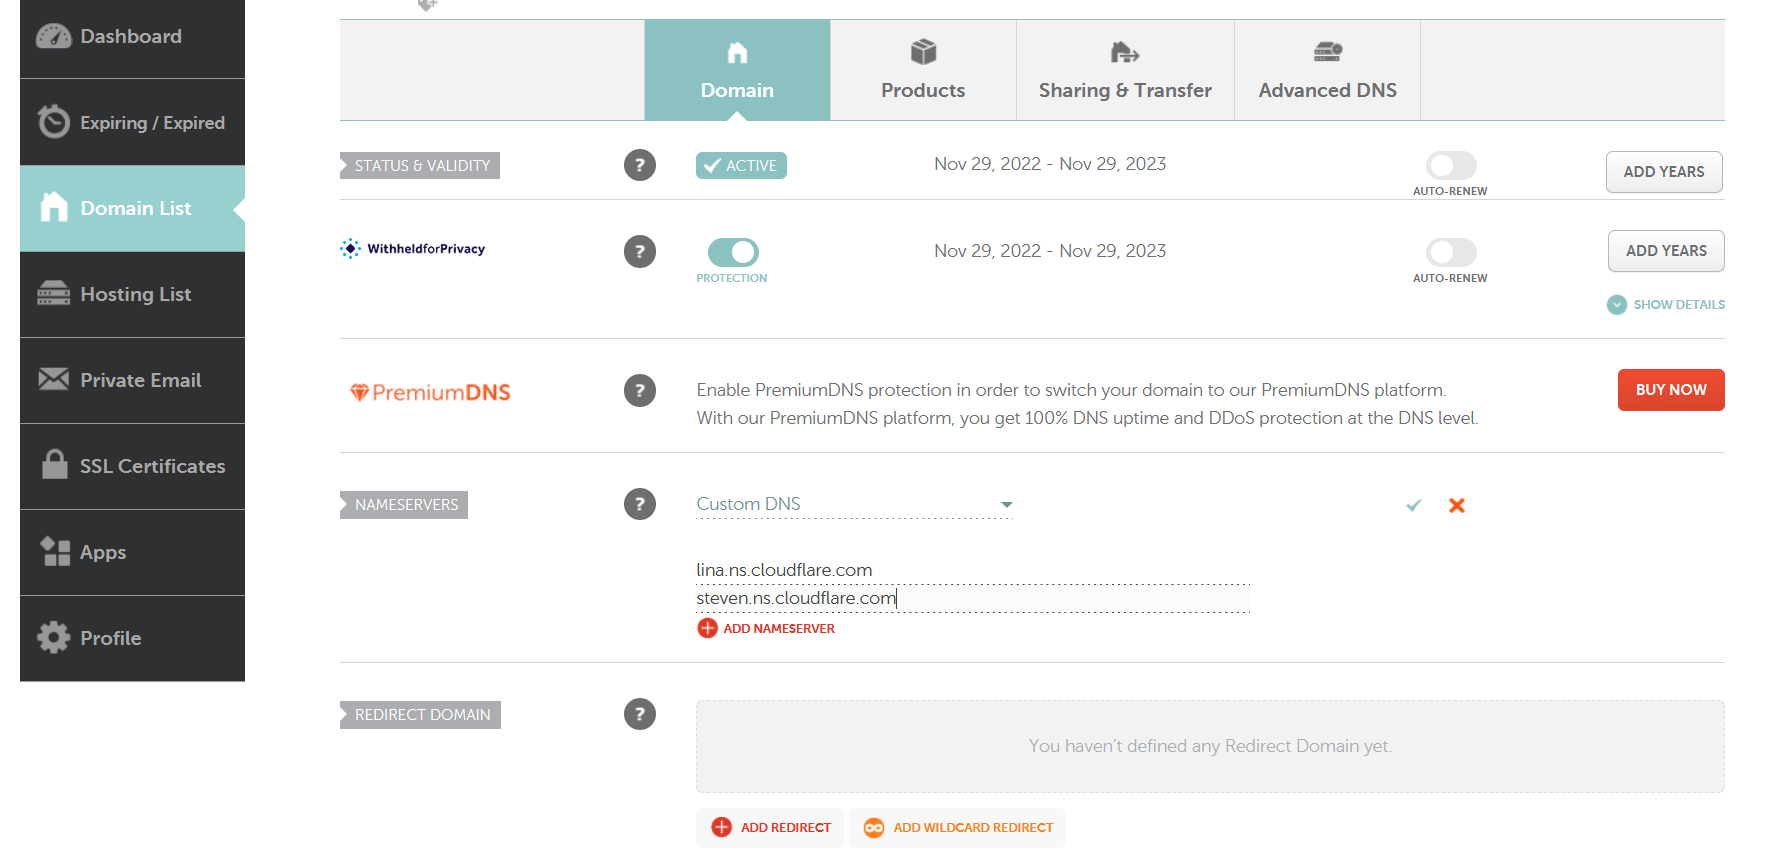
5. Go to Overview and find the API Token.
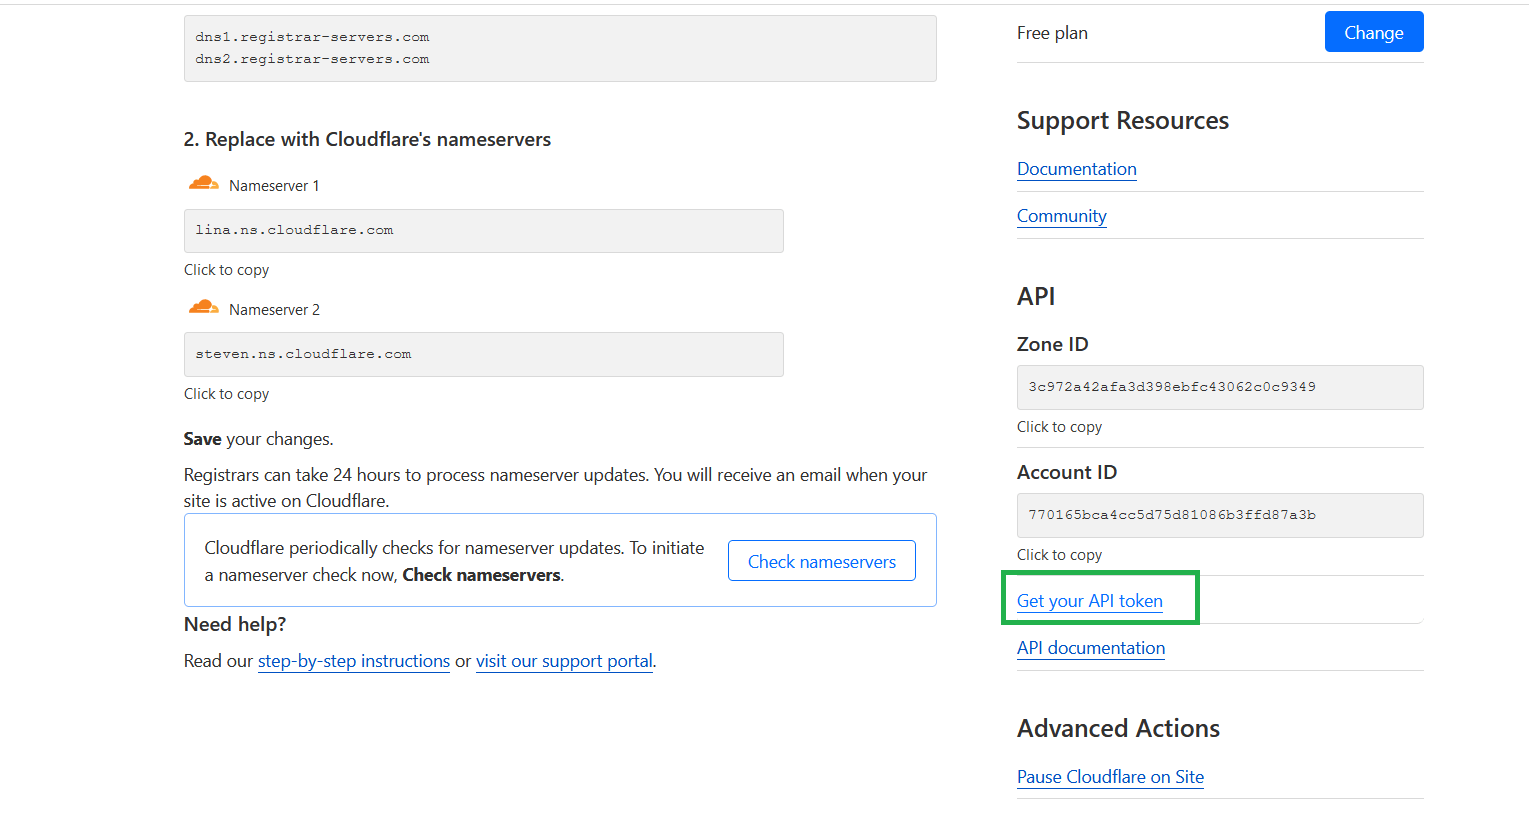
6. Add the API Token to your domain in Cloudron.
Wait for at least 24 hours for the DNS to propagate before clicking Save.
Step 3: Enable Email and Add Mailbox
Once you’ve added a domain, click on the Email on the dropdown menu of your profile at the uppermost right corner of Cloudron dashboard. This will take you to the email settings page.
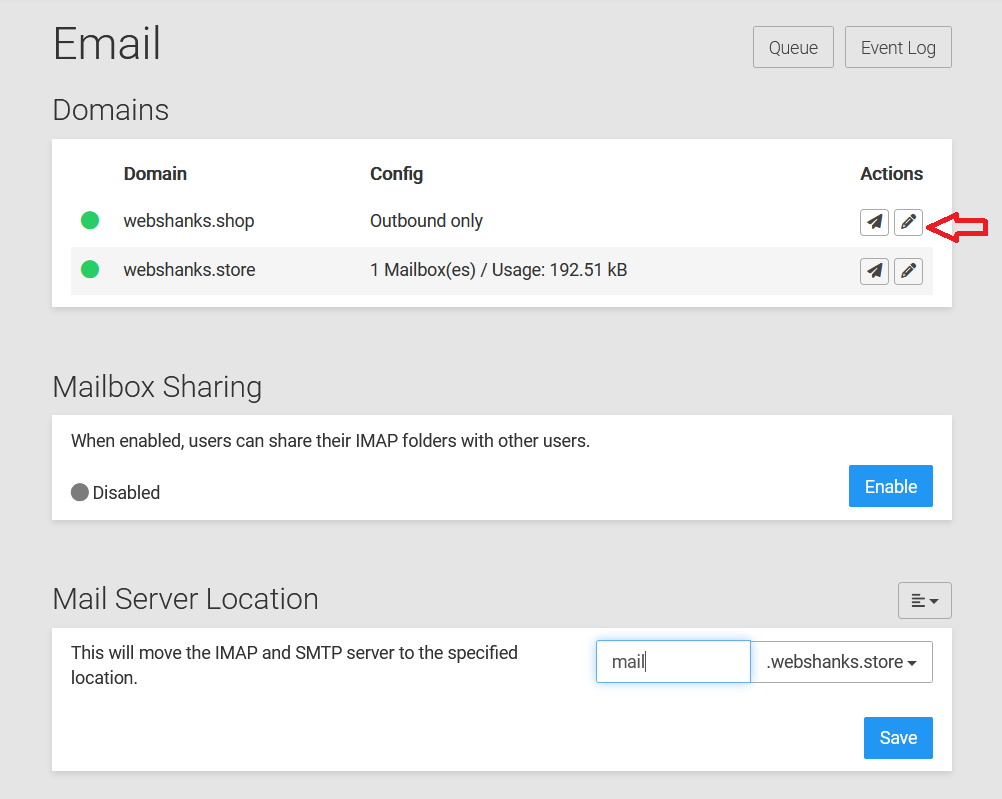

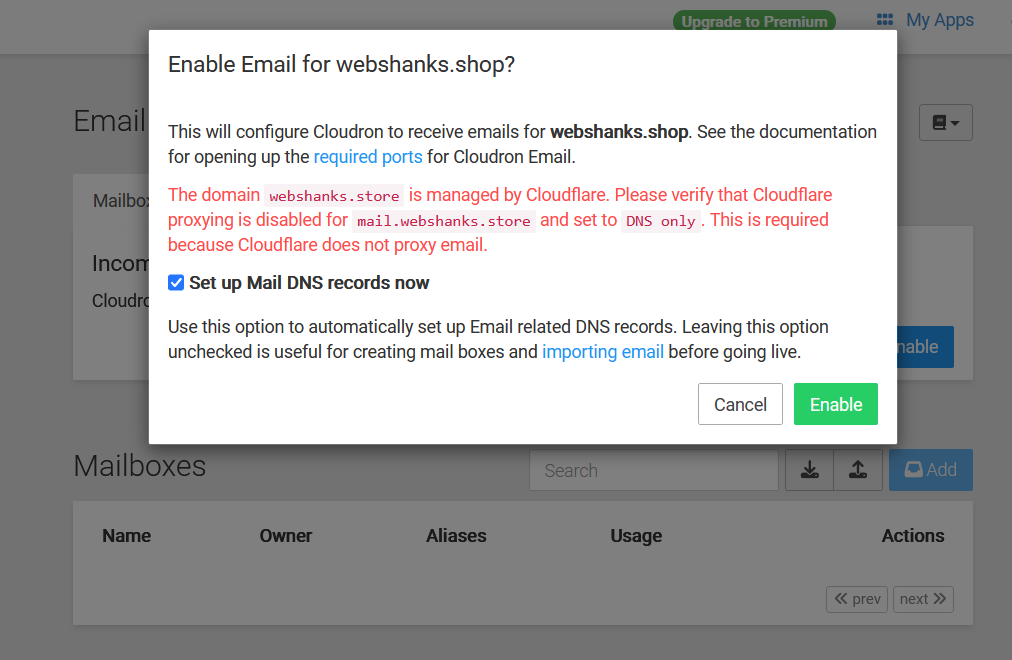
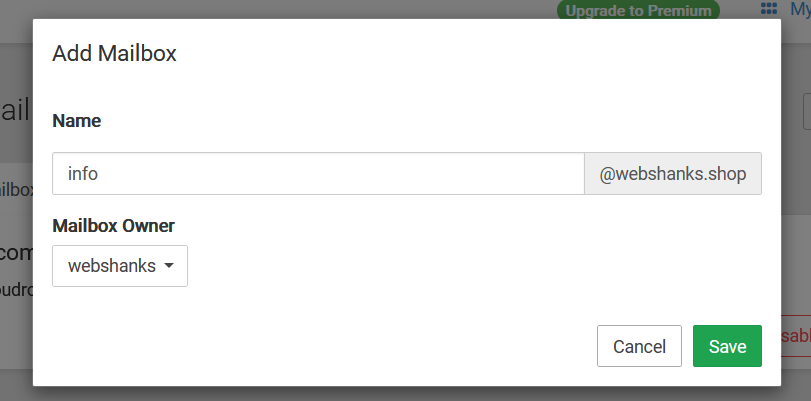
Next, add a mailbox.
Step 4: Verify Email Settings
After adding the domain and enabling email, Cloudron will automatically map your DNS records in Cloudflare. Amazing, isn’t it?
This step is crucial for proper domain verification.
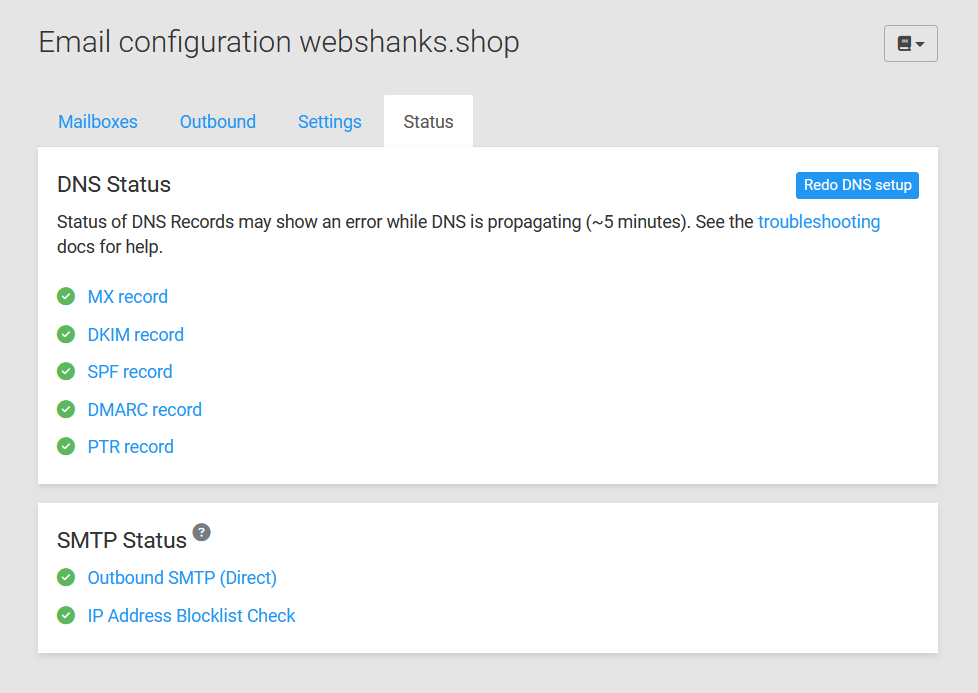
Be sure all DNS Status and SMTP Status are Green!
Step 5: Test Email Deliverability
Go to Mail-Tester and send a test email to see if we are missing something.

Perfect! We can now send and receive email messages with our second domain.
Step 6: Repeat for Additional Domains
Repeat steps 2-5 for each additional domain you want to add to your Cloudron email setup.
Step 7: IP and Domain Warmup
Sign up for SendNow.ai or WarmupInbox to warmup your mailboxes. Though you are using the same IP address, you should warmup your mailbox before sending bulk emails.
You can use these credentials to add into whatever warmup services you are using.
Your IMAP relay:
Server Name: Your mail server hostname (mail.webshanks.store).
Port: 993
Connection Security: TLS
Username/password: Use the email id as the username and the Cloudron account password
Your SMTP relay:
Server Name: Your mail server hostname (mail.webshanks.store).
Port:587
Connection Security: STARTTLS
Username/password: Use the full email as the username and the Cloudron account password
Pro tip: Monitor your spam rate by adding your domain to Google Postmaster Tools.
Frequently Asked Questions (FAQ)
How can I monitor email deliverability during warmup?
Use email delivery monitoring tools like Postmaster Tools and Sender Score to assess your email reputation and deliverability.
How often should I warm up my domains on Cloudron?
It is recommended to warm up your domains whenever you add a new one or make significant changes to your email infrastructure. Regular warmups help maintain good email deliverability.
How many domains can I add on Cloudron?
Cloudron allows users to add an unlimited number of domains to their Cloudron instance. The platform doesn’t impose a specific limit on the number of domains you can add.
How many mailboxes can I create on Cloudron?
Cloudron doesn’t impose a specific limit on the number of mailboxes you can create. The ability to create mailboxes is typically associated with the email server software used by Cloudron (e.g., Dovecot for IMAP/POP3 and Postfix for SMTP). These email servers can handle a large number of mailboxes.
Does VPS virtualization matter with this setup?
Yes! Cloudron doesn’t support ARM, LXC, Docker or OpenVZ. Also, your VPS doesn’t close its port 25.
Watch on YouTube
Conclusion
Congratulations! You have successfully added and configured multiple domains on Cloudron for email hosting. Users associated with each domain can now access their email services through the Cloudron interface.
If you encounter any issues, refer to the Cloudron documentation or community forums for additional support. You can also contact me on my Telegram.
Seems not easy to setup simply an email account address. I don’t understand also why the mailbox should be assigned to a user or group. Usually someone wants just to create few email account with different passwords so each one has its own access only in their mailbox. Strange cloudron…
That’s the way Cloudron is built. It can be managed by non-admin if you assign roles for someone. You can choose mailcow but you need to manually add DNS for each domain.
Is mailcow a similar app like cloudron?
Yes it is but mailcow is a standalone mail server stack while cloudron can host multiple web applications.