 There’s no exact guide on how to restore WordPress backups on CloudPanel. So, I made this step by step guide for you so it could help you restore your own WordPress websites hosted on CloudPanel.
As a rule of thumb in the IT world, always backup your files. CloudPanel is free and open-source.
Prerequisite
- A fully functional CloudPanel. You have already installed CloudPanel on you server.
- Access to CloudPanel dashboard. You need valid credentials to log in to the CloudPanel dashboard.
- Backup availability. Before restoring, you must have a backup of the data you want to restore. CloudPanel should have previously created and stored these backups.
How to Restore WordPress Backups on CloudPanel
In this tutorial, I have backed up my site on Dropbox. I installed CloudPanel on RackNerd VPS.
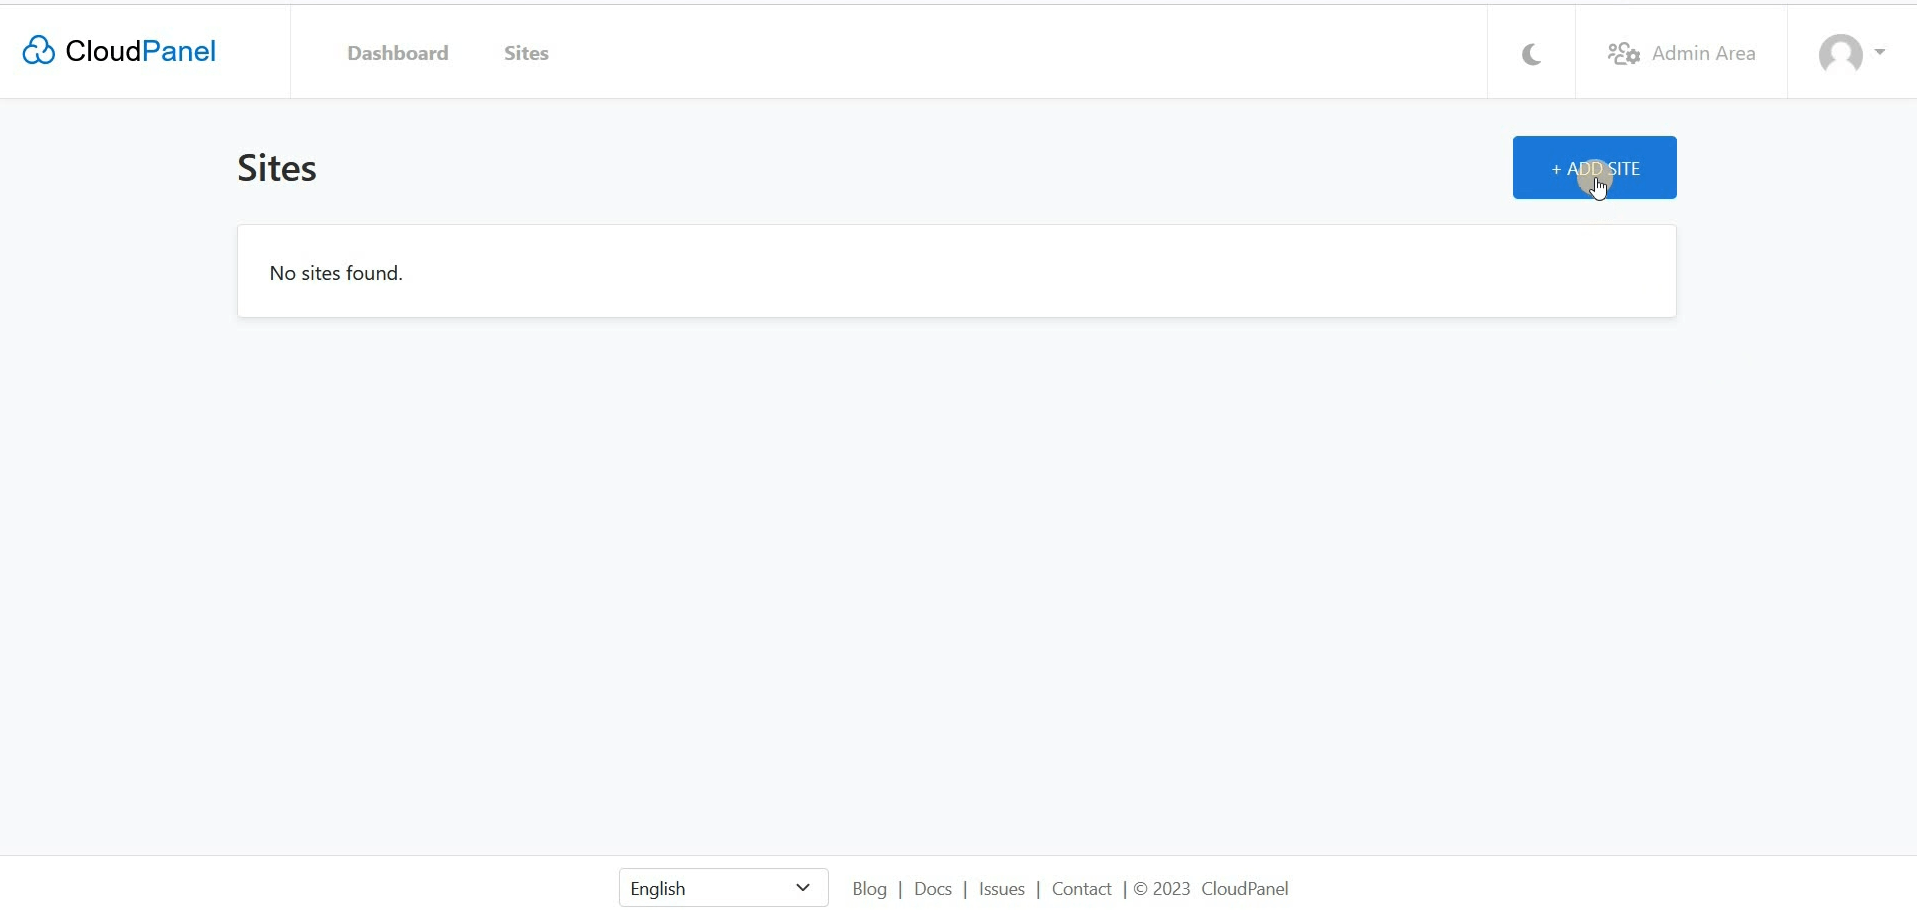
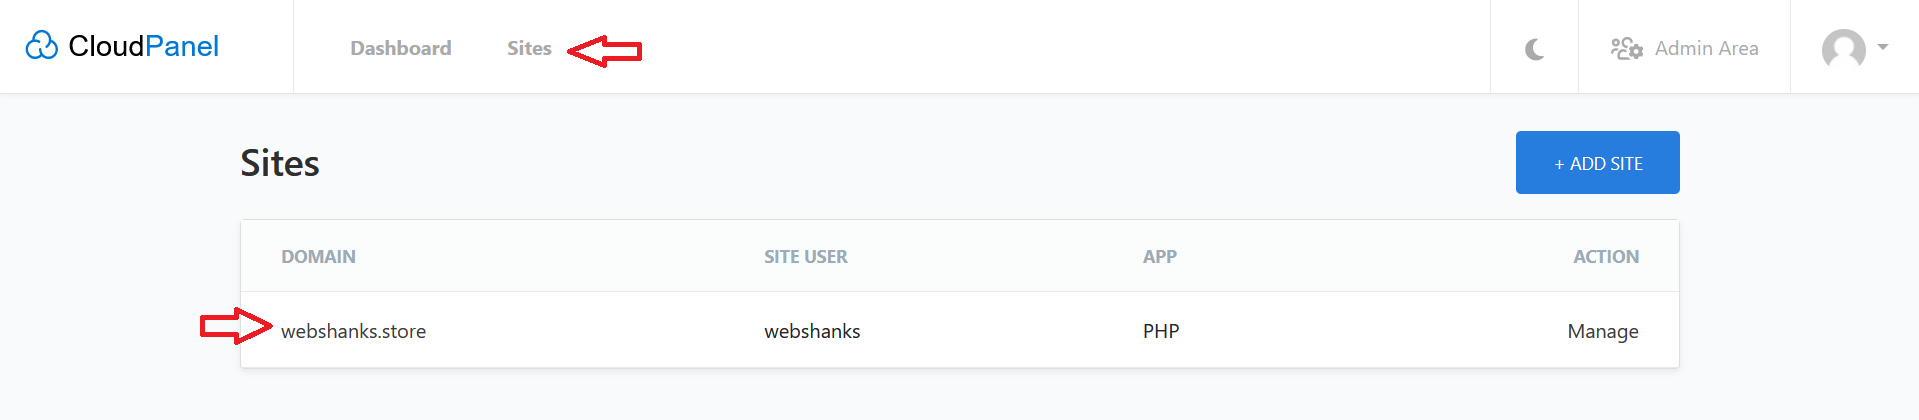
Step 1: Access CloudPanel Dashboard
Log in to the CloudPanel dashboard using your credentials created during installation process.

Step 2: Add Site
Go to Sites > Add Site and choose WordPress.
Fill in the necessary details and click Create. Be sure your domain name should be the one to be restored.
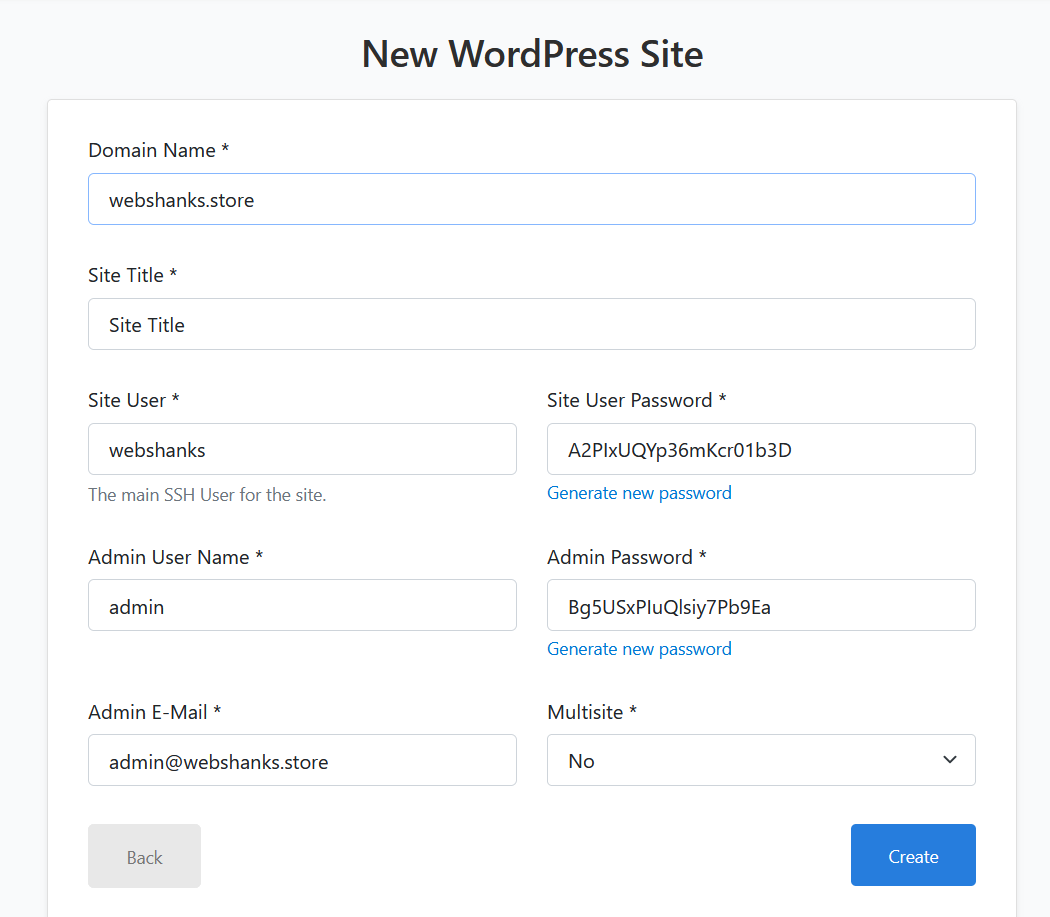
Store the credentials on a safe place. We will need the database password later on.

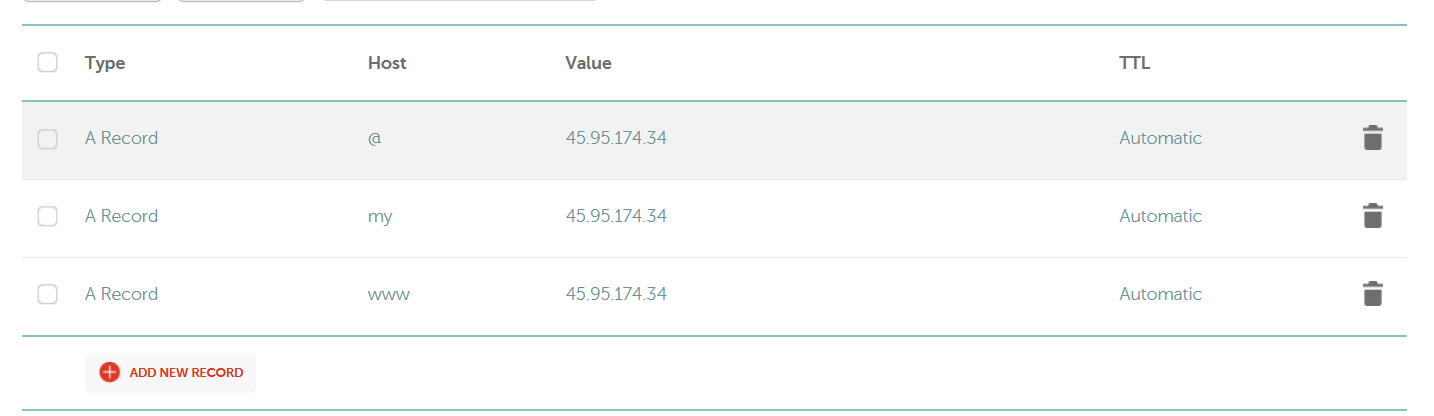
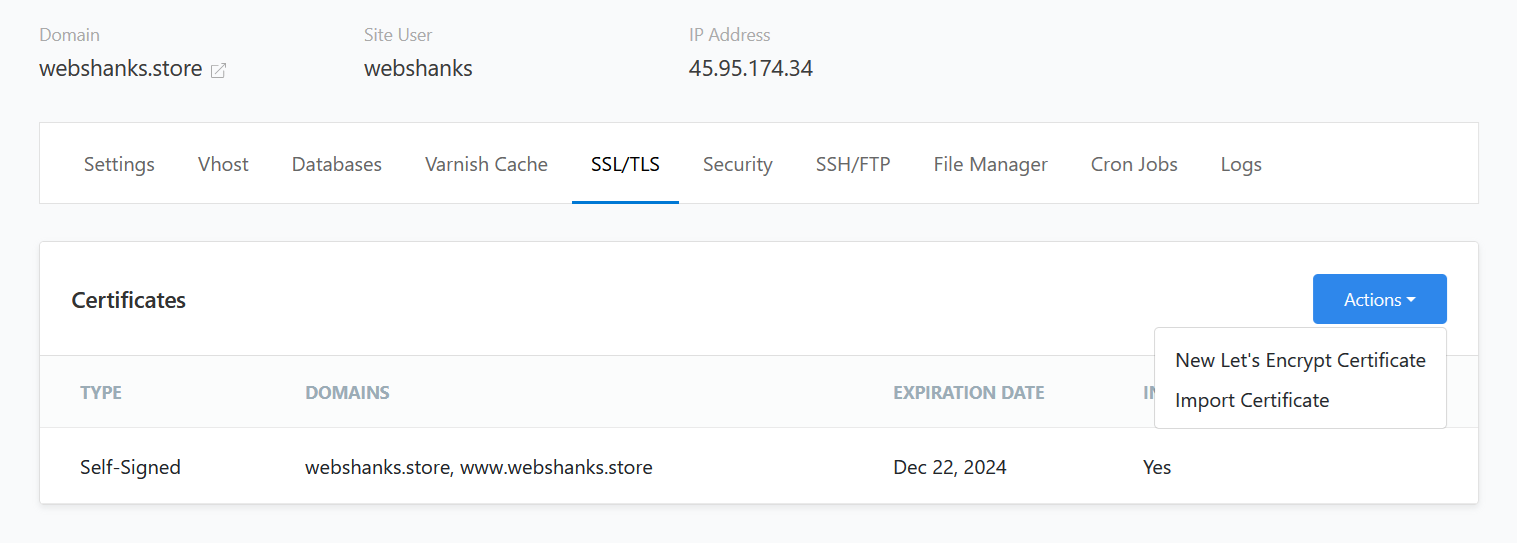
Step 3. Add DNS Records and Issue SSL
You can skip this step if you are using the same server, assuming your DNS records are intact. If you are on a new server, add two A Records for your site, one with www and the other without.
I am using Namecheap as my DNS provider. Go to Namecheap and add your DNS records.
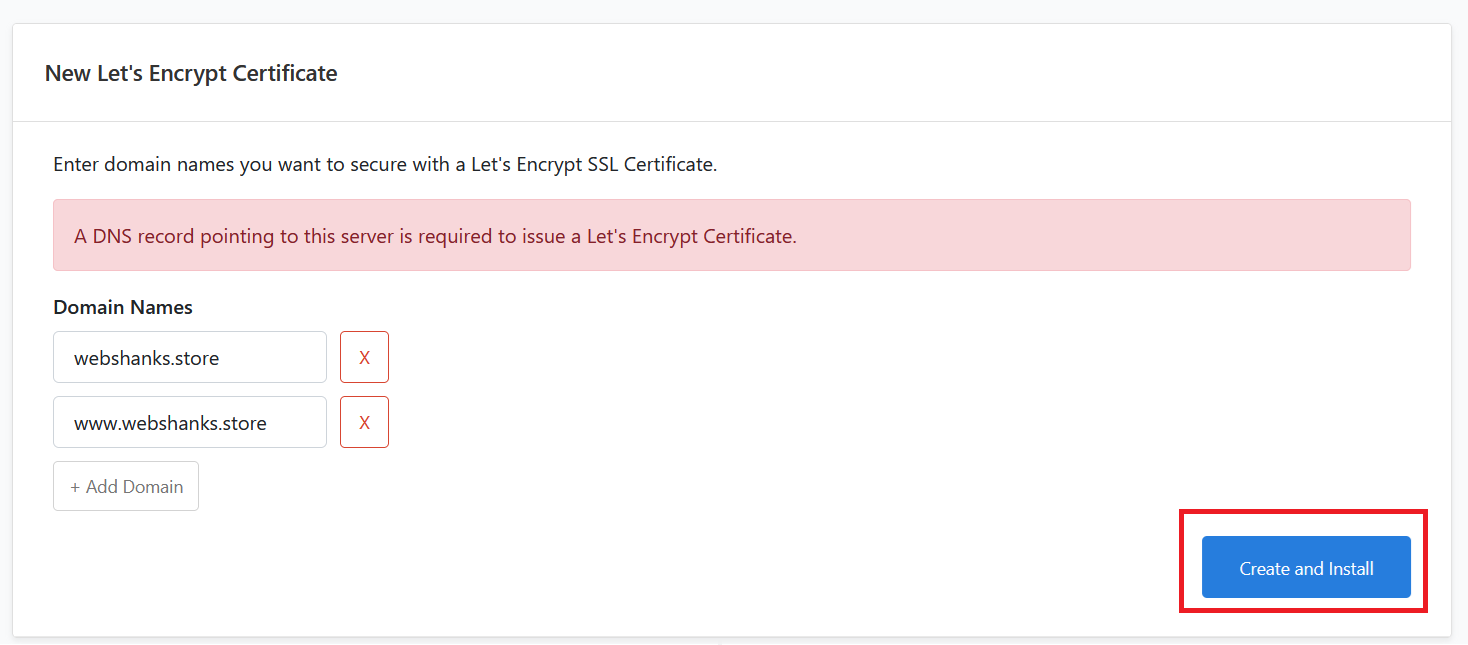
After adding your DNS records, go back to CloudPanel and we’ll issue a Let’s Encrypt Certificate.
Just click Create and Install.
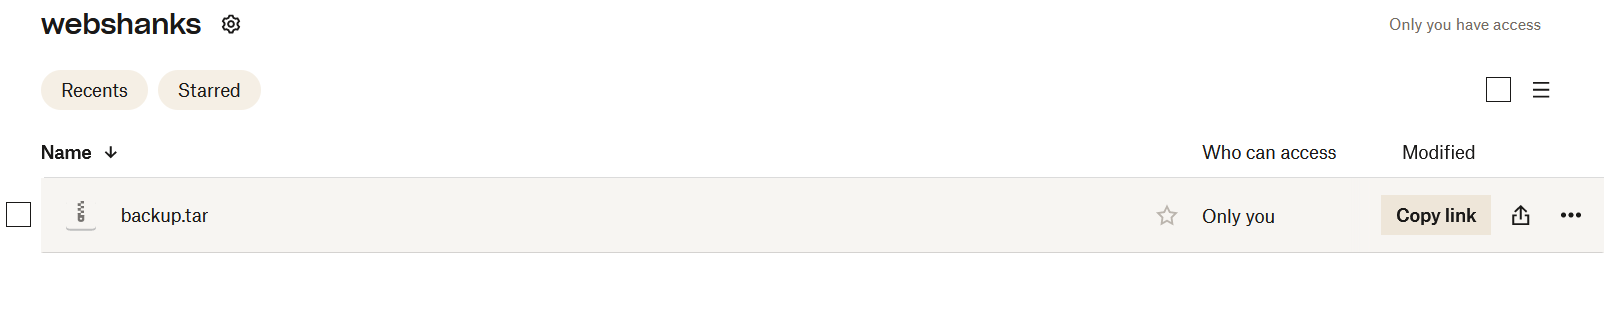
Step 4: Download Your Backup
Since I have stored all backups on Dropbox, I will download the backup file. It is in .tar format.
Typically, backups are listed with timestamps or identifiable names. You should see a list of available backups under CloudPanel folder. Choose the backup you want to restore.
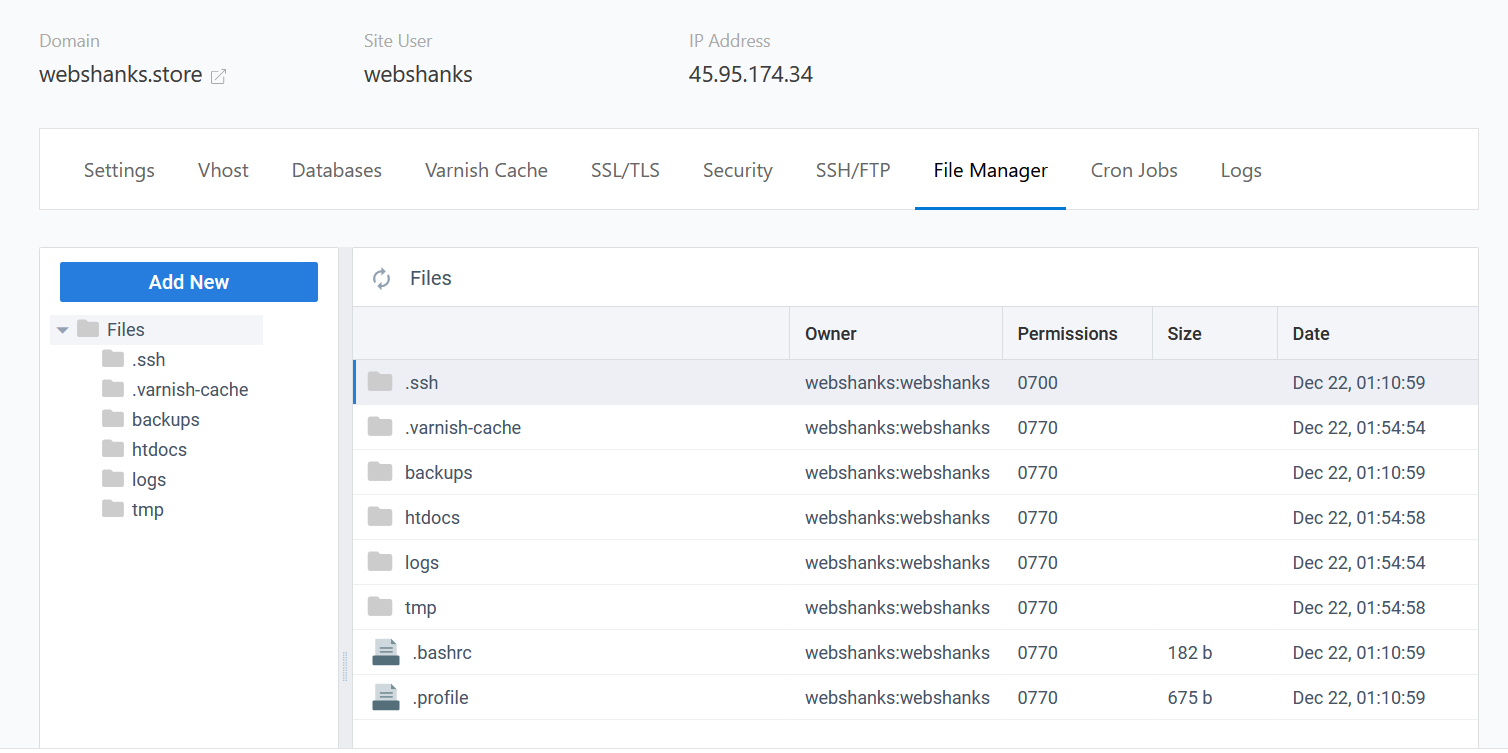
Step 5: Upload File on CloudPanel
Go back to CloudPanel and click Sites > choose the site you want to restore.
Choose File Manager.
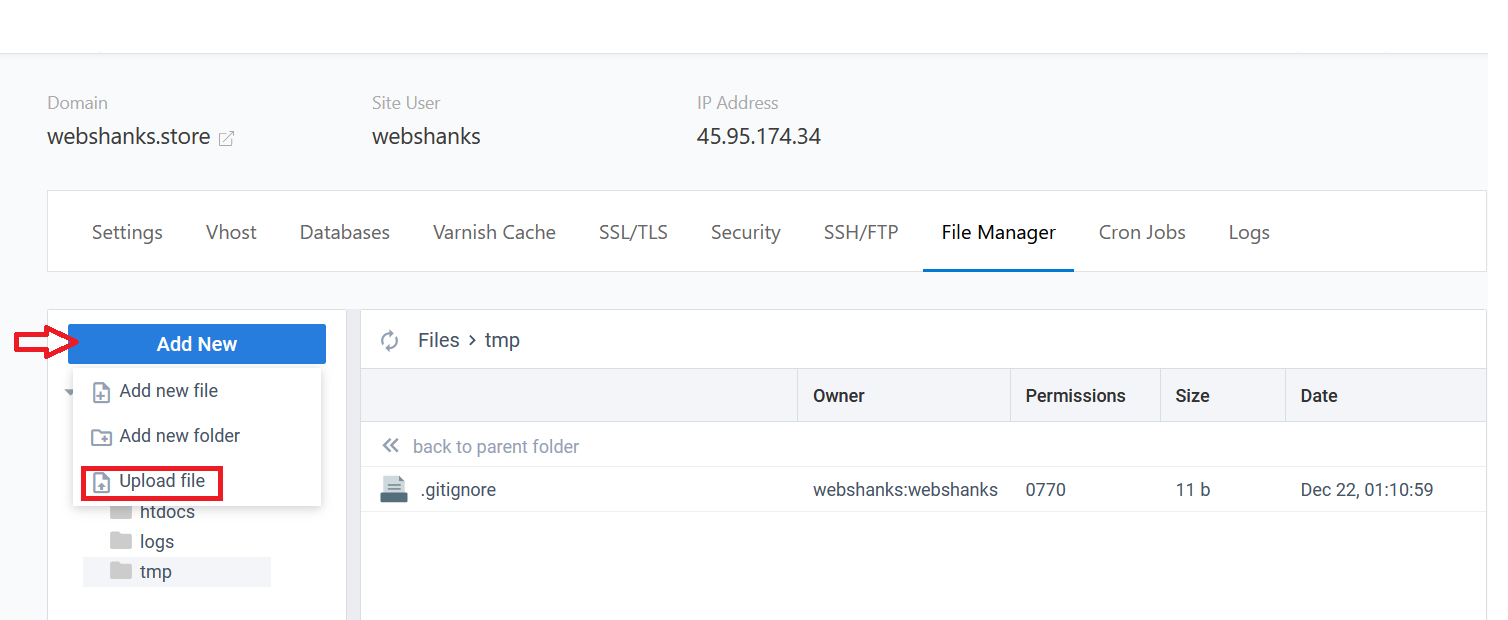
On the left side bar, click on tmp. Then click Add New > Upload File. Choose the file you download on Dropbox.
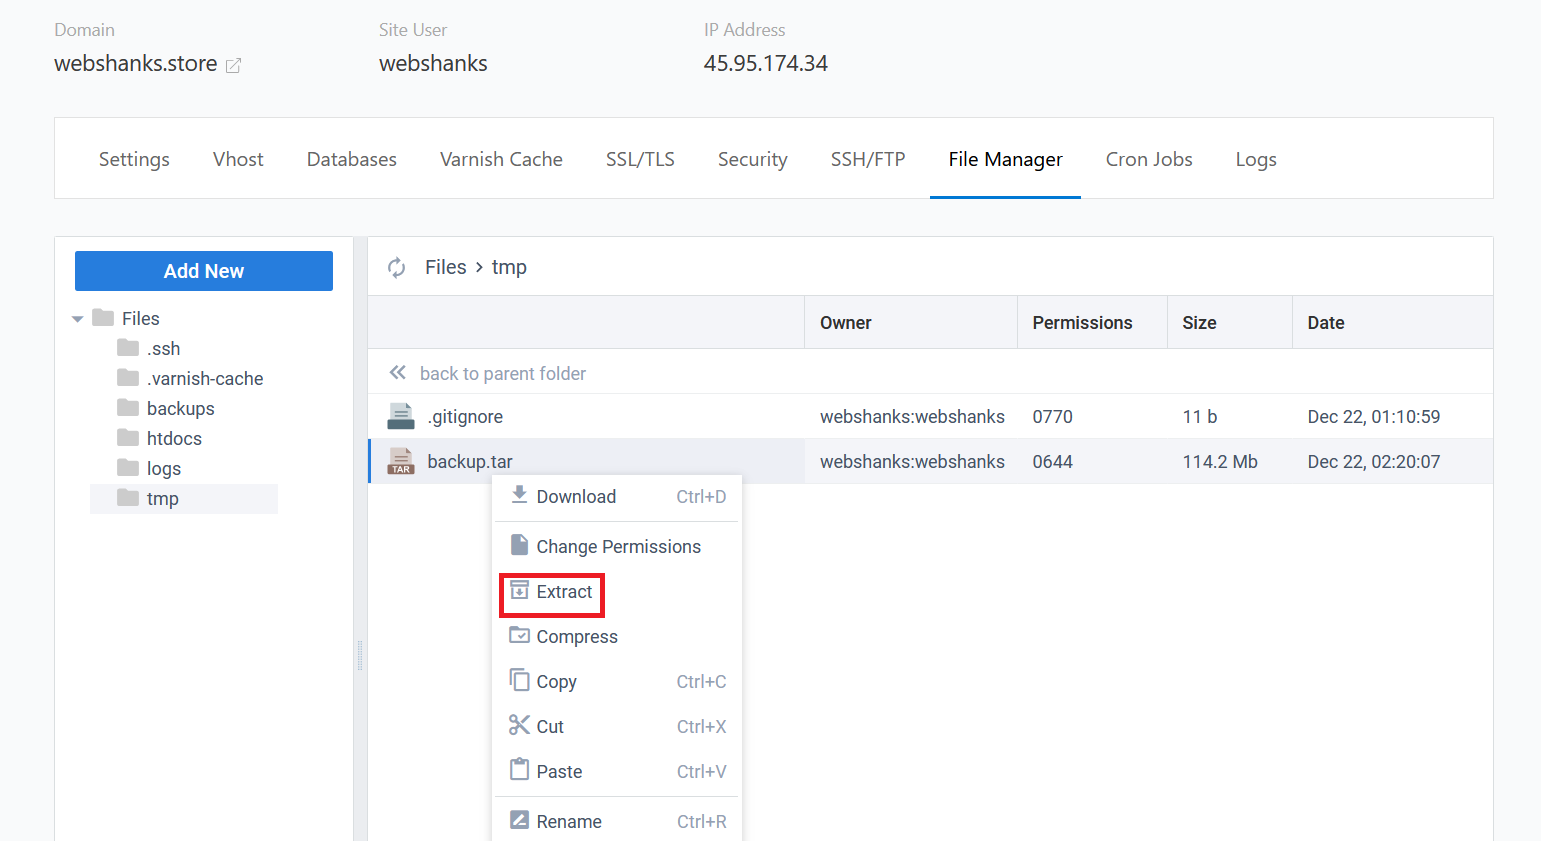
Step 6: Initiate Restore Process
Now we have the file uploaded in tmp folder, it’s time to extract all contents. Hover to the backup file and right click and choose Extract. It will create a folder called backup.
Once extracted, open the folder backup > home > webshanks > htdocs > webshanks.store and cut all contents. Do not copy because it will create a double file with -copy name.
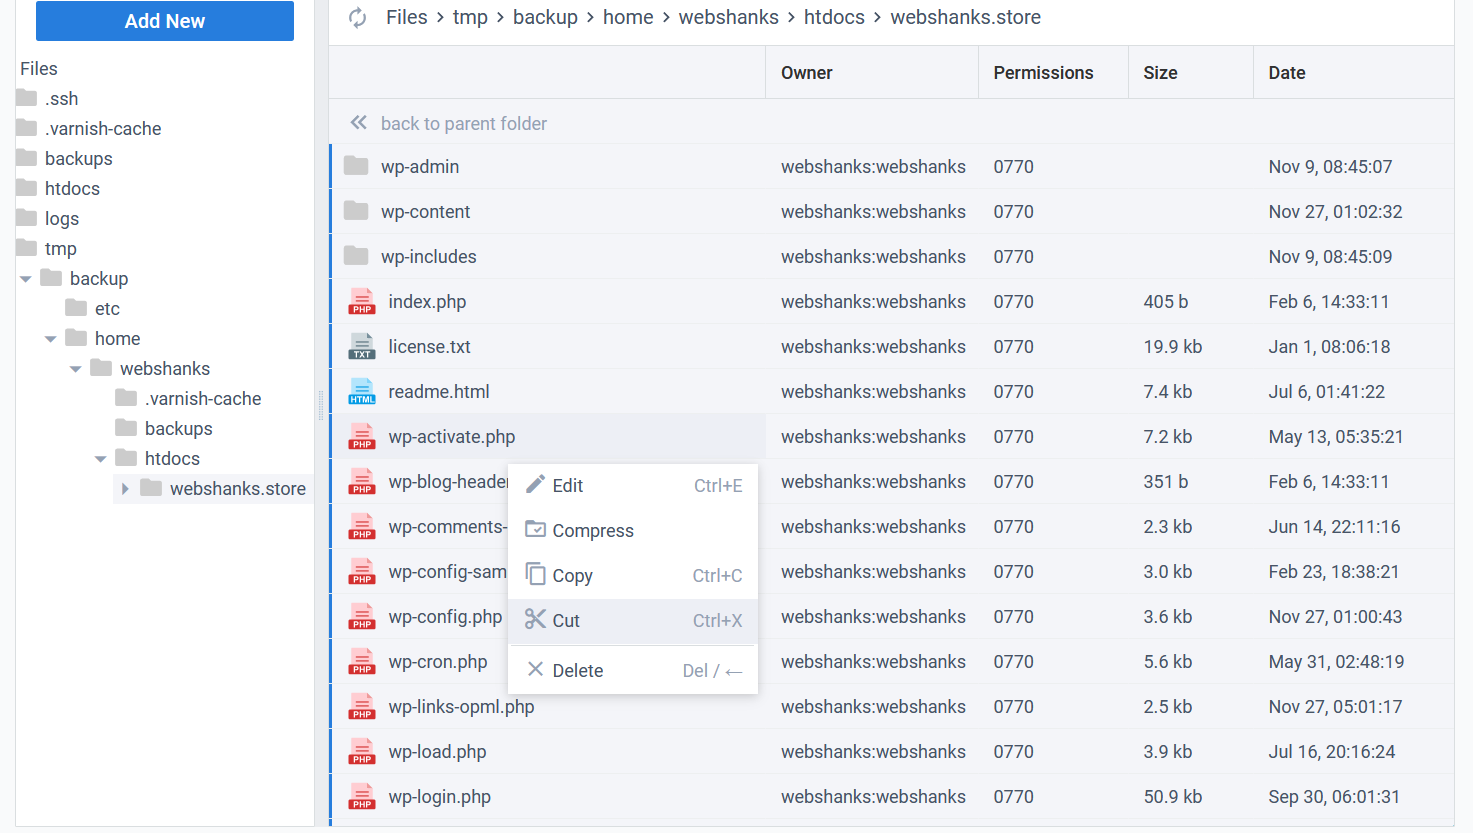
Next, let’s paste it on our main htdocs folder where our newly created WordPress site is located.
On the left side bar, click htdocs > webshanks.store (this is your newly created domain). Under that folder, remove all contents before pasting out backup contents. Just ctrl + A, right click and select Delete.
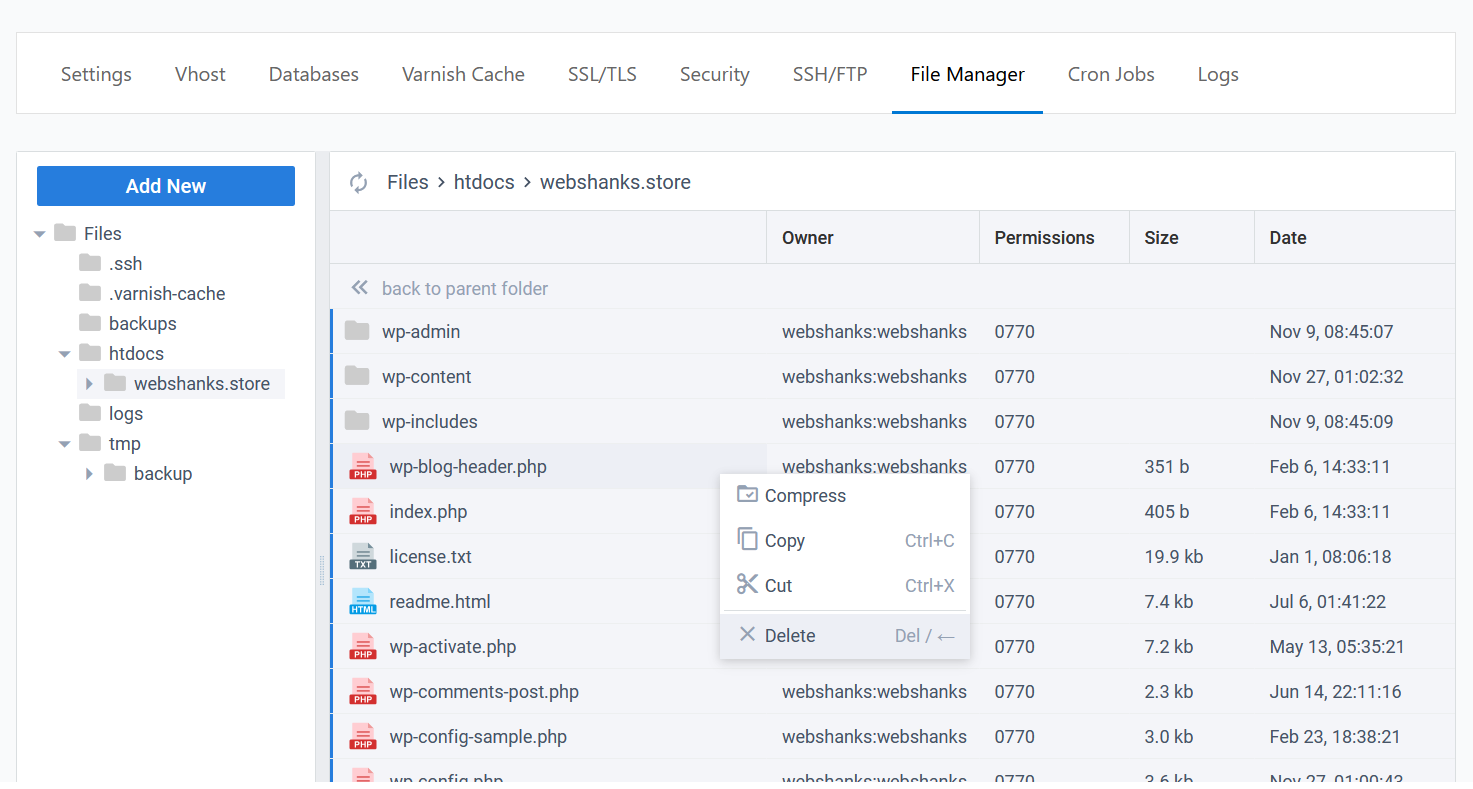
Then mouse right click and paste the contents.
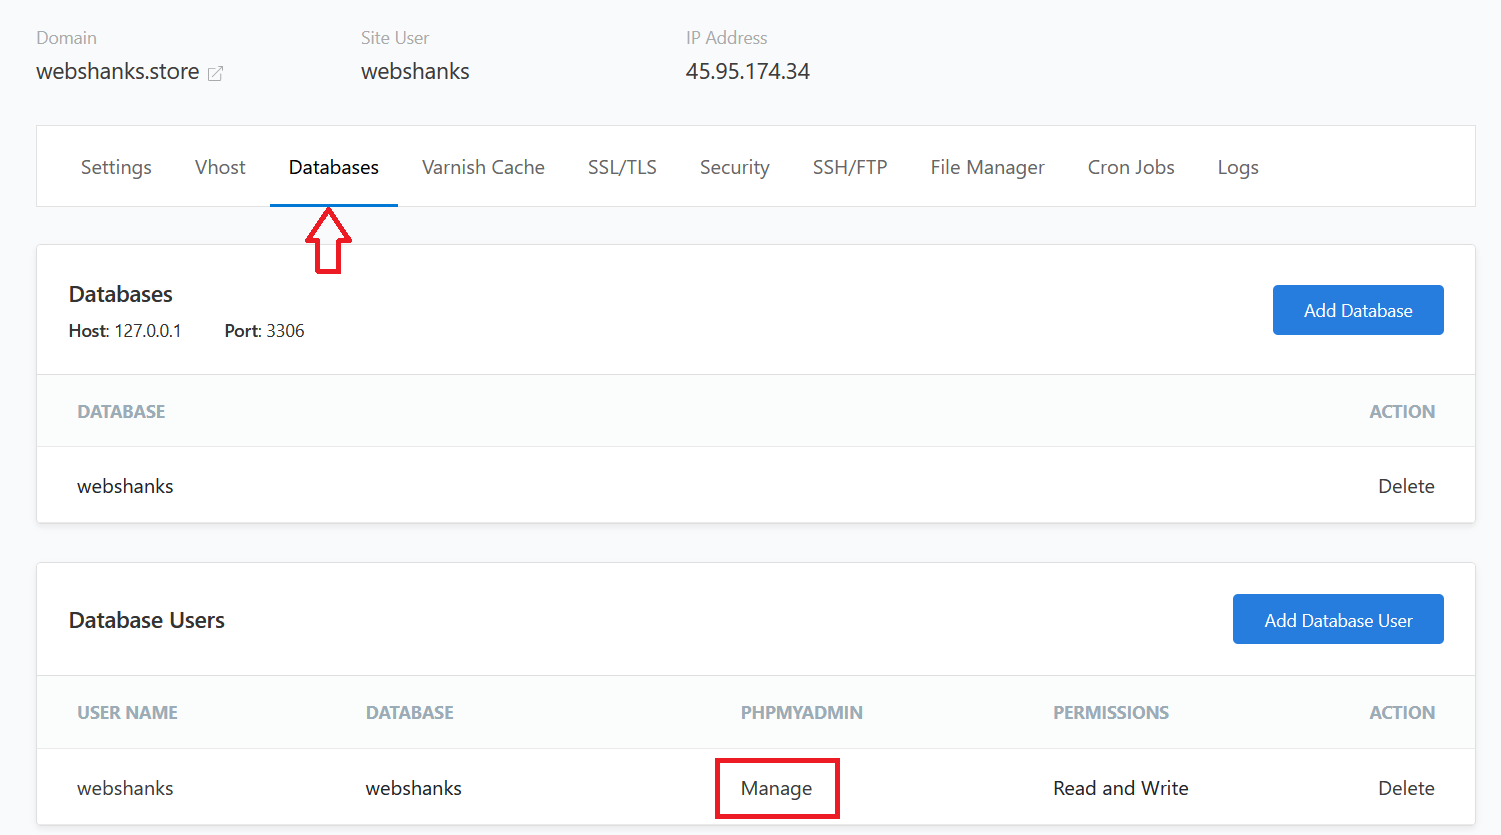
We will now proceed to restoring the database. Go to Database tab scroll down and click Manage. You will be redirected to PHPMyAdmin.
Once you are in PHPMyAdmin, select the site and drop all tables. We will upload the database file later on.
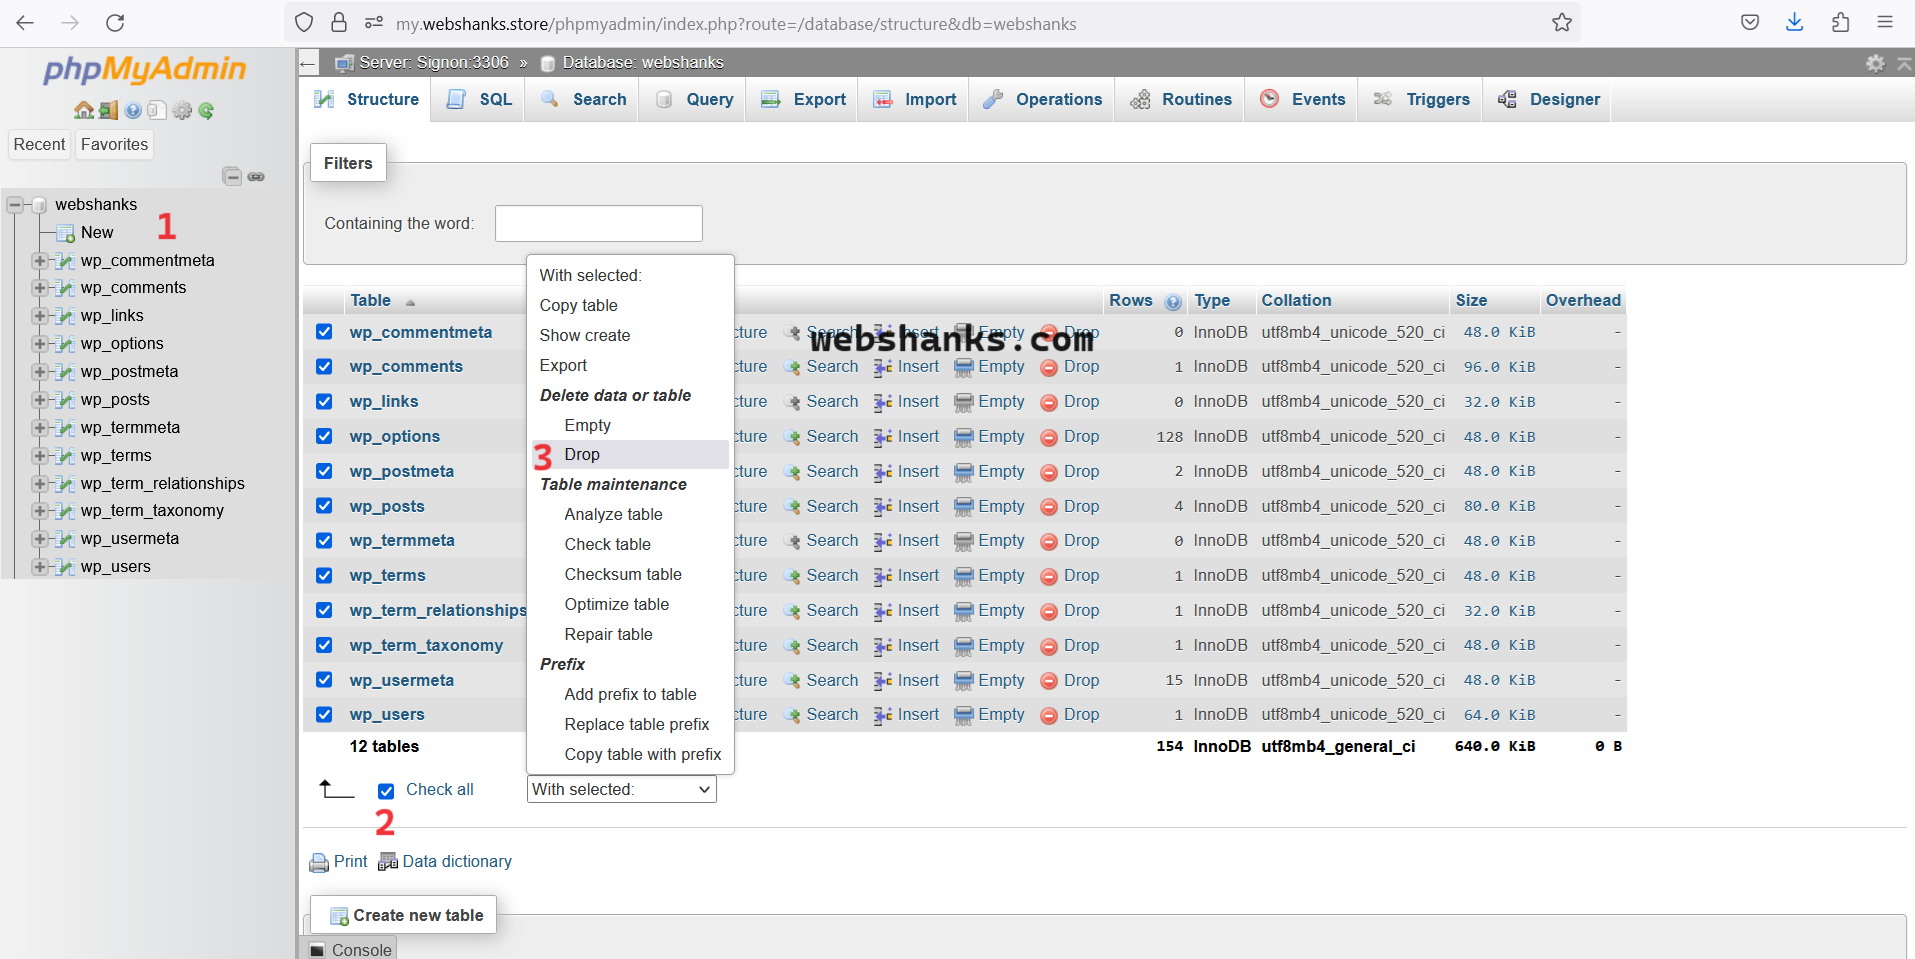
You will be asked “Do you really want to execute the following query?”, just choose Yes.
Next, go back to the backup file you have downloaded. Find the folder called backups and look for the SQL file. The should be like webshanks_1701072901.sql. Extract it.
Go back to PHPMyAdmin and import the SQL File.
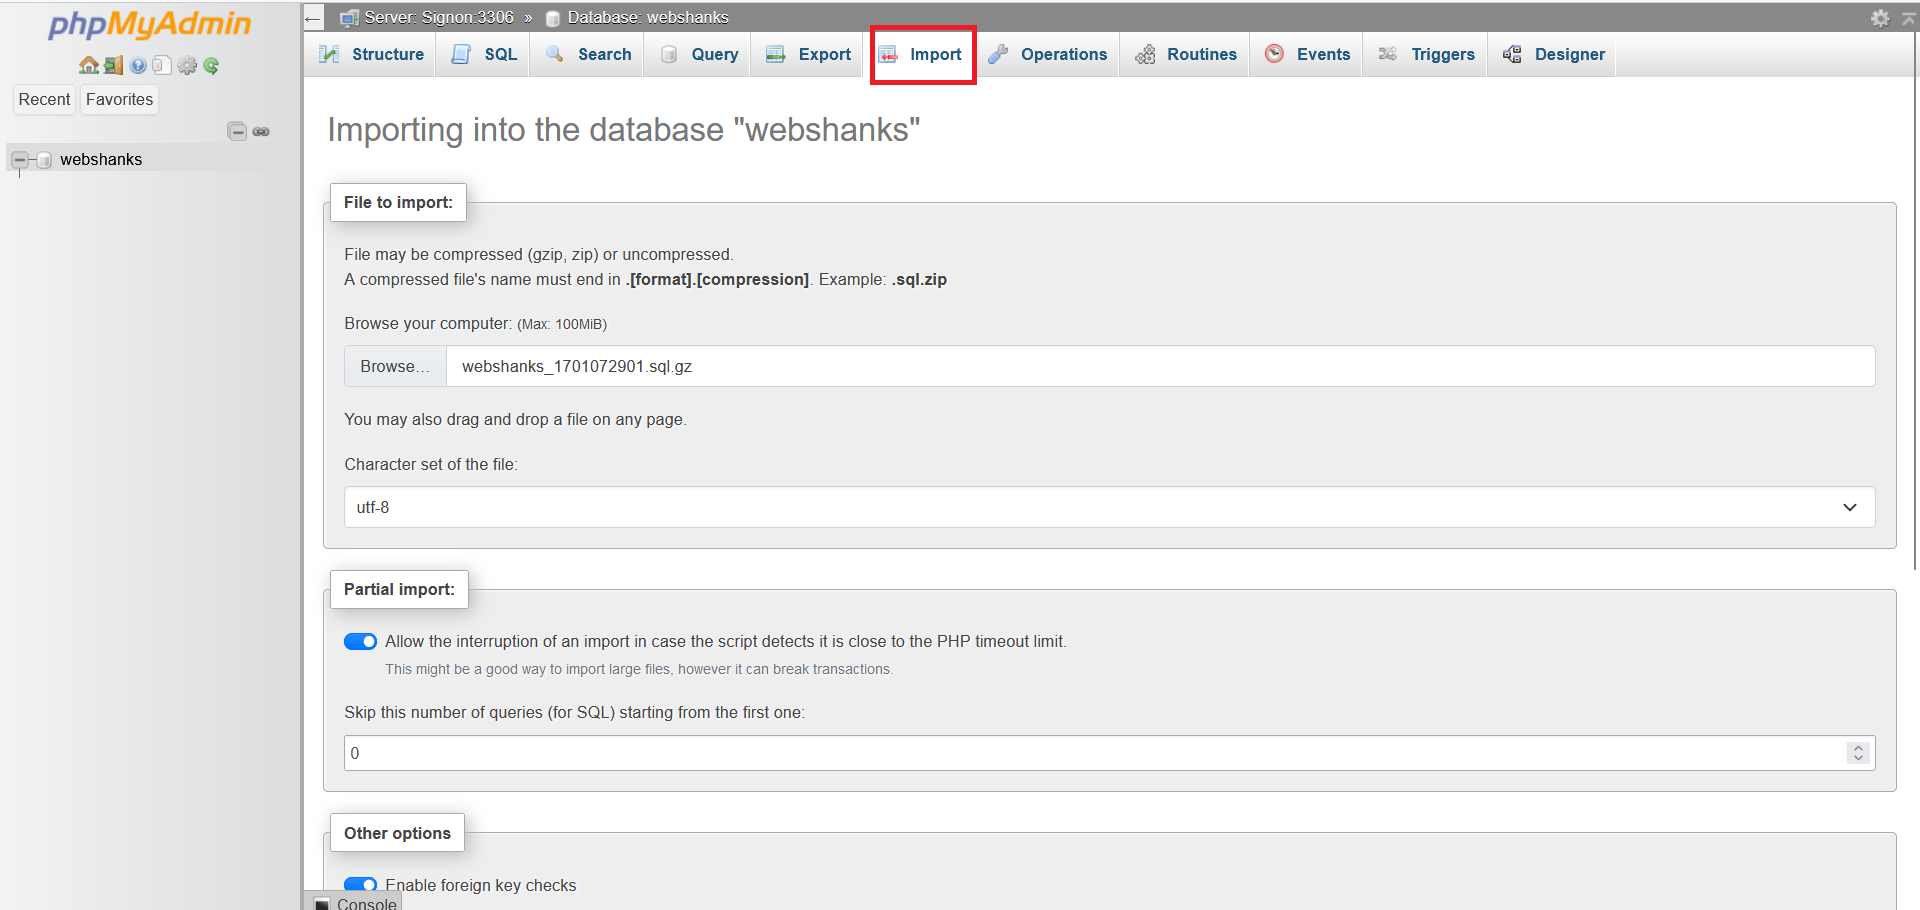
Scroll down and you will see an Import button and click it.
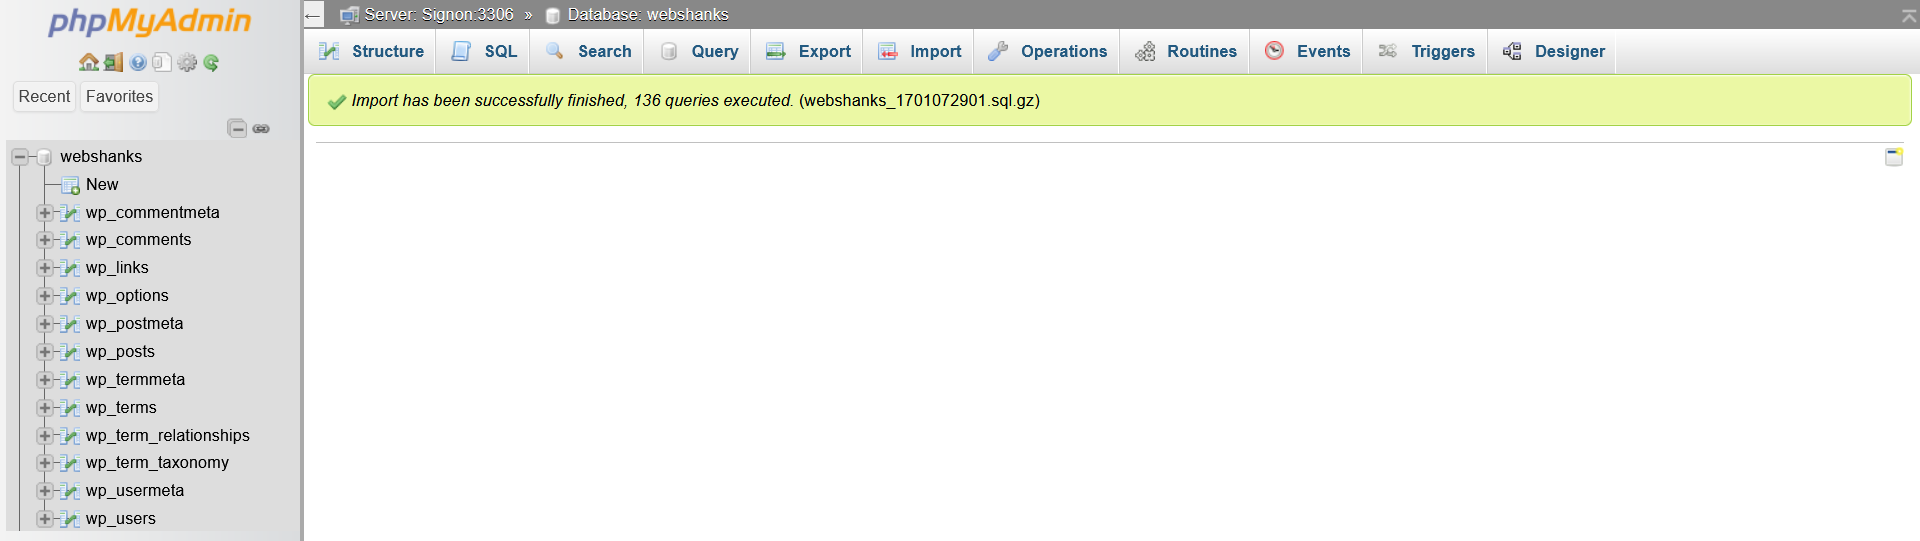
Now you have successfully uploaded the SQL file.
Go back to File Manager. Choose htdocs > webshanks and edit wp-config.php.
Find Database password and replace it with the new credentials database password you saved earlier.

Step 7: Test Restoration
After the restoration process is complete, verify that your data has been successfully restored to its previous state.
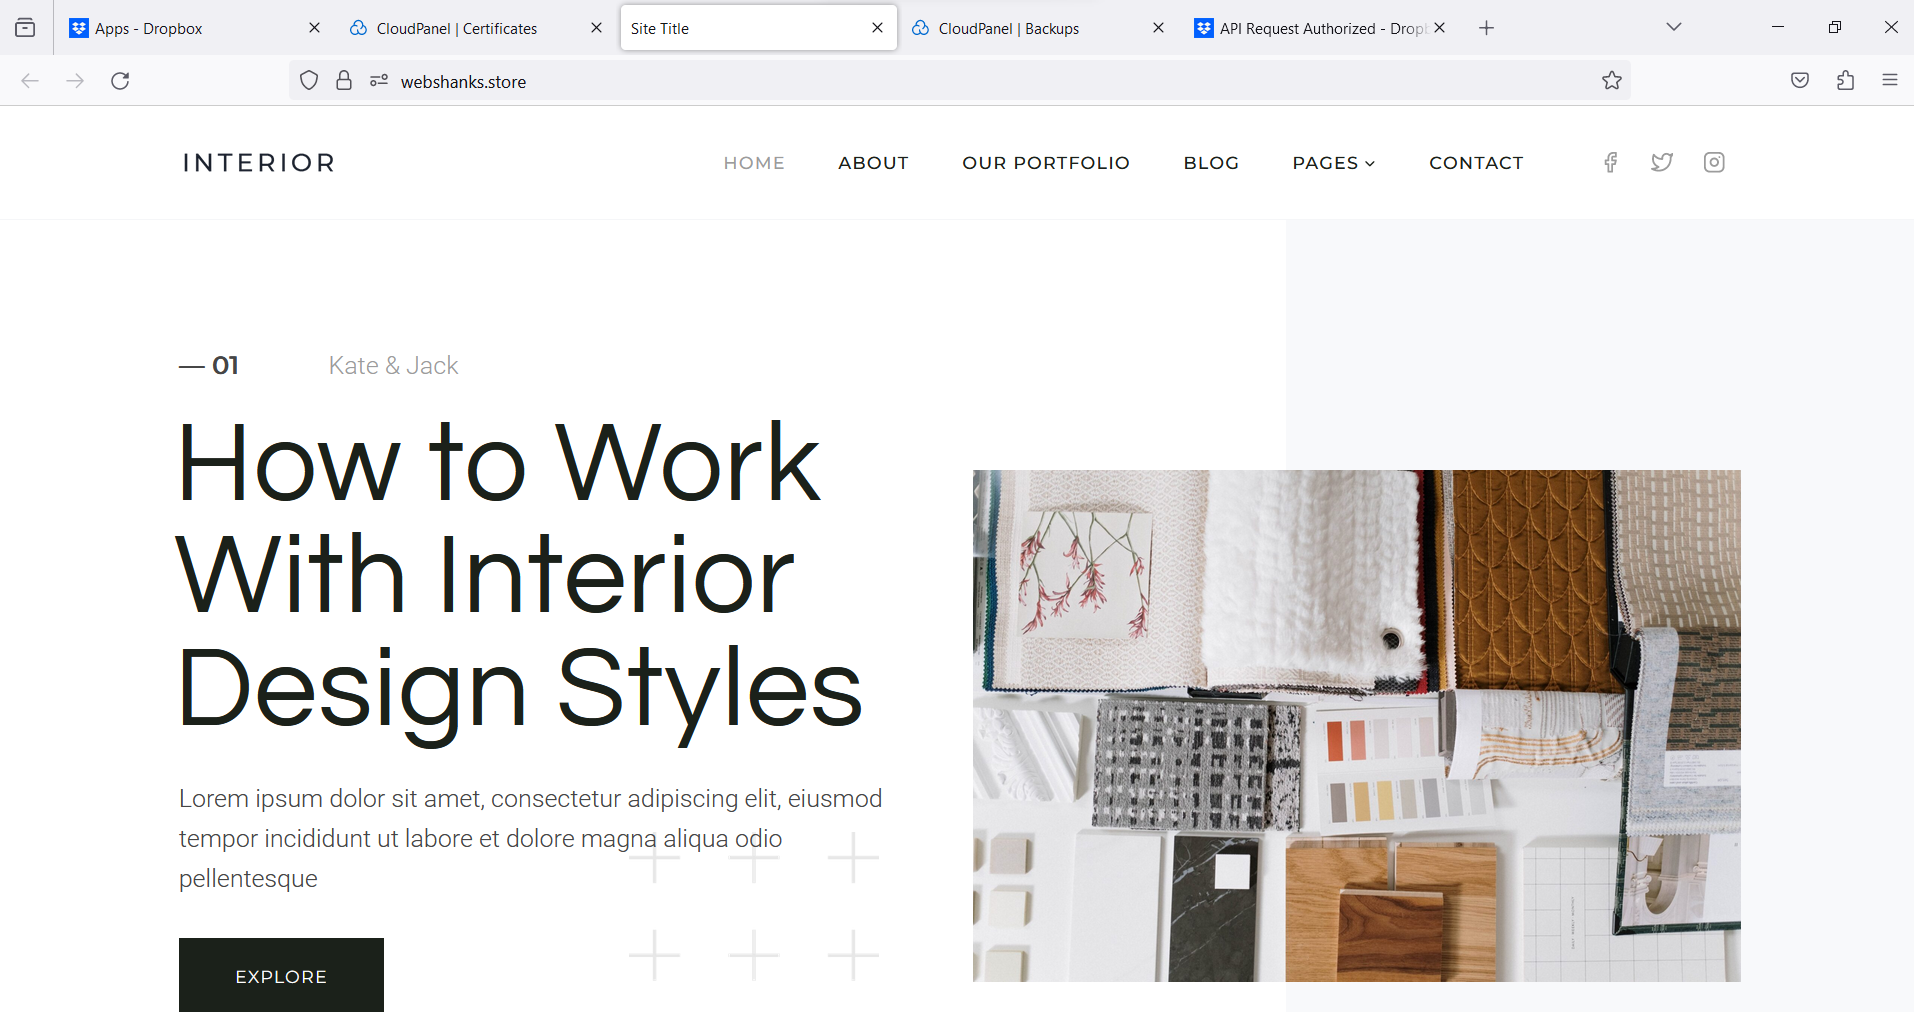
Success! We have restored a WordPress site on CloudPanel using backup created.
Check key functionalities to ensure everything is working as expected.
You Can Also Watch This Tutorial on YouTube
Conclusion
Restoring backups from Dropbox to CloudPanel is a critical process for ensuring data integrity and business continuity.
By following the above steps I laid, you should be able to successfully restore your data. Regularly backing up your data and familiarizing yourself with the restoration process is crucial for effective disaster recovery and maintaining the stability of your web hosting environment.
Always refer to the specific documentation or support resources provided by CloudPanel for the most accurate and up-to-date information.
If you have any questions, drop them down below.
Please can you explain how to get backup in .tar file?