
 Is it possible to host WordPress websites on Windows Server 2022? It can seem daunting, especially if you’re accustomed to the Linux environment, which is more commonly associated with WordPress.
As many of you read about my tutorials, I’ve been hosting WordPress on Linux distros but today will be different.
In this guide, I will walk you through the process of hosting WordPress websites on Windows Server 2022 Datacenter.
Prerequisites
Before you begin, ensure you have the following prerequisites in place:
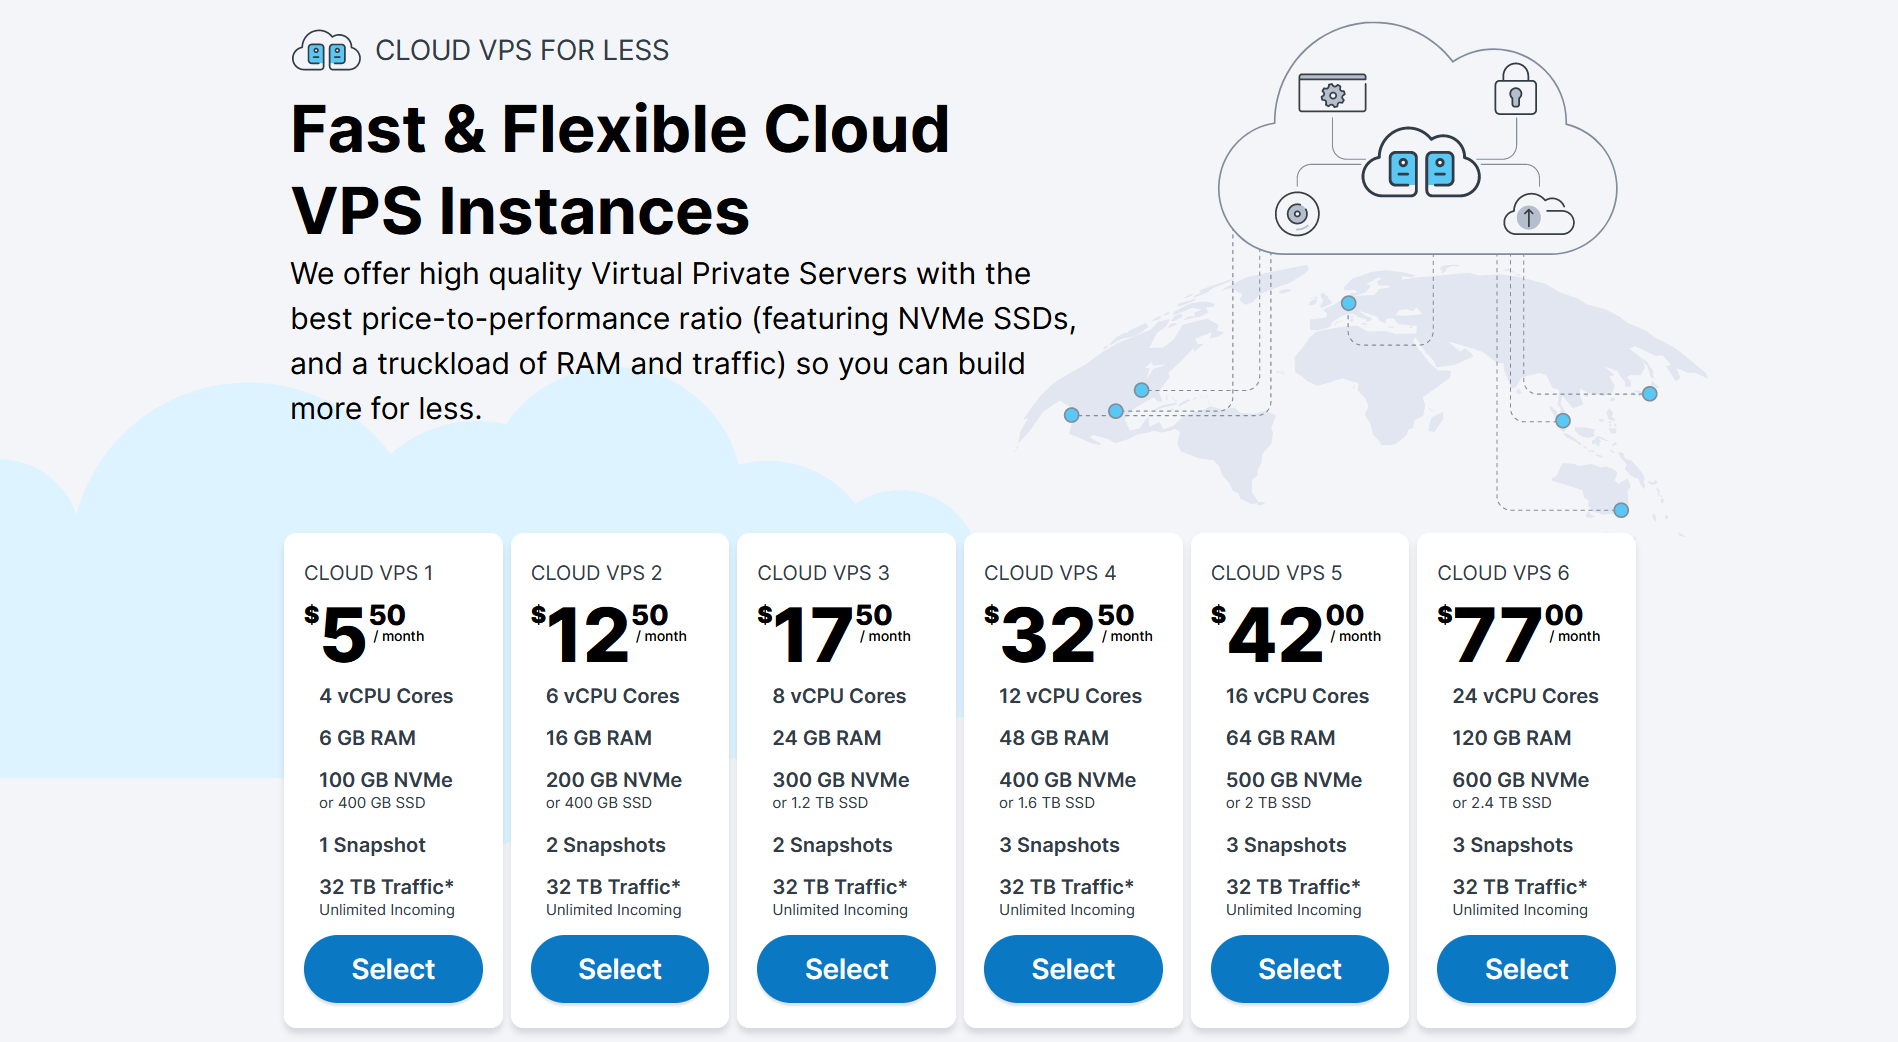
- Windows Server 2022: Ensure your server is up and running with the latest updates installed. You can get your Windows Server on Contabo.
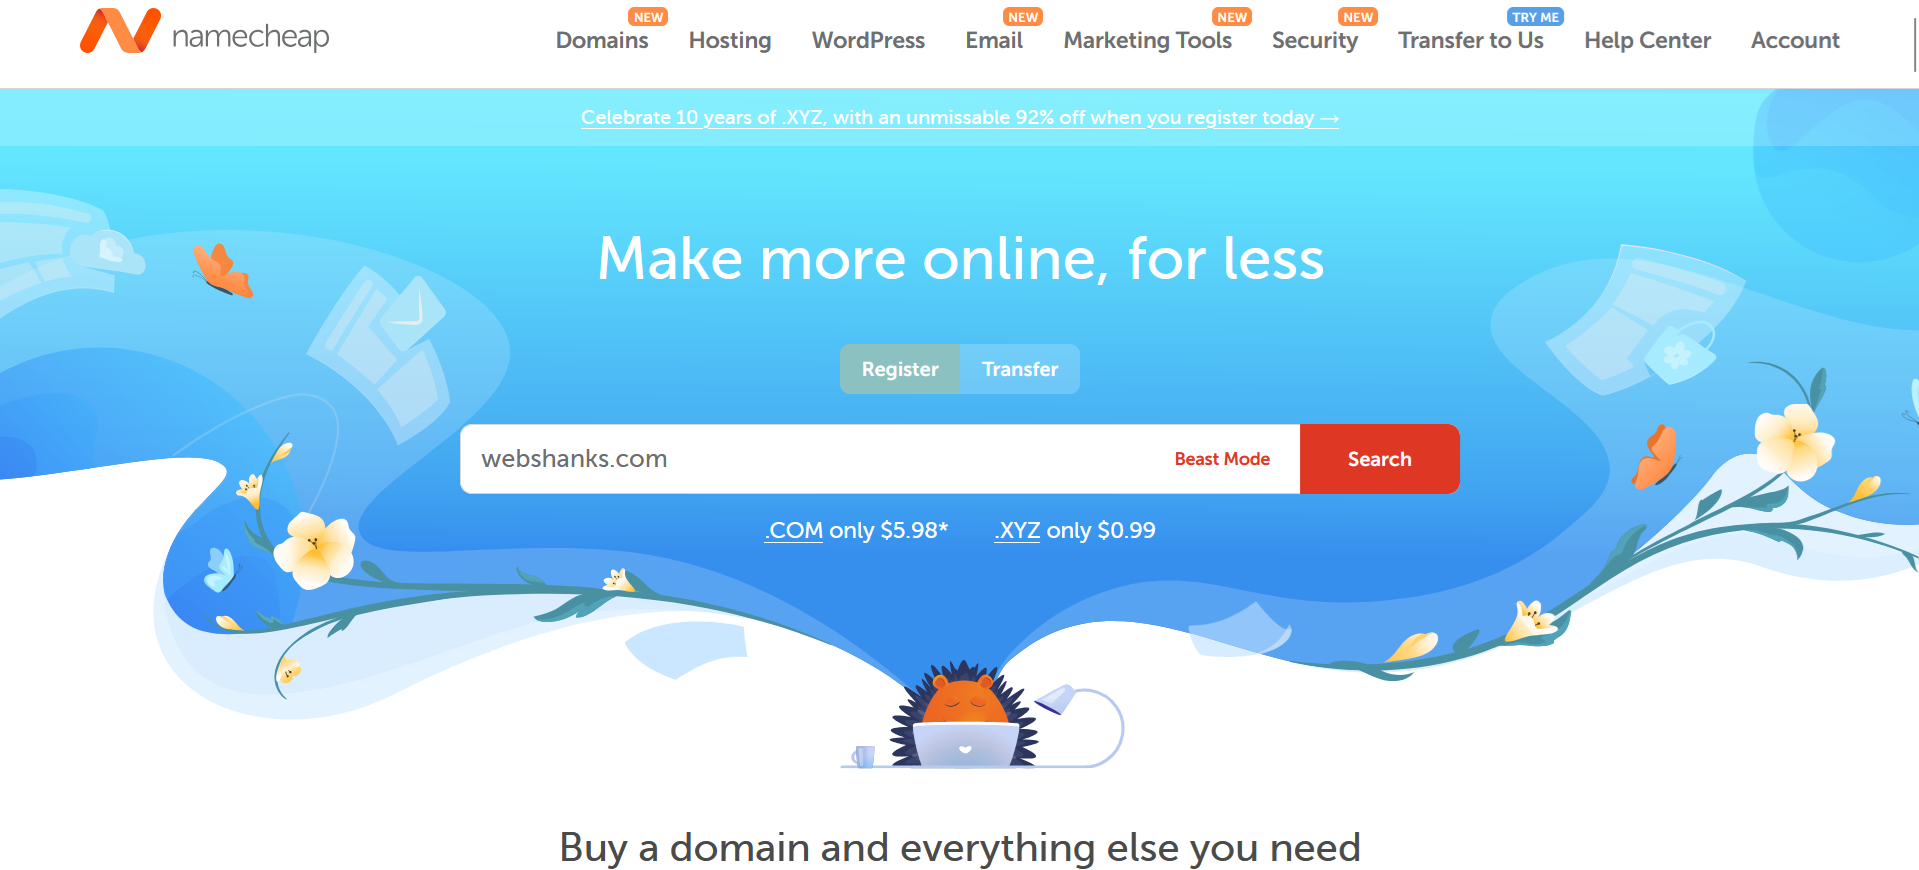
- Domain: We need to access our WordPress website using a domain. Get an affordable domain on Namecheap.
- Internet Information Services (IIS): IIS should be installed and configured on your server.
- PHP: The PHP language must be installed to run WordPress.
- MySQL: A database server is required to store your WordPress data.
- WordPress Files: Download the latest version of WordPress from the official website.
- Administrator Access: Ensure you have administrative privileges on your server.
Step-by-Step Guide: Host WordPress Websites on Windows Server 2022 Datacenter
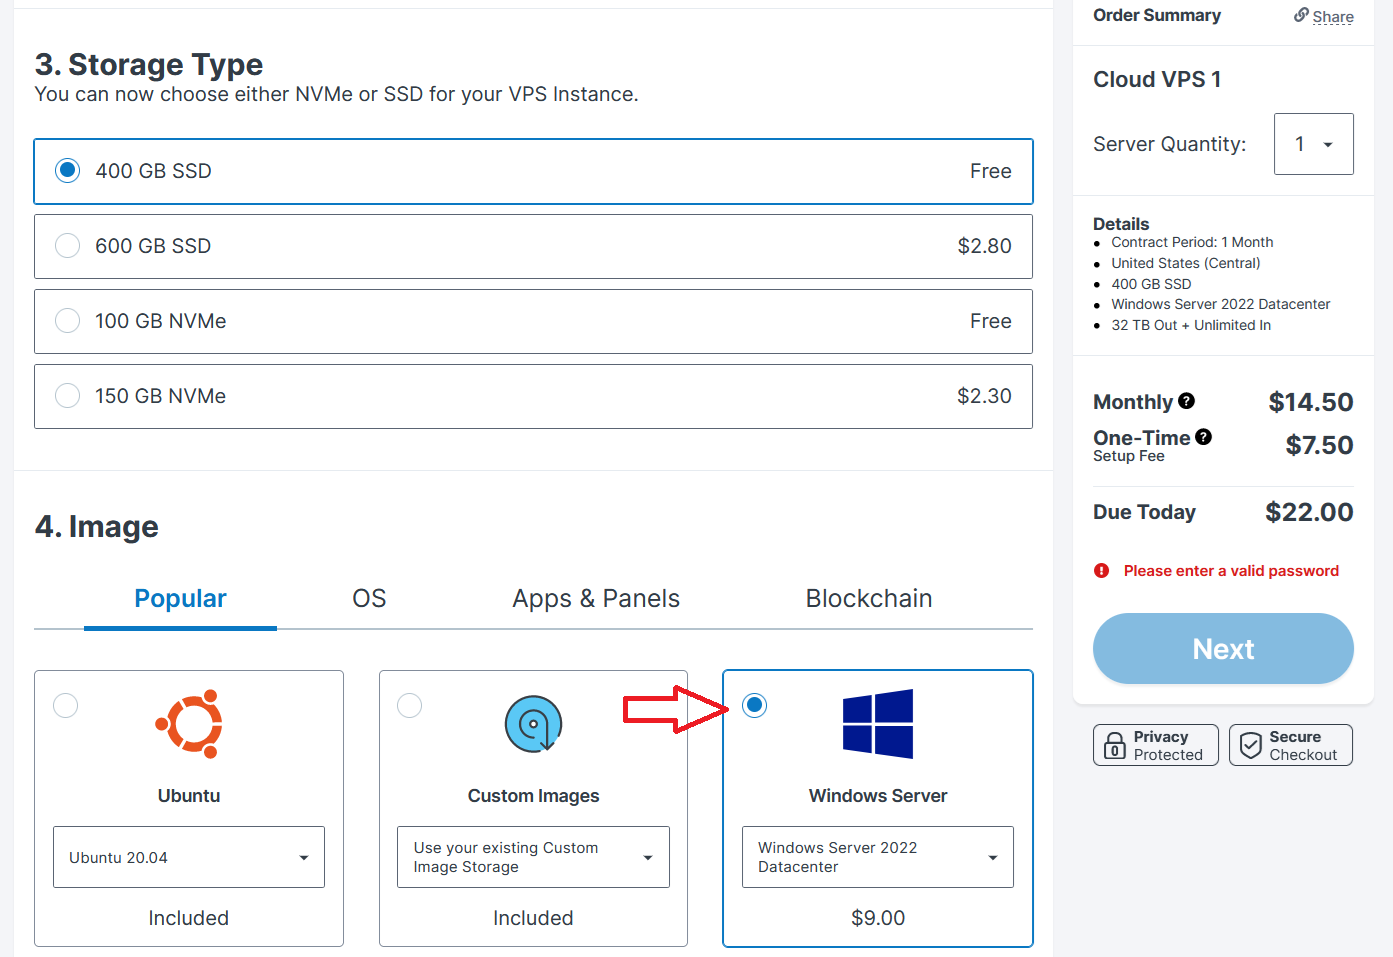
Step 1: Buy a Windows VPS on Contabo
Setting up a Windows VPS on Contabo is very much like Linux. Follow my complete guide here.
If you followed my guide, you should be able to connect to your Windows Server by now.
Step 2: Get a Domain on Namecheap
Go to Namecheap and register your domain name.
Step 3: Install Latest Microsoft Visual C++ Redistributable
Visit the Microsoft Download Center: Go to the Visual C++ Redistributable download page.
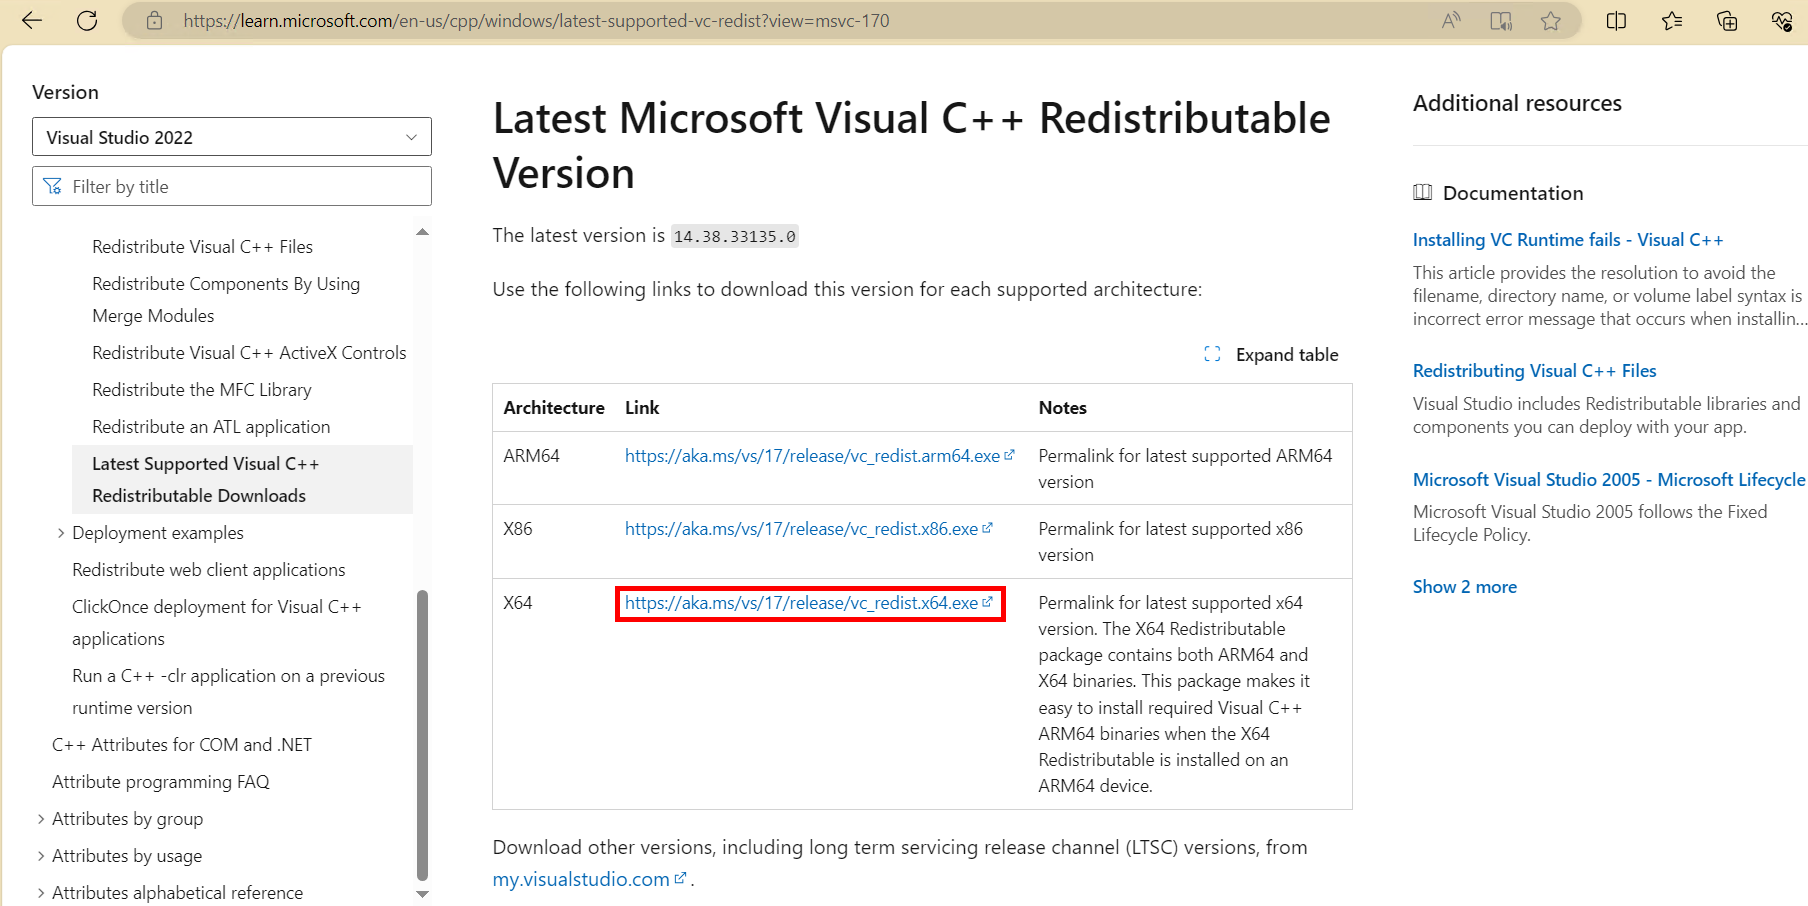
Just follow the on-screen instructions.
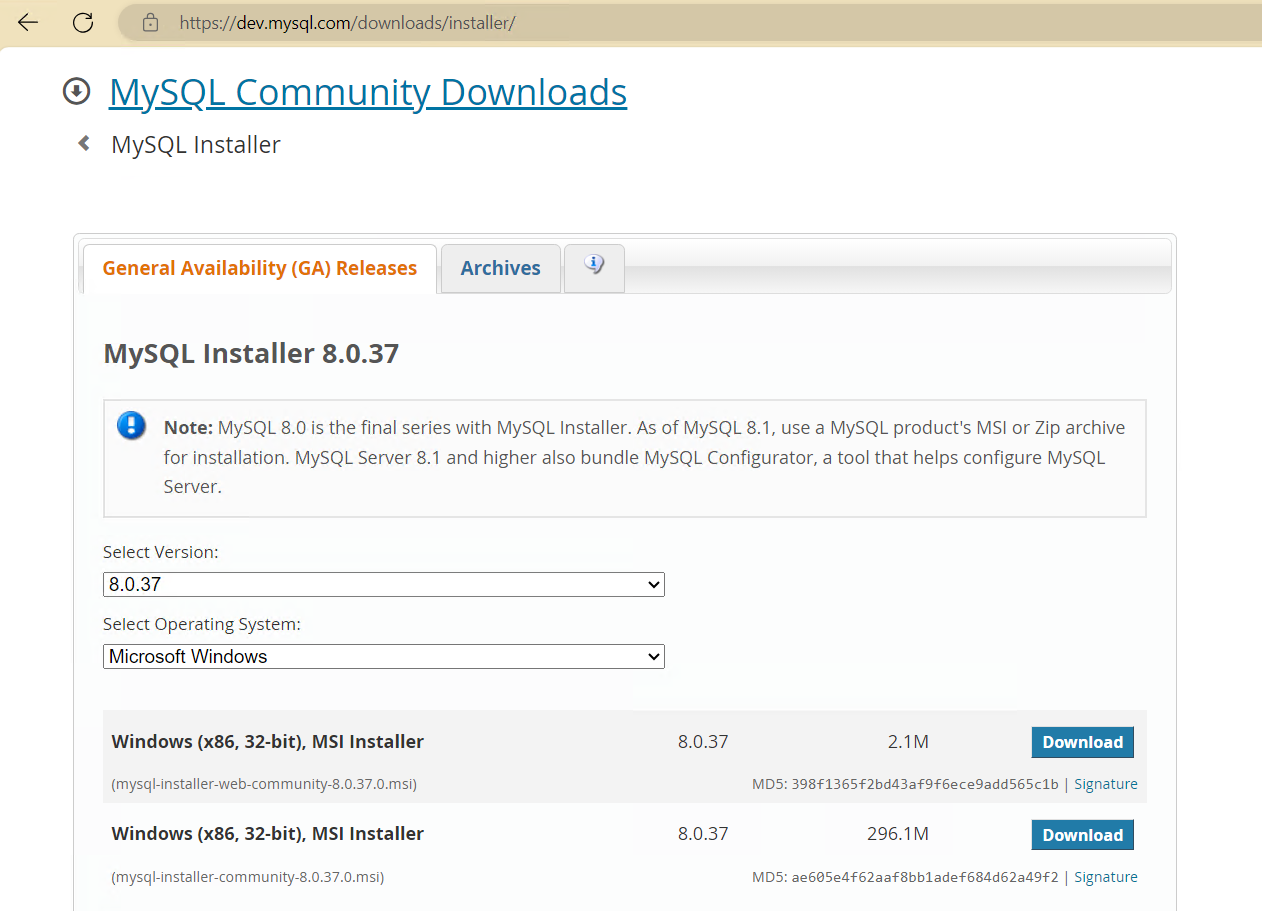
Step 4: Install MySQL
Download the MySQL installer from the MySQL website. You can download either installer (web community or community). It will just install MySQL anyway.
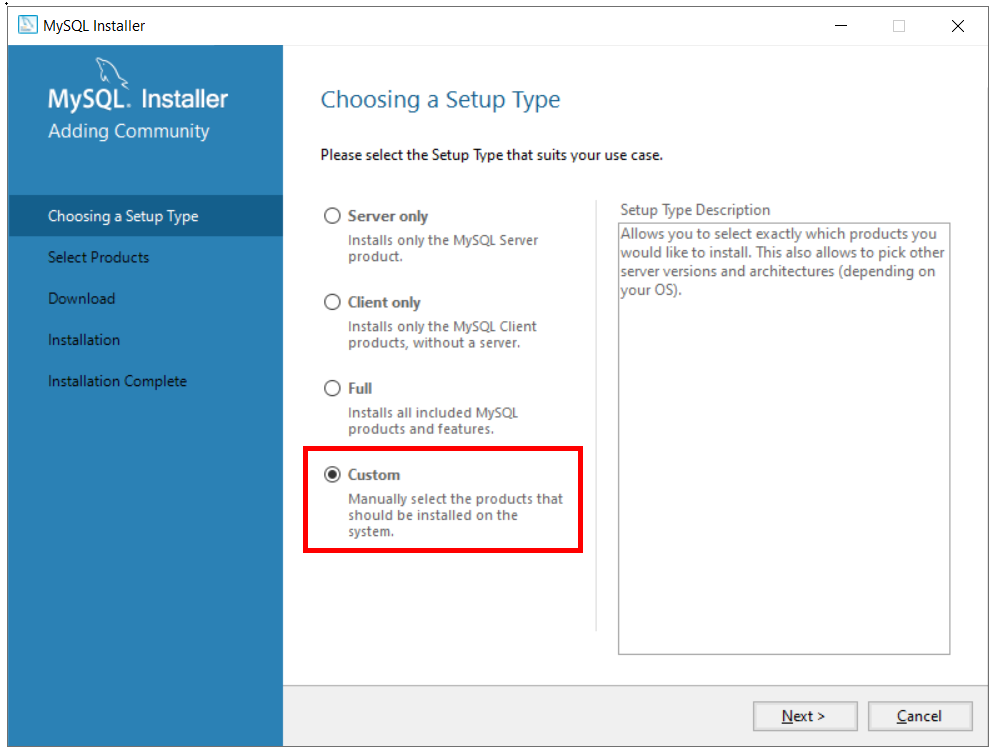
Run the installer and follow the setup wizard.
We don’t need all the products of MySQL. Just the necessary ones so choose Custom.
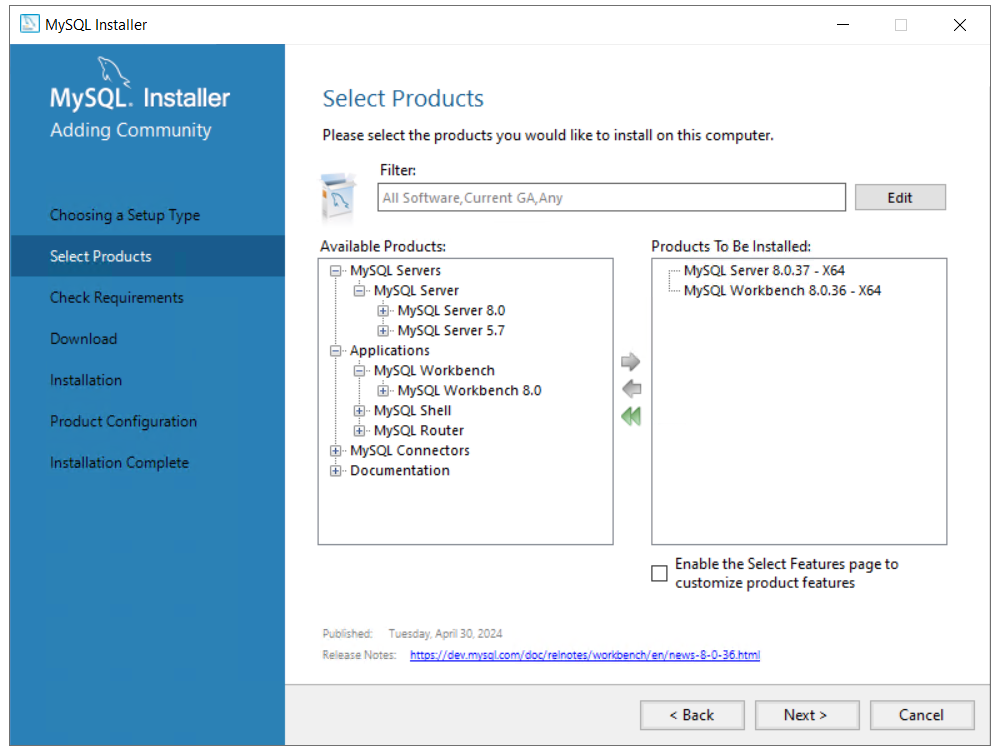
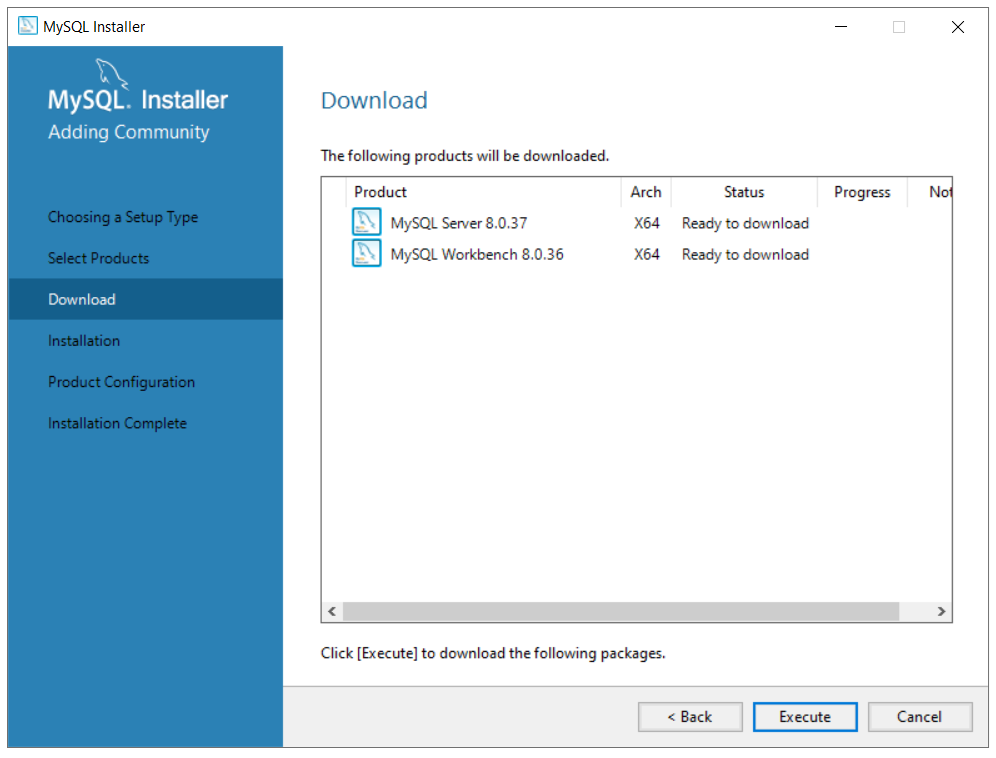
We only need two products. The MySQL Server 8.0.37 – X64 and MySQL Workbench 8.0.36. If they have the later versions, choose them.
The installer will download and install the selected MySQL products and features. Click Execute and follow the on-screen instructions.

Once the installation is finished, click Next.
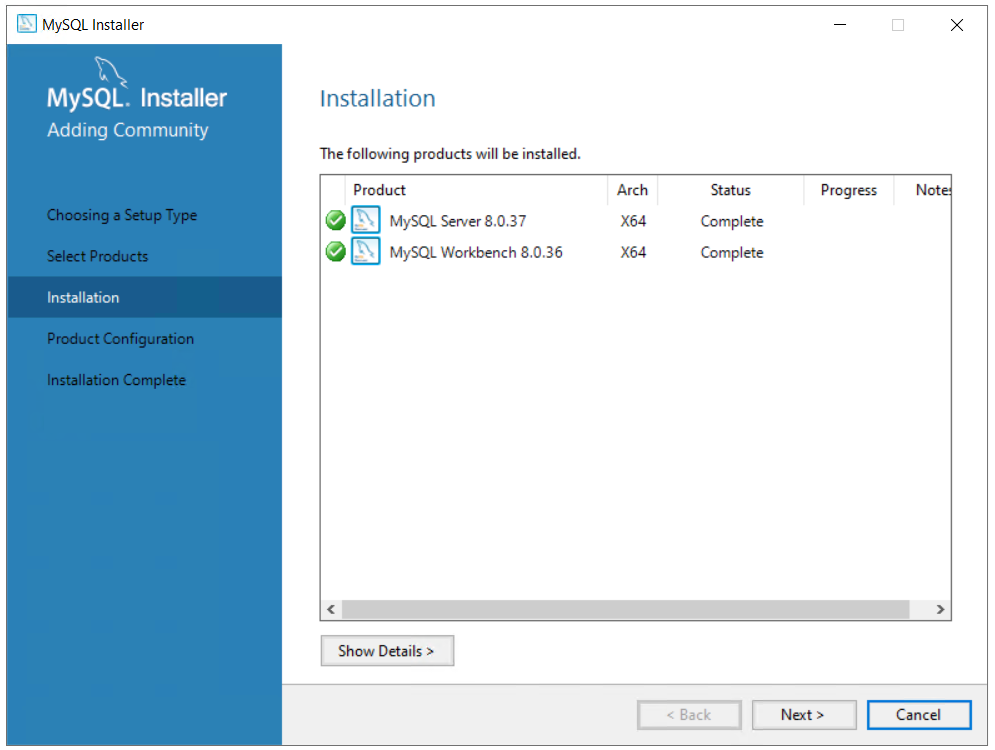
We are now ready to configure the MySQL Server.
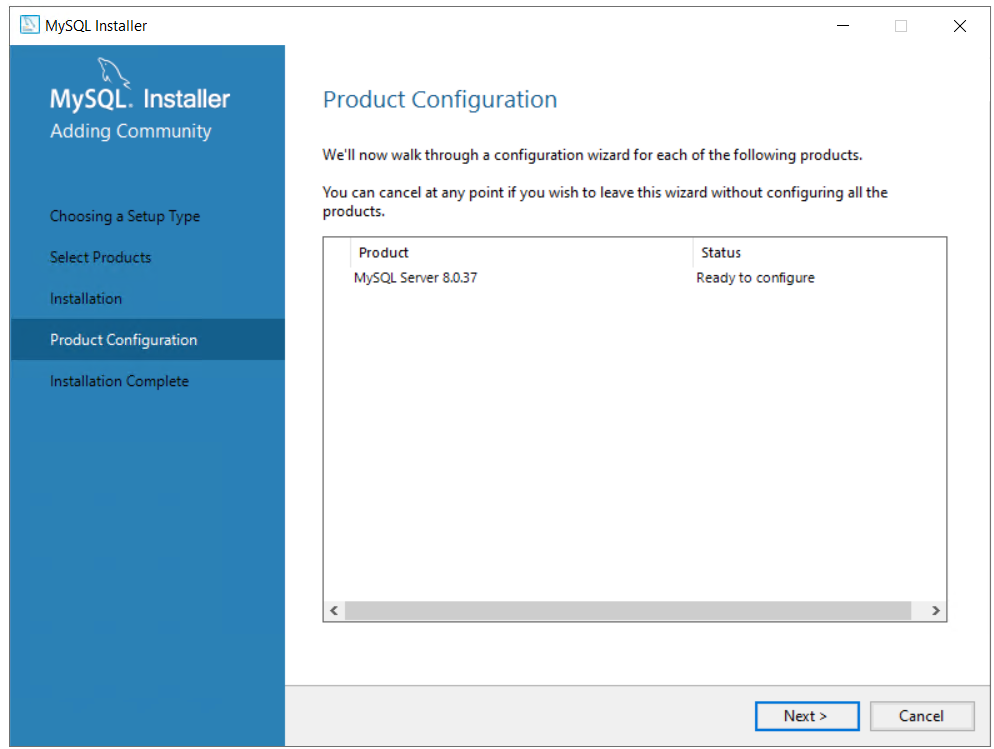
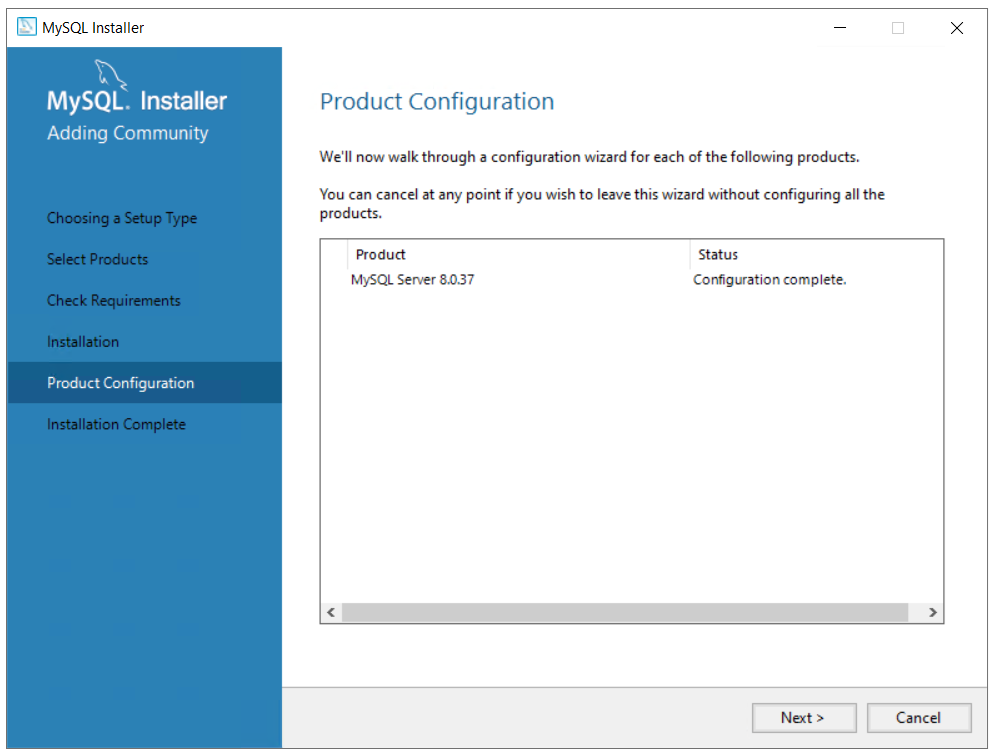
Once the installation is complete, the MySQL Installer will guide you through the configuration steps.
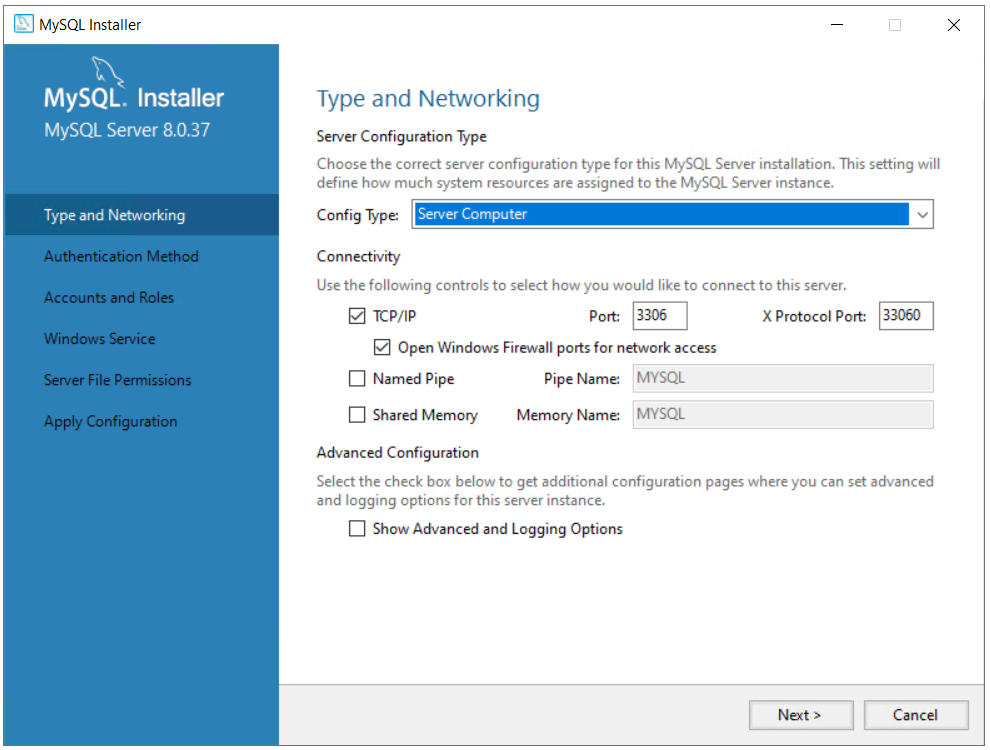
Type and Networking
- Config Type: Development Computer, Server Server, or Dedicated Computer. Choose the Server Computer because we will be hosting a web application.
- Connectivity and Advanced Configuration: Remain as is.
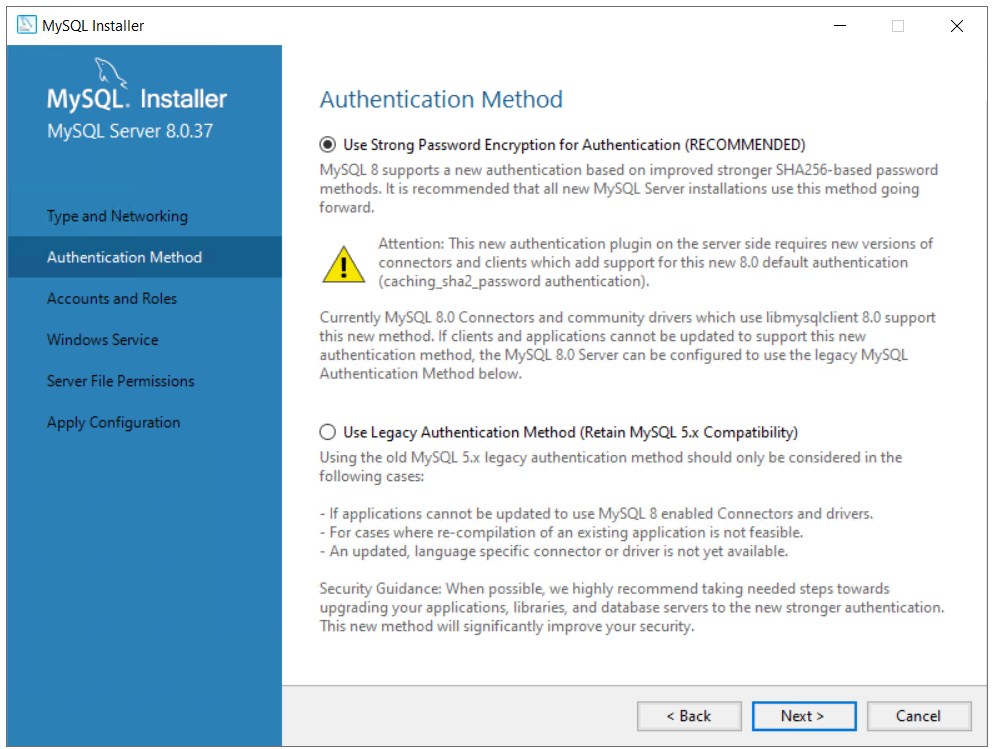
Authentication Method: Choose the authentication method. The default (Use Strong Password Encryption) is recommended.
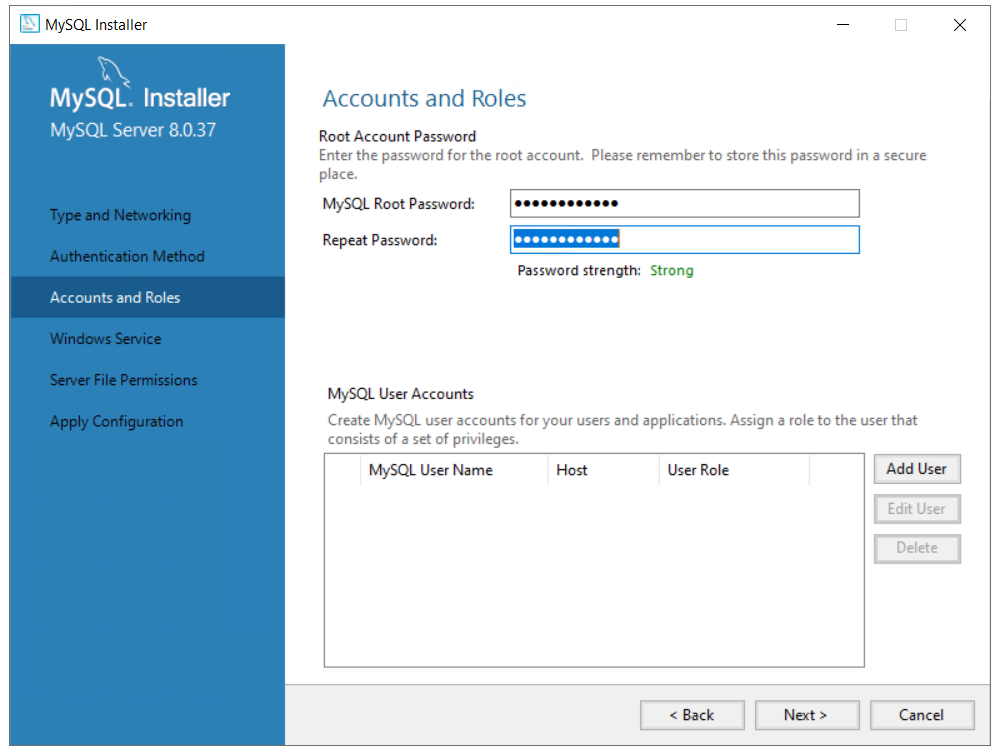
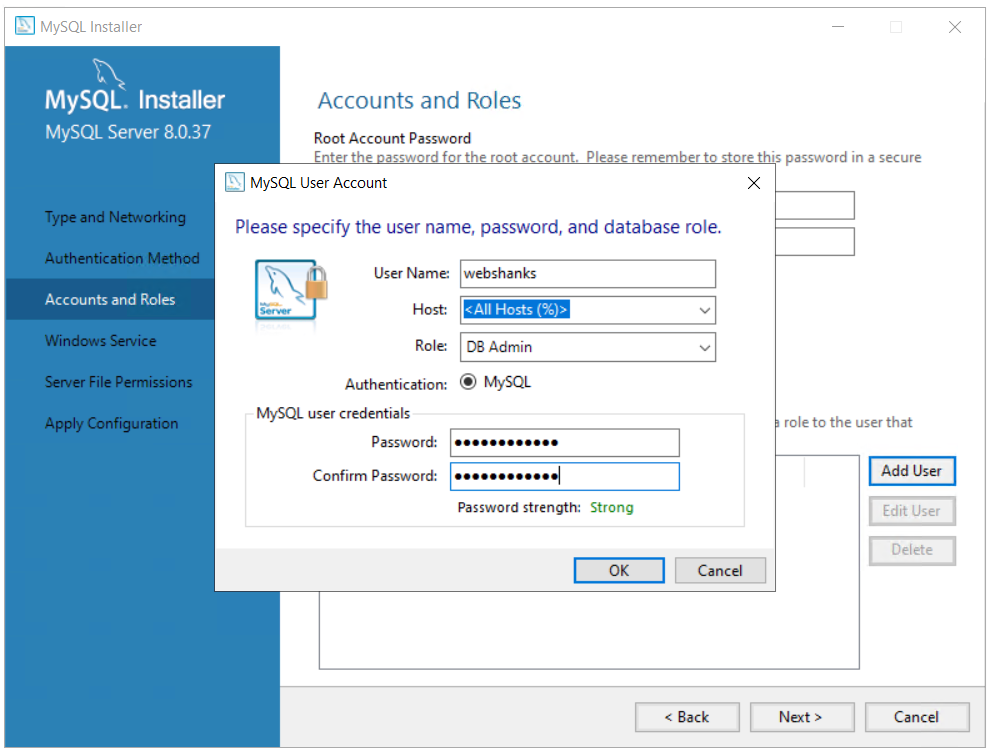
Accounts and Roles: Set the root password and, if desired, create additional MySQL user accounts.
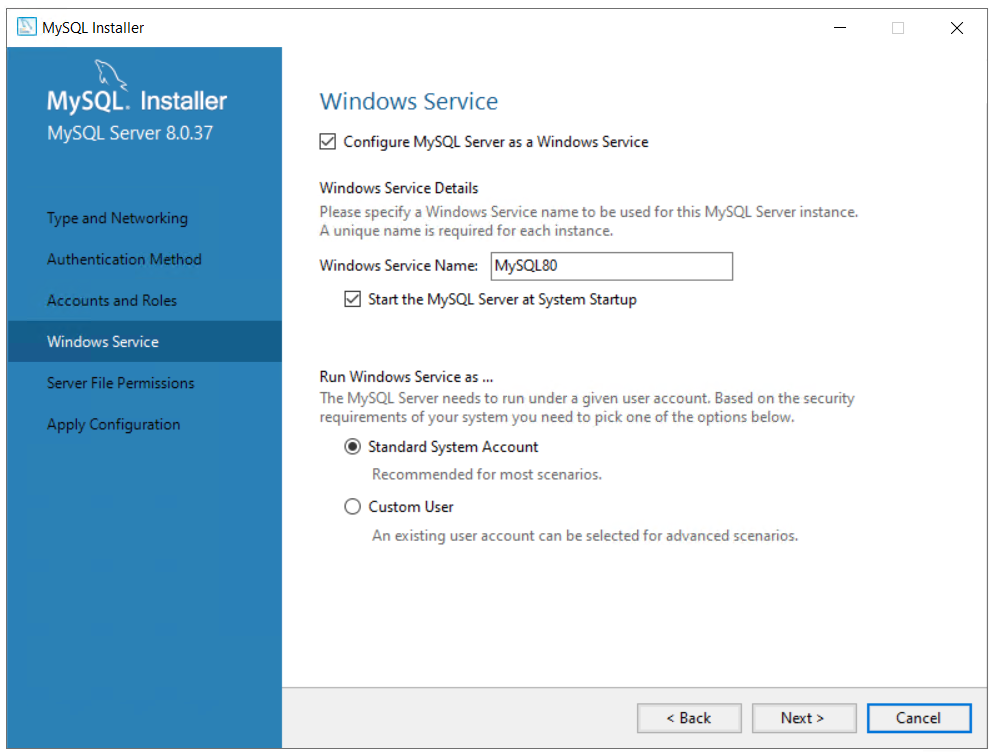
Windows Service: Configure MySQL as a Windows Service. This allows MySQL to start automatically with Windows. You can also choose to start the MySQL Server at the end of the setup.
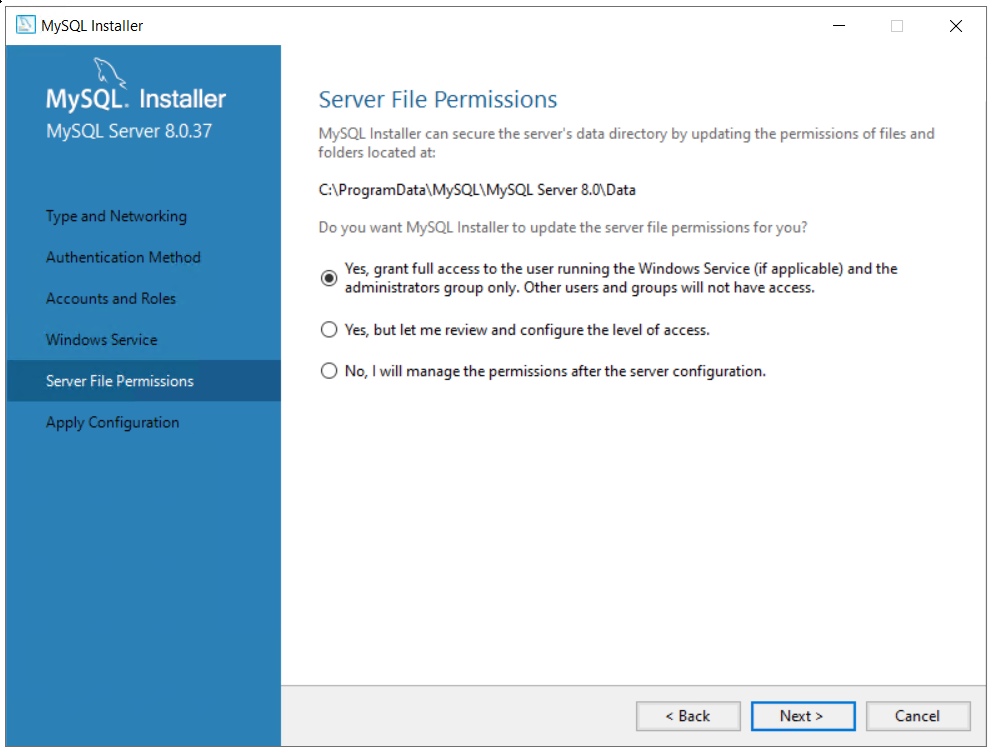
Server File Permission: Use the default to grant full access to the user running Windows service and administrator group only.
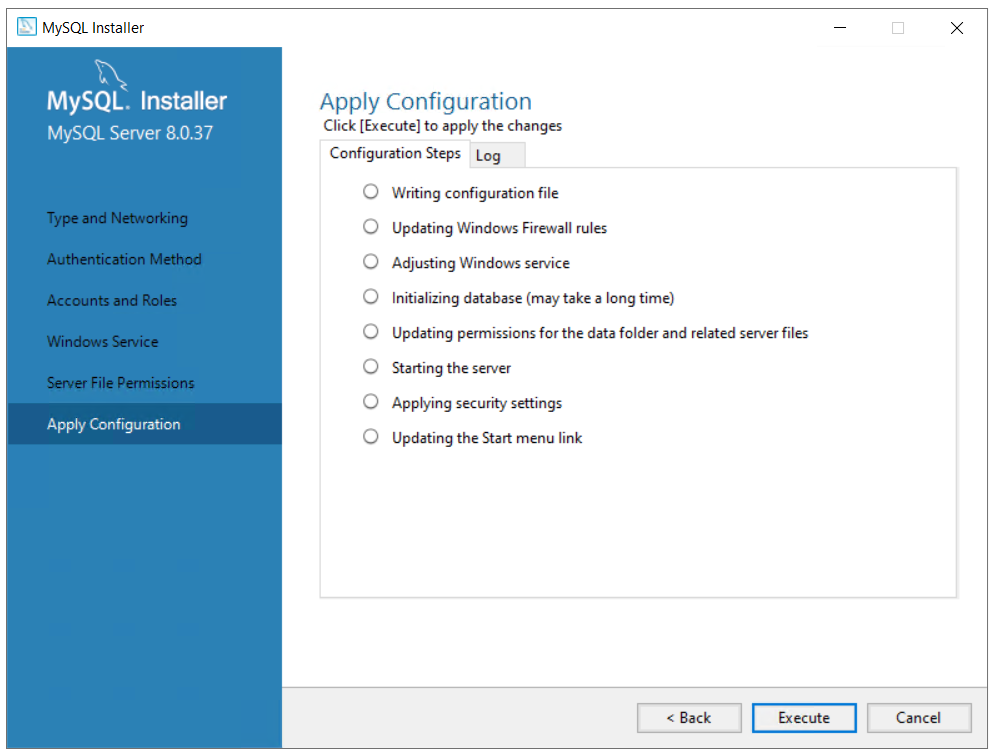
Apply Configuration: Review the configurations and apply them. The installer will execute the necessary steps to configure MySQL based on your selections.
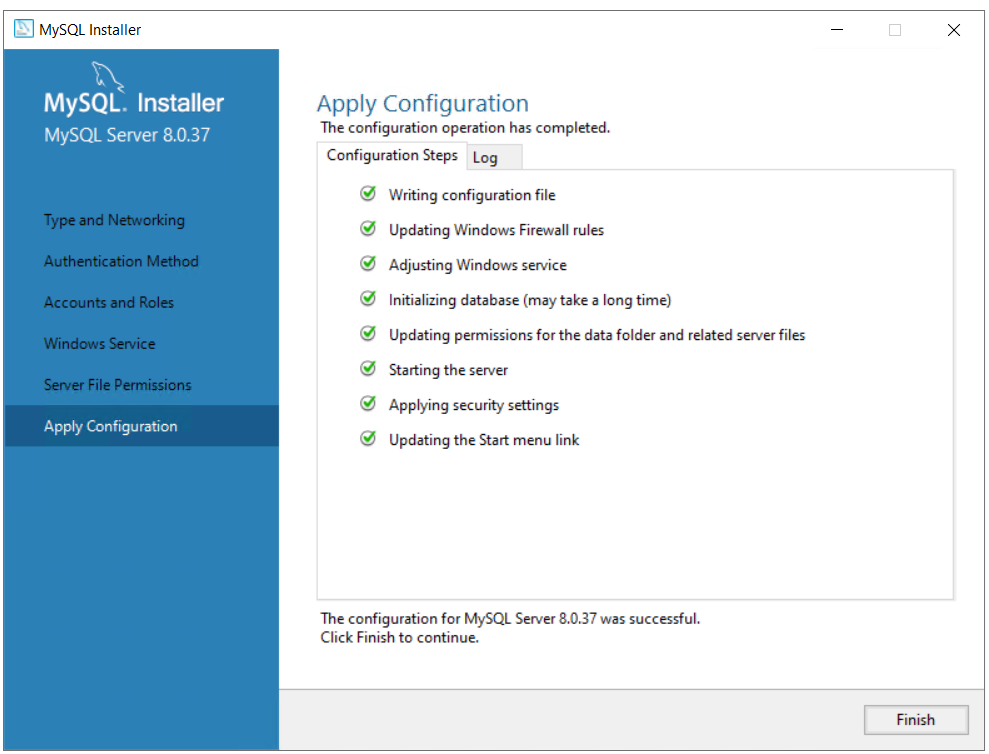
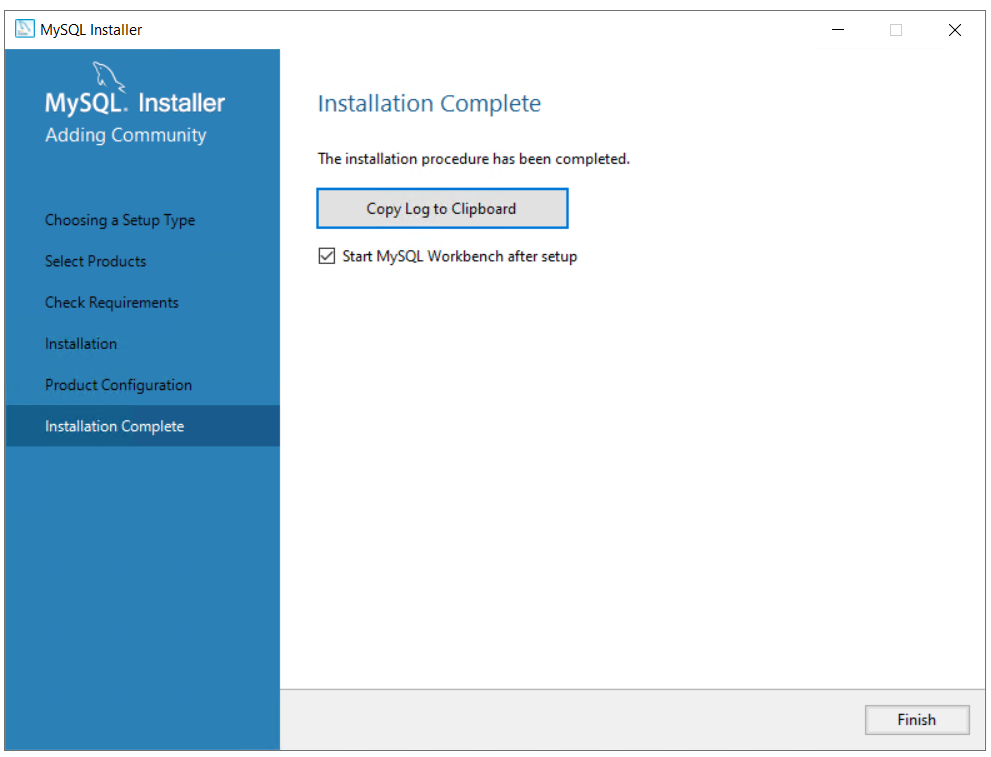
Finish Setup: Once the configuration is complete, the installer will show a summary of the installation and configuration steps. Click Finish to complete the setup process.
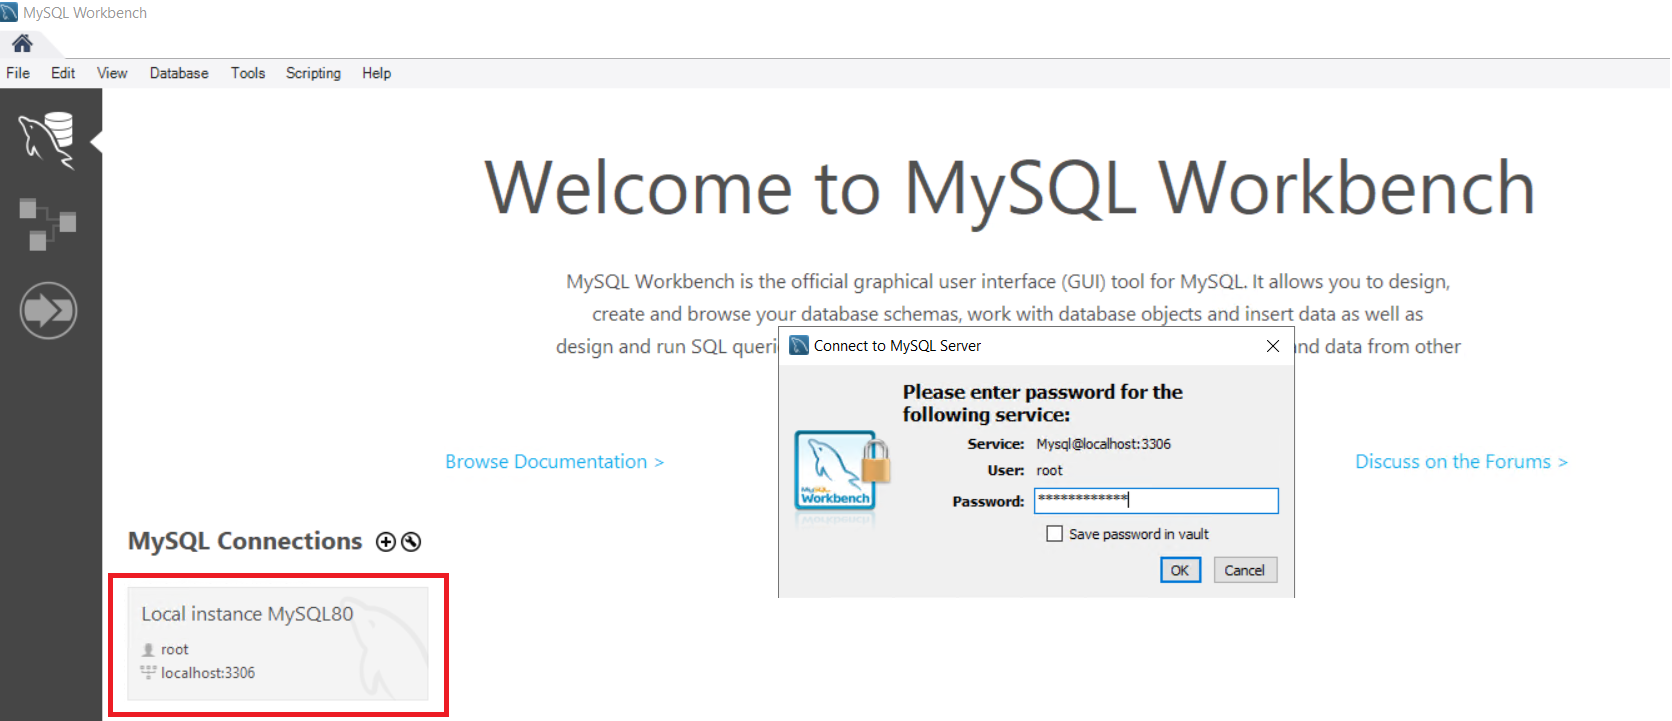
Connect to MySQL Server: Open MySQL Workbench, create a new connection to your MySQL Server, and log in with the credentials you set up earlier.
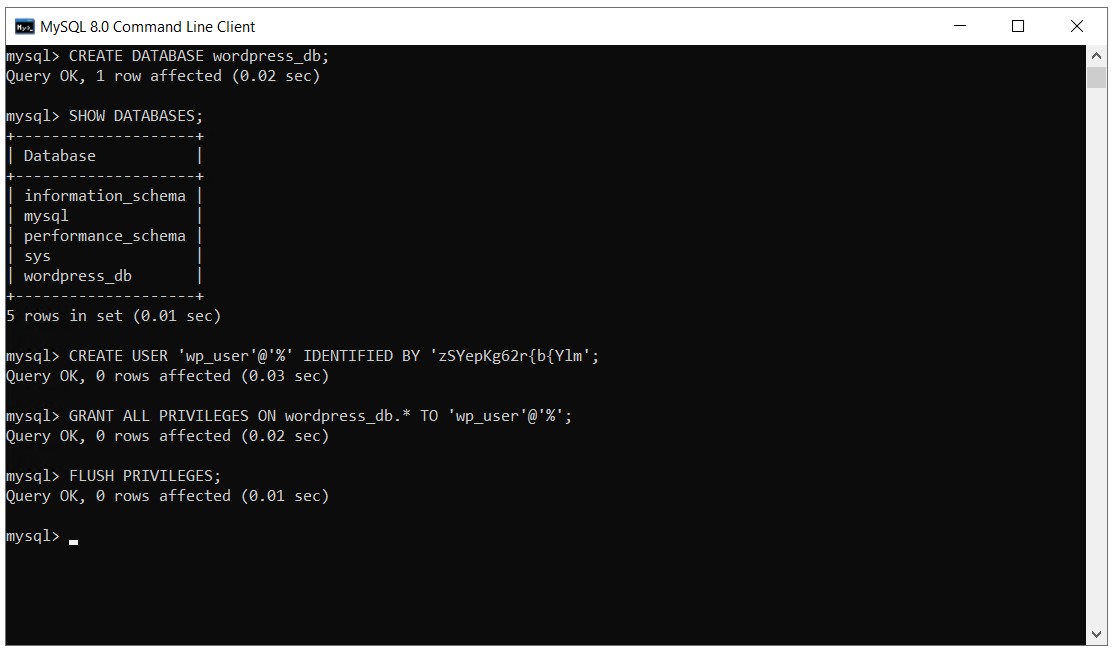
Step 5: Create a Database
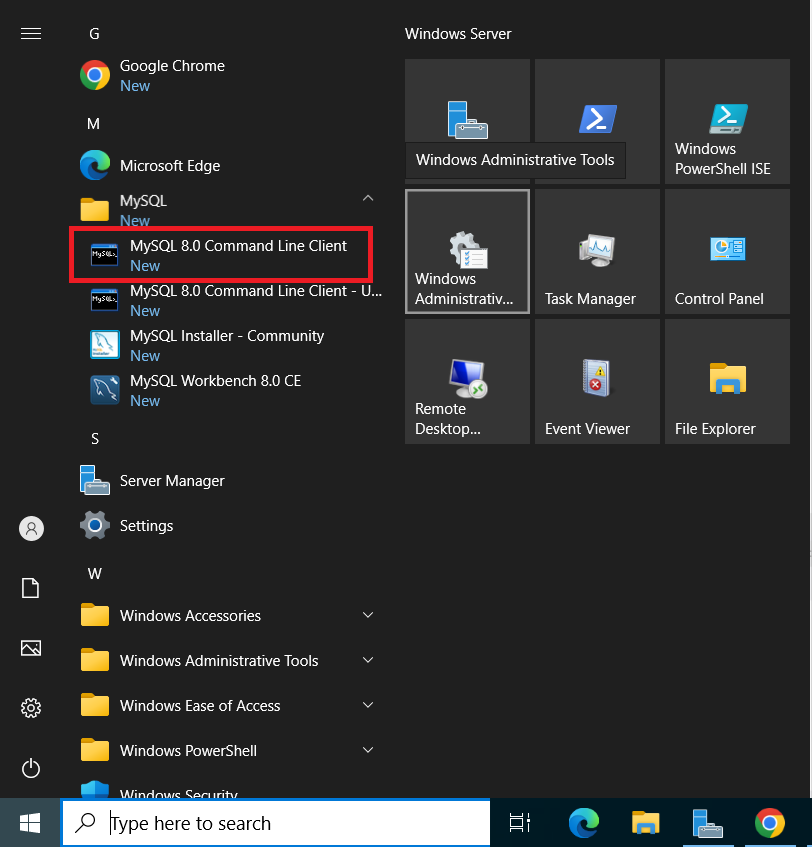
Open MySQL Command Line Client.
From the Start Menu, find the MySQL Command Line Client and open it.
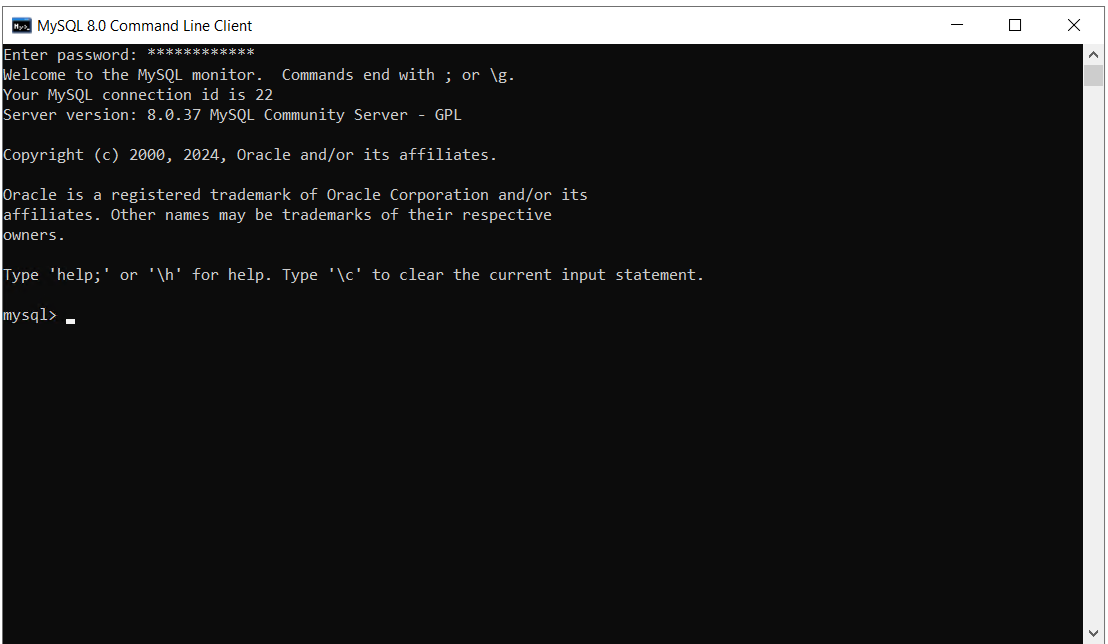
You will be prompted to enter your MySQL root password. Enter the password you set during the MySQL installation.
Create a database. Use the following command to create a new database for WordPress. Replace wordpress_db with your desired database name if you want something different:
CREATE DATABASE wordpress_db;
Check the database creation: To verify that the database has been created, you can list all databases:
SHOW DATABASES;
You should see wordpress_db in the list of databases.
We will now create a MySQL user for WordPress
It’s good practice to create a separate MySQL user for your WordPress installation. Replace wp_user with your desired username and strong_password with a secure password:
CREATE USER 'wp_user'@'%' IDENTIFIED BY 'strong_password';
Grant the new user all privileges on the WordPress database. This allows the user to manage the database:
GRANT ALL PRIVILEGES ON wordpress_db.* TO 'wp_user'@'%';
Apply the changes by flushing the privileges:
FLUSH PRIVILEGES;
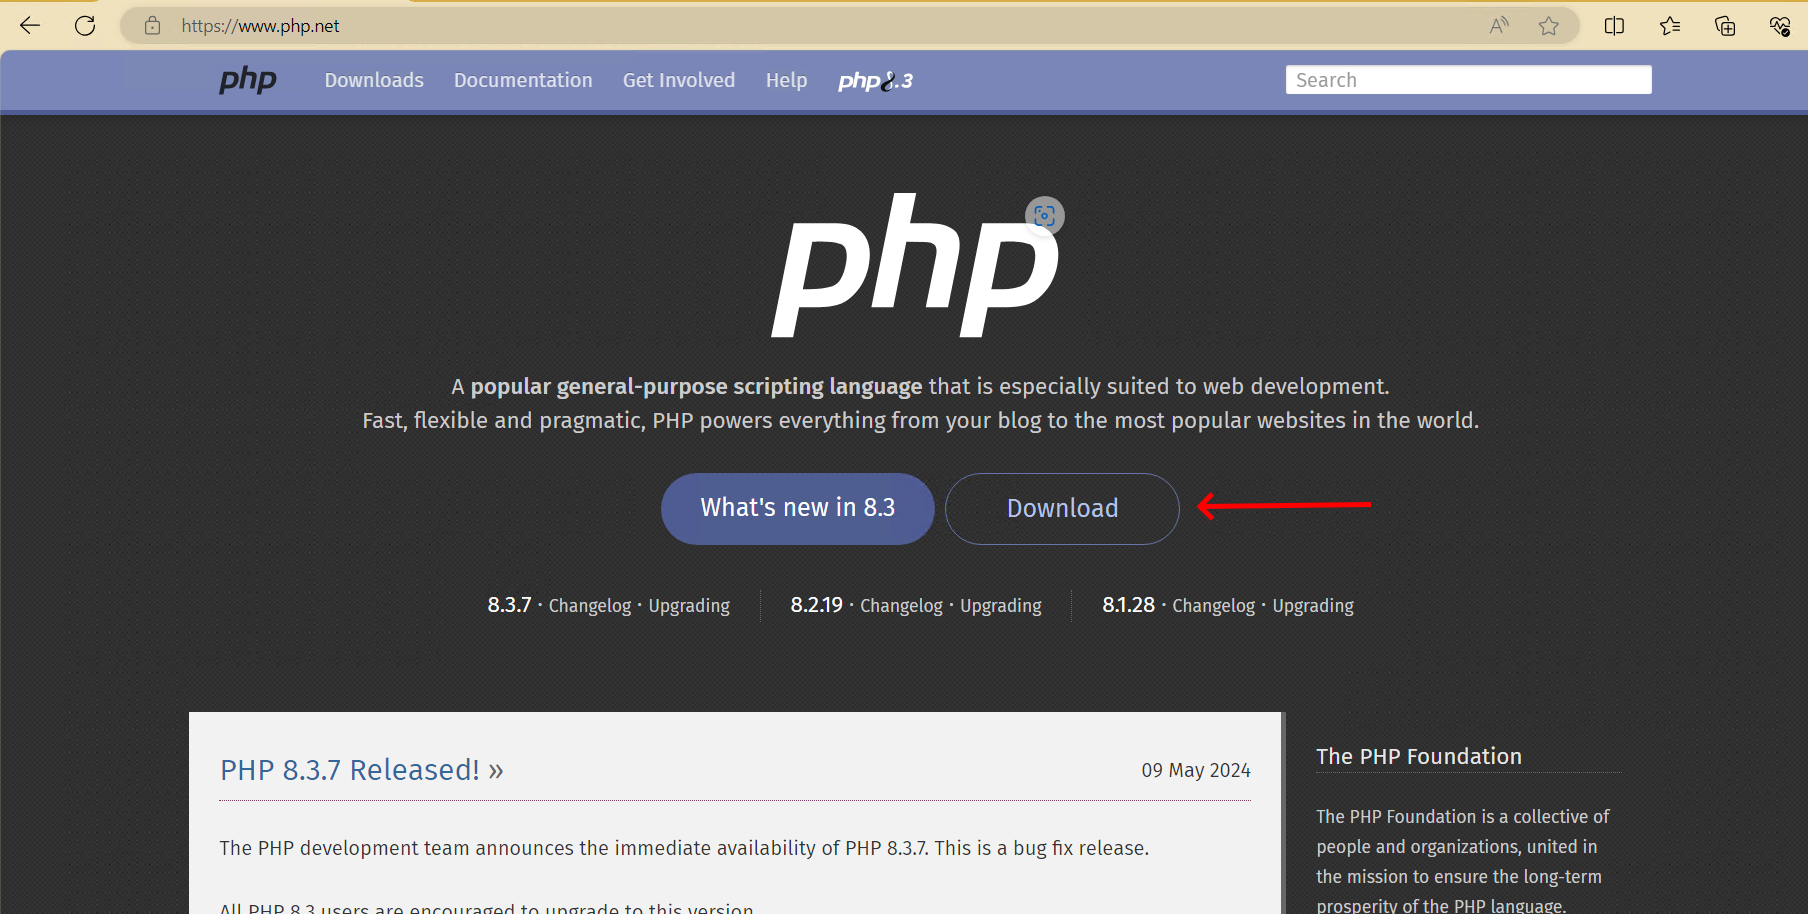
Step 6: Install PHP
Download PHP from the official PHP website.
Click the Windows downloads.
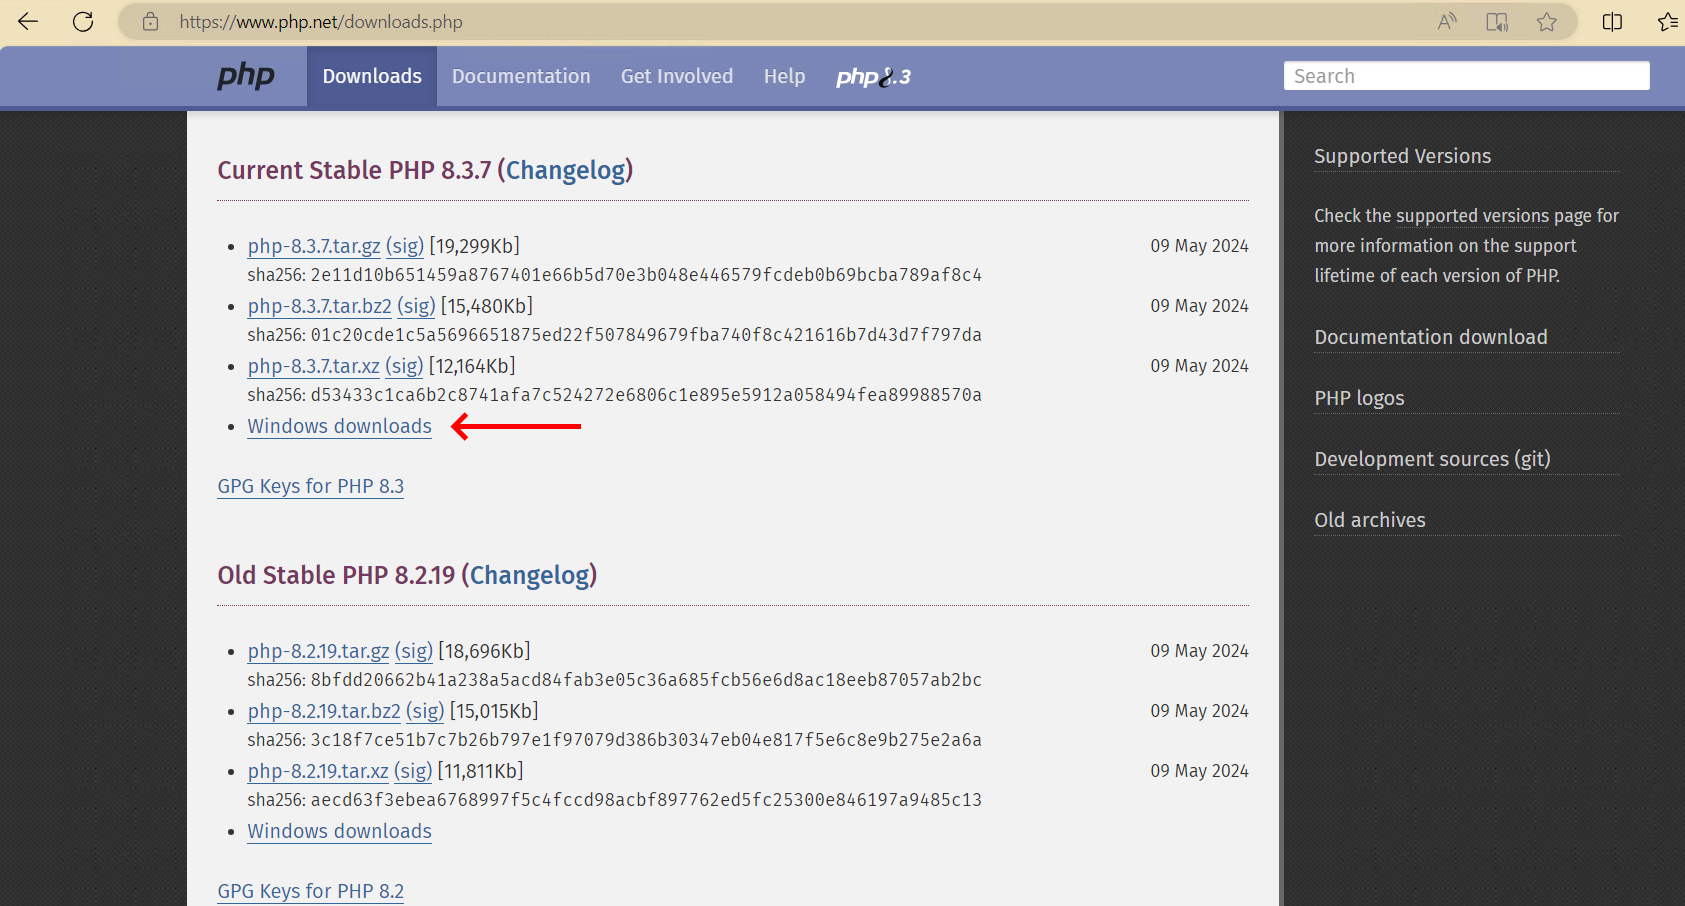
Download the latest stable release of PHP. Choose the Non Thread Safe (NTS) version if you are using IIS, or Thread Safe (TS) if you are using it with Apache.
We will be using the PHP 8.3.7 NTS.
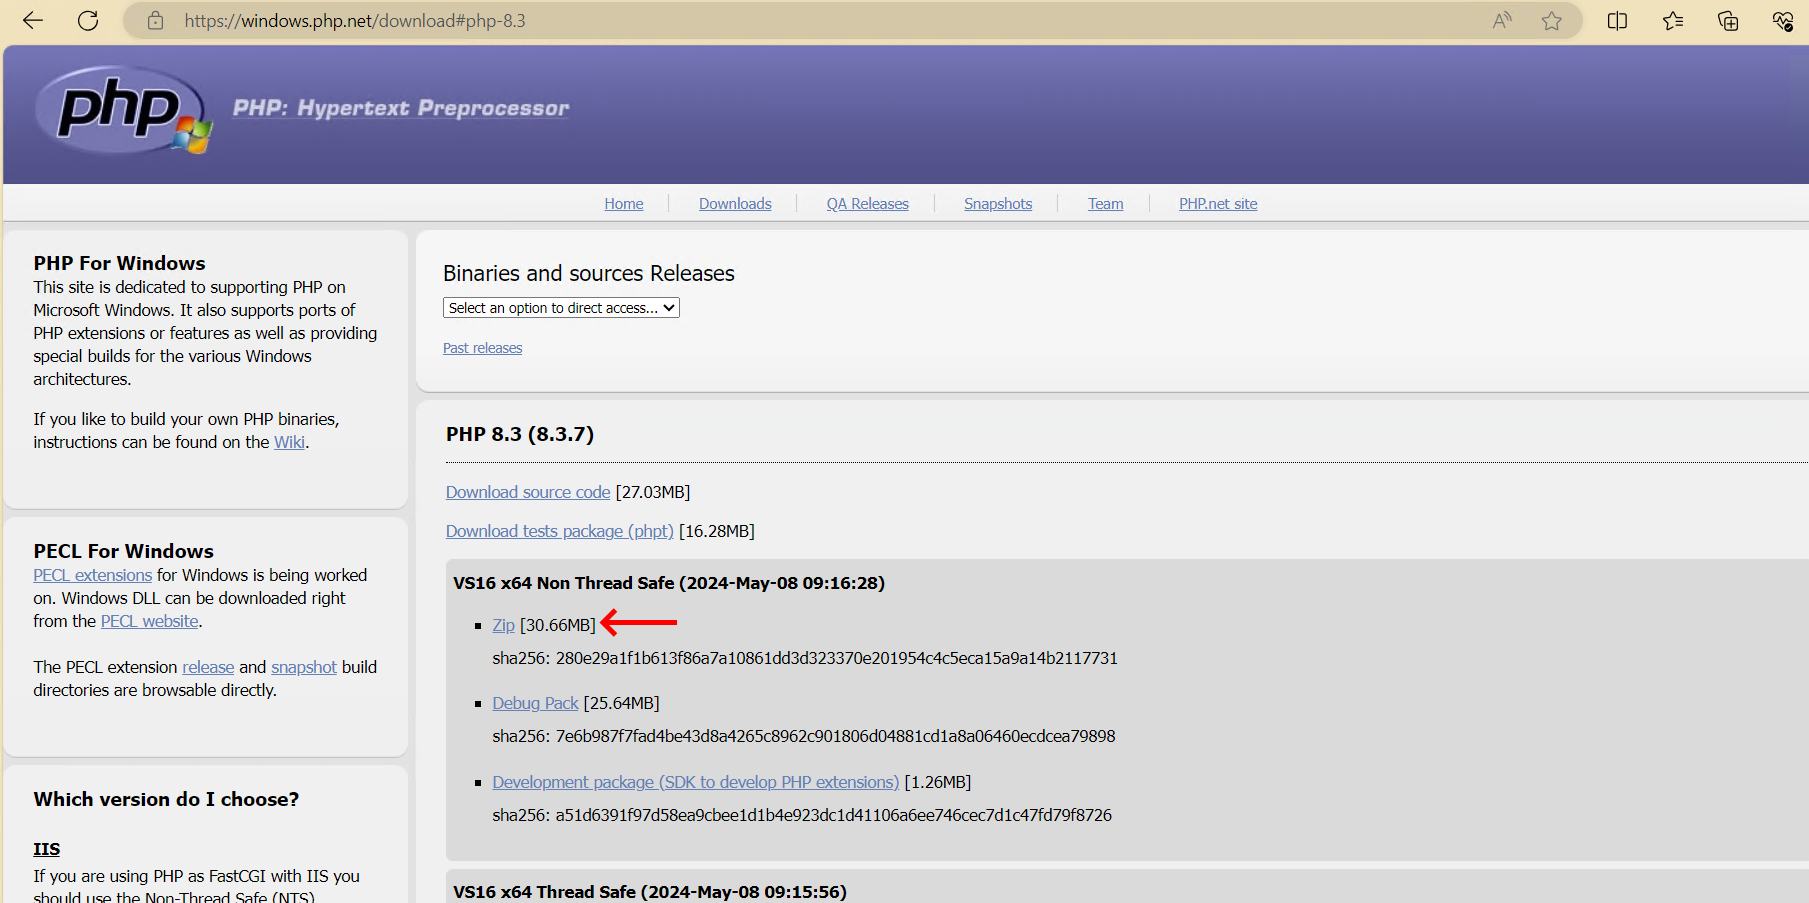
Extract the PHP files to a directory on your server, e.g., C:\PHP.
Rename the php.ini-production file in the PHP directory to php.ini.
Now edit php.ini with a file editor. I will be using Notepad++ because it is very user-friendly.
Uncomment the following:
cgi.force_redirect = 0
cgi.fix_pathinfo = 1
fastcgi.impersonate = 1
fastcgi.logging = 0
extension=mysqli
extension=pdo_mysql
Now let’s add PHP to the system path.
Open the System Properties and right-click on My Computer > Properties.
Go to Advanced system settings > Environment Variables.
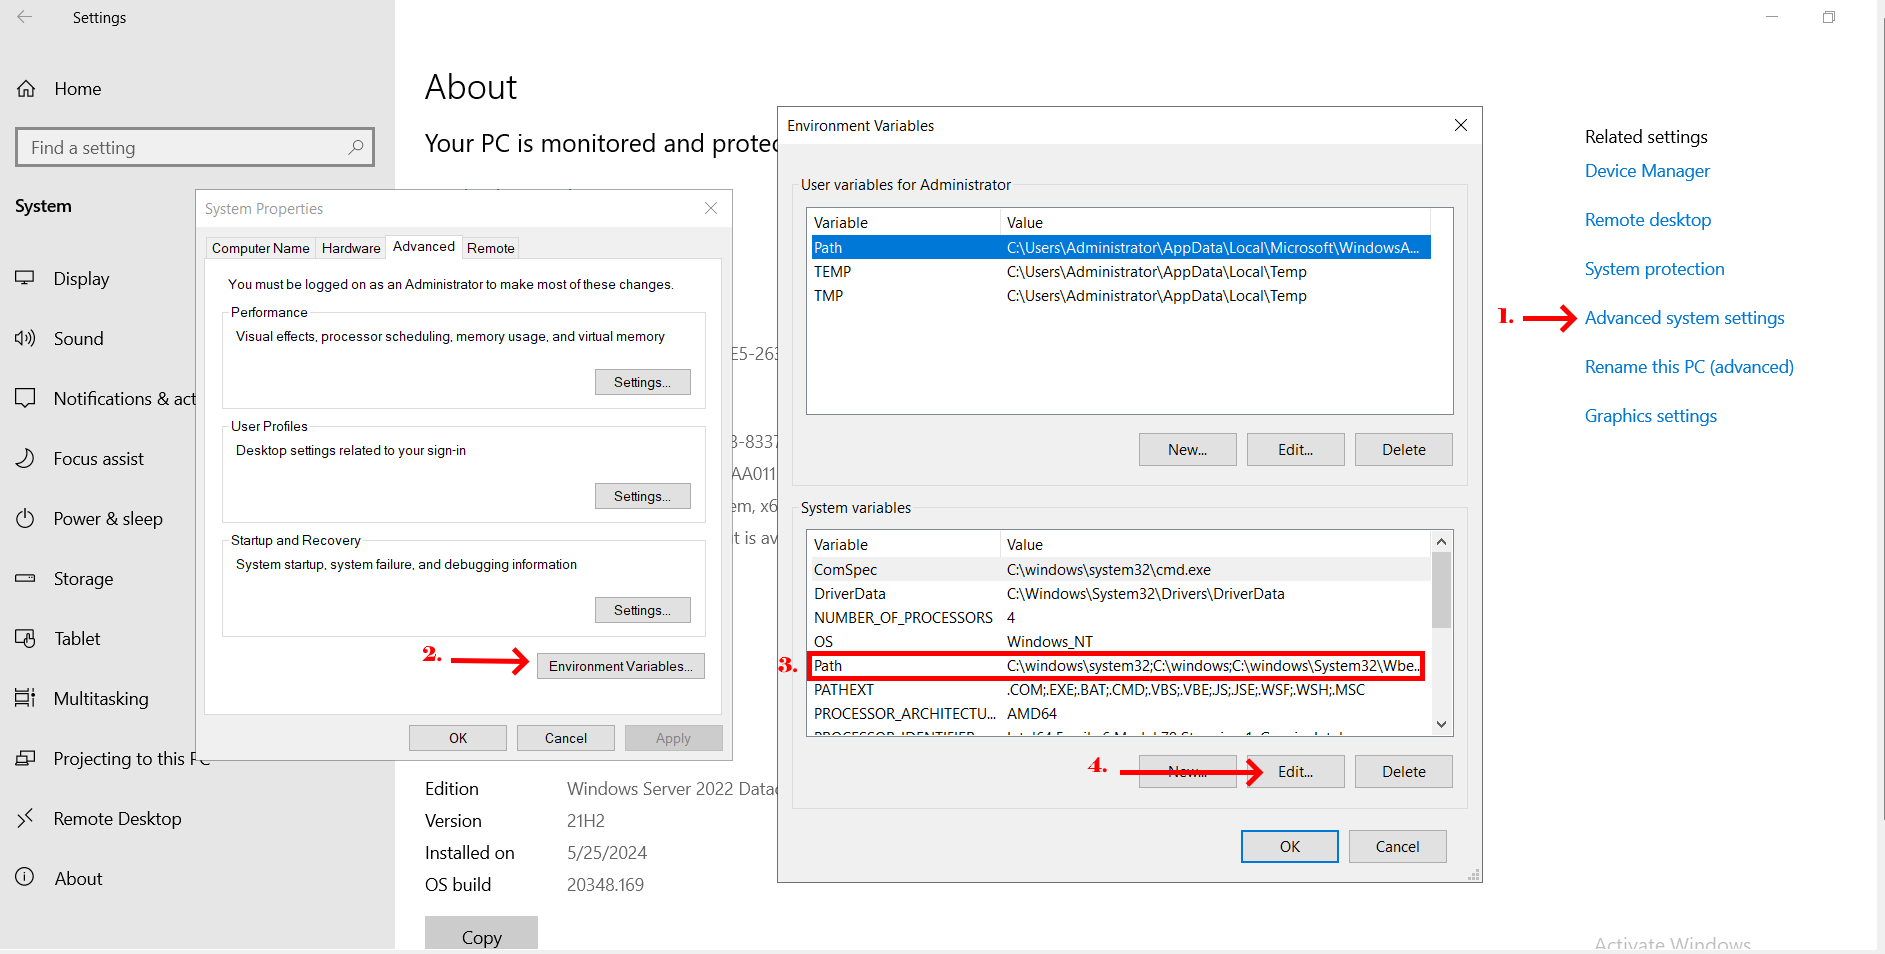
Under System variables, find the Path variable, select it, and click Edit.
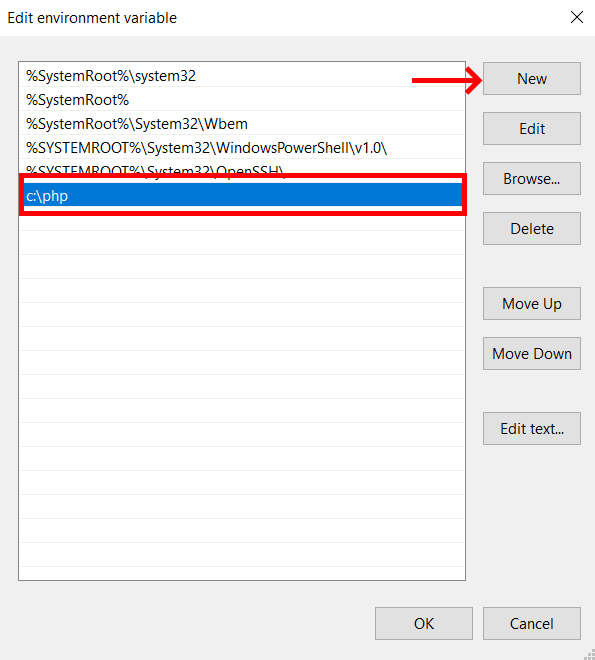
Add the path to your PHP directory (e.g., C:\php) to the list. Click OKs once you add the path.
Step 7: Install IIS
With IIS, you don’t need a control panel like cPanel. It’s free on Windows Server.
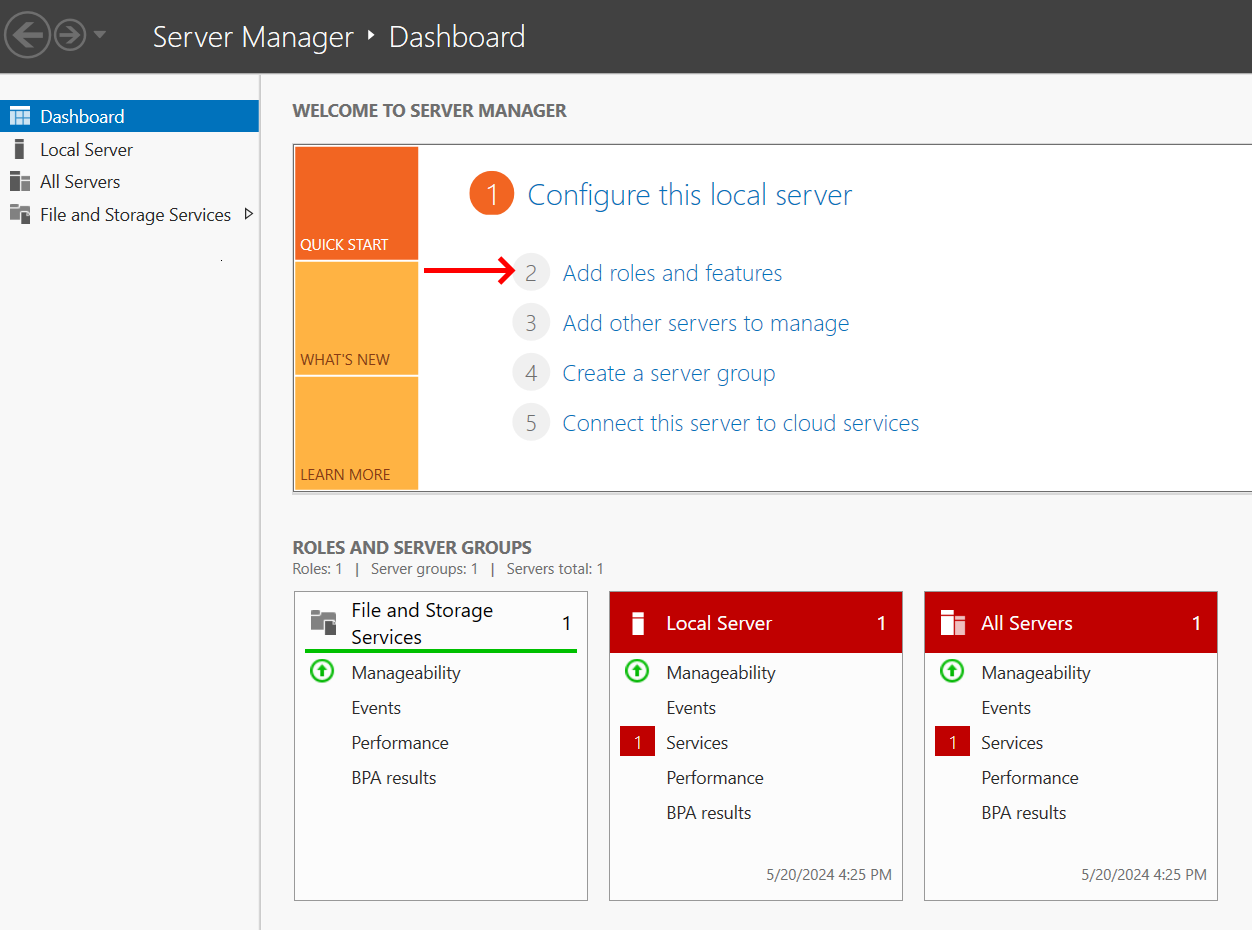
Open the Server Manager dashboard.
Click on Add Roles and Features.
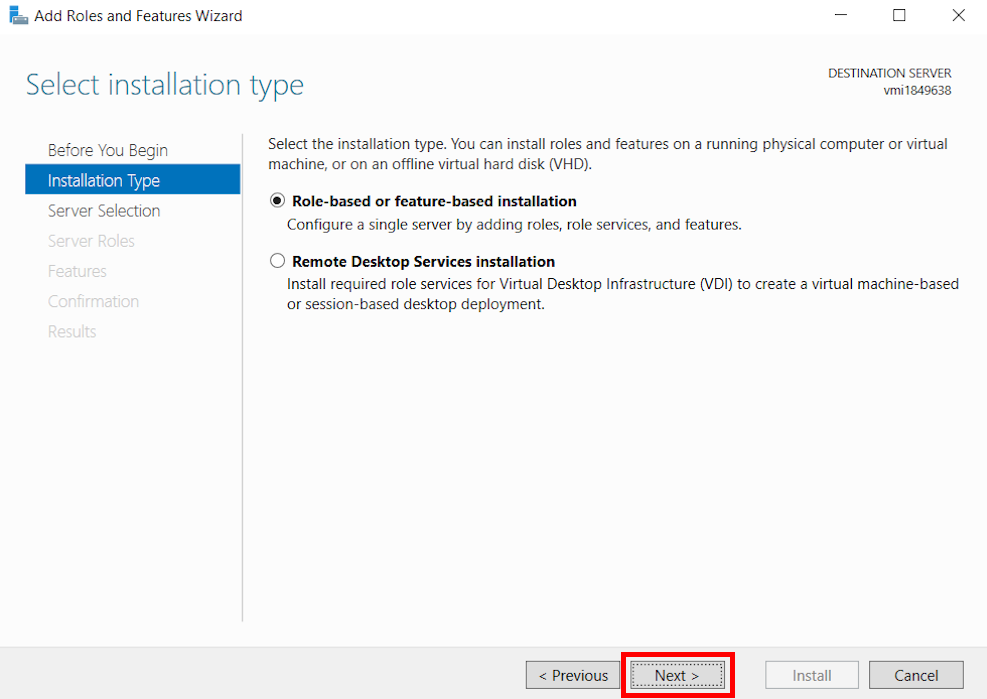
Follow the wizard and select Role-based or feature-based installation.
Choose your server from the server pool.

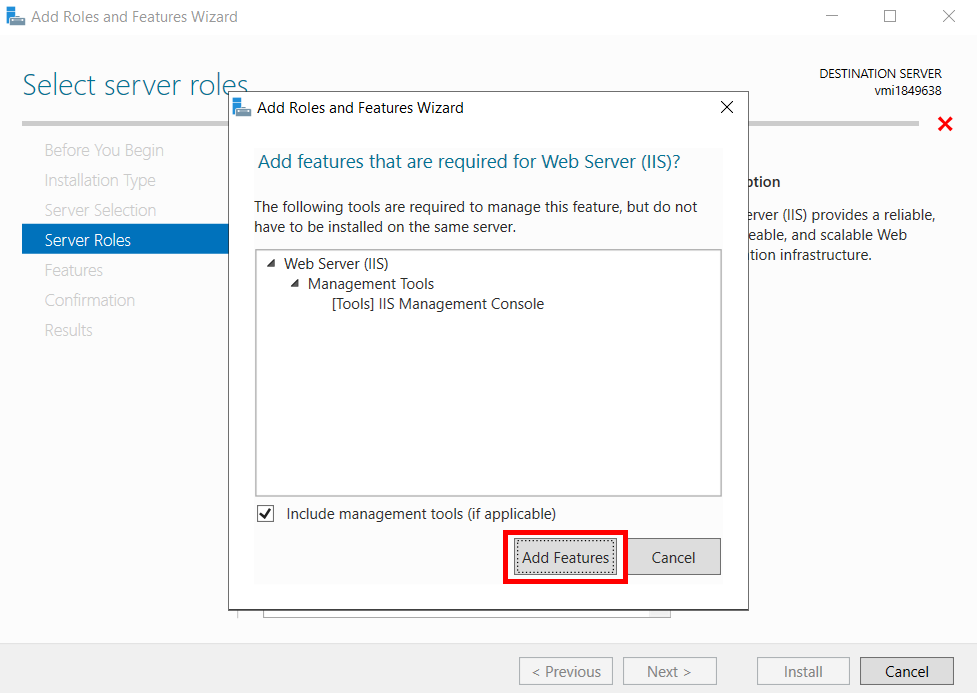
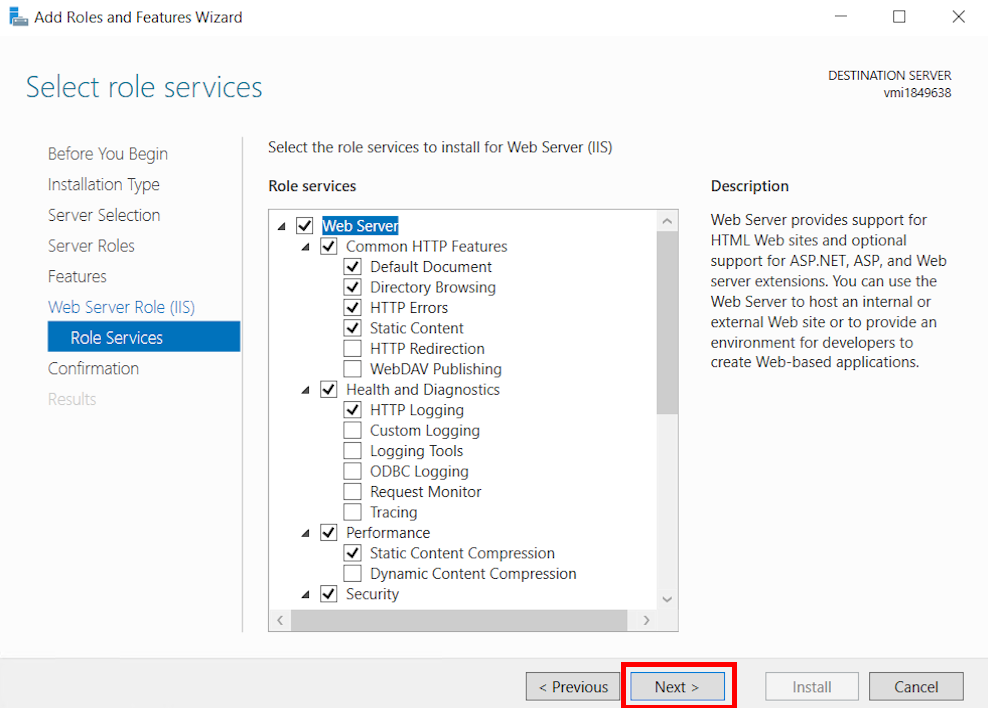
Select Web Server (IIS) and add the required features.
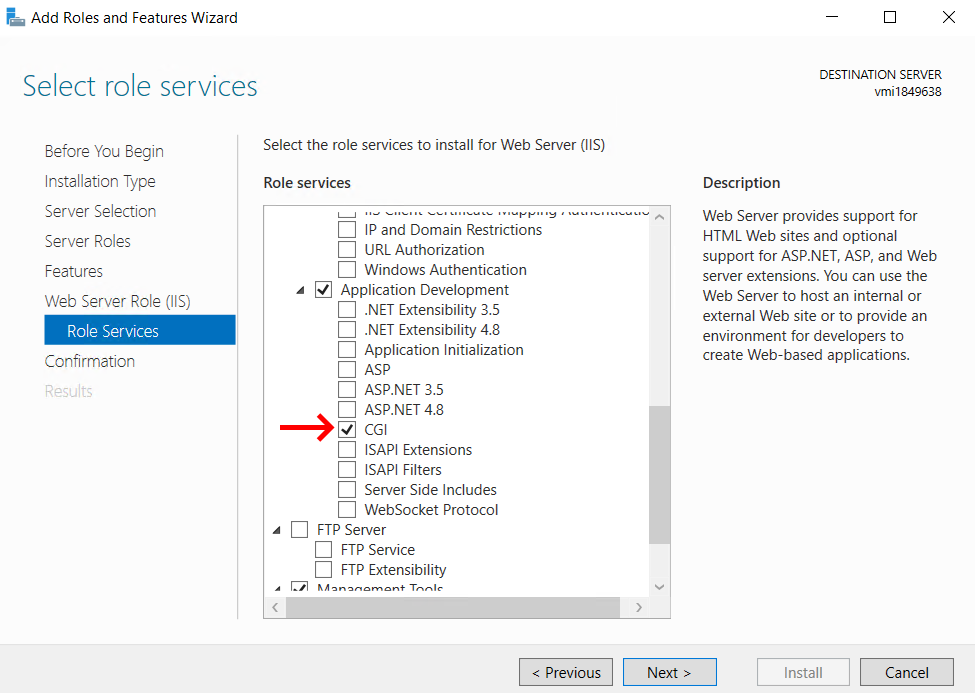
Under Application Development, check CGI.
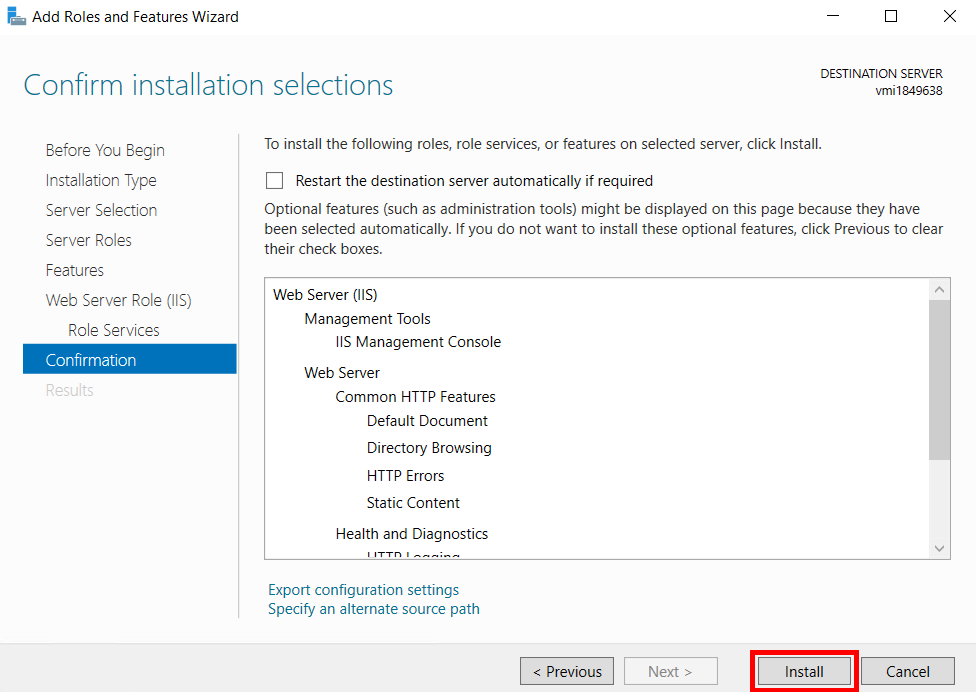
Continue through the wizard and click Install.
Download and install URL Rewrite. Choose the x64 installer. we will use this tool to rewrite WordPress URLs.
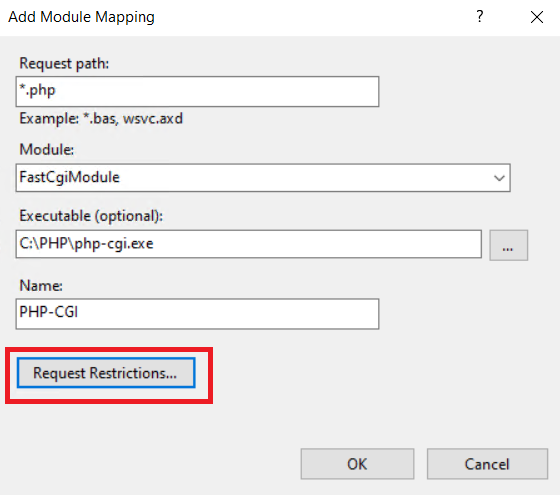
Next, go to IIS Manager > Select your Hostname > Handler Mappings > Add Module Mapping.

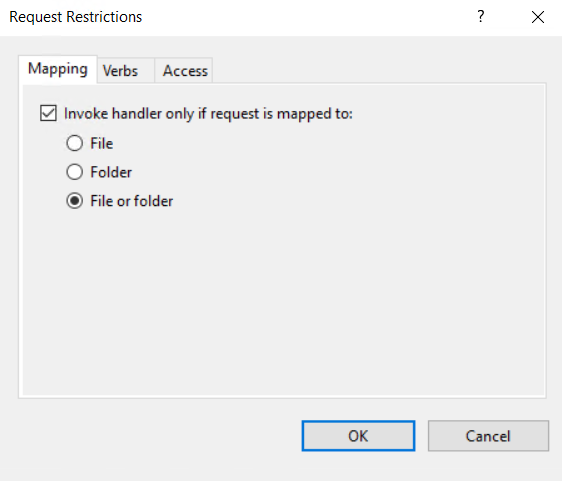
Then click on Request Restrictions and under Mapping tab choose File or Folder.
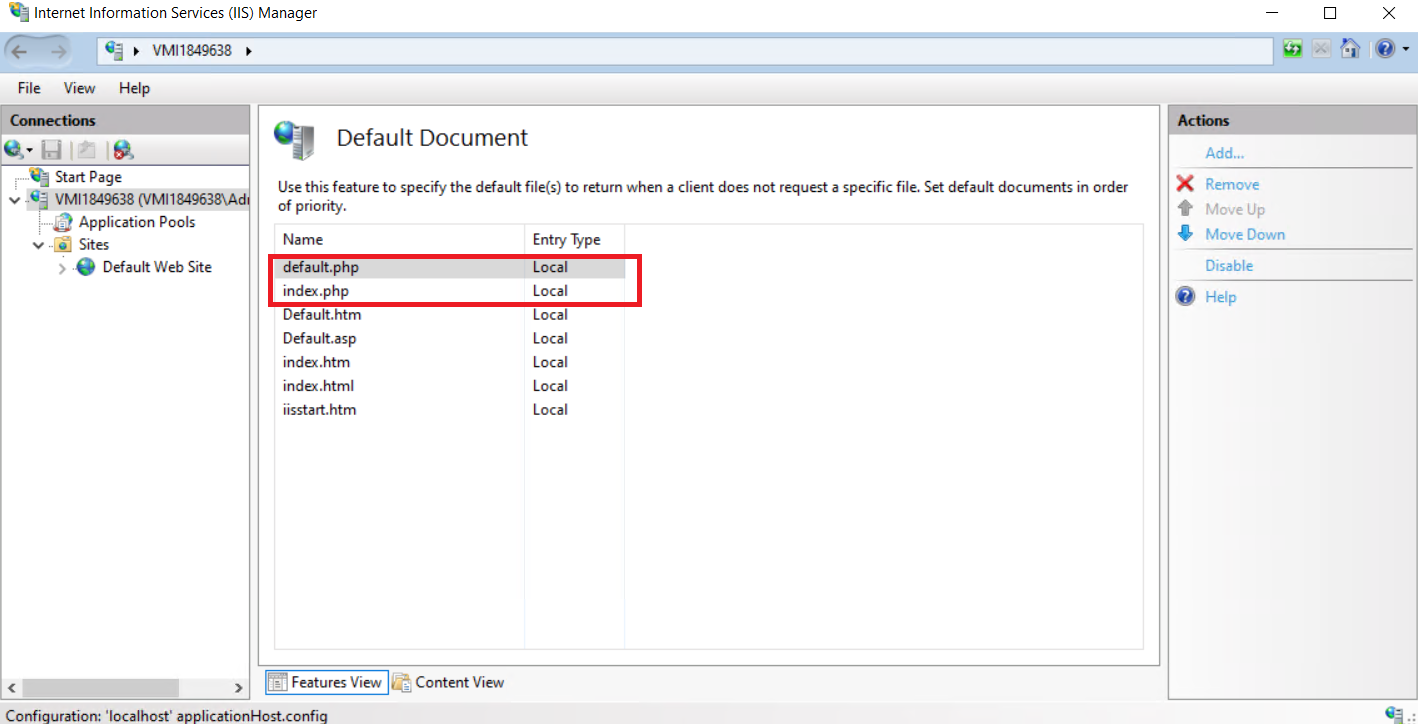
Next, select your Hostname > Default Document > Add index.php and default.php.
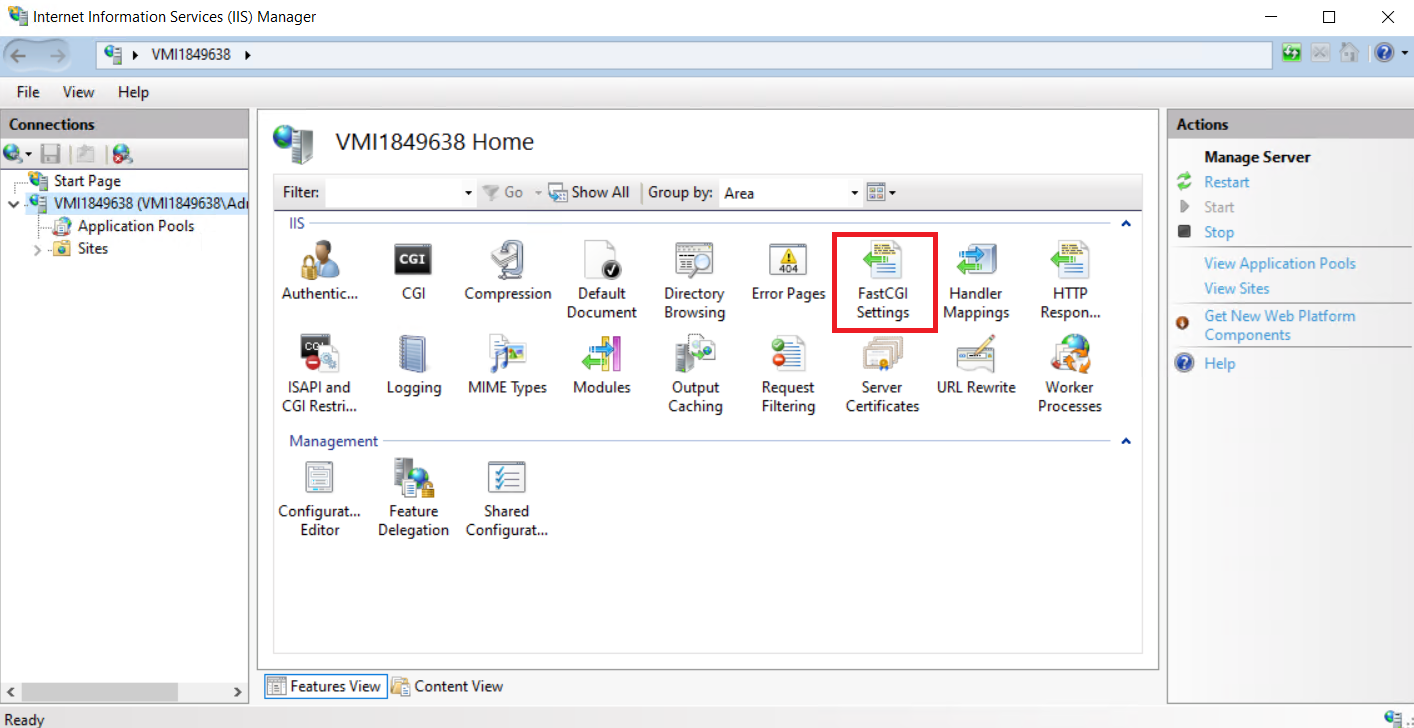
Now we’ll add FastCGI Application.
In the left-hand Connections pane, select your server’s hostname.
In the middle pane, double-click FastCGI Settings.
Click Edit in the Actions pane.
Set the Full Path to C:\php\php-cgi.exe.
Set Instance MaxRequests to 10000 and Max Instances to 0.
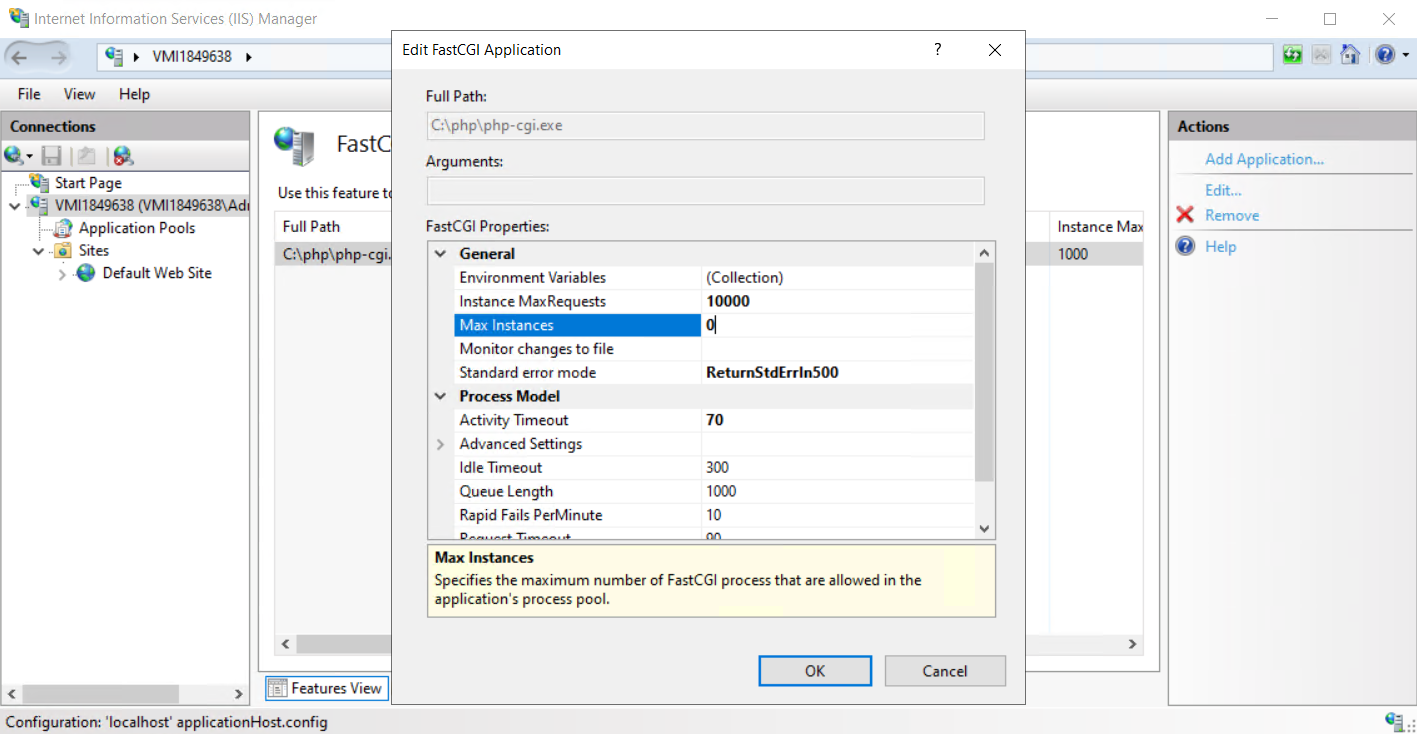
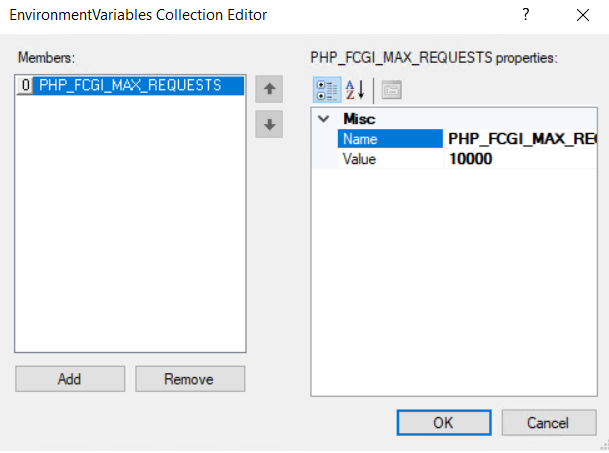
We will also set our Environment Variables. Set the properties of PHP_FASTcgi_MAX_REQUESTS as Name and 10000 as Value.
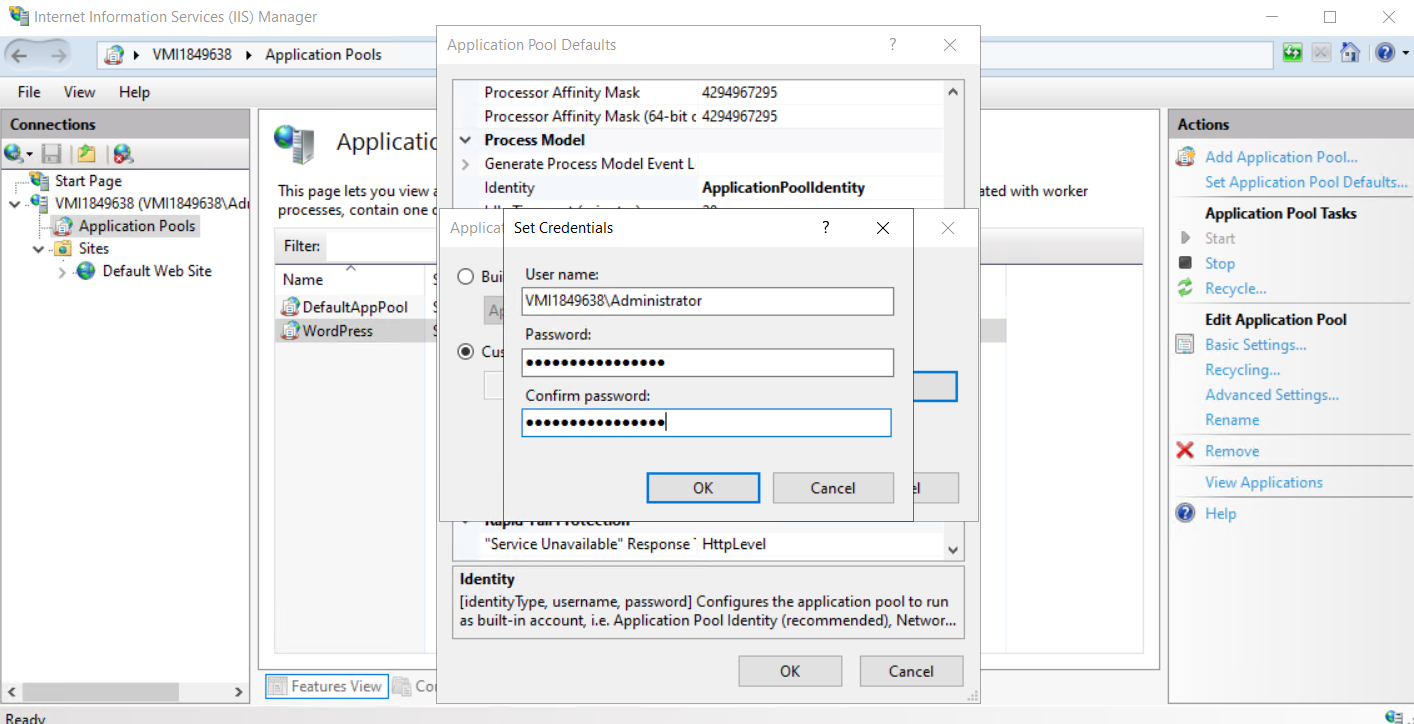
Go to Application Pools and we’ll add a new pool.

Right-click the newly created pool and choose Set Application Pool Defaults.

Go to Identity and click the three dots beside it. Use Administrator as username with your machine name. Password is the one you use to login to your server.
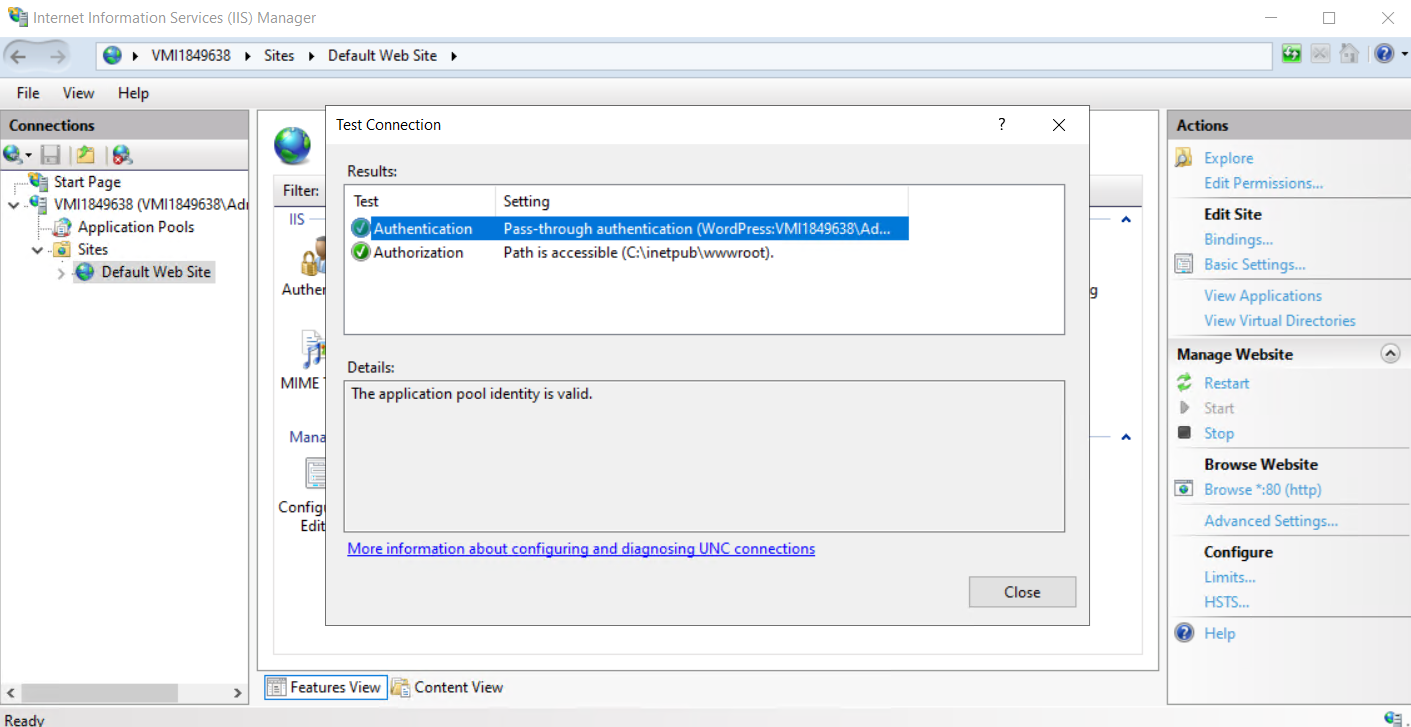
Then test if we have the read/write permissions to the WordPress directory.
Go to Sites > Default Website > Basic Settings > Select the WordPress Application Pool > Test Settings.
The results should be green checkmarks. Otherwise, go back if you missed some steps.
Now we are ready to install WordPress.
Go to wordpress.org and download the latest version.
Extract the WordPress files to your web root directory (e.g., C:\inetpub\wwwroot\wordpress).

Open the wordpress folder rename wp-config-sample.php to wp-config.php
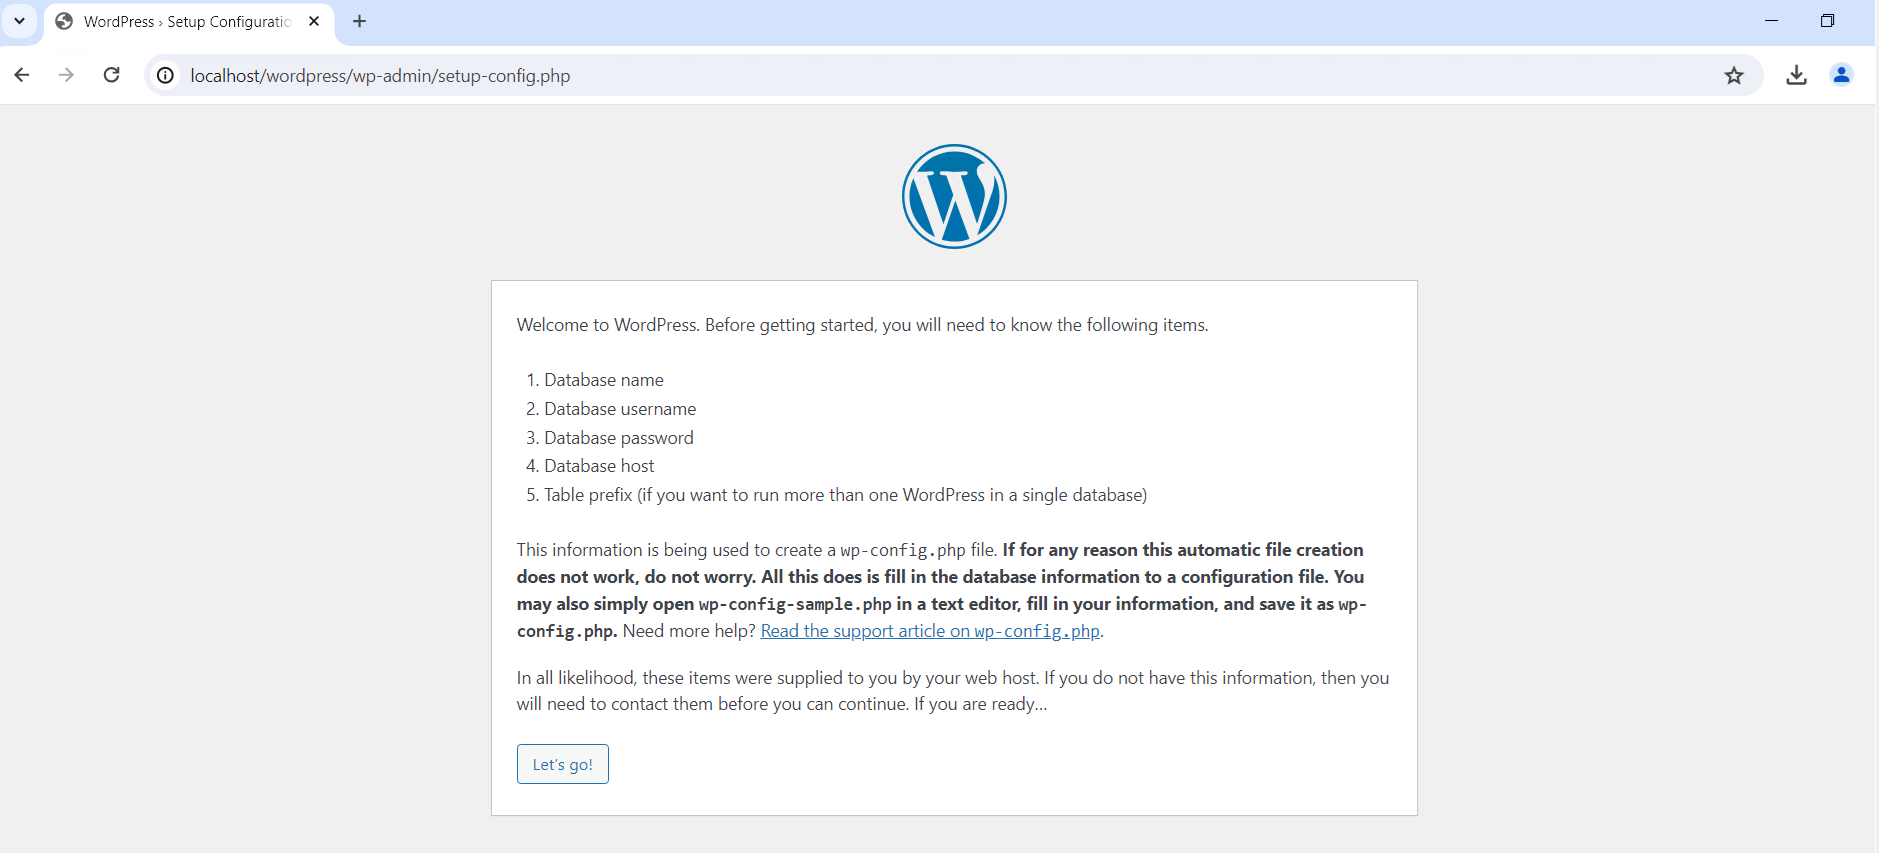
Open your favorite browser and type in localhost/wordpress. We will begin installing WordPress. It will appear like this. Click Let’s go!
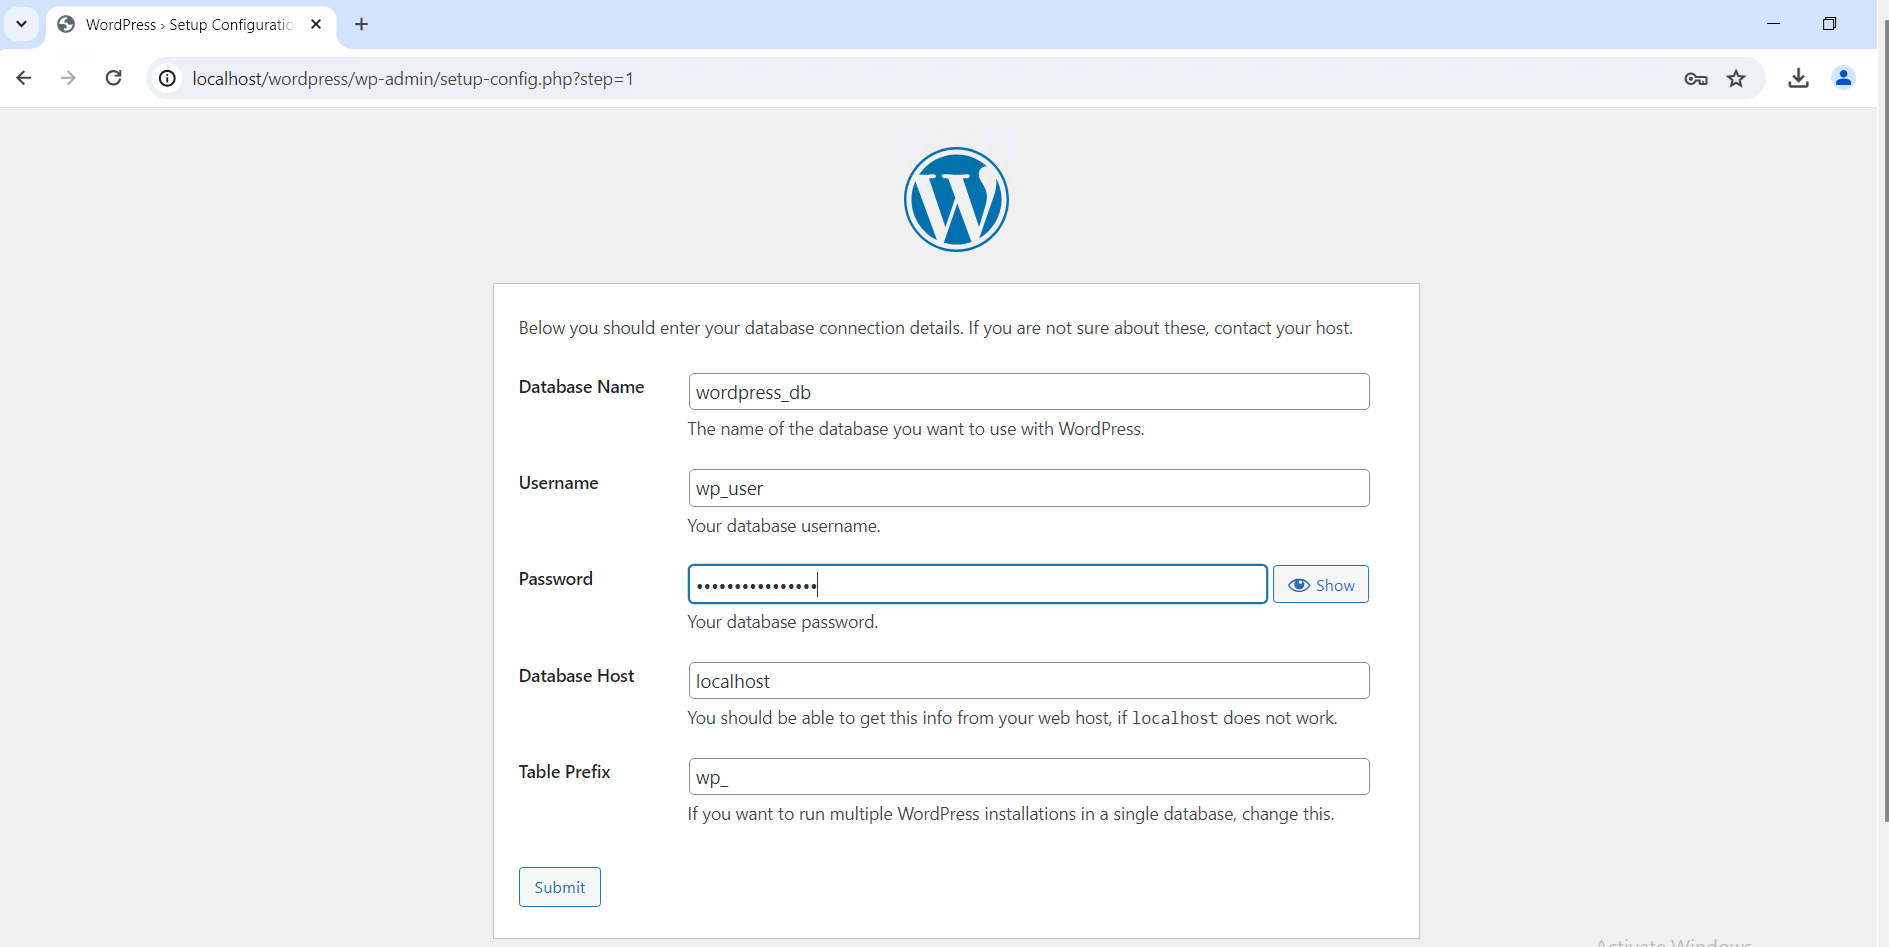
Do you remember the database name, username, and password you created? We will input those credentials in this step.
Before clicking the Submit button, rename the wp-config-sample.php to wp-config.php.
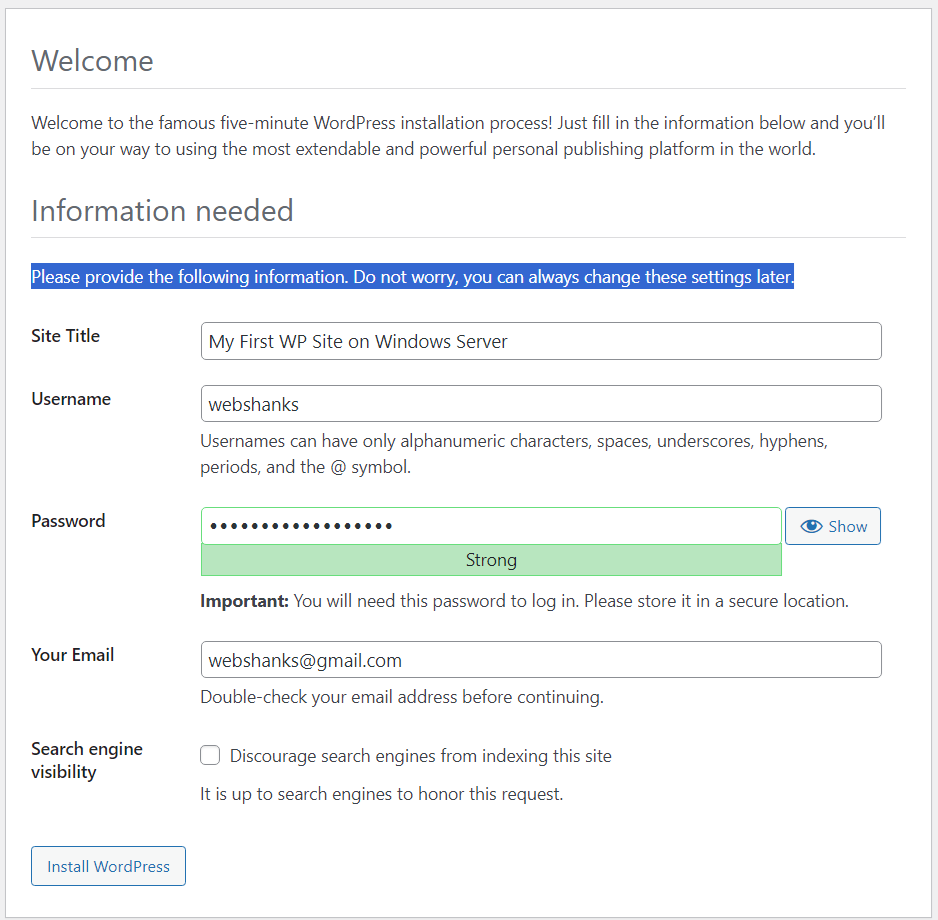
Next, we will add some information about our website and create an administrator user. Then click Install WordPress.
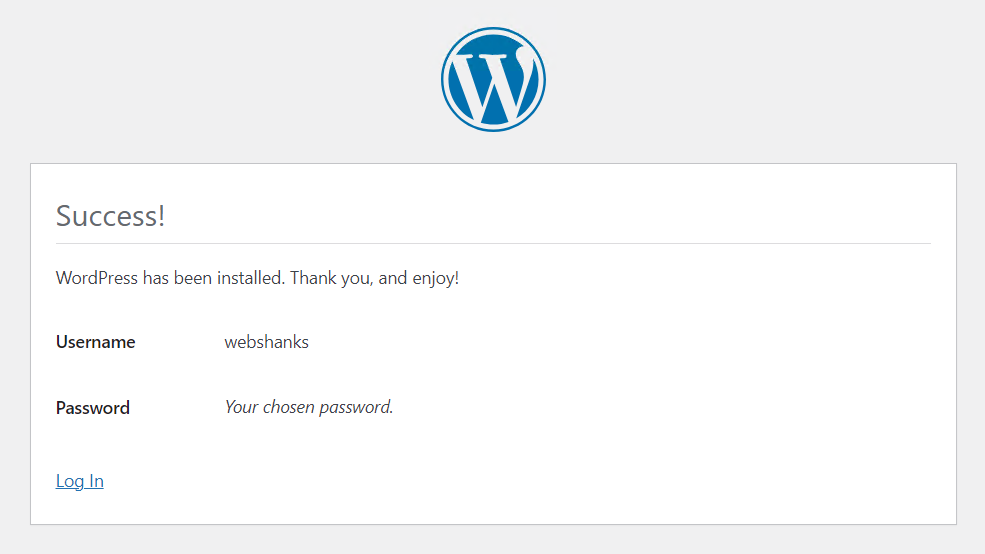
Now we have installed WordPress successfully, we will access it with our domain.
So first add two A records for your website. It should be added to your domain registrar.
I’m using Cloudflare so I will add those records here.

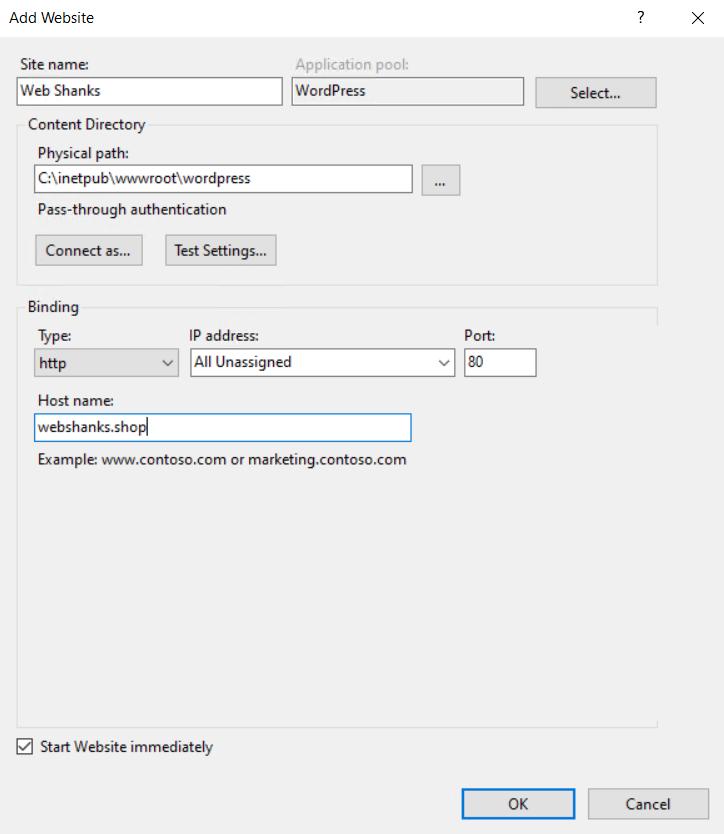
Now we will bind our IP with our domain. Go to Sites > Add Website and enter the website details.
- Sitename: Your chosen name for your site.
- Application Pool: Select the pool we created earlier.
- Physical Path: Your WordPress installation directory.
- Binding Type: Choose http.
- IP Address: Choose your server IP address.
- Port: Choose 80 for http to work.
- Hostname: Enter your domain name. It can also be a subdomain.
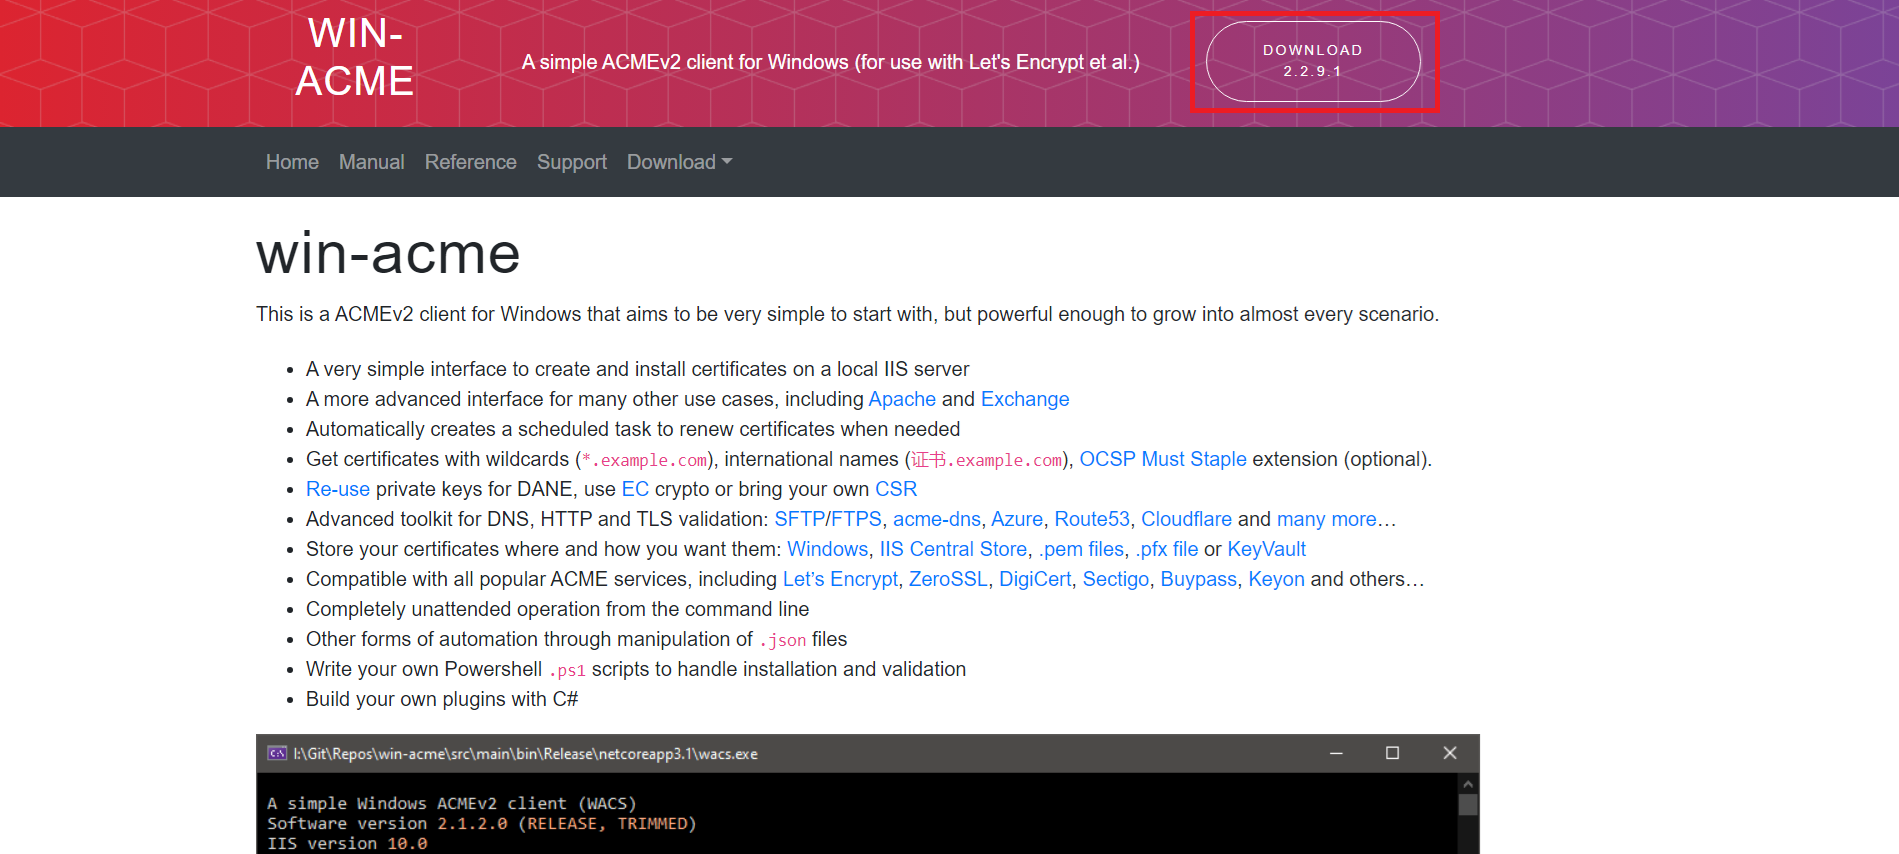
Then we will issue an SSL certificate so that we can access our domain with https. To do that go to win-acme and download the latest version.
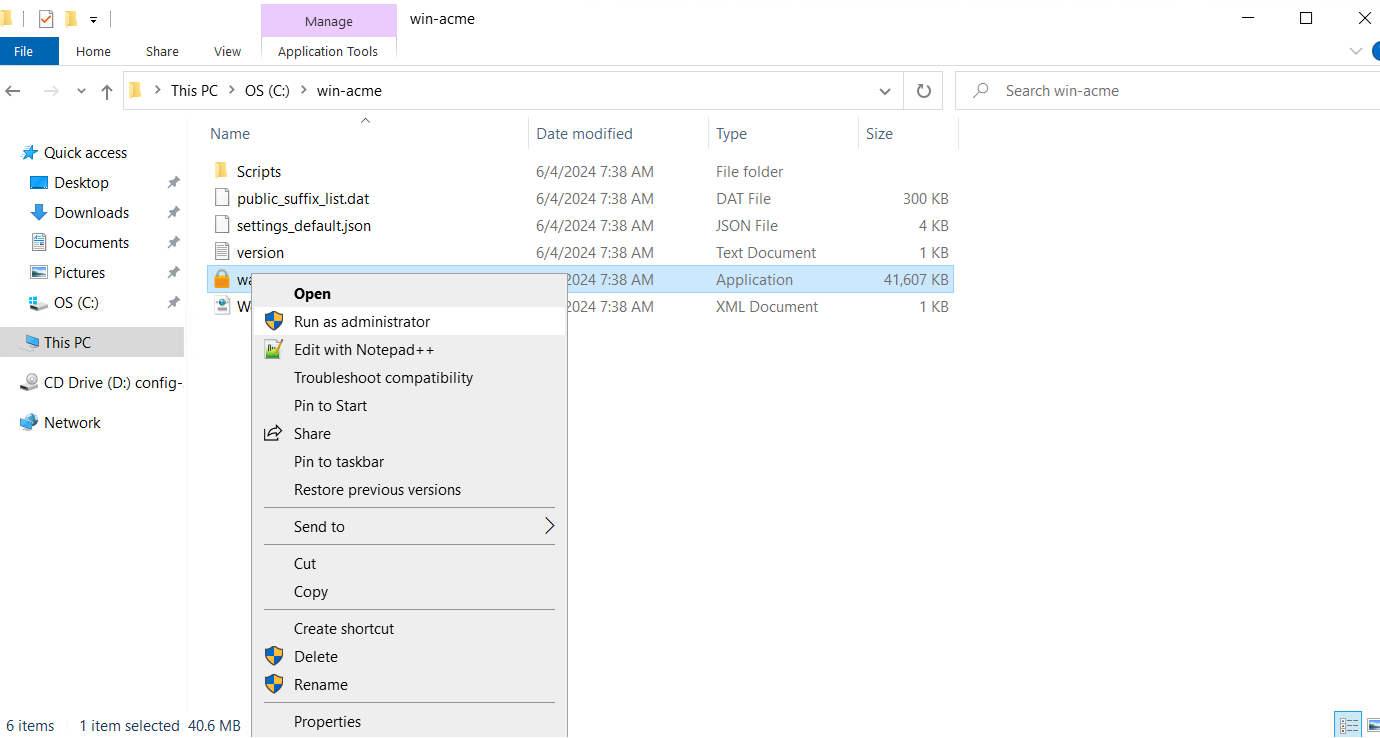
Extract the contents of the zip file to a directory on your server (e.g., C:\win-acme).
Run wacs.exe as administrator.
Windows Defender will prevent it from running but just click More info and Run Anyway.
Now it will begin creating a certificate.
Follow the steps in the images below.
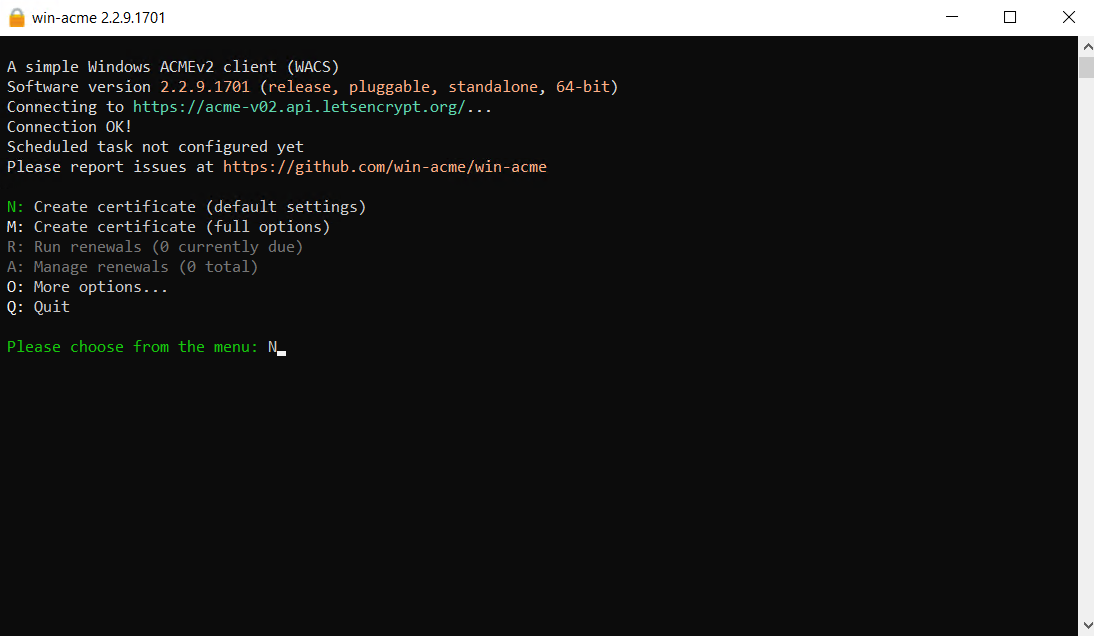
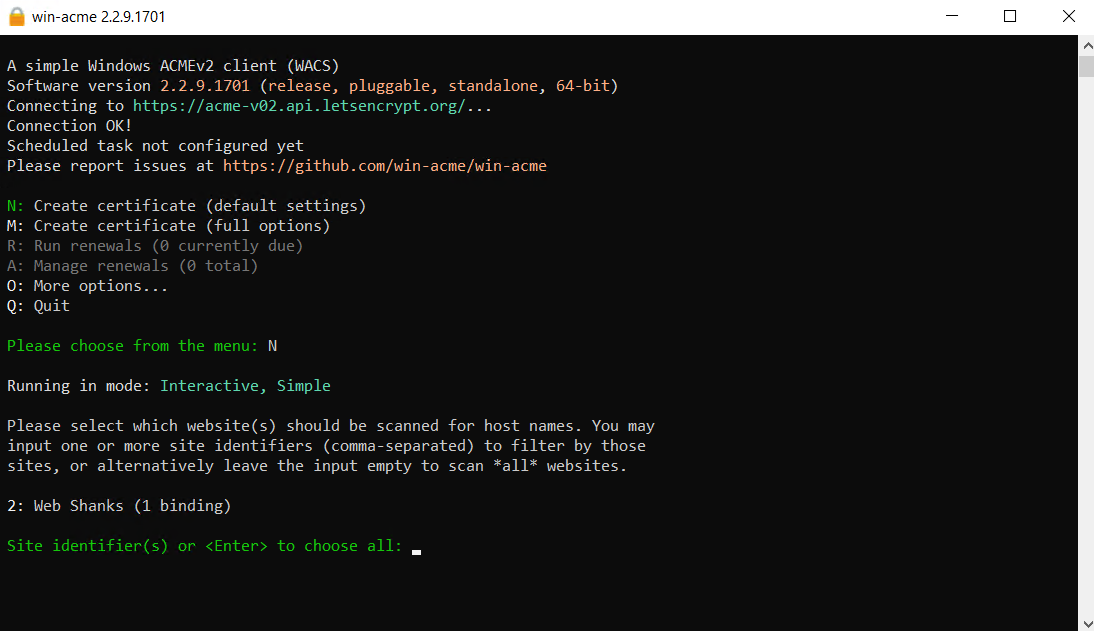
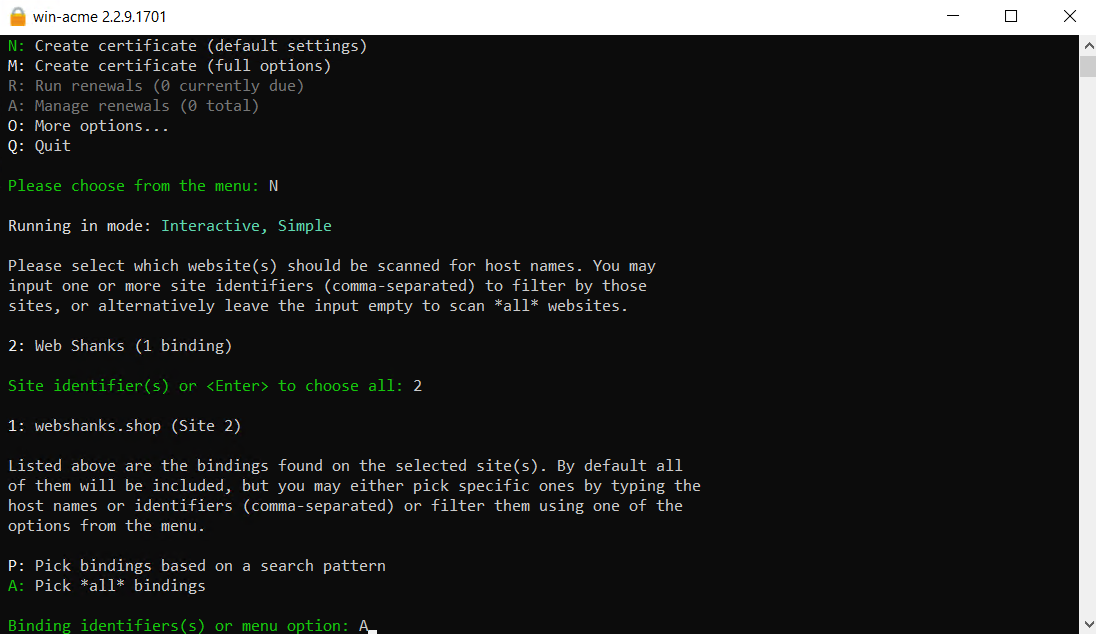
Then follow the on-screen questions. You will be asked to read the terms and conditions.
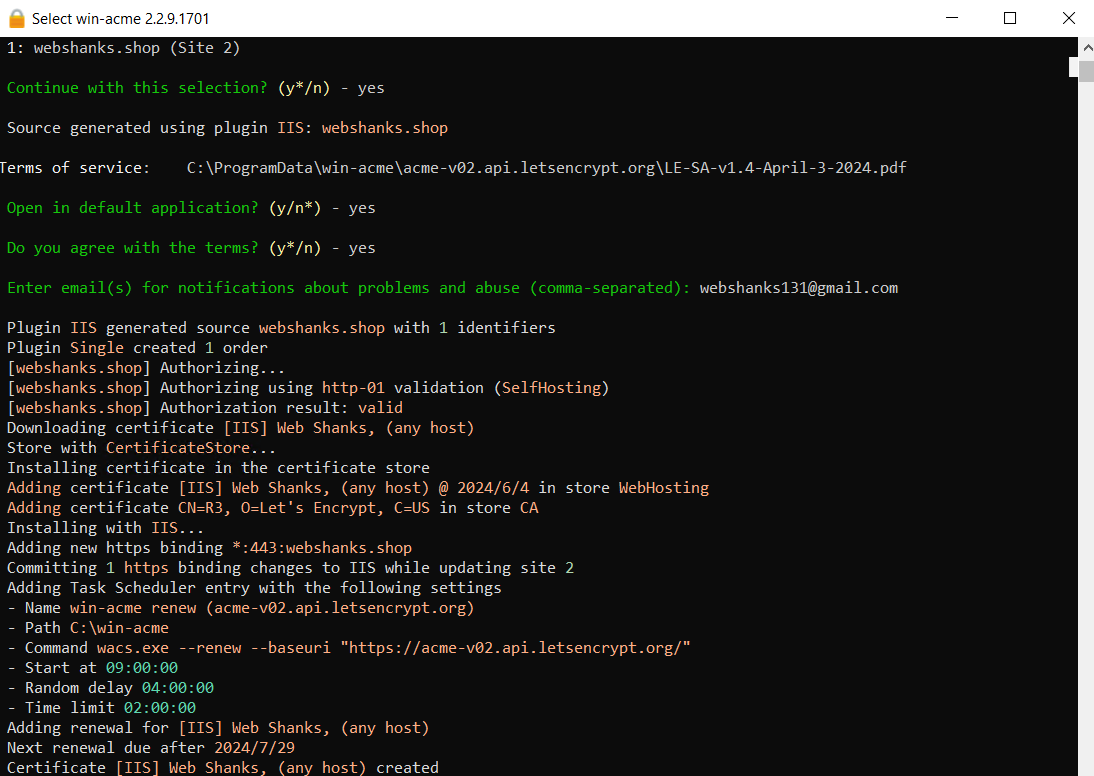
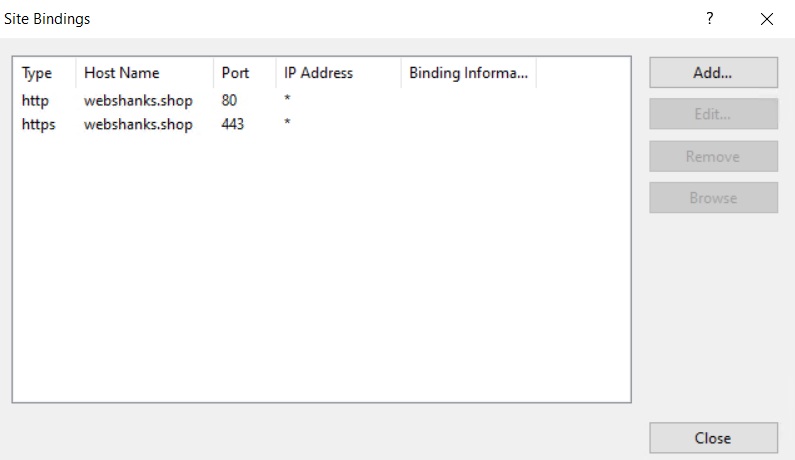
Go back to your Windows server and go to IIS Manager. Select your domain and click Bindings on the right panel. You should be able to see an https with your domain at port 443.
Now access your domain with SSL.
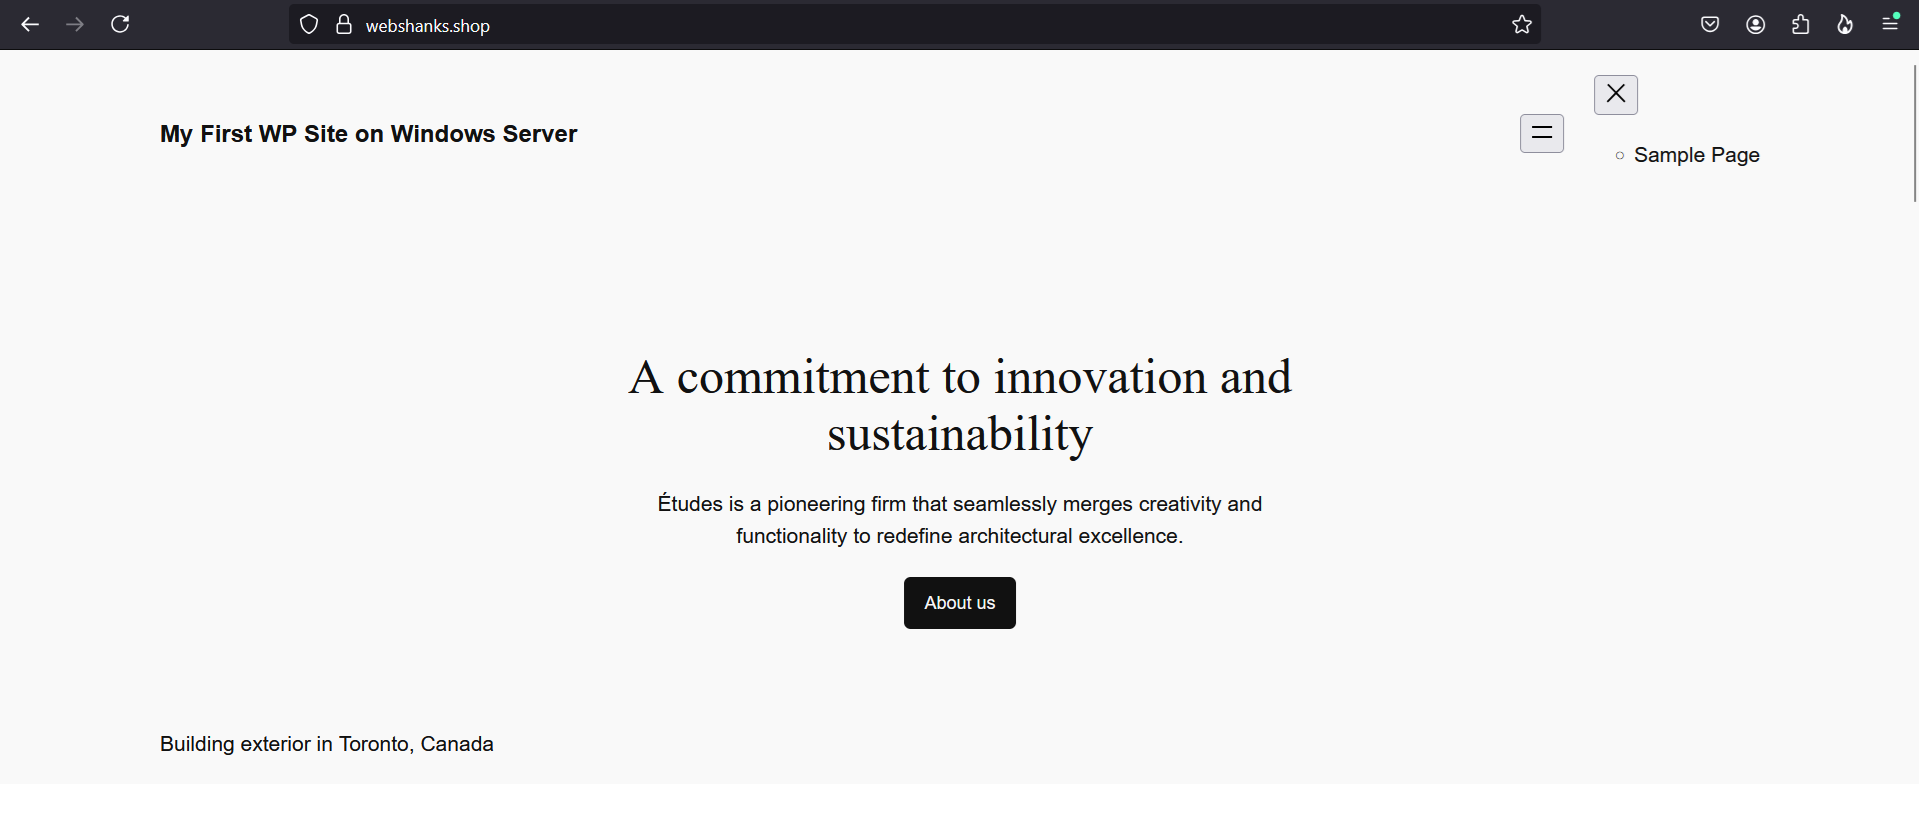
Now you have your WordPress website hosted on Windows Server 2022 Datacenter!
But that’s not just it. We need to set our WordPress Address (URL) and Site Address (URL) to our domain so we can access our admin page.
Use your localhost to change it because we cannot access it using our domain just yet.
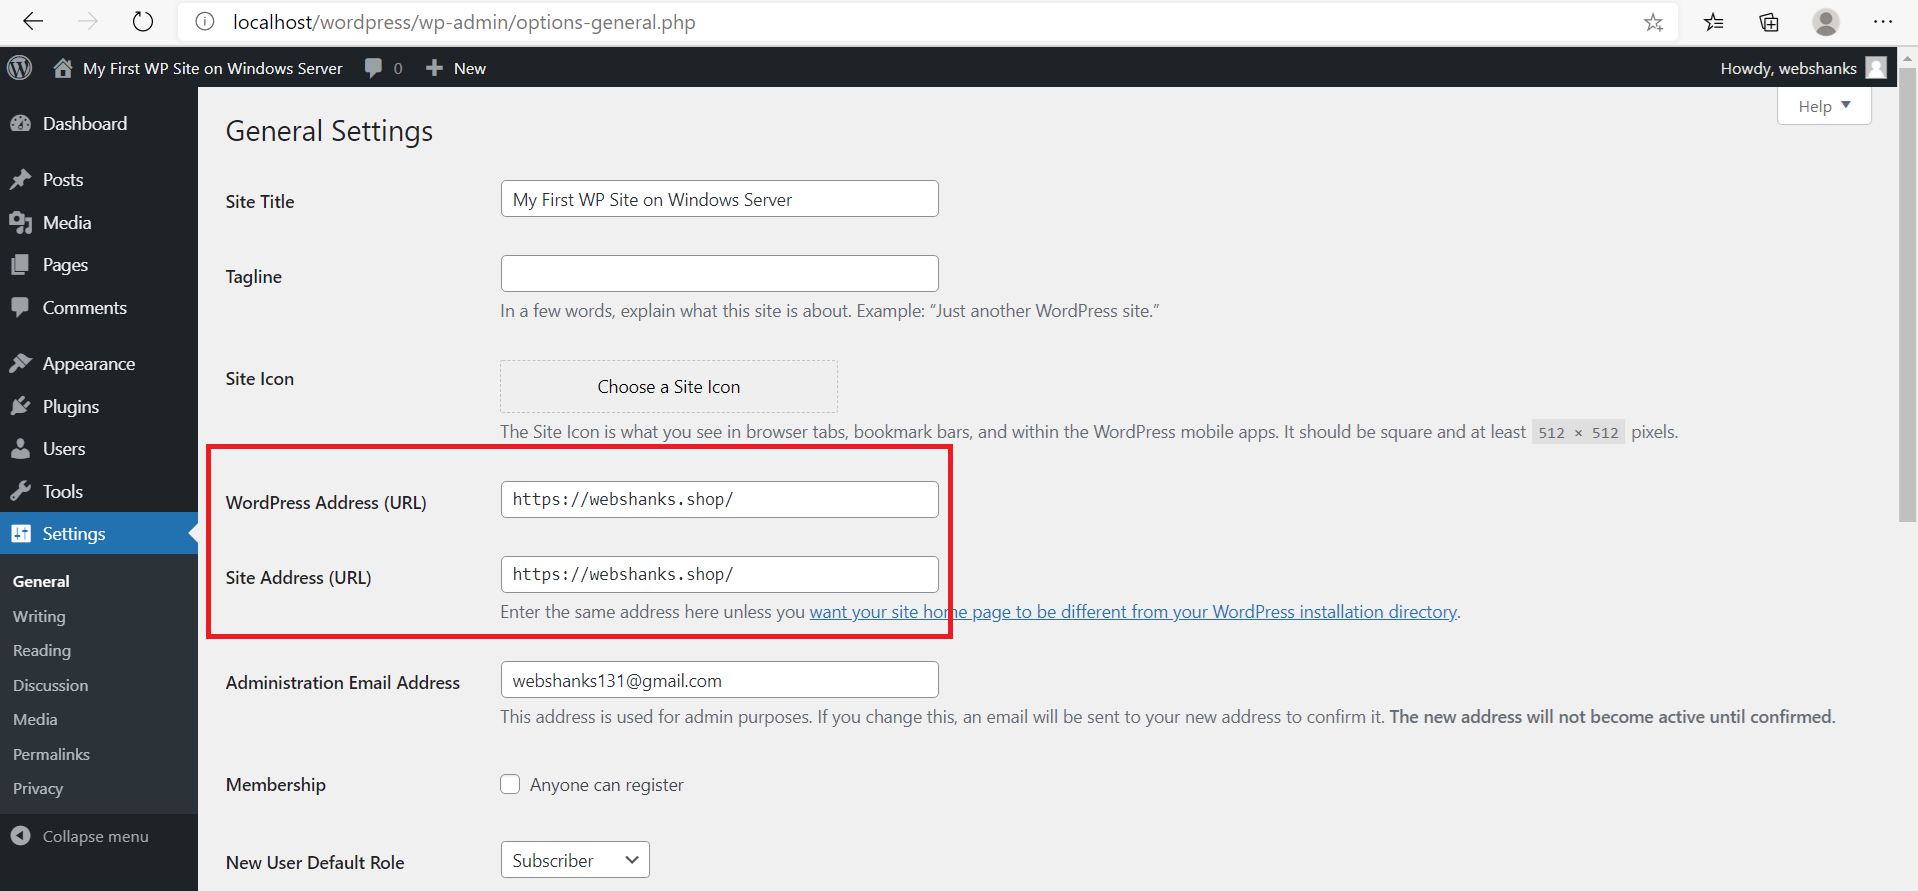
Now let’s try to access our admin page using our domain.
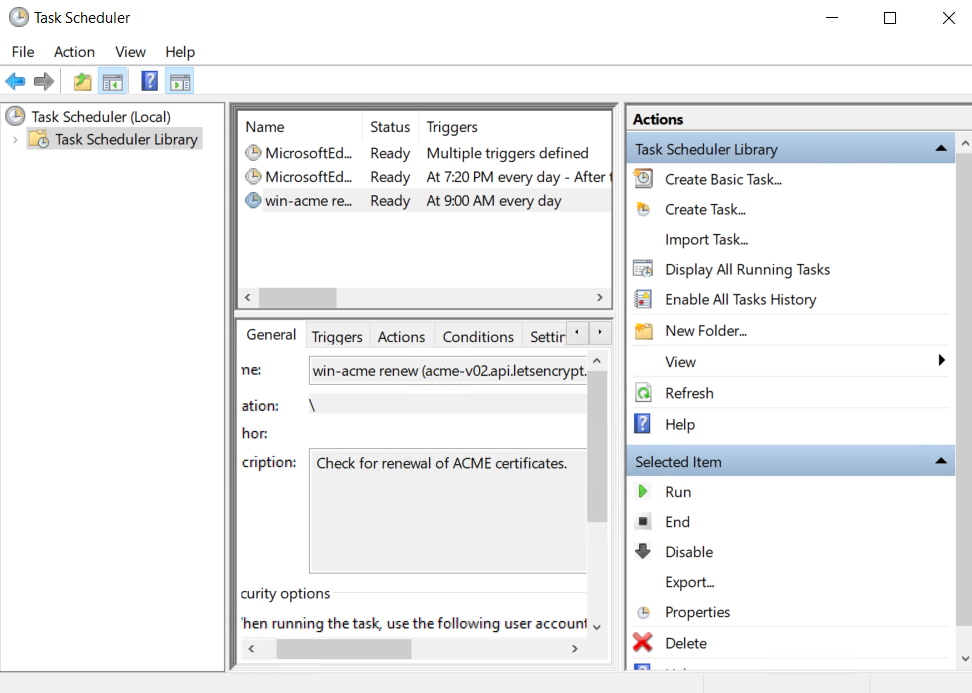
The good thing is that the certificate will auto-renew thanks to Window’s task scheduler.
You can set your theme, install plugins, add a logo, create content, and optimize your WordPress site for SEO and speed.
If you want to add more domains to host multiple WordPress websites, just follow steps 5 and 7 or follow this detailed tutorial.
Did you face a roadblock? Comment it down!