
 iRedMail is a free and open-source mail server solution that integrates several popular email components, including Postfix, Dovecot, and Roundcube.
In this guide, I will walk through the step-by-step process of installing and configuring iRedMail on a RackNerd VPS running Debian 12.
Prerequisites
Before you begin, ensure you have the following:
- A RackNerd VPS with Debian 12 installed with at least 4GB of memory.
- Root access to your server.
- A domain. You can get your affordable domain on Namecheap.
- A warmup service like Warmup Inbox to build a reputation (only if you’re doing B2B cold email marketing).
Build Your Own iRedMail Mail Server on RackNerd VPS with Debian 12 Step-by-Step
iRedMail requires at least 4 GB memory and a server with open port 25.
Step 1. Signup with RackNerd VPS
Go to RackNerd and choose the 4GB VPS Plan.
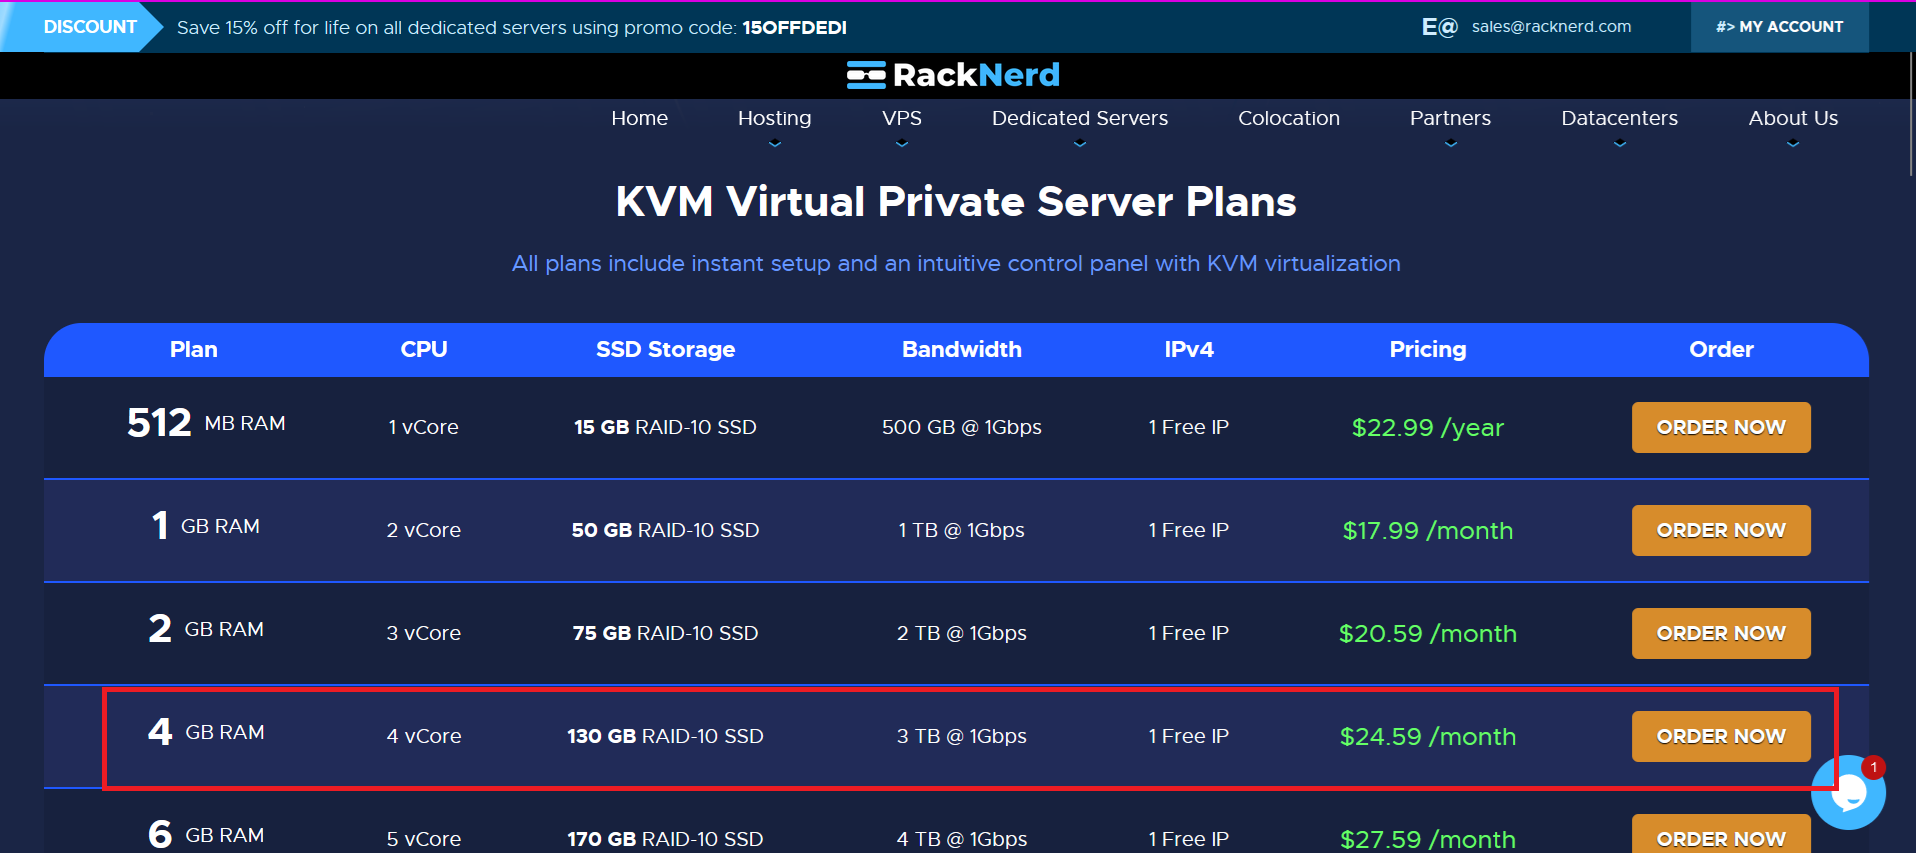
Follow these steps on how to completely setup your RackNerd VPS.
Be sure to choose Los Angeles or France because they have free IPv6.
After signing up with RackNerd, your root and control panel credentials will be sent to you on your email you’ve provided.
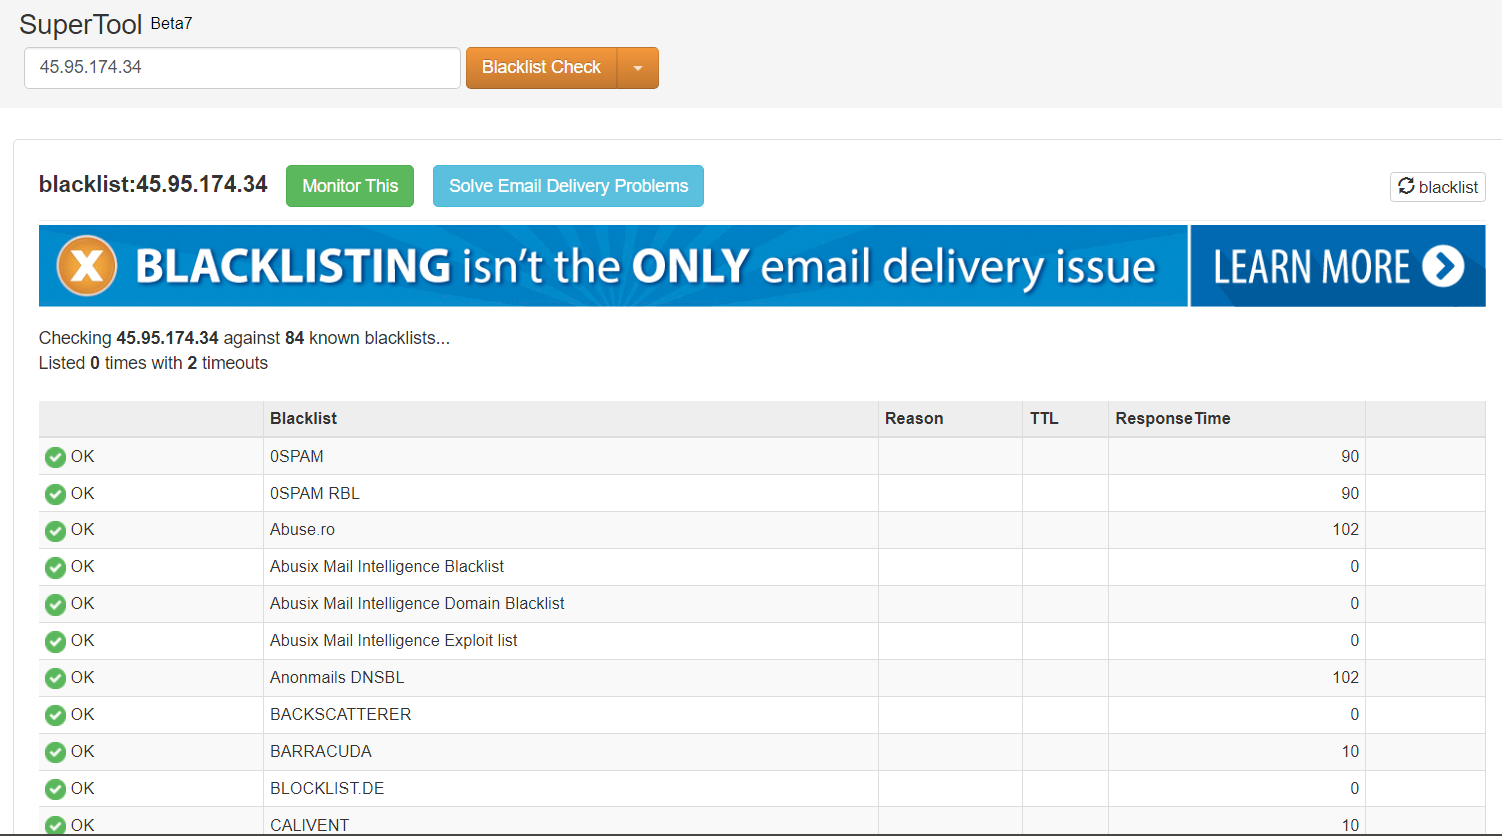
Once you have your VPS control panel credentials, check your IP for any blacklist. My IP is not on the blacklist so we’re good to go!
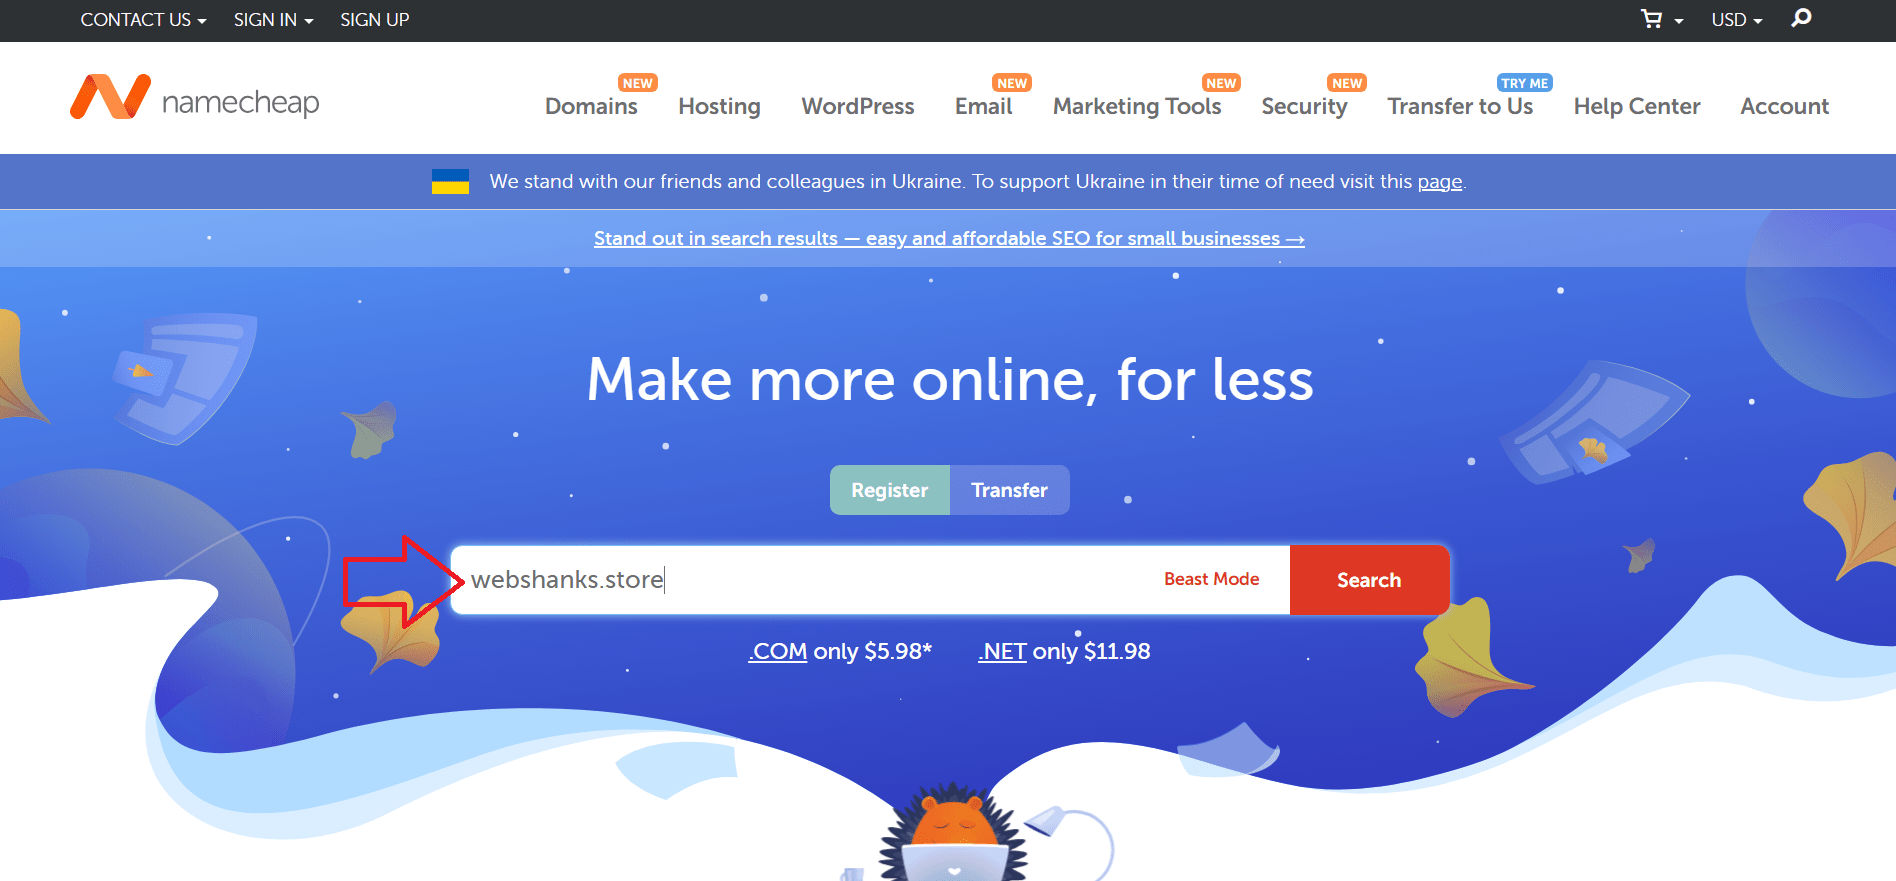
Step 2. Get a Domain
Go to Namecheap and find your ideal domain name. Avoid using xyz, loans, biz, gq top level domains. Instead, use .com .org .io .ai, or .net.
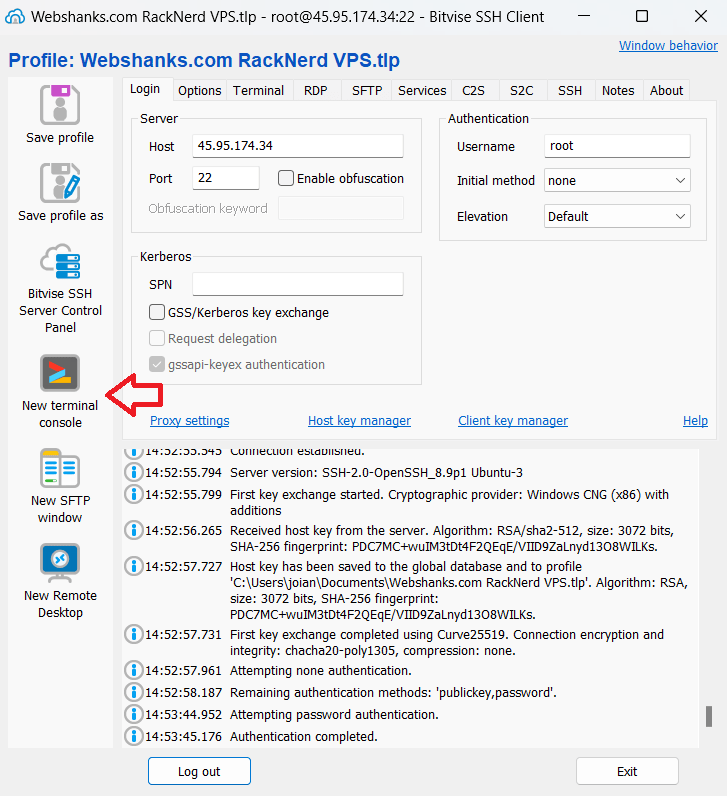
Step 3. Access Your VPS Through SSH
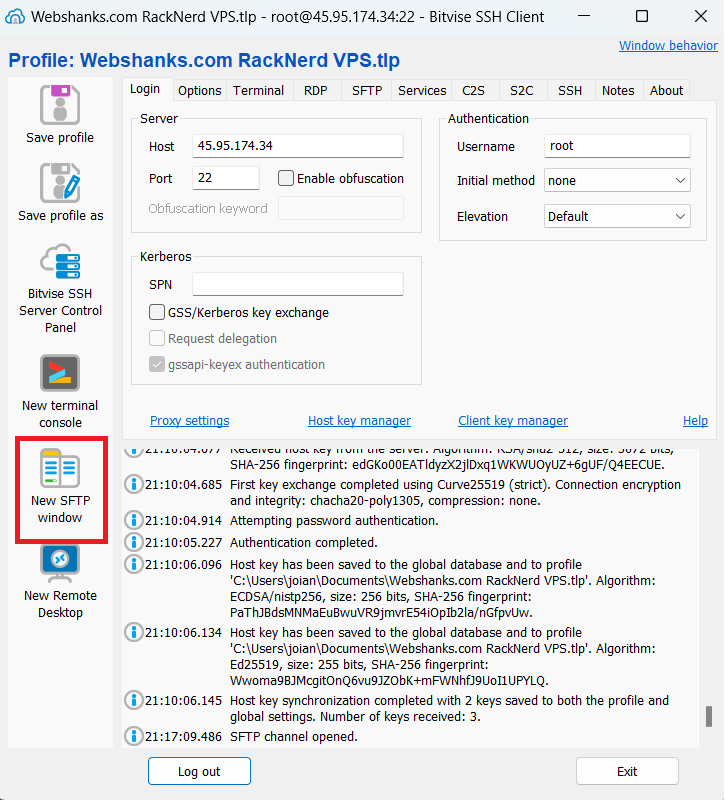
Access your VPS through SSH using the provided credentials. I’ll be using Bitvise.
Use the root credentials that were sent to your email.
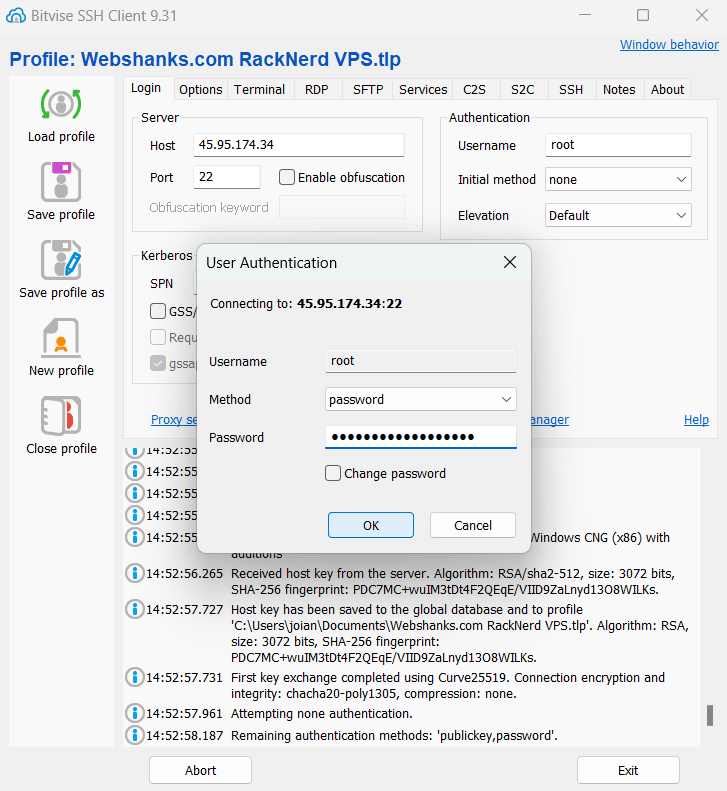
We can now access our server with a terminal.
Step 4. Update and Upgrade Debian
Start by updating the package list and upgrading existing packages on your Debian 12 server:
apt-get update && apt-get upgrade
Step 5. Enable IPv6
In this part, you need to contact RackNerd support and ask for IPv6.
We will enable our IPv6 on our server by adding the following commands.
Go to /etc/sysctl.conf by using an editor.
nano /etc/sysctl.conf
Then add the following lines at the end of the file. To save, click ctrl X and press Y and Enter.
net.ipv6.conf.all.autoconf = 0
net.ipv6.conf.all.accept_ra = 0
net.ipv6.conf.eth0.autoconf = 0
net.ipv6.conf.eth0.accept_ra = 0
Additionally, make the value of the following lines to 0.
net.ipv6.conf.all.disable_ipv6 = 0
net.ipv6.conf.default.disable_ipv6 =0
net.ipv6.conf.lo.disable_ipv6 = 0

Then reboot our server.
reboot
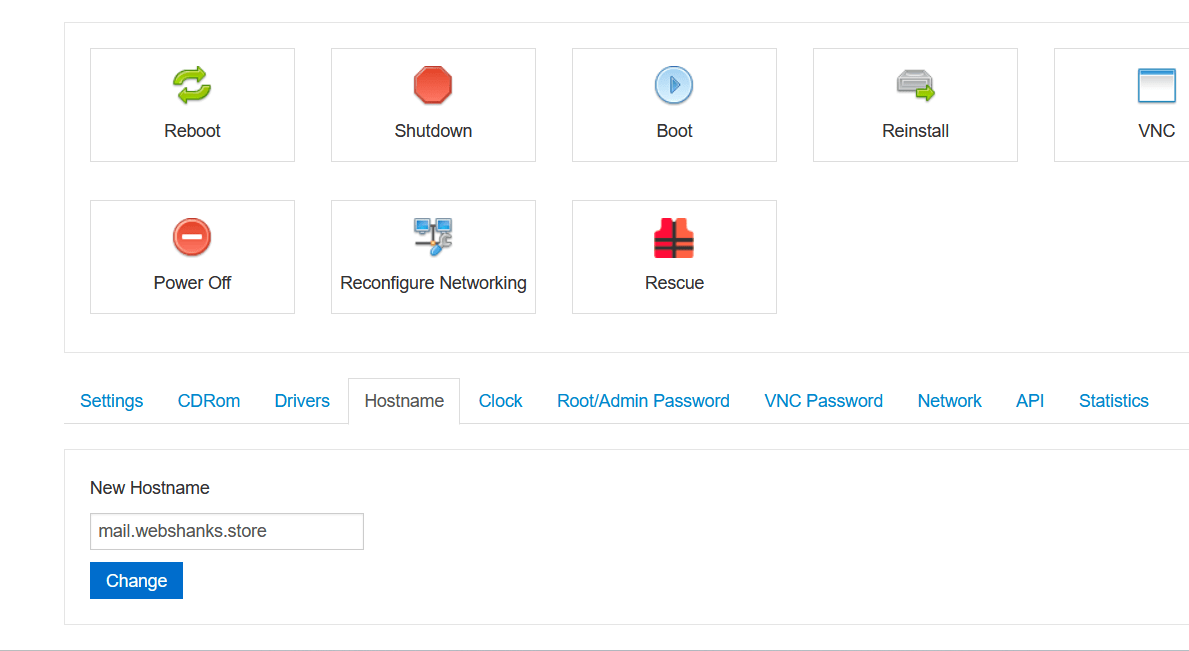
Step 6. Set Hostname, Initial A Records and Reverse DNS for Your Domain
Go to your VPS control panel and set a Hostname. I’ll set it as mail.webshanks.store.
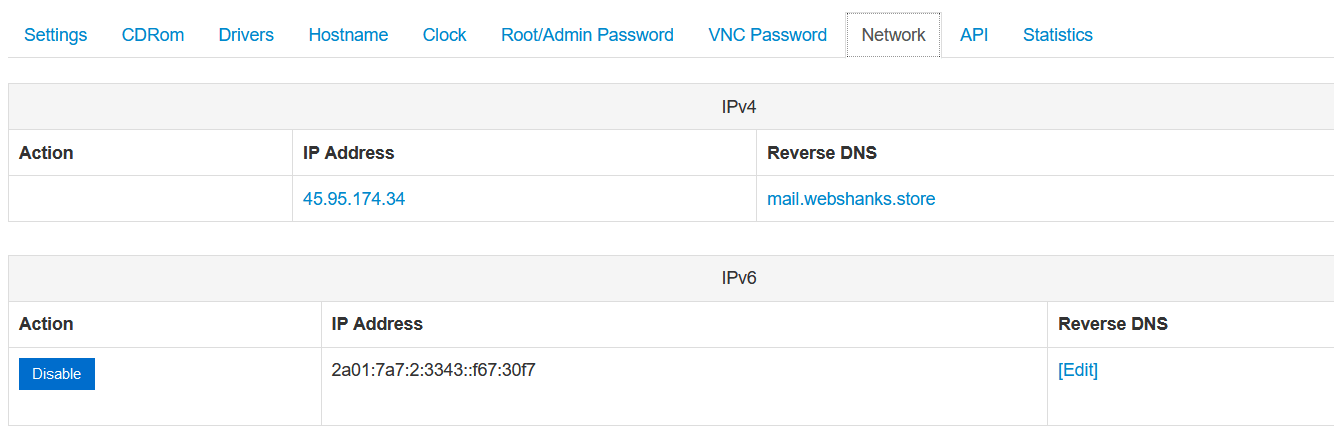
Then go to RackNerd support and ask them to set your reverse DNS to mail.webshanks.store for both IPv4 and IPv6. Reverse DNS is handle by RackNerd themselves.
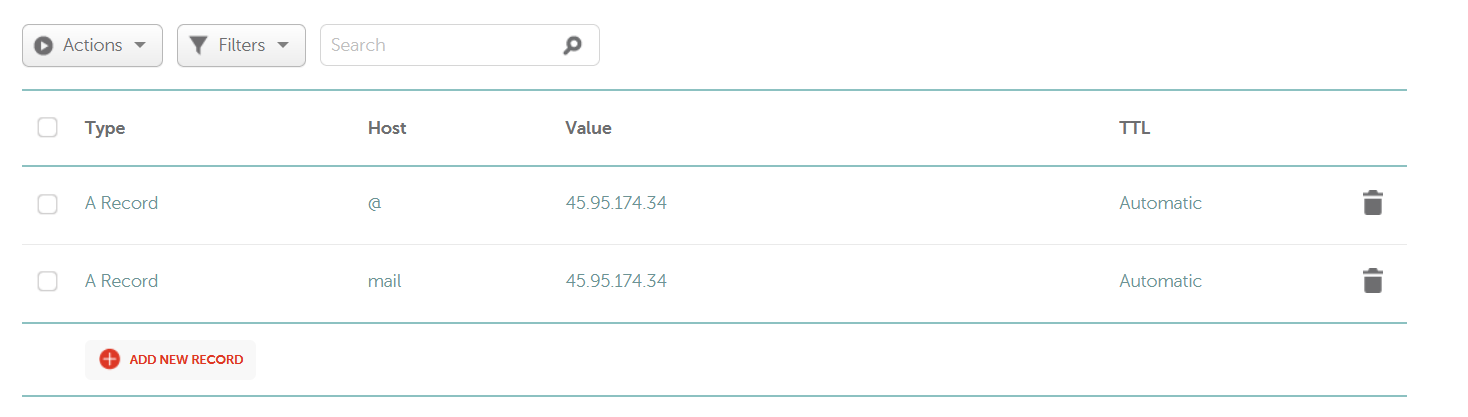
Let’s go to Namecheap and add our initial A records for our top level domain and email hostname. We will add the rest later on.
Step 7. Install iRedMail
First, let’s install packages that required by iRedMail installer.
apt-get install -y gzip dialog
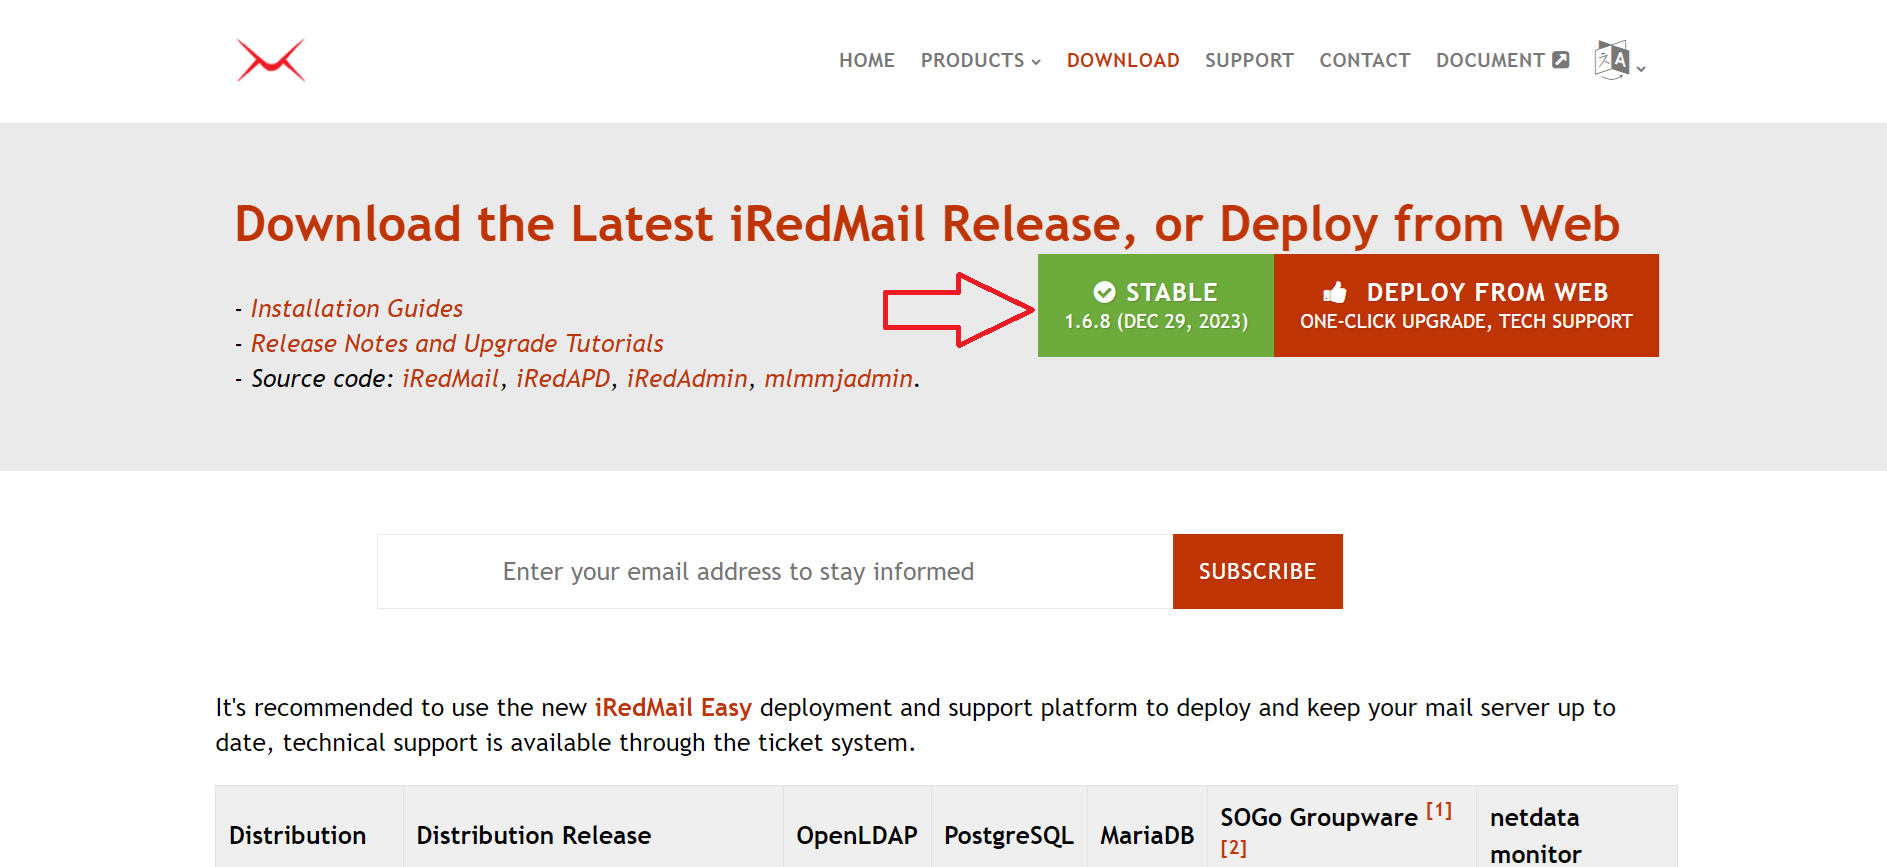
Next go to iRedMail and download the latest stable release.
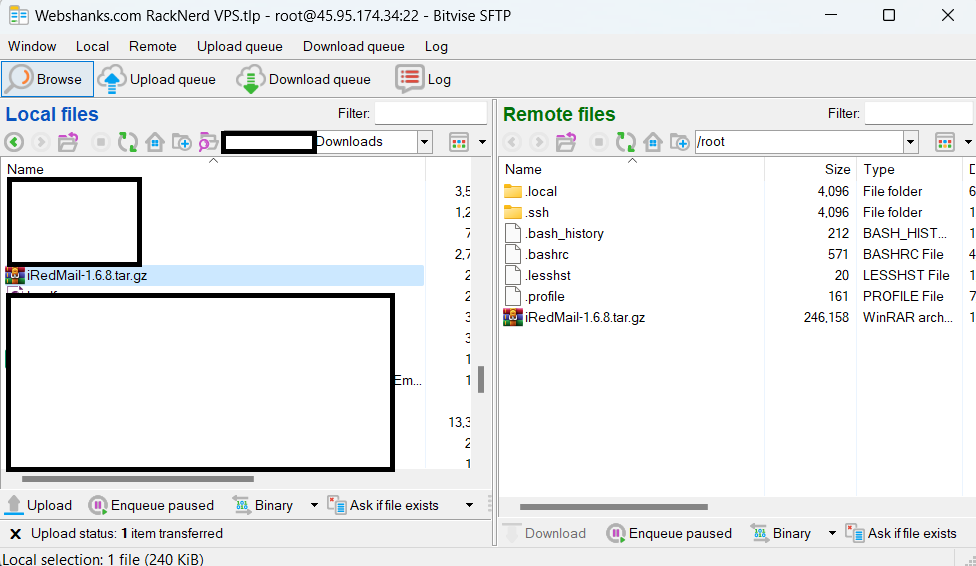
Using SFTP, upload it to root.
Let’s go back to Bitvise and click New SFTP window on the left menu.
Find your newly downloaded iRedMail and upload it.
Let’s go back to terminal.
We should be seeing the iRedMail tarball file by using dir command.
We can now uncompress the tarball.
tar zxf iRedMail-1.6.8.tar.gz
Be sure you have the exact version. I’m using v1.6.8.

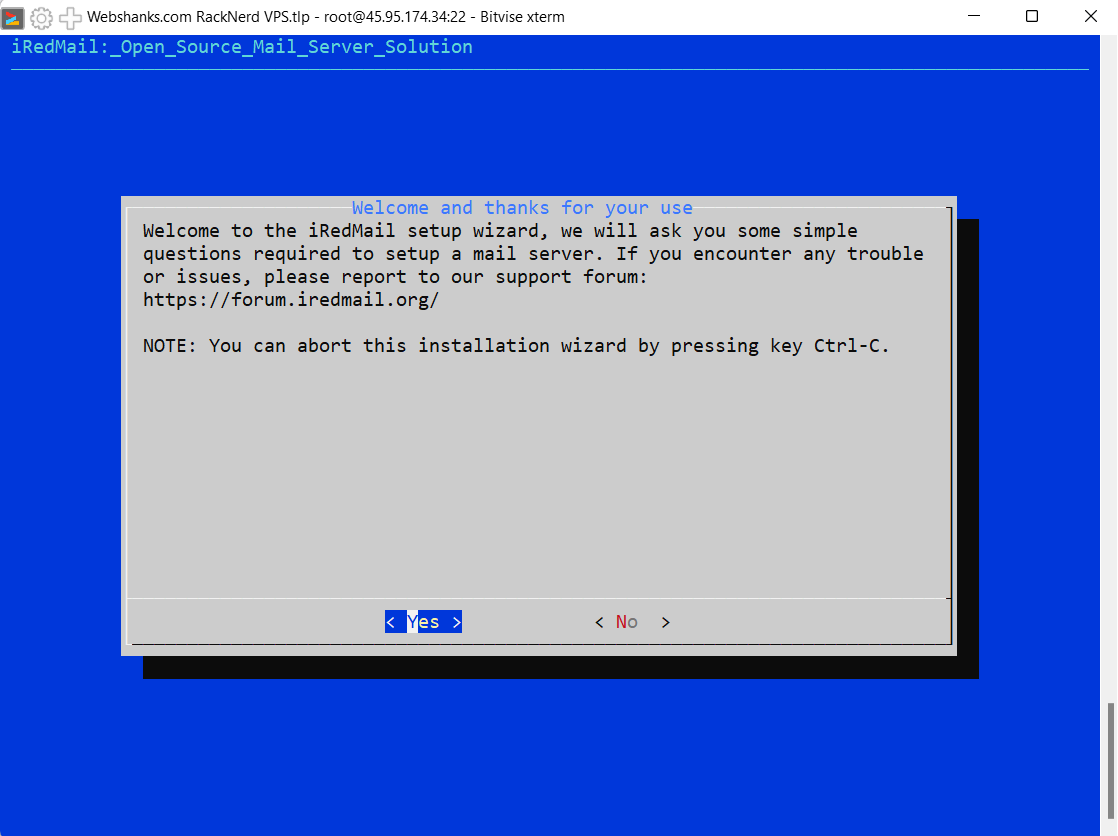
Now let’s start iRedMail installer.
cd iRedMail-1.6.8
bash iRedMail.sh

Follow the on screen installation wizard.
Default mail storage path. We’ll use /var/vmail/.

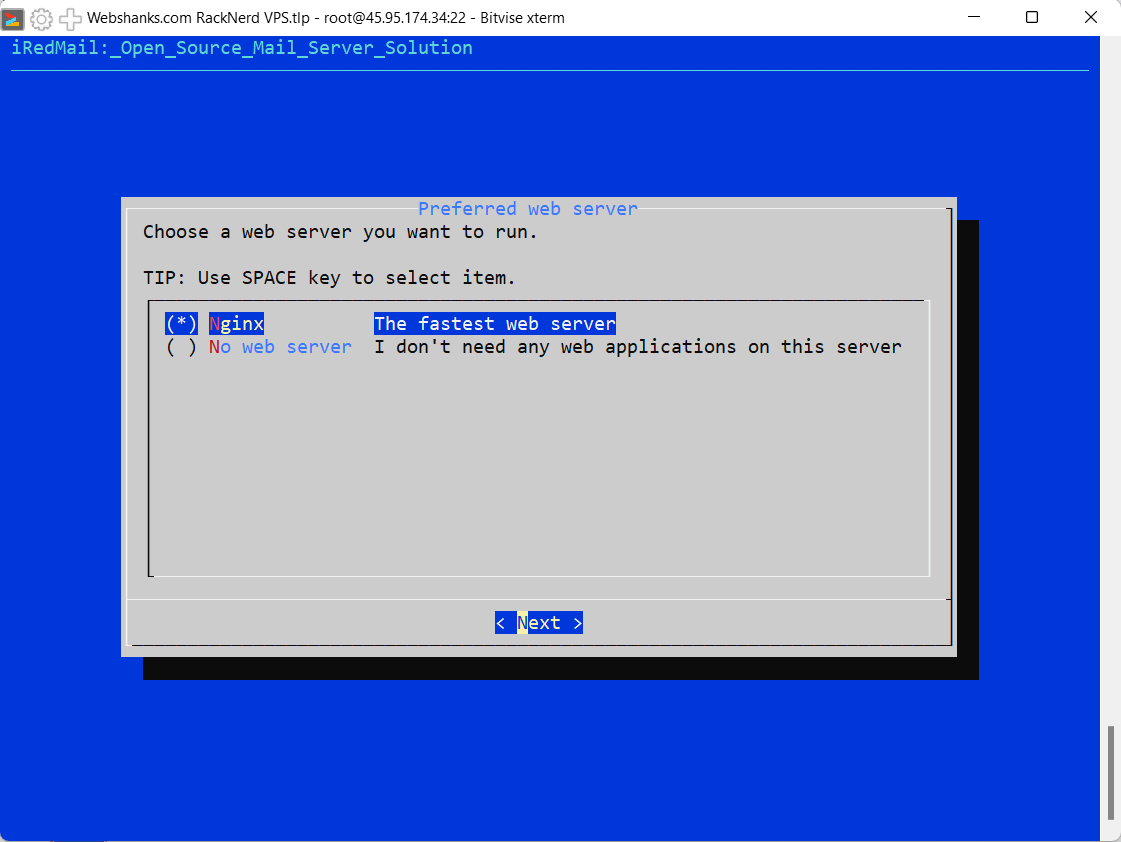
Preferred web server. We’ll use Nginx.
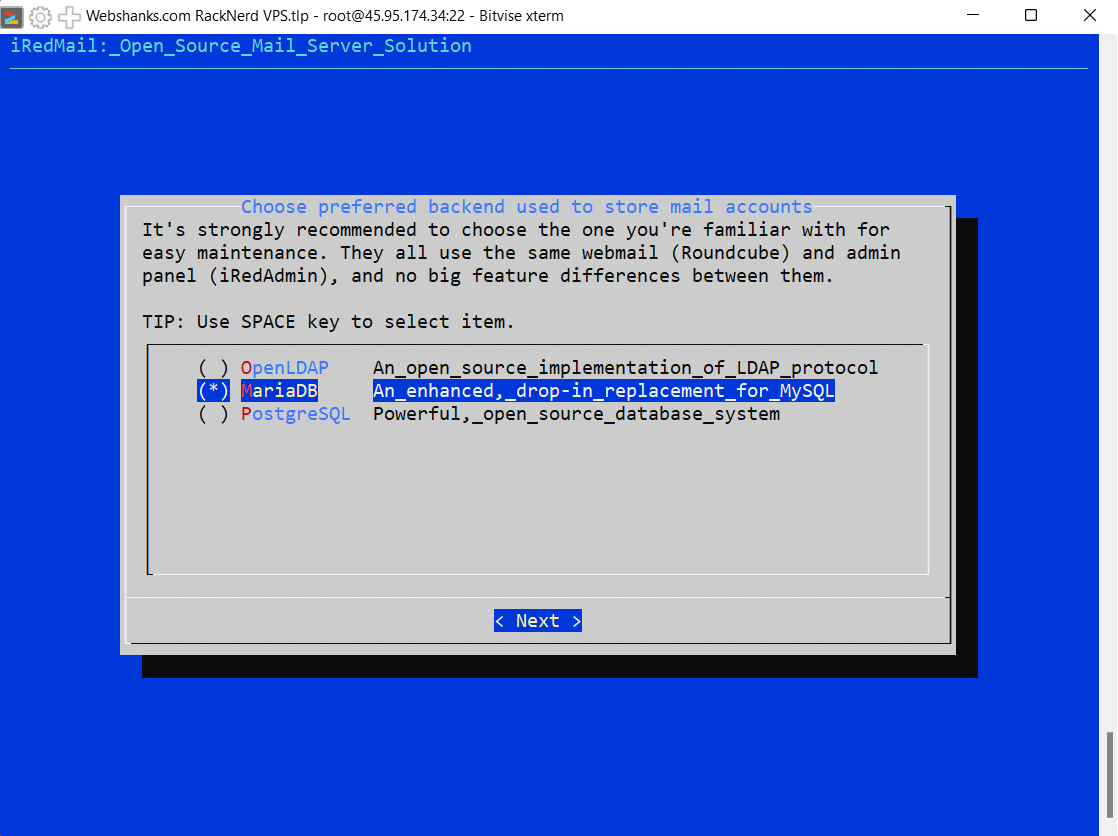
Choose preferred backend used to store mail accounts. We’ll be using MariaDB.
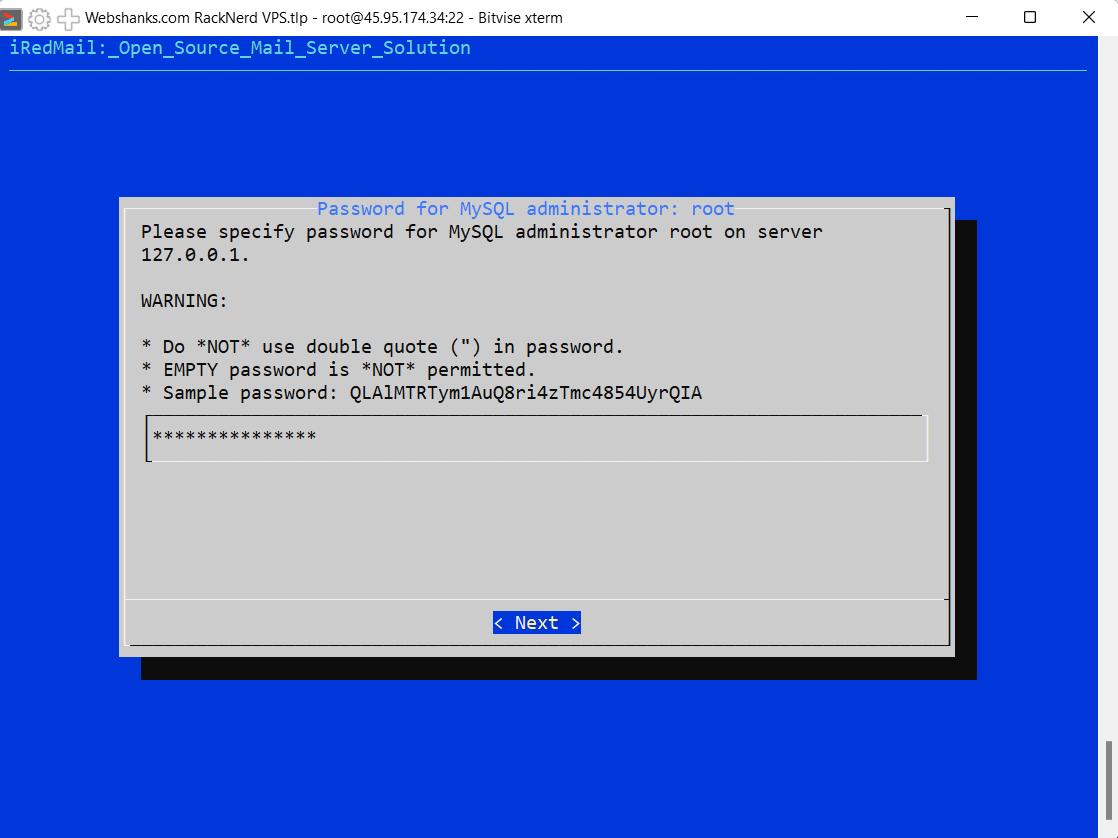
Password for MySQL administrator. We’ll set a strong password for our MySQL.
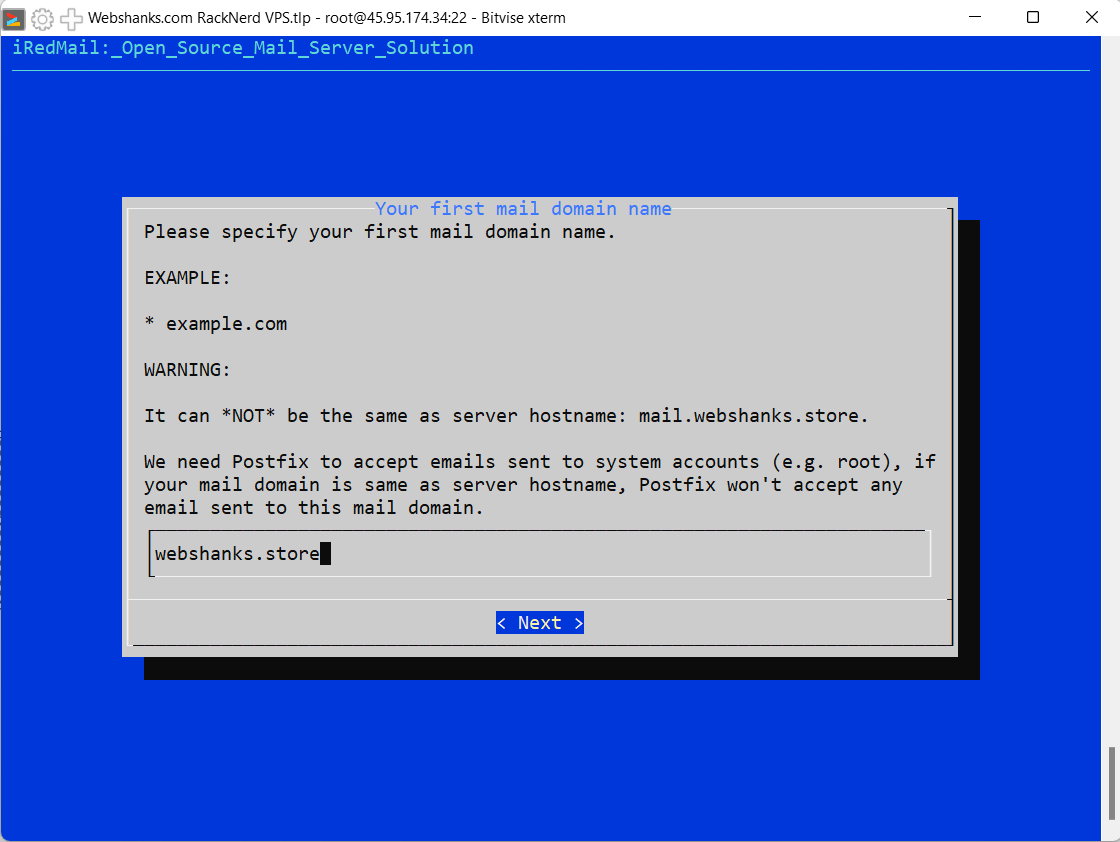
Your first mail domain name. We’ll use our domain name webshanks.store.
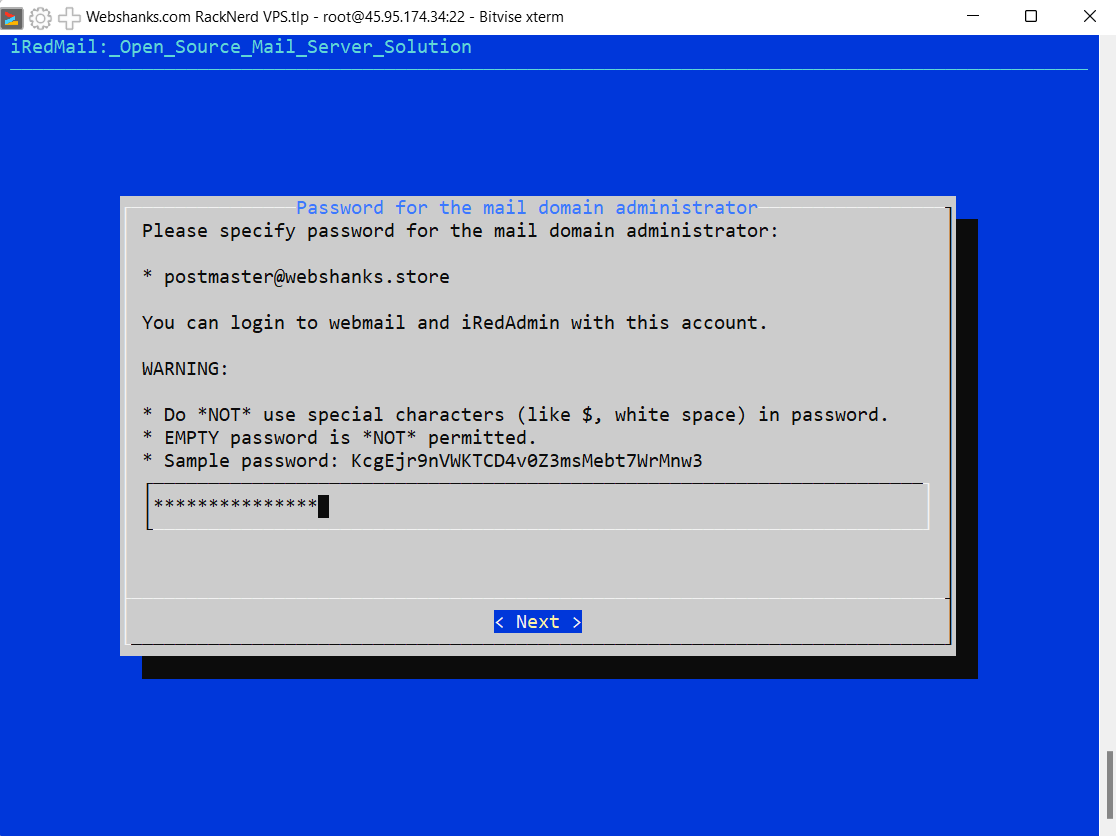
Set password of mail domain admin. We’ll set a strong password.
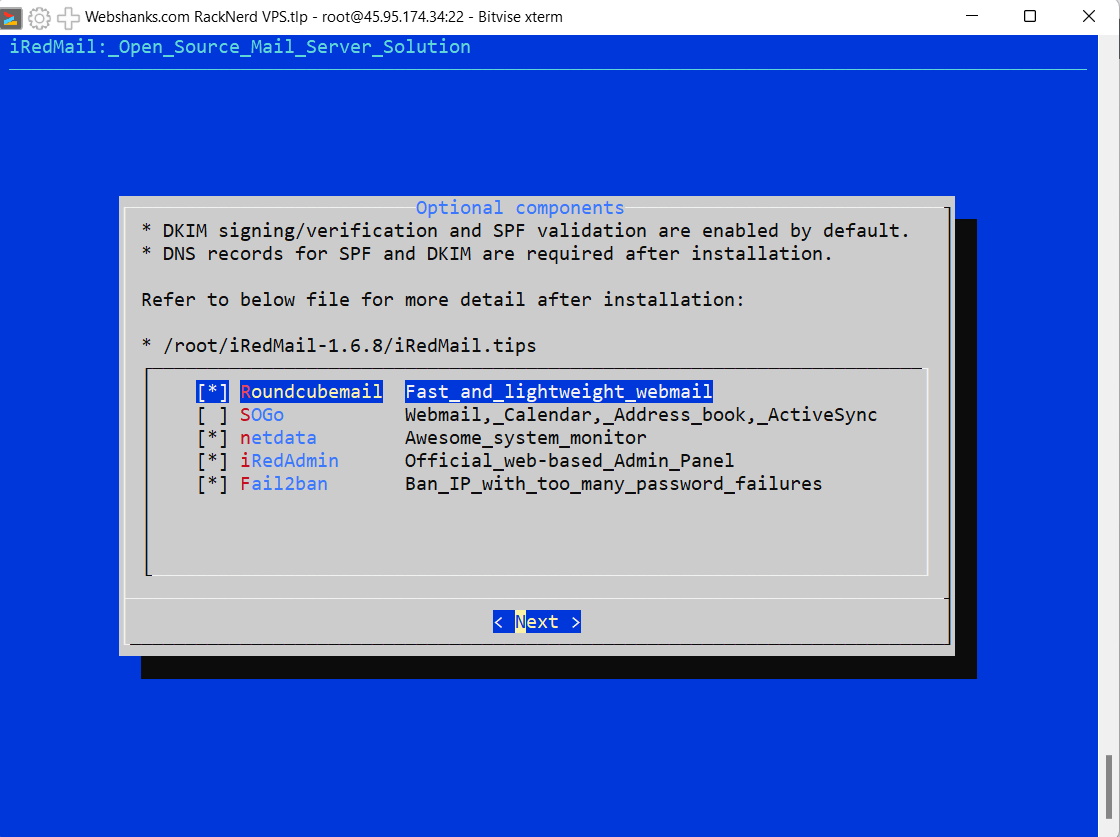
Choose optional components. We’ll use Roundcube as our webmail.
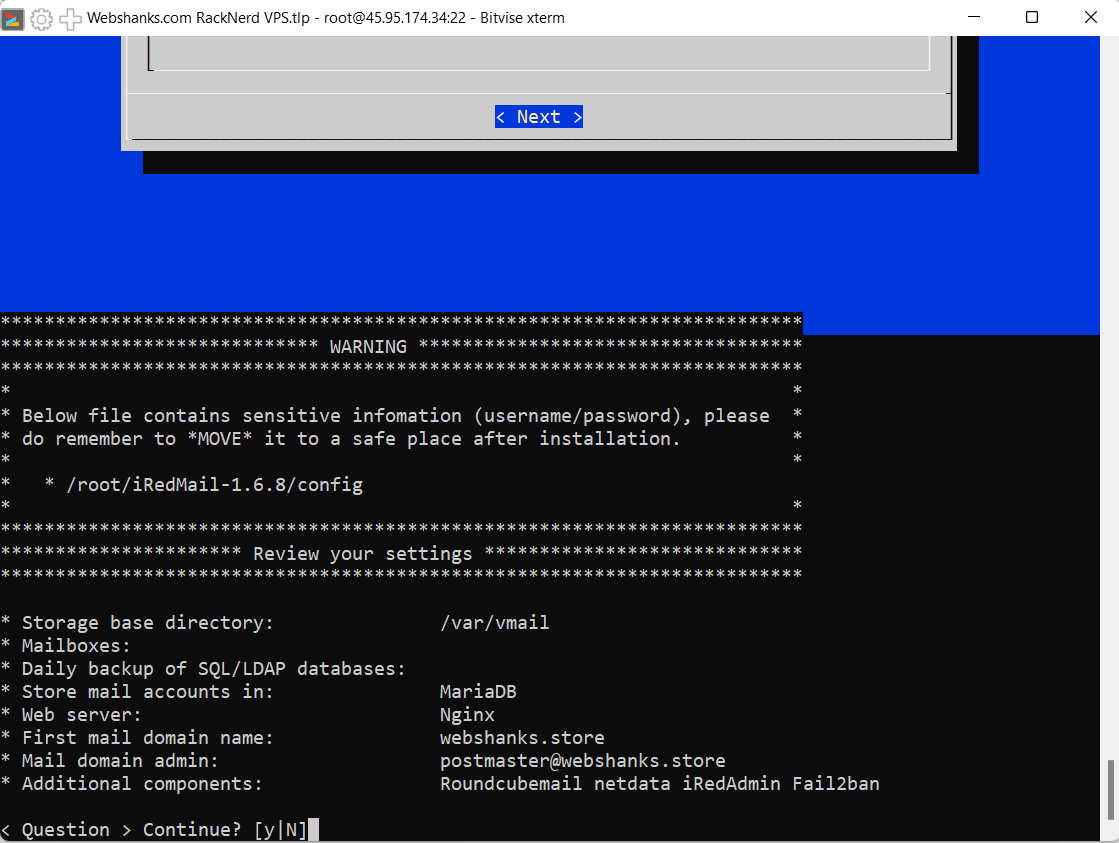
Review your settings.
* Storage base directory: /var/vmail
* Mailboxes:
* Daily backup of SQL/LDAP databases:
* Store mail accounts in: MariaDB
* Web server: Nginx
* First mail domain name: webshanks.store
* Mail domain admin: [email protected]
* Additional components: Roundcubemail netdata iRedAdmin Fail2ban
Choose Y to continue.
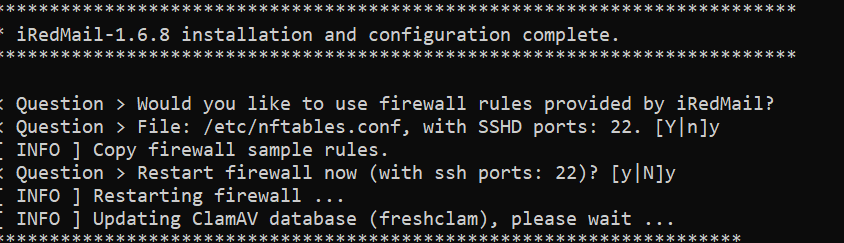
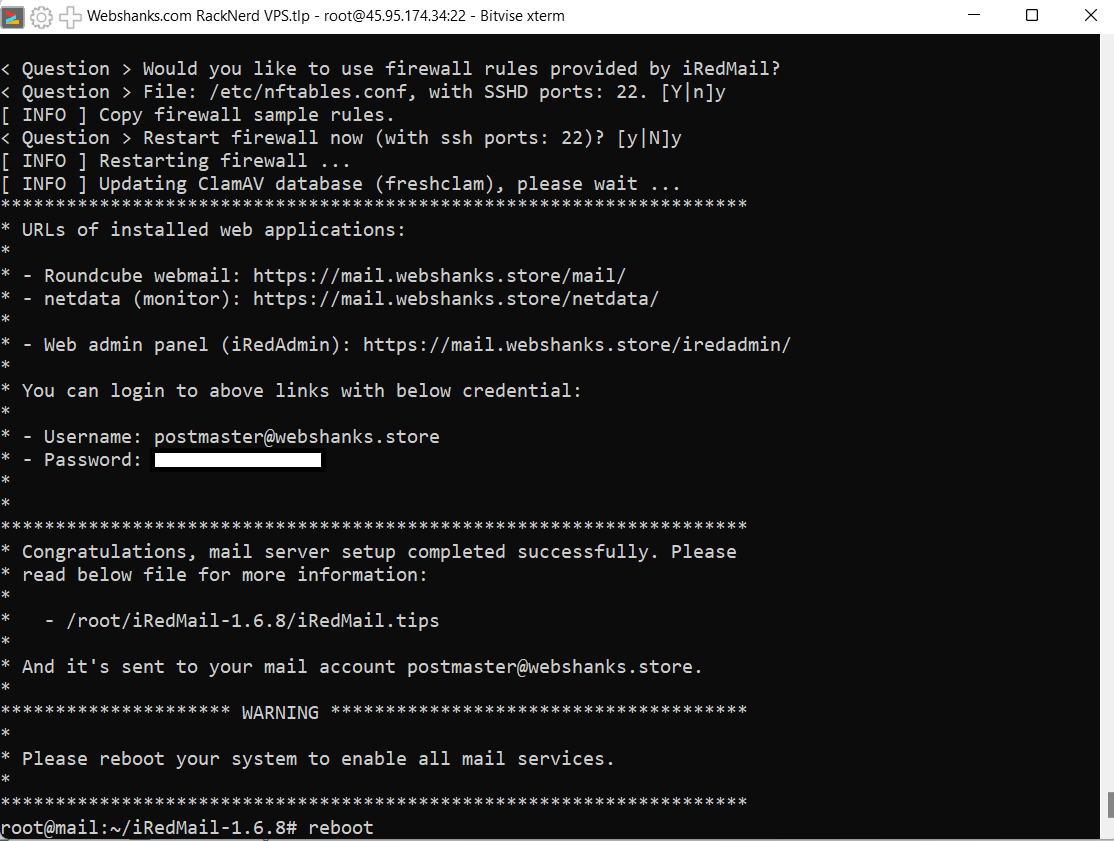
< Question > Would you like to use firewall rules provided by iRedMail?
< Question > File: /etc/nftables.conf, with SSHD ports: 22. [Y|n]y
[ INFO ] Copy firewall sample rules.
< Question > Restart firewall now (with ssh ports: 22)? [y|N]y
[ INFO ] Restarting firewall …
[ INFO ] Updating ClamAV database (freshclam), please wait …
Choose Y to proceed.
We will now reboot our server once iRedMail finish installing everything.
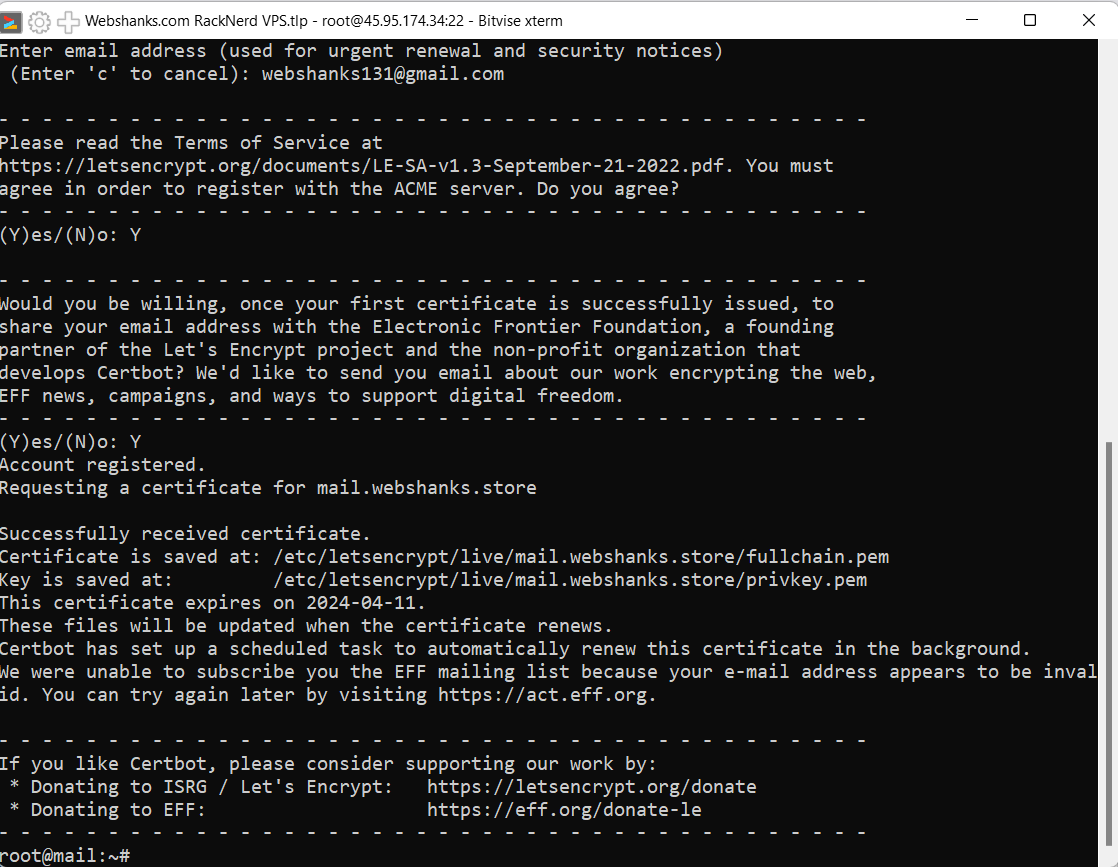
Step 8. Install Free Let’s Encrypt Certificate on iRedMail
Before accessing our admin panel or webmail, we’ll install a free Let’s Encrypt certificate.
First, install Certbot.
apt -y install certbot
Now let’s run Certbot. This command will guide you through the process of obtaining and installing a certificate.
Be sure to replace the mail.webshanks.store with your own hostname.
certbot certonly --webroot -w /var/www/html -d mail.webshanks.store
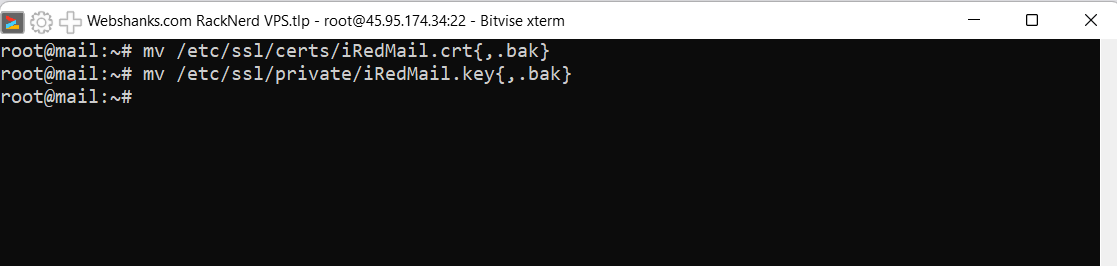
If you want to use the Let’s Encrypt certificate with iRedMail by creating symbolic links to the self-signed SSL certificate generated by the iRedMail installer, you can follow these steps:
Backup and rename iRedMail.crt to iRedMail.crt.bak.
mv /etc/ssl/certs/iRedMail.crt{,.bak}
Backup and Rename iRedMail.key to iRedMail.key.bak.
mv /etc/ssl/private/iRedMail.key{,.bak}
Create symbolic links to the Let’s Encrypt certificate and key in the directories where iRedMail expects them. Replace mail.webshanks.store with your actual domain.
ln -s /etc/letsencrypt/live/mail.webshanks.store/fullchain.pem /etc/ssl/certs/iRedMail.crt
ln -s /etc/letsencrypt/live/mail.webshanks.store/privkey.pem /etc/ssl/private/iRedMail.key
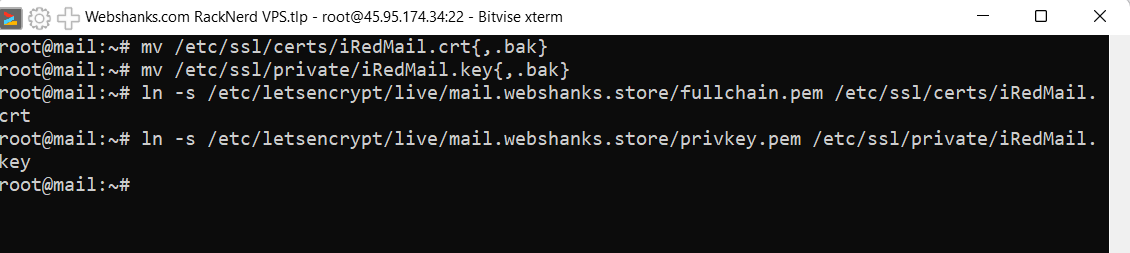
Finally, reboot the server.
reboot
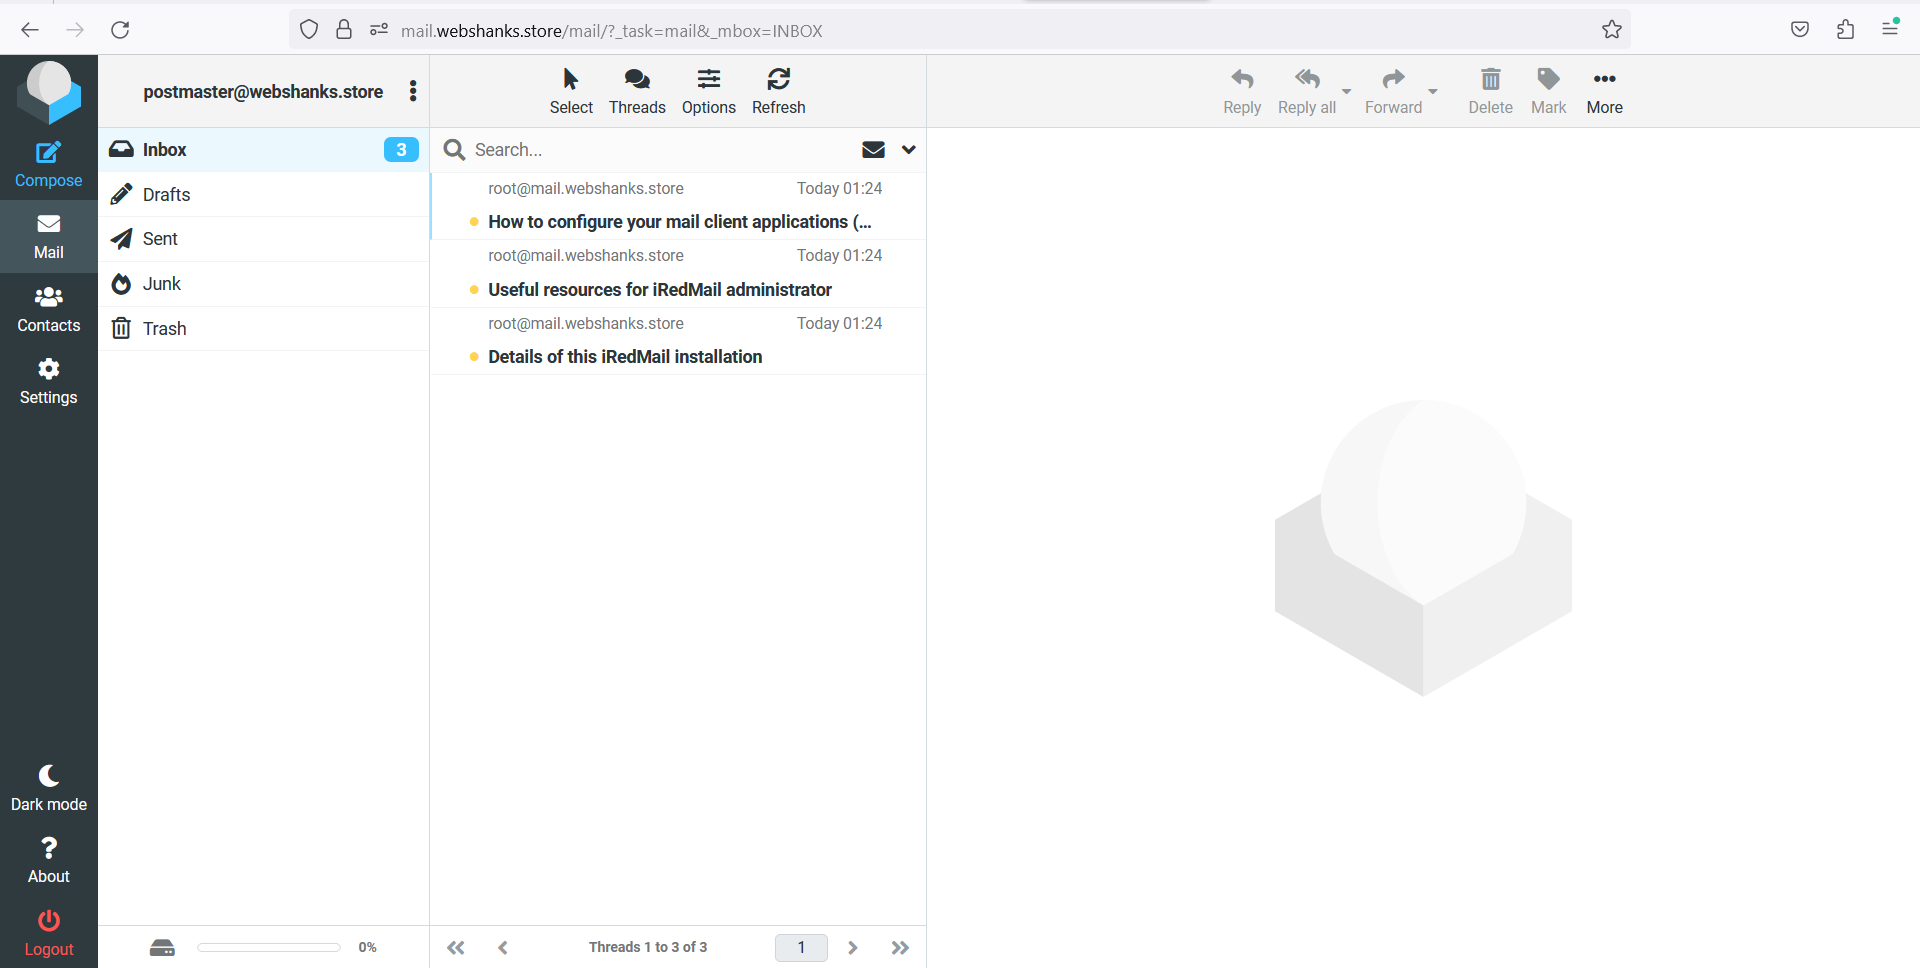
Step 9. Access iRedMail
Go to Roundcube webmail https://mail.webshanks.store/mail/.
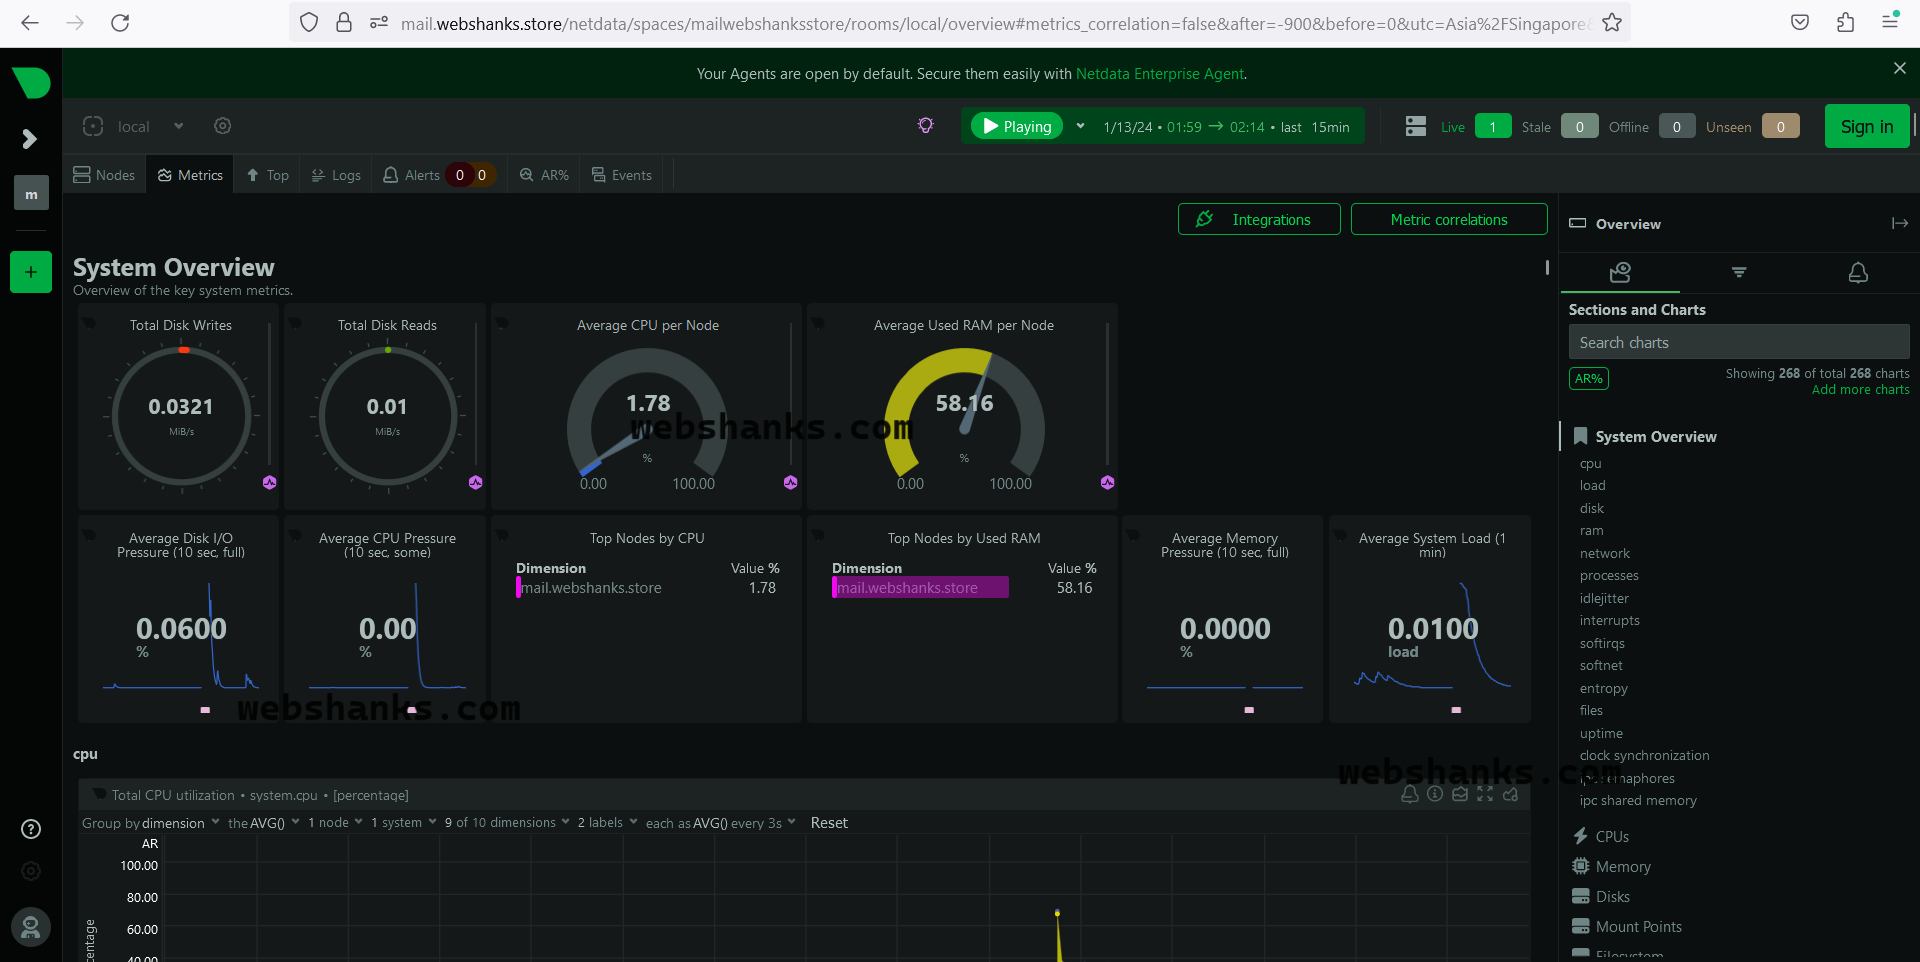
You can monitor your mail server on https://mail.webshanks.store/netdata/.
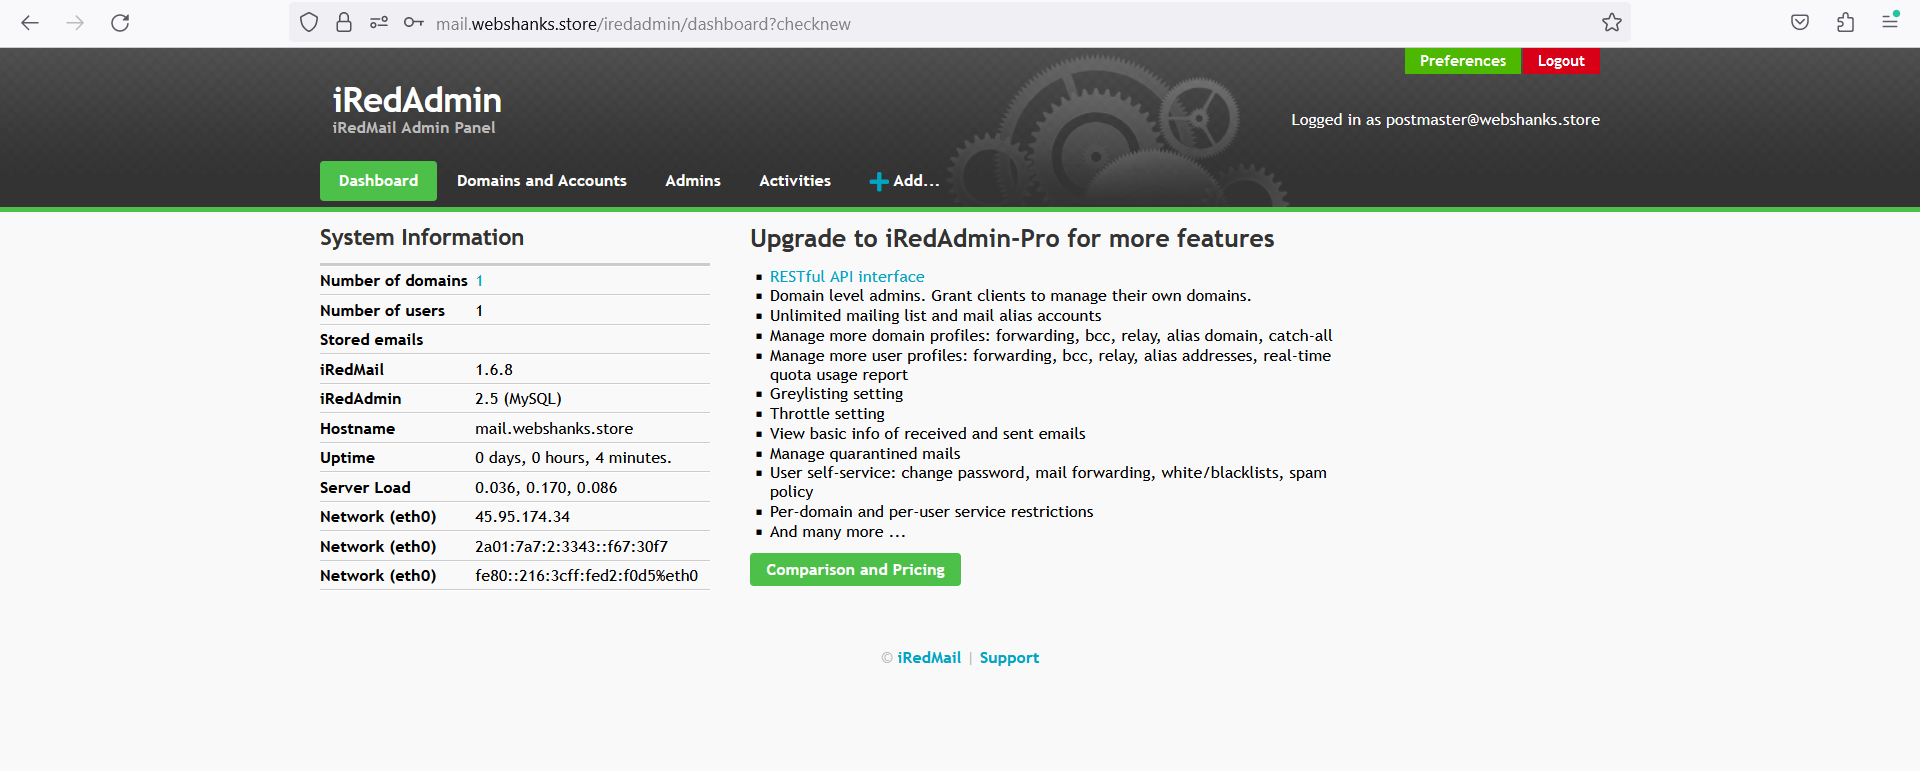
Web admin panel (iRedAdmin): https://mail.webshanks.store/iredadmin/.
Default login username for all access links is [email protected] and password is the one you created while installing iRedMail.
Step 10. Setup DNS Records
Let’s go back to Namecheap and set all of our DNS records.
We have added two DNS records so far – A record for our top level domain and our email hostname.
We will add MX, SPF, DKIM, DMARC and autodiscover.
MX Record
- Type: MX Record
- Host: @
- Value: mail.webshanks.store
- Priority: 10
- TTL: Automatic
SPF Record
Be sure to replace your IPv6 and IPv4 with our own IPs.
- Type: TXT Record
- Host: @
- Value: v=spf1 a mx ip6:2a01:7a7:2:3343::f67:30f7 ip4:45.95.174.34 -all
- TTL: Automatic
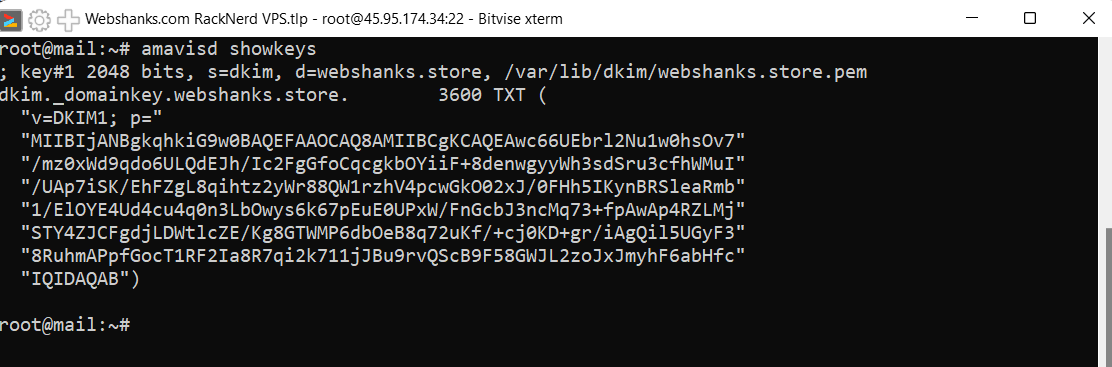
DKIM Record
Let’s go back to our Terminal console and run the following command:
amavisd showkeys
- Type: TXT Record
- Host: dkim._domainkey
- Value: v=DKIM1; p=MIIBIjANBgkqhkiG9w0BAQEFAAOCAQ8AMIIBCgKCAQEAwc66UEbrl2Nu1w0hsOv7/mz0xWd9qdo6ULQdEJh/Ic2FgGfoCqcgkbOYiiF+8denwgyyWh3sdSru3cfhWMuI/UAp7iSK/EhFZgL8qihtz2yWr88QW1rzhV4pcwGkO02xJ/0FHh5IKynBRSleaRmb1/ElOYE4Ud4cu4q0n3LbOwys6k67pEuE0UPxW/FnGcbJ3ncMq73+fpAwAp4RZLMjSTY4ZJCFgdjLDWtlcZE/Kg8GTWMP6dbOeB8q72uKf/+cj0KD+gr/iAgQil5UGyF38RuhmAPpfGocT1RF2Ia8R7qi2k711jJBu9rvQScB9F58GWJL2zoJxJmyhF6abHfcIQIDAQAB
- TTL: Automatic
Do not include the quotation marks. Connect all the values of ‘p’.
Test your configuration using the command:
amavisd testkeys
If passed, it should look like this:

DMARC Record
We will use the following records.
- Type: TXT Record
- Name: _dmarc
- Value: v=DMARC1; p=quarantine; adkim=r; aspf=r; pct=100
- TTL: Automatic
Autoconfig/Autodiscover Records
For autoconfig
- Type: CNAME Record
- Host: autoconfig.webshanks.store
- Value: mail.webshanks.store
- TTL: Automatic
For autodiscover
- Type: CNAME Record
- Host: autodiscover.webshanks.store
- Value: mail.webshanks.store
- TTL: Automatic
Now this is what your final DNS records look like:
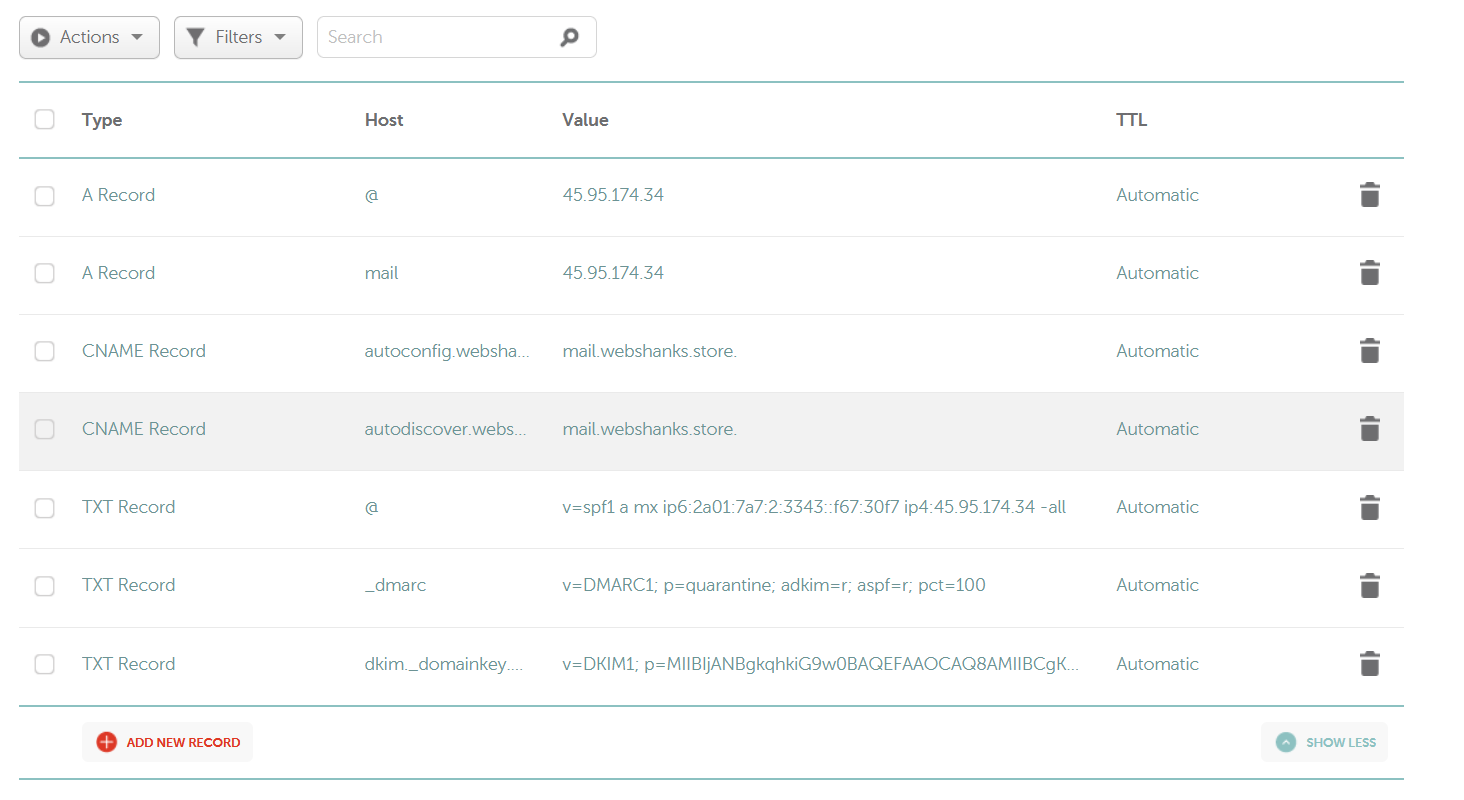
MX records in Namecheap has different column.

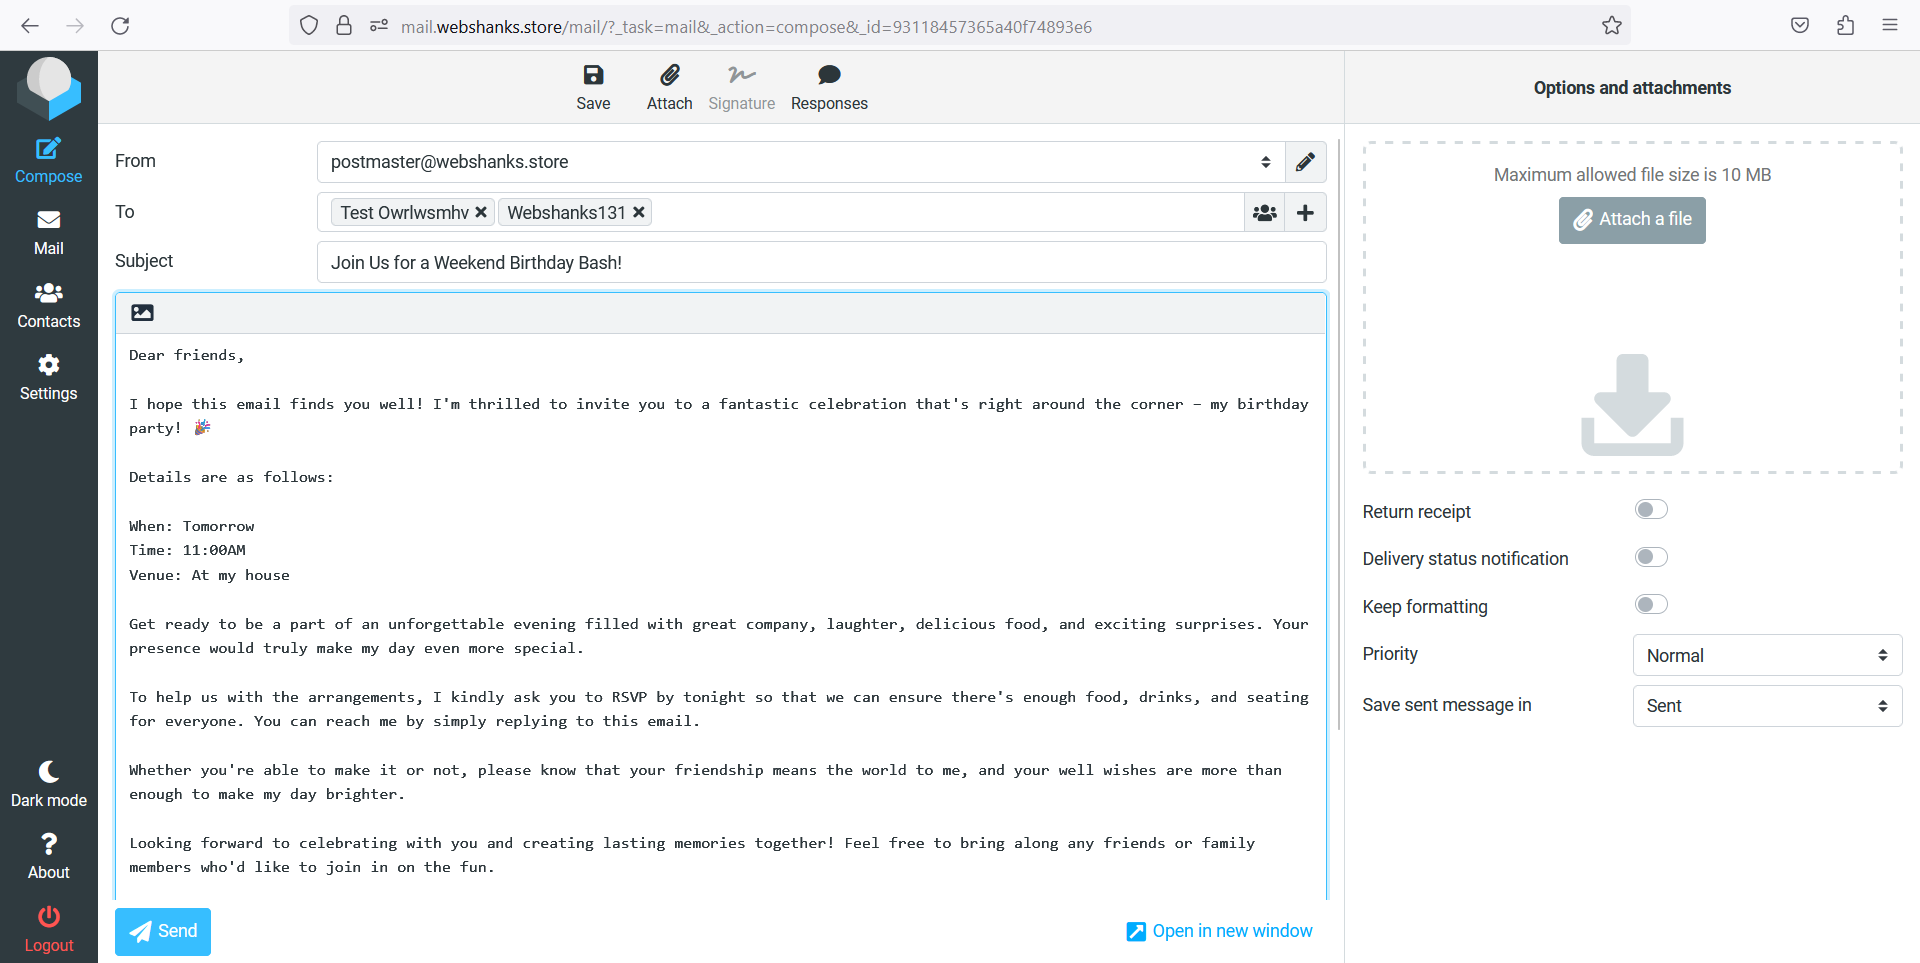
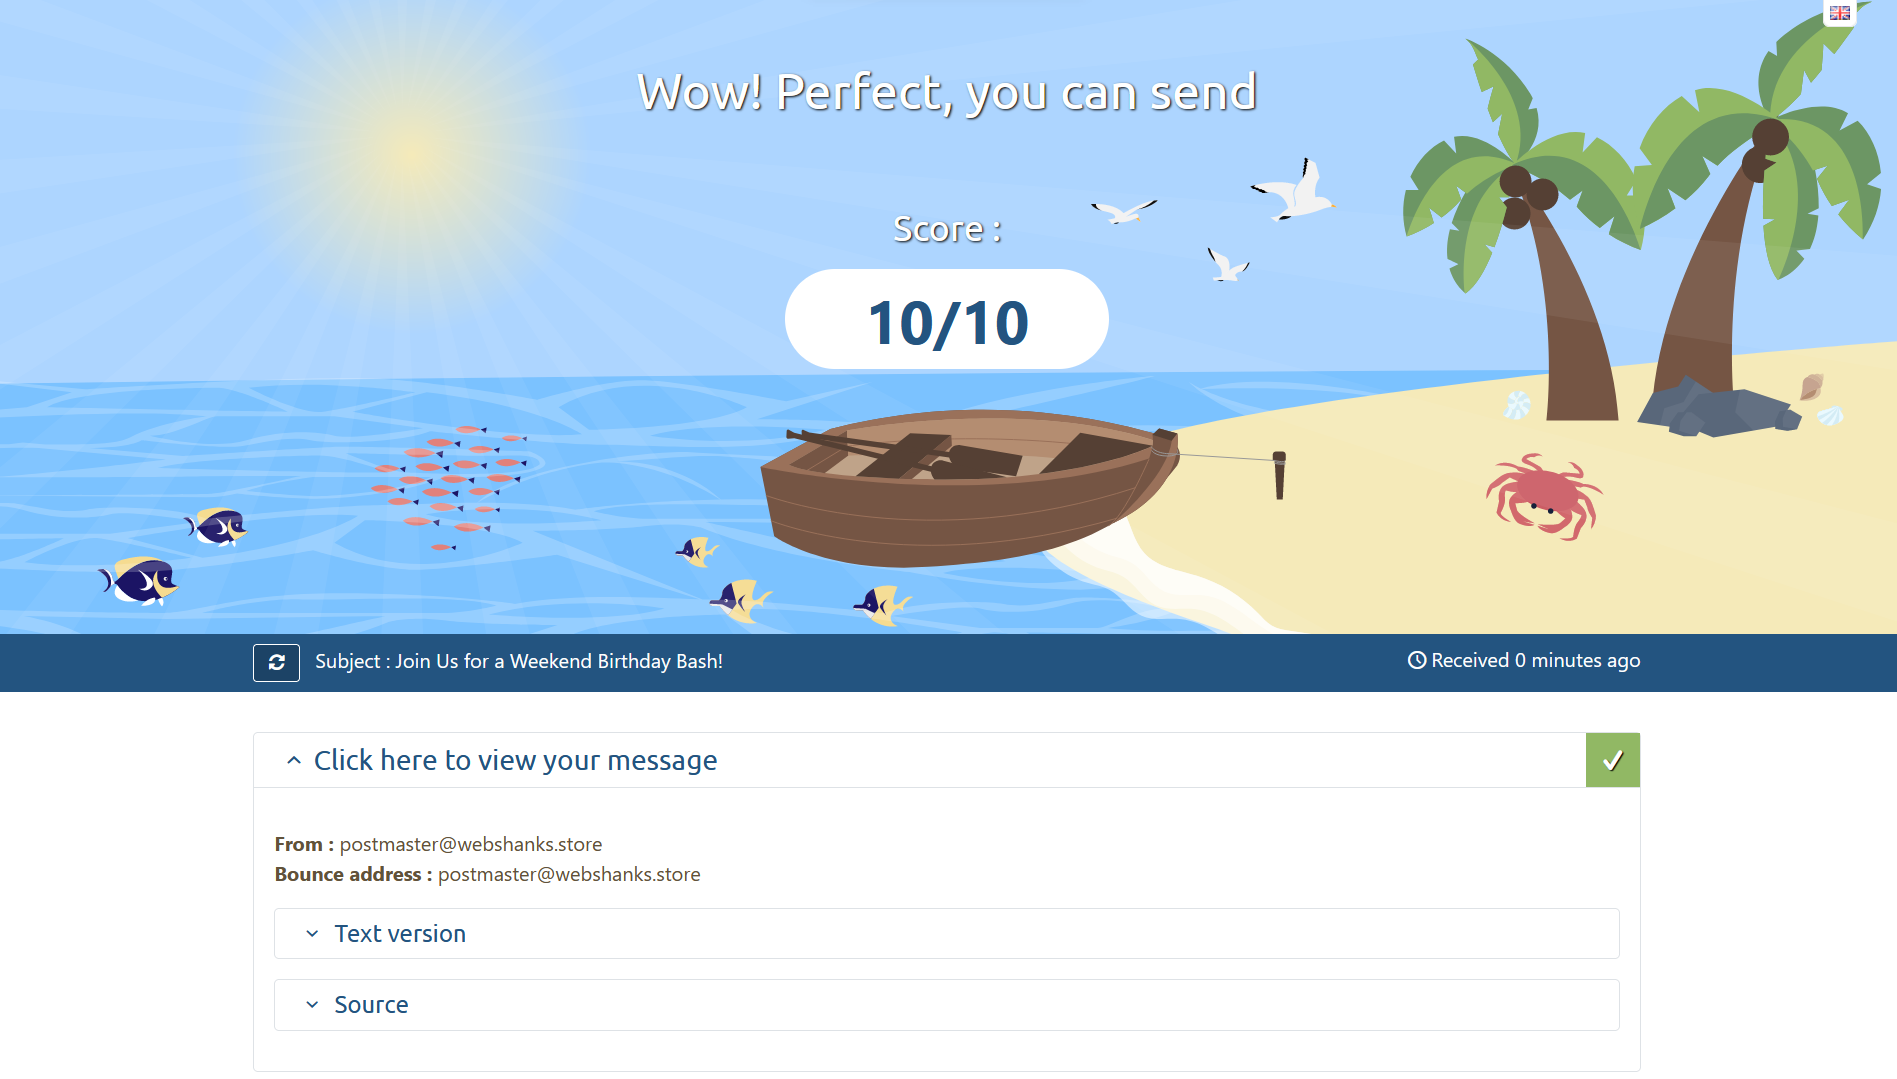
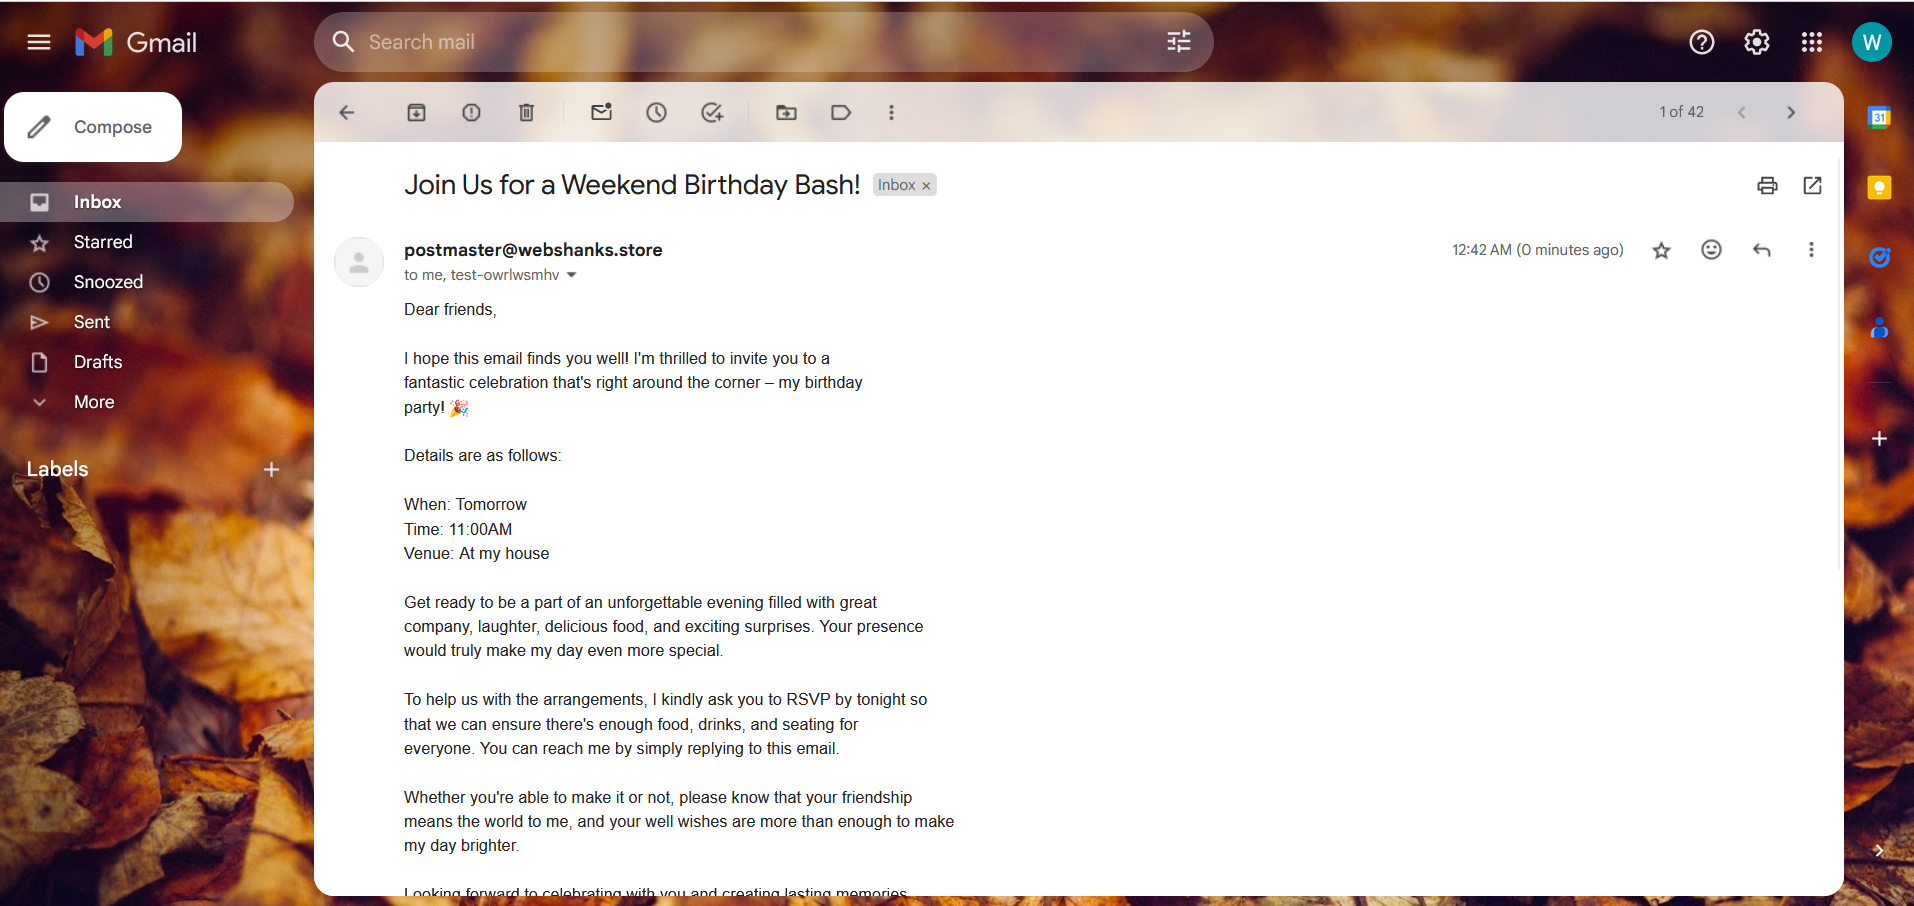
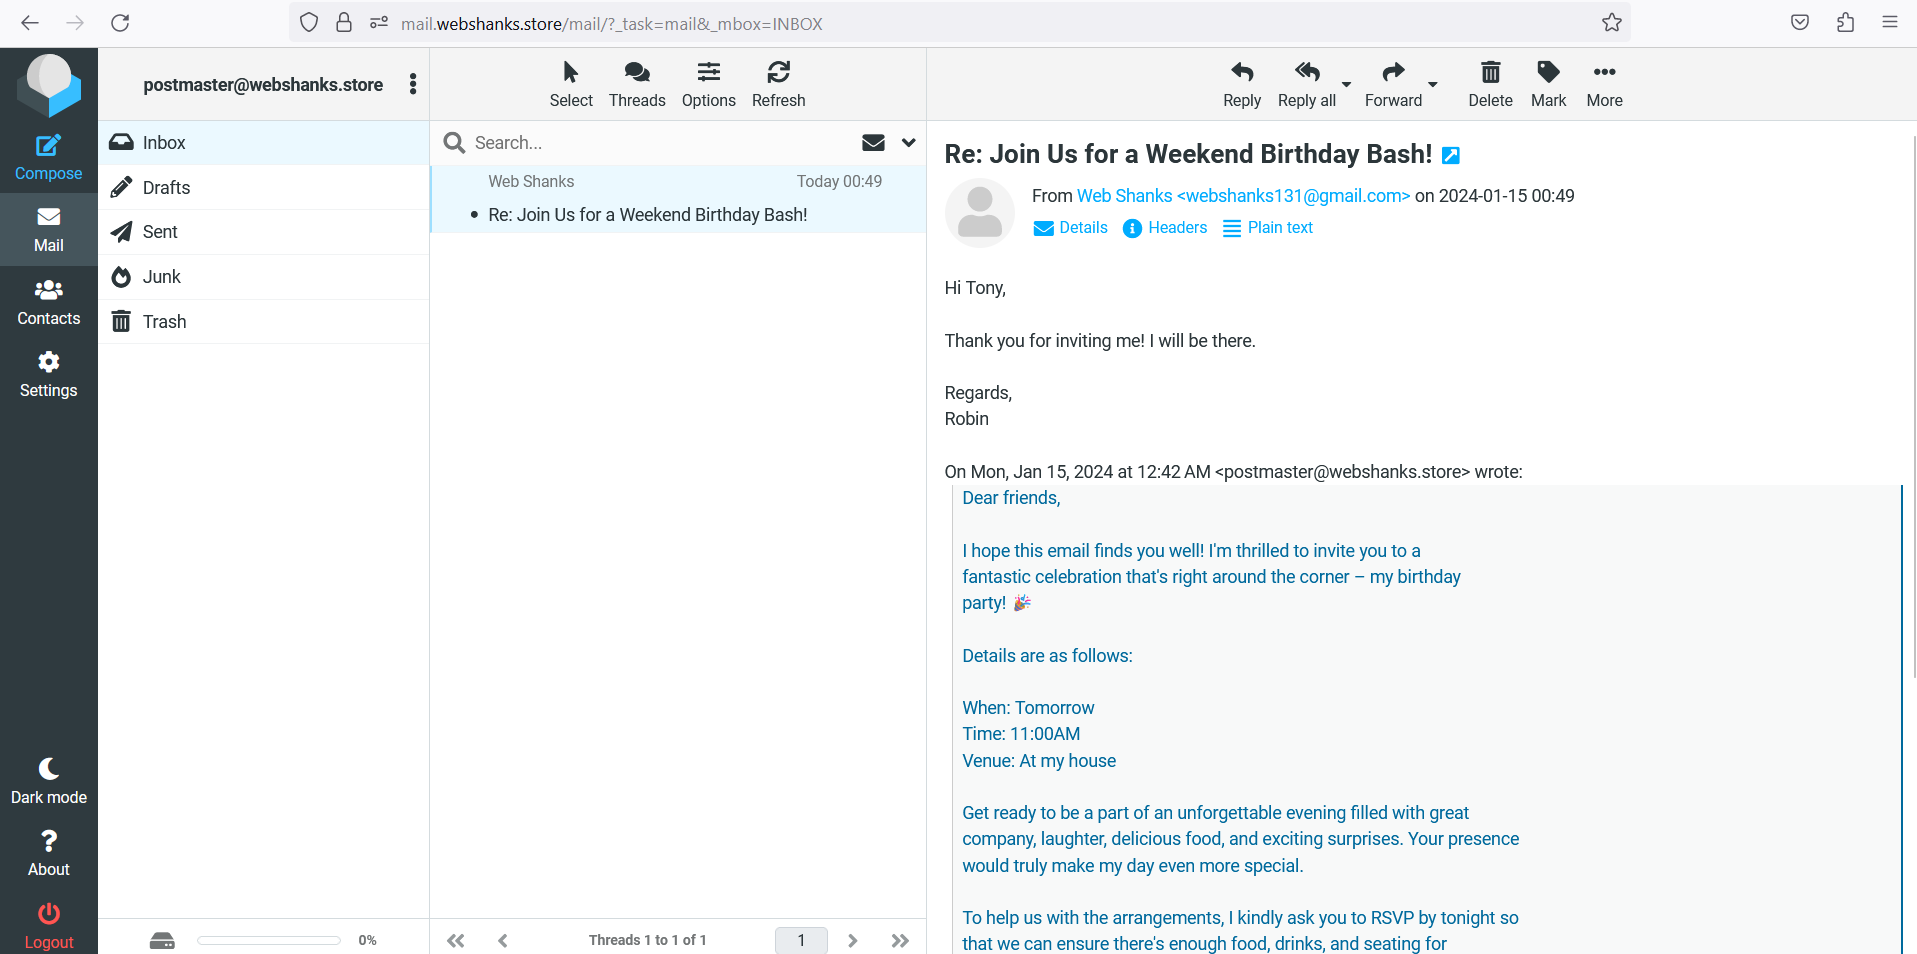
Step 11. Test Email on Mail-Tester and Gmail
Now let’s go to our webmail and test our email. Let’s send using an email template.
I sent a sample message using an email template.
On mail-tester, I got a 10/10 score! Perfect!
On Gmail, I received it directly on Gmail Inbox!
Now let’s reply that we will come to the birthday party!
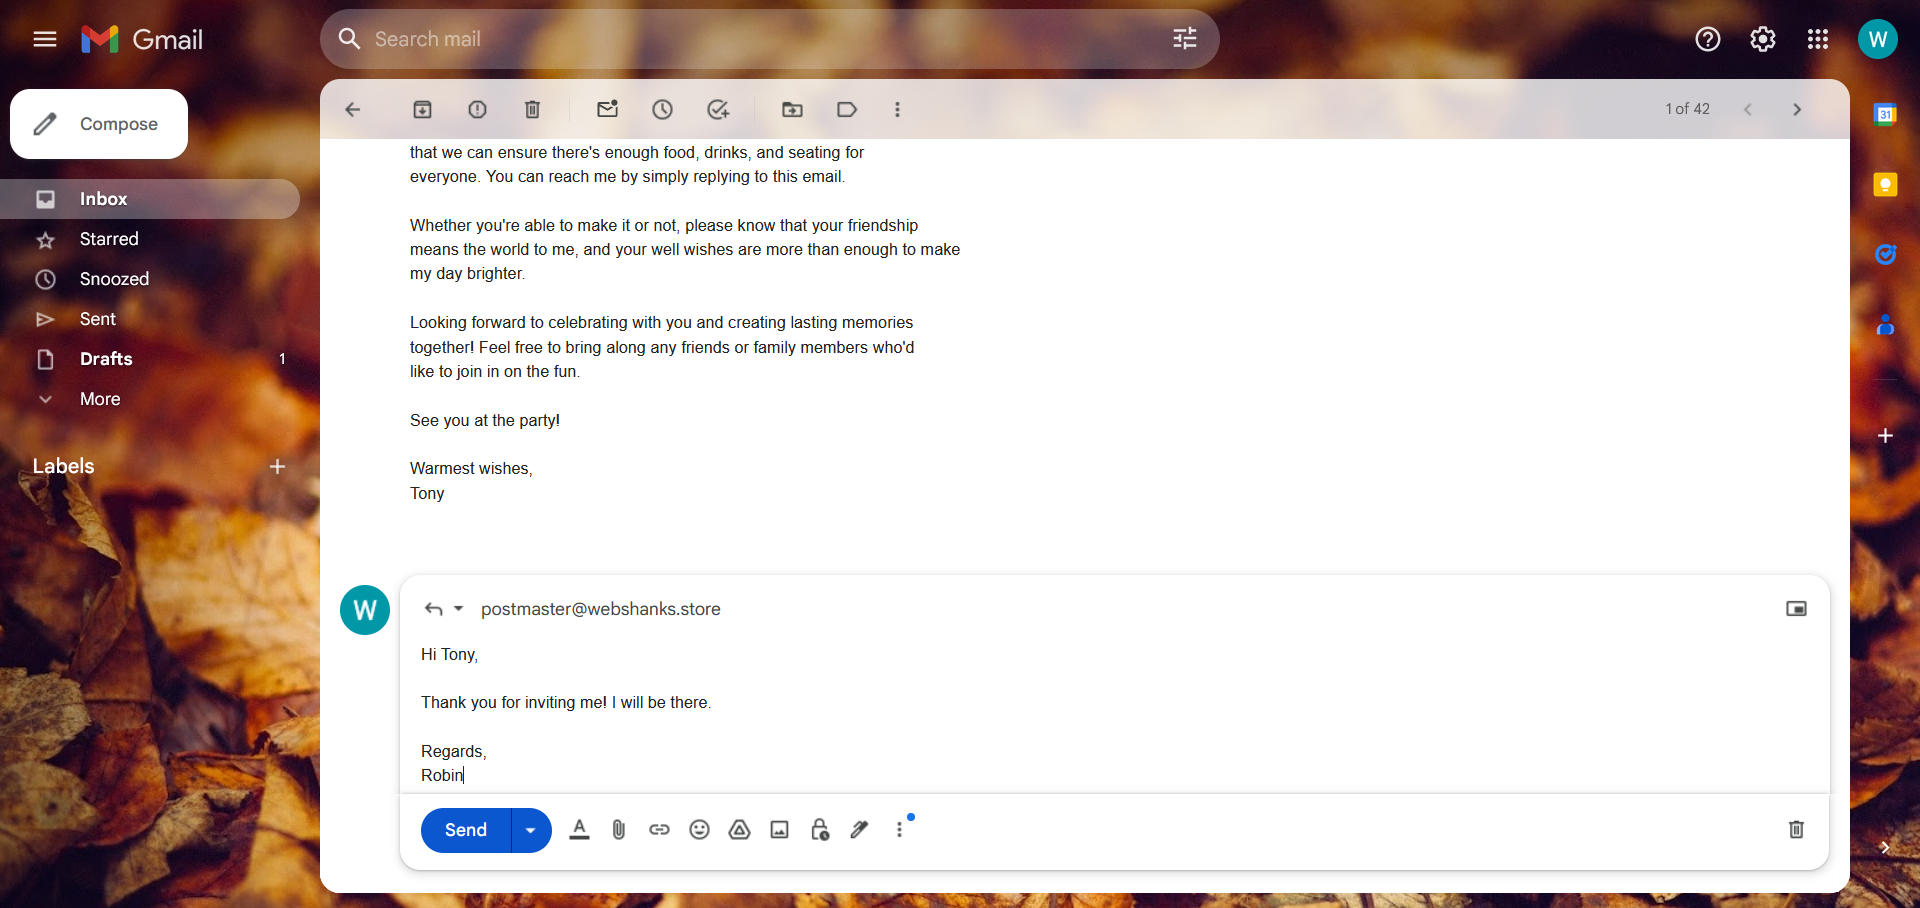
And I received it!
This tutorial is a success! We’ve managed to configure iRedMail to be a stand alone mail server.
Now you can proceed in warming up your IP for at least 3-4 weeks to build reputation.
Step 12. Warm Up IP
Why do we need to warm up IP and inboxes?
Warming up an IP address is essential in email marketing to gradually establish a positive reputation with email service providers, preventing potential spam flags and ensuring better email deliverability.
This process involves slowly increasing email volume to demonstrate responsible sending practices and build trust with email platforms.
Signup with Success.ai. Get a lifetime access instead of monthly.

Start for free and add your SMTP credentials. Be sure to change the domain with your own domain or hostname.
- Login username of SMTP/POP3/IMAP services: [email protected].
- Hostname: mail.webshanks.store
- POP3: port 110 over STARTTLS, or port 995 with SSL.
- IMAP: port 143 over STARTTLS, or port 993 with SSL.
- SMTP: port 587 over STARTTLS, or port 465 with SSL.
Frequently Asked Questions
Can I install iRedMail on a different Linux distribution?
iRedMail officially supports several distributions, including Debian. However, make sure to check the official documentation for the most up-to-date information on supported distributions.
How do I access the webmail interface?
Once iRedMail is installed, you can access the webmail interface by navigating to https://mail.your_domain/mail in your web browser.
How do I add additional email domains?
You can add new domains using the iRedMail admin panel. Navigate to Add and click Domain.
Conclusion
Congratulations! You’ve successfully installed and configured iRedMail on your RackNerd VPS running Debian 12. You now have a robust mail server ready to handle your email communications.
Always refer to the official iRedMail documentation for any updates or additional configuration options. If you encounter issues, check the documentation or community forums for solutions or comment them below!
Hello,
It’s working thank you !
This tutorial works 100% not like the others here where there’s always something that doesn’t want to work, it wasn’t the softs I was probably supposed to use !
Once you’ve added more domains and emails to Redimail, all you need to do is add MX, SPF, DKIM, DMARC and autodiscover to the DNS for each domain you’ve added ?
Merci 😉
Yes but use the mail server of the original domain and not the new domains.
Yes for sure or it will never found the mail server !
10/10 me too !
Good to hear!