
 MailEnable is a free (standard edition) and robust email server solution for Windows platforms, offering a comprehensive suite of mail services.
It supports various protocols such as SMTP, POP3, IMAP, and webmail, making it an ideal choice for small to big businesses.
This article will guide you through the process of installing MailEnable on a Windows Server 2022 system, ensuring that you have a functional mail server to handle your organization’s email needs or even your personal.
This is the first project I have made for Windows Server. So, without further adieu let’s start!
Prerequisites
Before you begin the installation of MailEnable, ensure that your system meets the following requirements:
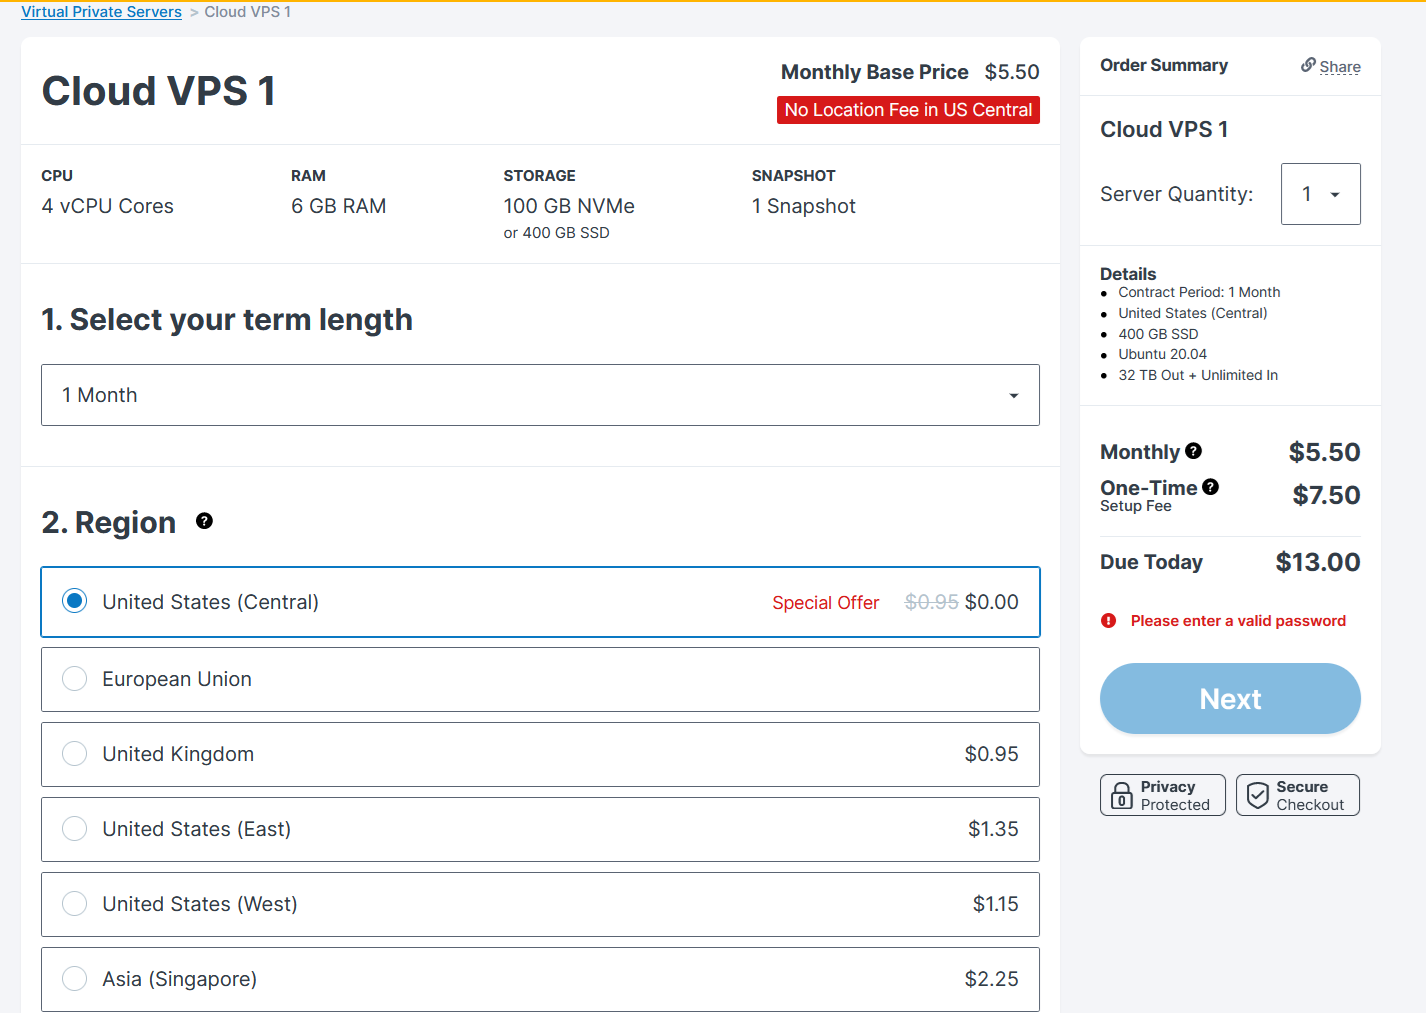
- Open Port 25 VPS: Get a Contabo VPS running Windows Server Datacenter 2022 because they don’t block port 25.
- Windows Server 2022: A fresh or existing installation of Windows Server 2022.
- System Requirements: Ensure your server meets the minimum requirements for running MailEnable. Have at least 1vCore, 4GB RAM, and 10GB Disk space. Contabo meets these requirements.
- Domain: I can vouch for Namecheap for affordability and security.
How to Create a Free Mail Server on Windows Server 2022 With MailEnable
Step 1: Get a Windows VPS on Contabo
I’ve laid out the steps here on how to setup a Windows VPS on Contabo. Be sure to follow it.
You should be able to connect to your Windows VPS by now.
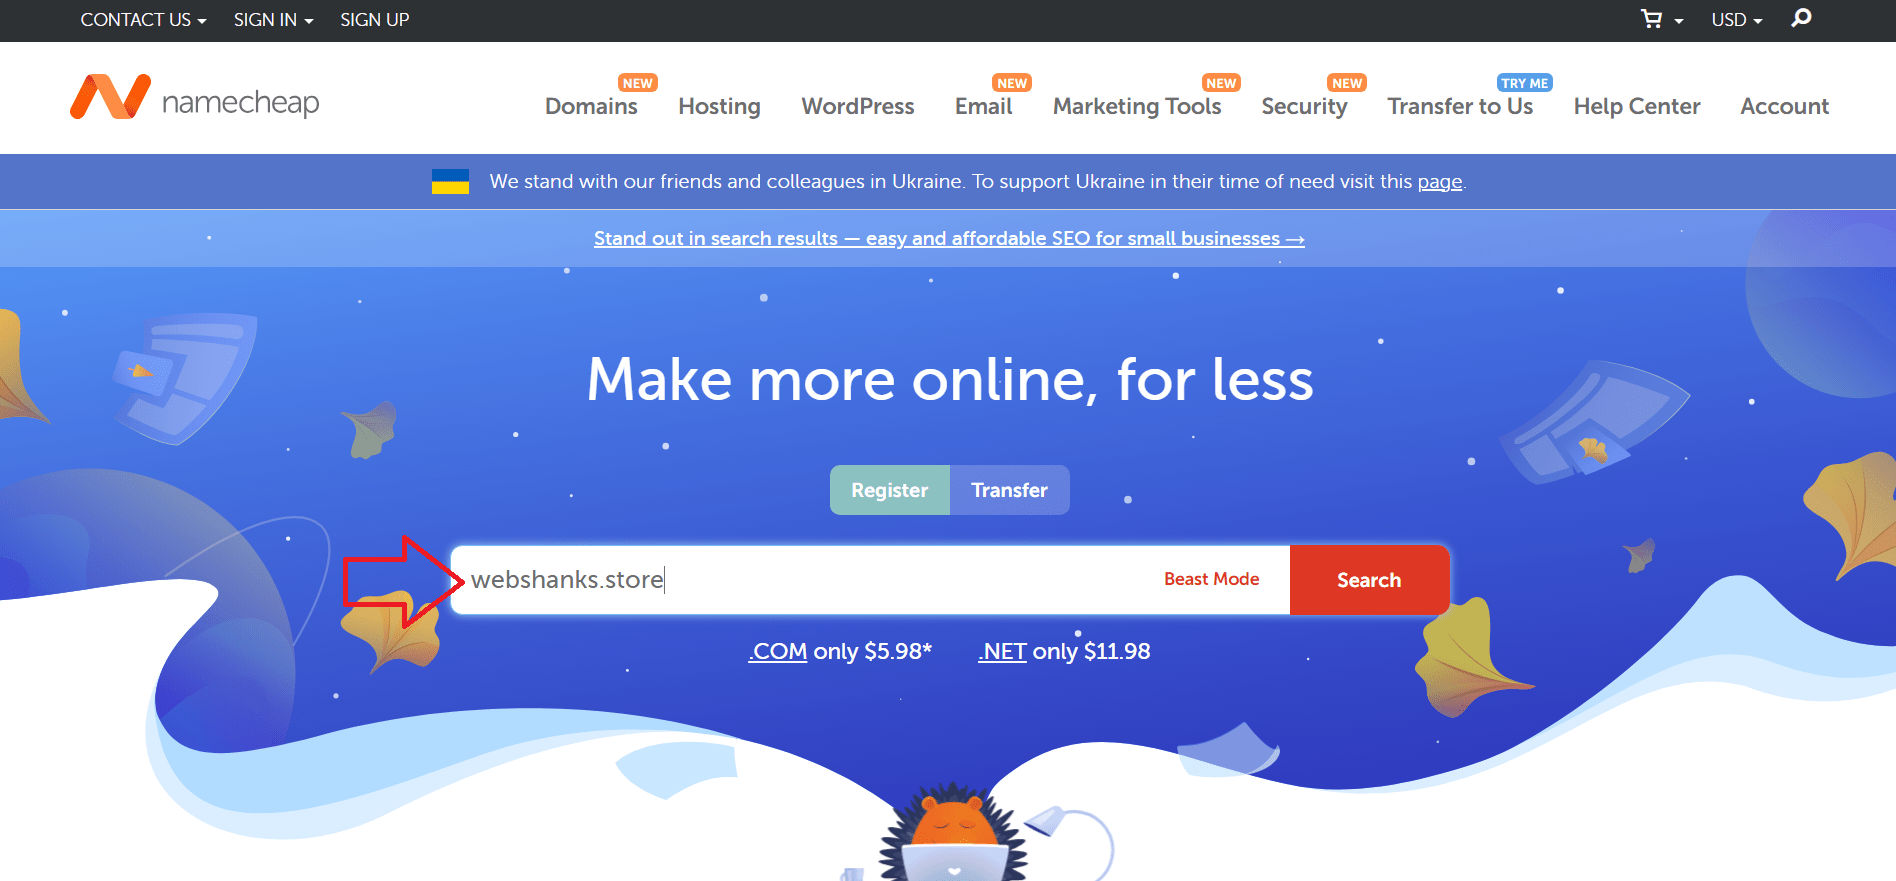
Step 2. Get a Domain
Go to Namecheap and buy a domain. Avoid top-level domains like .work .date .top .fun .life .review .xyz .bid .stream .site .space .gdn .click .pro.
Instead get .com .net .io .co.uk .org top-level domains.
Step 3: Download MailEnable
- Visit the MailEnable website.
- Navigate to the ‘Download‘ section.
- Choose the appropriate version (Standard, Professional, or Enterprise) and download the installer. The Standard Edition is free.
Step 4: Set Hostname
By now you are already connected to your Windows VPS.
If you are plainly using your Windows VPS as a mail server, you will need to set a hostname. To do that, click the folder on the taskbar and choose This PC. Then right-click on the empty space and choose Properties.
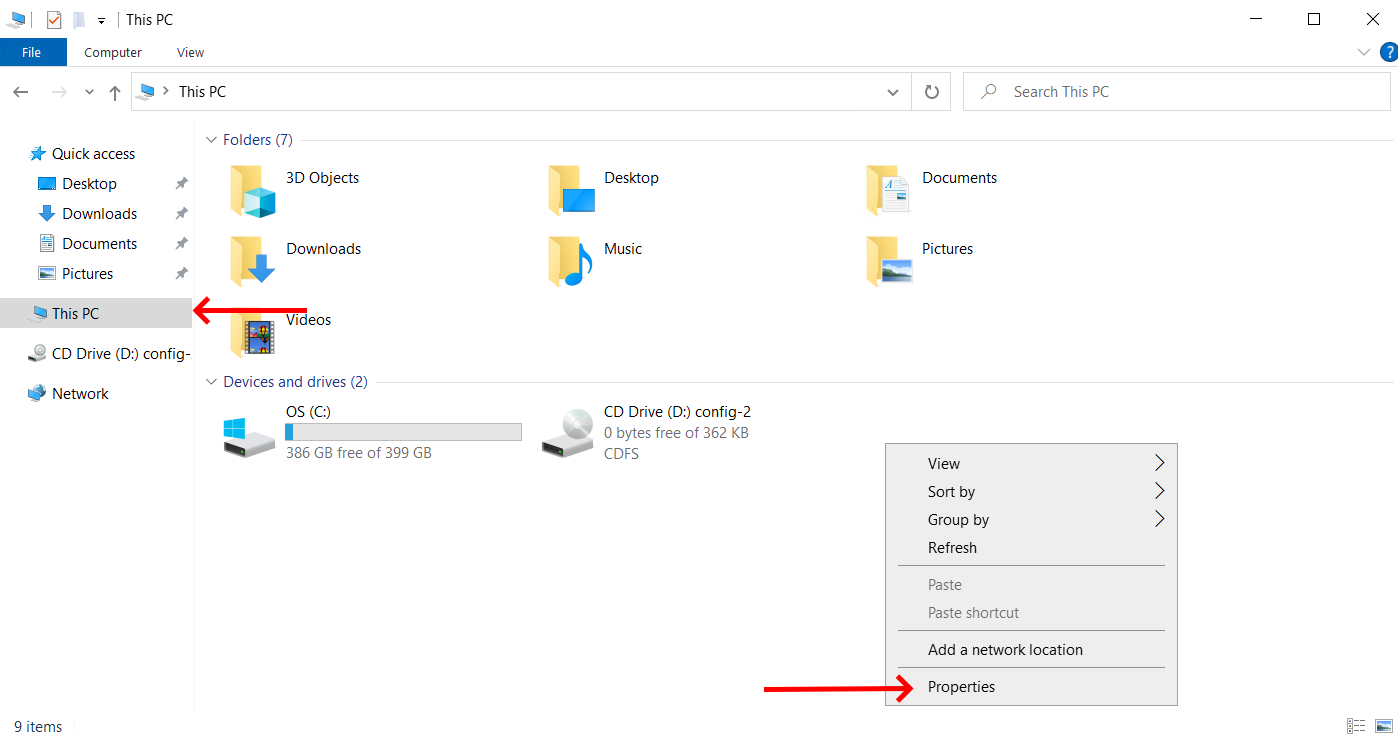
Click Rename this PC and name your PC to mail.

Finally, restart your Windows server.
Step 5: Install Microsoft IIS and Microsoft .NET Framework 3.5 or later
We need to install MailEnable prerequisite services first to enable it to work properly.
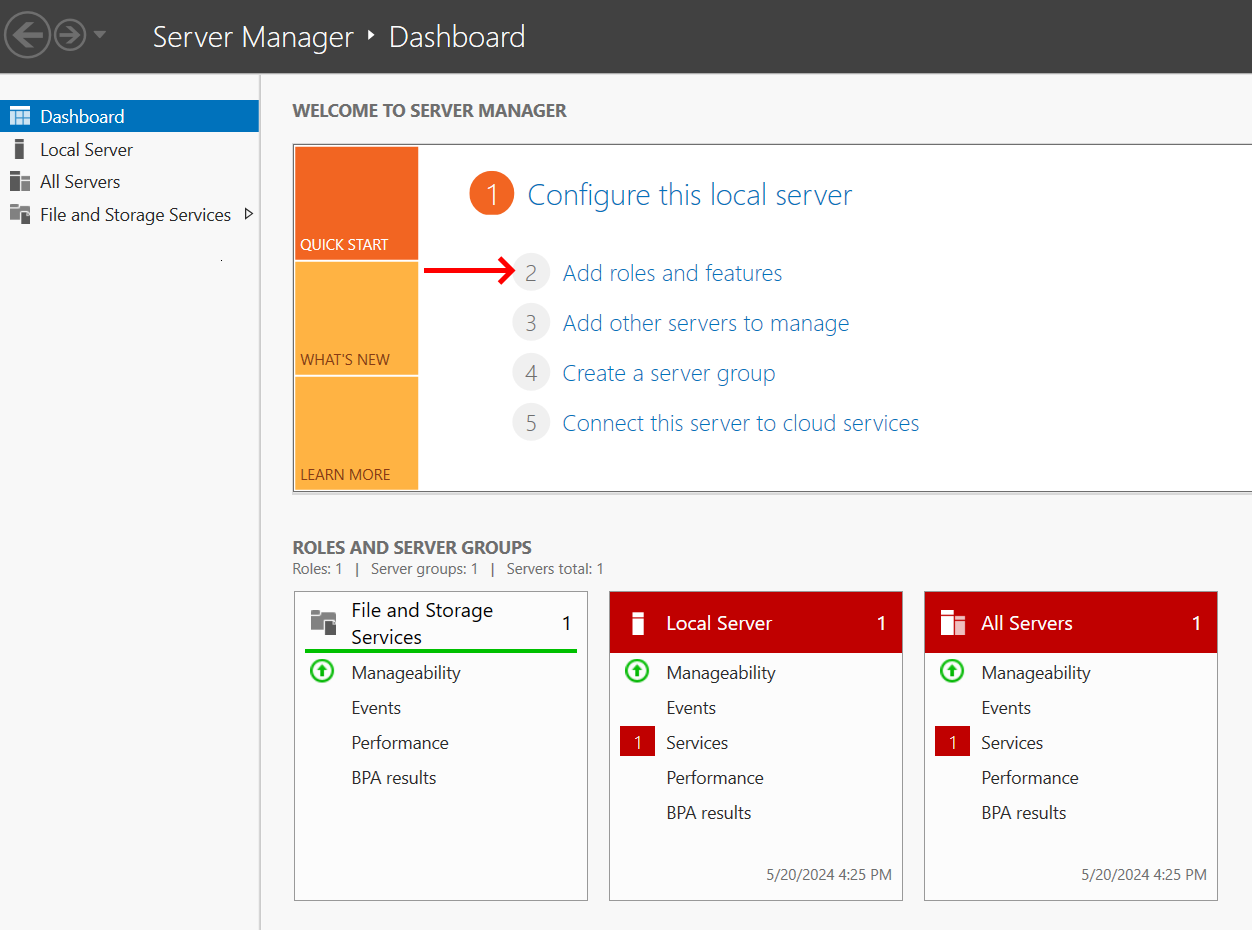
Click on the Start menu > select Server Manager.
In the Server Manager dashboard, click on Add roles and features. This will launch the Add Roles and Features Wizard.
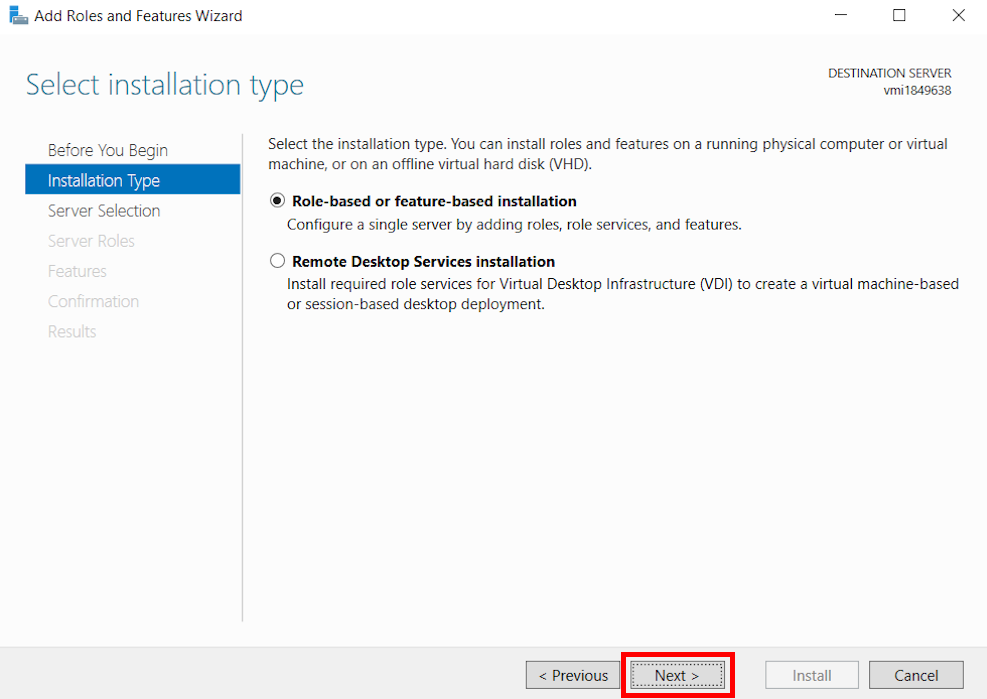
Click Next on the Before You Begin page.
Choose Role-based or feature-based installation and click Next.
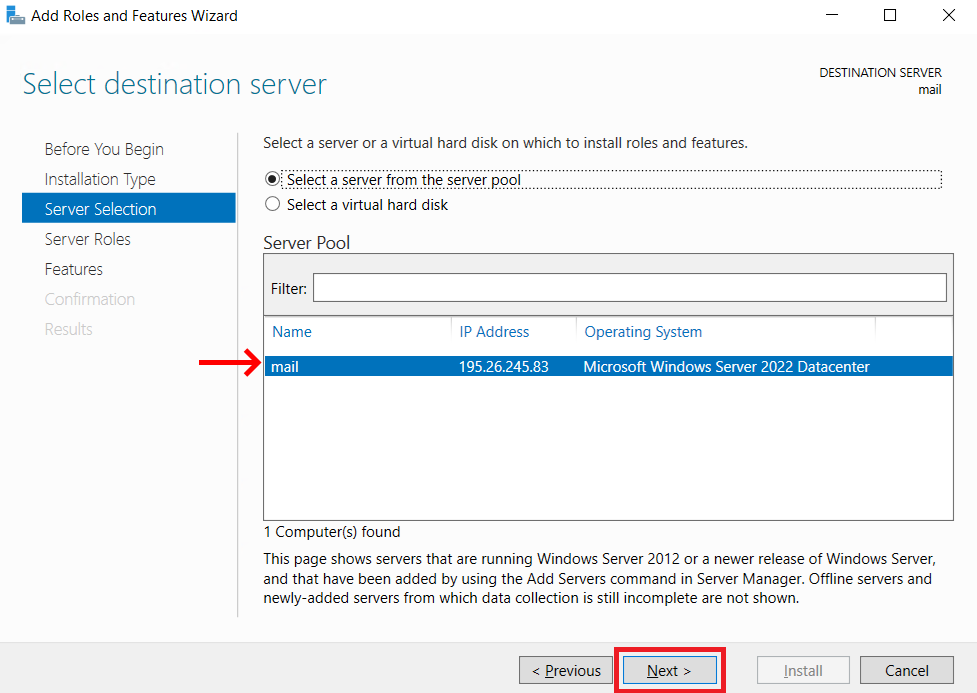
Select the server where you want to install IIS (usually the local server is selected by default) and click Next.
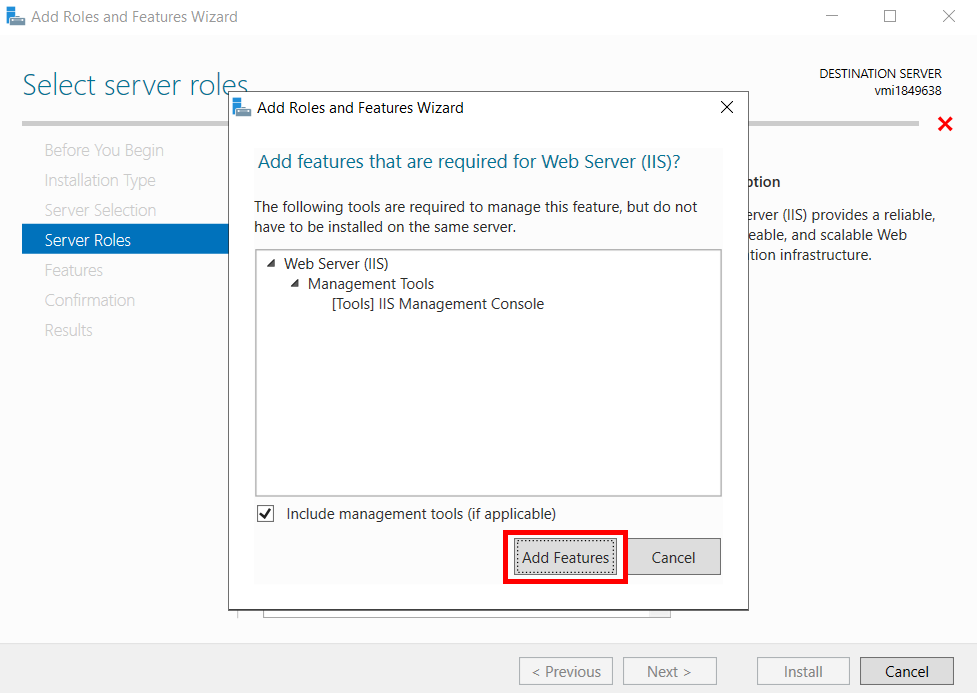
Scroll down and check the box next to Web Server (IIS).
A pop-up will appear asking to add required features. Click Add Features. Click Next.
Check the box next to .NET Framework 4.8.
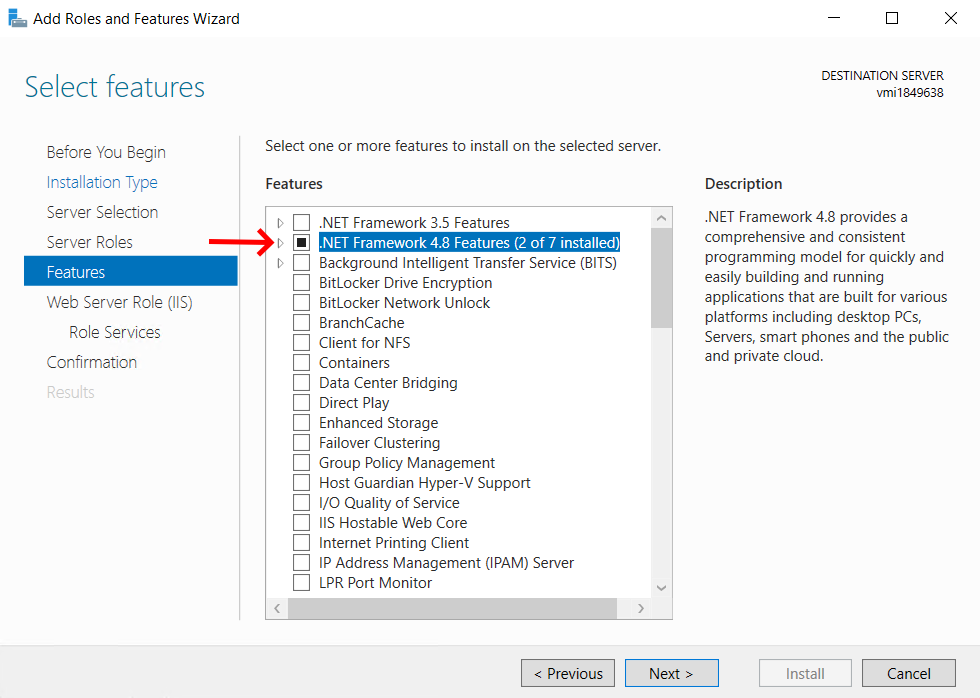
Click Next on the Web Server Role (IIS) page.
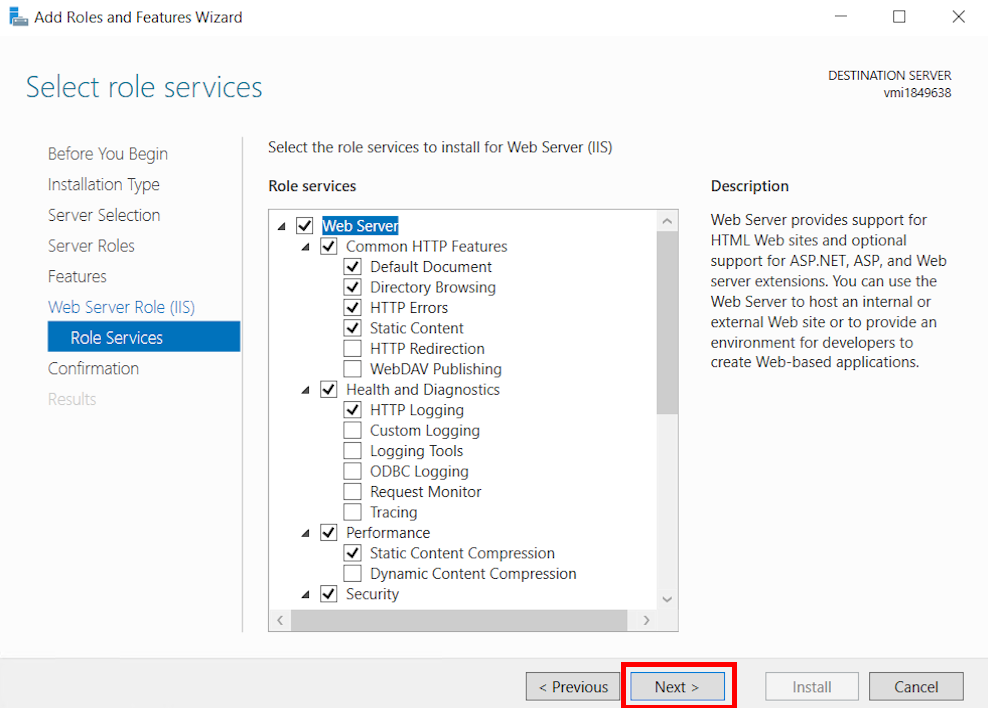
Select Role Services.
The default settings are usually sufficient. Ensure that the basic services you need are selected.
Click Next.
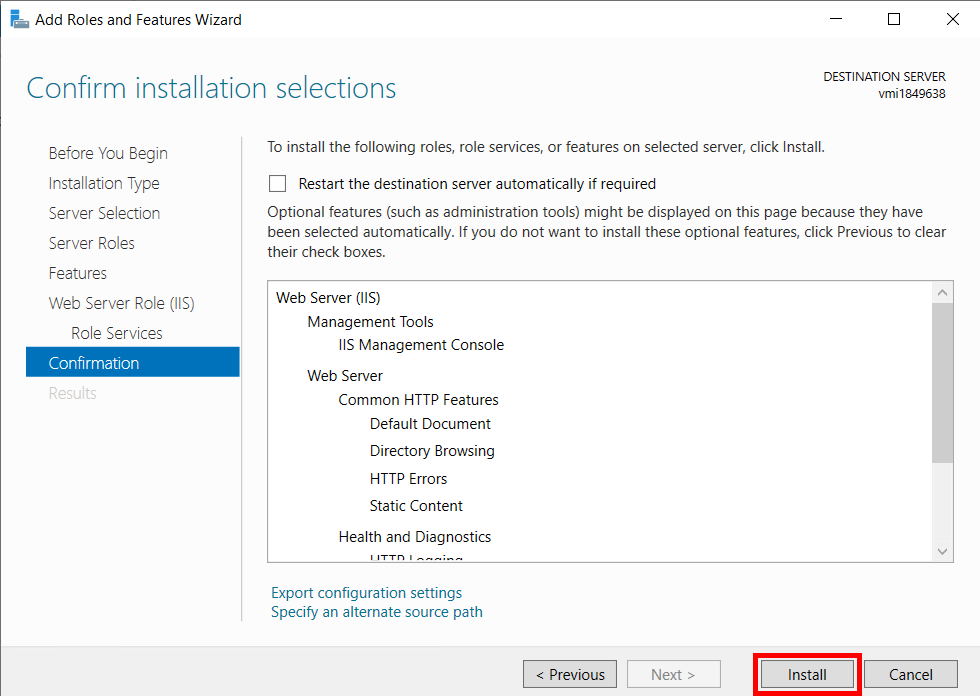
Review your selections and click Install.
The installation process will begin. Wait for it to complete.
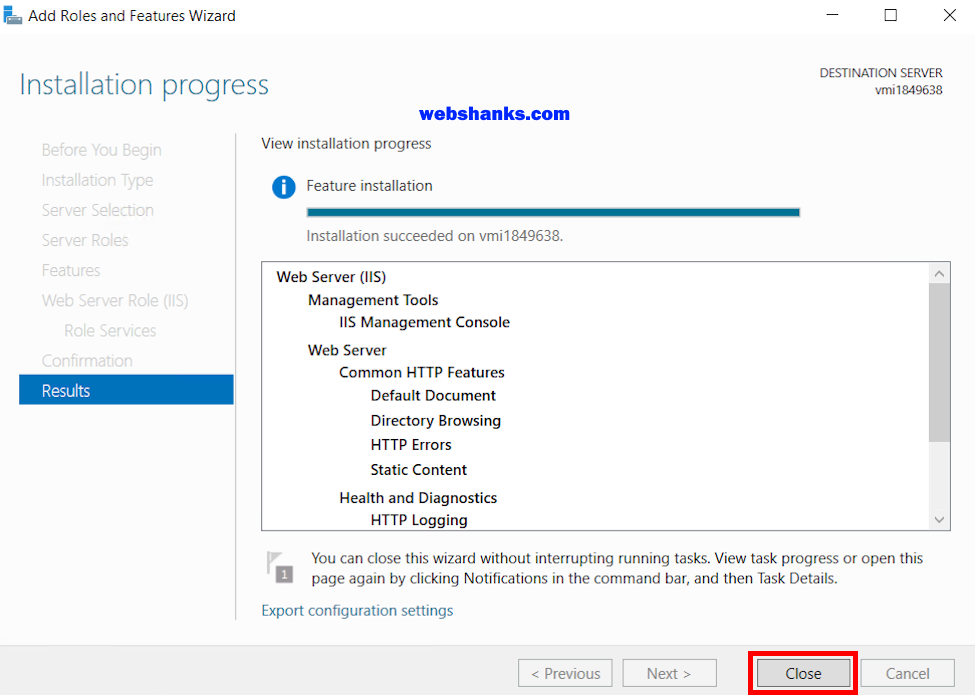
Once the installation is complete, click Close. Restart your server.
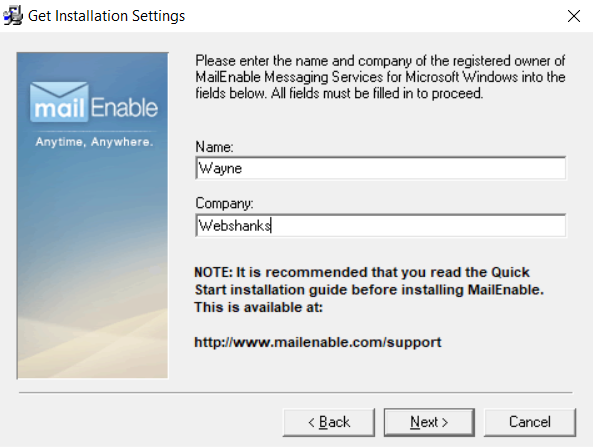
Step 6: Run the Installer
Locate the downloaded installer file and double-click to run it.
Follow the on-screen instructions to begin the installation process.
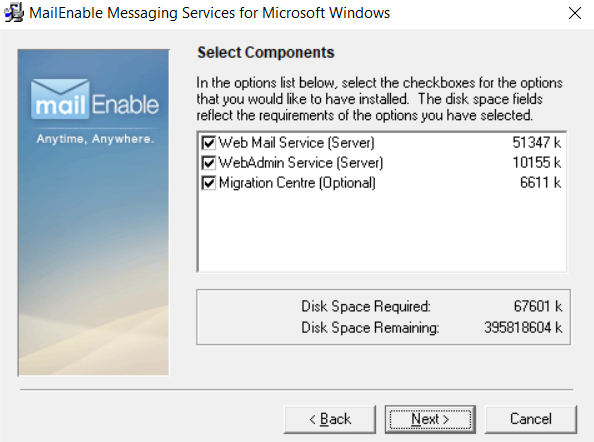
Select components. Be sure to choose the three options.
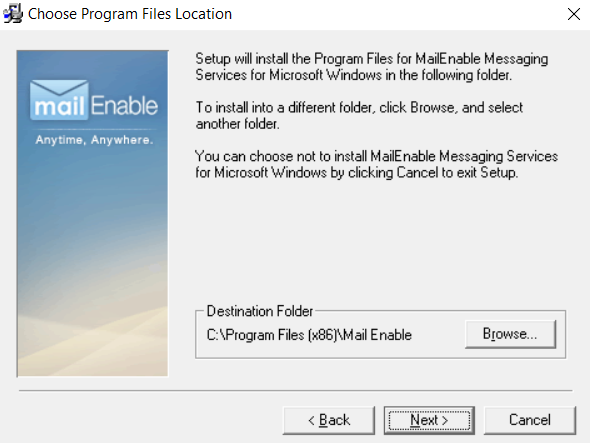
Select a destination folder. The default location is Program Files.
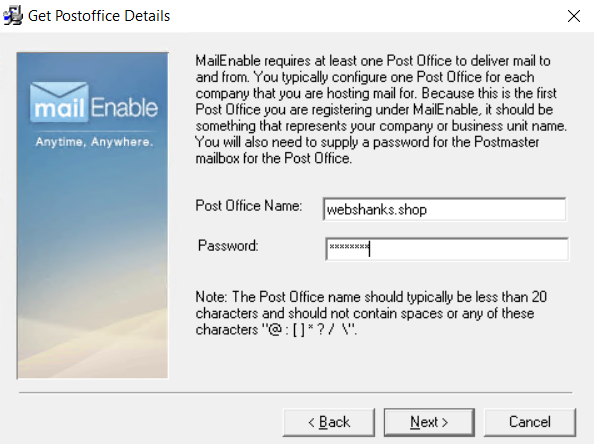
Get Postoffice details. You should enter your domain and assign a password.
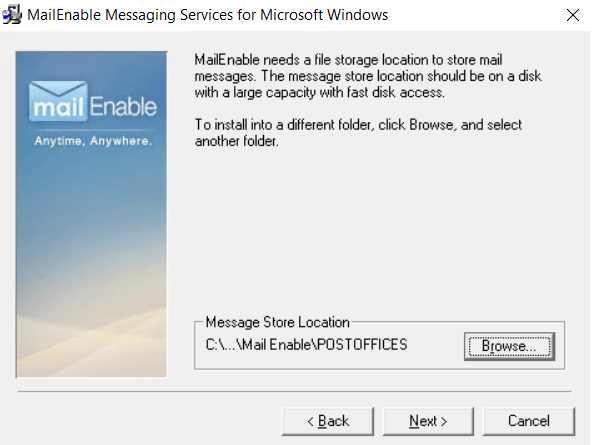
MailEnable needs a file storage to store email messages. Just choose the default location.
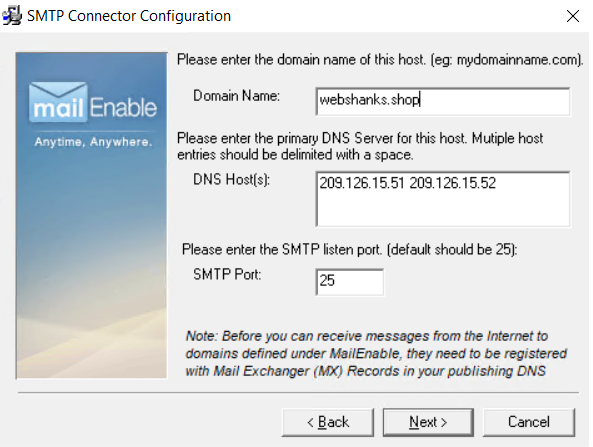
Enter your domain. Just use the default DNS and use port 25.
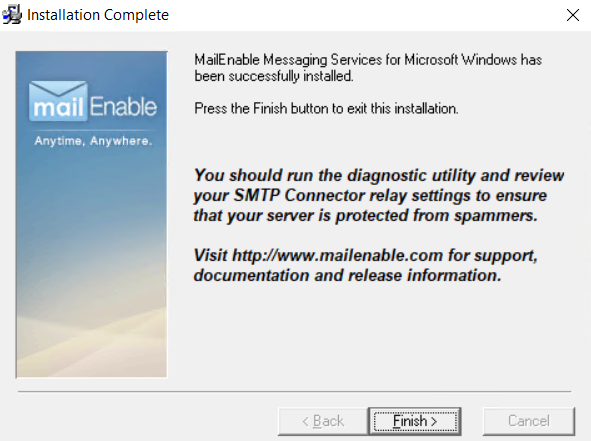
Start the installation by clicking Next.
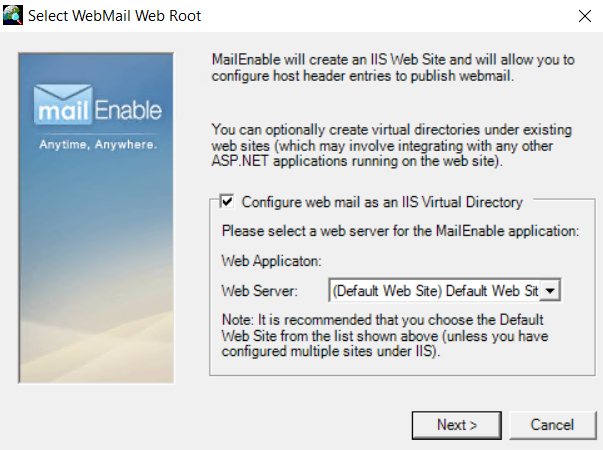
You will be prompted to select a web server. Just choose the default and click Next.
Step 7: Configuring MailEnable
After installation, you need to configure MailEnable to start handling emails.
Open MailEnable Management Console: Find this in the Start menu and search MailEnable.
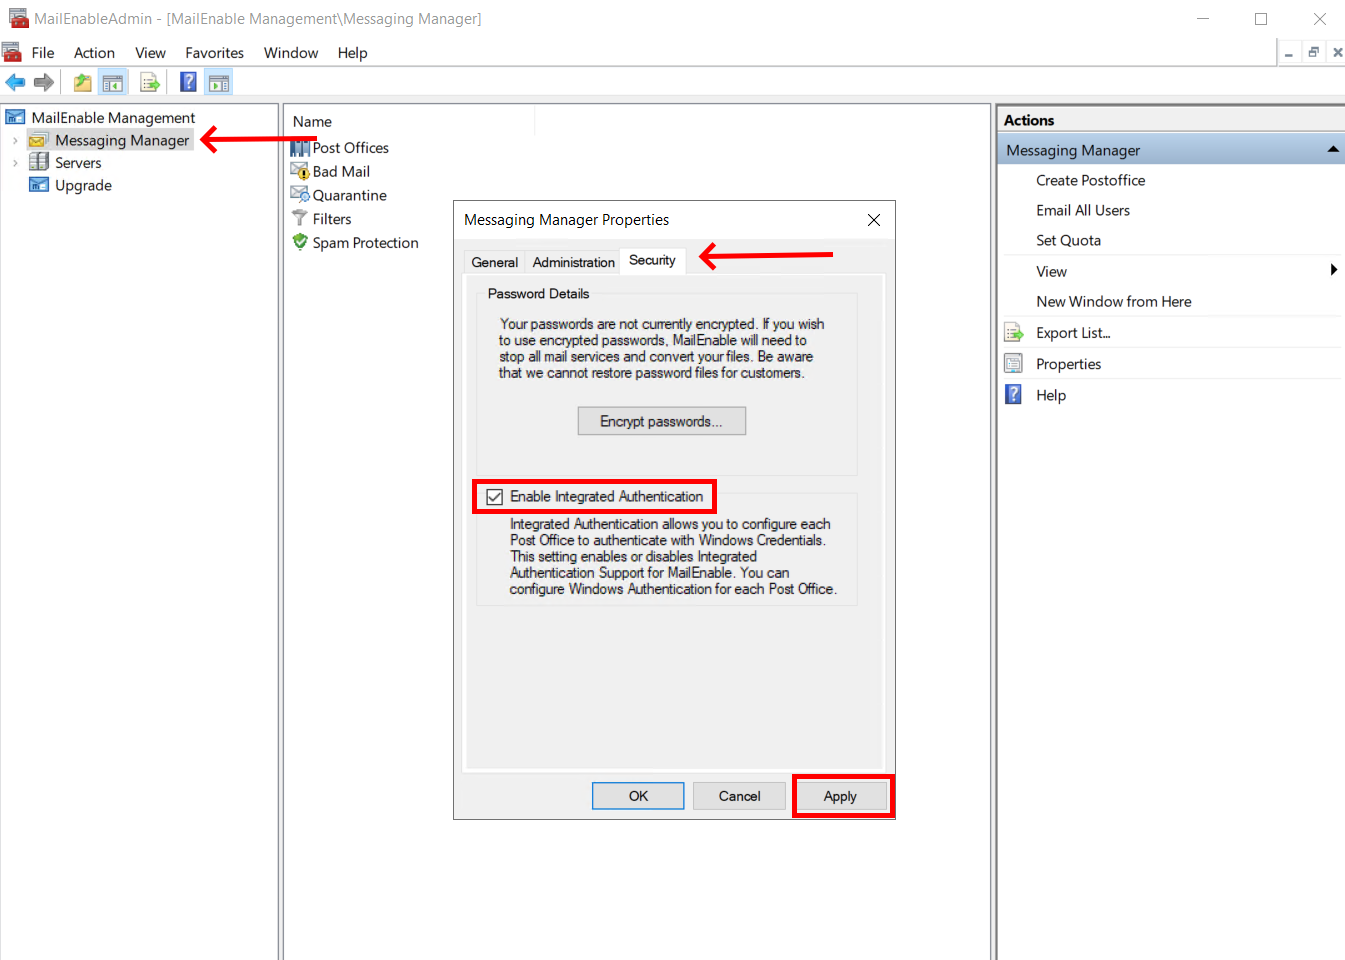
First, we need to enable integrated authentication.
Right-click Messaging Manager > Properties. Select the Security tab and check Enable Integrated Authentication.
Click Apply.
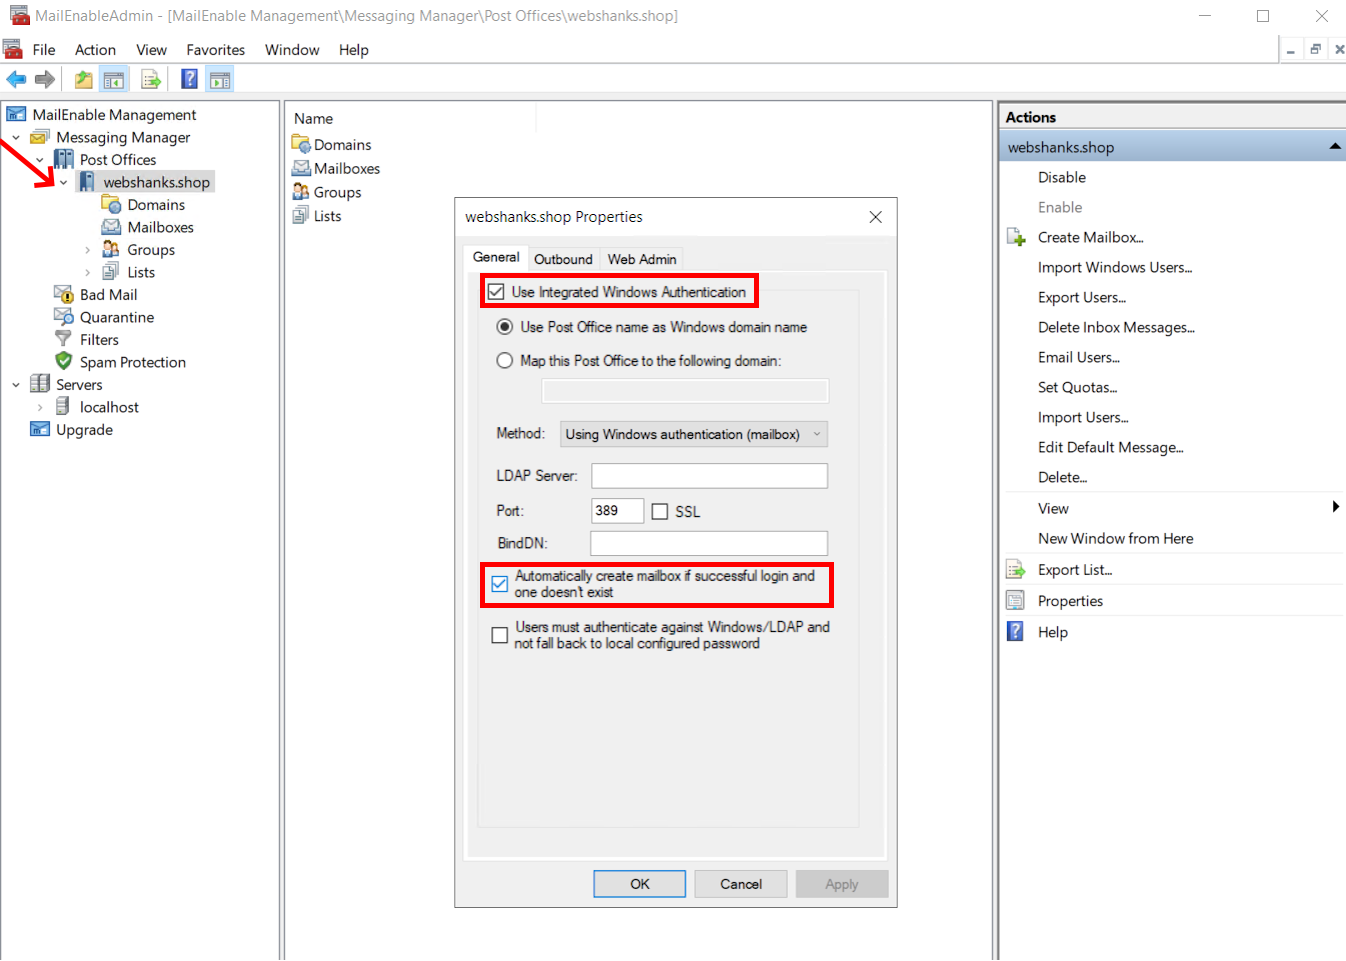
Next, select your domain and click Properties on the right side of the menu.
Check Use Integrated Authentication and Automatically create mailbox if successful login and one doesn’t exist.
Next, we will create a self-signed certificate so that we can use authentication on our inbound and outbound connections.
In the Start menu, search for IIS.
Choose the localhost and double click Server Certificates.
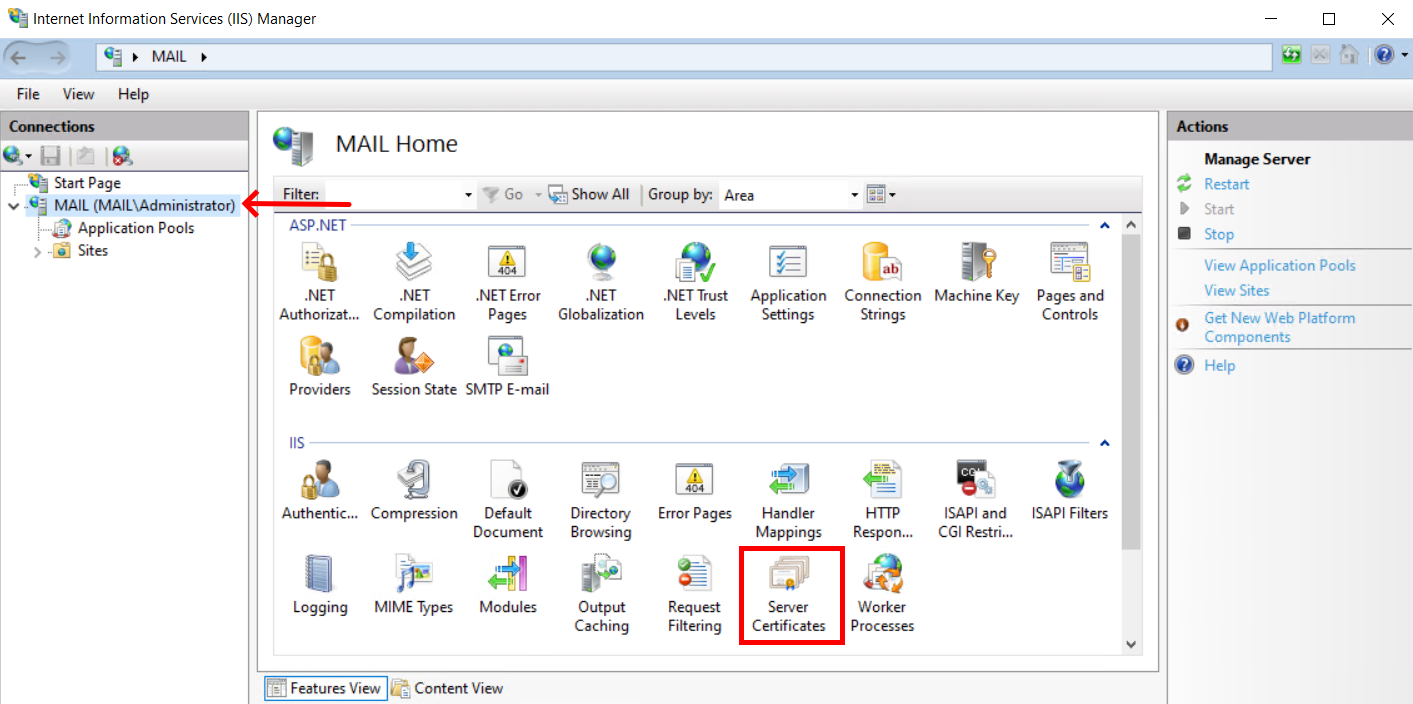
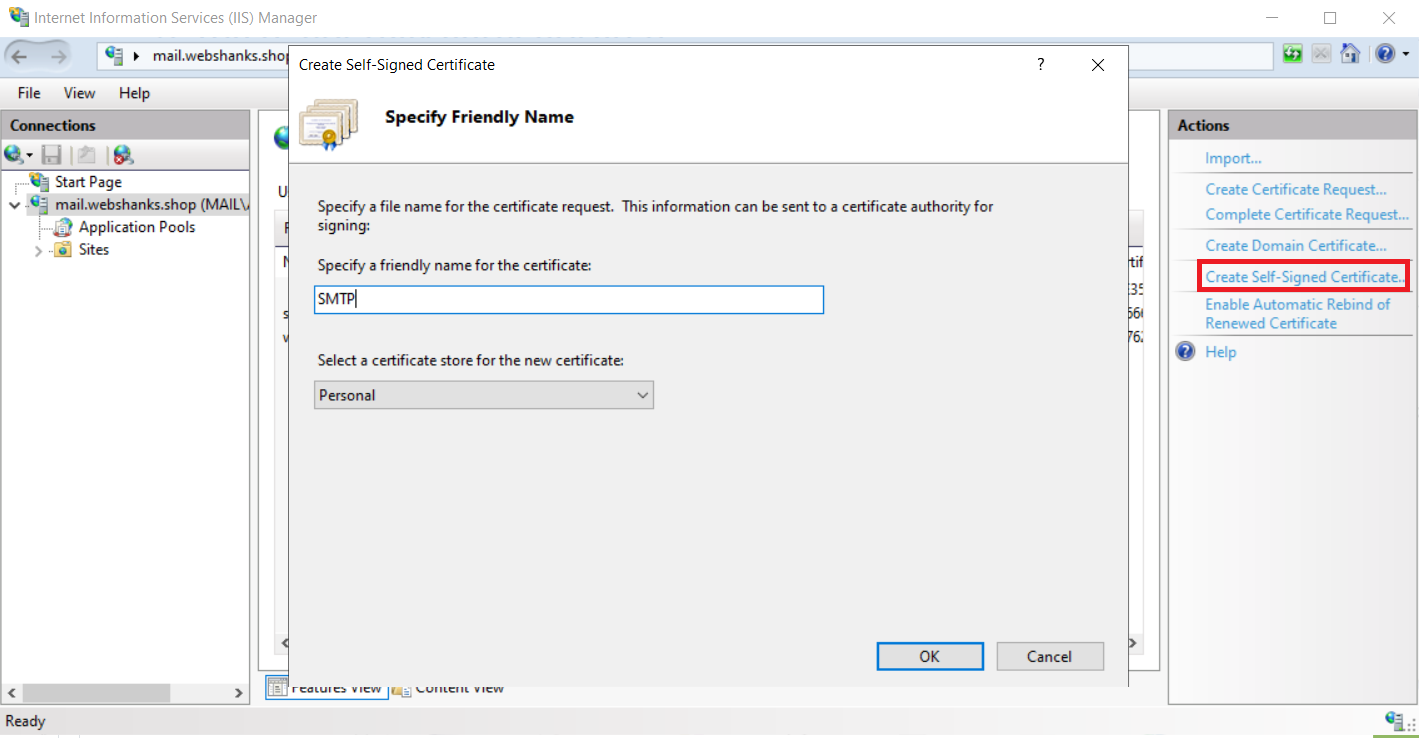
We will issue a Self-Signed certificate for our local host.
Click Create Self-Signed Certificate and specify a certificate name. Then click OK.
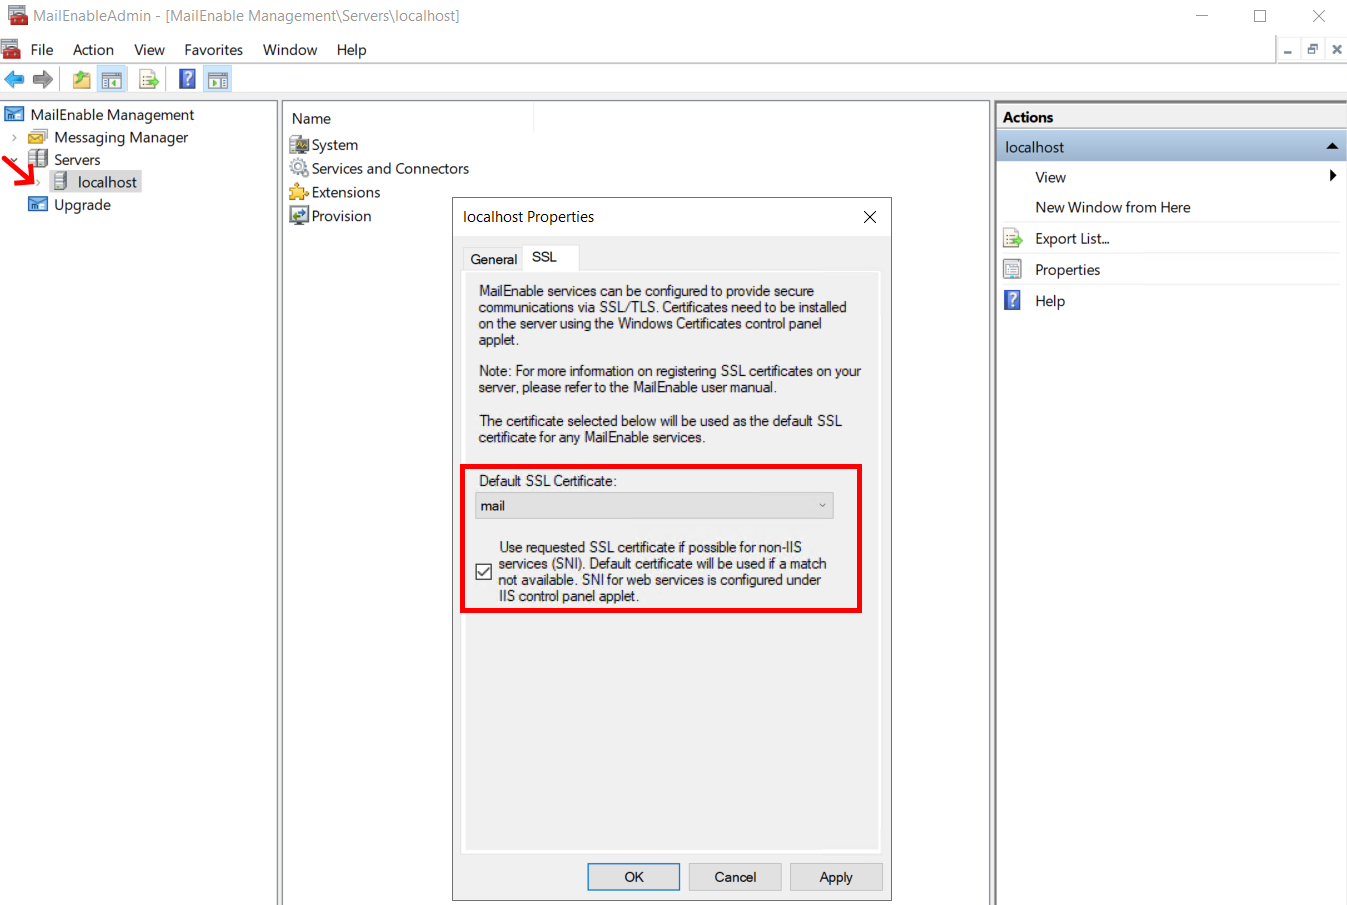
Now that we have created a self-signed certificate, we will use it on our servers.
In MailEnable, go to Servers > localhost > on the right menu choose Properties > SSL. Then check the box and click Apply and OK.
We will now configure SMTP and IMAP services so that we can send and receive email messages.
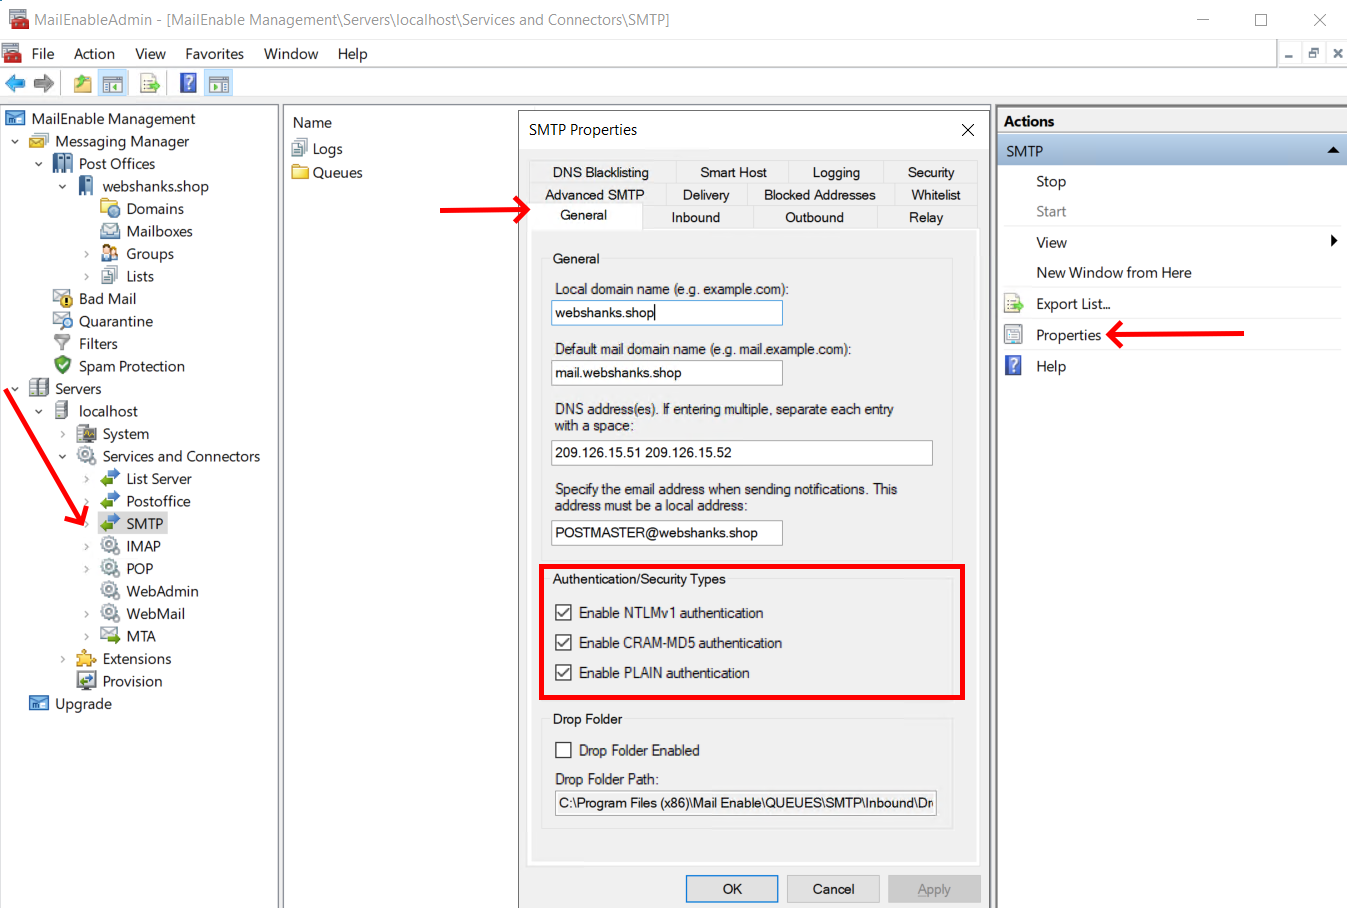
Go to Services > localhost > Services and Connectors > SMTP.
Click Properties on the right menu and select the General tab.
Set the Local domain with your own domain and default mail domain to mail. Then click Apply. The SMTP services will restart.
Mark all checkboxes under Authentication/Security Types.
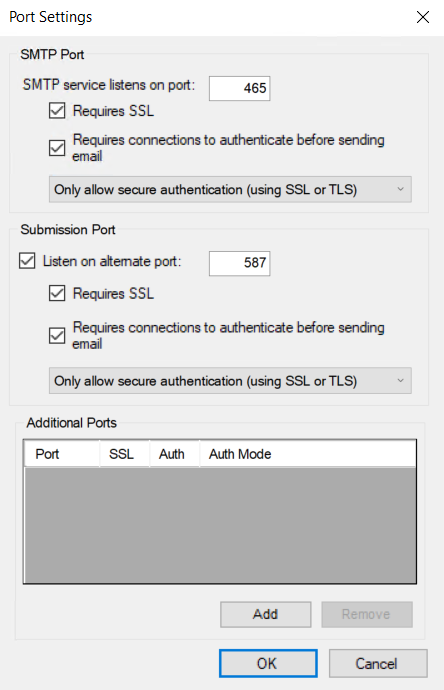
Next, go to the Inbound tab > Port Settings > Settings.
You can choose to have port 25 without authentication, but in this tutorial, we will be using Ports 465 and 587. Follow the settings I’ve made on the image below.
Click OK and Apply changes. The SMTP services will restart.
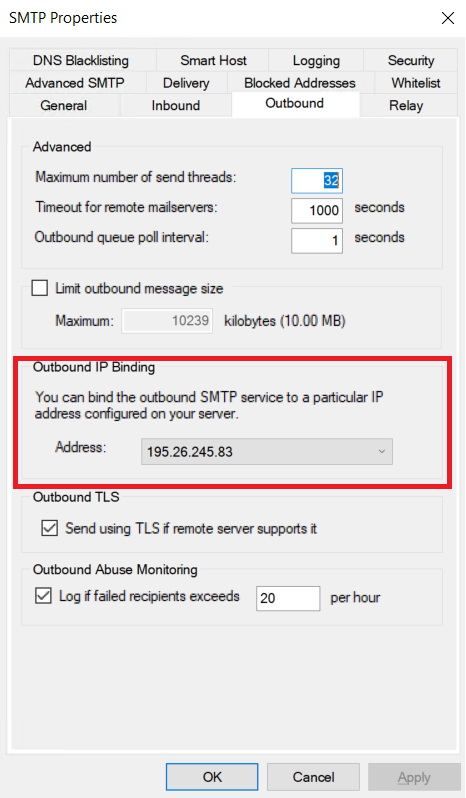
On the Outbound Tab, select your IP address under Outbound IP Binding.
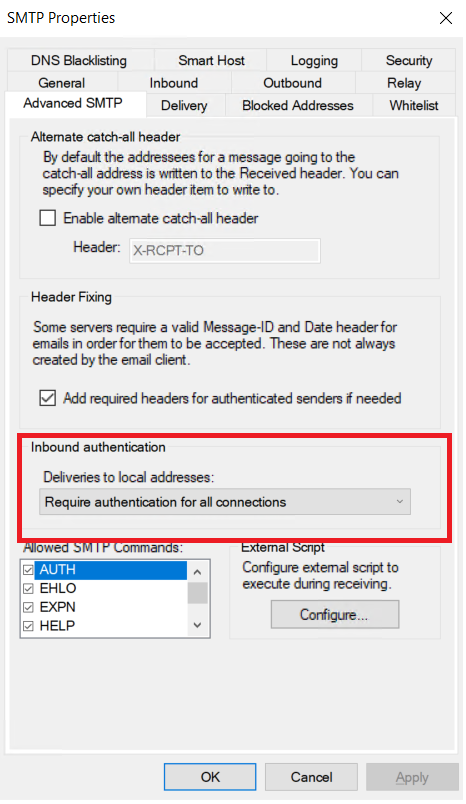
Go to the Advanced SMTP tab.
Under Inbound Authentication, select Require authentication for all connections.
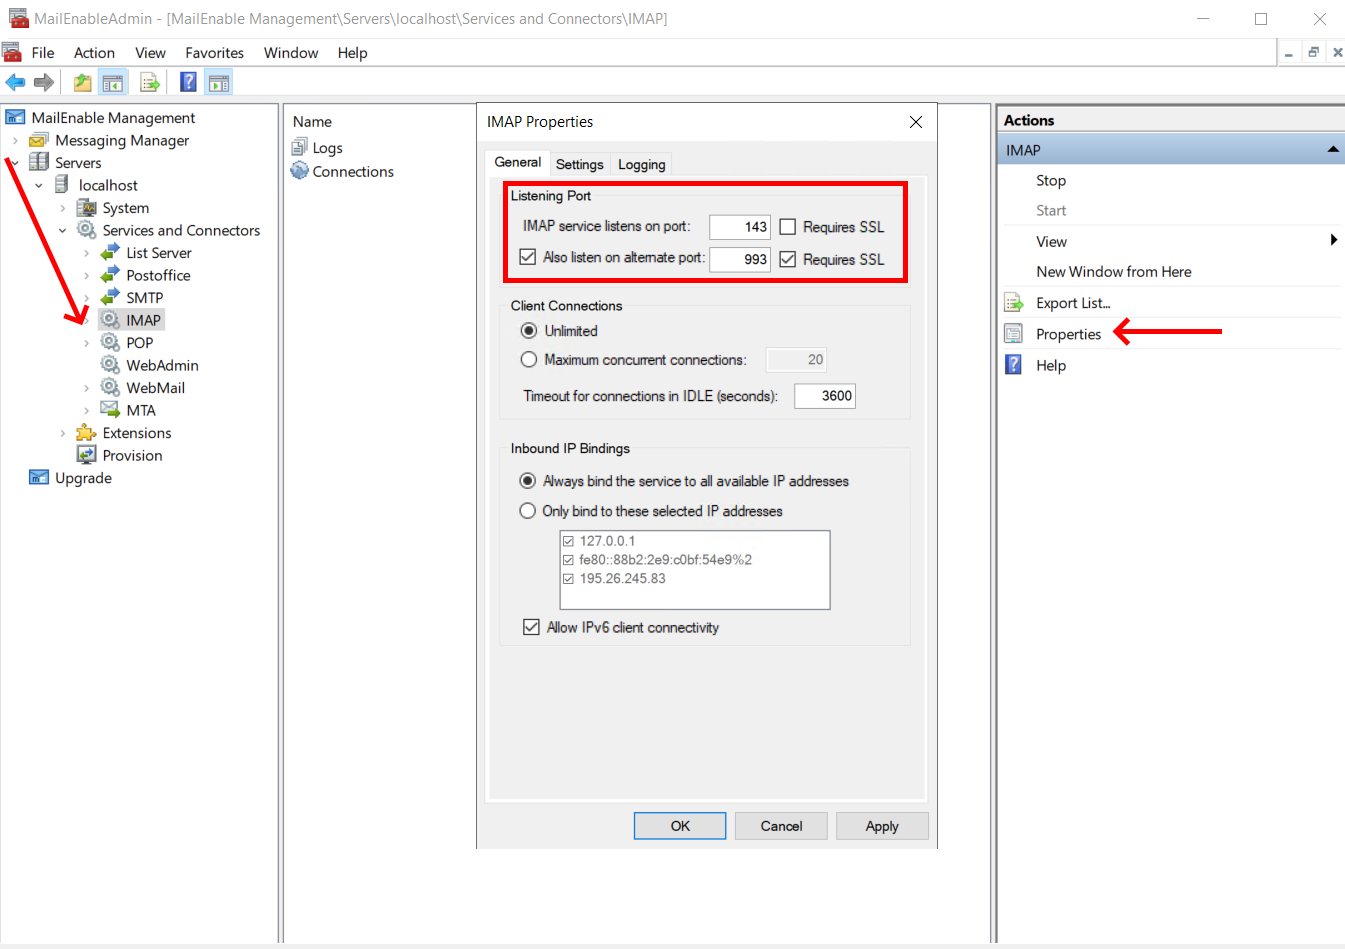
Next, we will configure our IMAP.
Go to Services > localhost >Services and Connectors > IMAP.
Check the box Also listen on the alternate port and set it to 993 and check the Require SSL checkbox.
Next, on the Settings tab, mark all checkboxes under the Security option.
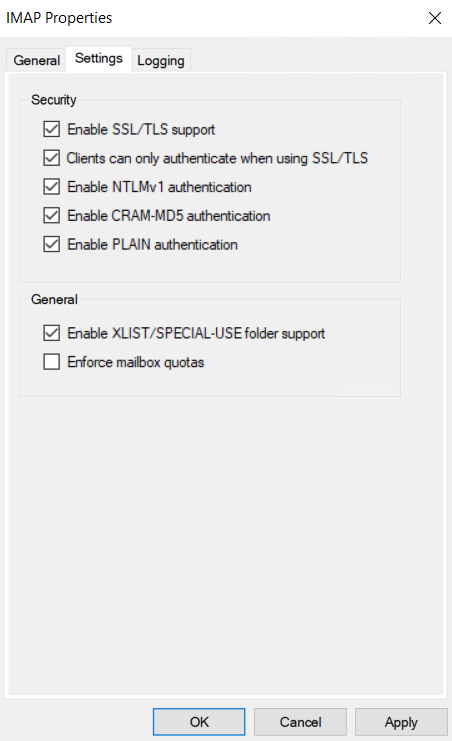
Click OK and Apply changes. The IMAP services will restart.
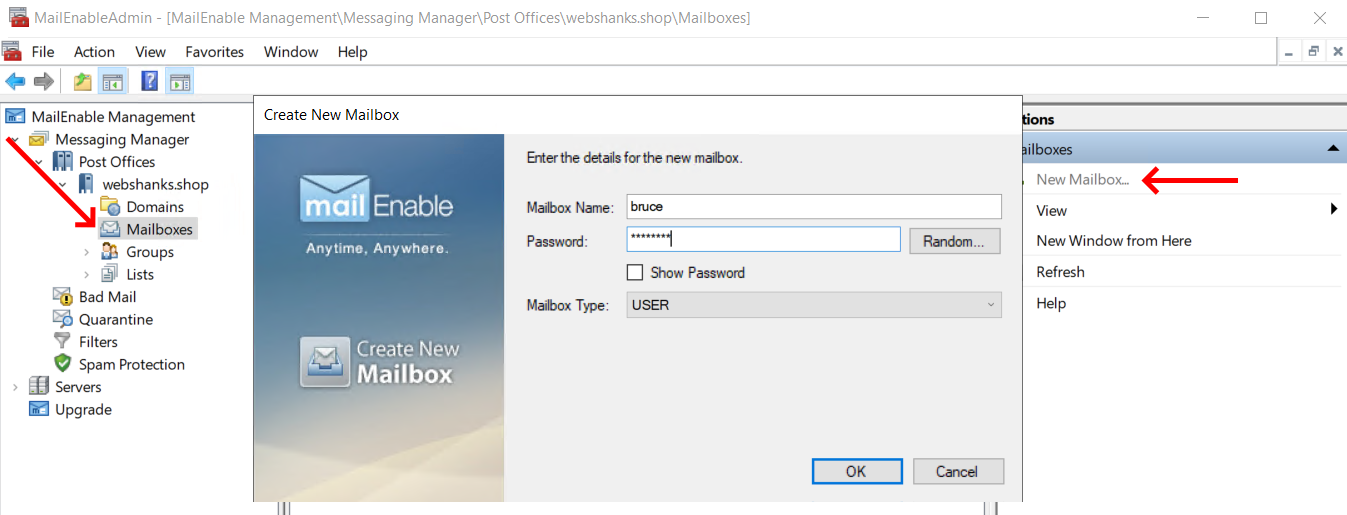
Now our SMTP and IMAP settings are configured, we will add mailboxes.
Expand Messaging Manager > Post Offices > Your Domain > Mailboxes and click New Mailbox.
I’d like to restart my server after this part for the mail domain to take effect.
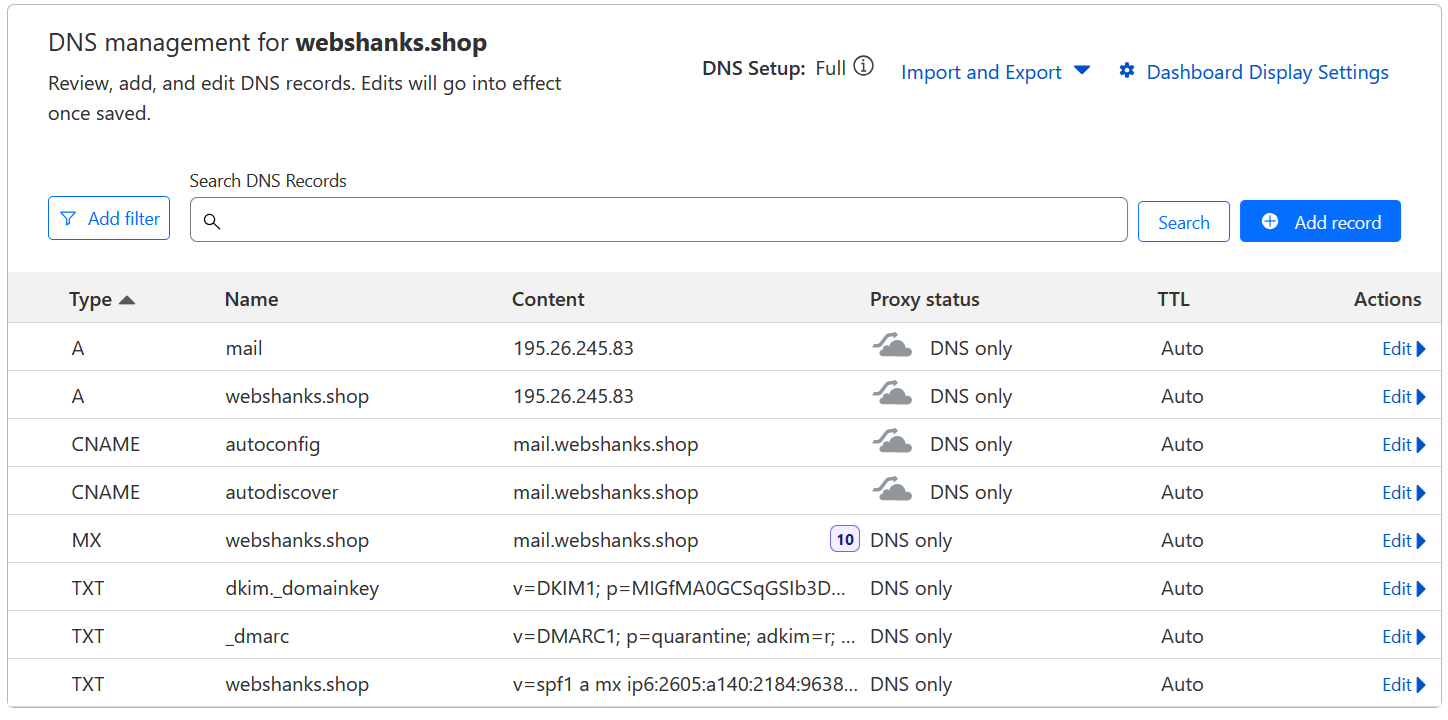
Step 8. Map DNS Records and Reverse DNS
Now our MailEnable is set, we need to map our DNS
Create a free account on Cloudflare.
Login to your Namecheap and set the custom DNS to Cloudflare’s nameservers.

Set the A, MX, SPF, DKIM and DMARC records.
For A, CNAME, and MX records:
| Type | Name | Content/Value |
| A | @ | yourServerIP |
| A | yourServerIP | |
| CNAME | autoconfig | mail.webshanks.shop |
| CNAME | autodiscover | mail.webshanks.shop |
| MX | @ | mail.webshanks.shop priority 10 |
For SPF, DKIM, and DMARC records:
SPF Record
Be sure to replace your IPv6 and IPv4 with our own IPs.
- Type: TXT Record
- Host: @
- Value: v=spf1 a mx ip6:2a01:7a7:2:3343::f67:30f7 ip4:195.26.245.83 -all
- TTL: Automatic
DMARC Record
We will use the following records.
- Type: TXT Record
- Name: _dmarc
- Value: v=DMARC1; p=quarantine; adkim=r; aspf=r; pct=100
- TTL: Automatic
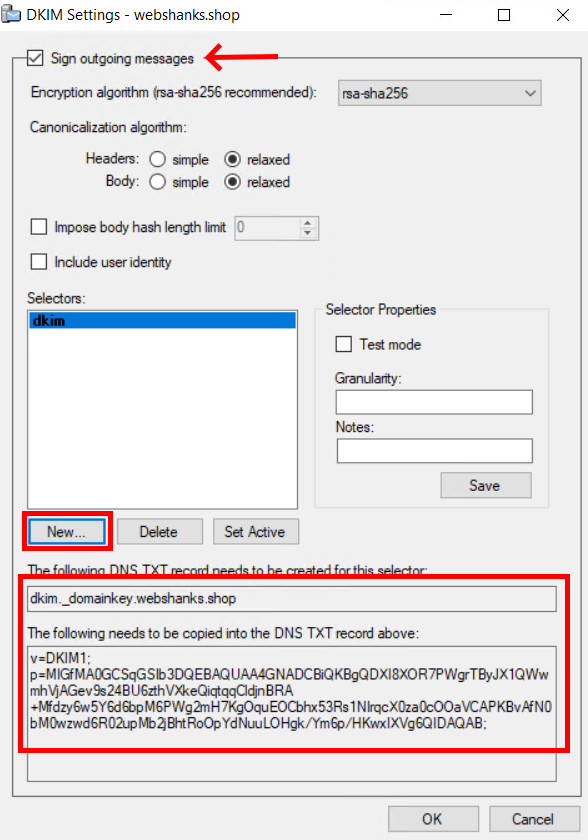
DKIM Record
For our DKIM record, we will generate one on MailEnable.
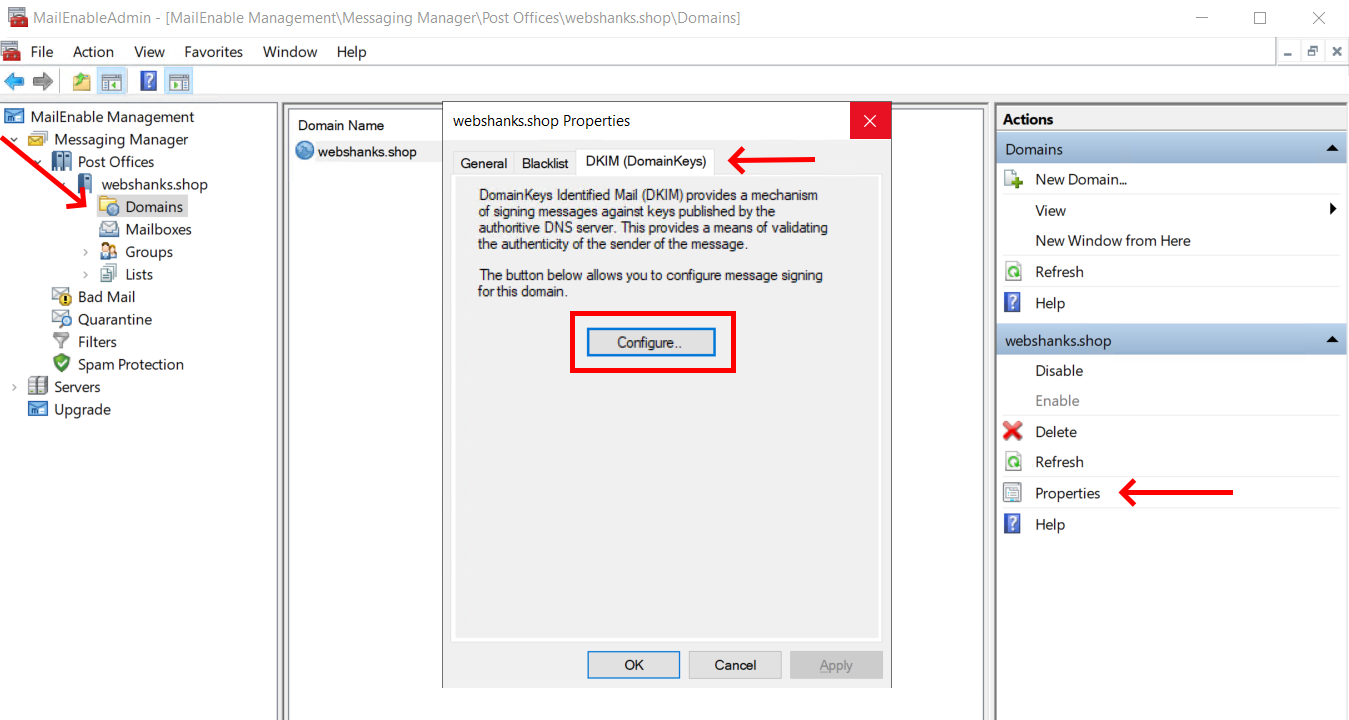
Check the Sign outgoing messages.
Create a New selector. You can name it like dkim or something similar. I’d like to add t=s tag in the DKIM.
Let’s take a look at our DNS management.
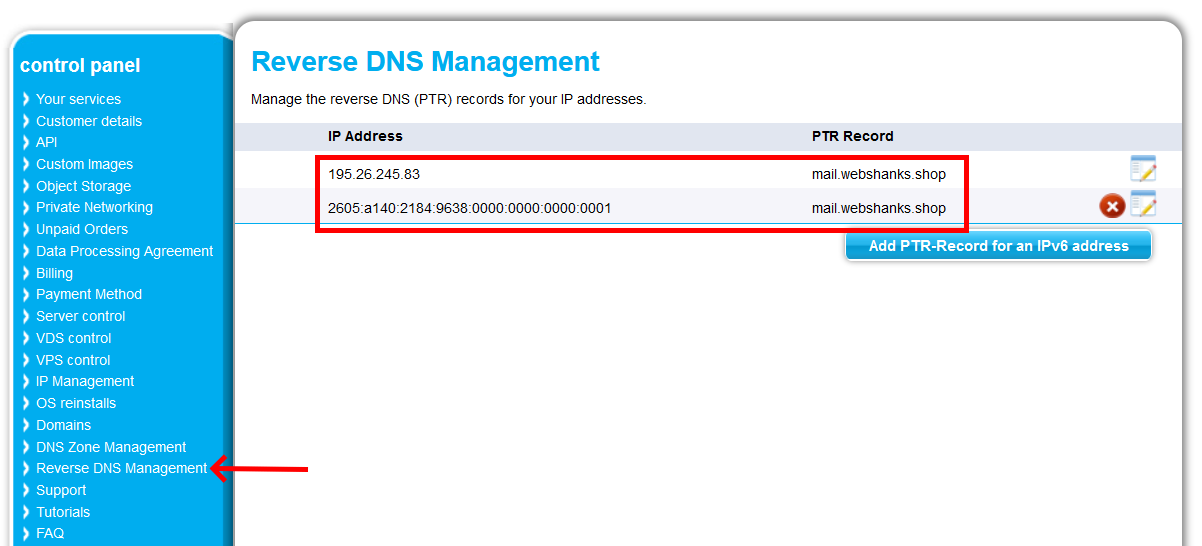
Our final step in our mapping is the reverse DNS.
Head to your Contabo VPS control panel and go to Reverse DNS management.
Set it to mail.yourdomain.com
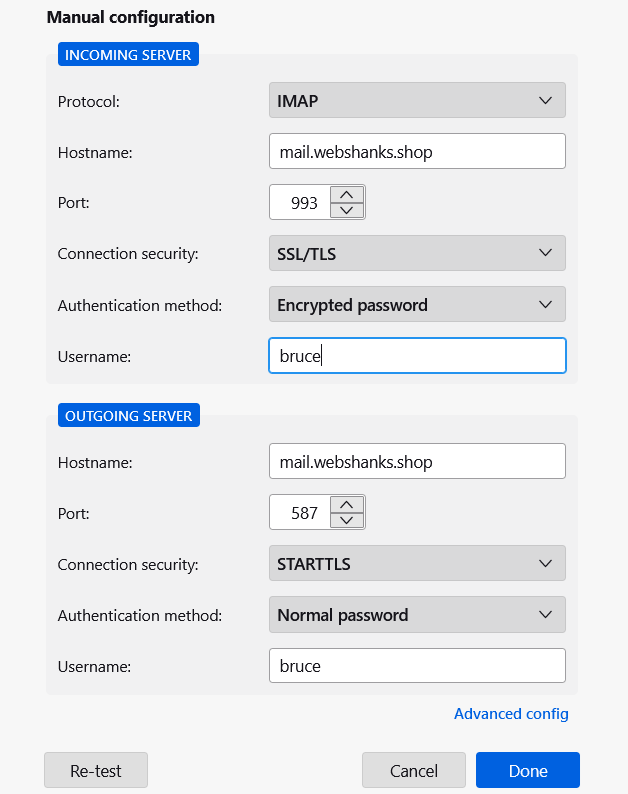
Step 9: Test our Email
For us to send an email, we will be using an email client. Plug the SMTP/IMAP relays and we are good to go!
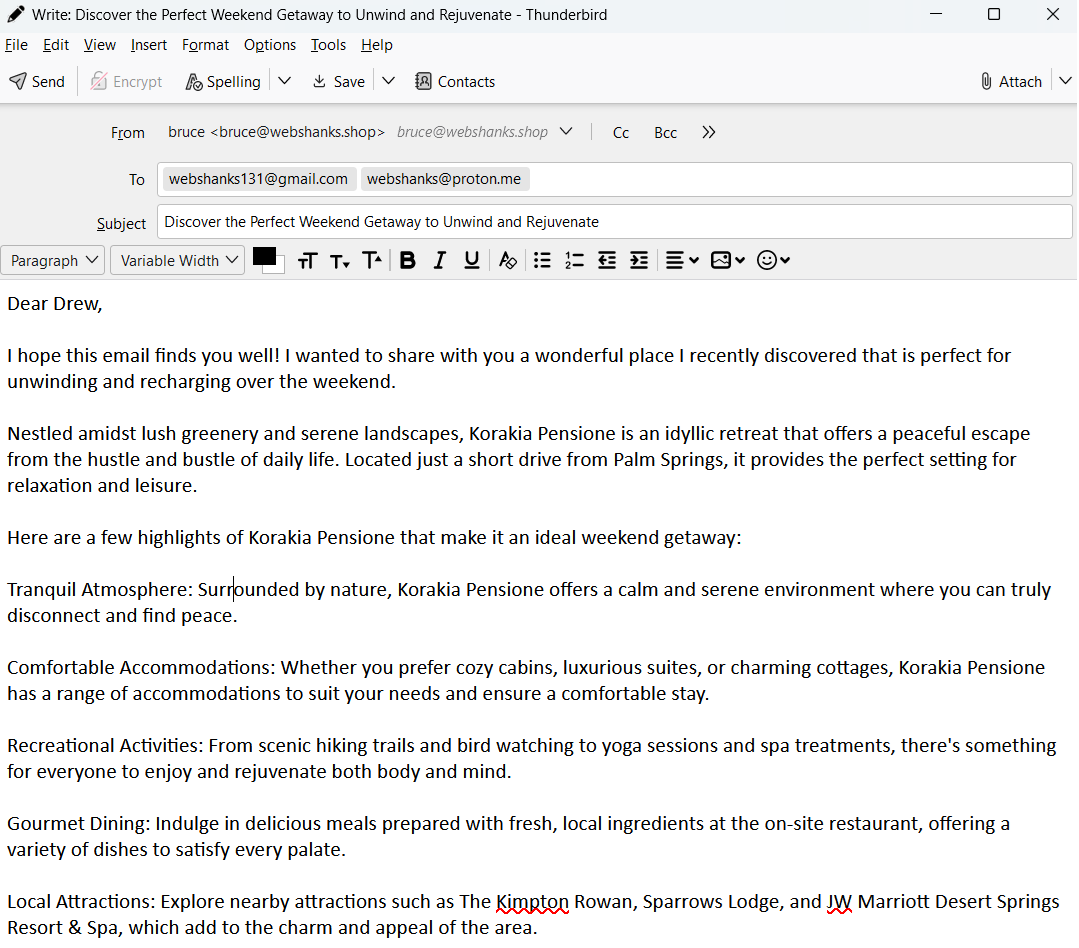
I’m using Thunderbird to send and receive emails.
Now let’s send a test email to Gmail and Proton Mail to see if we can receive it. We’ll also send an email to Mail-Tester to see our results.
Let’s see the results.
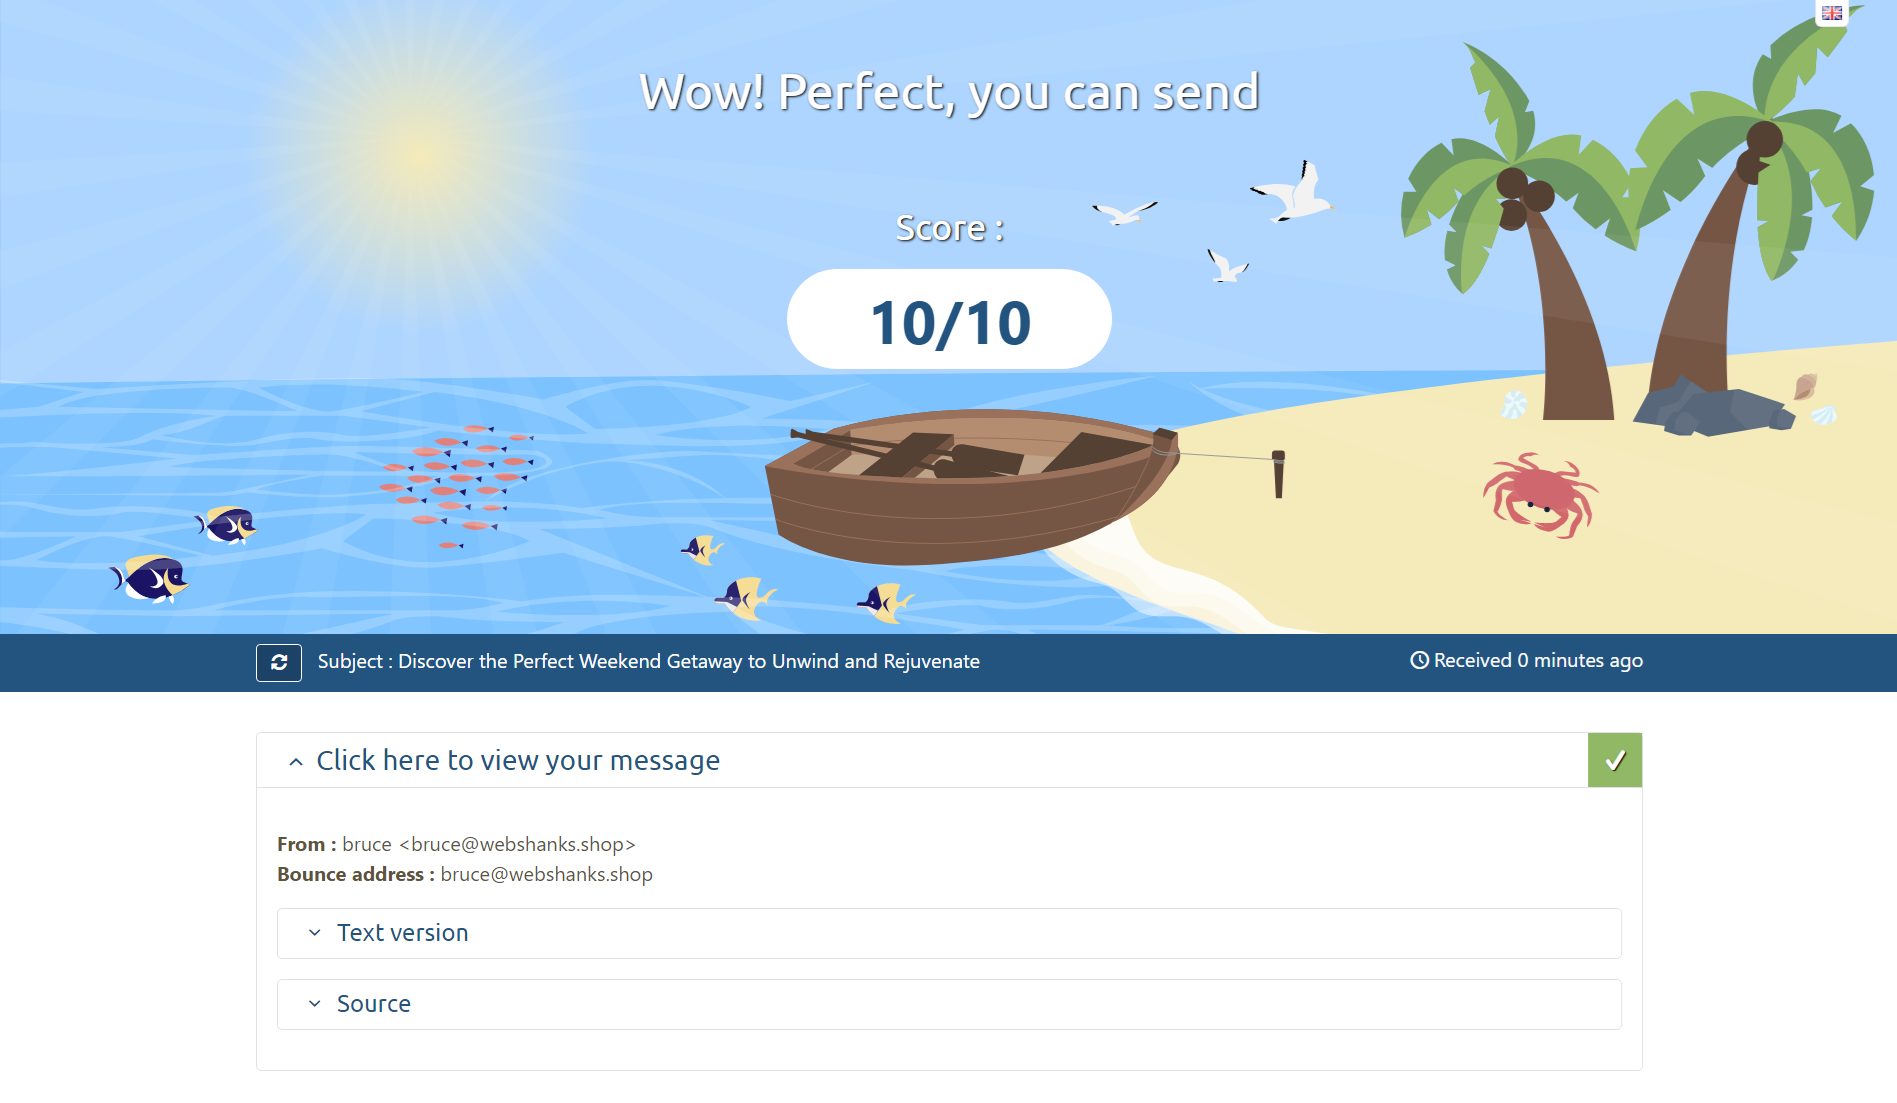
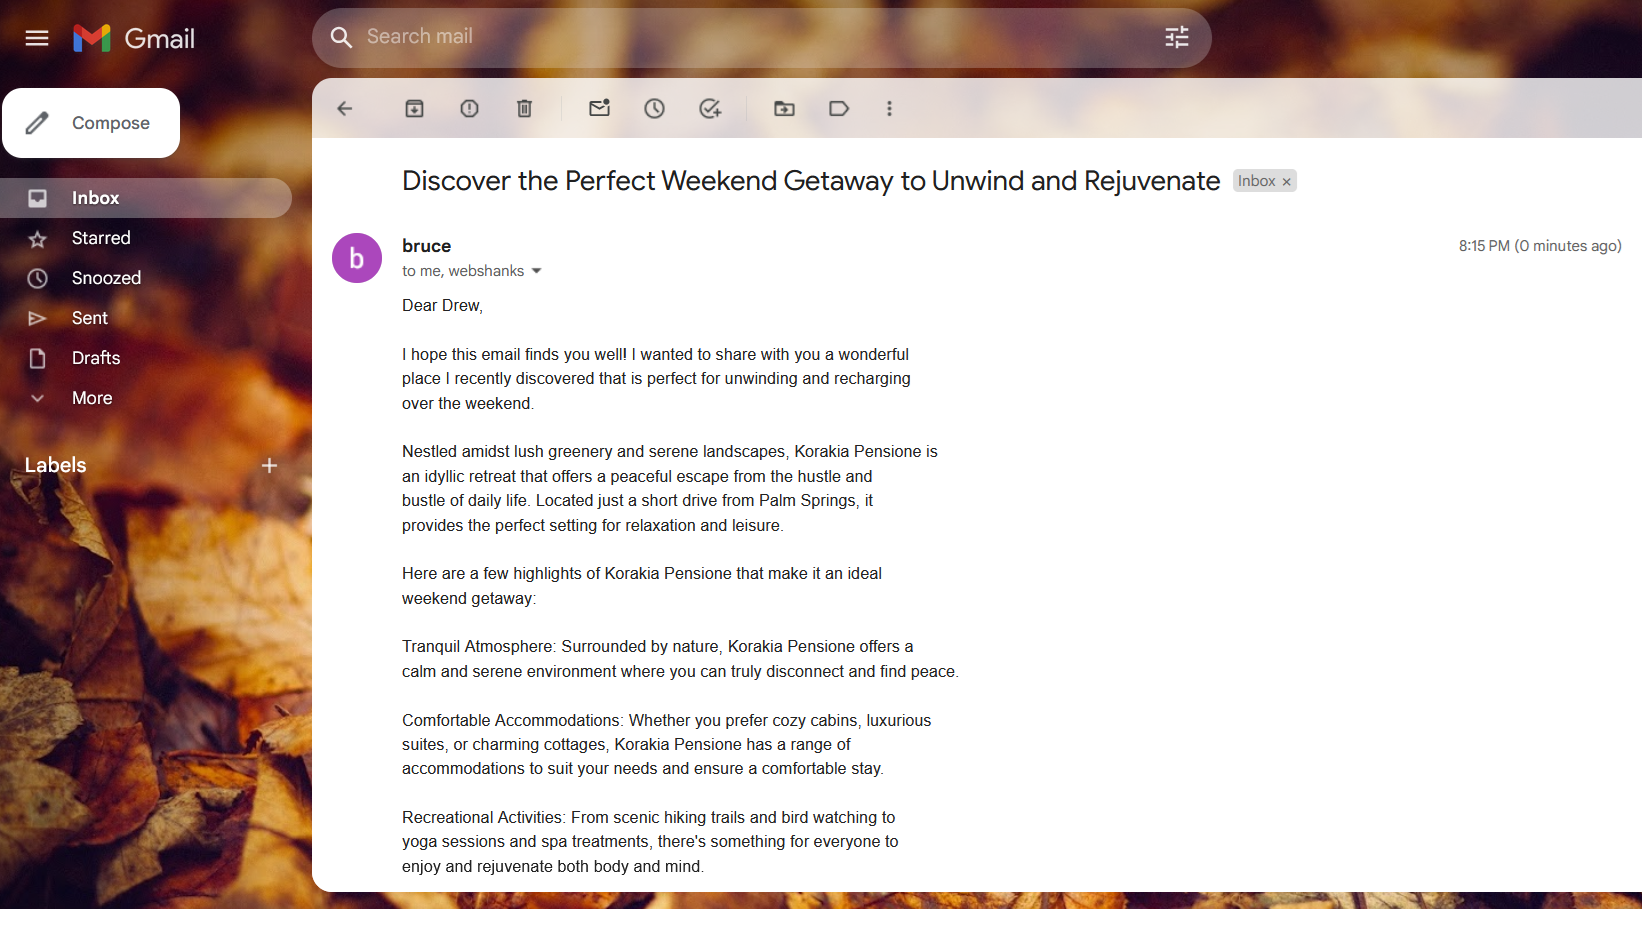
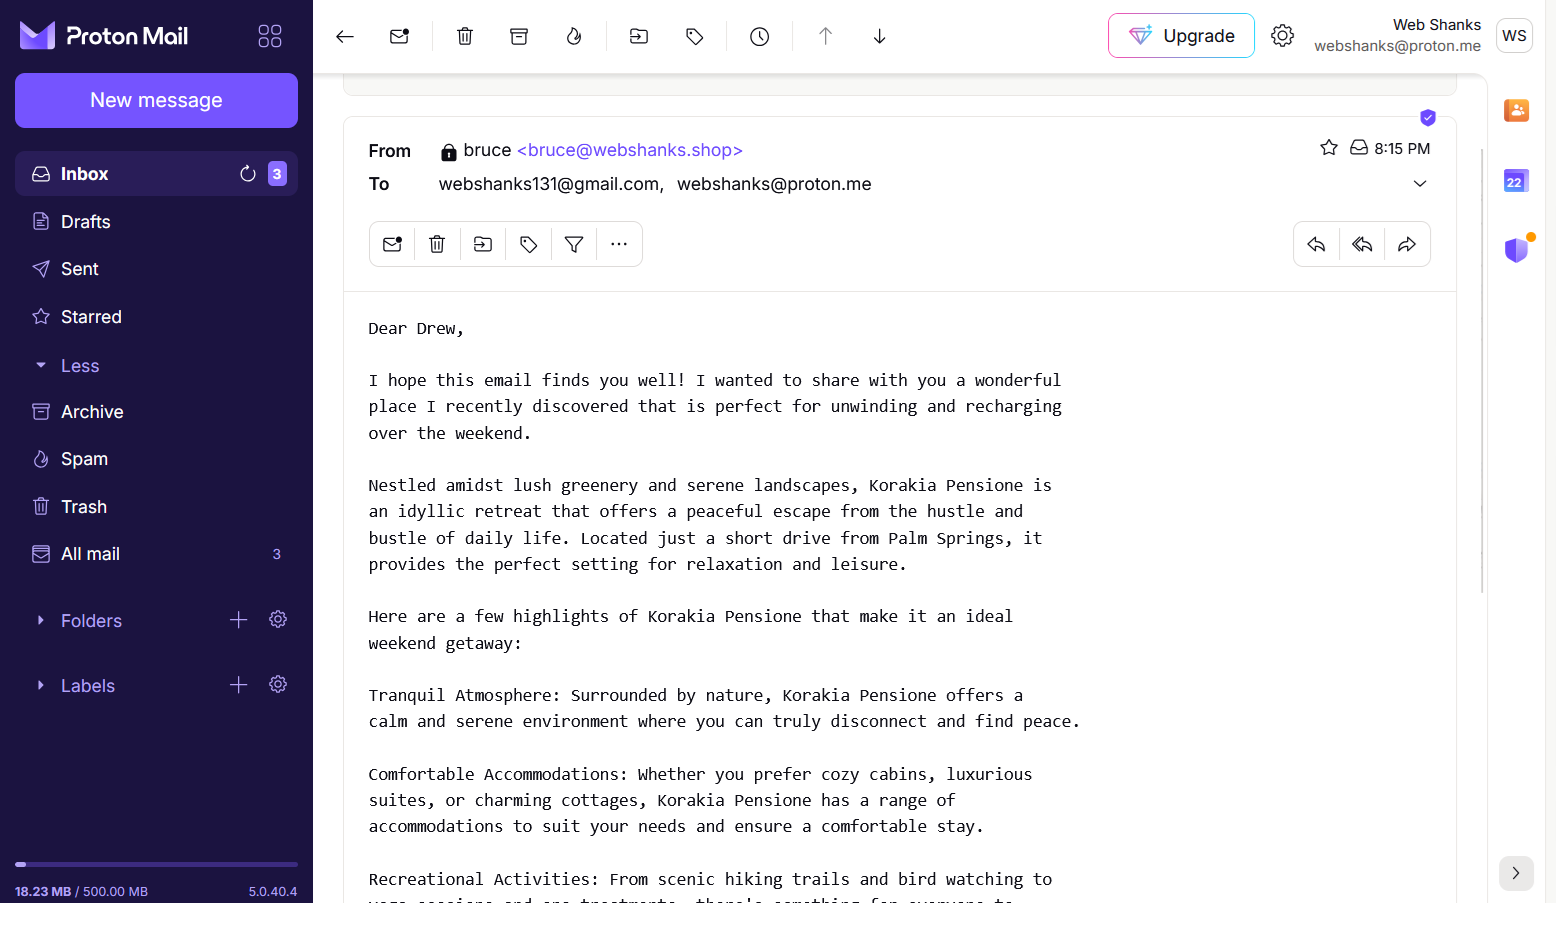
Hurrah we can now send emails!
Let’s try to send an email to the hard-to-get AOL Mail.
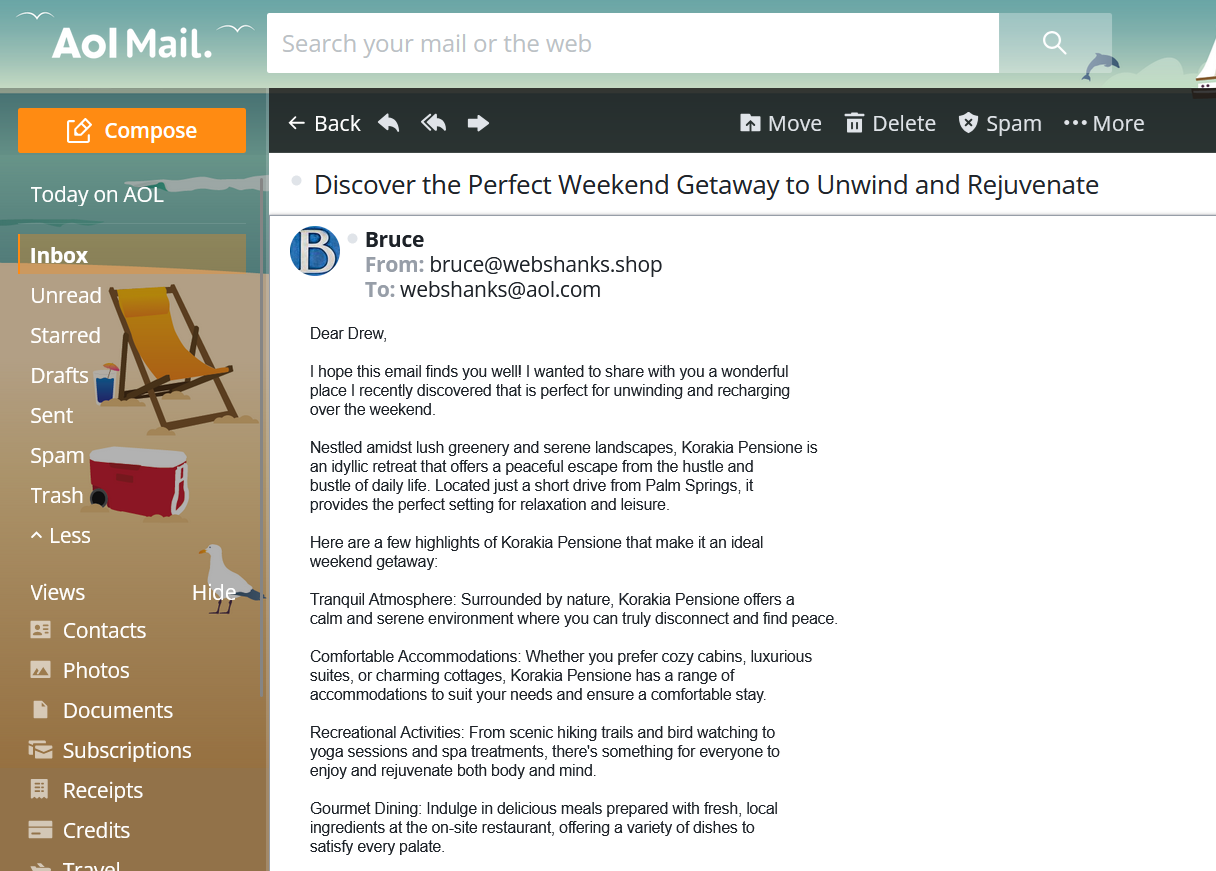
Surprisingly, we received the mail directly to our inbox!
I’ve also sent this to my personal AOL Mail and it went right through the inbox. It’s not a coincidence!
FAQs
What versions of Windows Server does MailEnable support?
MailEnable supports all recent versions of Windows Server, including Windows Server 2022. For more information about their system requirements go here.
Can MailEnable handle large volumes of emails?
Yes, MailEnable is designed to handle large volumes of emails efficiently, especially the Professional and Enterprise editions.
Is there a webmail interface available with MailEnable?
Yes, MailEnable includes a webmail interface that can be accessed via a web browser, providing users with the ability to send and receive emails without needing a local email client.
How do I secure my MailEnable server?
Securing your MailEnable server involves configuring SSL/TLS for encrypted communications, setting up SPF, DKIM, and DMARC records, and regularly updating the server and MailEnable software to patch any vulnerabilities.
Conclusion
Installing and configuring MailEnable on Windows Server 2022 is quite challenging if you are new to Windows Server and MailEnable. But you can follow my step-by-step guide to setup your own MailEnable mail server on a Windows Server.
If you find my tutorial useful, you can buy me a coffee.
You can also check out my Linux-based email servers like Docker Mailserver, aaPanel, mailcow, CyberPanel, or iRedmail.
For further assistance, refer to the MailEnable Documentation or seek support from the MailEnable community.