 In today’s digital age, email communication plays a crucial role in both personal and professional spheres. Having your own SMTP (Simple Mail Transfer Protocol) server can offer enhanced control and reliability over your email correspondence at an affordable price.
This guide will walk you through the process of setting up your own SMTP server using aaPanel, a user-friendly control panel, along with a Contabo VPS for hosting, and Cloudflare for added security and performance.
You may also check my FastPanel, HestiaCP, CyberPanel and Cloudron email server setups.
Understanding the Components
What is an SMTP Server?: An SMTP server is a computer program or server responsible for sending, receiving, and relaying emails over the internet. It’s a crucial component of the email communication process.
aaPanel: aaPanel is a user-friendly, yet free and open-source control panel that simplifies server management tasks, making it accessible to those without advanced technical skills. It is a free alternative to commercial panels like cPanel.
Contabo VPS: Contabo offers virtual private servers (VPS) that provide the computing power and resources needed to host applications, websites, and services online.
Cloudflare: Cloudflare is a content delivery network (CDN) that offers security and performance enhancements for websites and online services.
Prerequisites
Before you begin, you’ll need:
- A registered domain name on Namecheap (e.g., yourdomain.com).
- A Contabo VPS subscription with ROOT access. Follow this guide on how to setup a Contabo VPS. You can also watch the guide on YouTube.
- A Cloudflare account (free).
Note: aaPanel will be installed on a fresh OS Ubuntu 20.04 LTS. Don’t use CentOS 7 because it will reach end of life next year.
As an alternative to Contabo, you can use RackNerd VPS or any other VPS with port 25 open.
Once you have met these requirements, proceed to step 1.
You can also watch this tutorial on YouTube.
Build a Free SMTP Server Using aaPanel, Contabo VPS, and Cloudflare
Step 1. Connect to Your VPS Using SSH
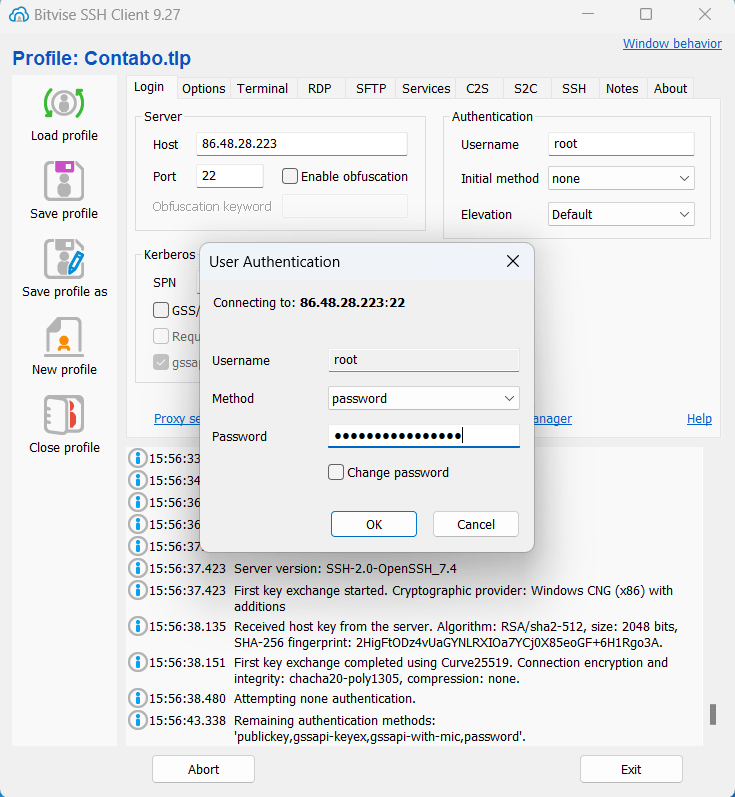
First, you need to install a free SSH client. I like Bitvise because it is interactive.
Open Bitvise. Connect to your host which is your server IP address using port 22. A Host key verification will popup, just click Accept and Save.
Then login using ROOT and enter your password you have generated when signing up with Contabo.
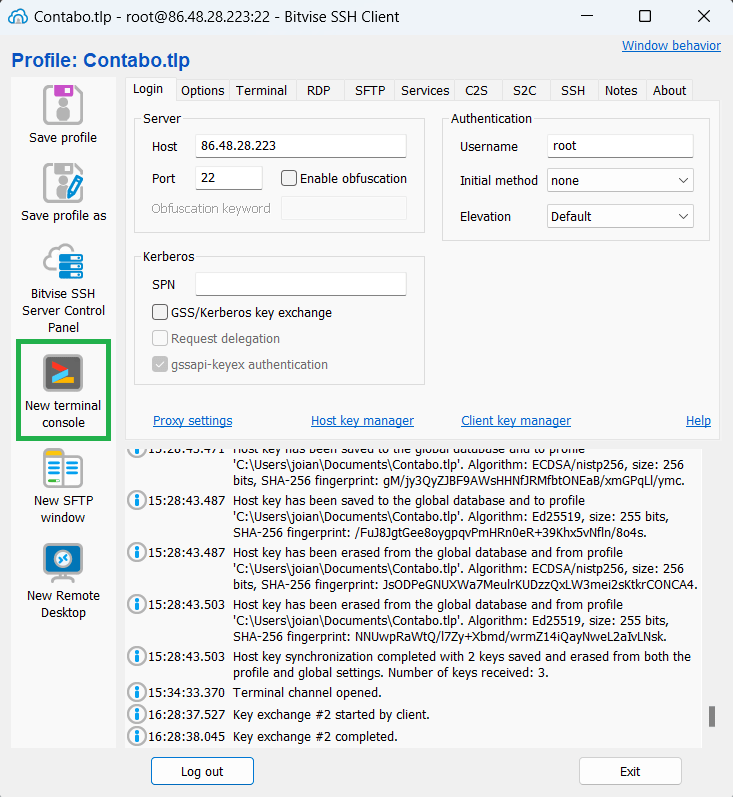
Once you are logged in, click on New terminal console.
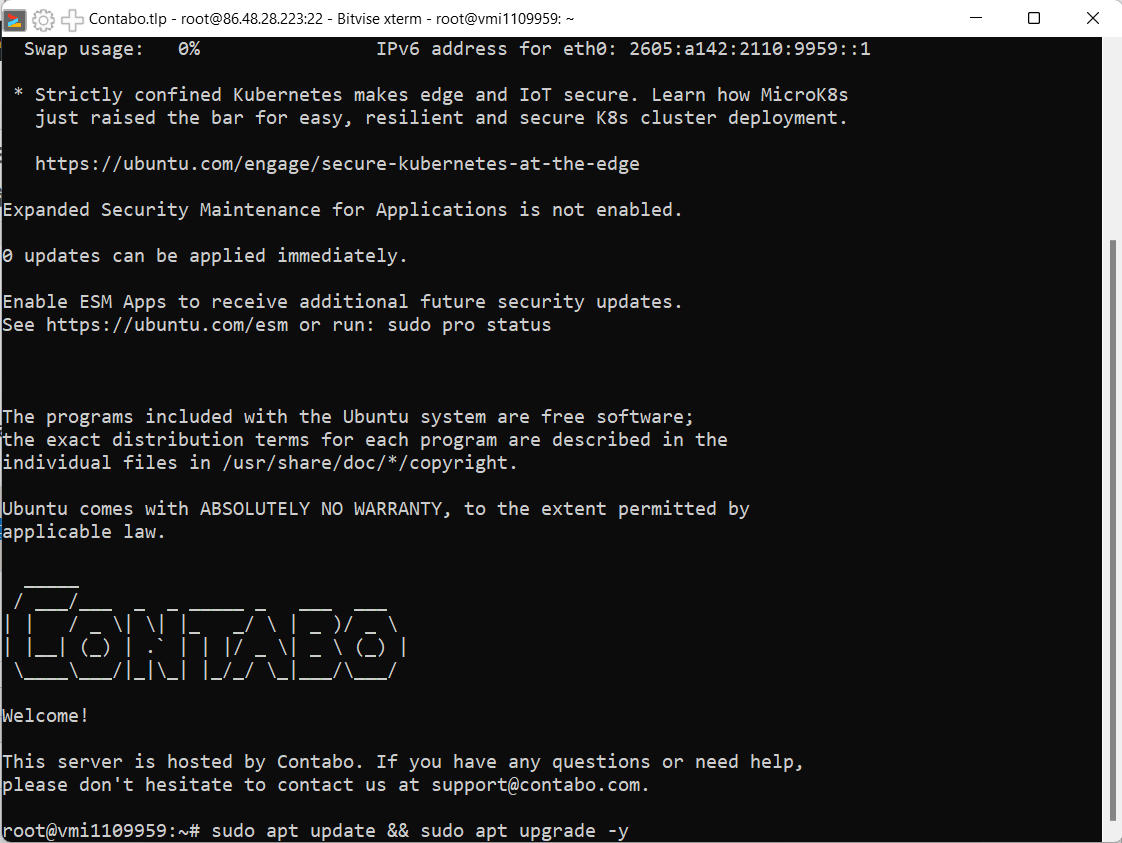
Step 2. Install aaPanel
We will be installing aaPanel on Ubuntu 20.04 LTS. We need to update packages first if there are any. If you want to install aaPanel on CentOS 7, follow this guide.
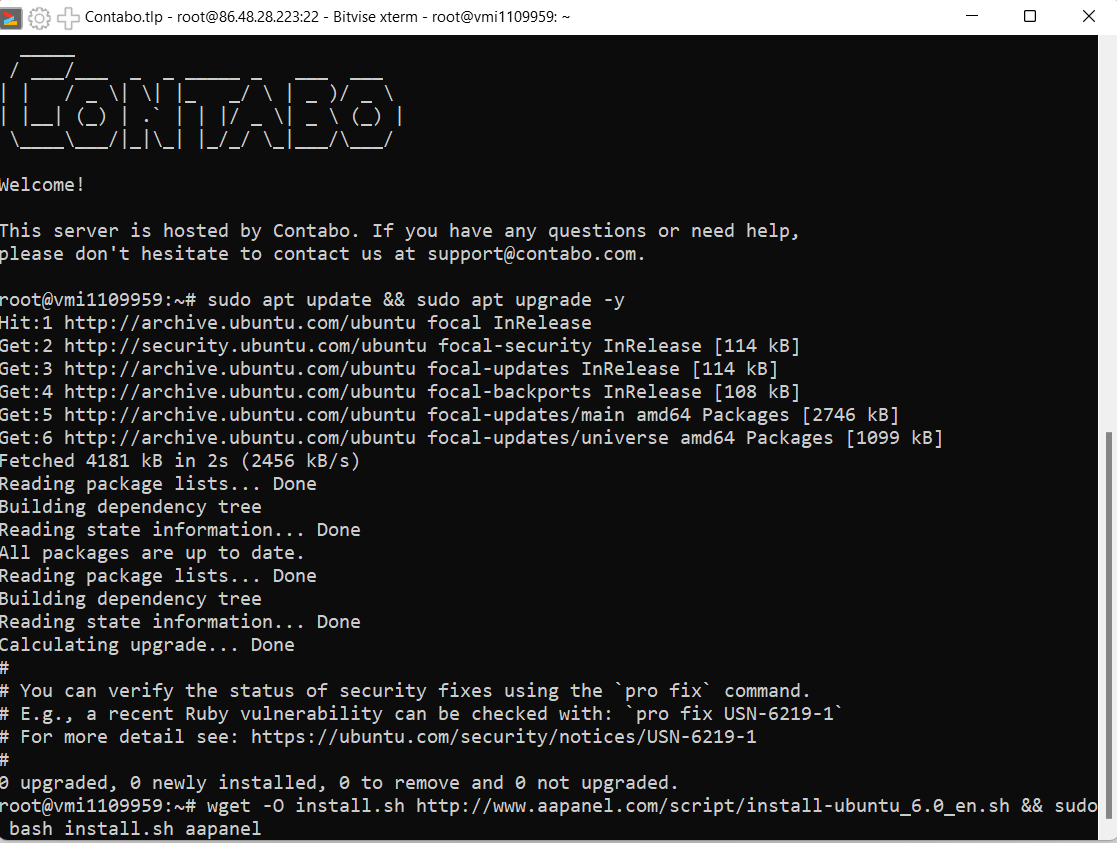
sudo apt update && sudo apt upgrade -y
Next, we will install aaPanel using the following command.
URL=https://www.aapanel.com/script/install_7.0_en.sh && if [ -f /usr/bin/curl ];then curl -ksSO "$URL" ;else wget --no-check-certificate -O install_7.0_en.sh "$URL";fi;bash install_7.0_en.sh ipssl
You will be asked the following questions. Just type y and yes respectively.
- Do you want to install aaPanel to the /www directory now? (y/n):
- Do you need to enable the panel SSL? (yes/n):
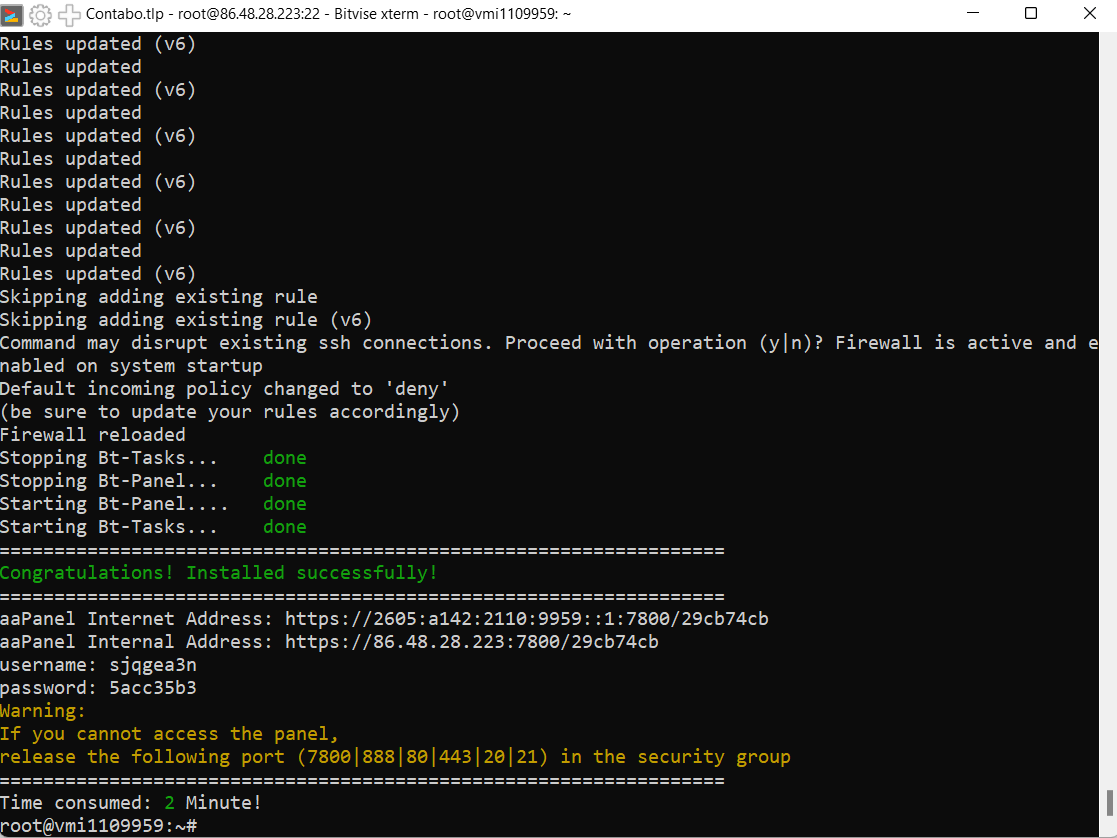
It will take at least 2 minutes for aaPanel to be installed on your server.
Step 3. Access and Configure aaPanel
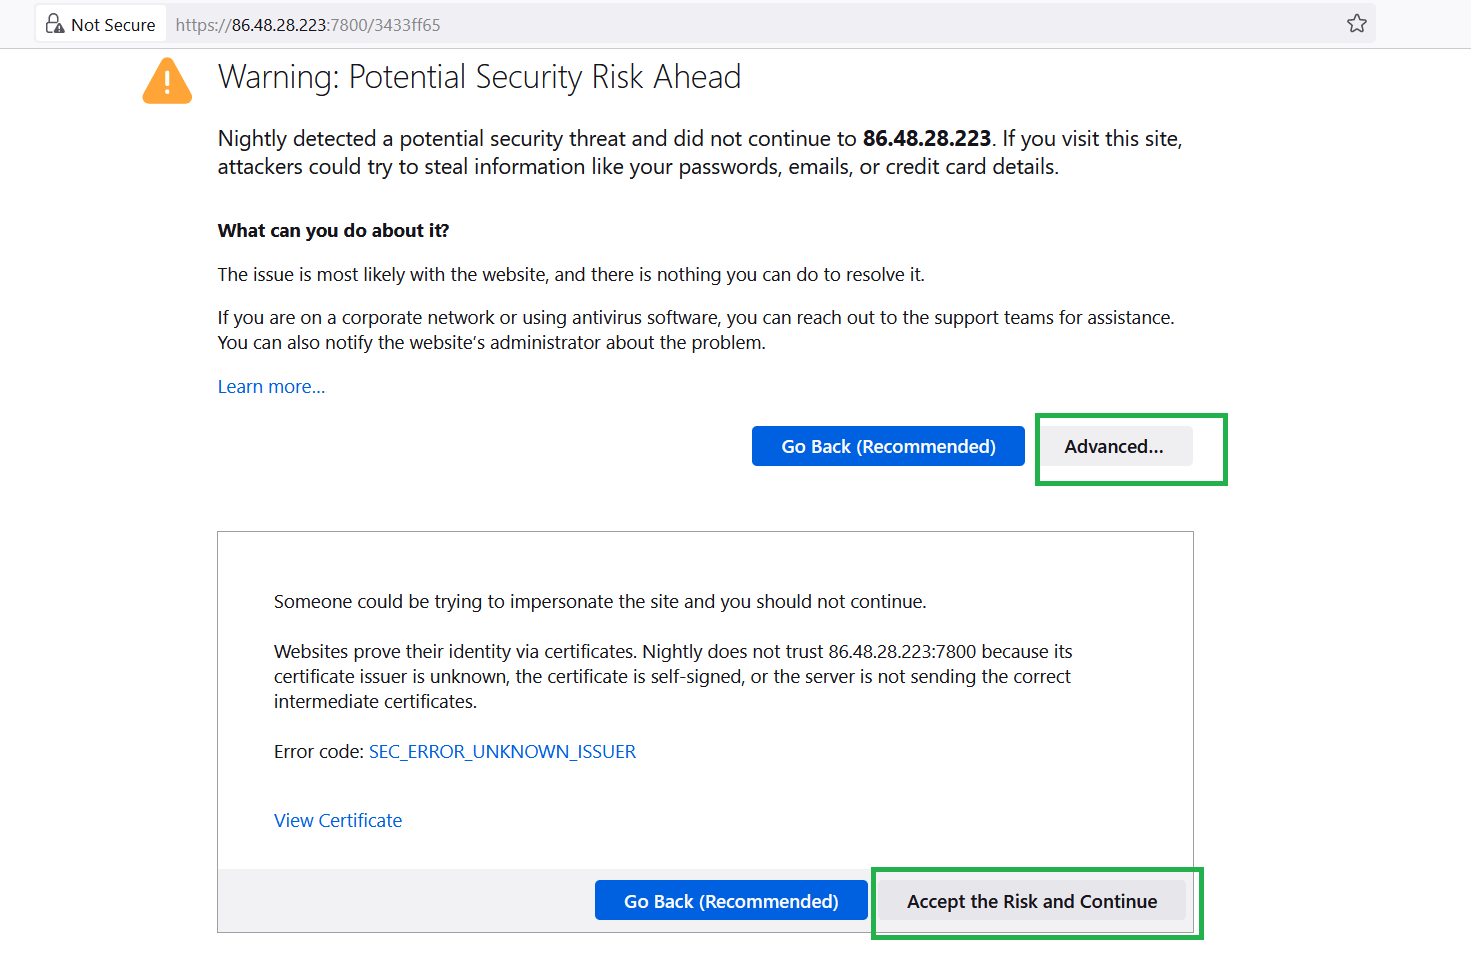
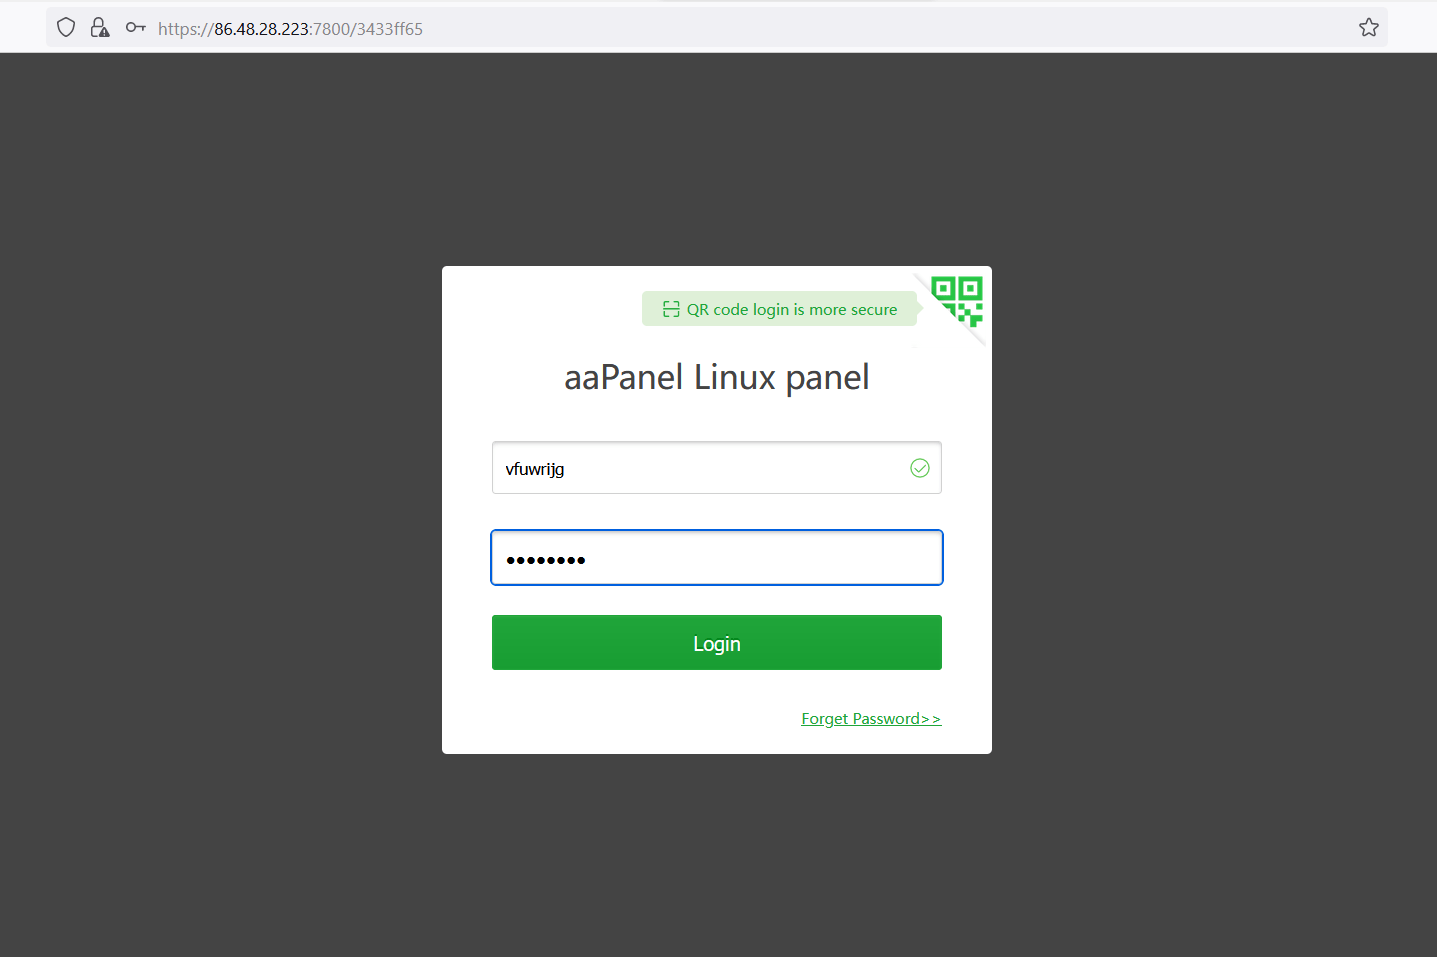
Access aaPanel using the given address.
Login using the credentials given.
Then choose the software packages to be installed. Don’t forget to select DNS Server and Mail Server.
It will take a long time to install and I hope aaPanel will address this soon. Patience is a virtue 🙂
If the process lags, restart your panel by going to the upper right corner Restart > Restart panel.

Step 4. Setup Email Server
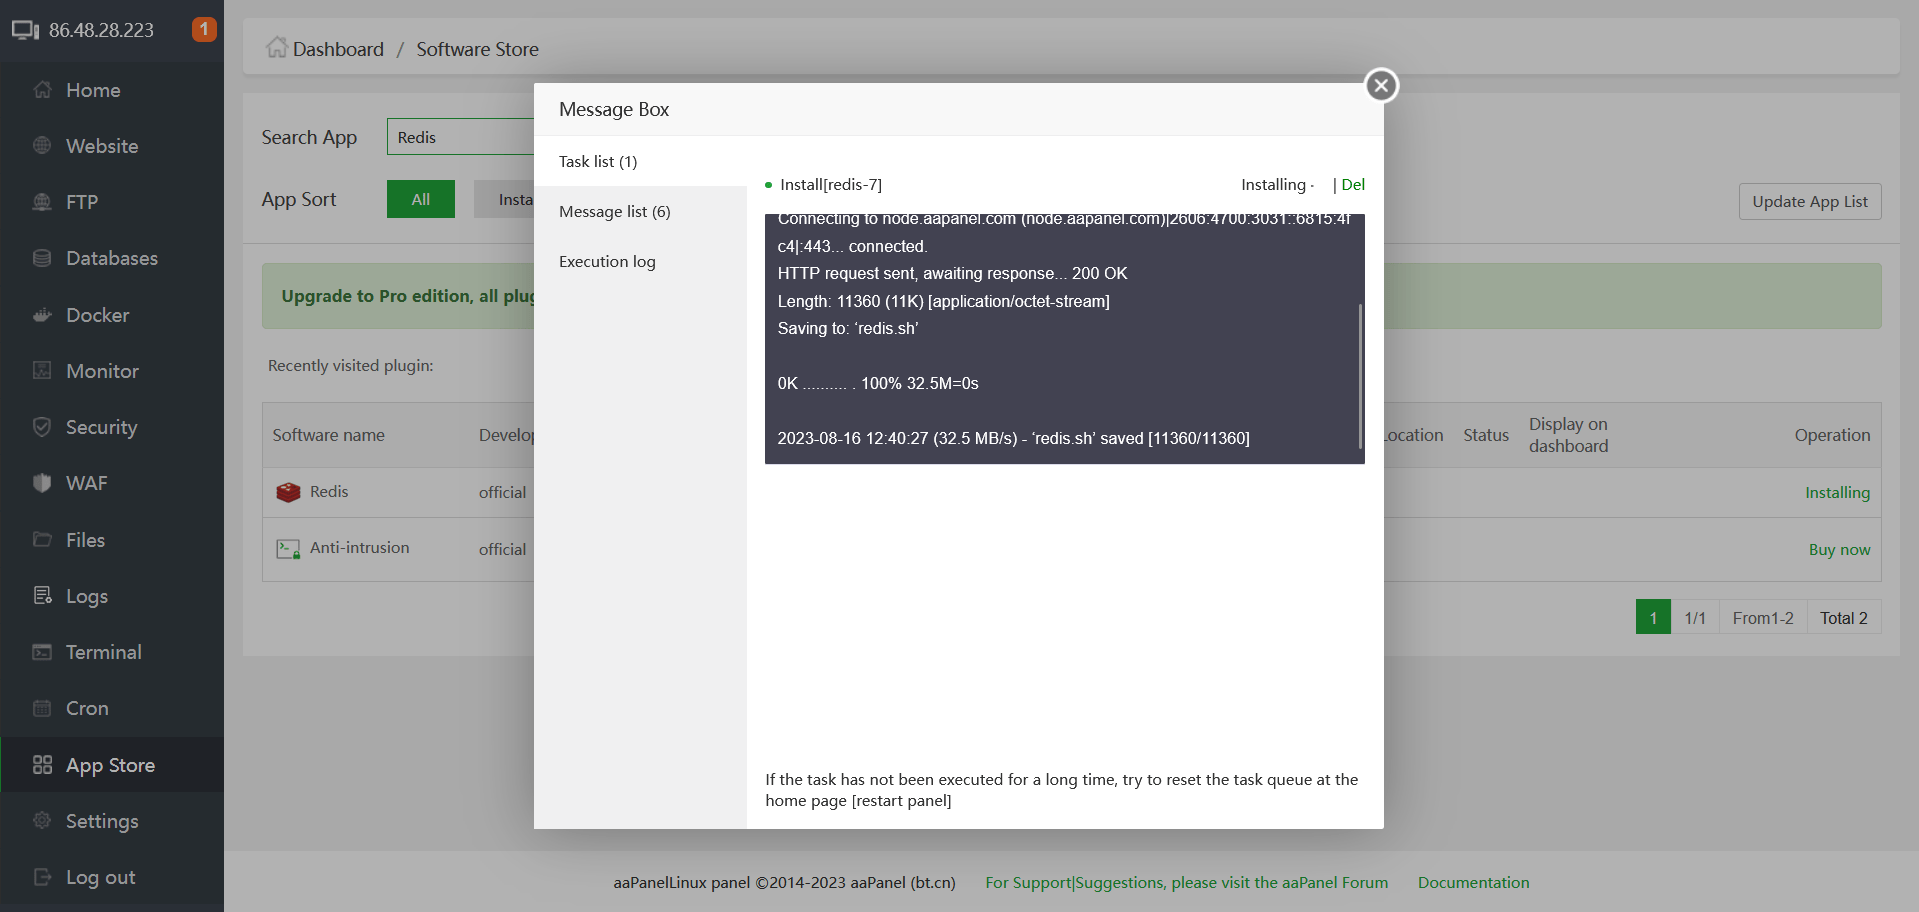
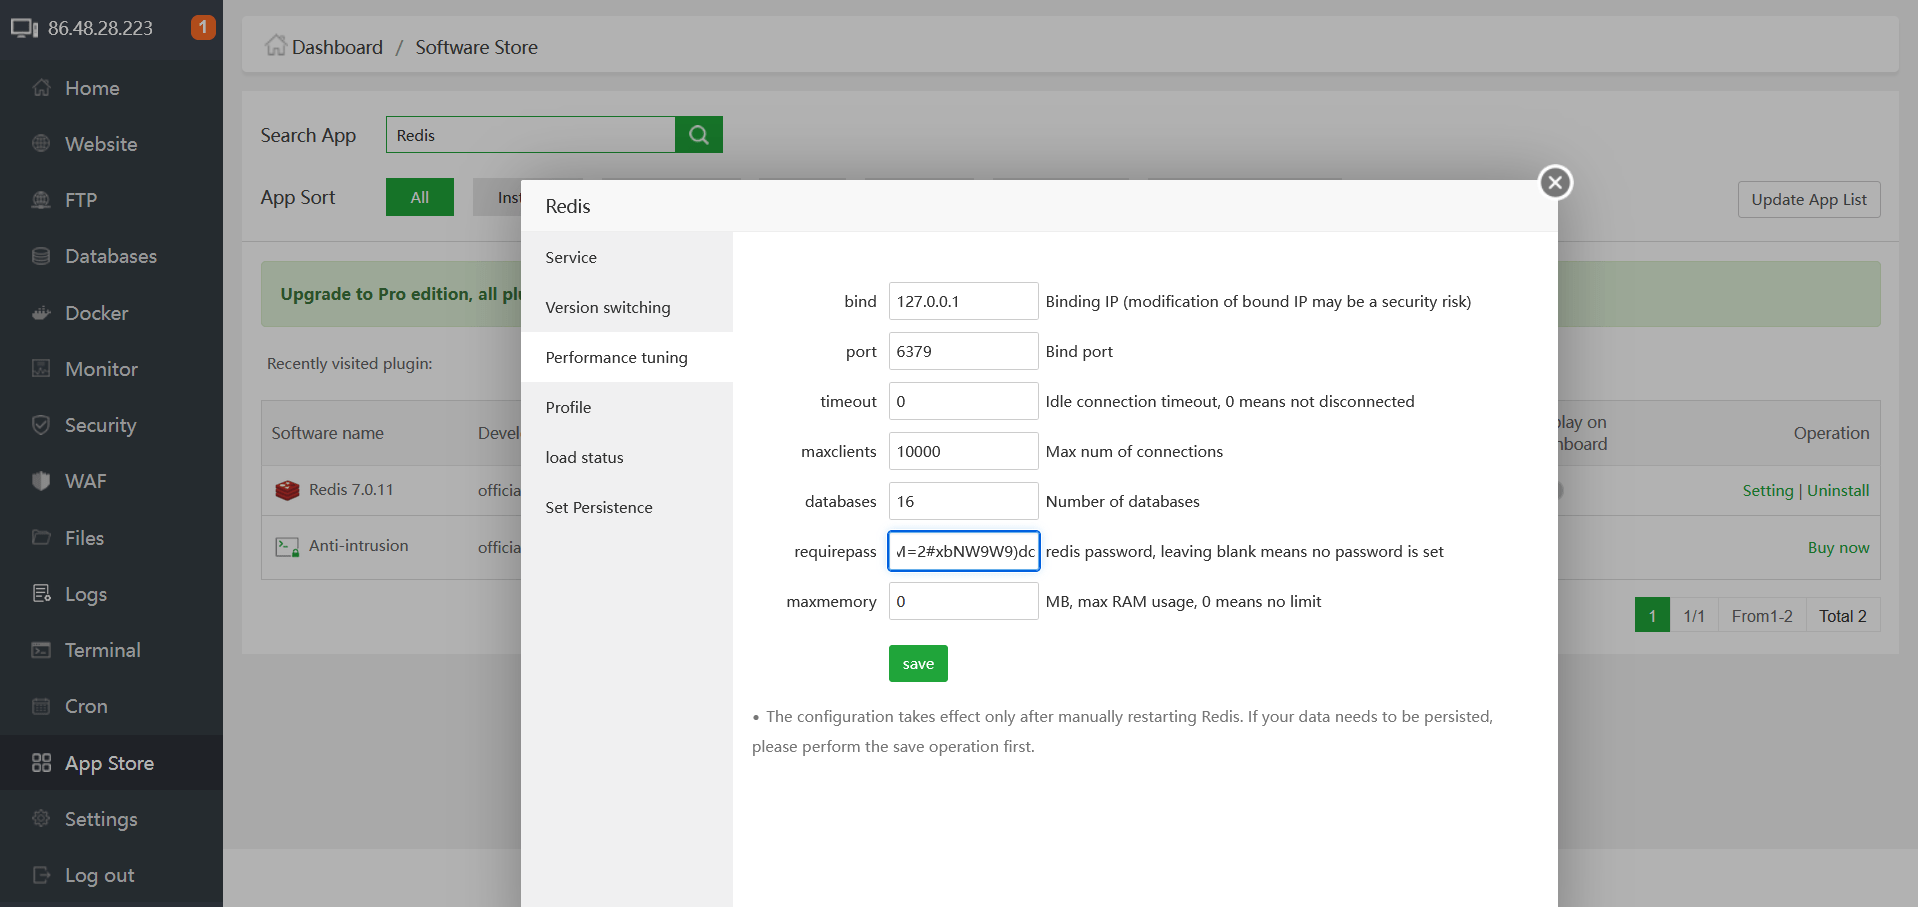
Once all necessary software packages are installed, we will install Redis.
Just go to App Store > Find Redis and install.
Once Redis is installed, create a password. Go to the Redis setting and choose Performance tuning. Beside requirepass put your password. Don’t forget to store it in a safe place if you’re using a password generator.
Next, search for Mail Server on the App Store. Then go to its Settings.
When asked “Mail Server is not installed, is it installed?” just click confirm.
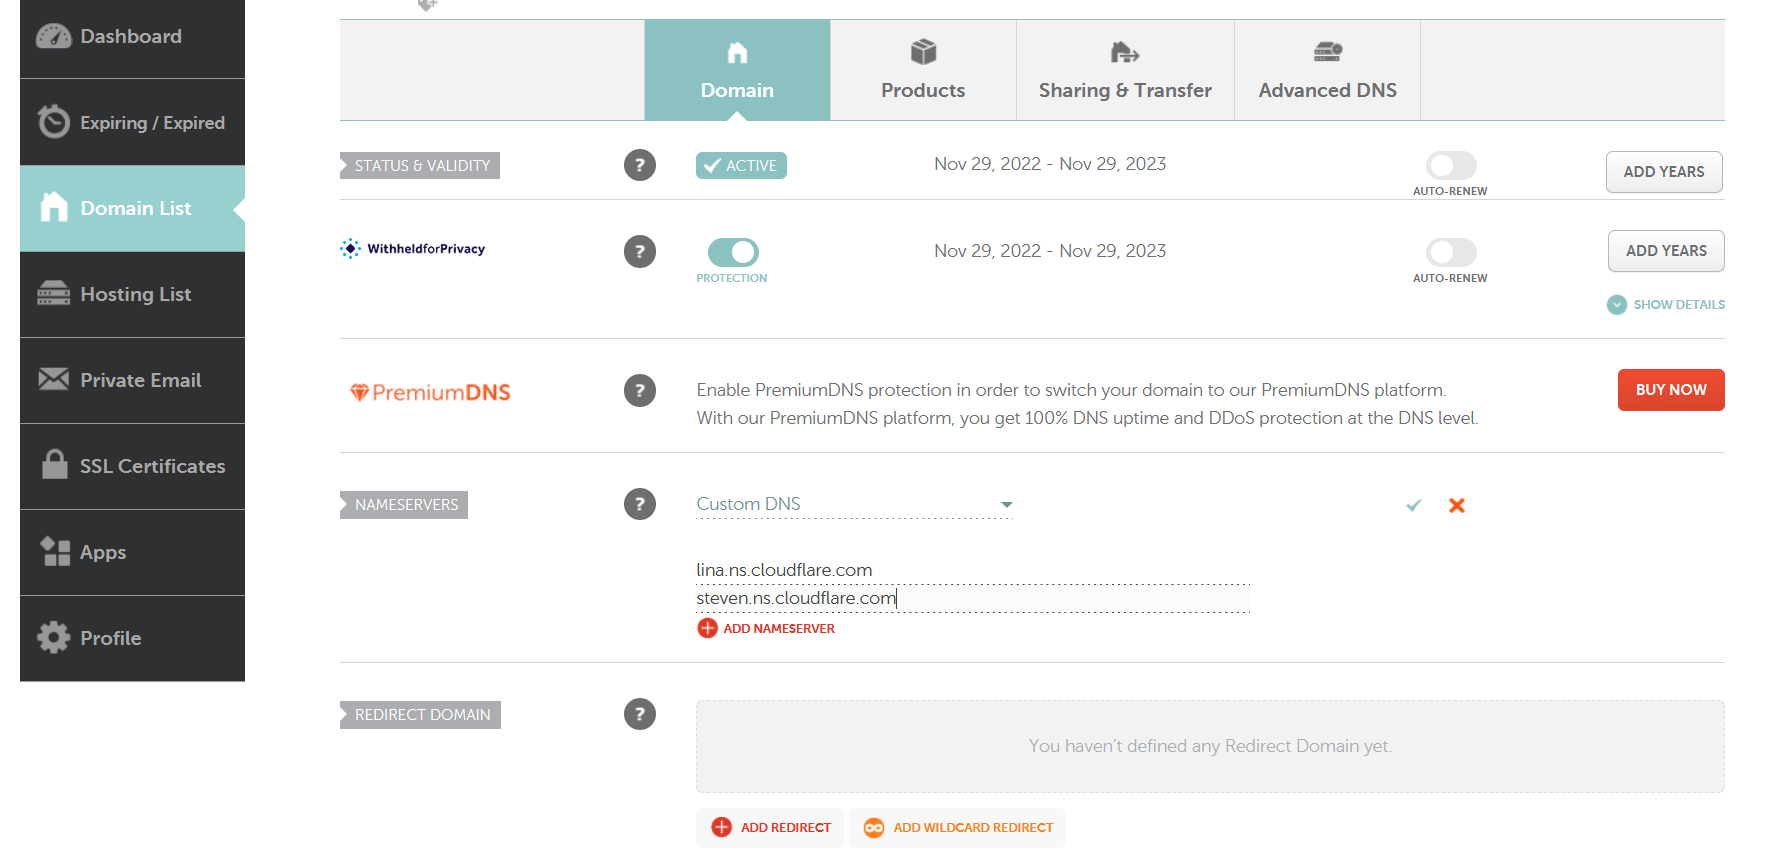
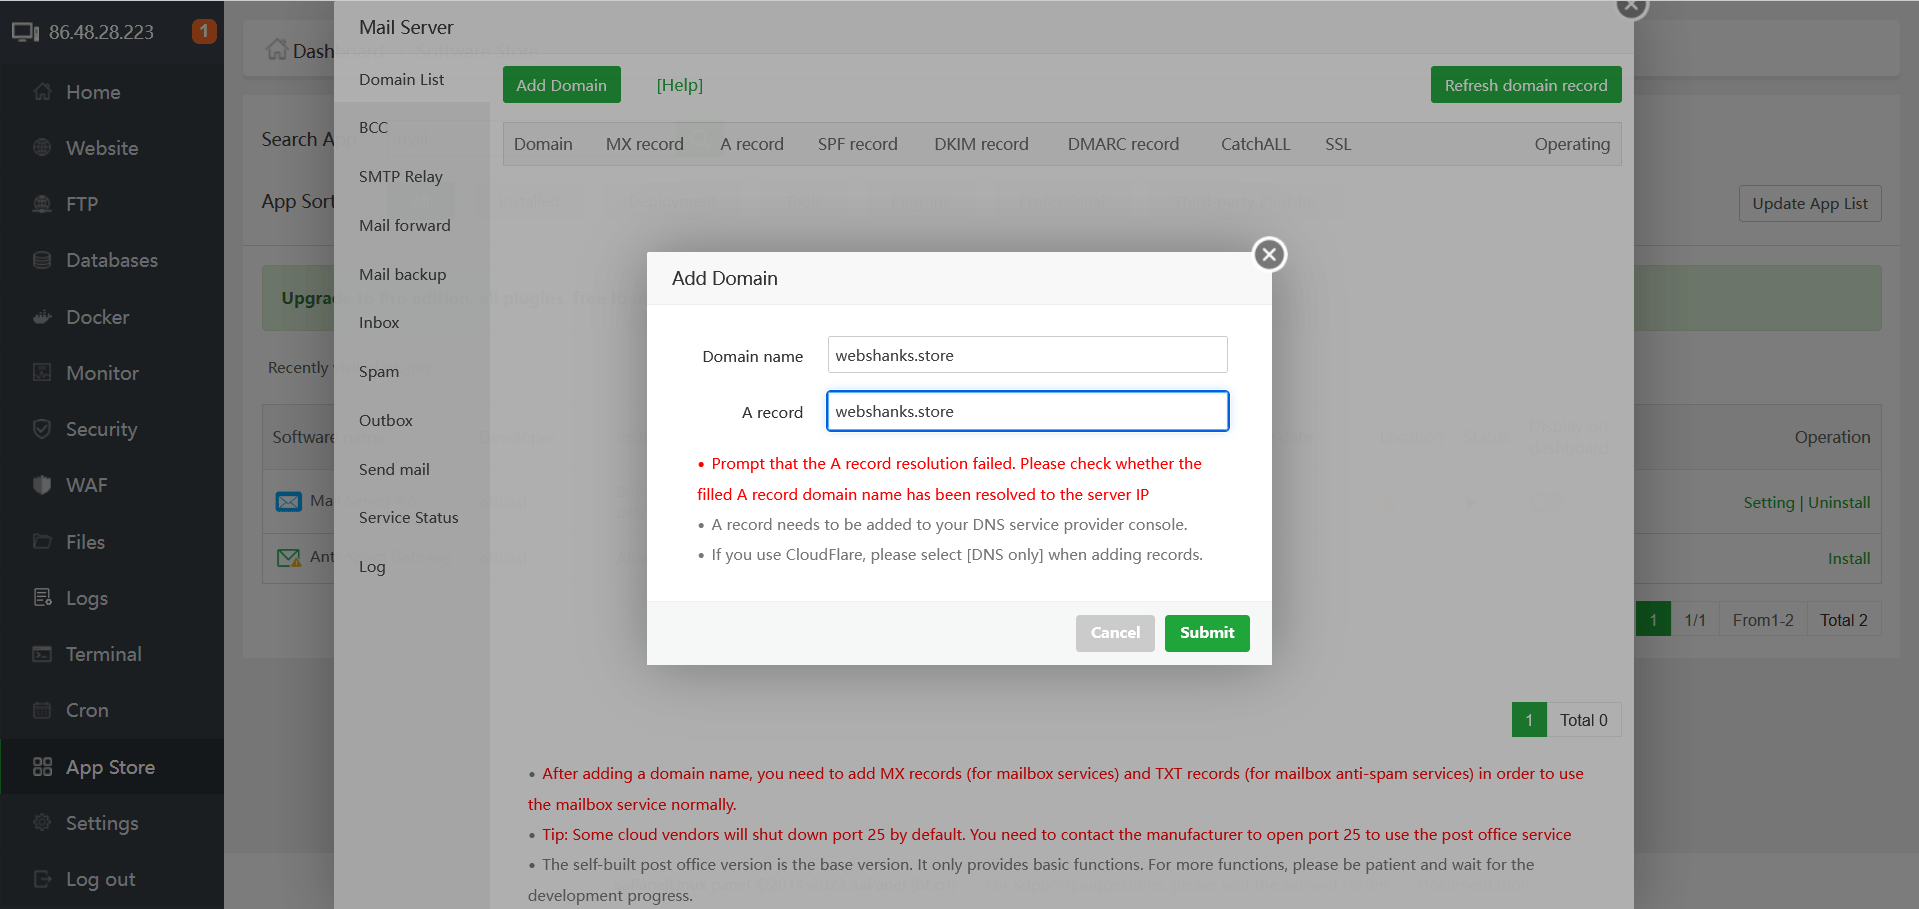
Then you will be asked to add a Hostname. Add a fully qualified domain e.g. control.webshanks.store or mail.webshanks.store.
Do not forget to add an A Record for this Hostname.
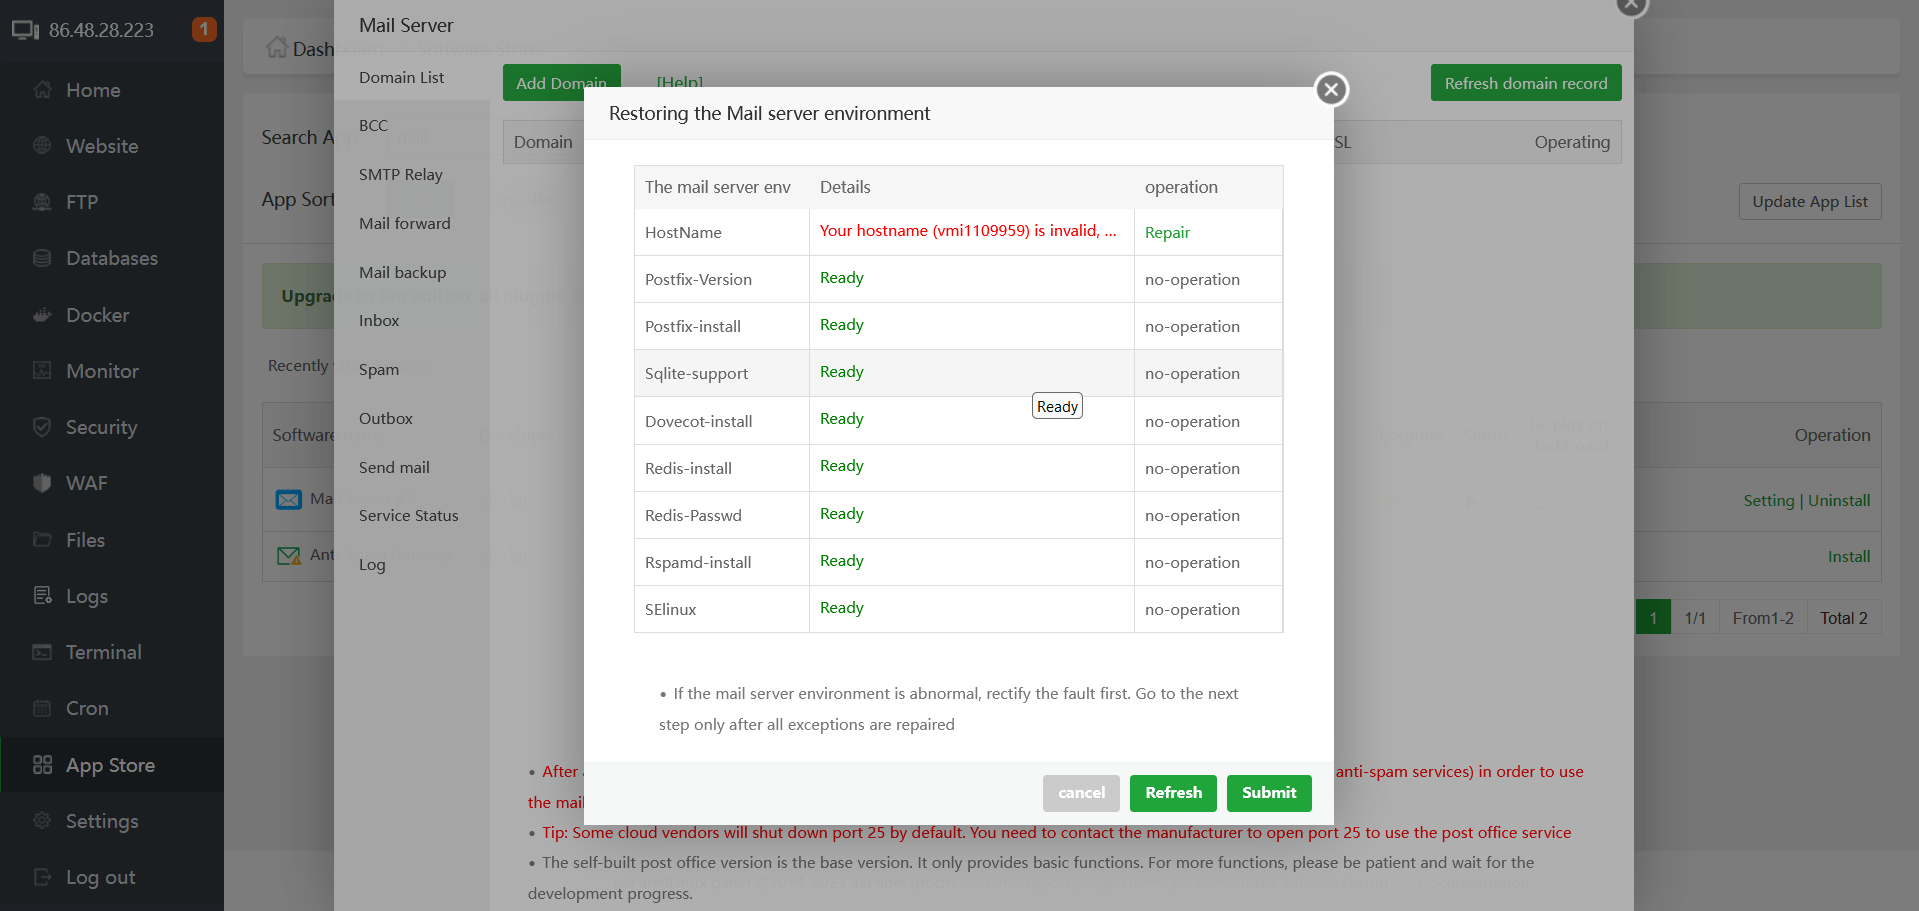
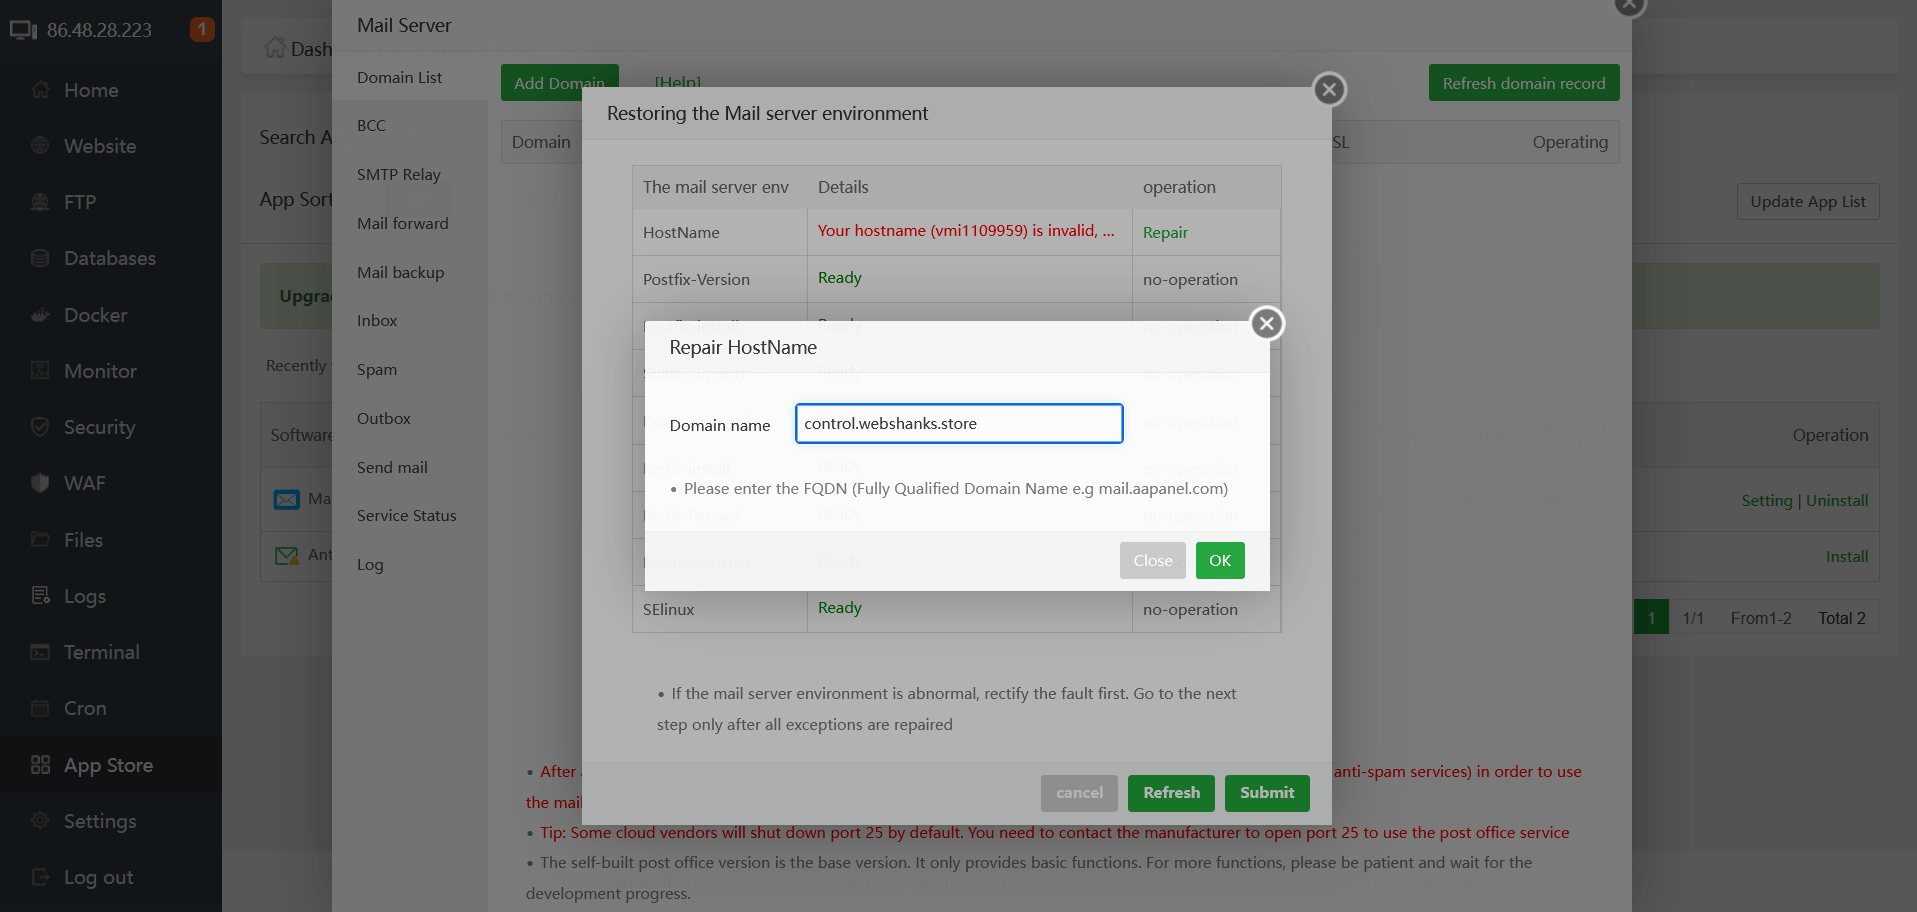
Then click Submit.
Step 5. Setup SSL and DSN Records (A, MX, TXT)
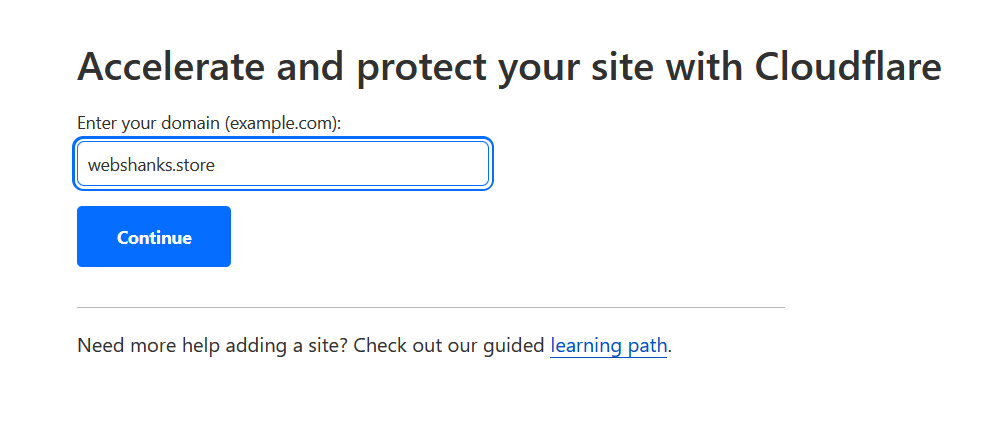
Next create a free Cloudflare account. Then add a Site. Scroll down and choose Free and click Continue.
Then change your nameservers in your domain registrar. For Namecheap, go to your dashboard and choose manage for the domain you want to setup DNS with.
Change the nameservers with Cloudflare’s.

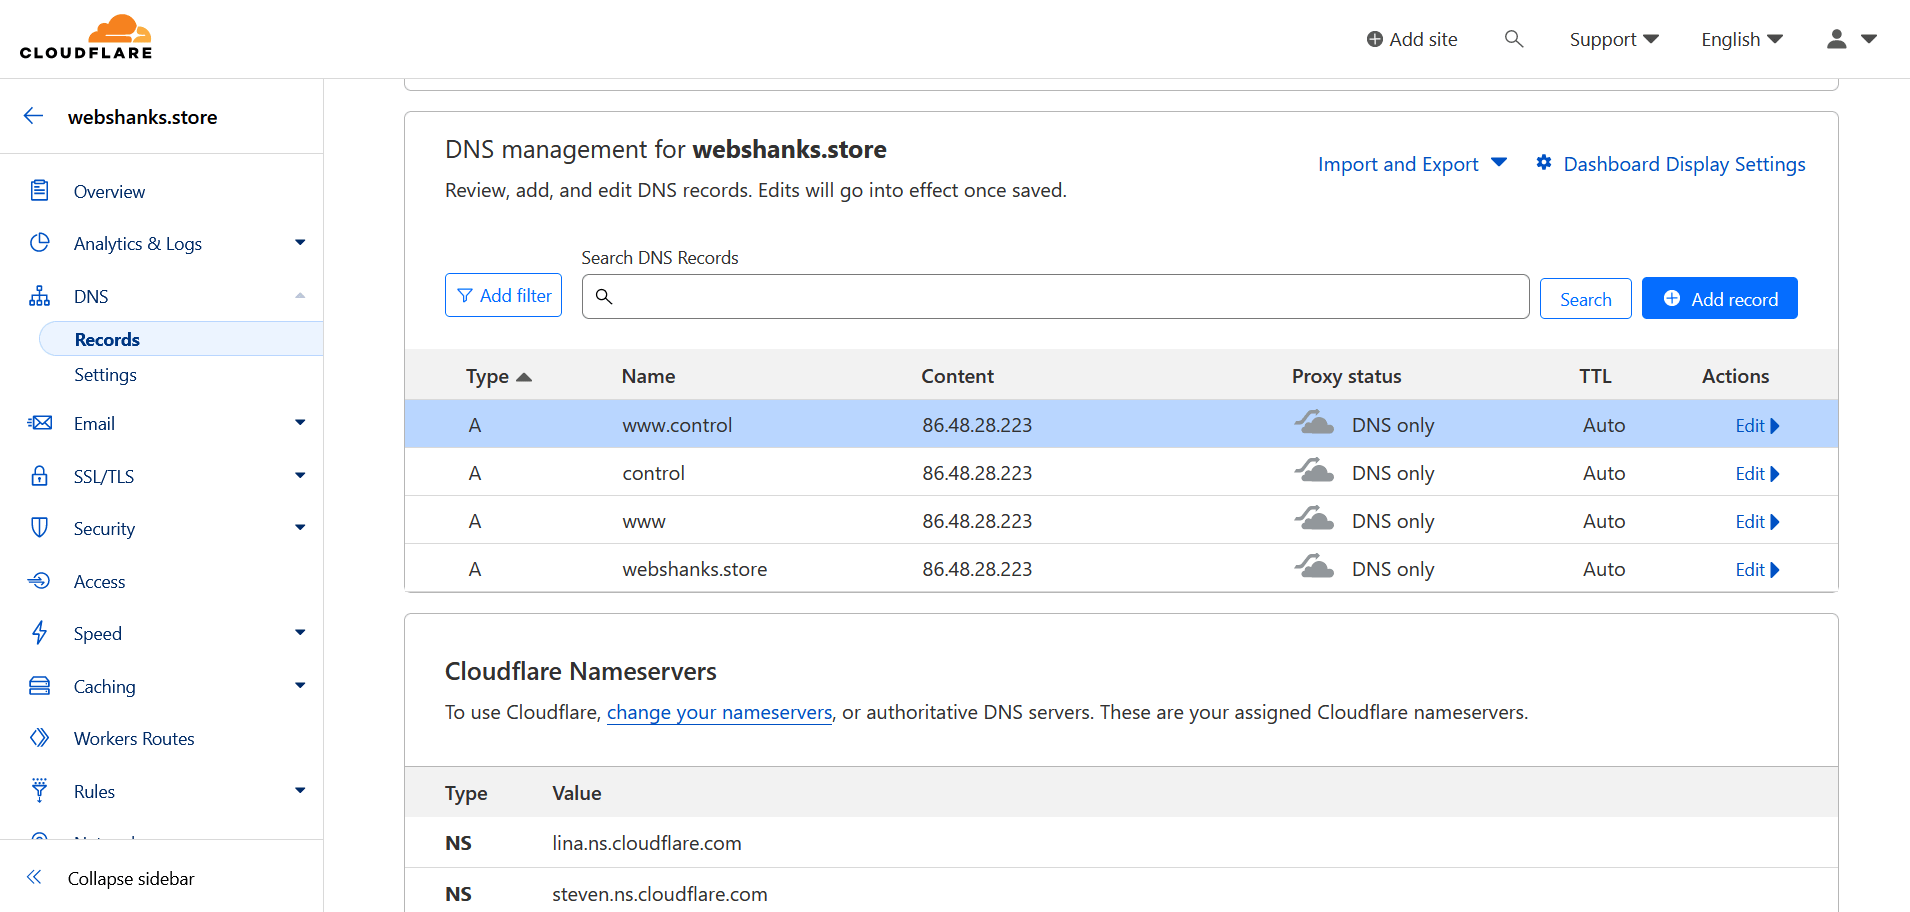
Next, add an A record for non-www and www for your top-level domain. Do not forget to add your Hostname A records as well.
From your Cloudflare dashboard, choose DNS on the left side menu.
Now that we have setup A records, let’s go back to aaPanel.
Click Add Domain from Mail Server.
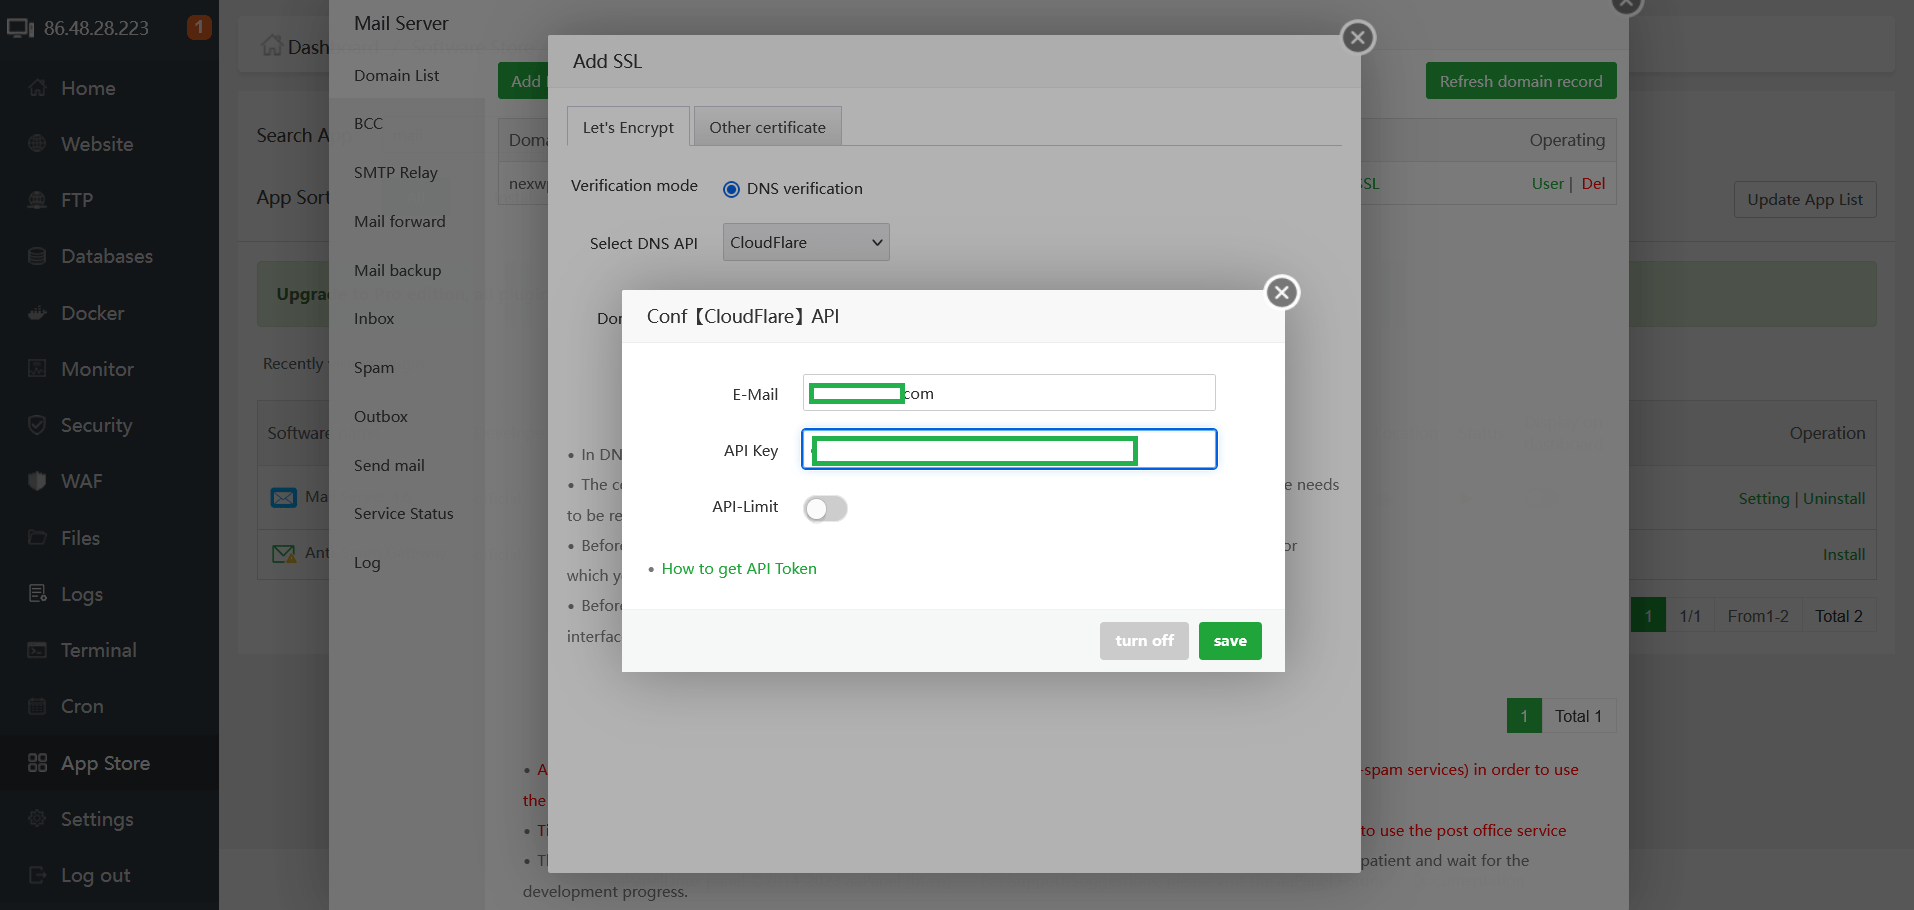
Next, add SSL. Select DNS verification as Cloudflare.
Go to Cloudflare and choose site and click Get your API token.
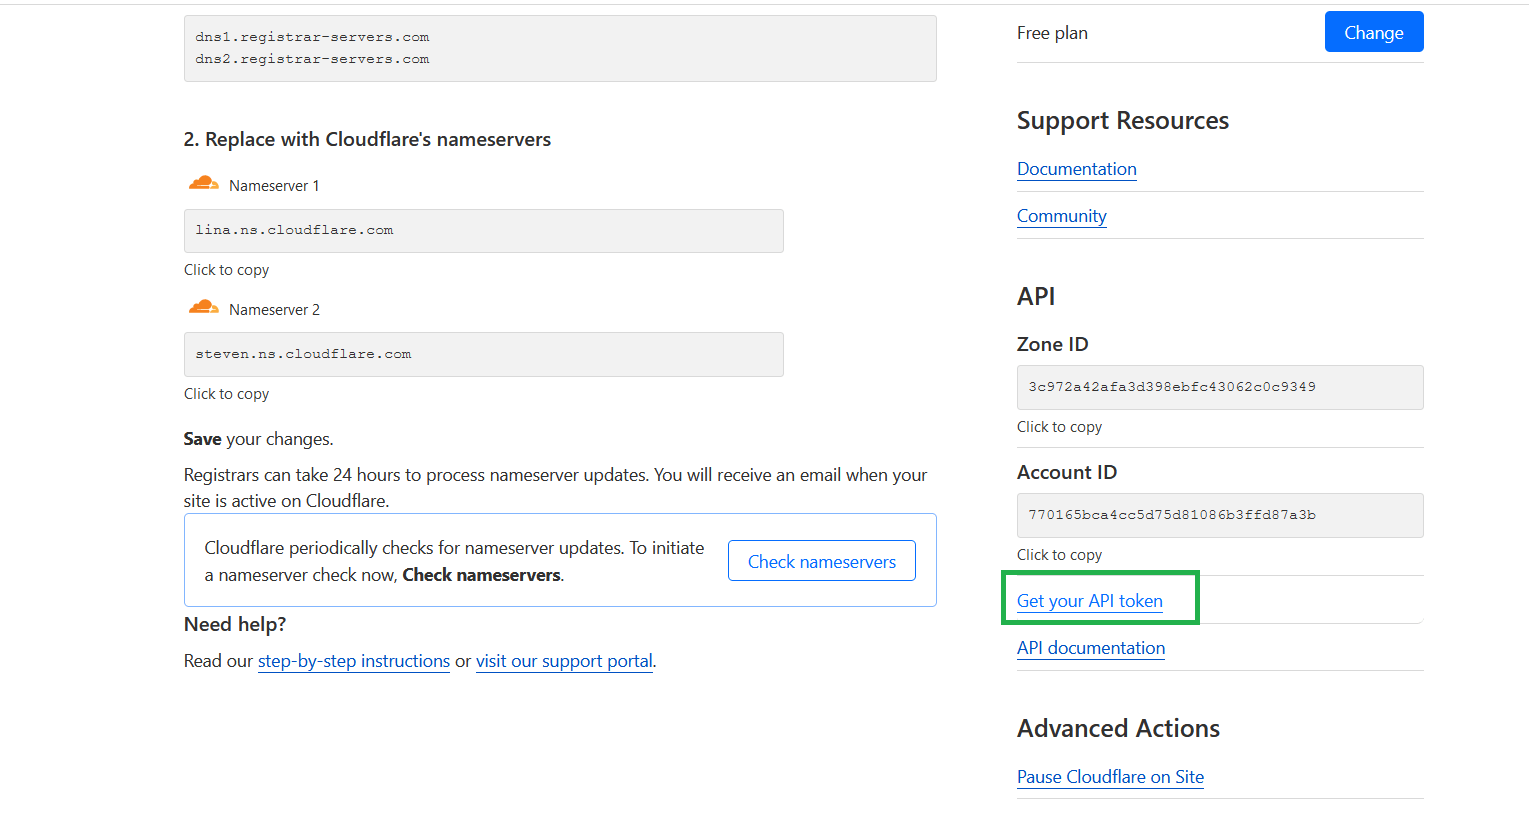
Choose Global API Key.
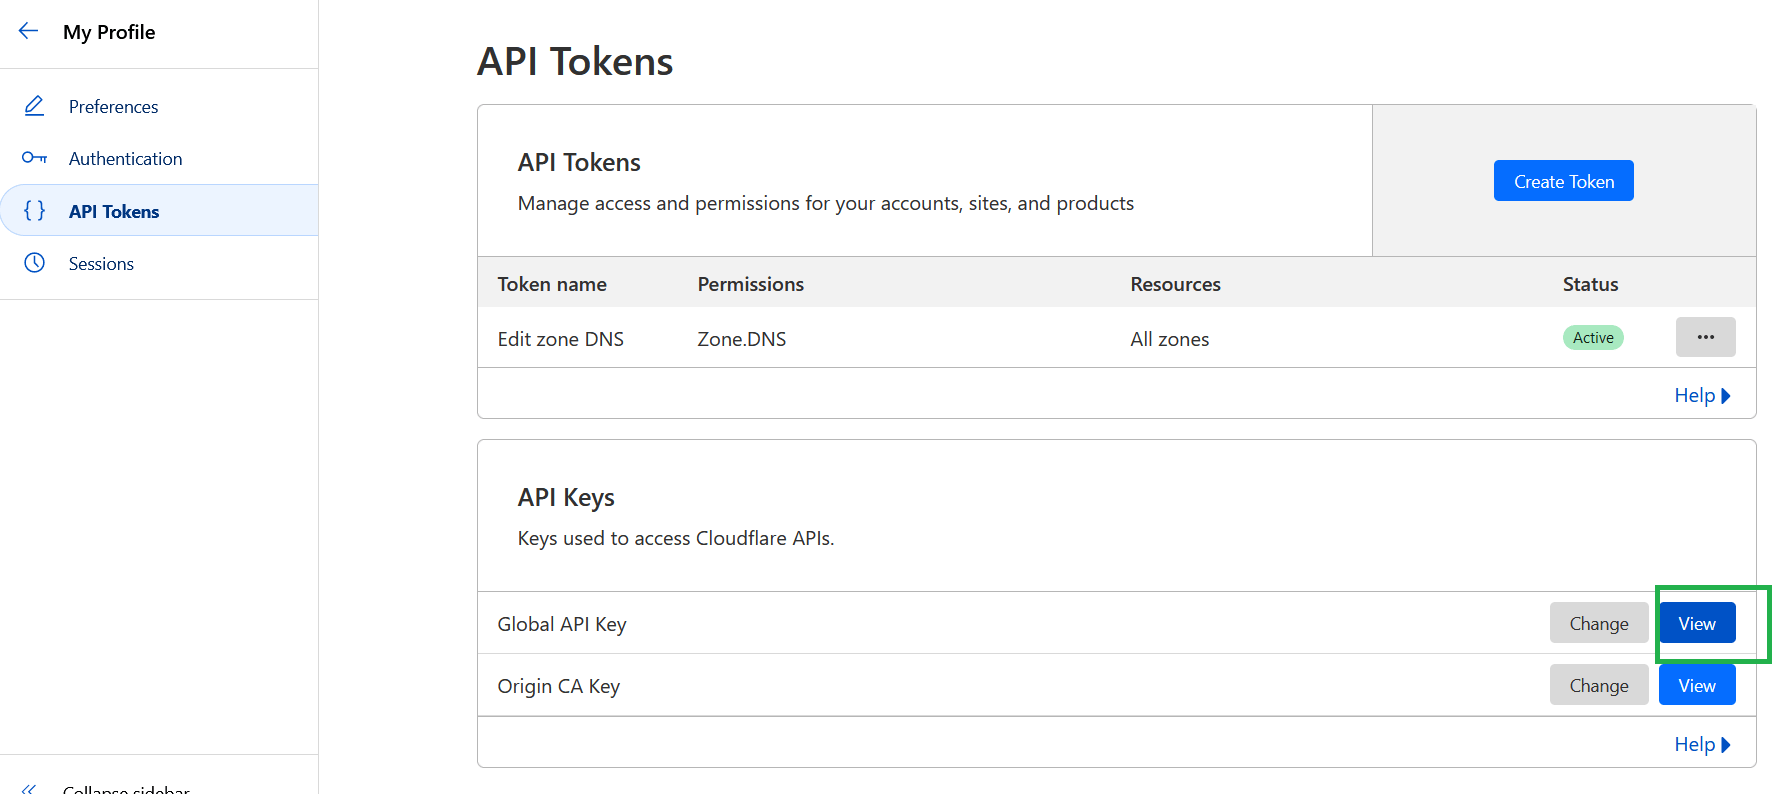
Fill up the Email and API key. Then click save.
Check the domain name and click Apply.
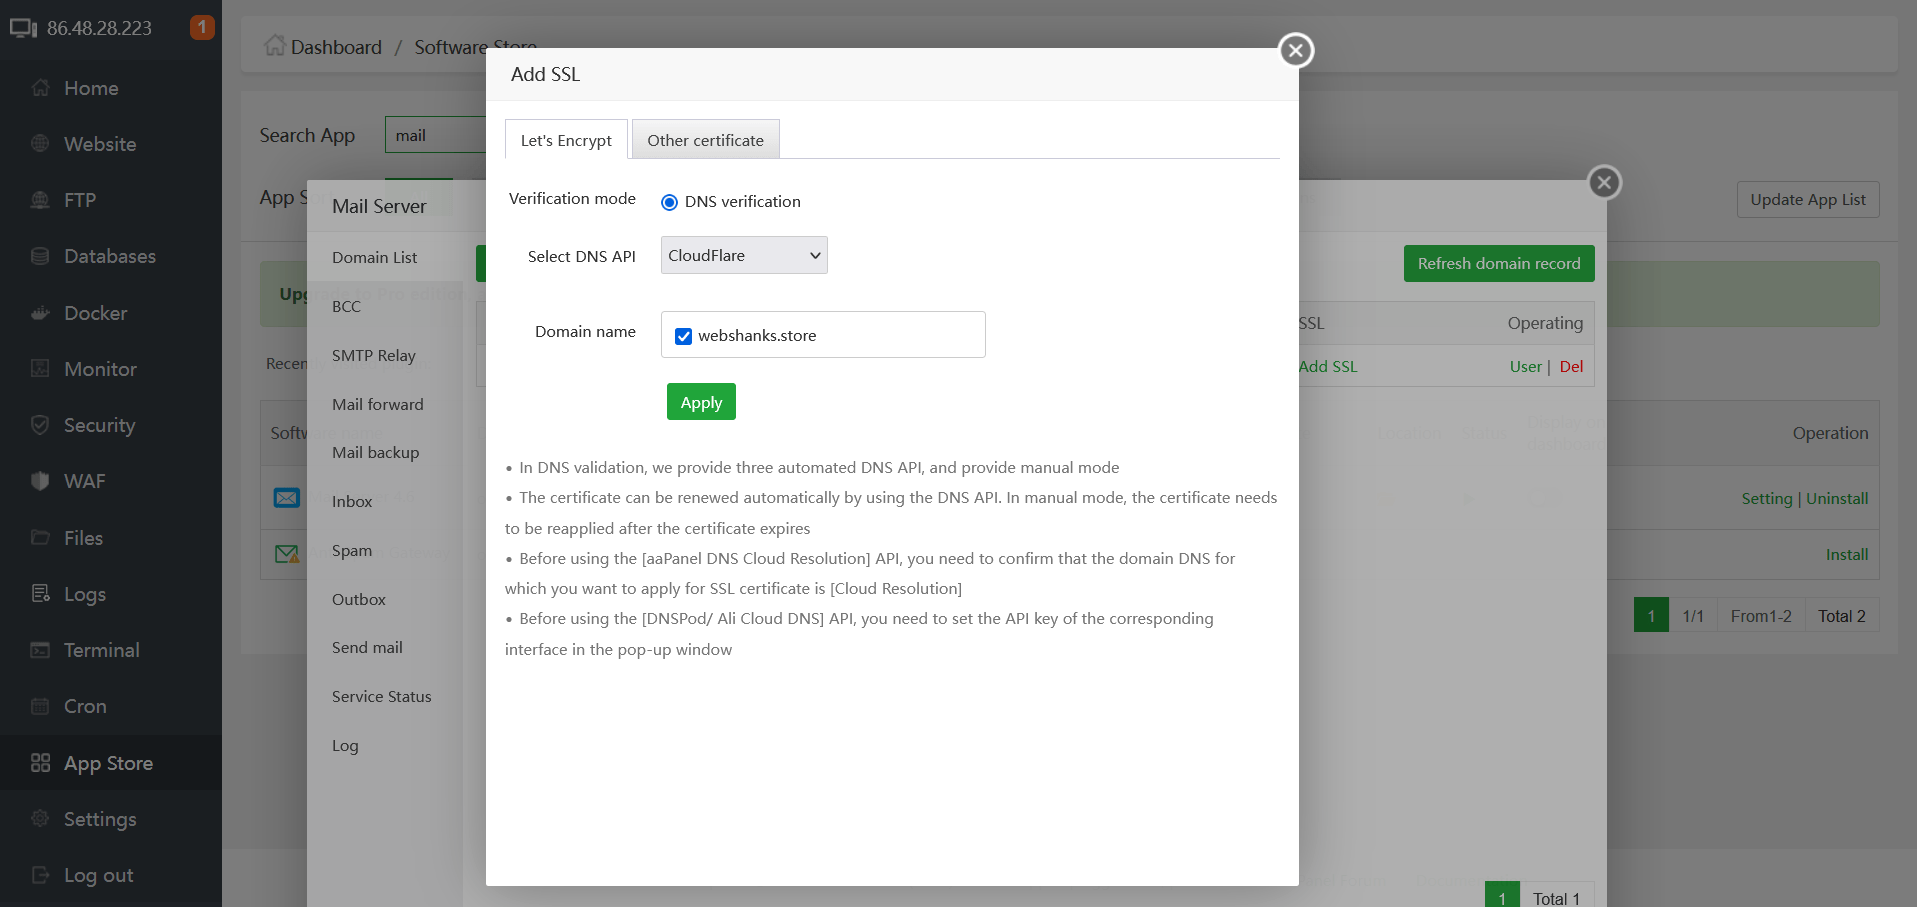
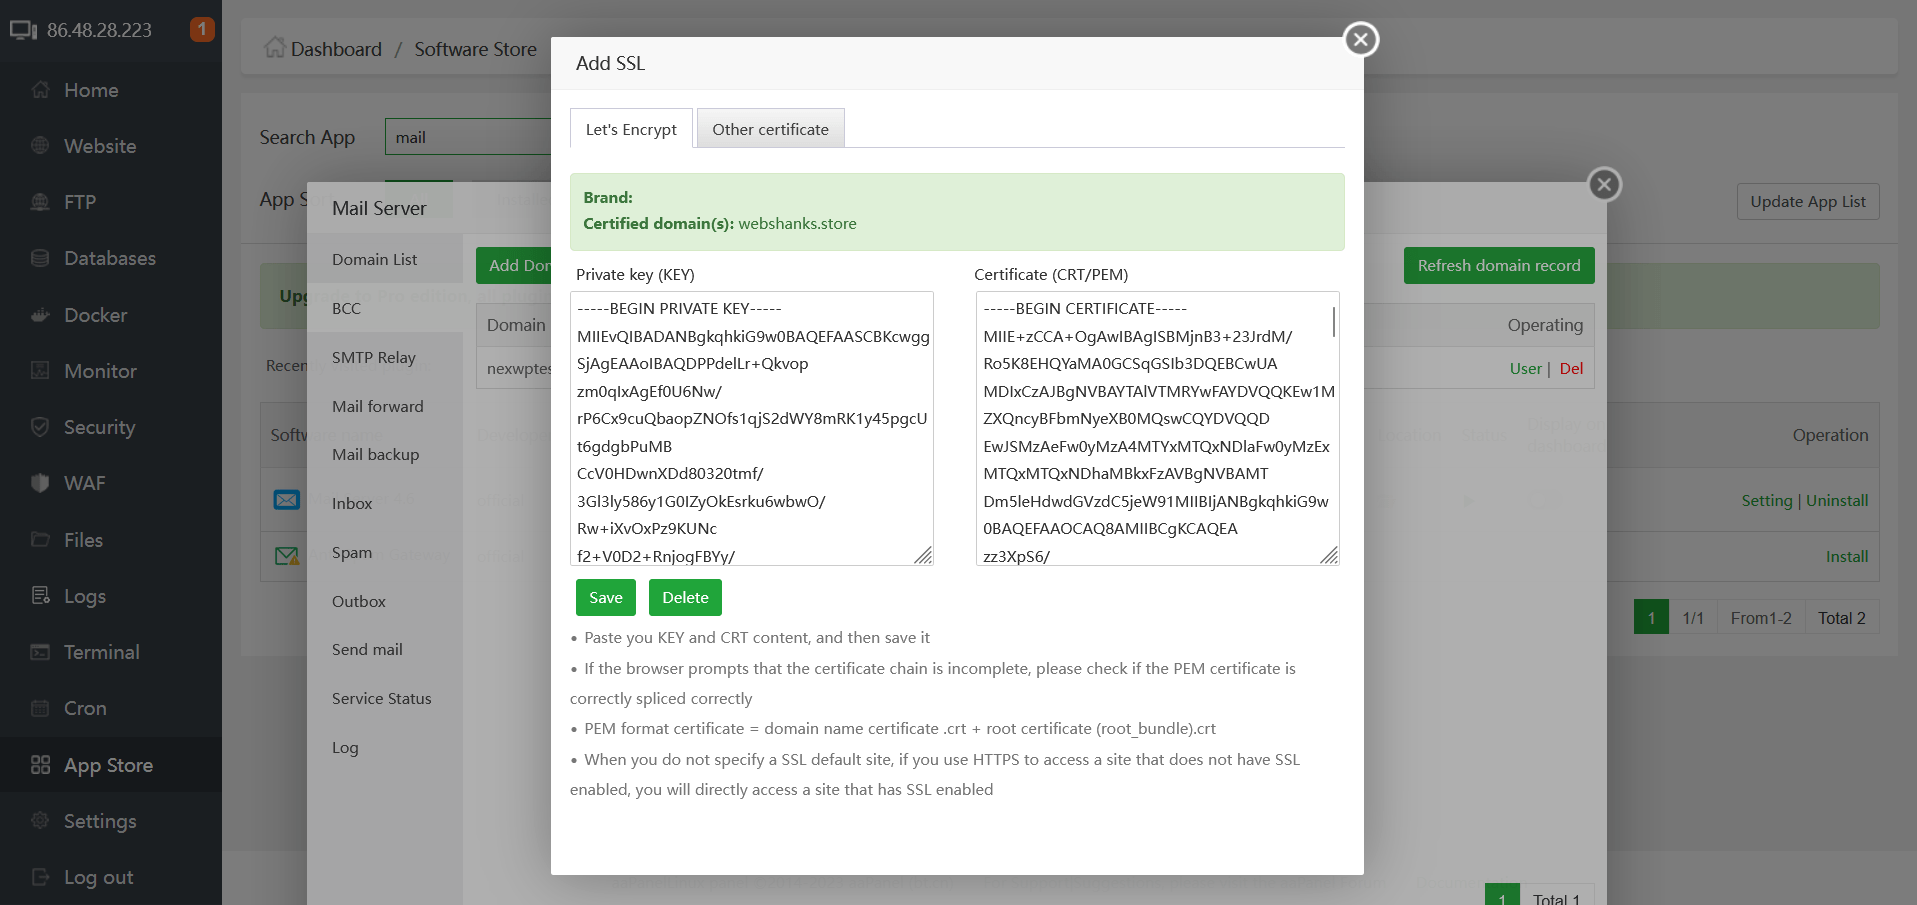
Now we have successfully added SSL.
Now it’s time to add DNS records.
Add MX and TXT records on Cloudflare using the following record value.
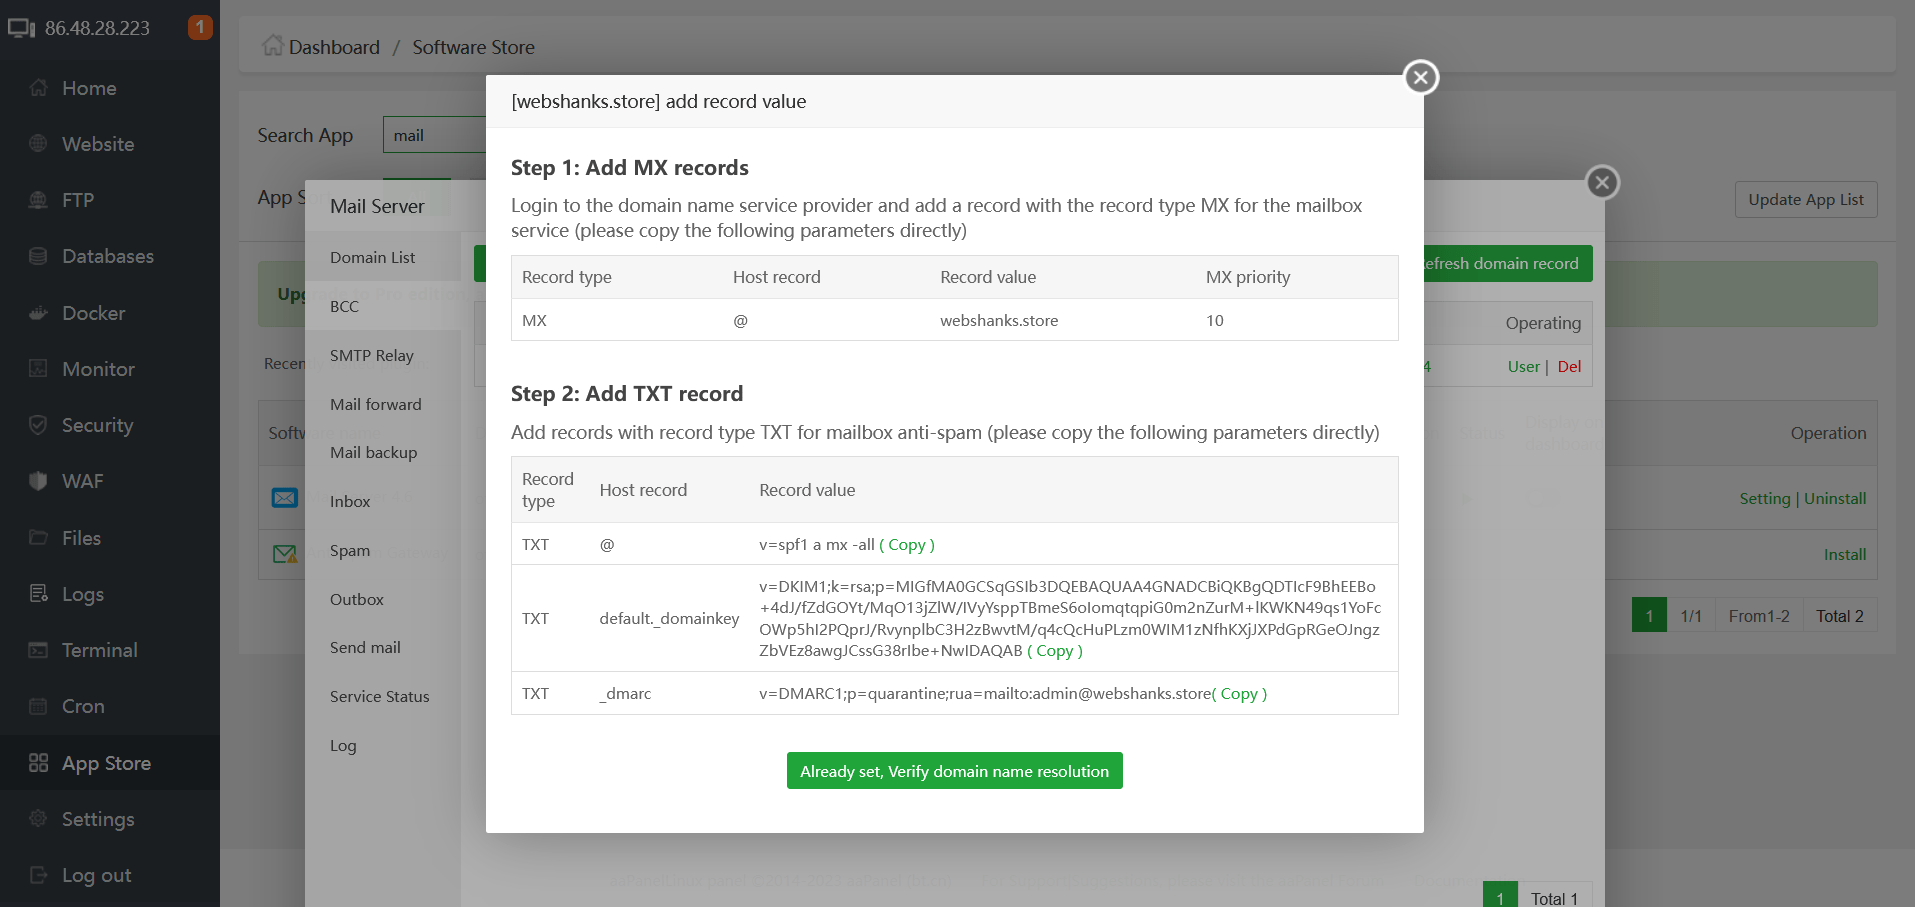
This will be your complete DNS records on Cloudflare.
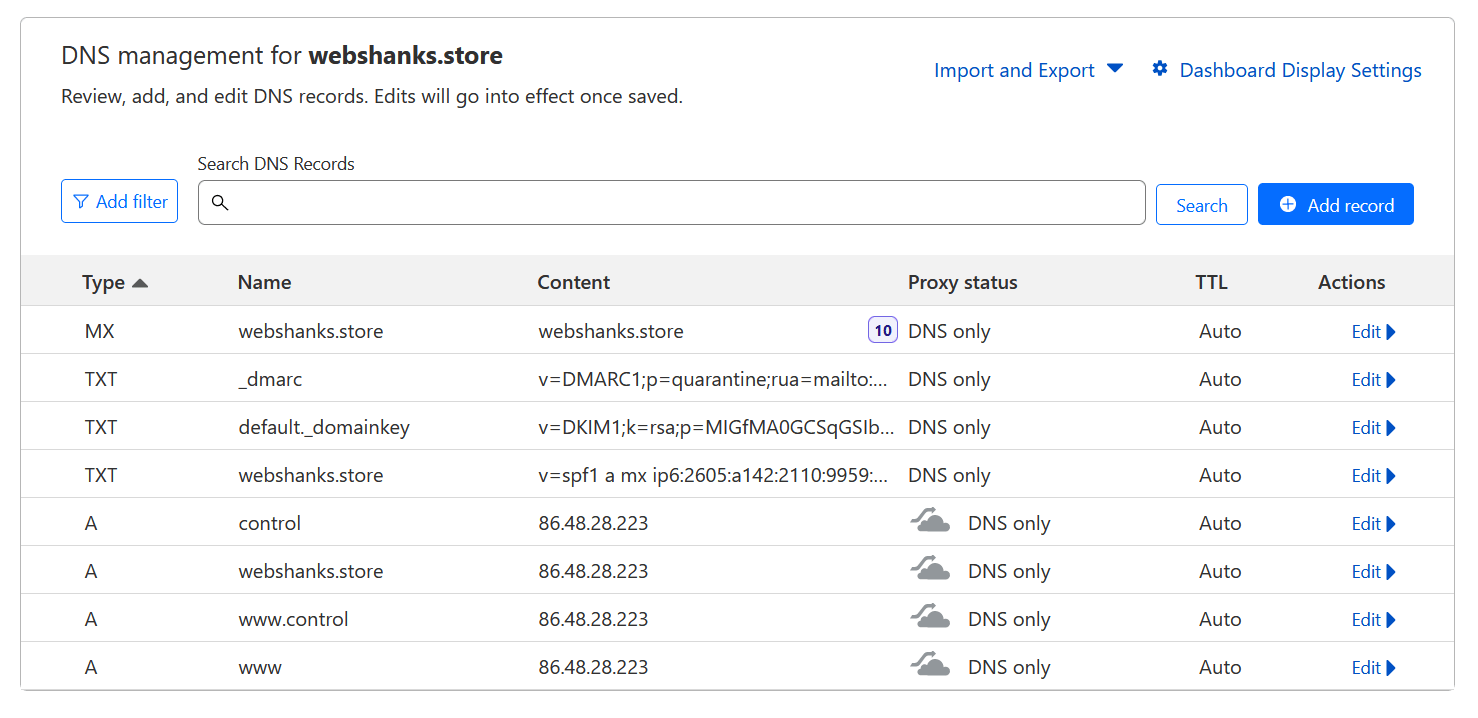
Once you have successfully added the DNS records, all the values are marked green.

Troubleshooting: In case you cannot receive an email, try this _dmarc value: v=spf1 a mx ip6:<IPV6Address> ip4:<IPV4Address> -all
Change the <IPV6Address> and <IPV4Address> with your server’s IPv6 and IPv4 respectively.
We will add a user to send and receive email messages.
Under Operating, click User. Then Add a user.

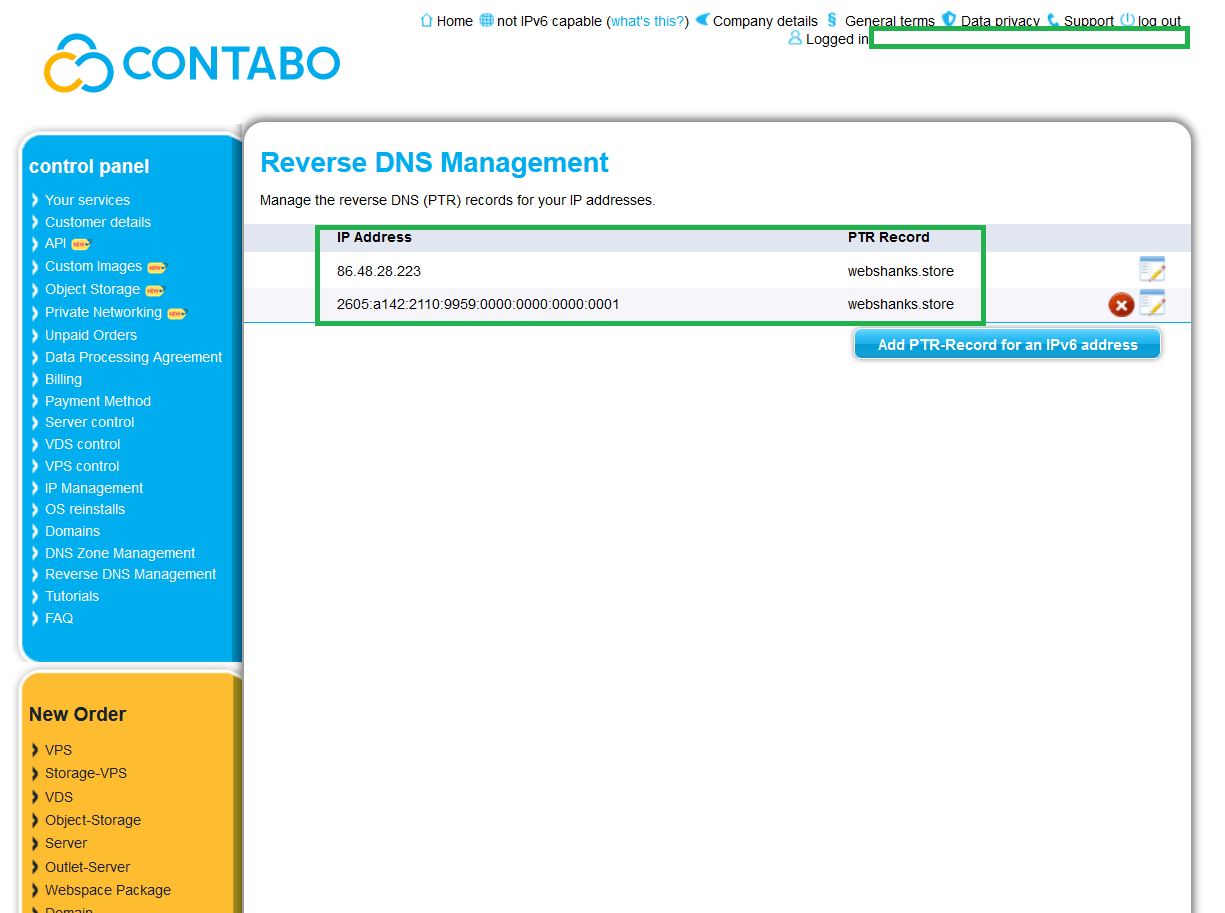
And finally setup a PTR record in your VPS. Be sure to use both IPv4 and IPv6.
Step 6. Test the Mail Server
Finally, we will send a test email to our Gmail.
I will be using an email template.

Success! We managed to send a test email to Gmail. What about from Gmail to aaPanel mail server?
Let’s reply with “Confirmed. See you tomorrow.”
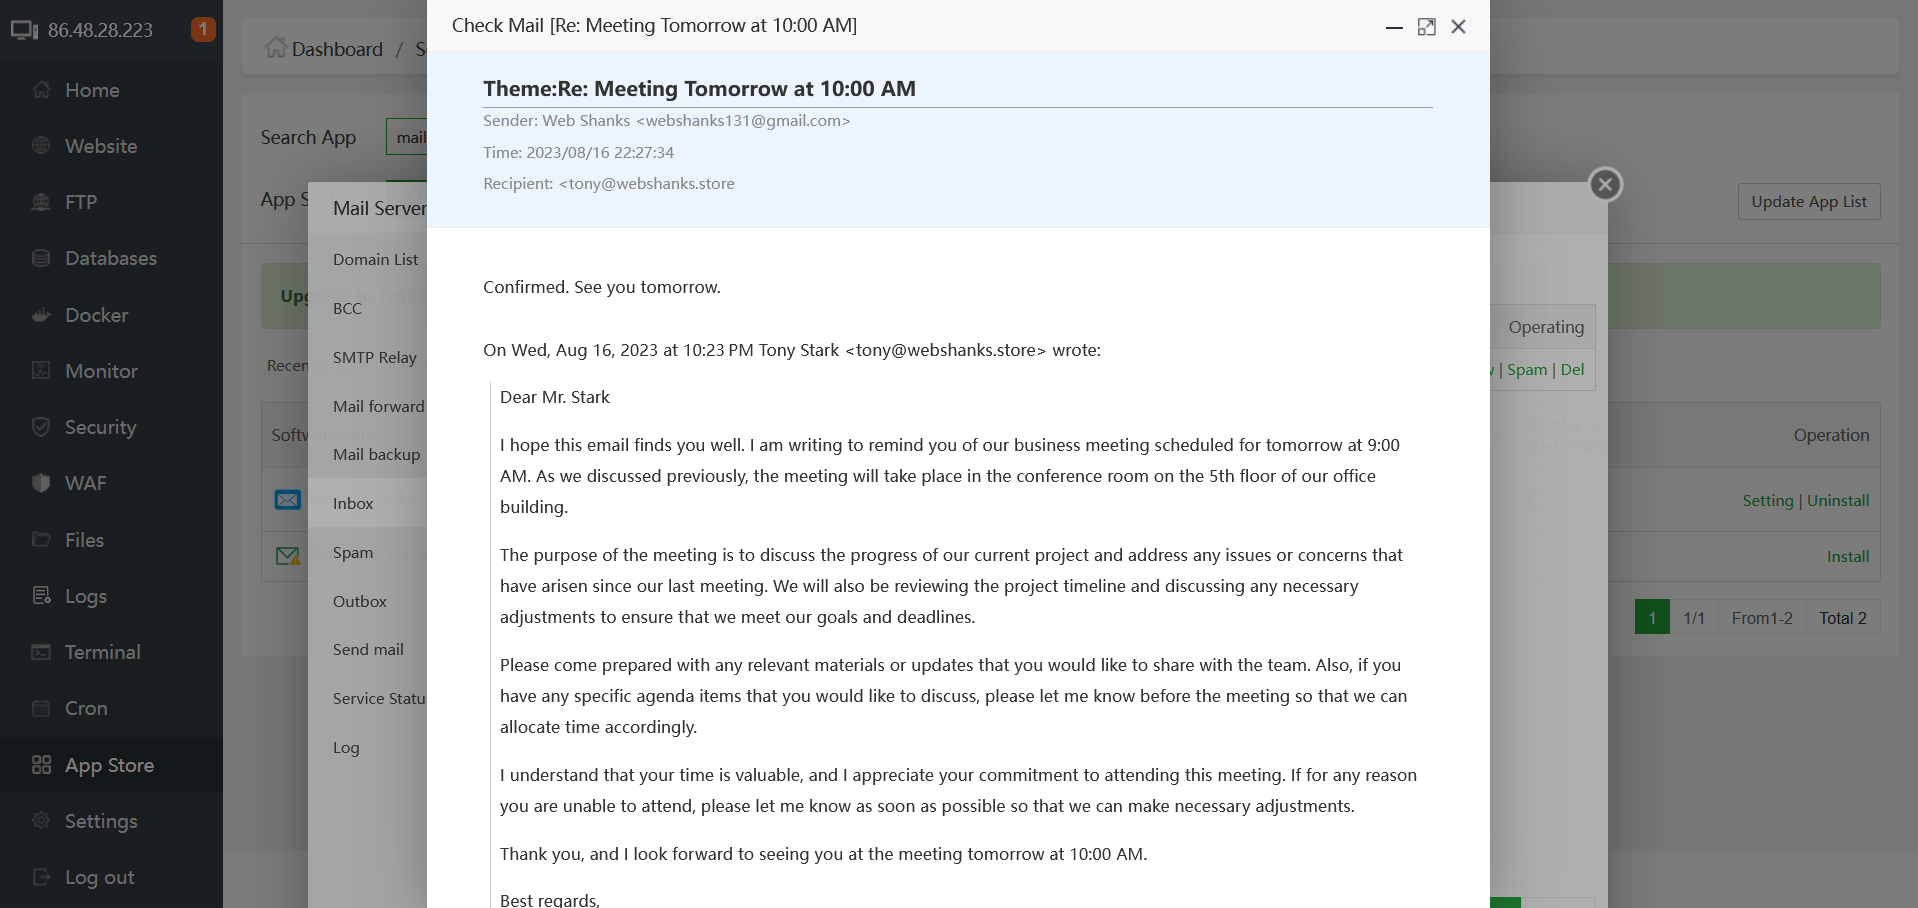
Flawless! Now we have a fully functional web server. Now you can send and receive email messages.
Let’s see how well we perform on mail-tester.
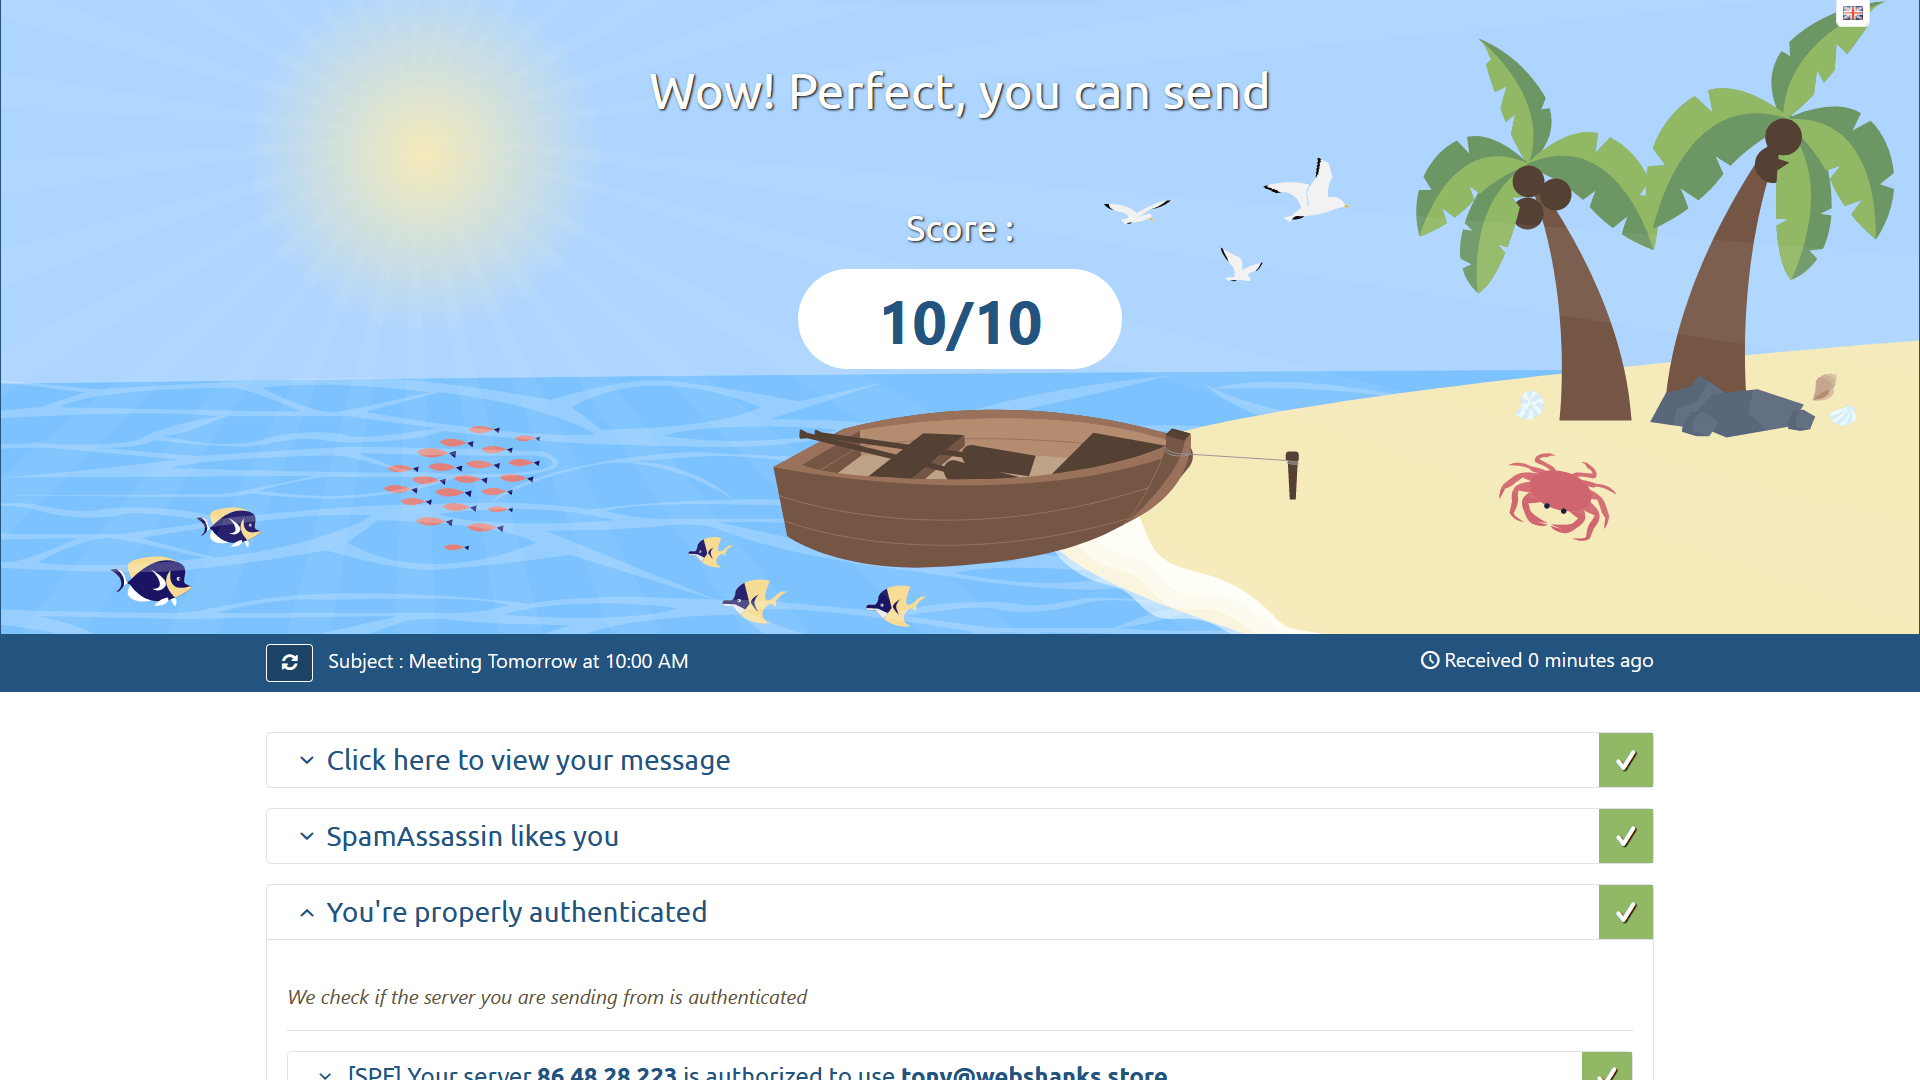
We got 10/10! Remember that do not use TLDs that are known to be abused by spammers. Check out Spamhaus for reference.
Troubleshooting
1. You’re not fully authenticated. We were not able to check your DKIM signature.
You need to change permission to this file from 640 to 644.
chmod 644 /www/server/dkim/domain.com/default.private
/etc/init.d/rspamd restart
Replace domain.com with your domain.
2. Your reverse DNS does not match with your sending domain.
Be sure your reverse DNS matches with your hostname. Also, your MX mail server DNS should match with your hostname.
3. I can’t receive an email.
Replace _dmarc value with v=spf1 a mx ip6:IPV6Address ip4:IPV4Address -all
Change the IPV6Address and IPV4Address with your server’s IPv6 and IPv4 respectively.
4. aaPanel does not use SSL itself.
Go to Settings > Toggle off Panel SSL and Toggle on back
Warming Up IP and Domain with aaPanel Mail Server
Warming up your IP address and domain when using an aaPanel mail server is essential to building a positive reputation with email service providers and ensuring your emails land in recipients’ inboxes instead of being flagged as spam.
1. Start Slowly
Begin by sending a small volume of emails to your most engaged subscribers. This helps establish a positive sending reputation.
2. Gradually Increase Volume
Slowly increase the number of emails you send each day. A common rule is to double the sending volume every few days.
3. Monitor Engagement
Keep a close eye on metrics like open rates, click-through rates, and bounce rates. If you notice engagement dropping, pause or reduce your sending volume.
4. Use High-Quality Content
Send engaging and relevant content that encourages recipients to interact with your emails. This improves your sender’s reputation.
5. Consistency is Key
Be consistent in your sending patterns. Drastic changes in volume or content can trigger spam filters. You can check your IP regularly by using IP spam checkers like https://mxtoolbox.com/blacklists.aspx.
6. Check Blacklists
Regularly check if your IP or domain is blacklisted. If you find any issues, take immediate action to address them.
Best Practices for Maintaining Your SMTP Server
Keeping Software Updated:
Regularly update aaPanel, Postfix, and other server software to ensure security and performance.
Monitoring Server Health:
Use aaPanel’s built-in monitoring tools to keep an eye on server resource usage.
Regularly Backing Up Your Data:
Implement regular backups of your server data and settings to prevent data loss.
Frequently Asked Questions (FAQs)
What is the advantage of setting up my own SMTP server?
Setting up your own SMTP server provides you with more control over your email communications. It can enhance the reliability of sending and receiving emails, and you can customize settings according to your needs.
Is aaPanel suitable for beginners with limited technical knowledge?
Absolutely! aaPanel is designed to be user-friendly and intuitive, making it accessible for beginners without advanced technical skills.
Can I use the SMTP server for sending and receiving emails on multiple devices?
Yes, you can configure email clients on different devices to send and receive emails through your SMTP server. Just make sure to set up the same email account settings on each device.
Can I use this setup for hosting websites in addition to the SMTP server?
Yes, you can host websites and other applications on the same VPS alongside your SMTP server. Just make sure to manage your resources effectively to ensure optimal performance.
Conclusion
By following this step-by-step guide, you’ve successfully set up your own SMTP server using aaPanel, a Contabo VPS, and Cloudflare.
Now you have greater control over your email communications, enhanced security, and improved performance. Remember to maintain your server regularly and enjoy the benefits of having a mail server of your own.
If you have any questions, don’t hesitate to comment them below.
How to send bulk emails using mautic?
I will make a tutorial about Mautic as soon as possible.
Hello
Can we use incoming/outgoing smtp to other SMTP Gateway?
Which’s files should be config?
Thanks
Yes just add your SMTP details in SMTP Relay.
Hello! Thank you for the description, it is very useful and good and everything is well written, plus even the video is very good.
I had a problem only after I try to send a letter I get this error message:
Failed to send mail, error reason [[Errno 101] Network is unreachable]
What could be the problem, where should I go?
Thank you in advance for your help
Hello!
Thank you for the video, everything was done beautifully as it was written, at the end I get this error message when I want to send an email:
Failed to send mail, error reason [[Errno 101] Network is unreachable]
What could be the problem or what did I do wrong?
Where should I go?
Thanks in advance for your help
please can dthis send to sms too
The DKIM fix does not seem to work, is there an updated fix?
Did you replace domain.com with your own domain?
No worries, that issue has been fixed. But I have another question when using the SMTP server from an outside source like the WP Mail SMTP Plugin which always fails to send the Email on the first connection but works after. It seems like there is a timeout or some sort of threshold period in which you must continously send. Is there a solution for this?
Could that be firewall issue or something? As I’ve learned there’s no limit in outbound email.
This is the mail system at host vmi1665854.contaboserver.net.
I’m sorry to have to inform you that your message could not
be delivered to one or more recipients. It’s attached below.
For further assistance, please send mail to postmaster.
If you do so, please include this problem report. You can
delete your own text from the attached returned message.
The mail system
: host madeinatlas.store[163.76.152.17] said: 554
5.4.0 Error: too many hops (in reply to end of DATA command)
Please comment your mail tester result. Did you change your rdns to your mail hostname?
Hey there!
Mail tester resulted in the “message is not signed with DKIM”.
In aapanel the DKIM is set up correctly.
I’ve tried changing the perission to 644 but the directory you’ve shown here is not present on my server. In /domain.com only text files present.
I’ve tried to play with the rspamd settings but couldn’t find anything related to the perission.
I’ve tried also reinstalling the mail server but to no avail.
What could go wrong during the installation? Or am I missing something.
Cheers!
Hi,
What OS are you using? Is it possible you can share the link of the mail tester result?
Hi.
It’s Ubuntu 22.
https://www.mail-tester.com/test-8vfgxe12o
Did you change domain.com with your own domain?
you mean the directory name? I didn’t have to. it was already mine domain
Can you please let me know the exact error you are getting after changing permission?
what about connecting to these email on pc .. i tried to coonet with it using my phone with gmail app it works but i wanna install web webmail
You can install roundcube in aaPanel.
how I cant see roundcube on aapanel?
Why do I set 16 gigabytes, is 2 gigabytes enough for smtp to send at least 10 thousand per day because I want to do a lot of smtp
Contabo VPS 1 is enough for that number.
after creating the mail server (smtp) i decided to test it by mailing a message to my gmail, i did but the message arrived at the spam folder , i decided to test with my hotmail that was when i started receiving mailer deamons telling me the messages wont go through…….i tired refreshing the aapanel it went blank on me ( like it was blocked or somthing ) showing somthing like “404 forbidden ” , i checked mx toolbox and i found out that my server ip has been blacklisted on spamhaus and one orther, please how can i resolve this issue and get my aapanel/smtp back???
Hello,
Recently aapanel updated the mass mail (bulk emails) function but it requires payment. Can you test it to see if it is worth buying?
we have problem in Postfix is stopped how can fix this
Try restarting your aaPanel from the top right menu.
how do i get my smtp detail for a mailer
You need to go to user option so that you can find your SMTP details.
i can’t configure my email address in thunderbird or on any other platform.
unable to login at server. probably wrong configuration, username or password.
i did exactly the same as shown above .
What port are you using? Your SMTP server should be domain.com and port is 587
AApanel has limits on all plans now it’s pretty expensive even in lifetime pro they have send limits and they seem to count many multiples of what’s sent even though it uses none of their resources. Best to avoid AApanel mail server since this change lots of annoyed customers on their message boards about it.
My Contabo port 25 VPS mail server is not open? How do I open it?
It will be opened once you install an email server.