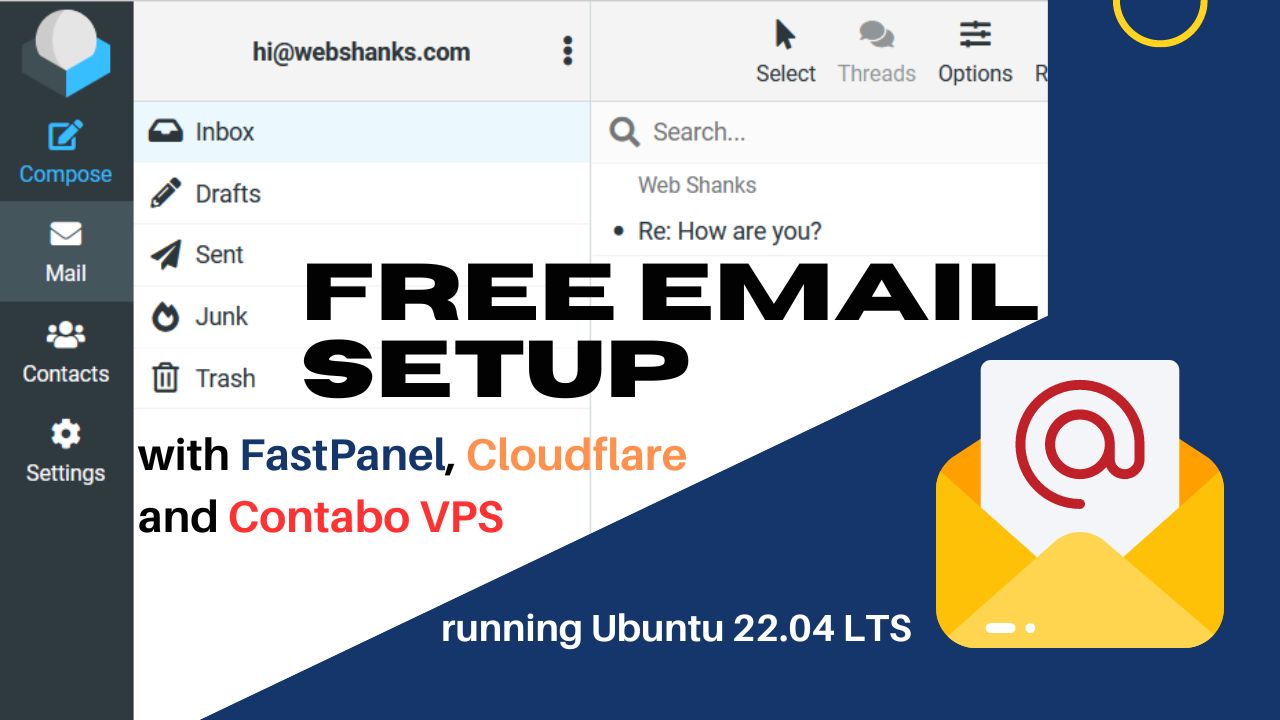
 Did you know that you can setup a free email server in FastPanel so that you can send and receive email messages without limits?
In this tutorial, I will be showing you how to setup an email server using FastPanel, Cloudflare and Contabo VPS.
The process of setting up an email server with FastPanel, Cloudflare, and Contabo VPS is relatively simple. All you need to do is:
- Install the FastPanel control panel on your VPS server (we’ll use Contabo VPS in this tutorial)
- Add website in FastPanel with email domain enabled
- Configure DNS settings in Cloudflare
- Add email account
- Send unlimited emails
With this setup in place, you can enjoy a secure and reliable email service that will help you stay connected with your customers or colleagues no matter where they are located.
But before that…
Prerequisites
Before you want to setup your email server with FastPanel, of course you need a VPS or a dedicated server with a fresh installation of Ubuntu 22.04 LTS or an OS compatible with FastPanel.
Your VPS also has a 25 port open. Contabo and RackNerd have their port 25 open by default. Digital Ocean, Linode and Vultr have closed their port 25. You need to ask their support to open it for you.
Lastly, you need a ROOT access to your server in order to install FastPanel.
Setup Free Email Server with FastPanel, Cloudflare, and Contabo VPS Step-by-step
One of the key benefits of setting up a free email server with FastPanel, Cloudflare, and Contabo VPS is that it provides you with full control over your email domain, allowing you to create custom email addresses that align with your brand or personal identity. This can enhance your professionalism and credibility when communicating with clients, customers, or colleagues.
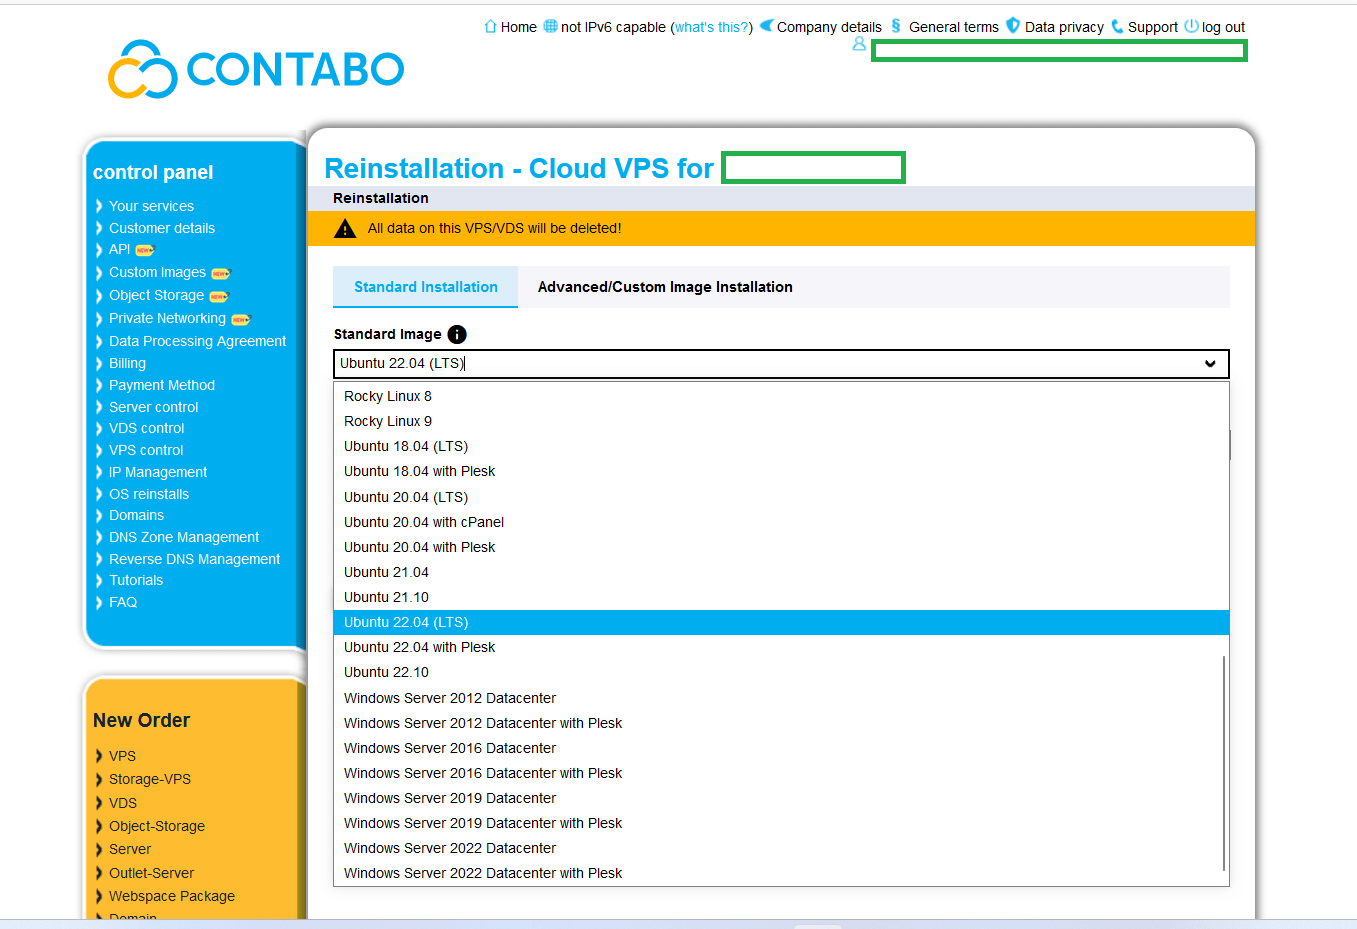
Step 1. Install FastPanel on Ubuntu 22.04 LTS
From your Contabo VPS dashboard, go to VPS Control > Reinstall > from the drop-down menu choose Ubuntu 22.04 LTS. Check out this article for a step-by-step installation guide.
Next, install FastPanel using the following command:
wget http://repo.fastpanel.direct/install_fastpanel.sh -O - | bash -
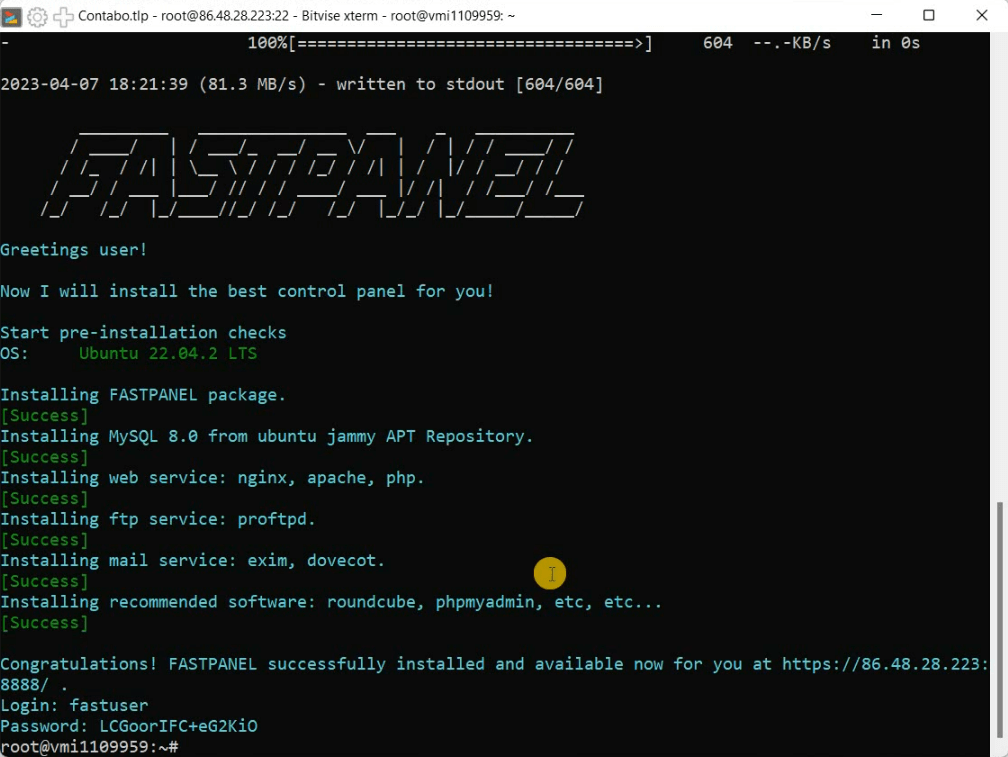
Access your FastPanel using <serverIP:8888>
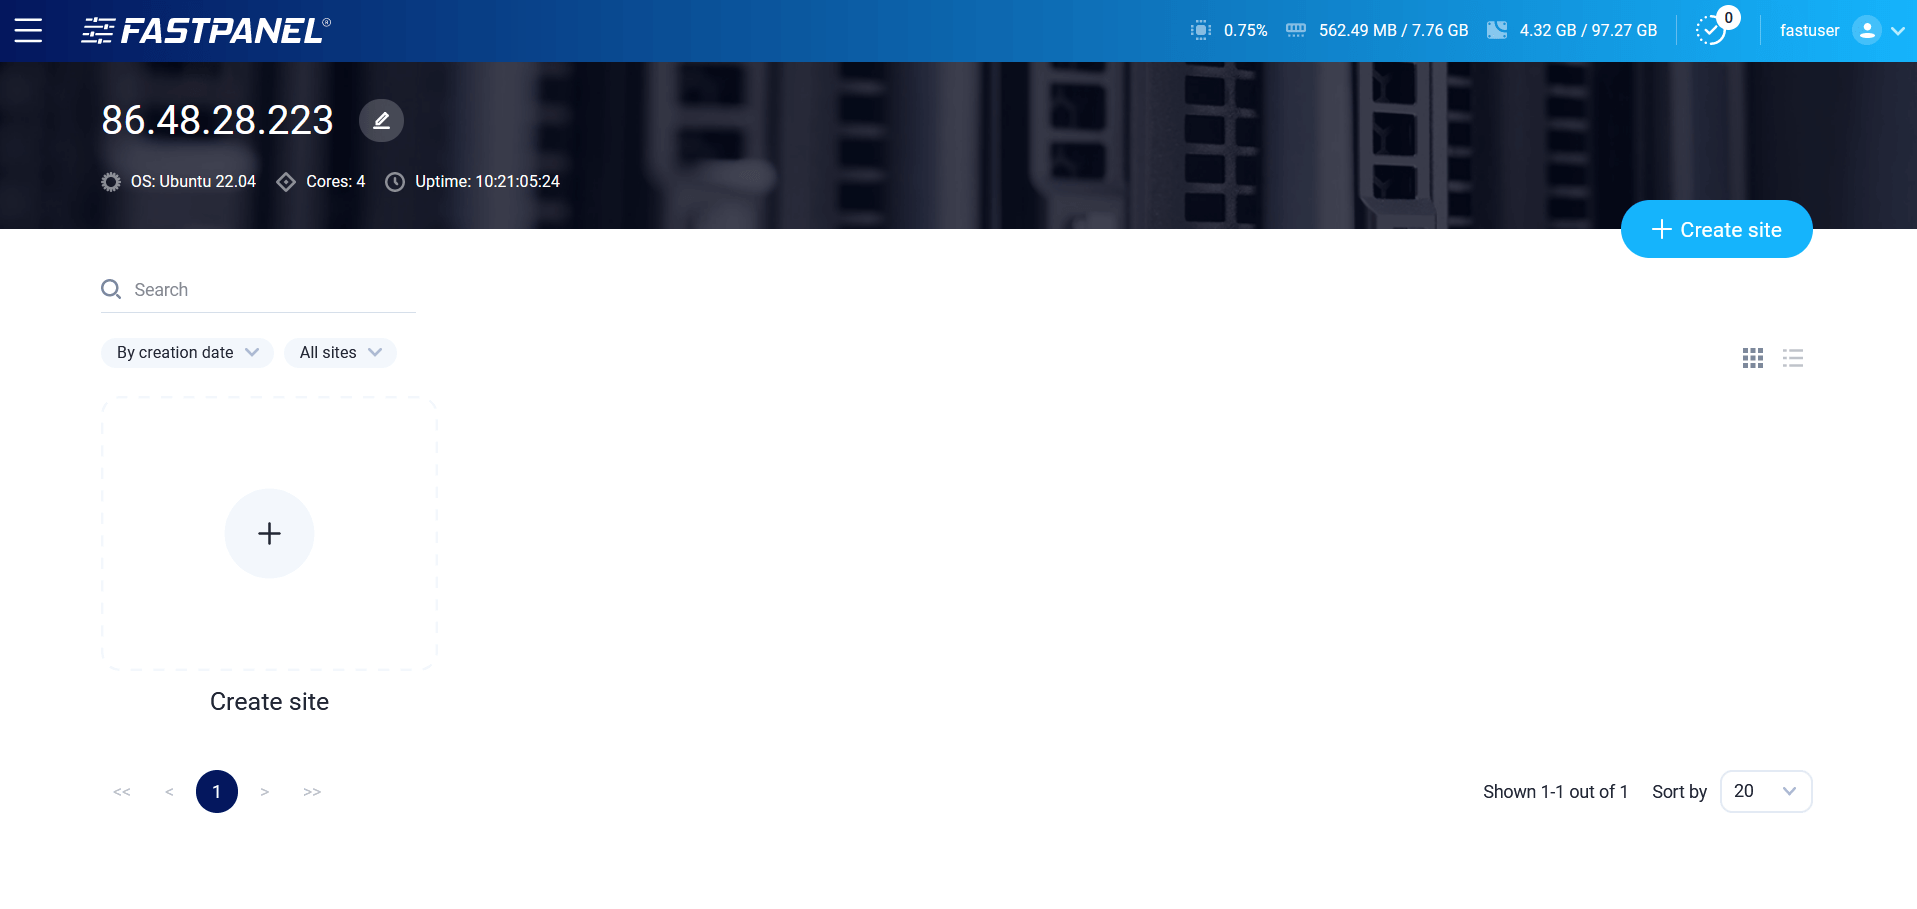
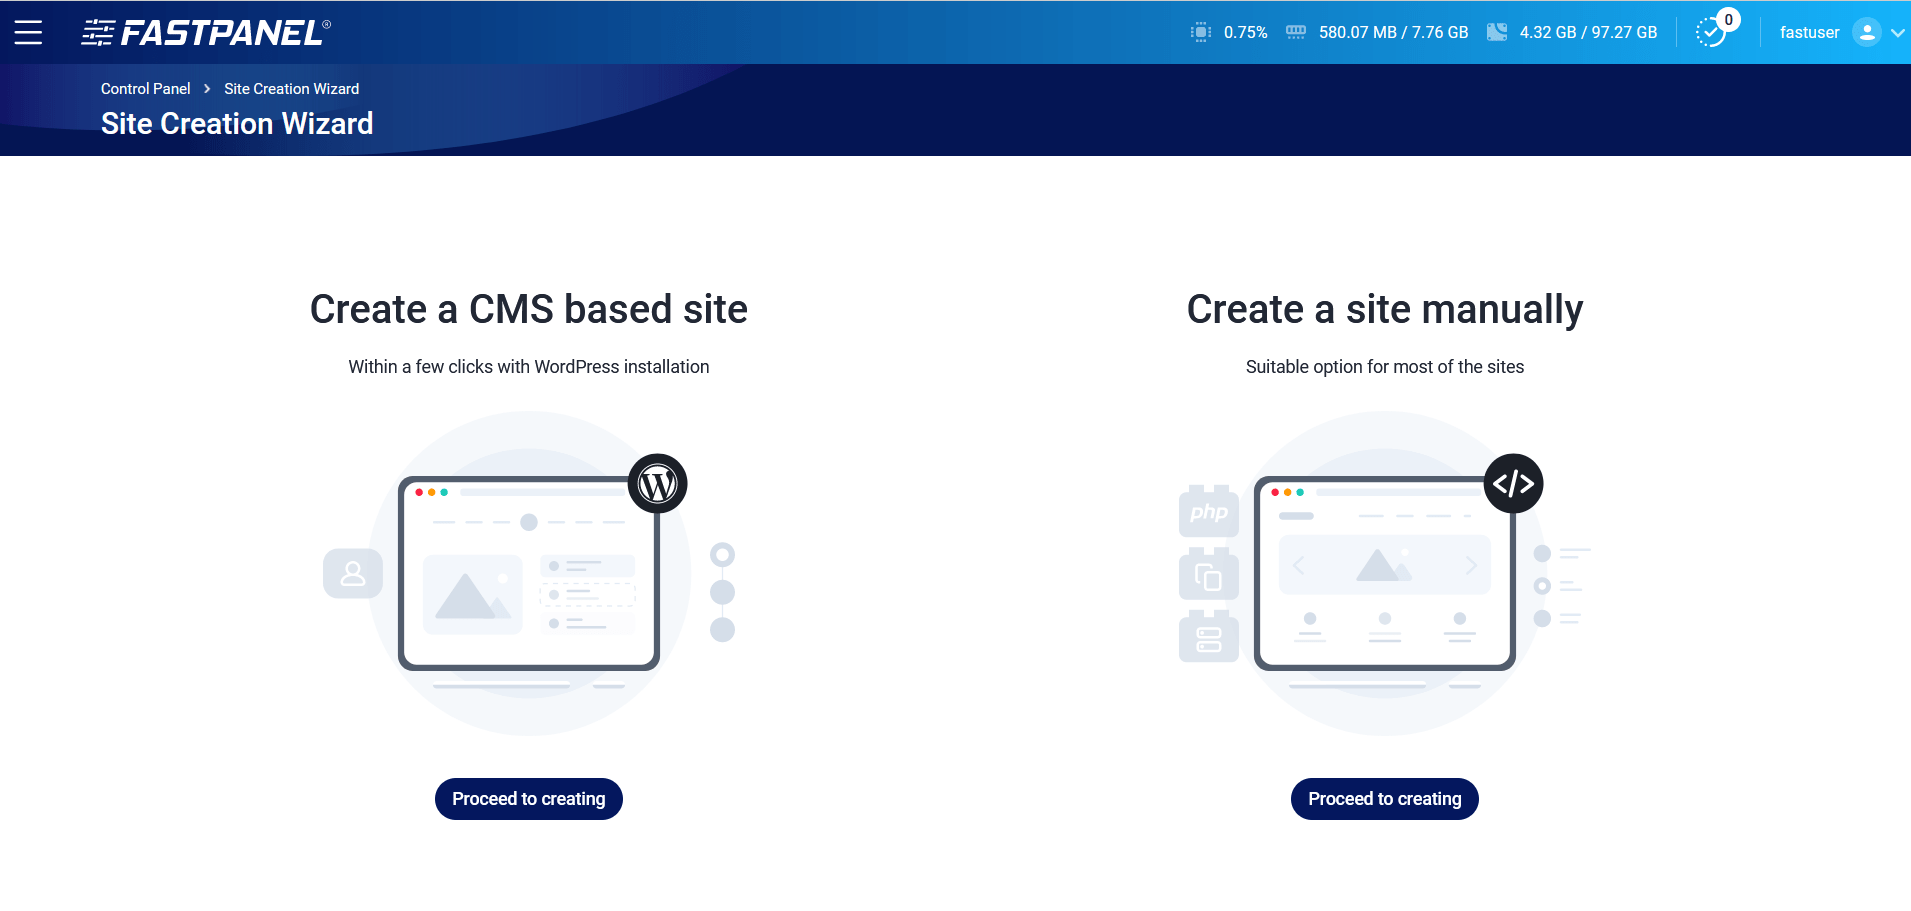
Step 2. Add a Site
Add a site whether it’s a CMS or other PHP applications. Click Create site.
Choose whether CMS or manual installation.
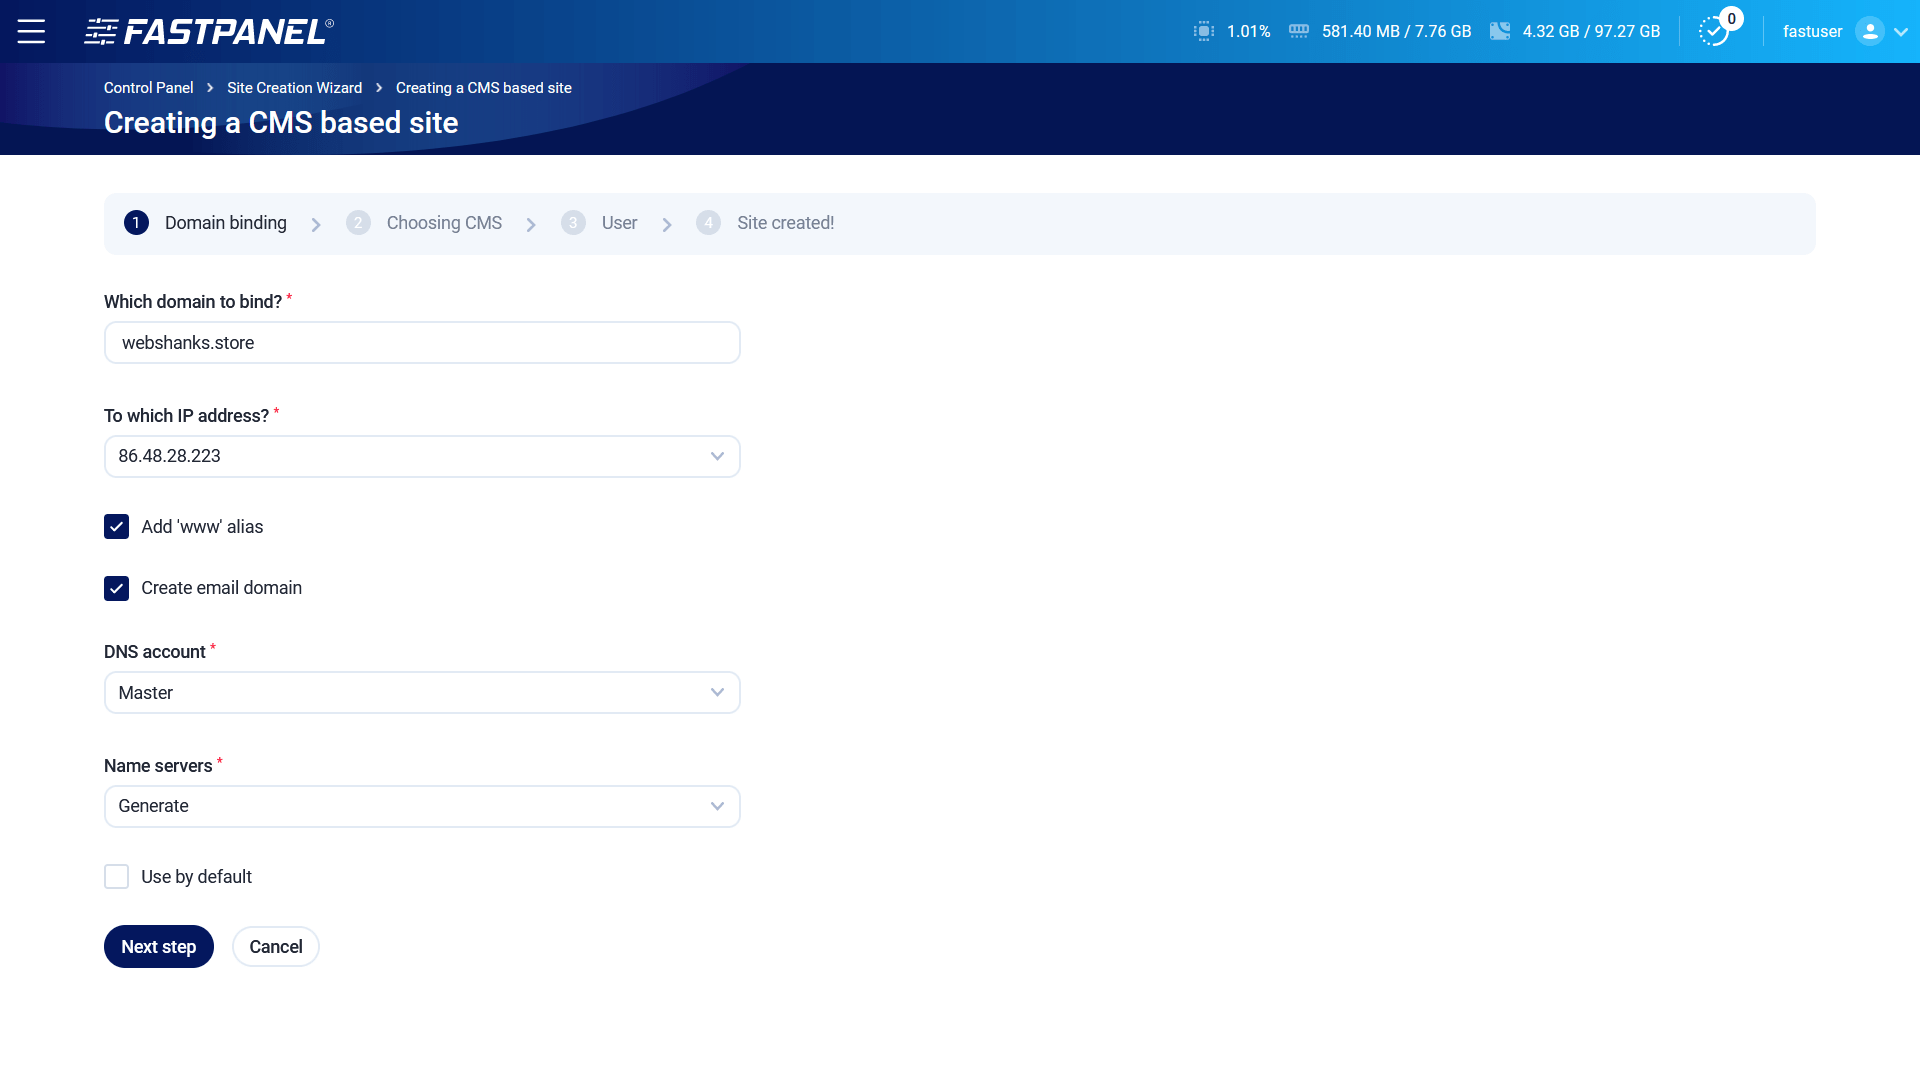
Enter your domain and be sure to check Create email domain.
Follow the next steps to create a website. Once your site is ready, you’ll see this message.
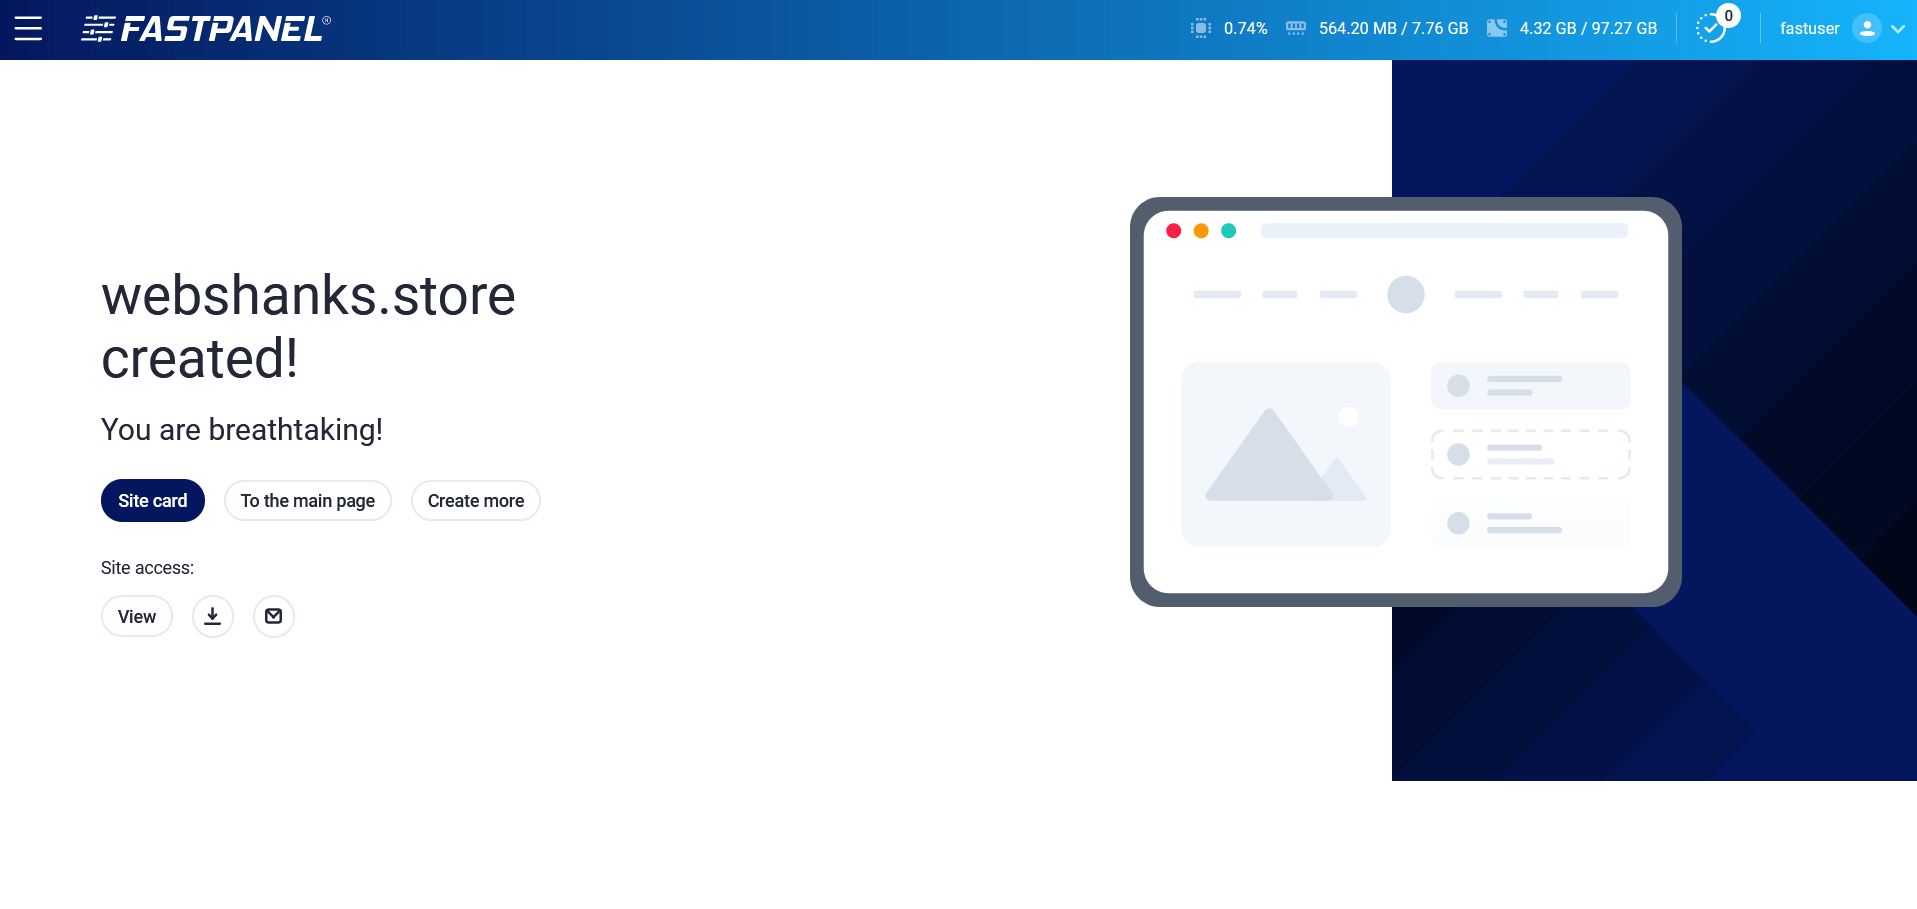
Then click Site card because we’ll add SSL. Then just scroll down and click SSL certificates.
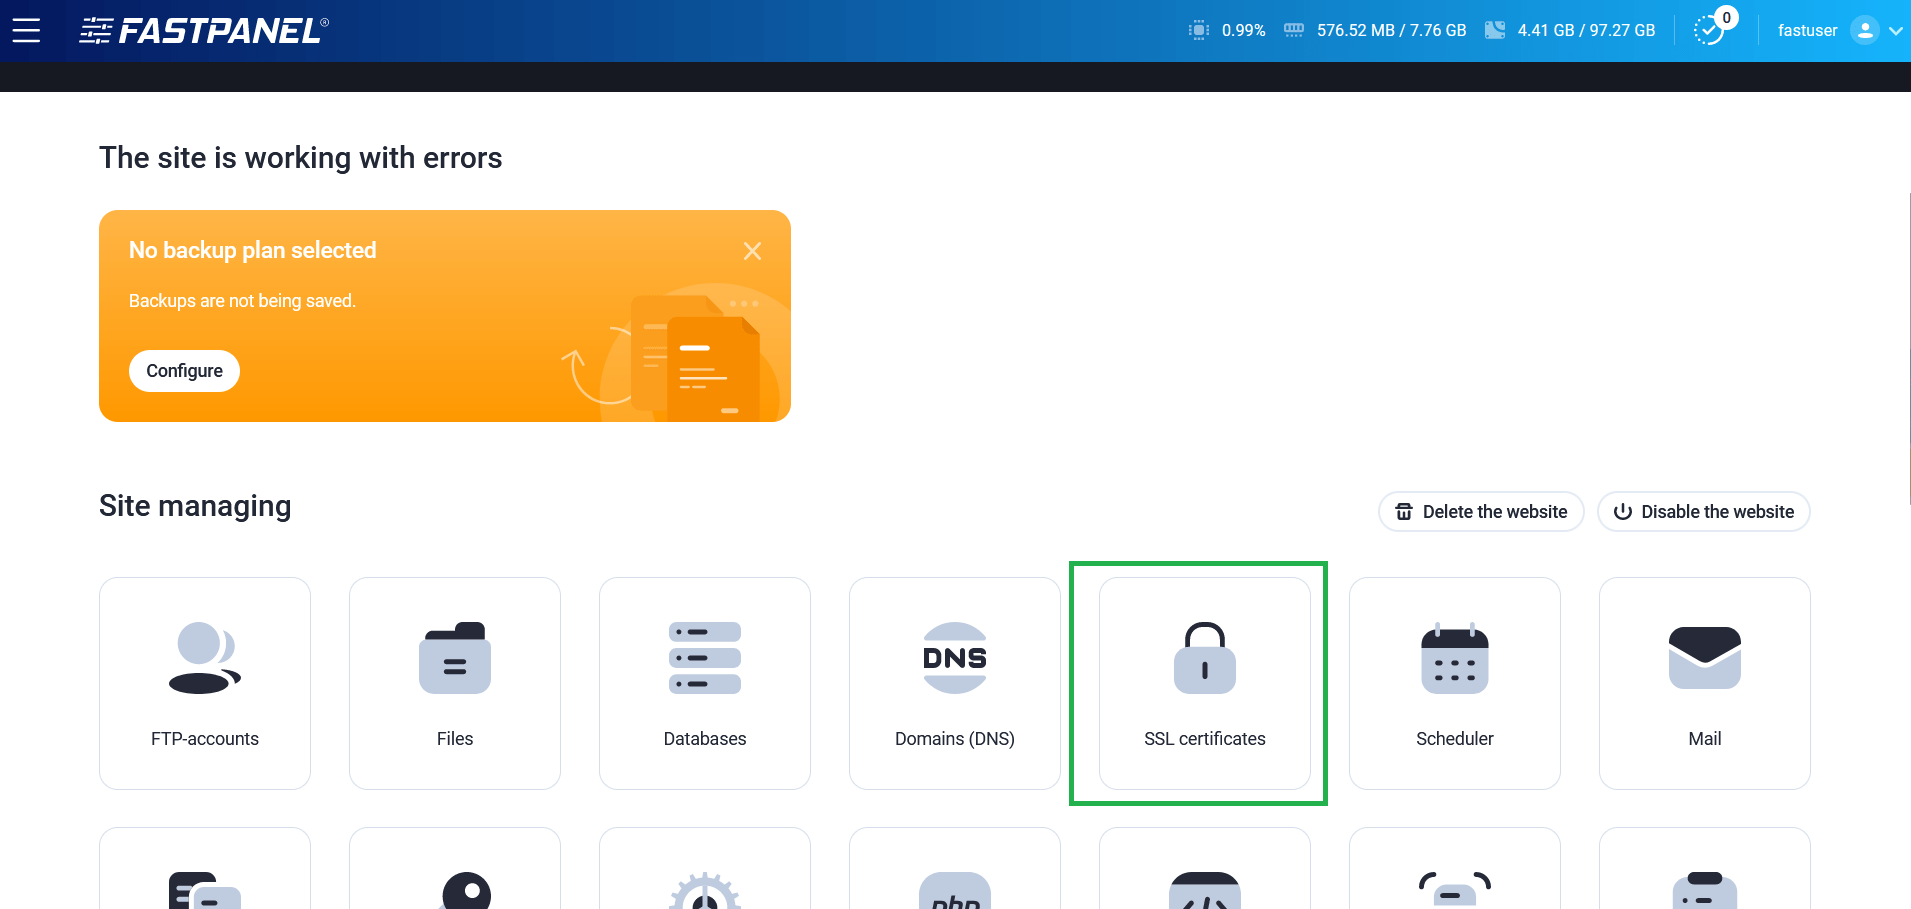
Then on the right corner click New certificate.
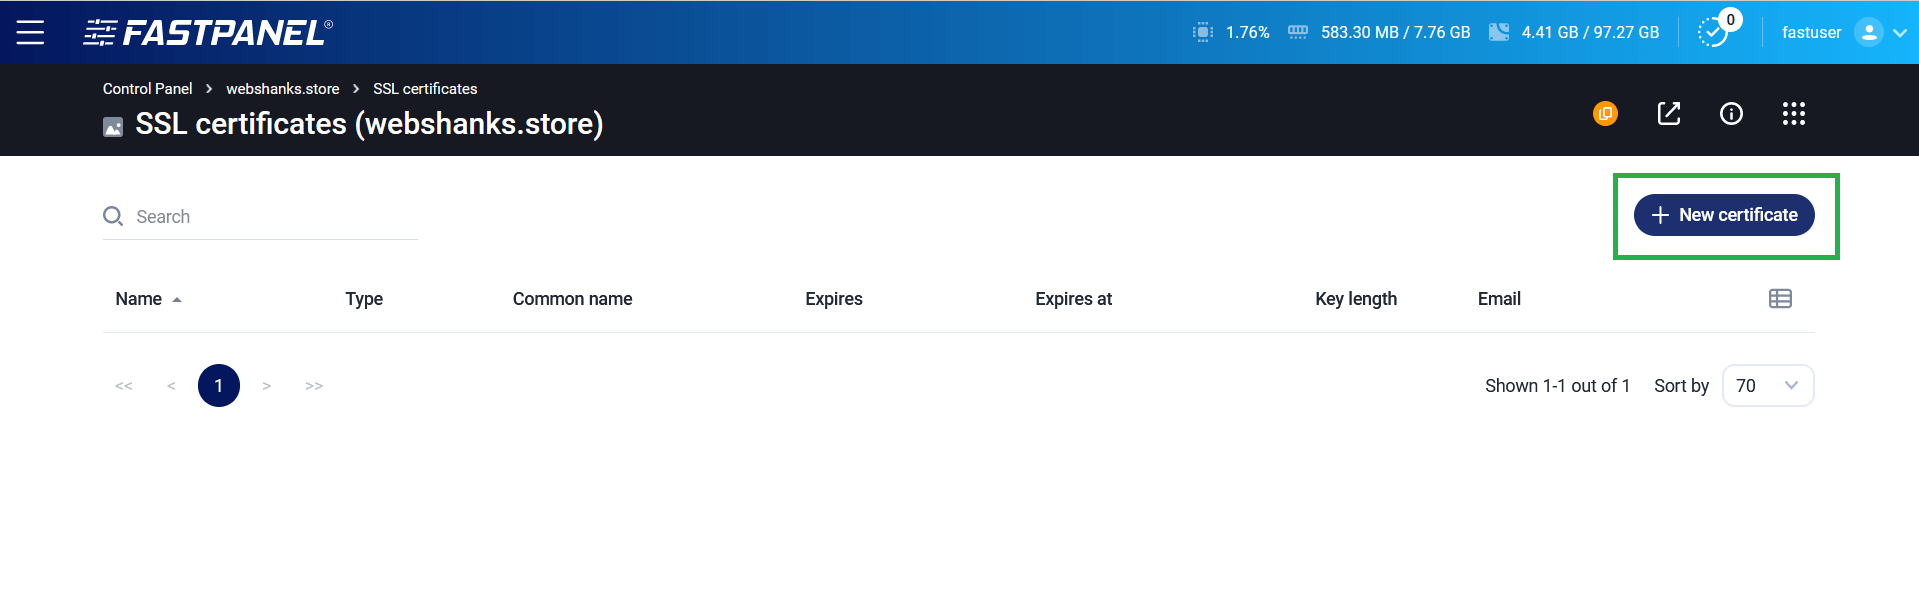
Choose Let’s Encrypt and click Save. SSL will be issued.
Step 3. Configure DNS in Cloudflare
Next, we’ll add A, TXT, and MX records in Cloudflare. We will use Cloudflare’s free nameservers and we’ll them on our domain registrar.
I don’t want to use FastPanel’s DNS records because one they are a bit confusing and difficult to copy and two they are not accurate.
Instead, I’ll be using a different approach base on Google’s anti spam guideline.
For A records, add both non-www and www for mail server and domain.
Use @ for non-www and www for www.
| Type: A | Name: @ | IPv4: <yourserverIP> | TTL: Auto |
| Type: A | Name: www | IPv4: <yourserverIP> | TTL: Auto |
| Type: A | Name: mail | IPv4: <yourserverIP> | TTL: Auto |
| Type: A | Name: www.mail | IPv4: <yourserverIP> | TTL: Auto |
For MX record use:
- Type: MX
- Name:@
- Mail server: mail.webshanks.store
- TTL: Auto
- Priority:10
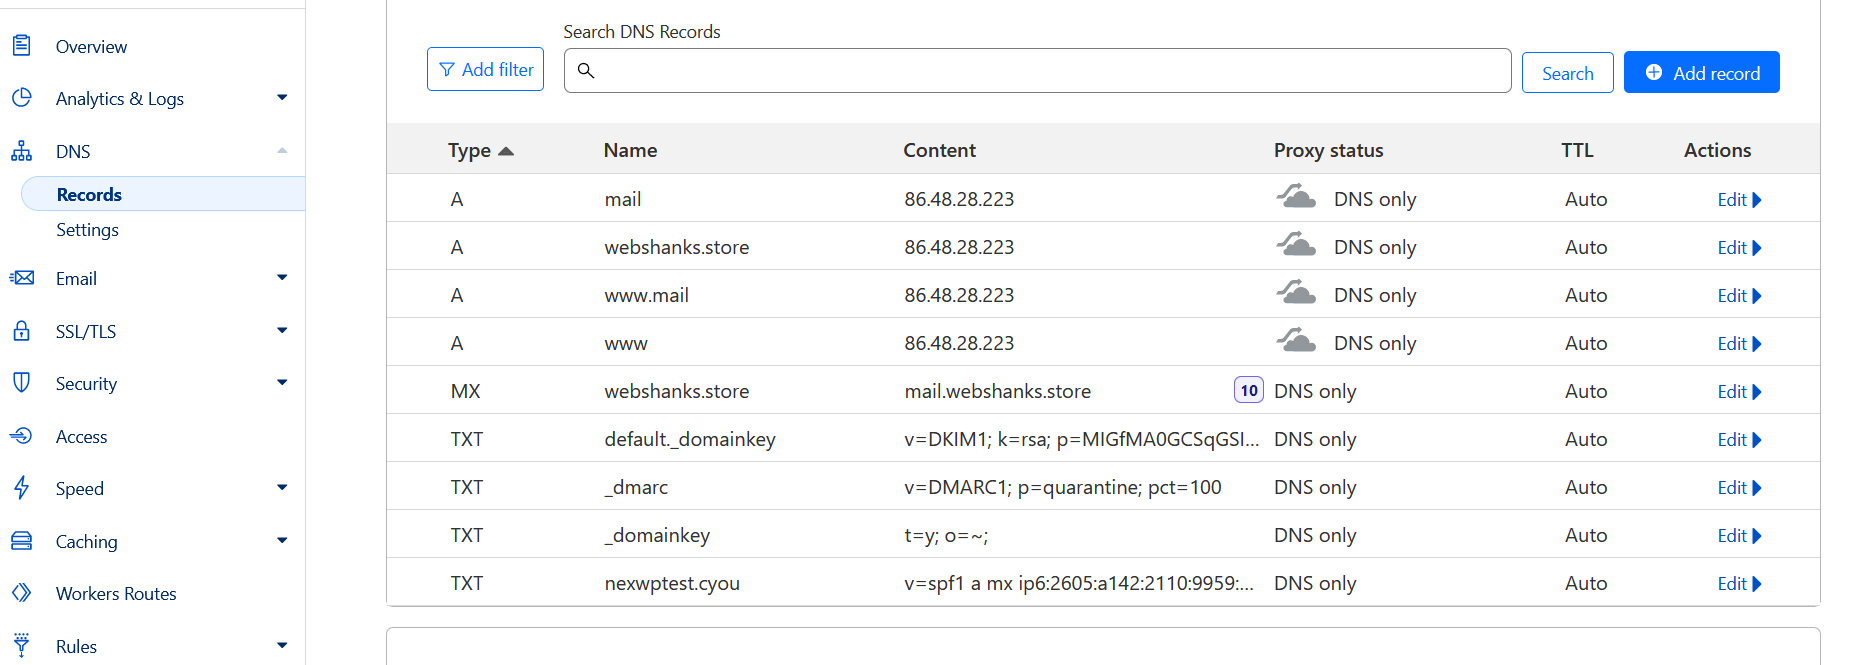
For TXT records use the following:
| Name | Content |
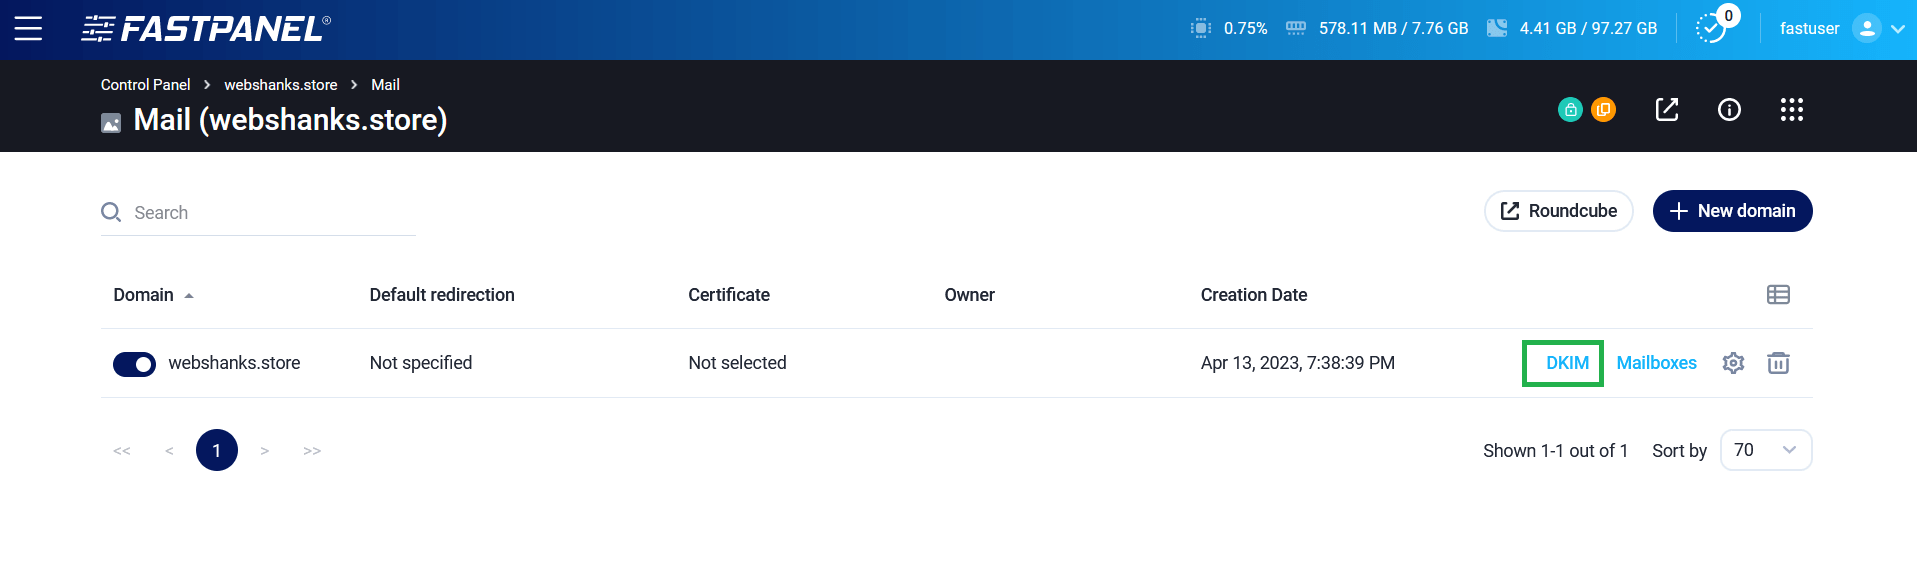
| dkim._domainkey | Go back to your FastPanel. Go to your Site > Mail > DKIM (check out the image below) |
| _dmarc | v=DMARC1; p=quarantine; pct=100 |
| _domainkey | t=y; o=~; |
| @ | v=spf1 a mx ip6:2605:a142:2110:9959:0000:0000:0000:0001 ip4:86.48.28.223 -all (change the value of ip6 and ip4 to your server’s IPV6 and IPV4 respectively) |
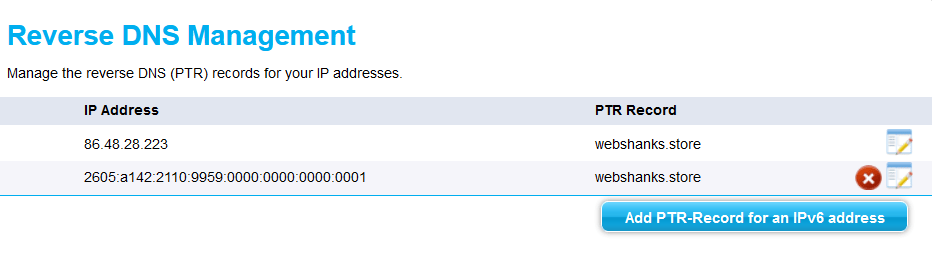
Next, go back to your VPS provider and change the reverse DNS to your domain name.Be sure your PTR Records points to your domain both IPV4 and IPV6.
Step 4. Add Mailbox in FastPanel
From your FastPanel dashboard, choose the site you want to create a mailbox. Then choose Mail > Mailboxes > New mailbox.
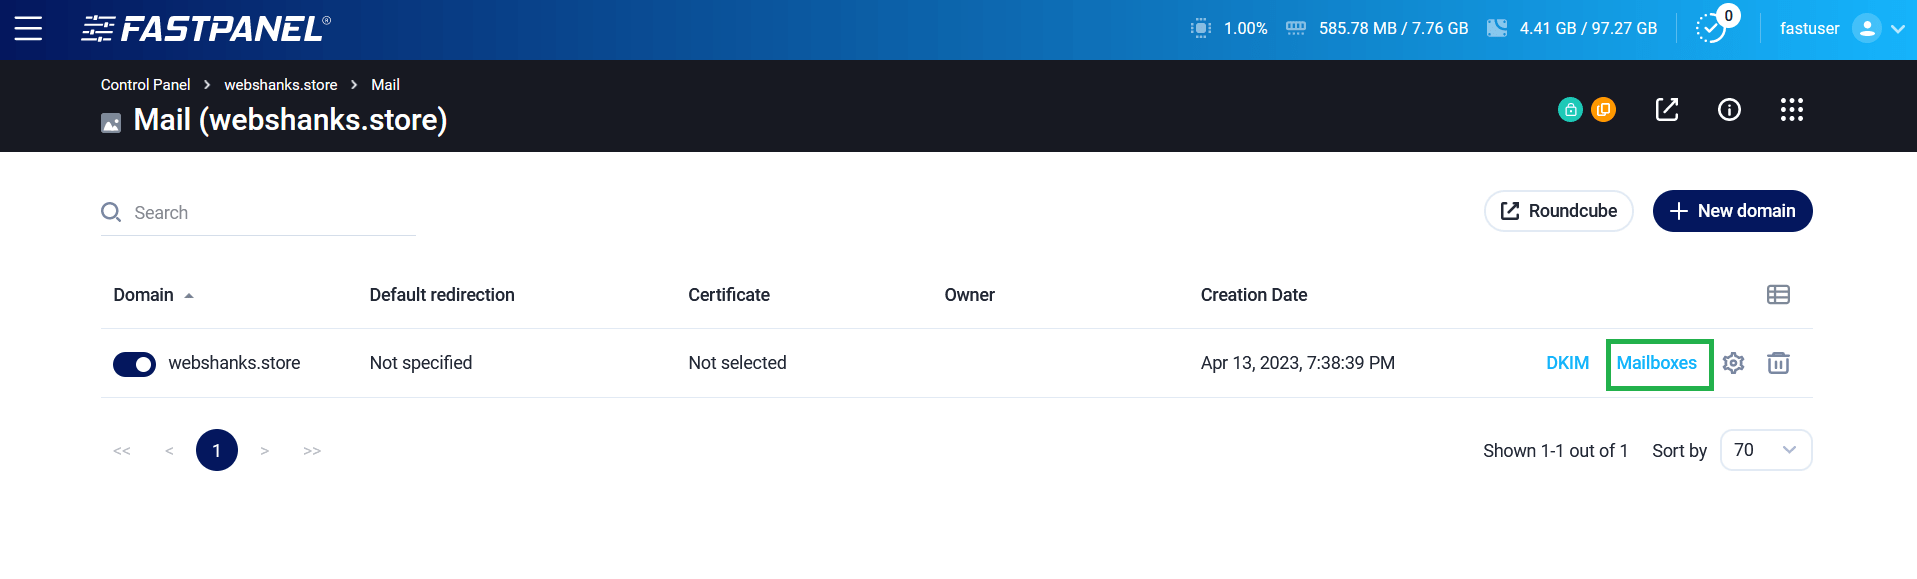
After creating a mailbox, login to Roundcube using the credentials you created.
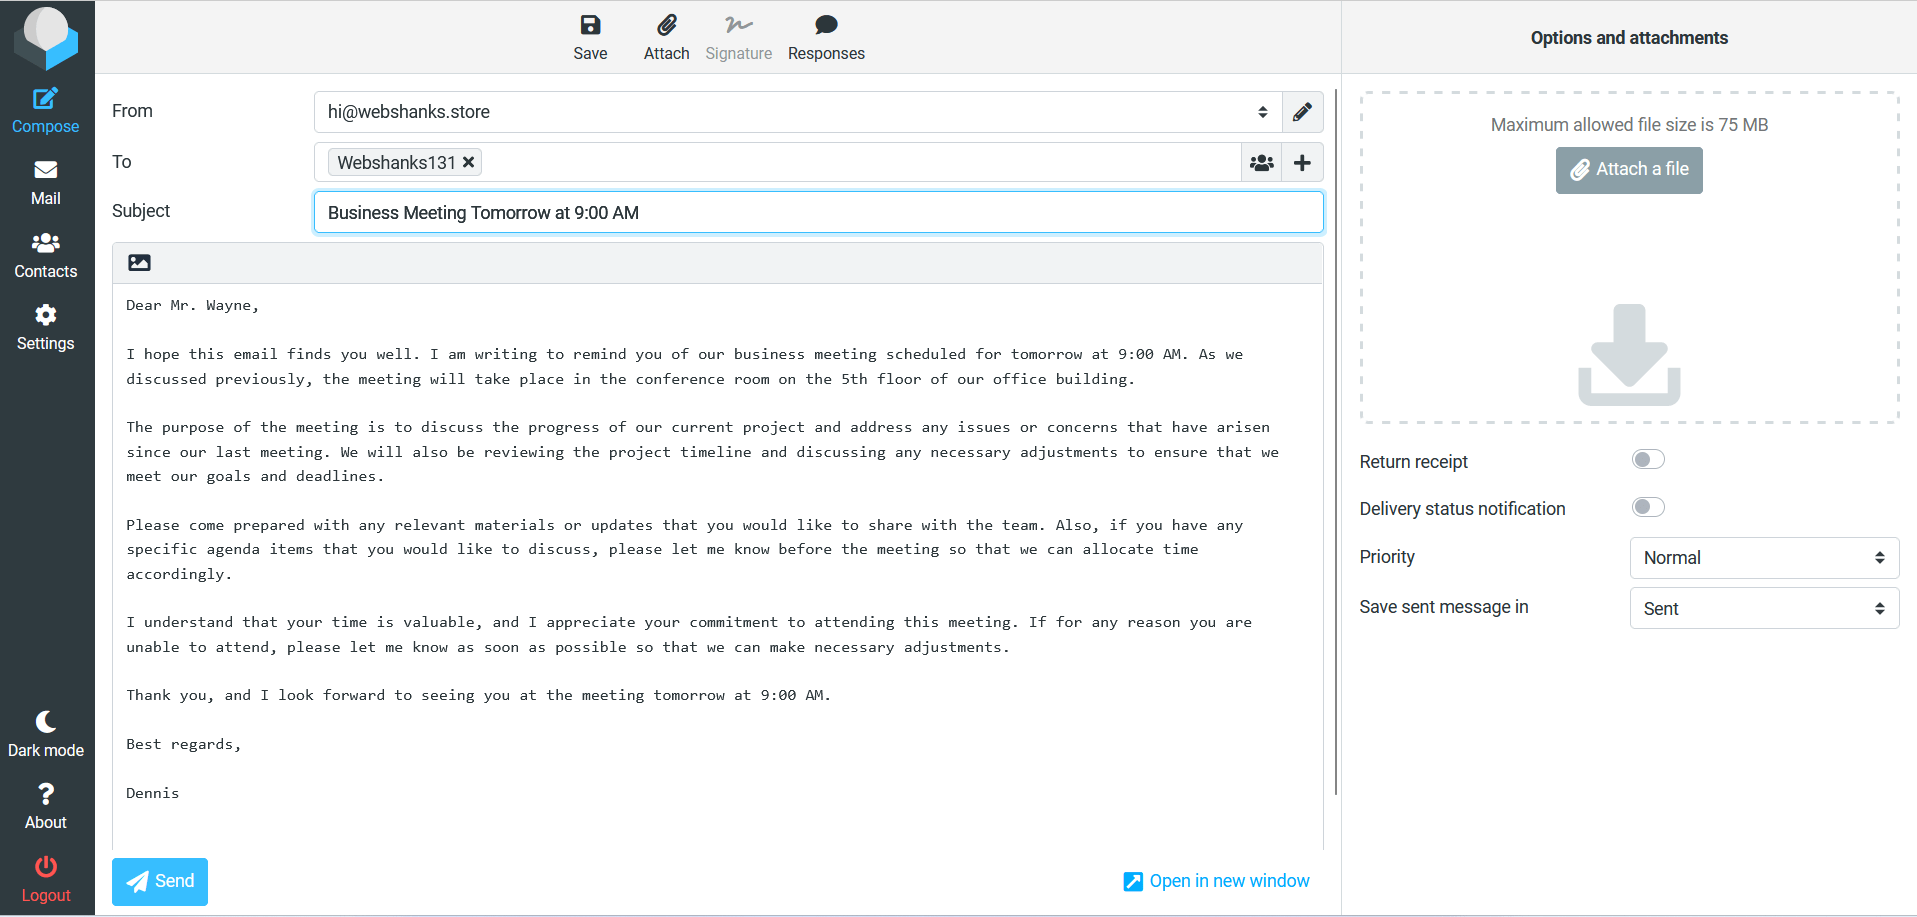
Step 5. Send Emails
Next, we’ll try to send an email to test if our configuration is successful.
Let’s see if we received the test email in Gmail. If we received it, we’ll reply “I will be there”.
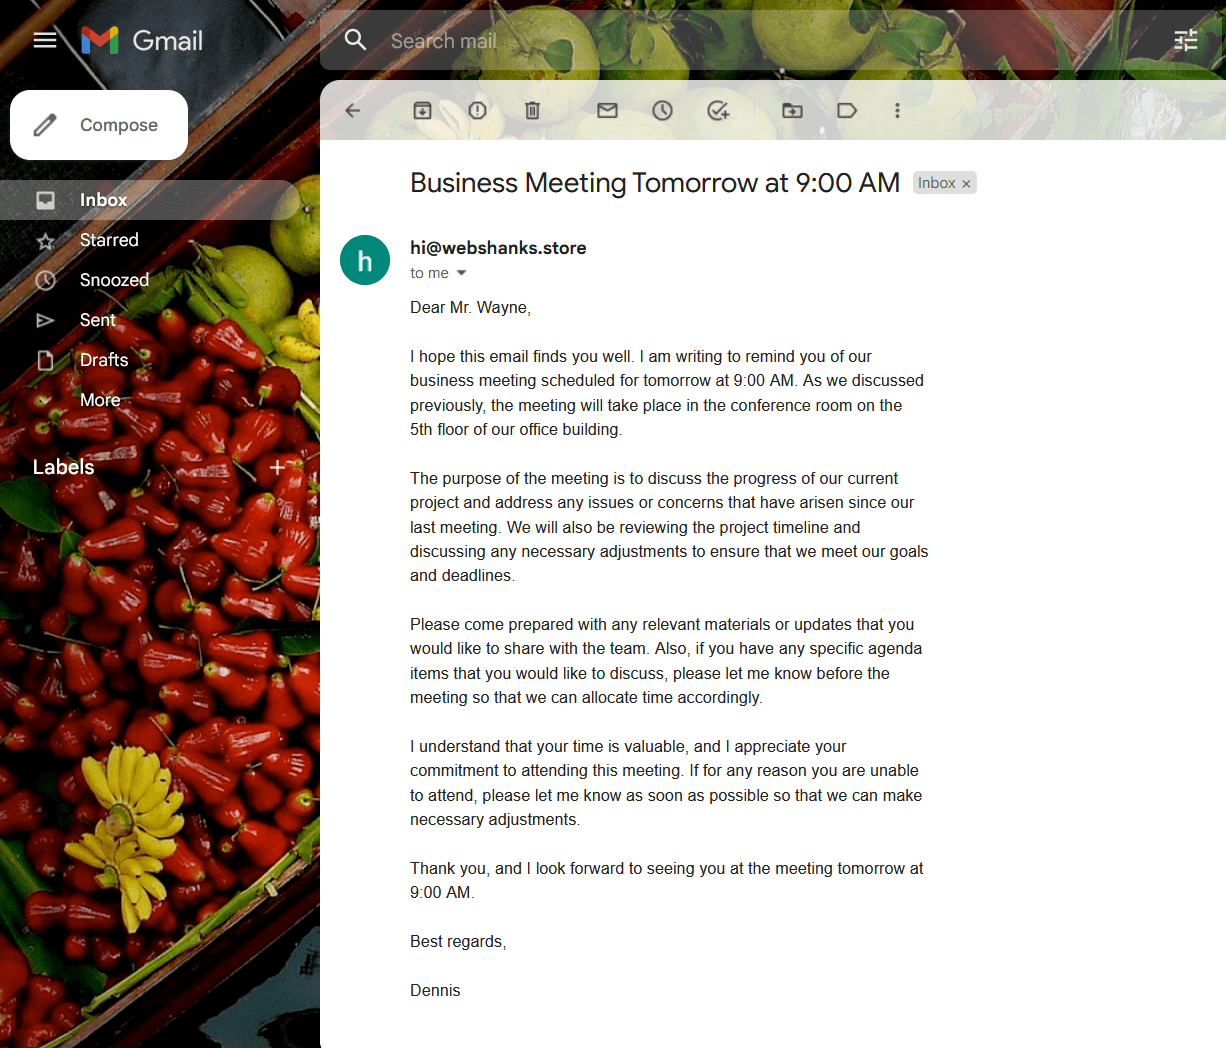
Okay great! We’ll reply ‘I will be there’. Let’s see if this message will be sent to our email in FastPanel.
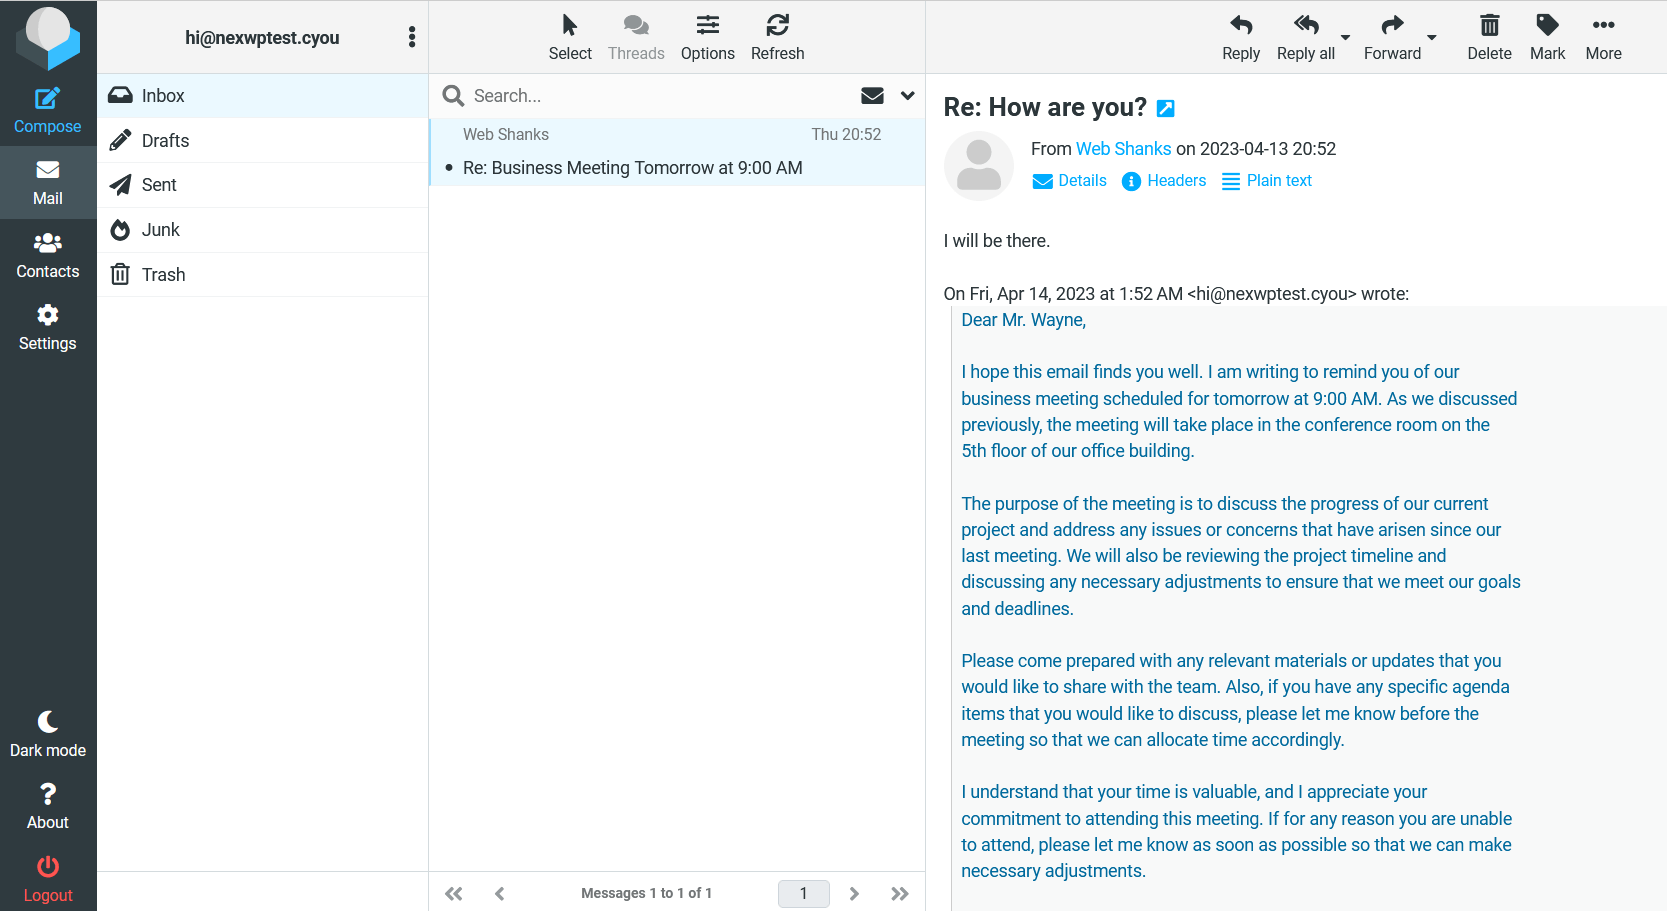
That’s it! we’ve successfully setup an email server in FastPanel!
Watch this tutorial on YouTube
Now’s Your Turn to Setup Your Email Server
In conclusion, setting up a free email server with FastPanel, Cloudflare, and Contabo VPS can be a powerful solution for those who want to have more control over their email communication and reduce their reliance on third-party email providers.
By using FastPanel’s user-friendly interface, Cloudflare’s security features, and Contabo VPS’s reliable hosting, you can create a self-hosted email server that gives you complete ownership and privacy over your email data.
So, what are you waiting for? It’s time to setup your own email server today!
thanks great article but how to configure different domain email hosted on fastpanel like i have 2 domain and i want to create mailbox for two domains how to do it in that case
Hi,
Email server should have at least 1 IP address per domain. This is necessary to avoid spam specially sending out to Gmail. You can also purchase another IP address to have two email servers and add a PTR record on reverse DNS.
How can you change HELO settings? Mail-tester sends an error about that.
Hello,
What settings should be applied so that users can access the Webmail using the URL webmail.mydomain.net, to prevent them from accessing through the Fastpanel console?
Hi,
Do you mean that webmail.mydomain.net should not be accessed by users aside from you?
Hello,
That time, I couldn’t find the path. But I was able to solve it by adding in Cloudflare a new record type “A” with the name “webmail”.
Hola,
Por cierto, la integración de Roundcube en Fastpanel no bastante pobre, dejando muchos plugins importantes fuera. Por ejemplo, el que me llamó mucho la atención es el plugin “password”. Este plugin, posibilita que el usuario pueda restaurar/actualizar su contraseña sin necesidad de recurrir al administrador para ello. El soporte técnico de Fastpanel dice que “actualmente” el uso de plugins en Roundcube no está disponible. Cueck!
Hello,
By the way, the integration of Roundcube in Fastpanel is quite poor, leaving many important plugins out. For example, the one that caught my attention is the “password” plugin. This plugin makes it possible for the user to reset/update their password without having to go to the administrator to do so. Fastpanel support says that “currently” the use of plugins in Roundcube is not available. Cueck!
If that’s the case, try other control panels with email servers like hestiacp.
How can you move webmail, admin panel, mail and such to different subdomains with this panel? If I turn on proxy on cf than website works but not the emails or vica-versa since iprev. Everything should have a different subdomain to be able to secure them. This could be my favorite if this has been working out of the box.
This panel is designed to work as such. You need to turn off cloudflare proxy so that port 8888 can be used. Check out https://developers.cloudflare.com/fundamentals/reference/network-ports/
Thank you. CF proxy is needed sadly, since if I turn it off it exposes the server IP address. Can you recommend a panel that handles this automatically?
CloudPanel does this perfectly even proxy enabled. Check out how to install it https://webshanks.com/install-cloudpanel-on-contabo-vps/
mail sending is not working, only mail is receiving. how to resolve?
Did you properly setup rnds?
I need to setup smtp(roundcube) in access share account so please let me know.
You can add more accounts in FP.
how i get smtp
like port and ssl
btw this no encrypt?
i test to my gmail , sending hello , in gmail get spam
Try warming it up.
When I set up FastPanel it automatically set up RoundCube for me, but it only lets me send emails. All emails sent to the address get “550 Please turn on SMTP Authentication in your mail client. mail-yb1-f171.google.com [209.85.219.171]:60422 is not permitted to relay through this server without authentication.”
But there is no place in RoundCube to adjust the SMTP settings.
I tried all the steps on this page (except that I added the DNS records via FastPanel instead of CloudFlare) but no change.
If that’s the case your authentication protocols are misconfigured.
why is the smtp port 587 failing, but 465 works. why?
587 works on TLS and 465 on SSL.
i can not see dkim in my fast panel it is not showing
i am new here. please may i know how to set it up if i wanna use my smtp. like if i wanna use it on software like Gammdyne mailer or supermailer.
Hello, you can use mailcow, aapanel, virtualmin. All tutorials are on this website.