 Do you want to have your own free business email? I’ll show you a free email server Setup with HestiaCP, Contabo VPS, and Namecheap today.
If you’re someone who wants to take control of your own email communications, increase security, and reduce dependency on third-party providers, then you’ve come to the right place.
In this blog, I’ll break down the steps into simple terms, ensuring that even if you’re new to the world of server management, you’ll be able to follow along effortlessly.
Let’s start but first…
Server Requirements
- CPU: 4 cores
- Memory: 4 GB
- Disk: 40 GB SSD
- Operating System: Debian 10, 11,12 Ubuntu 20.04, 22.04 LTS
- A domain name (I can vouch for Namecheap).
The Process
The process is straightforward in setting up an email server with HestiaCP, Contabo VPS, and Namecheap.
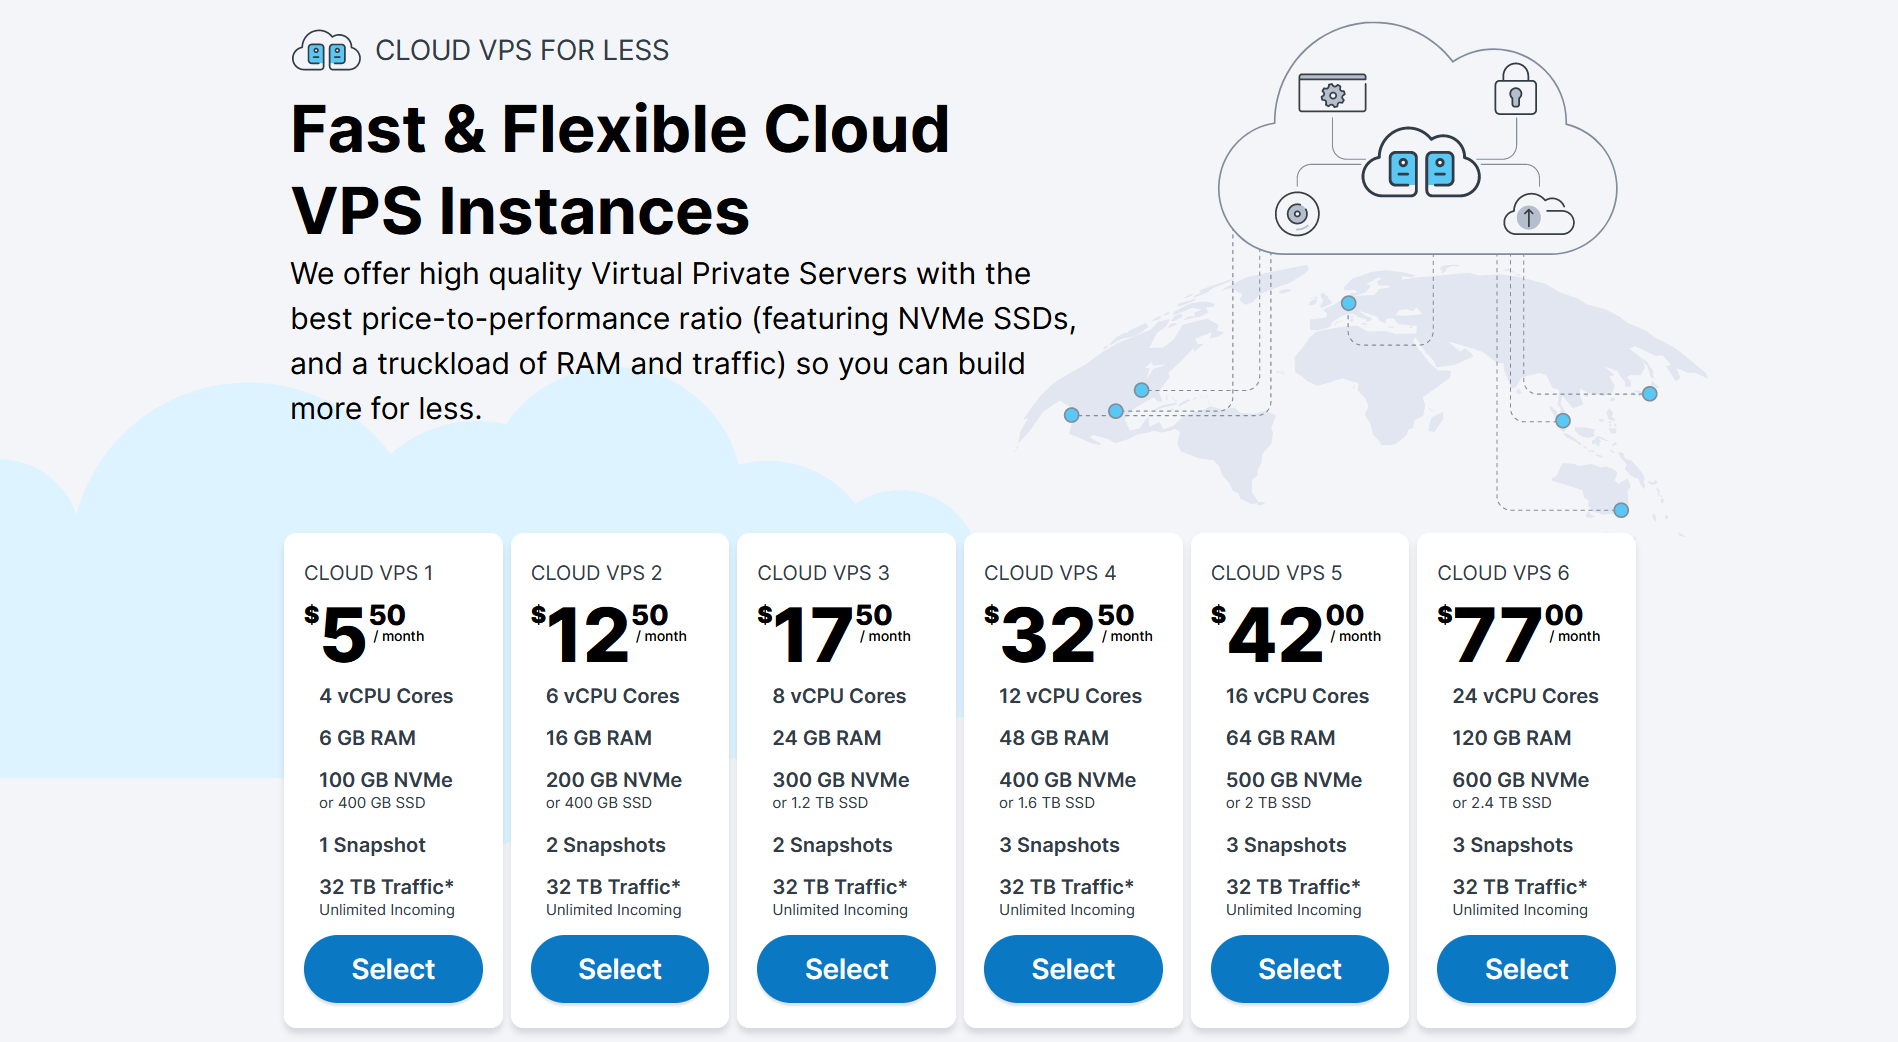
- Signup with a VPS (I’ll use Contabo VPS in this tutorial because it has an open port 25). You can also use RackNerd VPS.
- A fresh OS installation preferably the latest Debian or Ubuntu LTS.
- Install HestiaCP
- Add a domain in HestiaCP with a DNS zone and Email enabled
- Add an email account
- Configure DNS settings in Namecheap
- Send email and test spam score.
Free Email Server Setup With HestiaCP, Contabo VPS, and Namecheap Step-by-Step
Have you ever wondered what happens behind the scenes when you hit that send button? Well, it’s time to demystify the process and learn how to build your own email server like a pro!
So, are you ready to dive into the world of self-hosted email servers? Let’s get started on this exciting adventure together!
Step 1. Signup with a VPS with an open port 25
We will be using Contabo Cloud VPS because it has an open port 25. Port 25 is commonly used for the Simple Mail Transfer Protocol (SMTP). Therefore you need a VPS with an open port 25. Some VPS close this port to prevent spam.
Here are some of the VPS that have an open port 25.
Let’s signup with Contabo VPS!
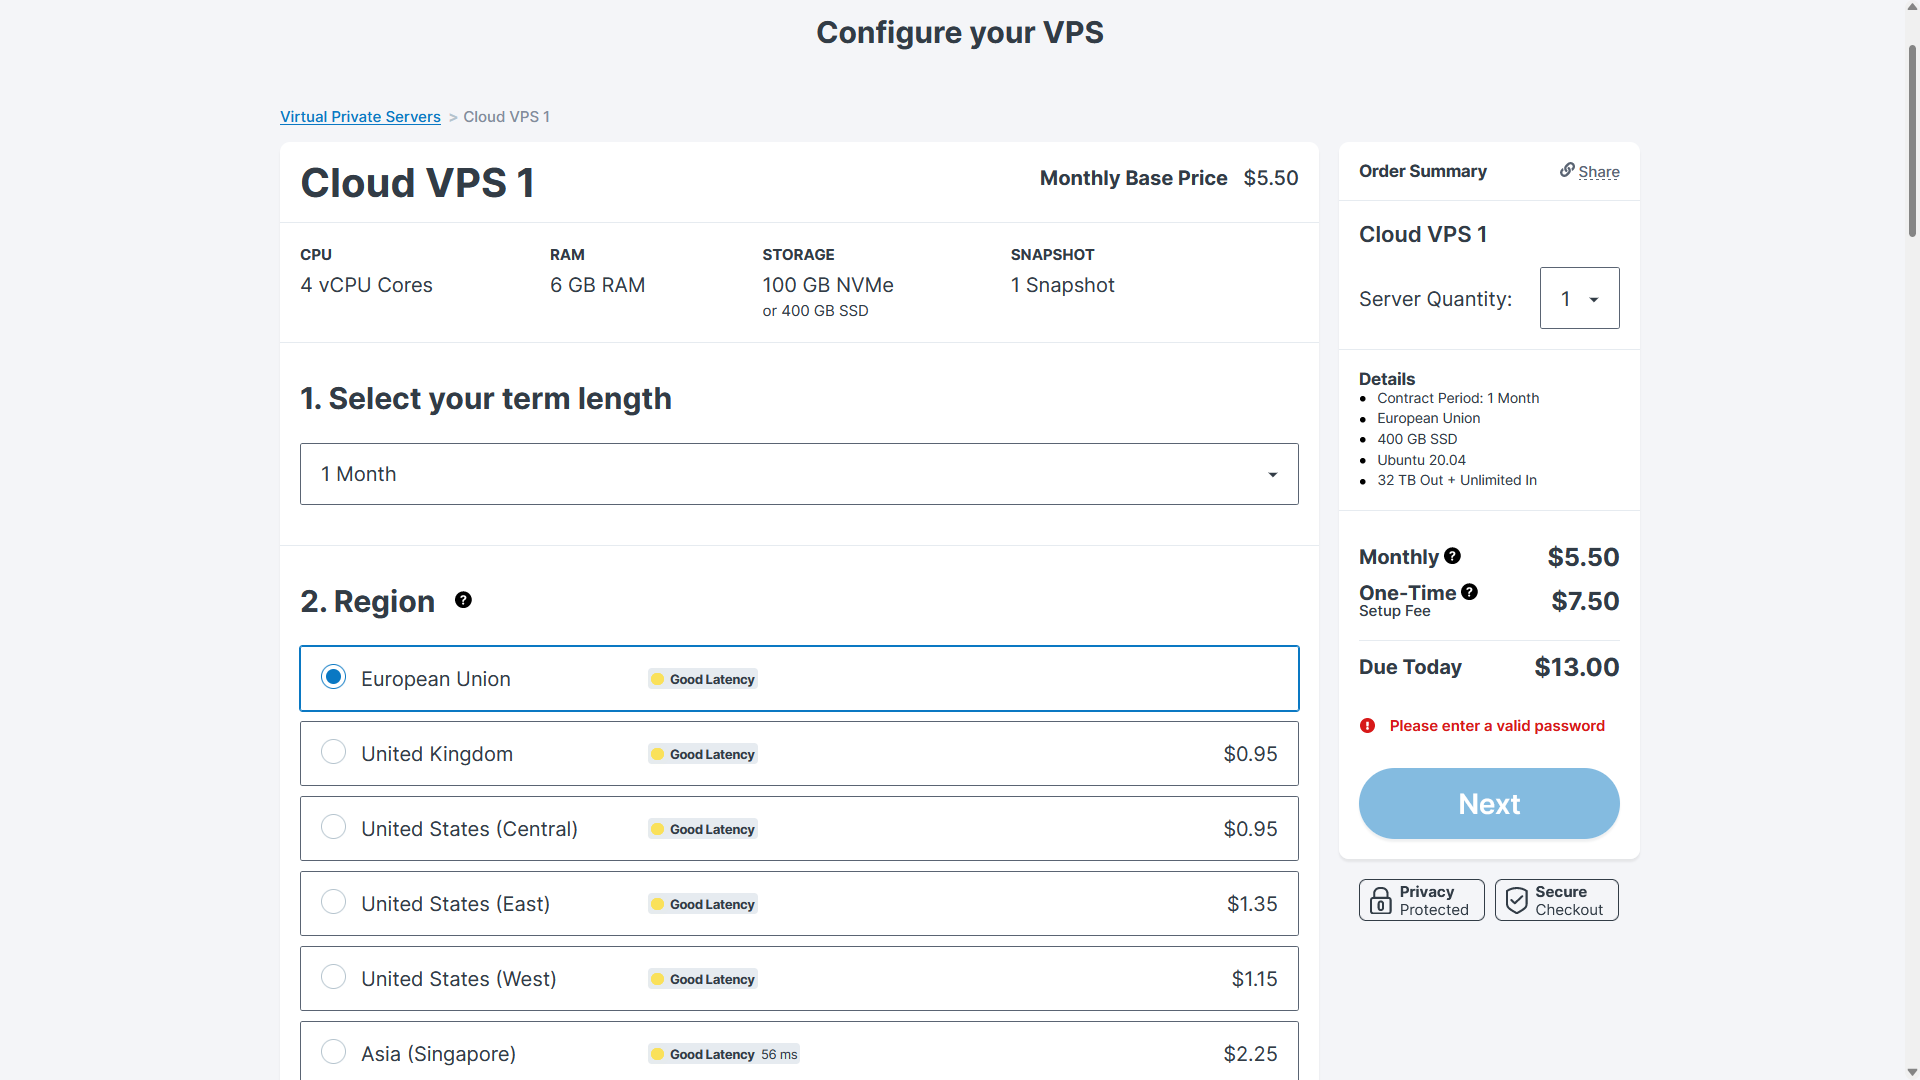
Choose your term length and region.
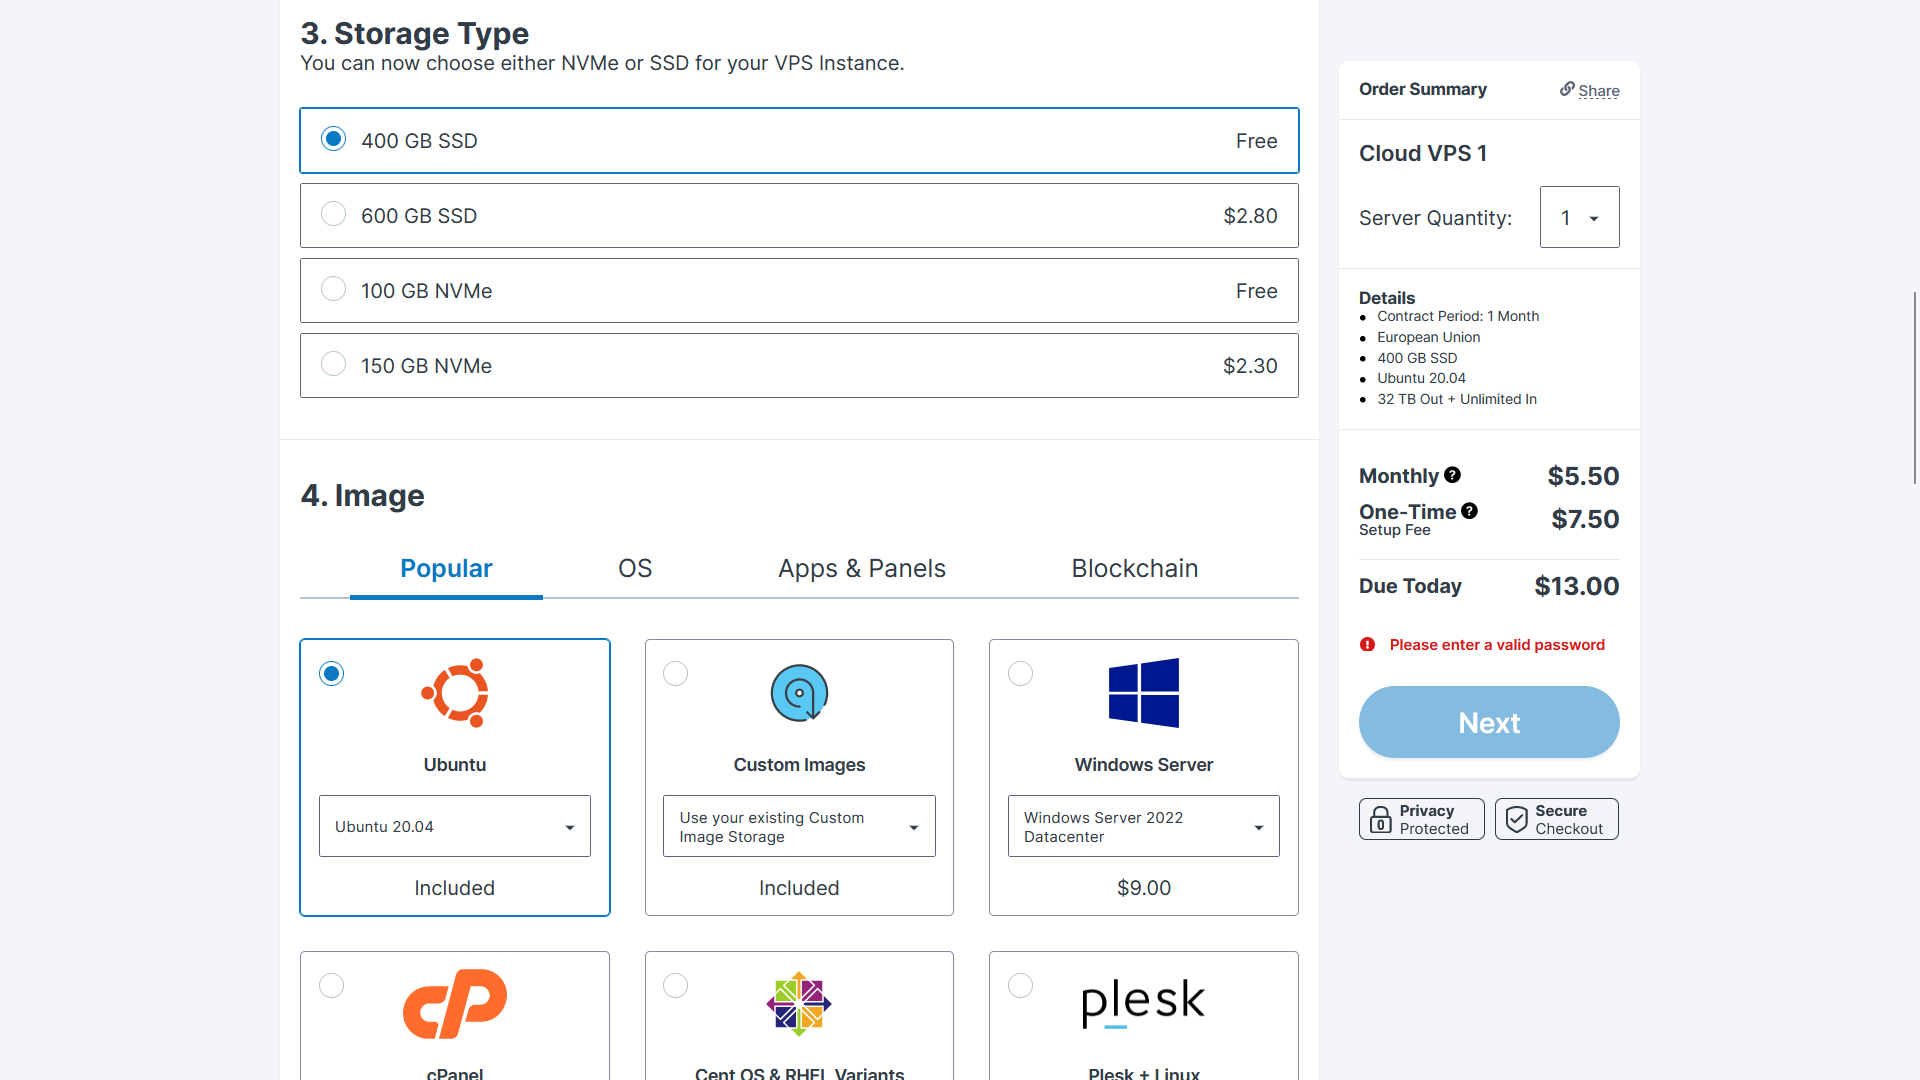
Next choose a storage type. I suggest an NVMe because it is much faster than an ordinary SSD. For the Image, choose Debian or Ubuntu LTS. Be sure it is an LTS (Long Term Support). In this tutorial we will be using Ubuntu 22.04 LTS.
Generate a secure password and leave Networking and Add-ons as is unless you want to add something.

Step 2. Install HestiaCP on Ubuntu 22.04 LTS
First, download a free SSH client called Bitvise. We’ll need this software to connect to our server. For Debian users check this HestiaCP installation guide.
Use your server IP address beside the Host and use Port 22. Login as Root using the password we generated during signup.
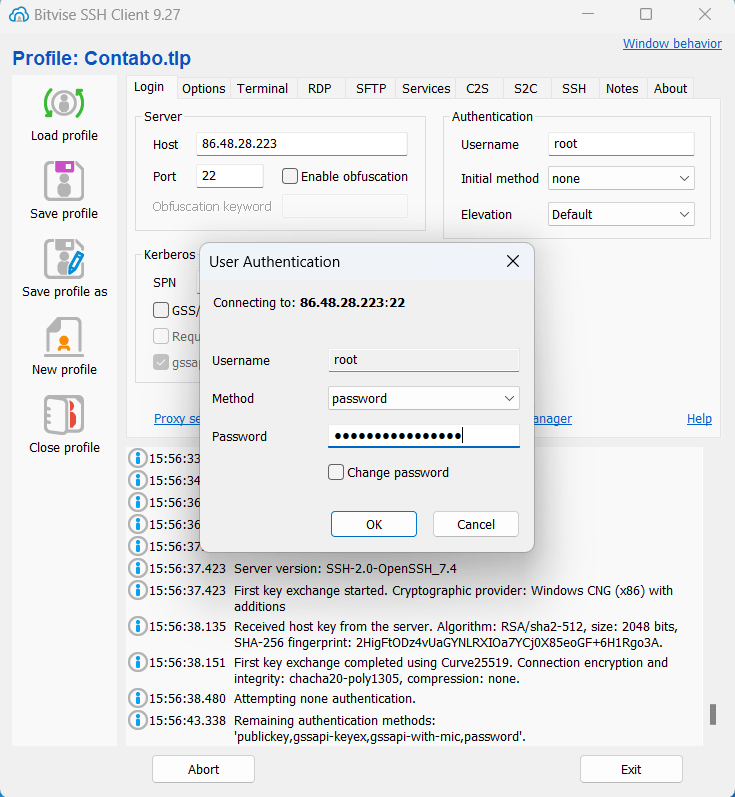
Run the following commands:
wget https://raw.githubusercontent.com/hestiacp/hestiacp/release/install/hst-install.sh
bash hst-install.sh
If bash hst-install.sh doesn’t work, add –force.

Follow the following options:
Would you like to continue with the installation? [Y/N]: Choose Y.
Provide an email valid address.
Enter a fully qualified domain. For instance, cp.webshanks.com
You can reboot your server once the installation is done.
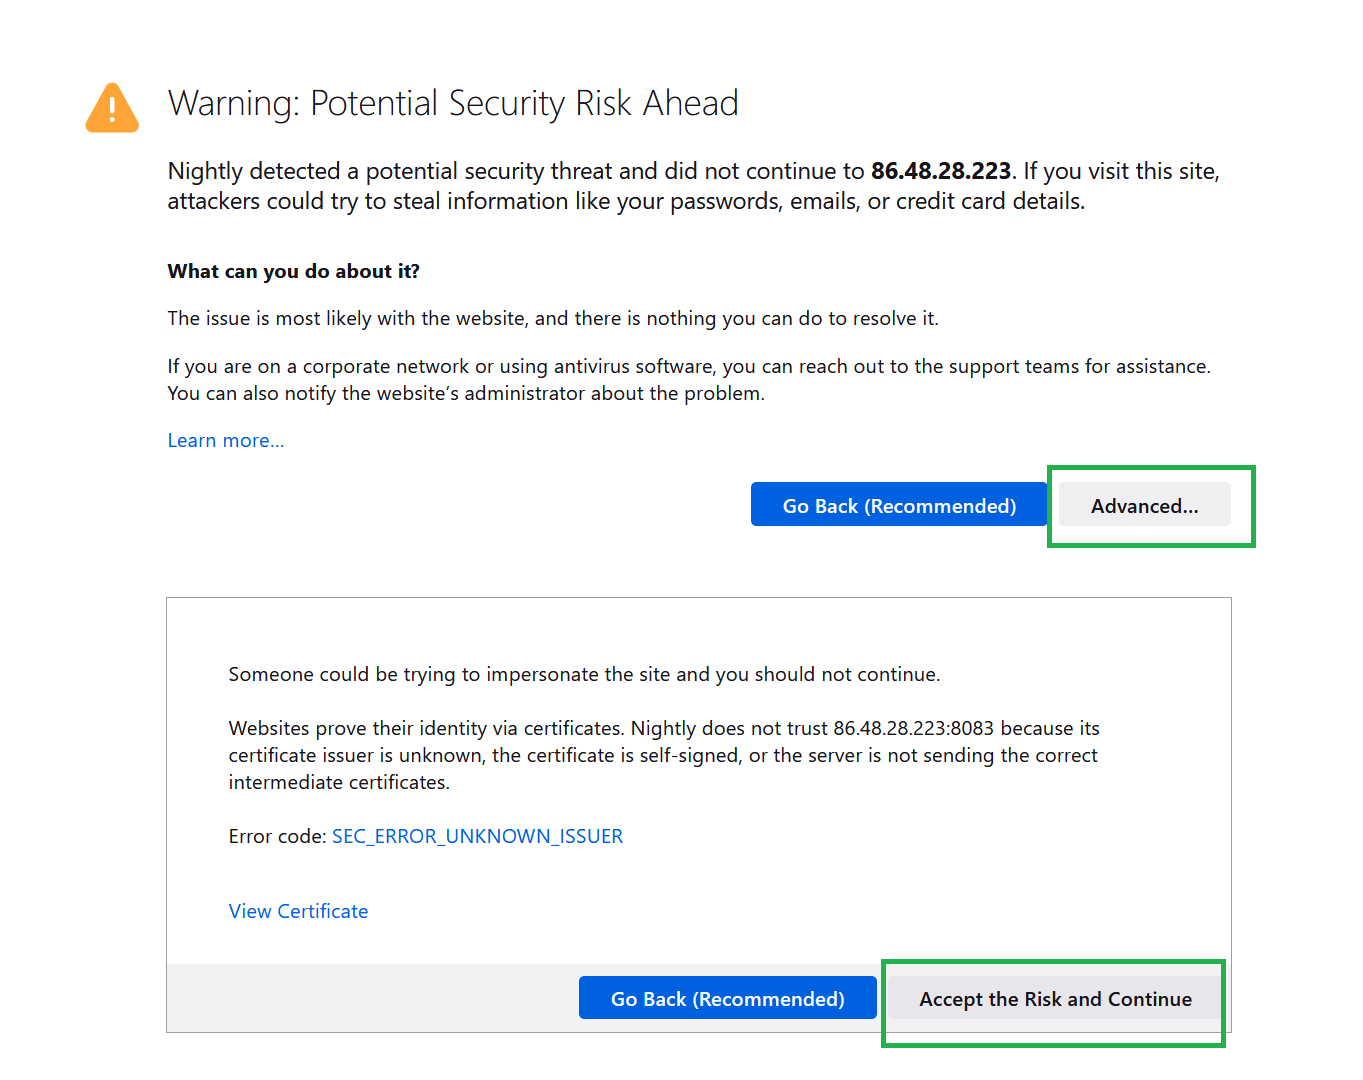
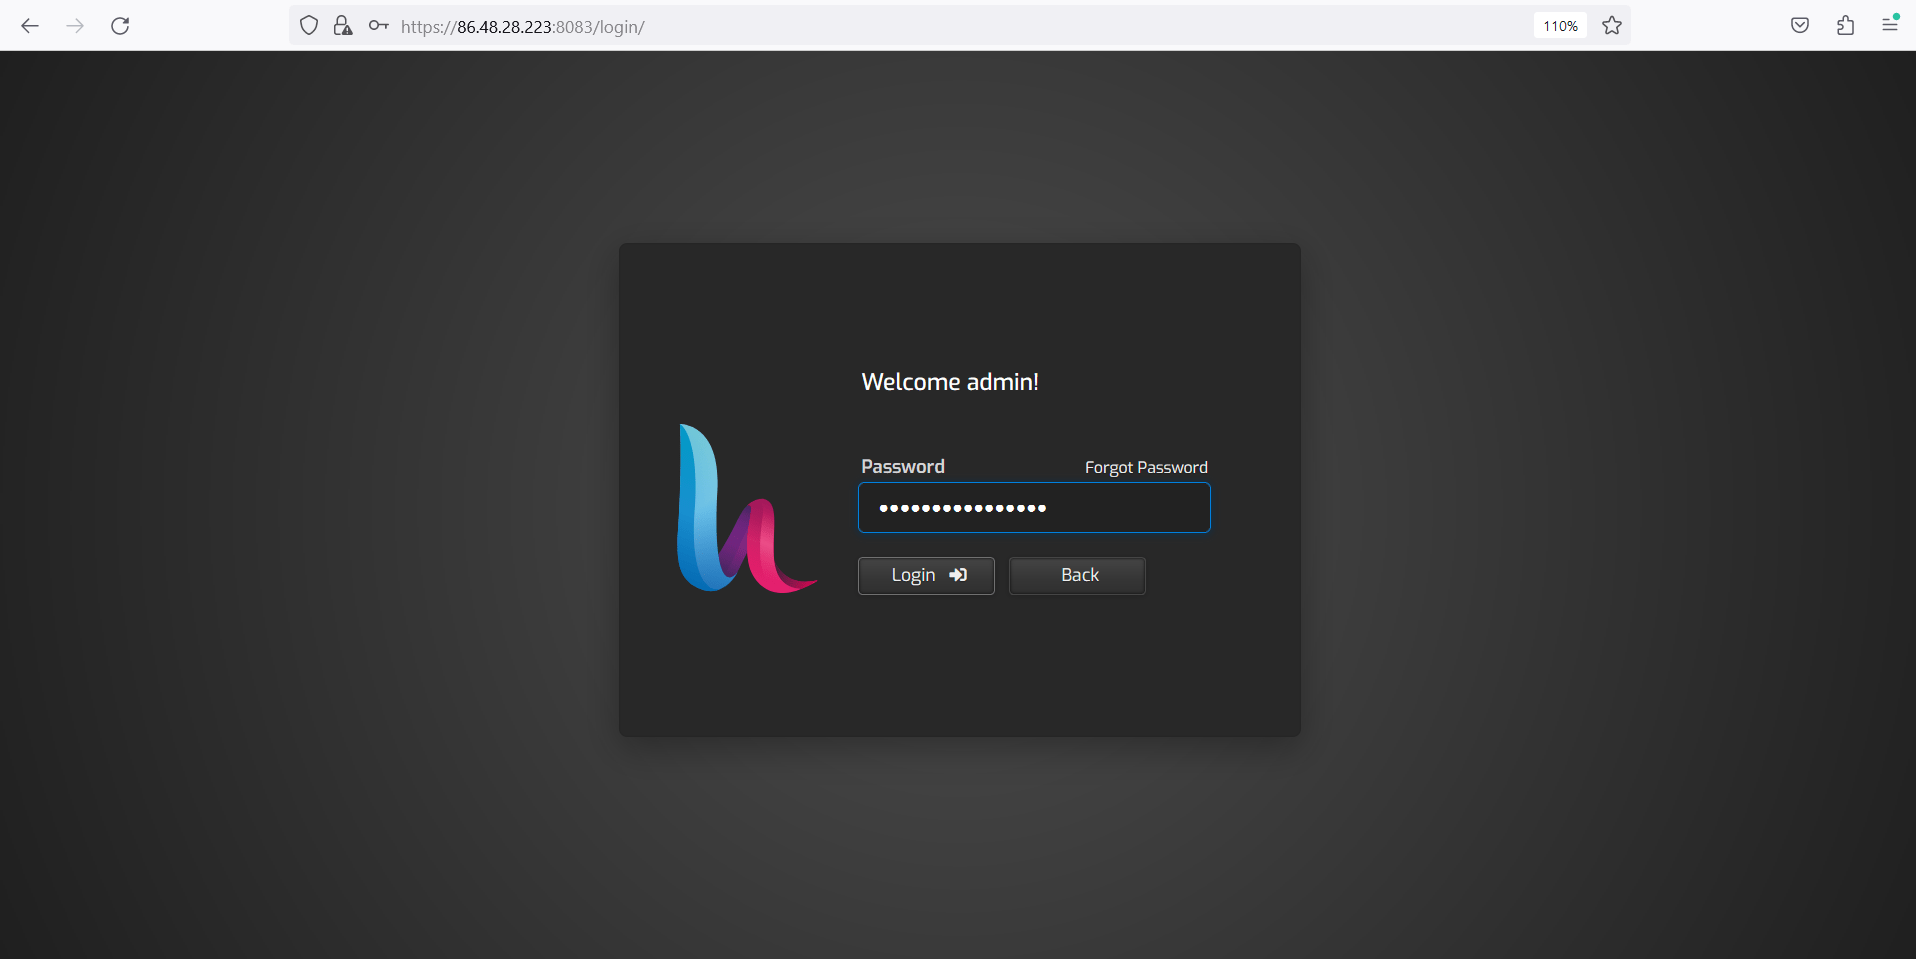
Step 3. Access Hestia Control Panel
You can access your HestiaCP through server IP and port 8083: <IPAddress>:8083
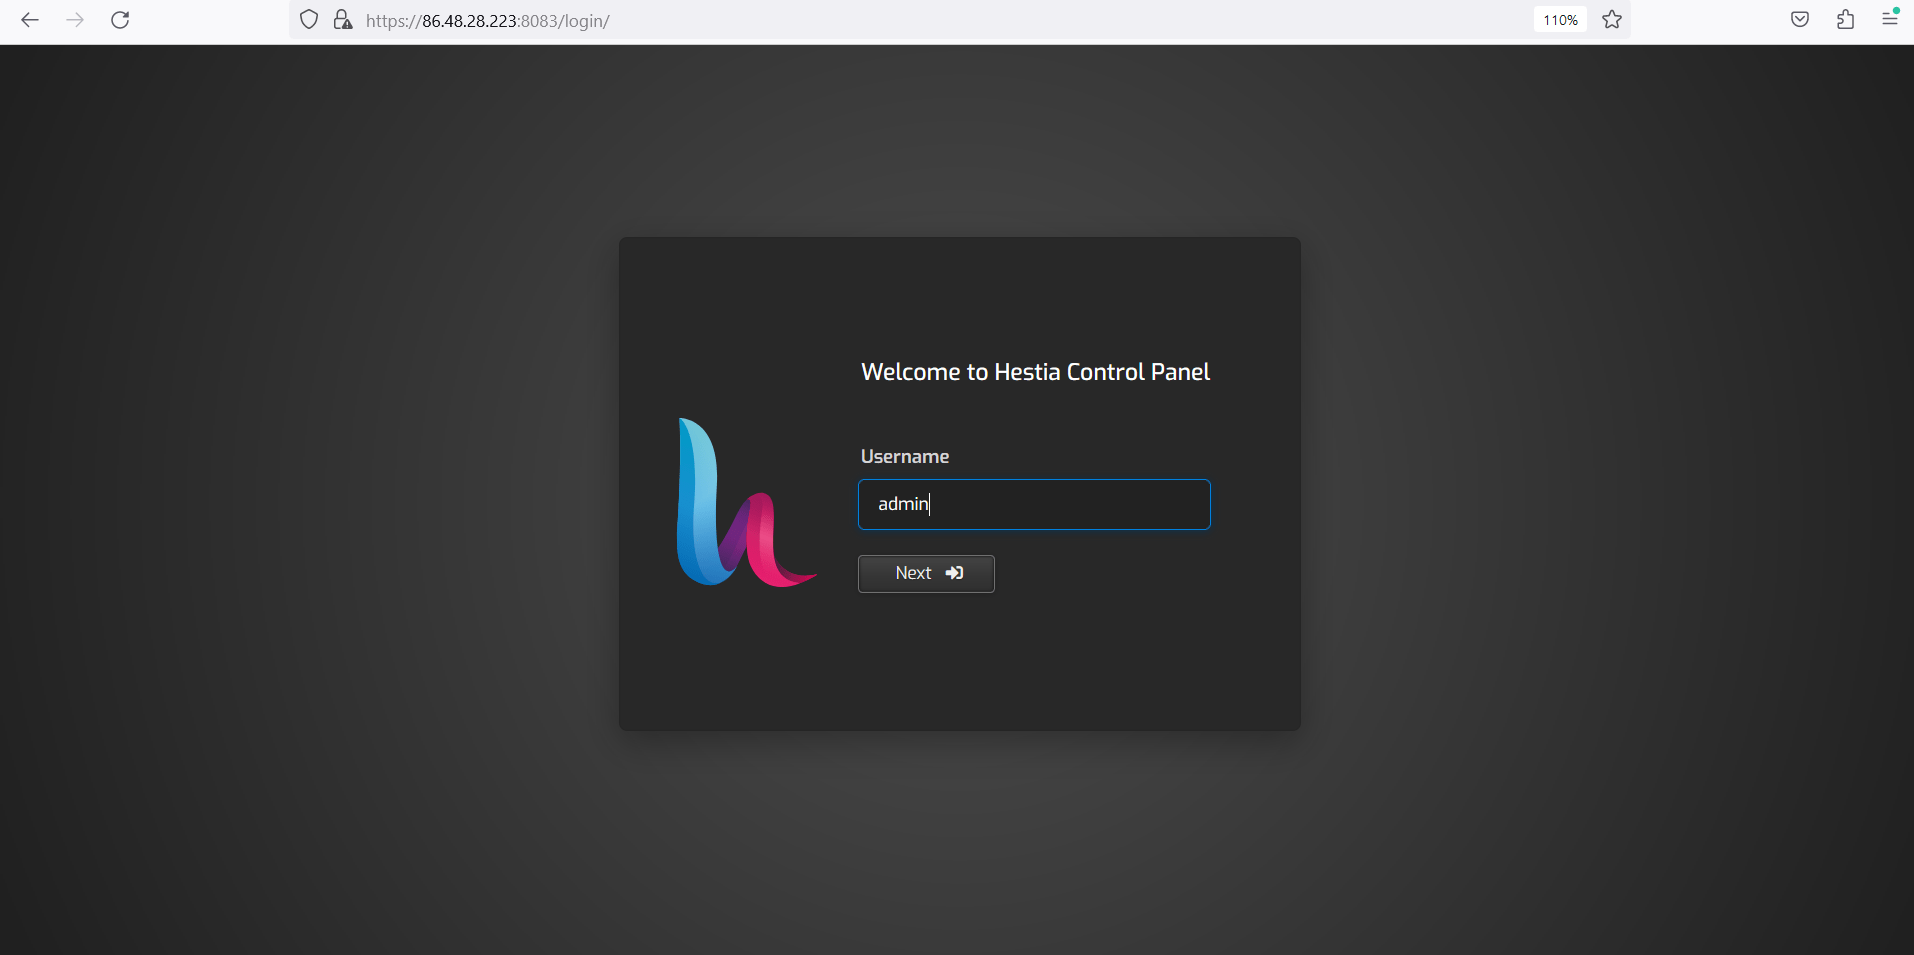

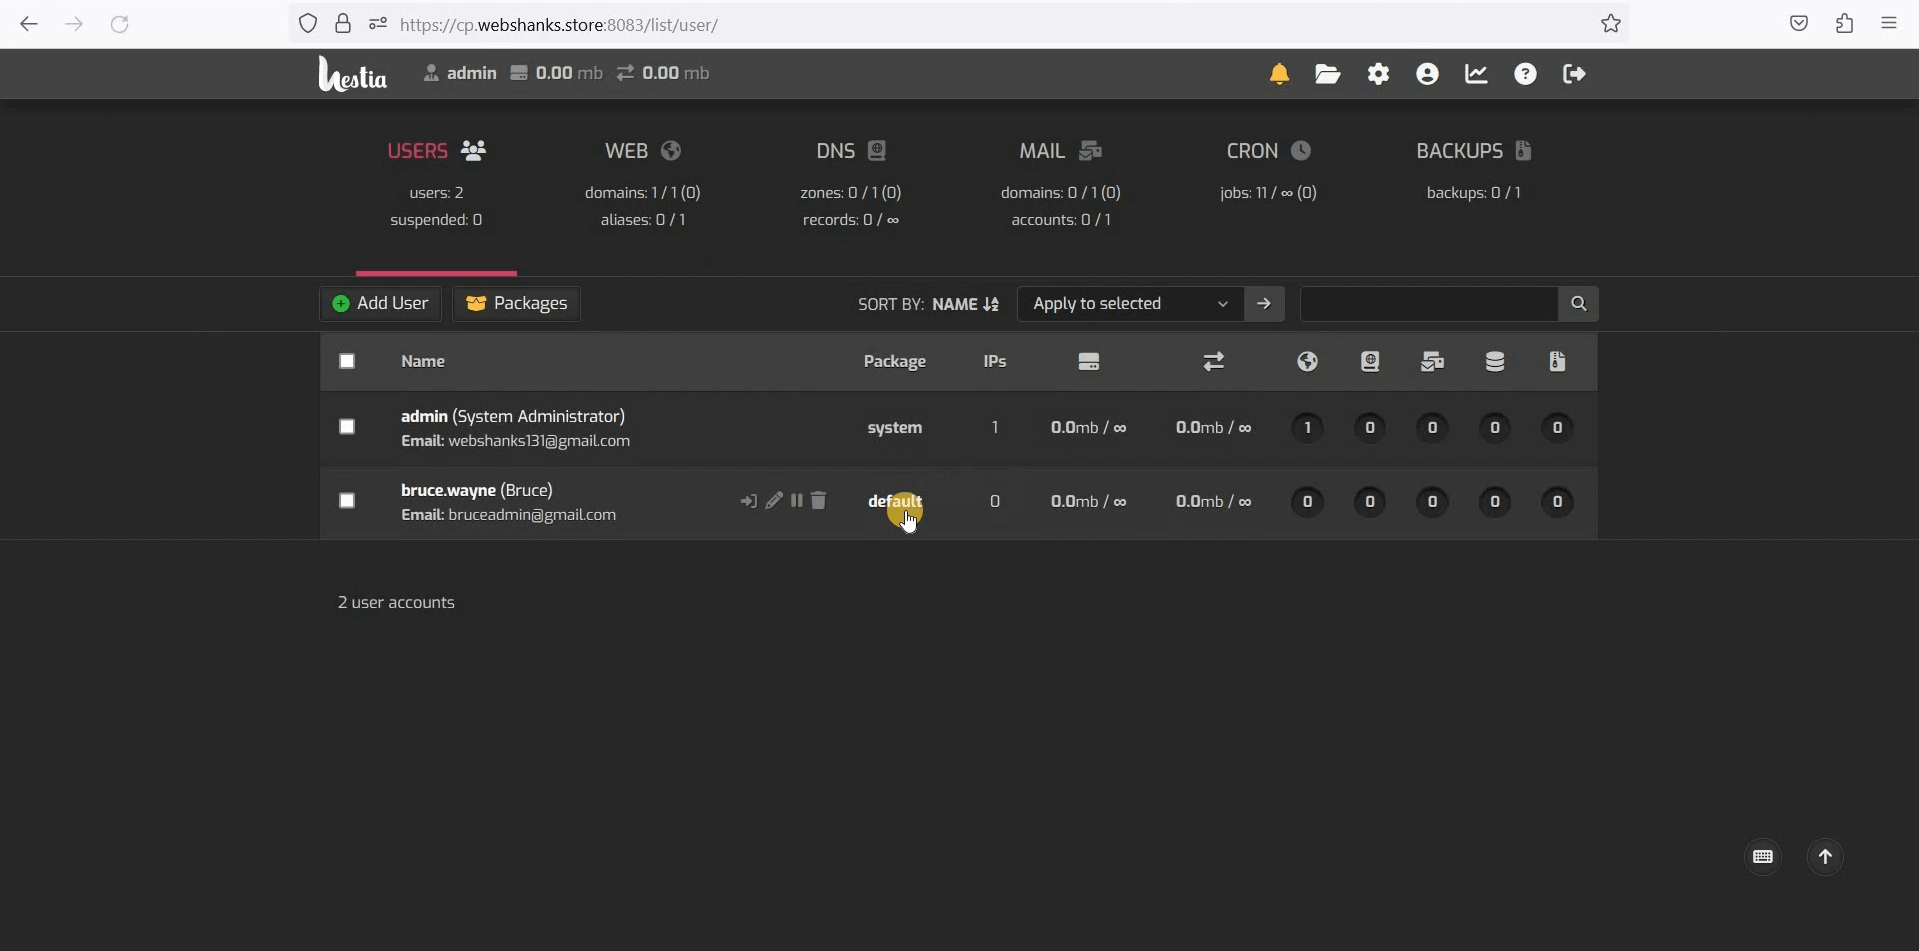
Add a non-admin user for security purposes. Just go to Add User to add a new user.
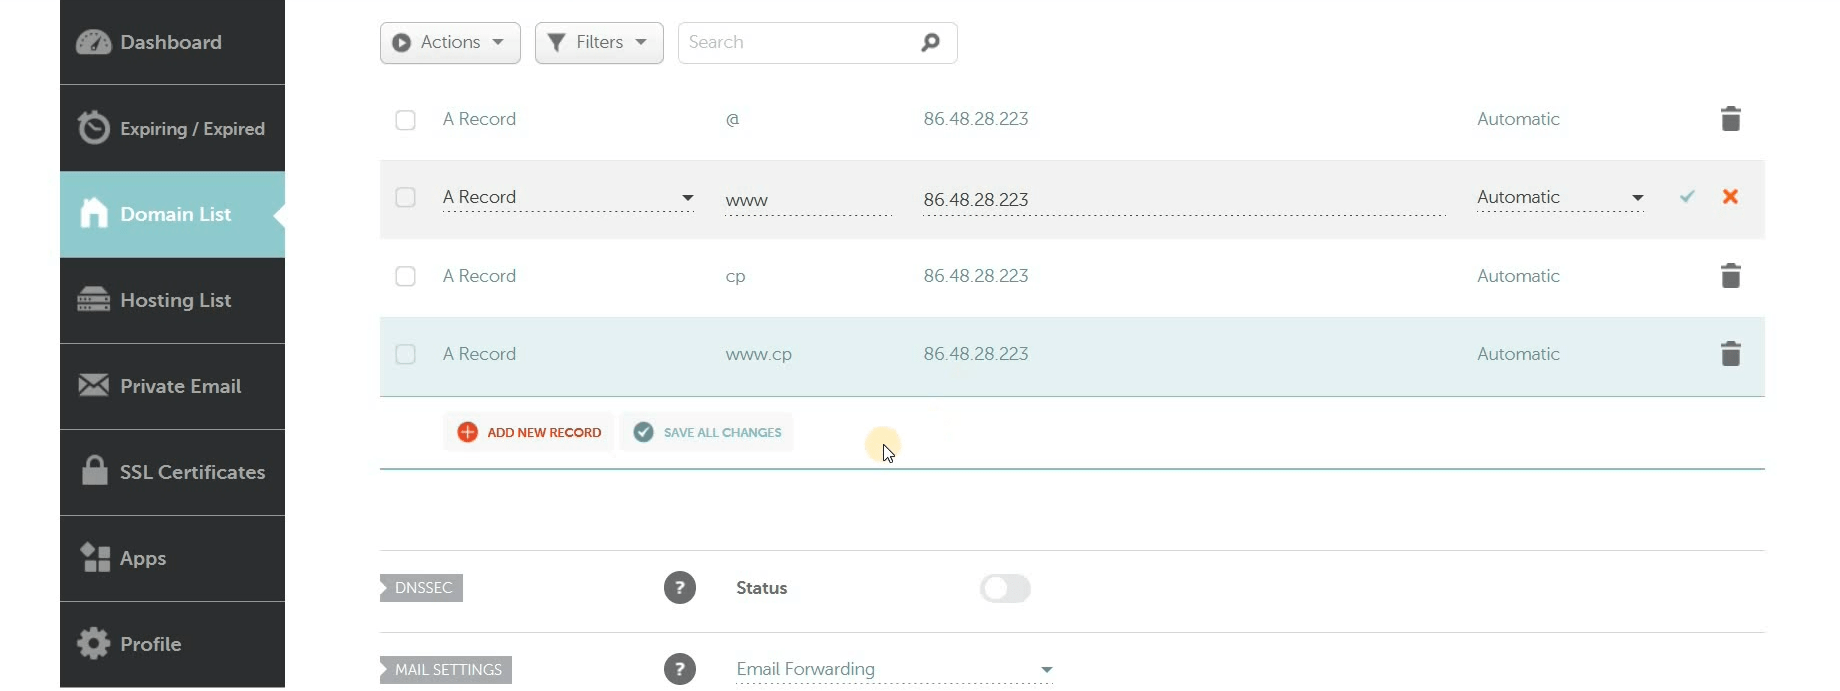
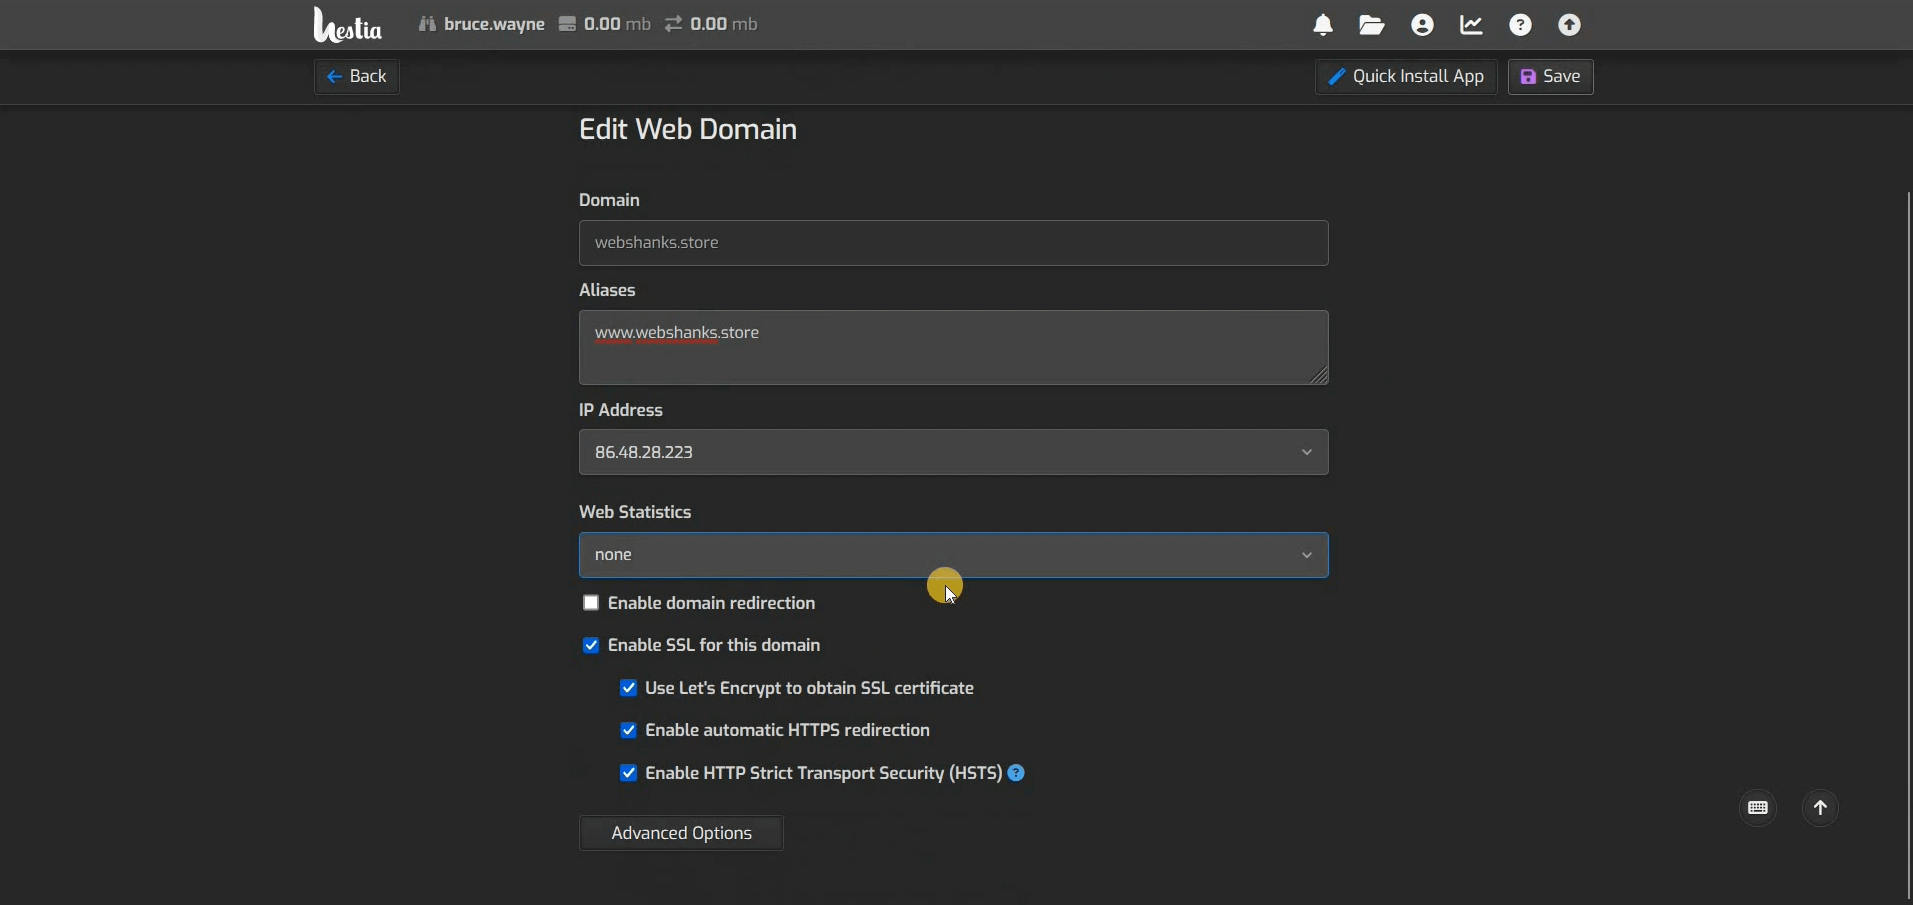
Add an A record for the domain and hostname. Go to Namecheap and add an A record for both non-www and www.
For example:
Our domain is webshanks.store. Create two A records with Host value as @ for non-www and WWW for www. You can also add A records for your hostname – cp and www.cp.
- Type: A record
- Host: @
- Value: Your server IP address
- TTL: Automatic
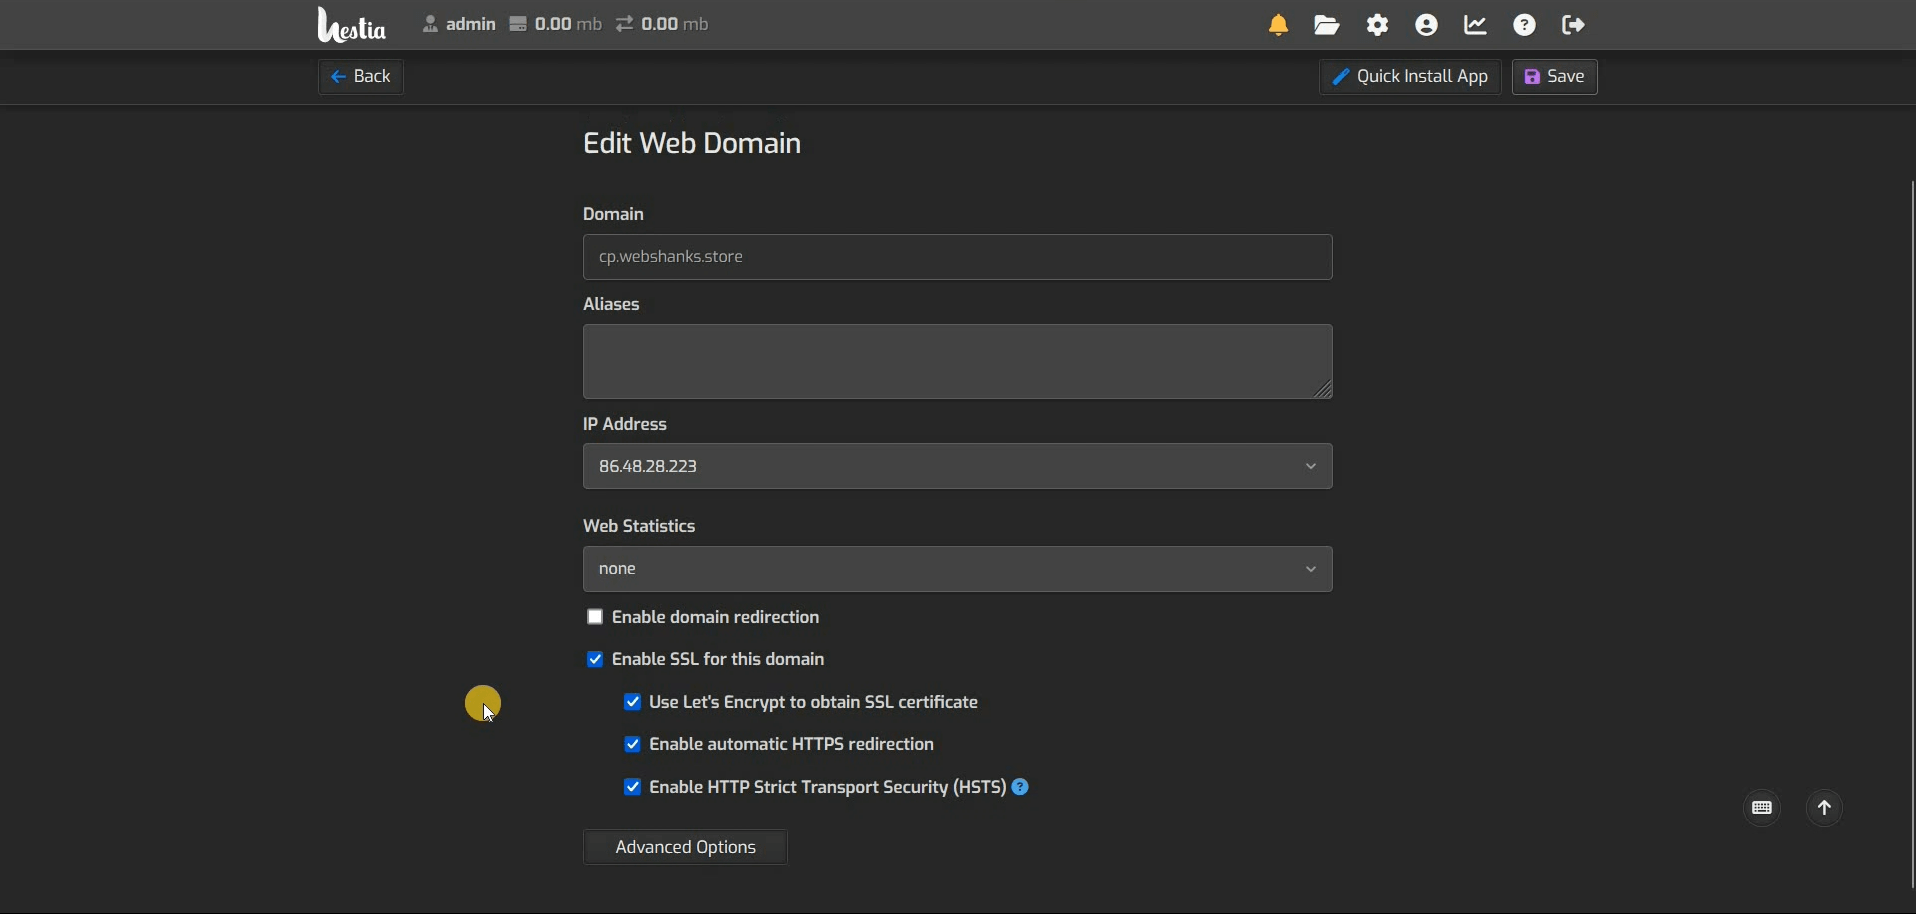
Next issue an SSL for hostname. Just go to Web > Choose your Hostname > Check Enable SSL
In case you can’t issue an SSL for your hostname in HestiaCP, try the following commands in the command line interface:
v-change-sys-hostname host.domain.tld
v-add-letsencrypt-host
host.domain.tld is your hostname.
If you are using RackNerd and you face an error below, go to /etc/hosts, find something like racknerd-071cd7127.0.0.1 and remove it. Then issue SSL using the commands above.
Error: WEB_DOMAINS limit is reached :: upgrade user package
Error: web domain racknerd-095au7127.0.0.1 doesn’t exist
Then access your hostname, cp.webshanks.store instead of IP address.
Step 4. Add a domain
Next, we’ll add a domain and issue an SSL. From your HestiaCP dashboard, choose the non-admin user you created. Click Add Web Domain. Check Create DNS zone and Enable mail for this domain.
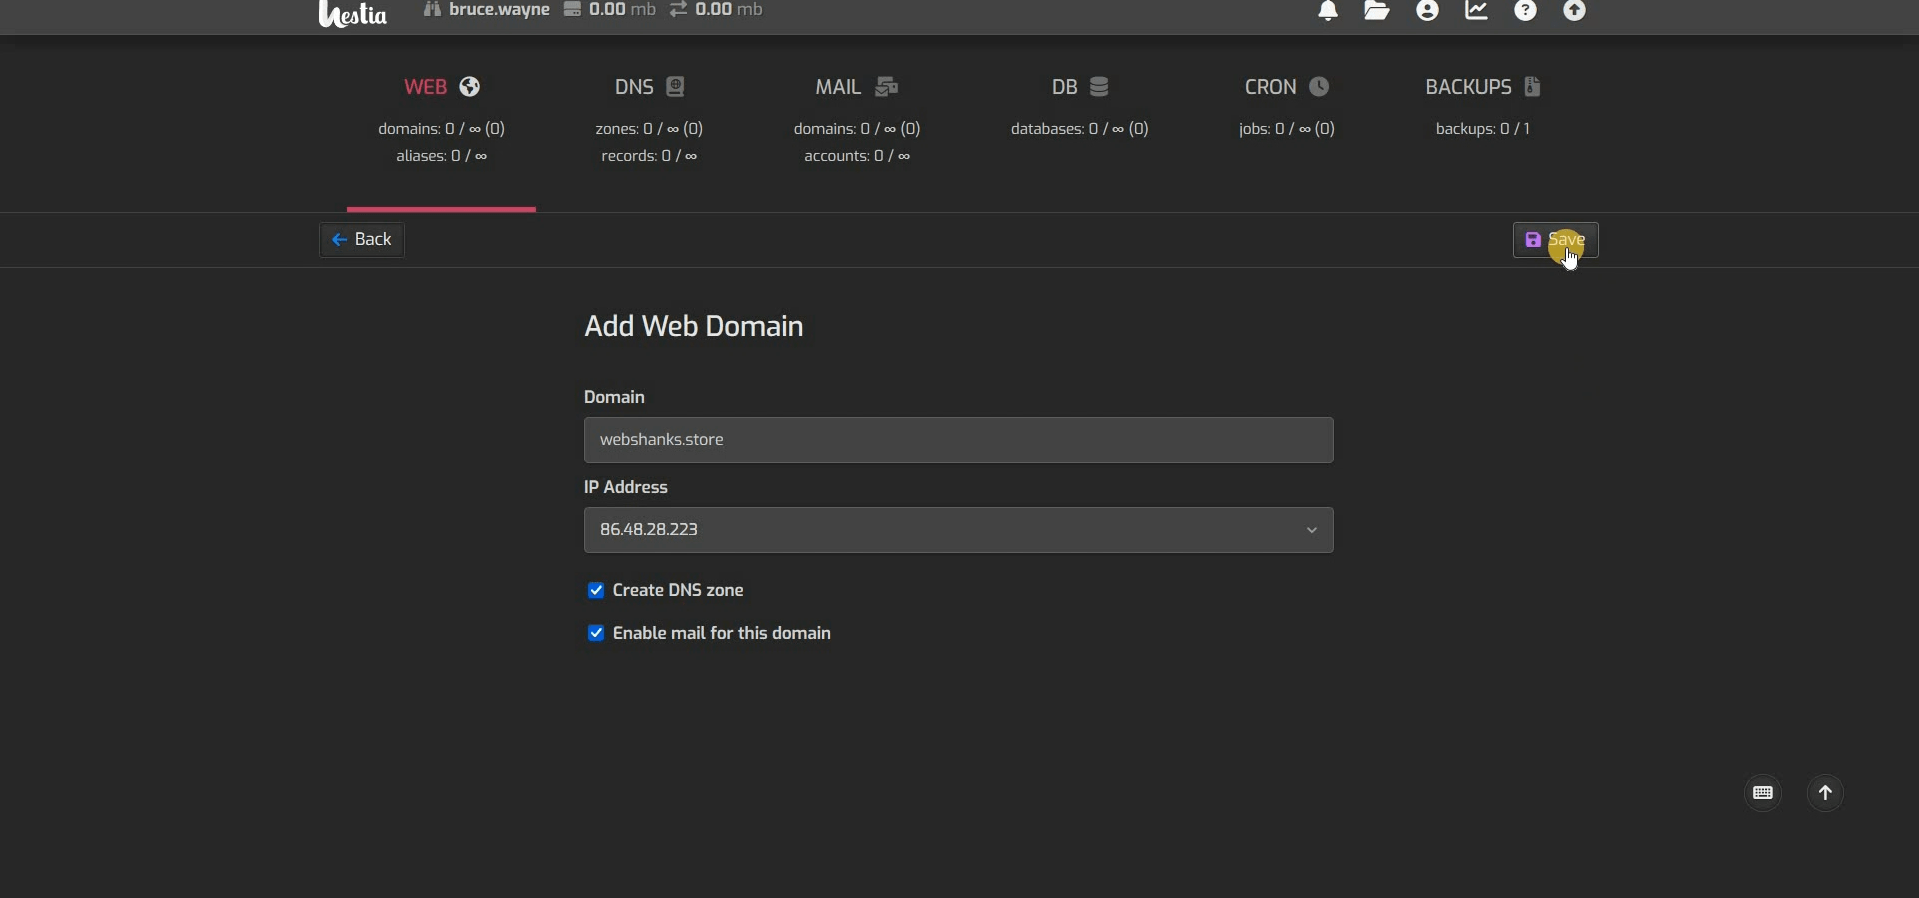
Since we have already added an A record for our domain, we can issue an SSL immediately.
Next, we will add an email account. Go to Mail > Choose the domain > Add Mail Account.
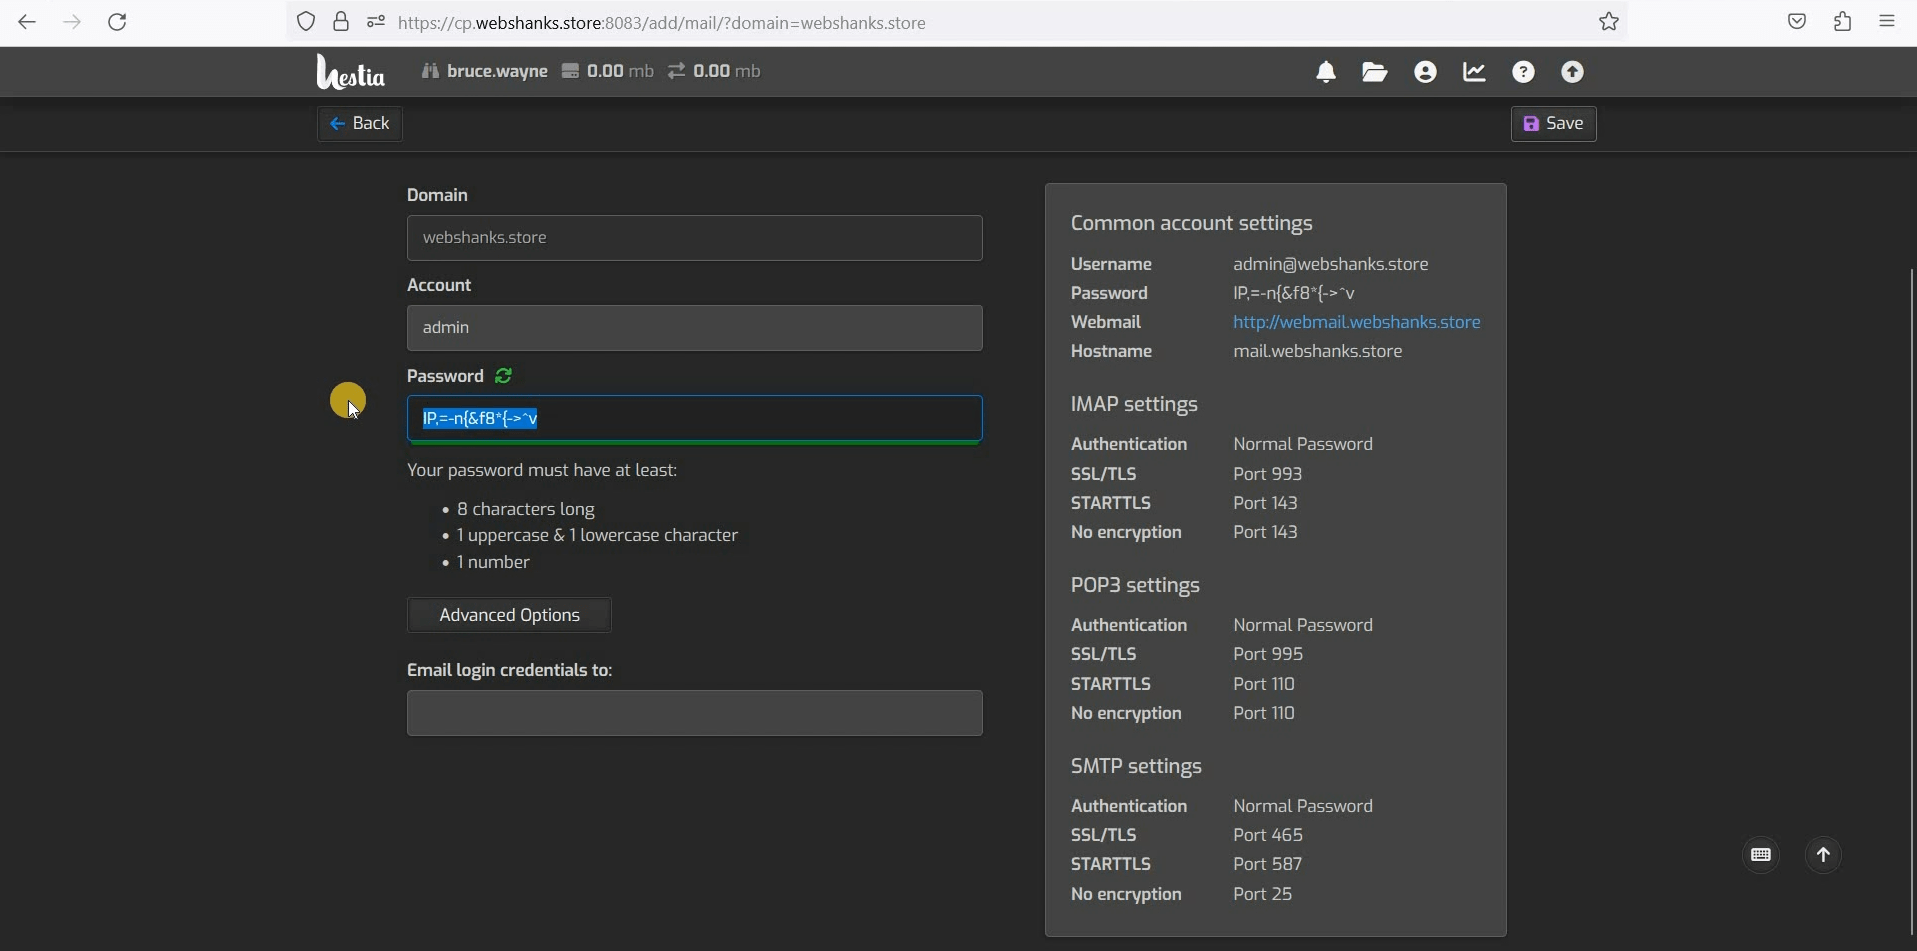
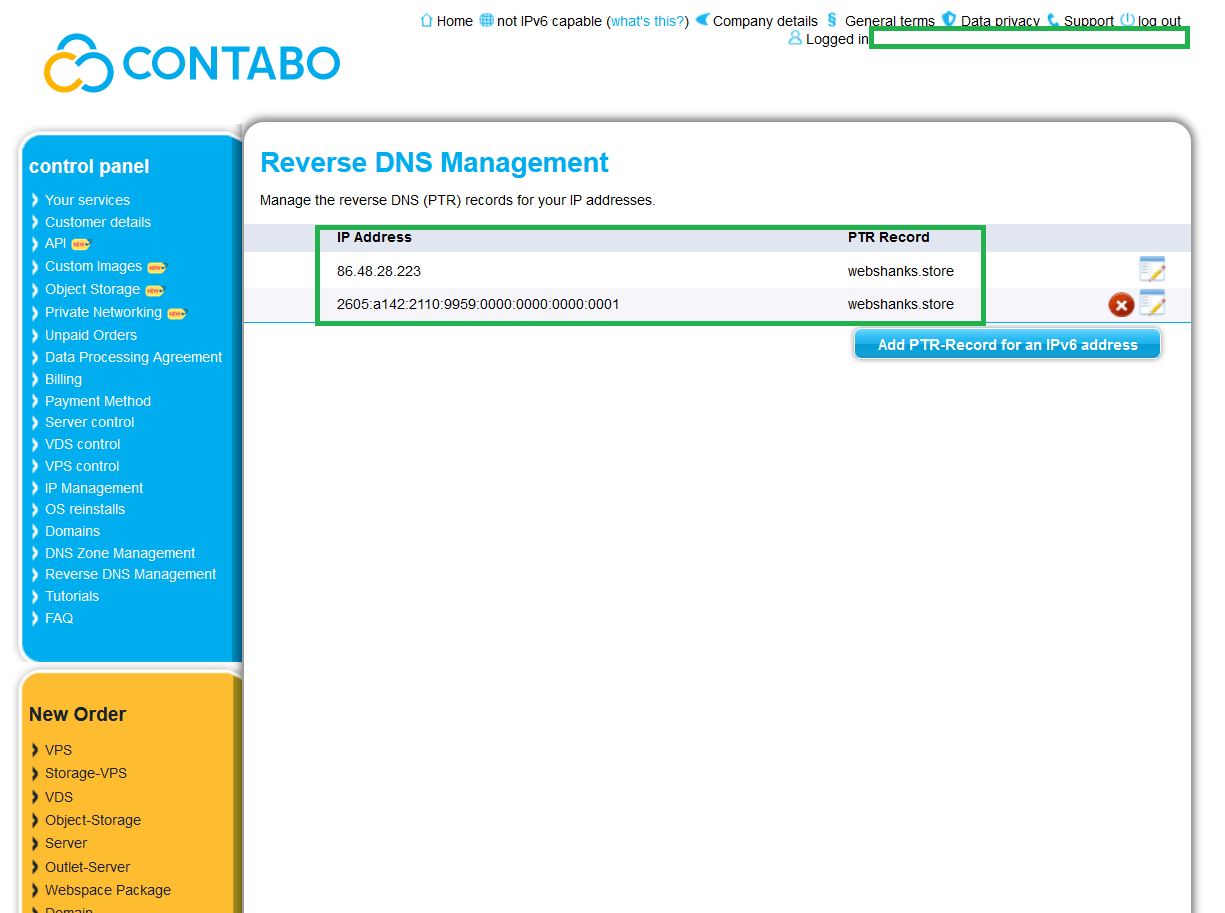
Now we need to add a PTR record in our VPS. Let’s go back to Contabo. From your Contabo dashboard, go to Reverse DNS Management in the left menu.
Your PTR record should contain your domain both IPV4 and IPV6 to avoid email going to the spam folder.
Step 5. Configure DNS settings in Namecheap
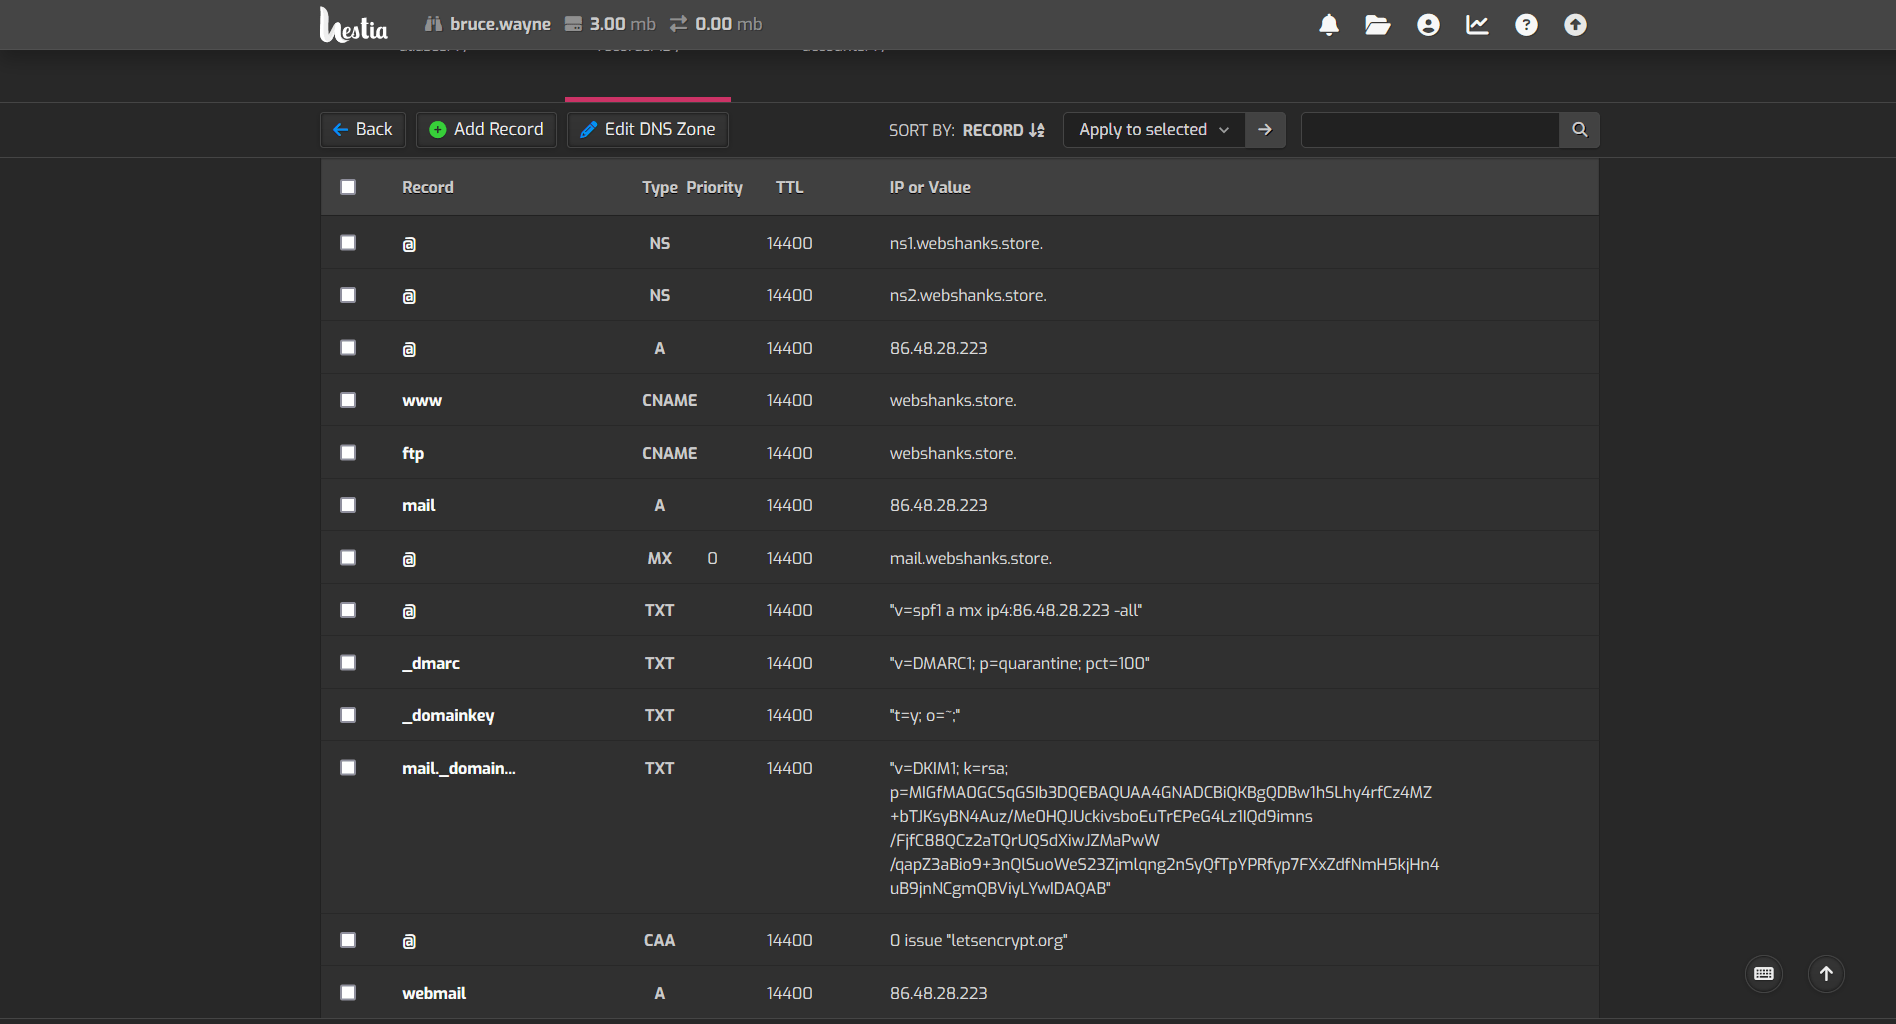
Next, go to your HestiaCP and click DNS > Choose domain and you will have your DNS records. Copy these records to Namecheap. You’ll just need to add A, MX, and TXT records. For a more detailed process watch the video above.
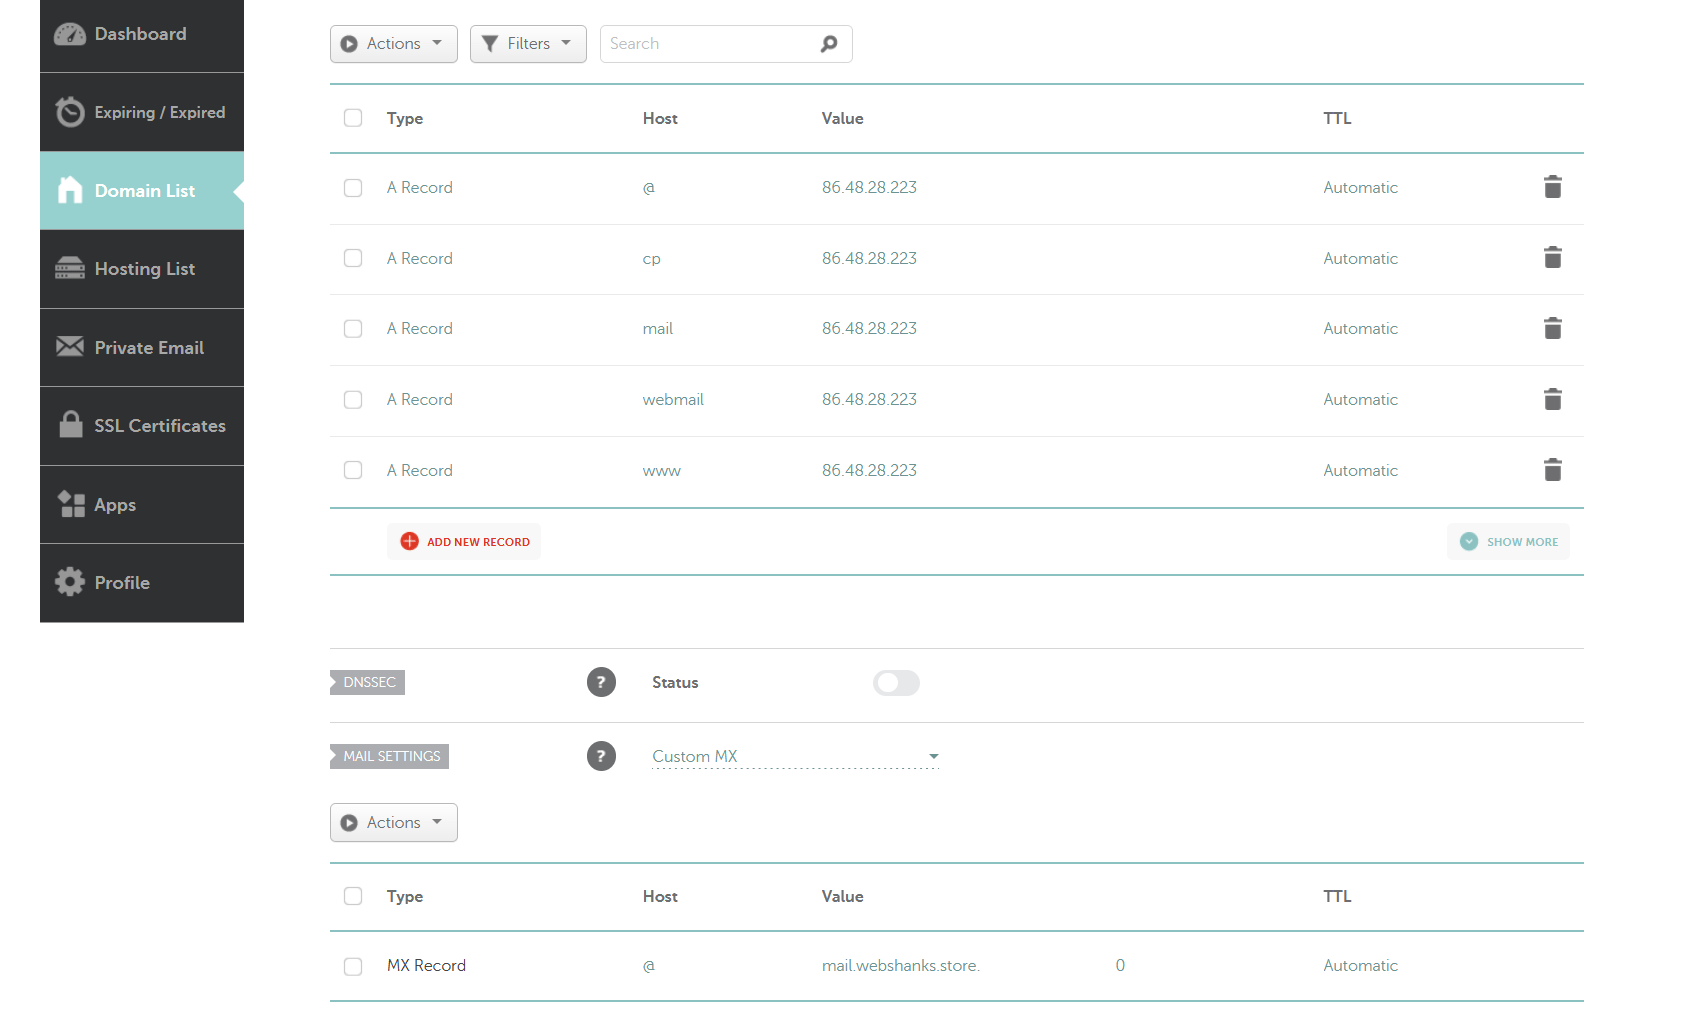
Now login to Namecheap and choose the domain to Manage > Advanced DNS.
Once we are done configuring DNS records, we’ll add an A record for our webmail. HestiaCP already has a webmail client. To access it just go to webmail.webshanks.store. Just replace the domain with your domain.
Go back to Namecheap and add an A record for our webmail.
Create two A records with Host value as webmail and www.webmail.
- Type: A record
- Host: webmail and www.webmail
- Value: Your server IP address
- TTL: Automatic
Next, we’ll now issue an SSL for our webmail.
Go to Mail > Choose the domain > Edit Mail Domain > Check Enable SSL for this domain
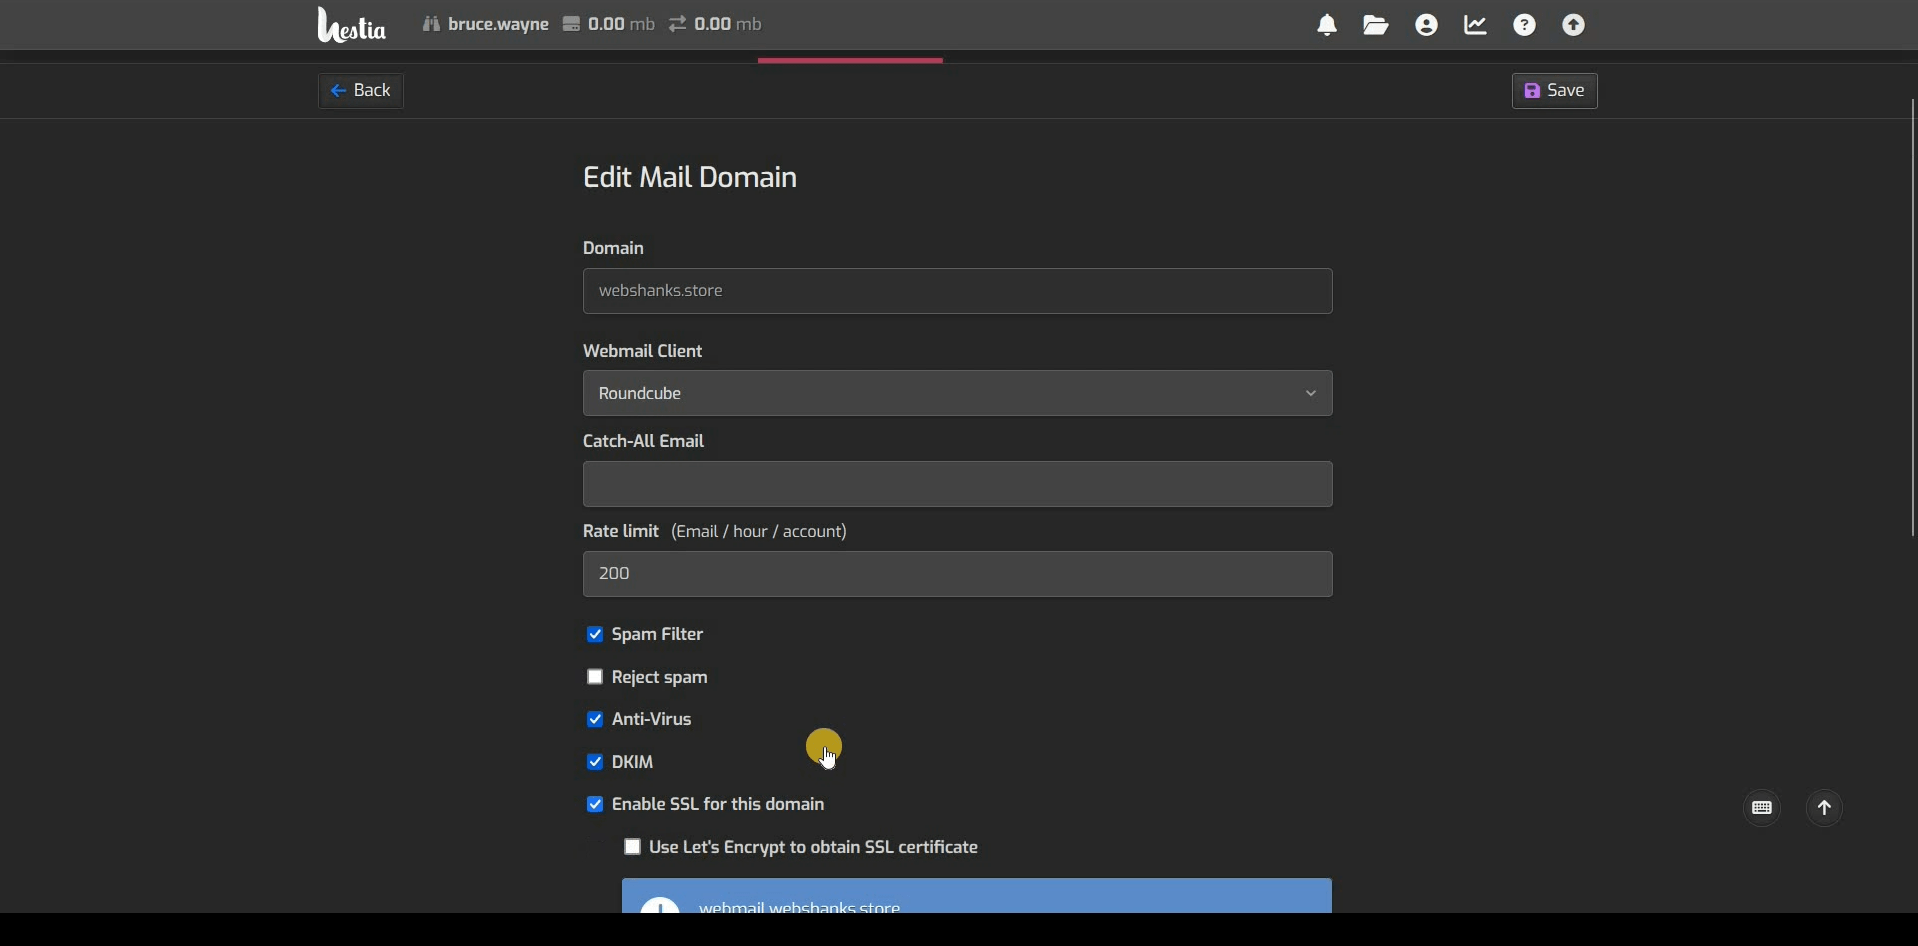
After issuing an SSL for the Mail domain, you can now access your webmail securely: https://webmail.webshanks.store/
Login using the email account we created earlier.
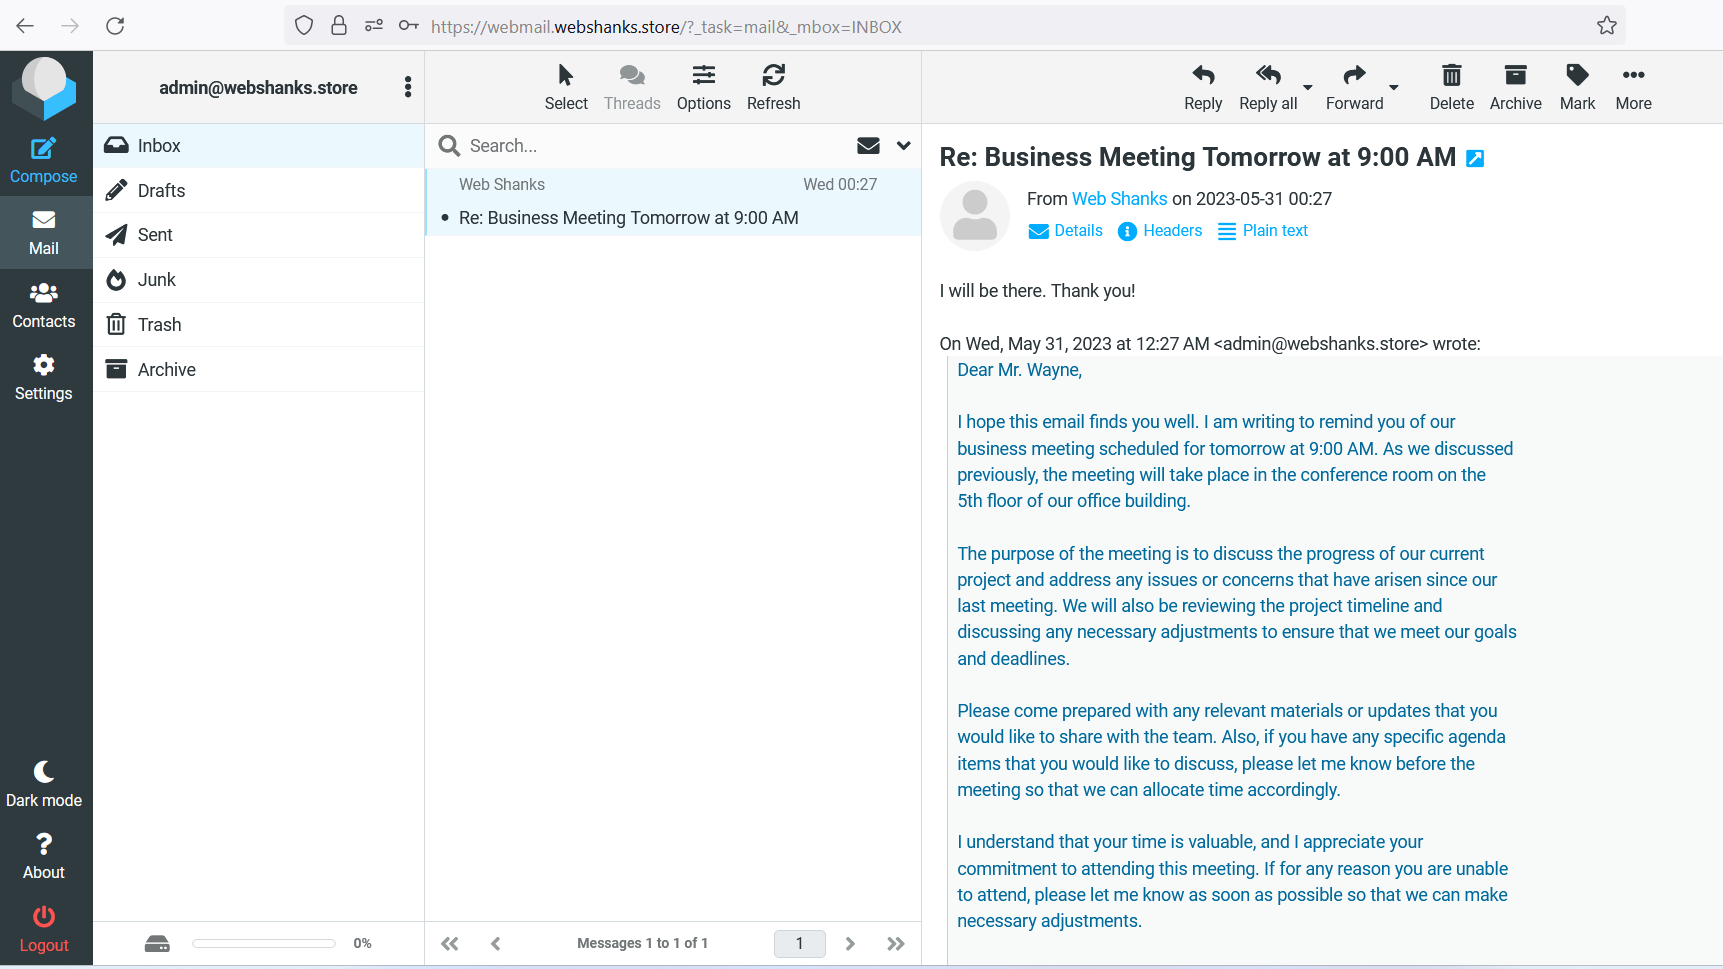
Step 6. Test Our Email Delivery
Next, we’ll test if we can send an email to Gmail.
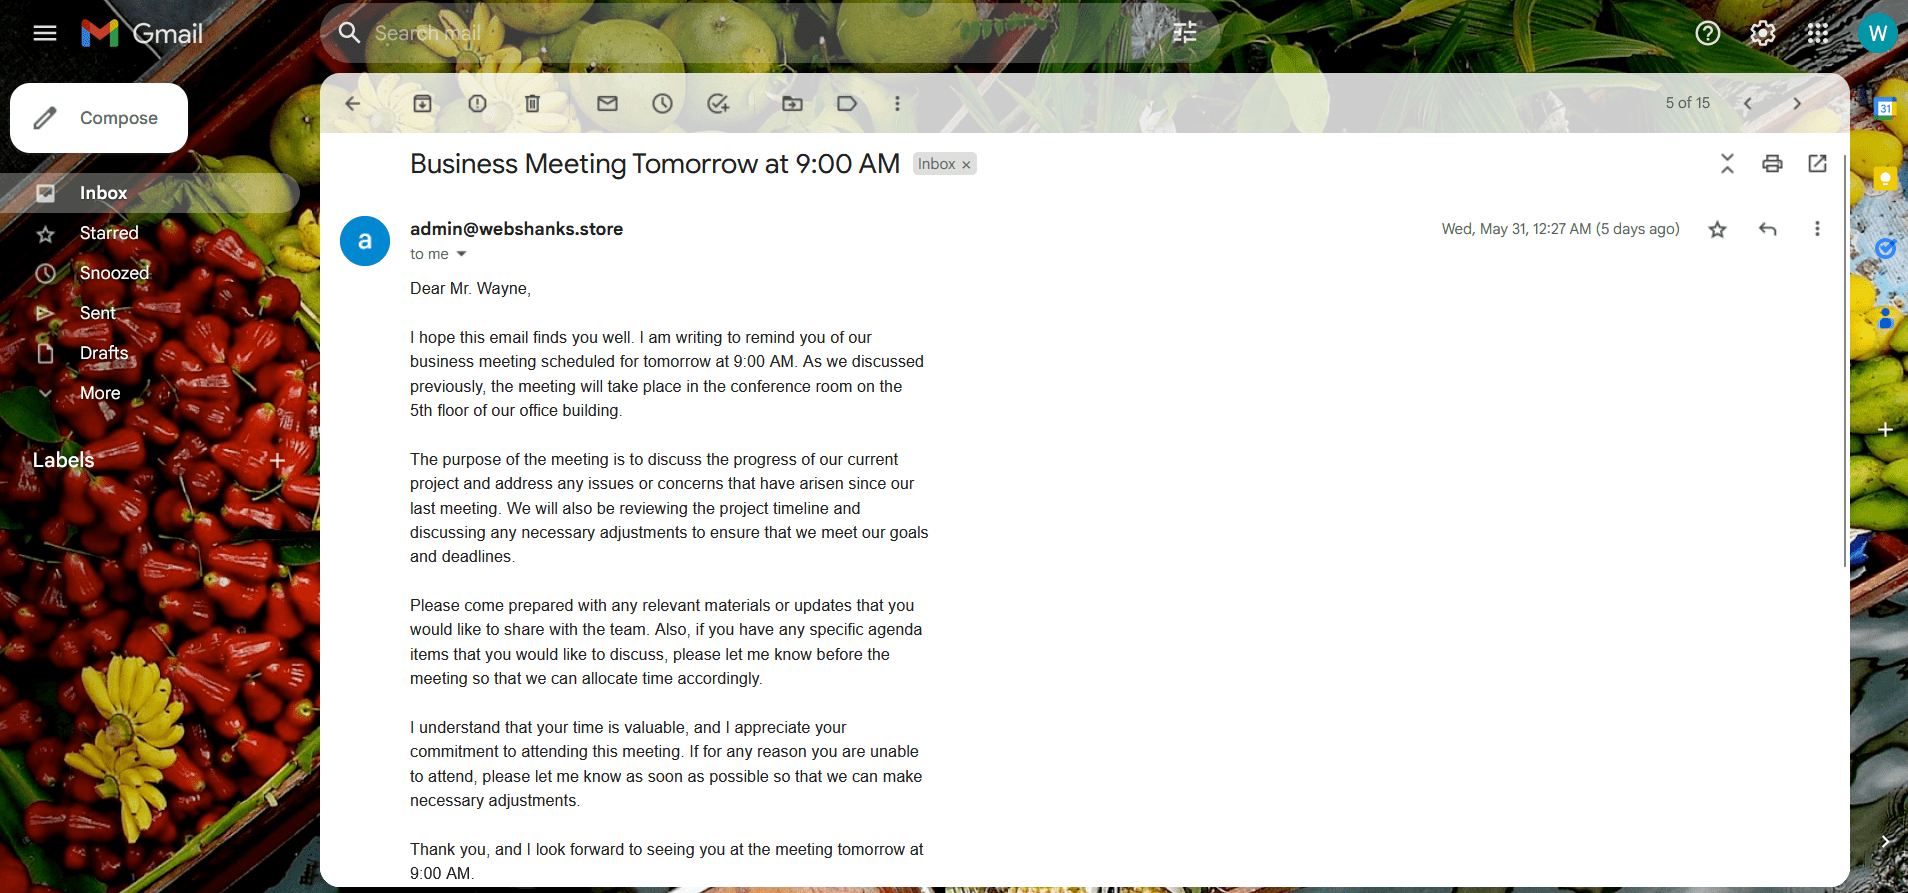
Now, from Gmail, we will reply to that email. Let’s see if we can receive a reply successfully.
Step 7. Test Email for Spam
Finally, let’s test our email for spam. If we get a score of 10/10, our deliverability is guaranteed.
We’ll just send a test email to the email address provided by Mail-tester.
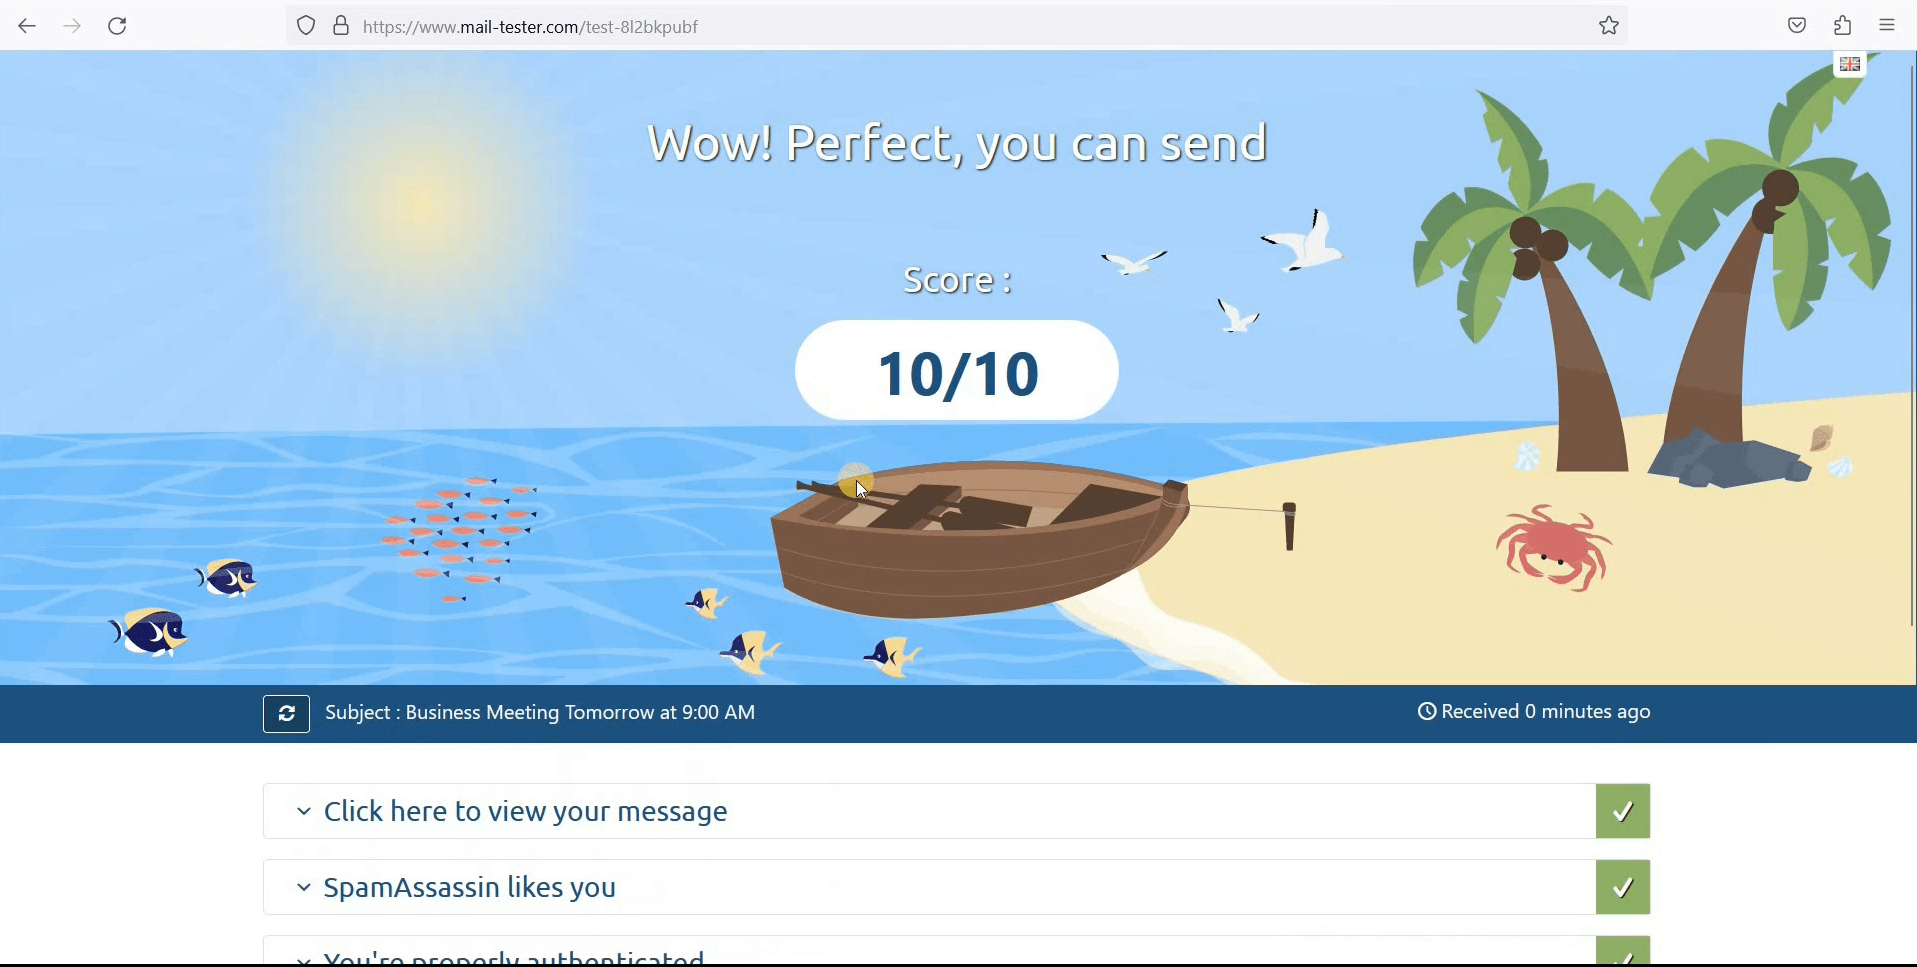
Well, isn’t that sweet to see a 10/10 score? Congratulations, you successfully setup a free email server with HestiaCP, Contabo VPS, and Namecheap!
Frequently Asked Questions
What is HestiaCP, and why should I use it for my email server?
HestiaCP is a user-friendly control panel that simplifies server administration. It provides a wide range of features for managing your email server, including domain management, email account creation, DNS configuration, and security settings.
How do I choose the right Contabo VPS plan for my needs?
Choosing the right Contabo VPS plan depends on your specific requirements, such as the number of email accounts, expected email volume, and server resources needed. Contabo offers a range of VPS plans with varying specifications and pricing.
If you’re not sure what plan to choose, you can contact their sales: [email protected]
Can I use a different VPS provider instead of Contabo?
Yes, you can use a different VPS provider of your choice. While we specifically mention Contabo due to its cost-effectiveness and reliability, there are numerous other reputable VPS providers available in the market.
Just be sure that the port 25 is open if you want to choose VPS other than Contabo.
VPS’s that have an open port 25:
Are there any alternative control panels I can use instead of HestiaCP?
Yes, there are alternative control panels available, such as cPanel or Plesk for commercial hosting panels and CloudPanel, FastPanel and CyberPanel for free and open-source control panels.
Will setting up my own email server affect the deliverability of my emails?
The deliverability of your emails can be influenced by various factors, including proper server configuration, adherence to email protocols and best practices, and maintaining a good sender reputation.
Conclusion
Email server setup with HestiaCP, Contabo VPS, and Namecheap opens up a world of possibilities for creating a solid email server. By following the steps outlined in this guide, you have learned how to take control of your email communications and reduce dependency on third-party providers.
With your own email server, you’re no longer dependent on external providers, giving you the freedom to customize and secure your email communications according to your unique requirements.
While you can have a free email server, you can also build multiple WordPress websites in HestiaCP!
Did I miss something? Comment them down below!
hello sir i want to use Free Email Server Setup With HestiaCP, wholesaleinternet.net vps and Namecheap 2024
Hi, please contact me on my email or telegram.