
 In my last step-by-step tutorial about Contabo VPS, you learned about setting up an Ubuntu operating system on Contabo VPS. In this step-by-step guide, I’ll walk you through the process of setting up Contabo Windows VPS easily.
Let’s get started!
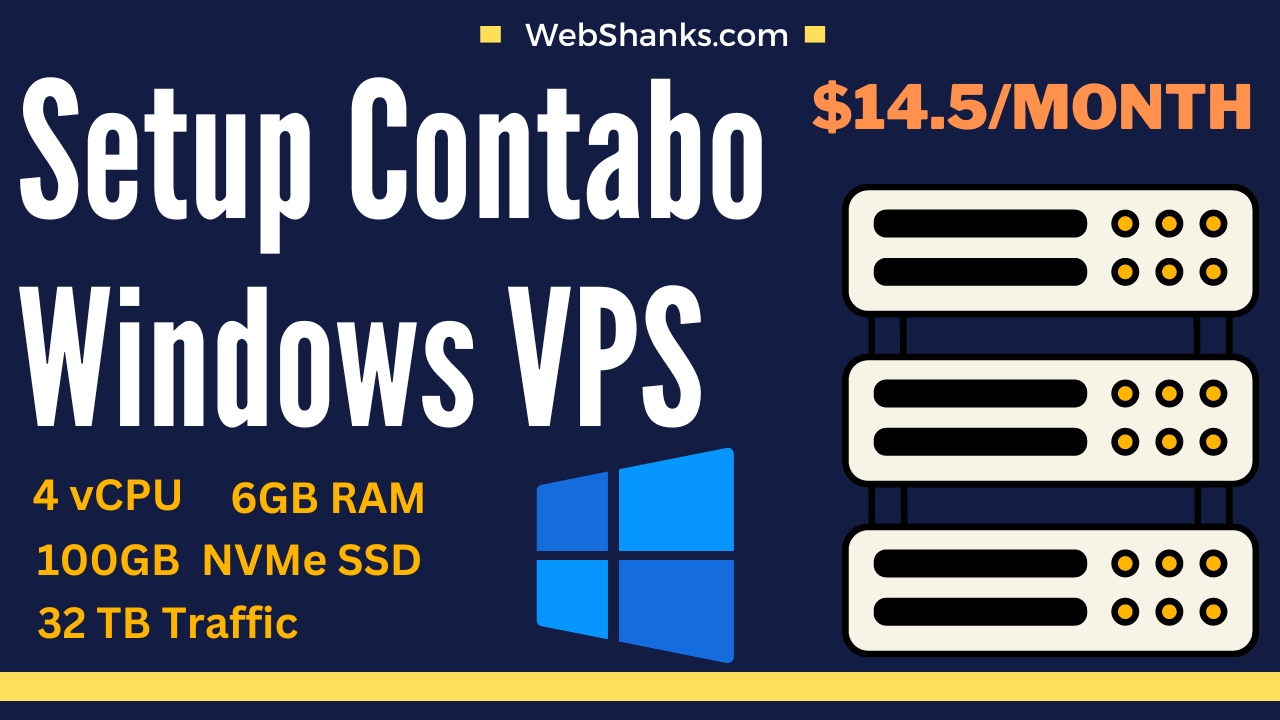
Setup Contabo Windows VPS Step-by-Step
Contabo offers a range of VPS hosting solutions, including Windows VPS, which provides users with a dedicated environment to run Windows-based applications and services.
Step 1: Choose Your Contabo Windows VPS Plan
Go to Contabo VPS.
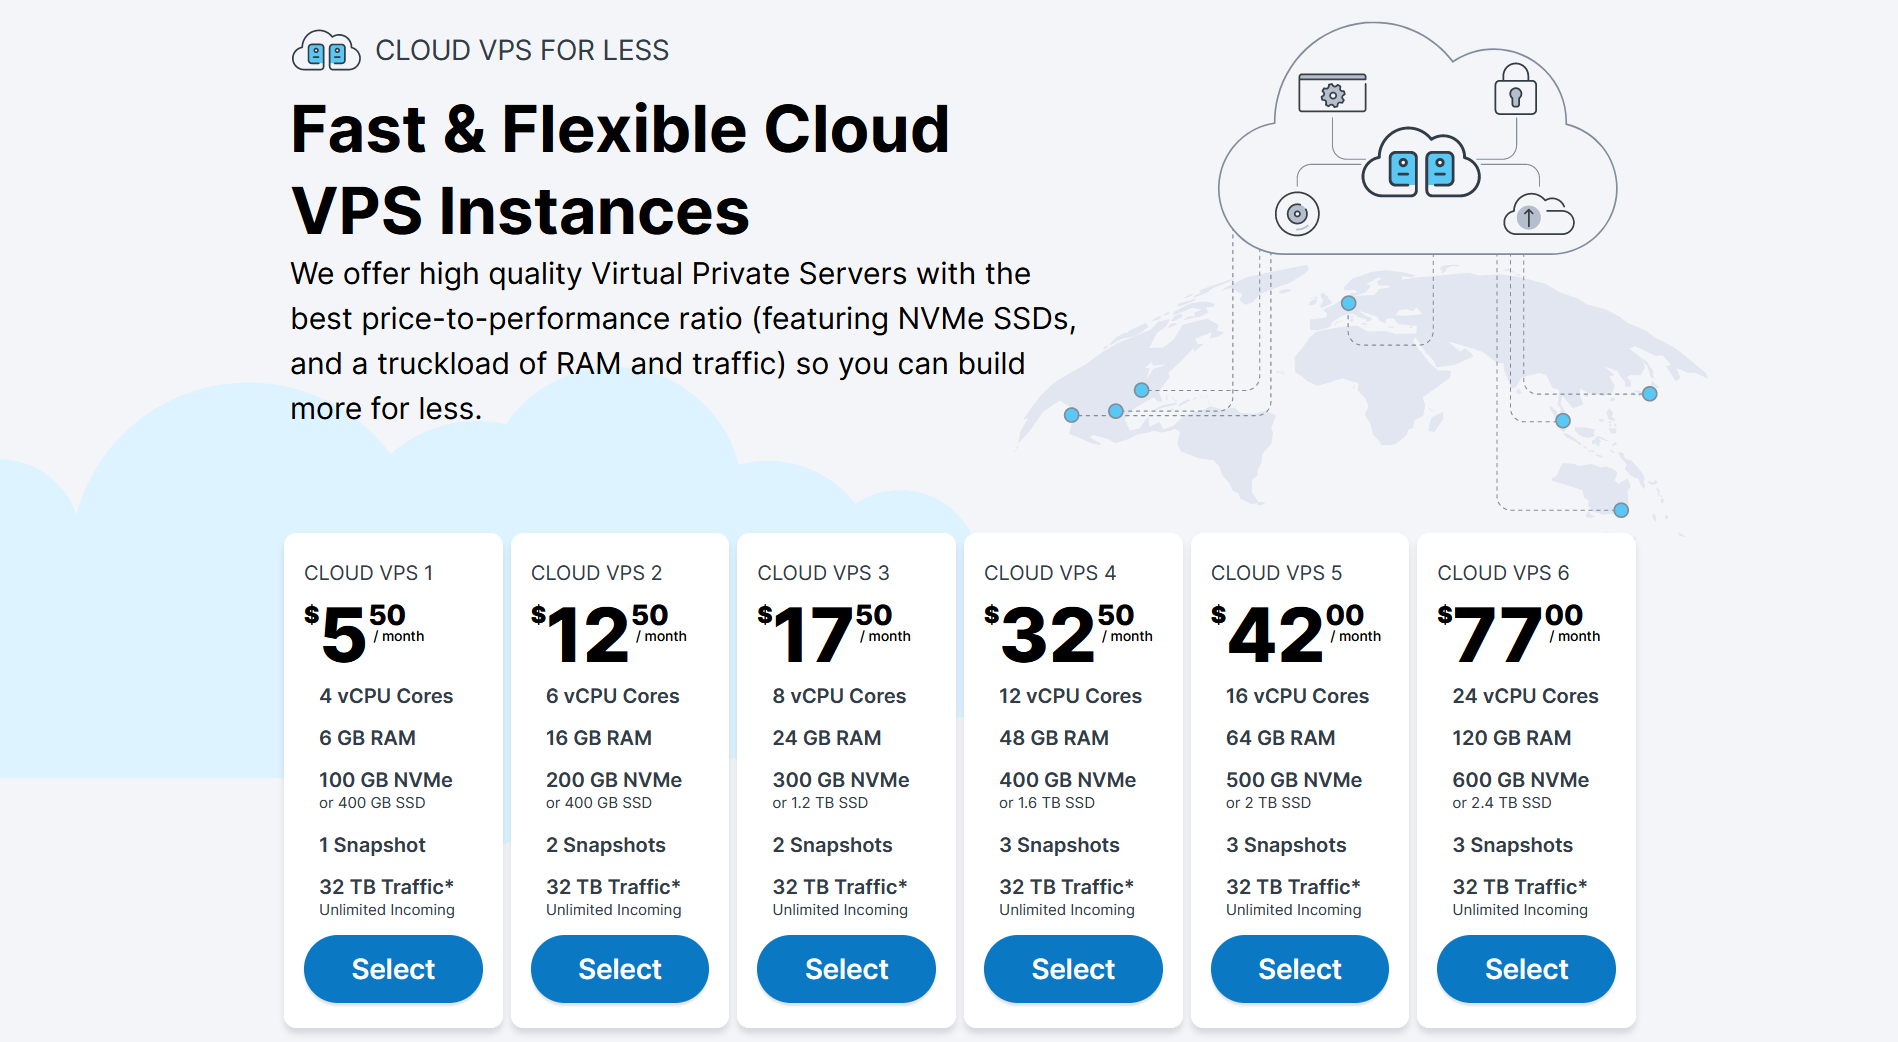
Browse through the available VPS plans and select the one that best fits your requirements in terms of CPU, RAM, storage, and bandwidth.
Step 2: Configure Your Contabo Windows VPS
During the checkout process, you’ll be prompted to select additional options such as operating system (choose Windows), data center location, and any add-ons you may need. So let’s get into it step-by-step.
If you select a monthly term, there’s a one-time fee of $7.50. However, for the annual term, the one-time setup fee is waived.
Select the region you prefer. Rule of thumb, choose the closest region of your area. For example, if you are located in Iowa, choose United States Central.
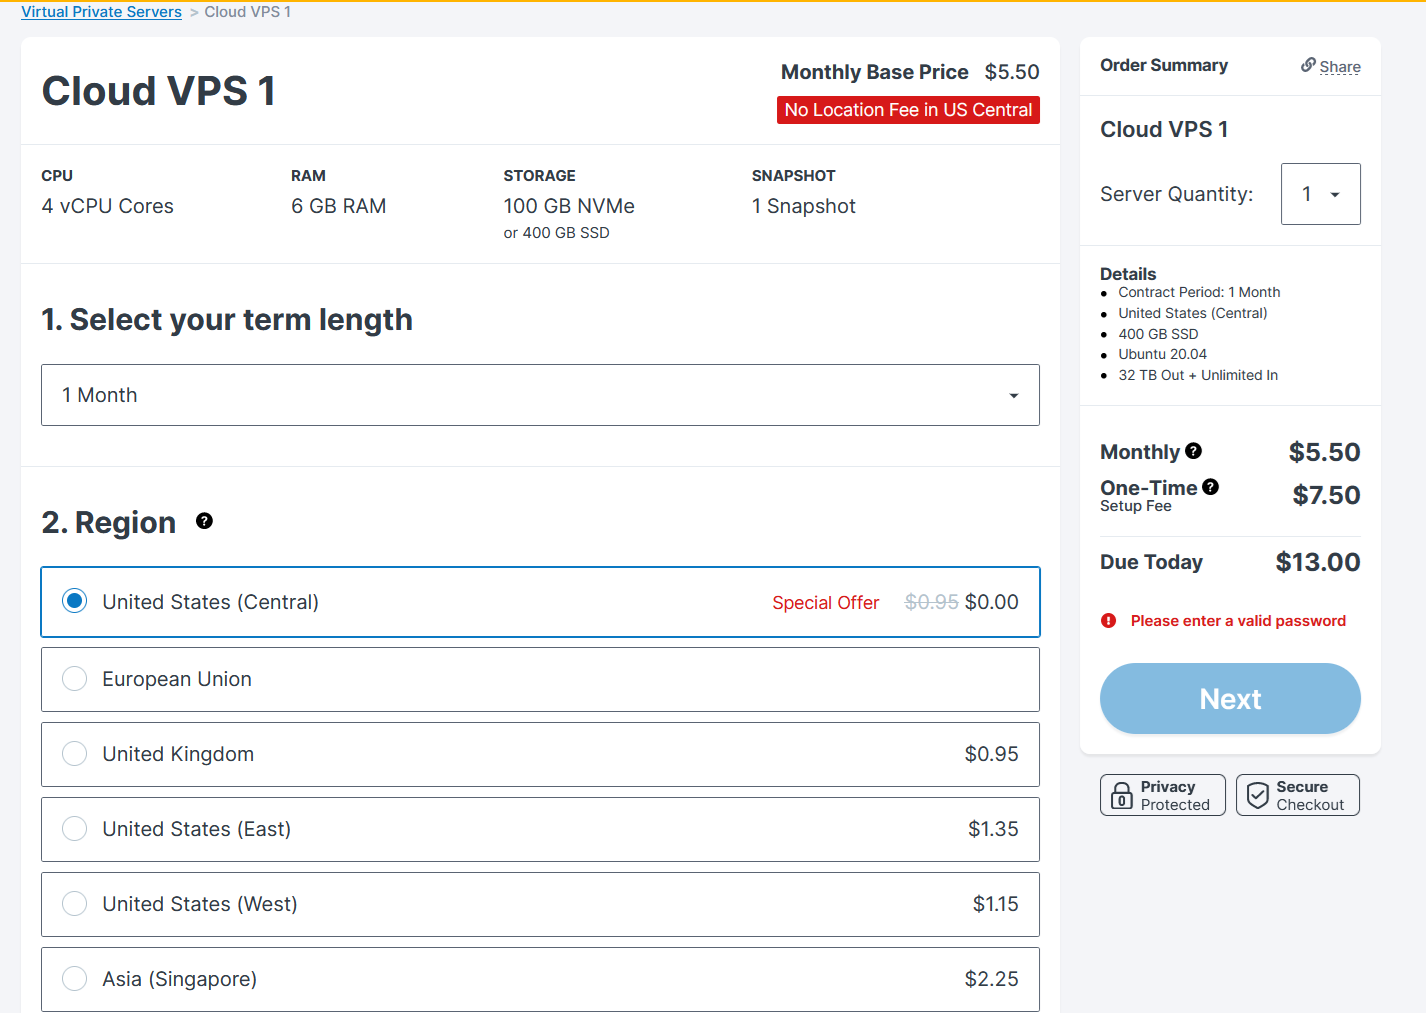
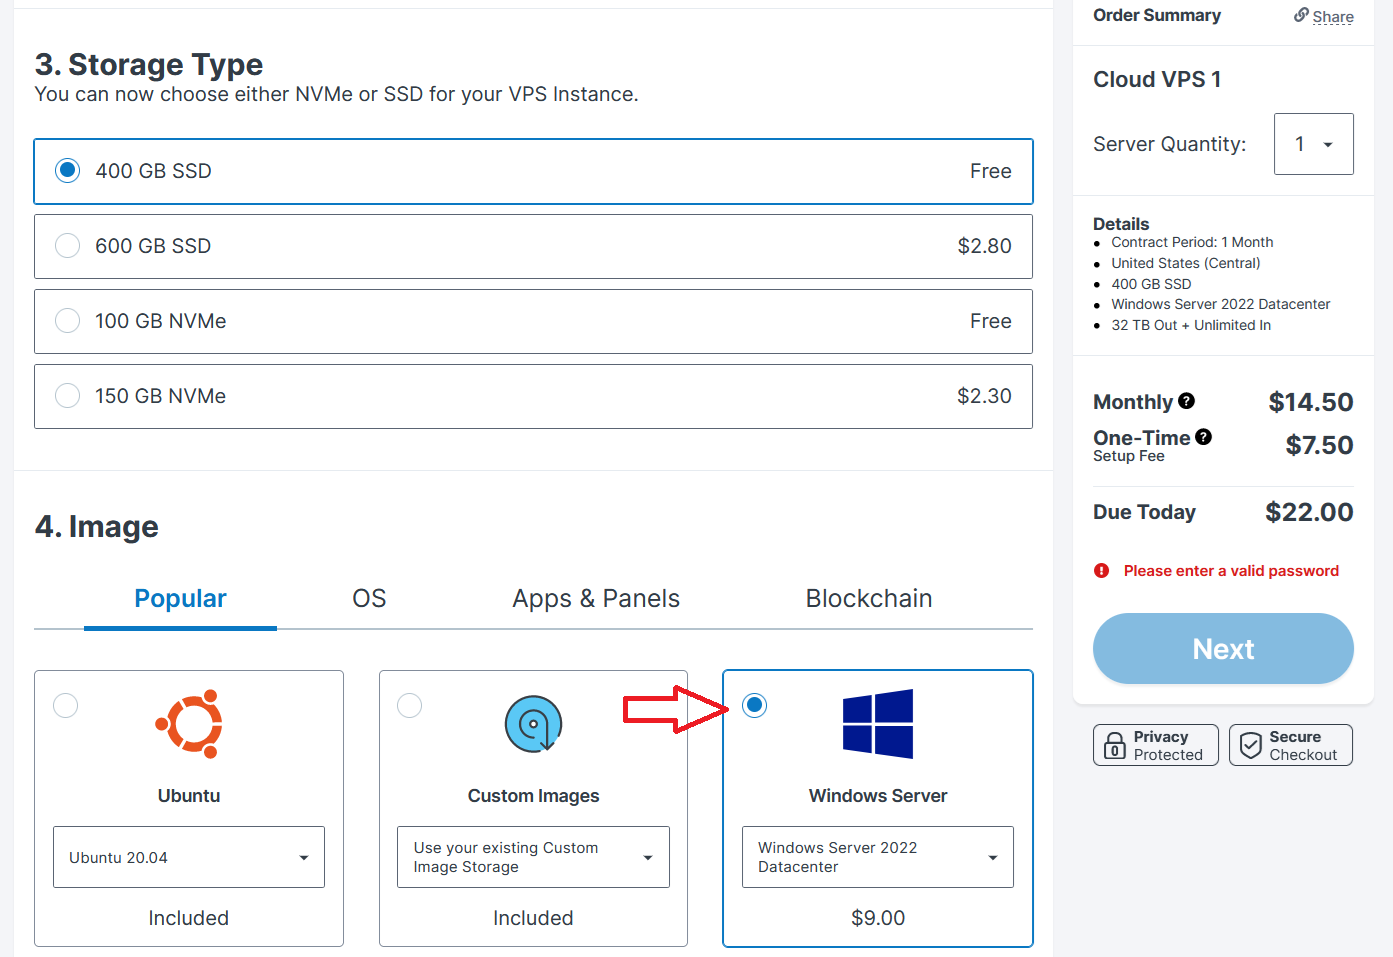
Now for storage type, NVMe is much faster than regular SSDs. However, regular SSD option has more storage space.
For the image, you should select Windows Server 2022. Take note that you will have to pay $9 monthly for the license. If you change your mind, you can reinstall Windows Server 2019 or 2022 only.
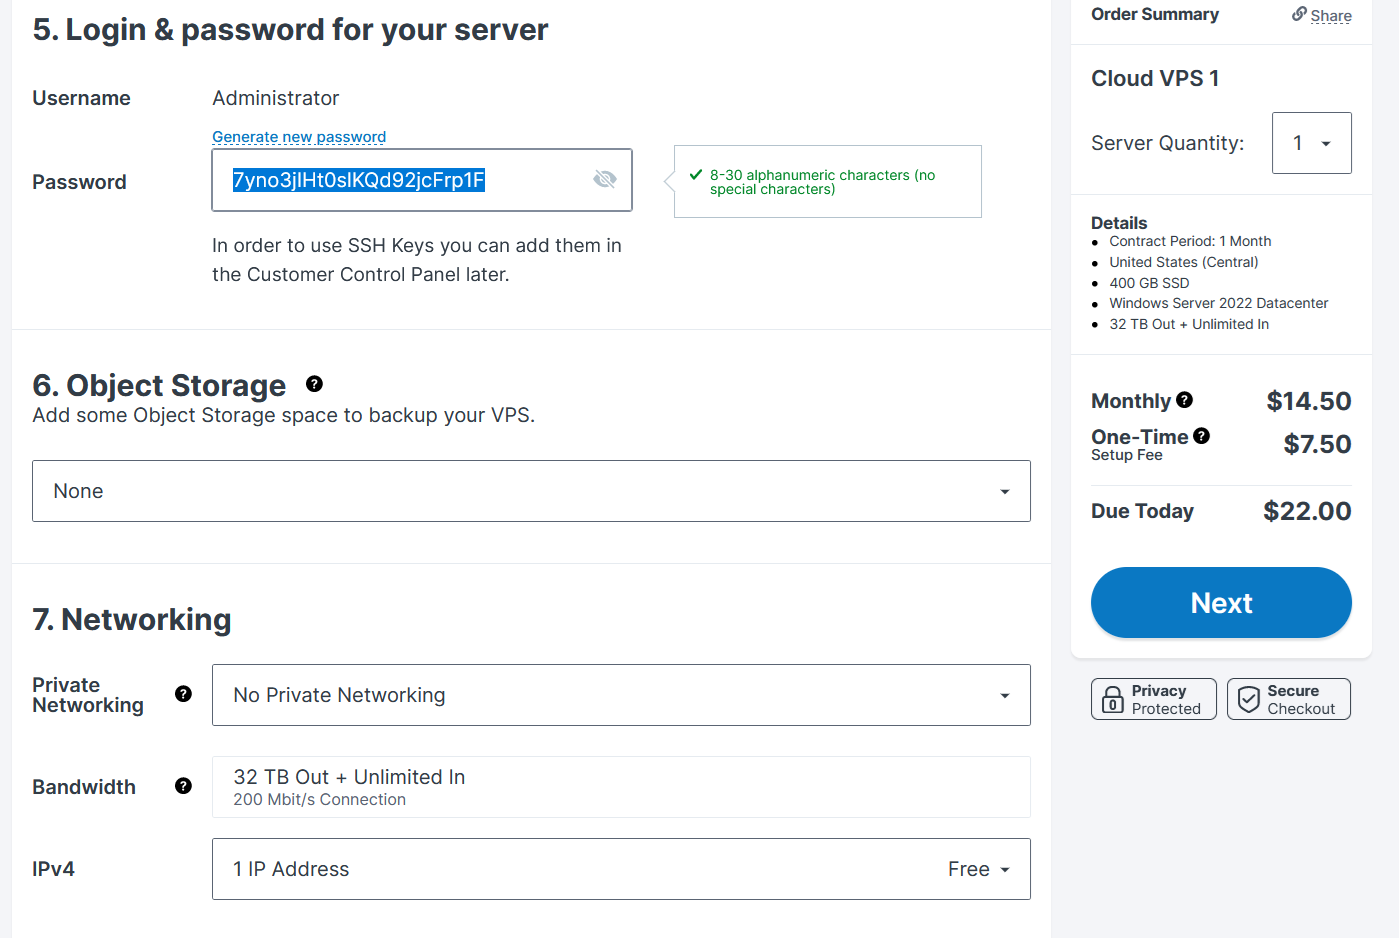
Next, generate a secure password for connecting to your Windows VPS once your server is up and running.
For options 6-8, choose the default unless you need something like additional IP.
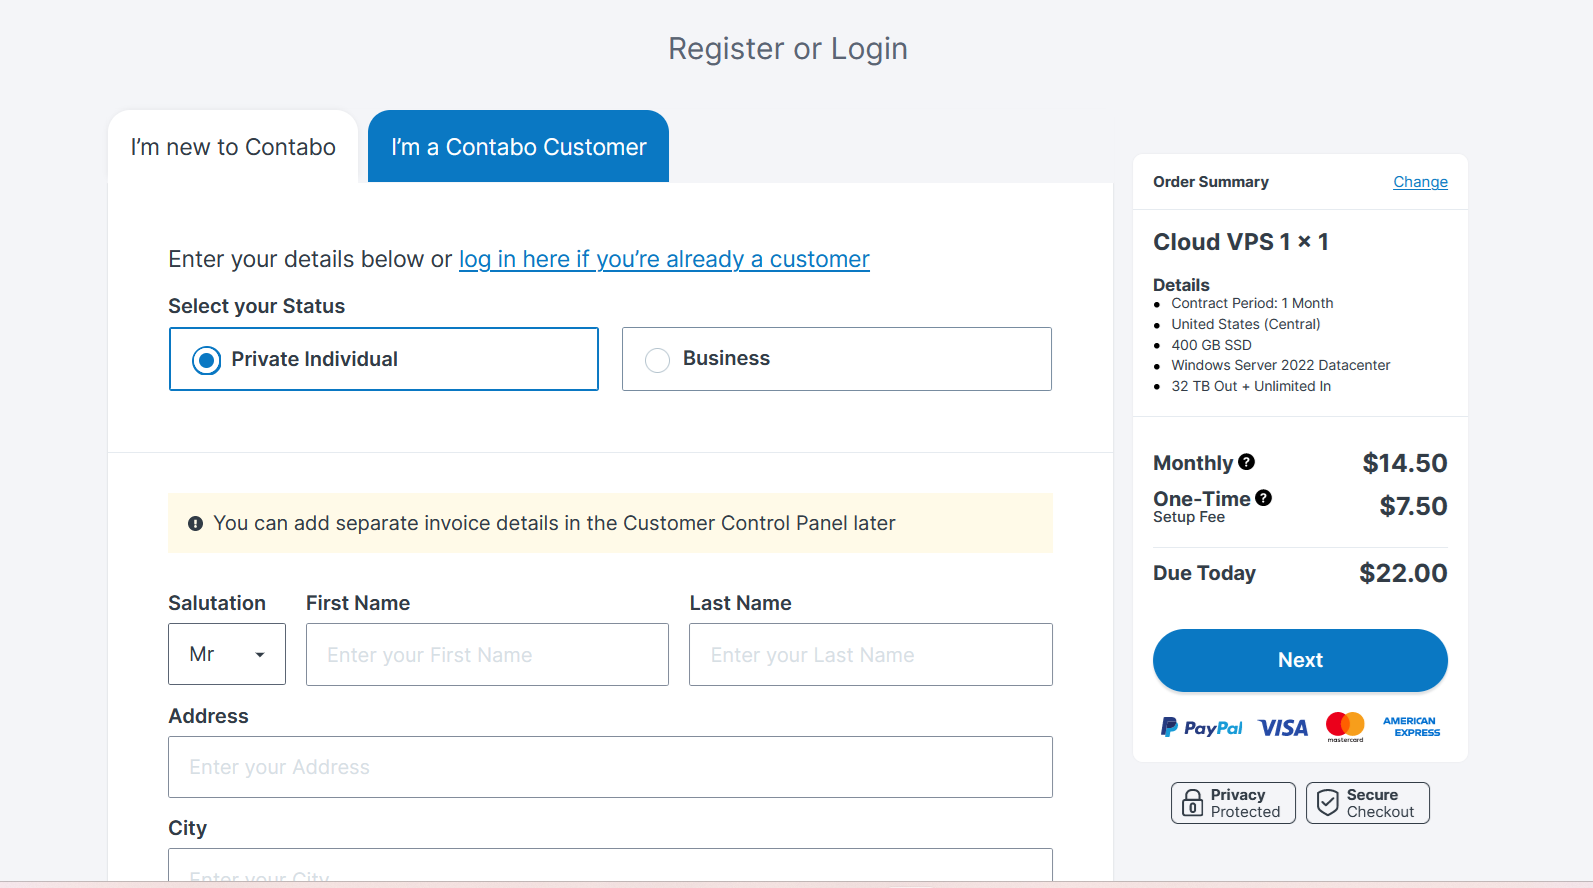
Once you’ve made your selections, proceed to complete the order by providing your personal/business information and payment.
Step 3: Access Your Contabo Windows VPS
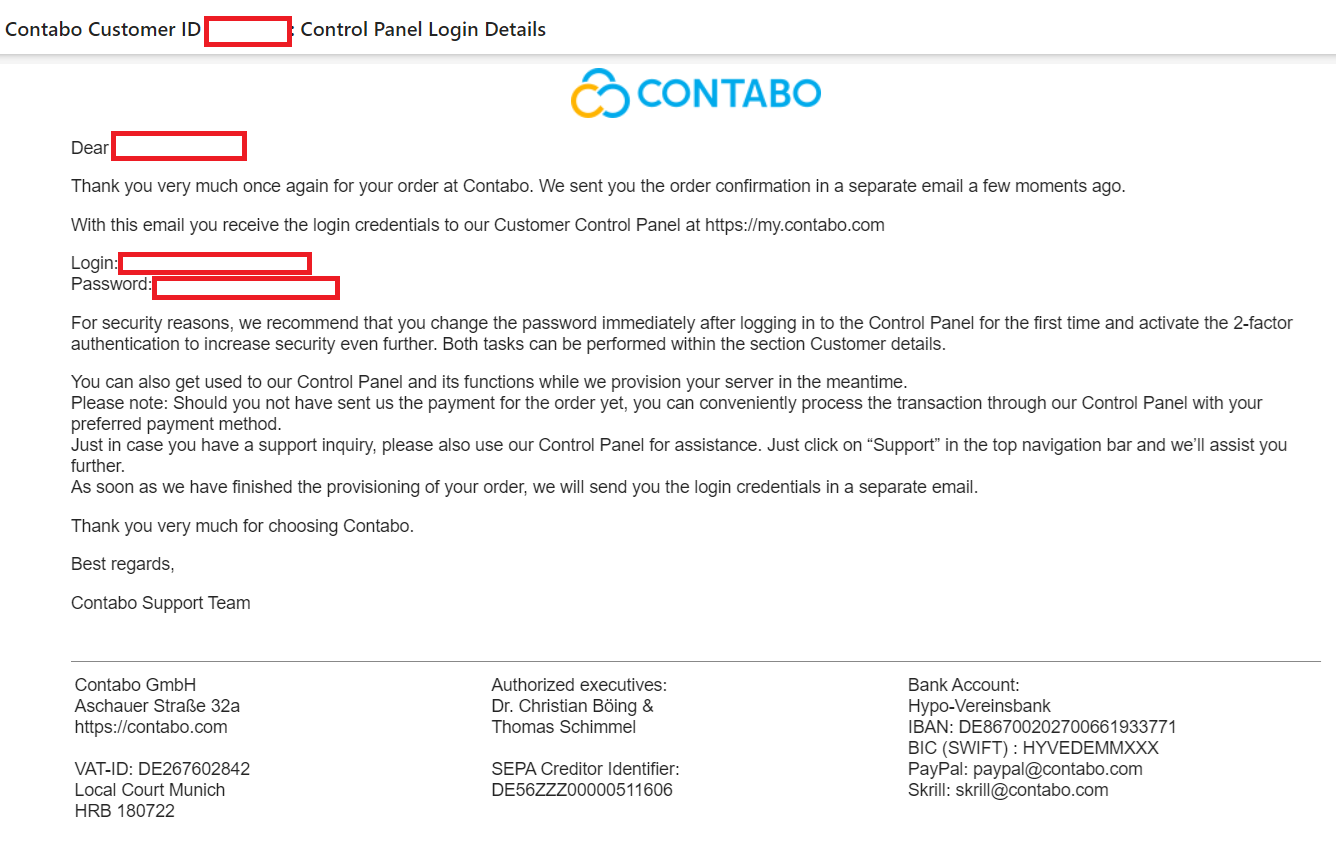
After your order is processed and confirmed, you’ll receive an email containing the login credentials and instructions for accessing your Contabo customer panel.
Log in to the Contabo customer panel using the provided credentials.
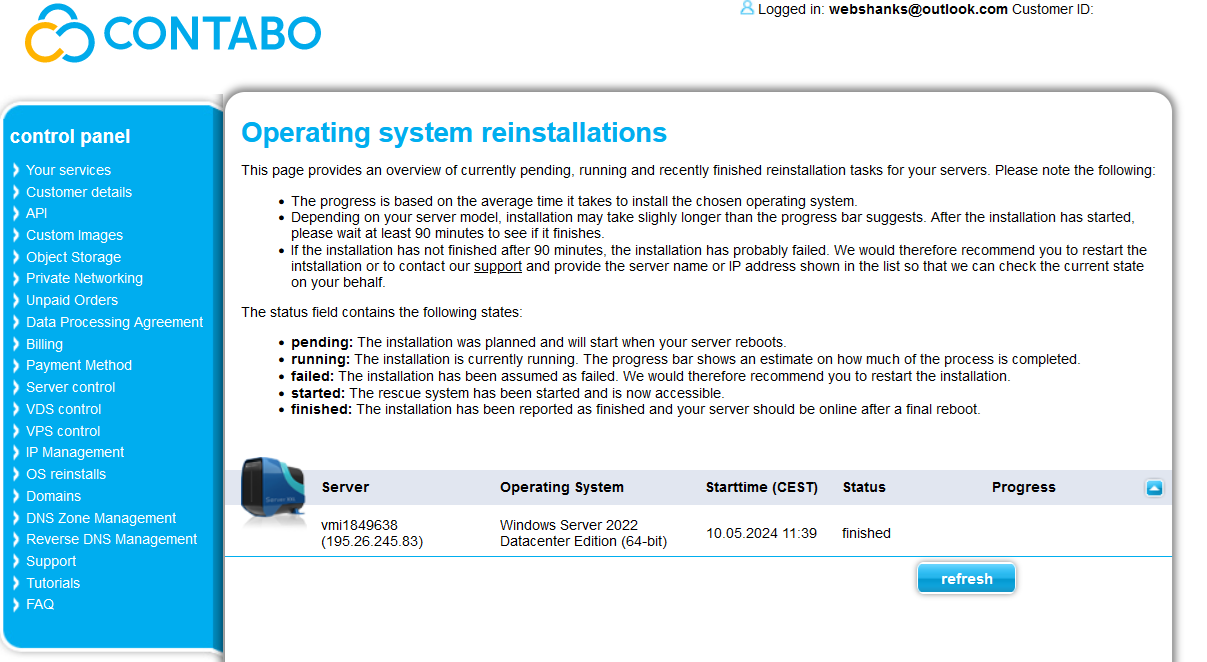
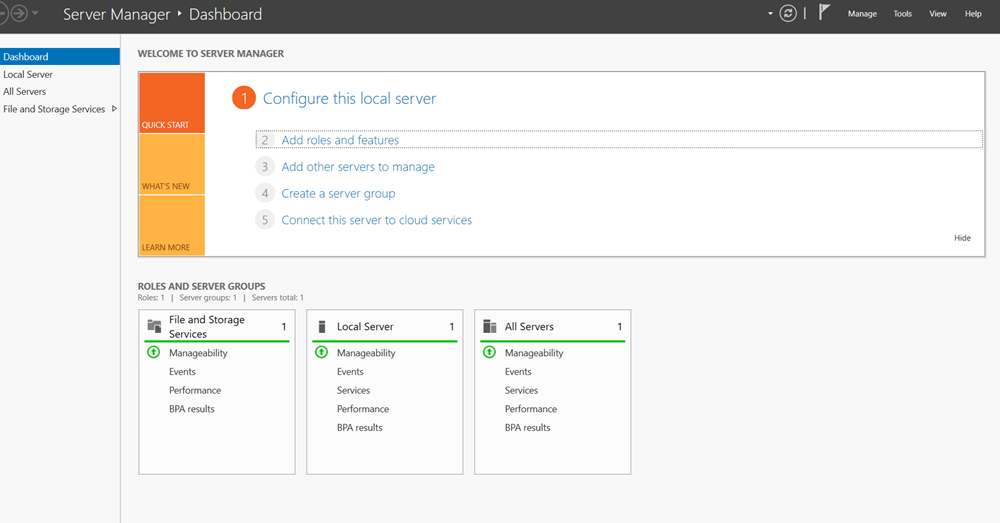
Navigate to the VPS control section and locate your newly created Windows VPS.
Click on the VPS to access its management interface, where you can start, stop, restart, and manage your server.
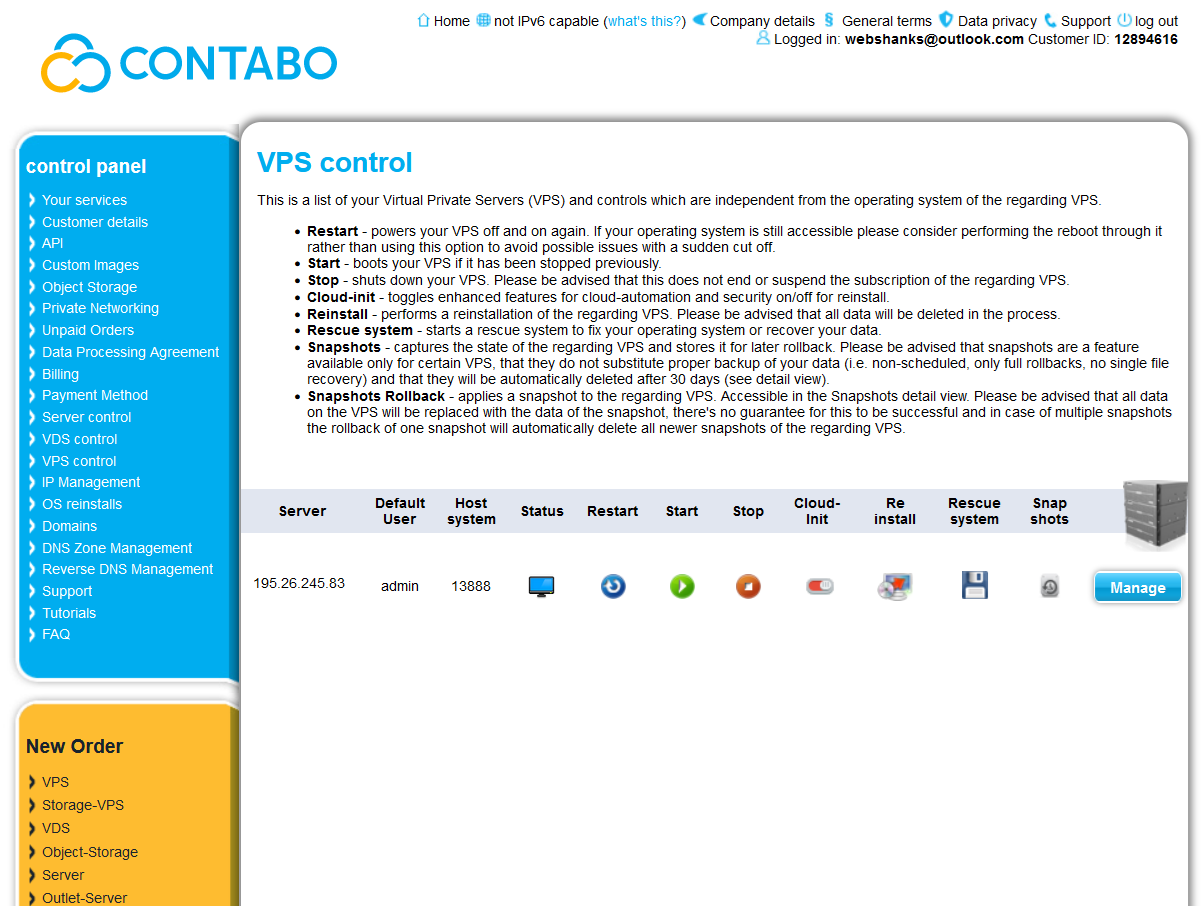
You should be able to see a finish status on OS reinstalls option.
Step 4: Connect to Your Contabo Windows VPS
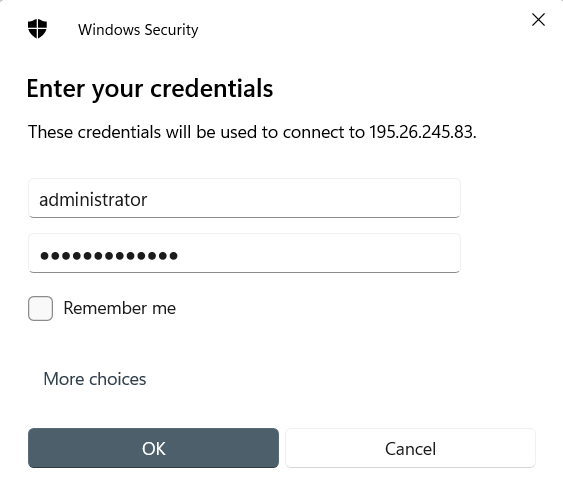
Run the Remote Desktop Connection in Windows in order to connect to your Windows VPS. Read this for MAC users.

Enter your password you generated when signing up with Contabo. Use the Administrator as username.
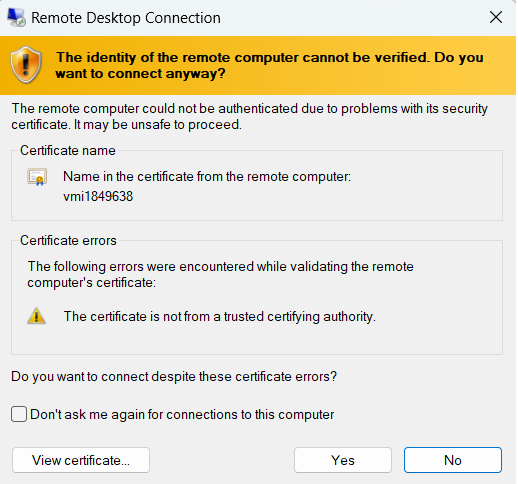
You will be asked “The identity of the remote computer cannot be verified. Do you want to connect anyway?” Just click Yes.
Once you’ve accessed the management interface, you can configure your Windows VPS according to your requirements.
Install any necessary software, set up security measures, and configure network settings.
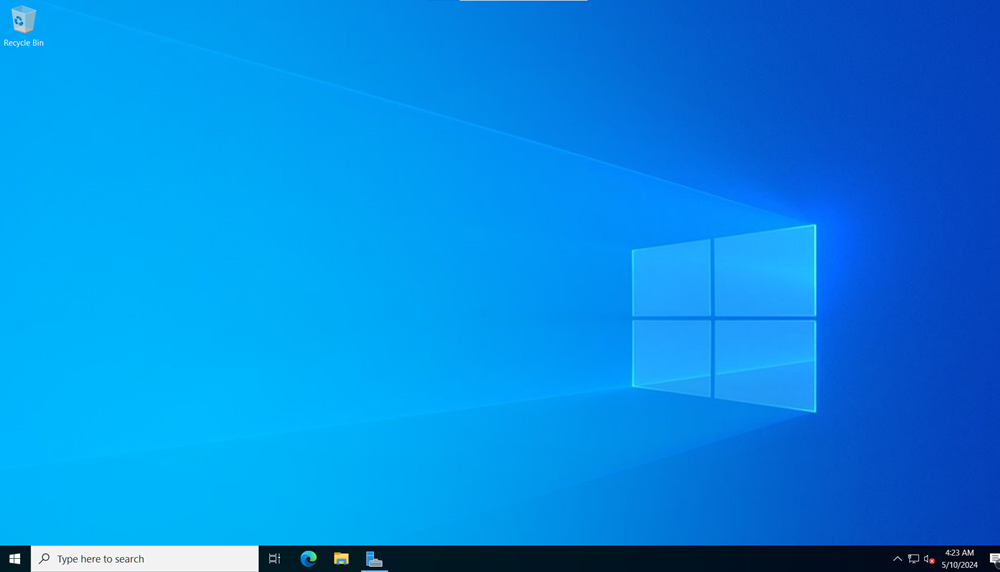
You now have a Windows VPS on Contabo!
Watch on YouTube
Frequently Asked Questions
Can I reinstall Windows anytime?
Yes, you can. Just go to VPS Control > Reinstall. If you choose Windows Datacenter 2022, you can reinstall 2019 or 2022 only.
I forgot my password. What should I do?
Due to previous Microsoft updates an automatic password reset is not supported on Windows Server 2012 and above anymore. There is also no other easy method to reset the password.
In case you forgot or lost your password, we recommend you to boot your instance into the rescue system, perform a backup of your data and then to reinstall the server from scratch.
– Contabo
I cannot connect to my server.
Be sure to use Administrator as a username. You should secure your password in a safe place during signing up. Also, Cloud-init should be enabled.
Can I install a Linux operating system like Debian?
Absolutely! Just go to VPS Control > Reinstall.
How do I backup my Contabo Windows VPS?
Contabo offers various backup options, including manual backups through the customer panel and automated backups as an add-on service.
The best way to backup your server is to create a snapshot.
Conclusion
Now you have a Windows VPS! You can install your Windows-based application on your server.
If you want to host WordPress websites or setup an email server, you can check out my tutorials.