
 Setting up your own mail server can feel like navigating a maze of complex configurations, security tweaks, and DNS records. But with YunoHost, the process becomes surprisingly straightforward—even for non-experts.
YunoHost is a self-hosting platform built on Debian that streamlines the deployment and management of web services, including a fully-featured mail server, right out of the box.
In this guide, I’ll walk you through the essential steps to get your YunoHost-based mail server up and running—covering domain setup, email configuration, and best practices to ensure your emails land in inboxes, not spam folders.
Prerequisites
- A VPS or Dedicated Server – A Linux-based server with open port 25, preferably Debian 12.
- A Domain Name – Purchased from a registrar like Namecheap or Cloudflare.
- Basic Linux Knowledge – Familiarity with SSH, terminal commands, and text editors (nano/vim).
How to Build Your Very Own Email Server With YunoHost
Step 1. Get a DartNode VPS

DartNode offers affordable VPS plans with port 25 unblocked, which is essential for running an email server. We recommend their “Budget 1G” plan or higher.
Why DartNode?
- Port 25 is open by default
- Competitive pricing
- Good uptime record
Step 2. Get a Domain on Namecheap

Register your domain through Namecheap:
- Search for your desired domain (e.g., yourdomain.com)
- Complete the purchase
- Enable WHOIS privacy protection
For better DNS performance, consider transferring your DNS to Cloudflare after registration.
Step 3. Setup Hostname, Initial DNS and rDNS
In your DartNode dashboard, you can easily change your hostname. But if you’re using other VPS, try this quick setup.
Connect to your VPS via SSH and run:
sudo hostnamectl set-hostname yourdomain.com
Verify the change:
hostname
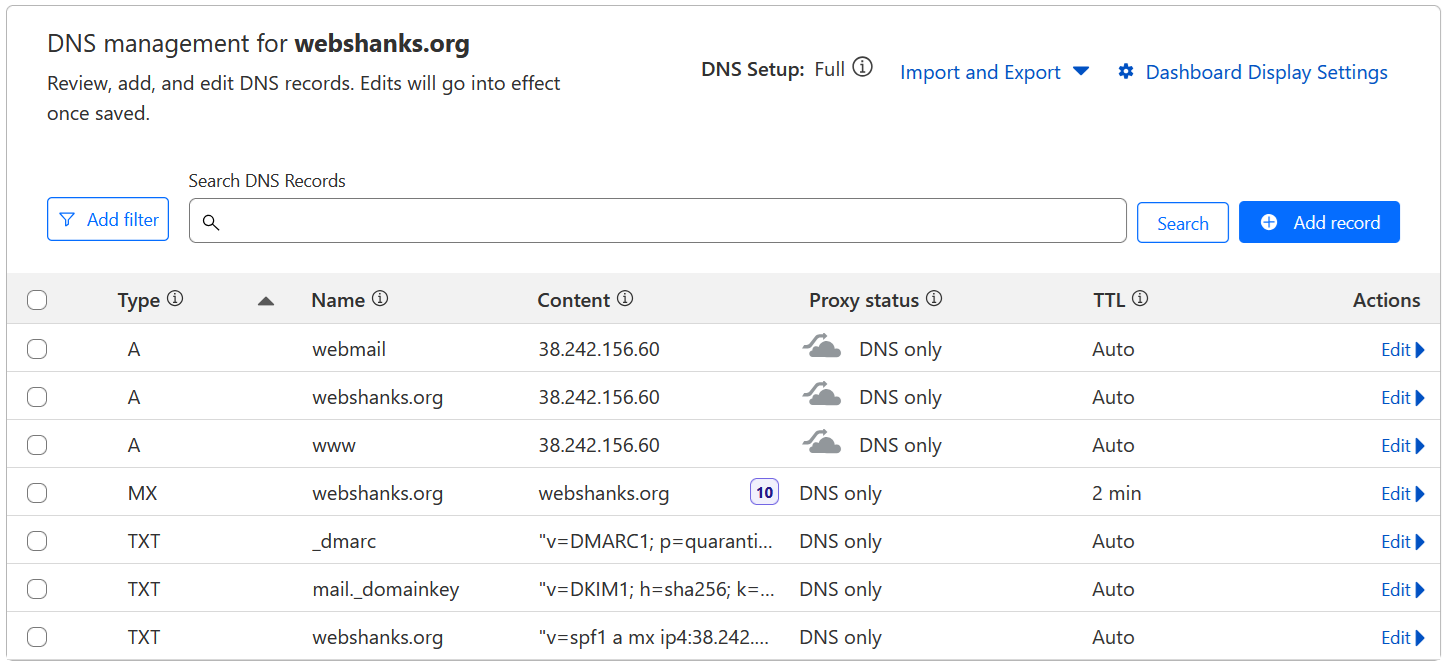
Configure Initial DNS Records
In your Namecheap DNS settings, create these records:
| Record Type | Name | Content | Priority | TTL |
| A | webshanks.org | YourServerIP | Auto | |
| AAAA | webshanks.org | YourIPv6 | Auto | |
| MX | webshanks.org | webshanks.org | 10 | Auto |
| TXT | _dmarc | v=DMARC1; p=quarantine; pct=100 | Auto | |
| TXT | webshanks.org | v=spf1 a mx ip4:yourIPv4 ip6:yourIPv6 ~all | Auto |
Set Reverse DNS (rDNS)
In your DartNode control panel:
- Navigate to the rDNS settings under the Network tab.
- Set the reverse DNS to yourdomain.com for both IPv4 and IPv6
- The changes will automatically save.
Note: rDNS is crucial for email deliverability. Without it, your emails may be marked as spam.
Step 4. Connect to VPS and Install YunoHost
SSH into your VPS:
ssh root@your-vps-ip
You can use PuTTy or Bitvise. Check out the tutorial here.
Update your system and install YunoHost:
sudo apt update && sudo apt upgrade -y
Install YunoHost:
curl https://install.yunohost.org | bash
If curl is not installed:
sudo apt install curl
Installing YunoHost requires to install various important services,
and possibly rework the configuration of some services that may already
be installed (such as: nginx, postfix, dovecot, fail2ban, slapd)
Are you sure you want to proceed (y/n) ? y
• Additionally, it is encouraged to let YunoHost manage the SSH configuration.
However, you should be aware that:
• SSH login using root will be disabled (except from local network).
Instead, you should login using the first YunoHost user.
(Note that this will only be effective *after* you run YunoHost's postinstall)

Should YunoHost override the SSH configuration (y/n) ? y
Just choose y to proceed.
Step 5. Configure YunoHost with Your Domain
Open your browser and enter your IP address.
If you face Warning: Potential Security Risk Ahead, just Accept the Risk and Continue.
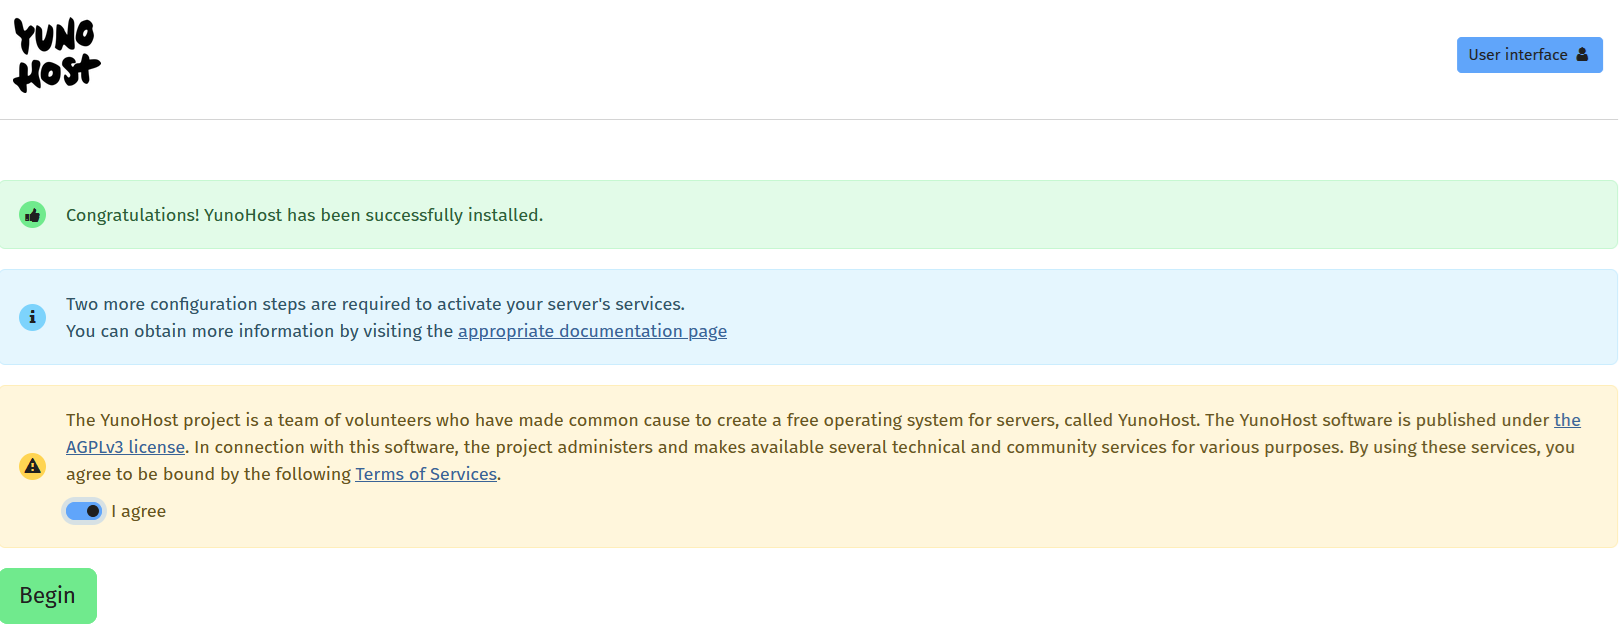
Then we will start YunoHost configuration.
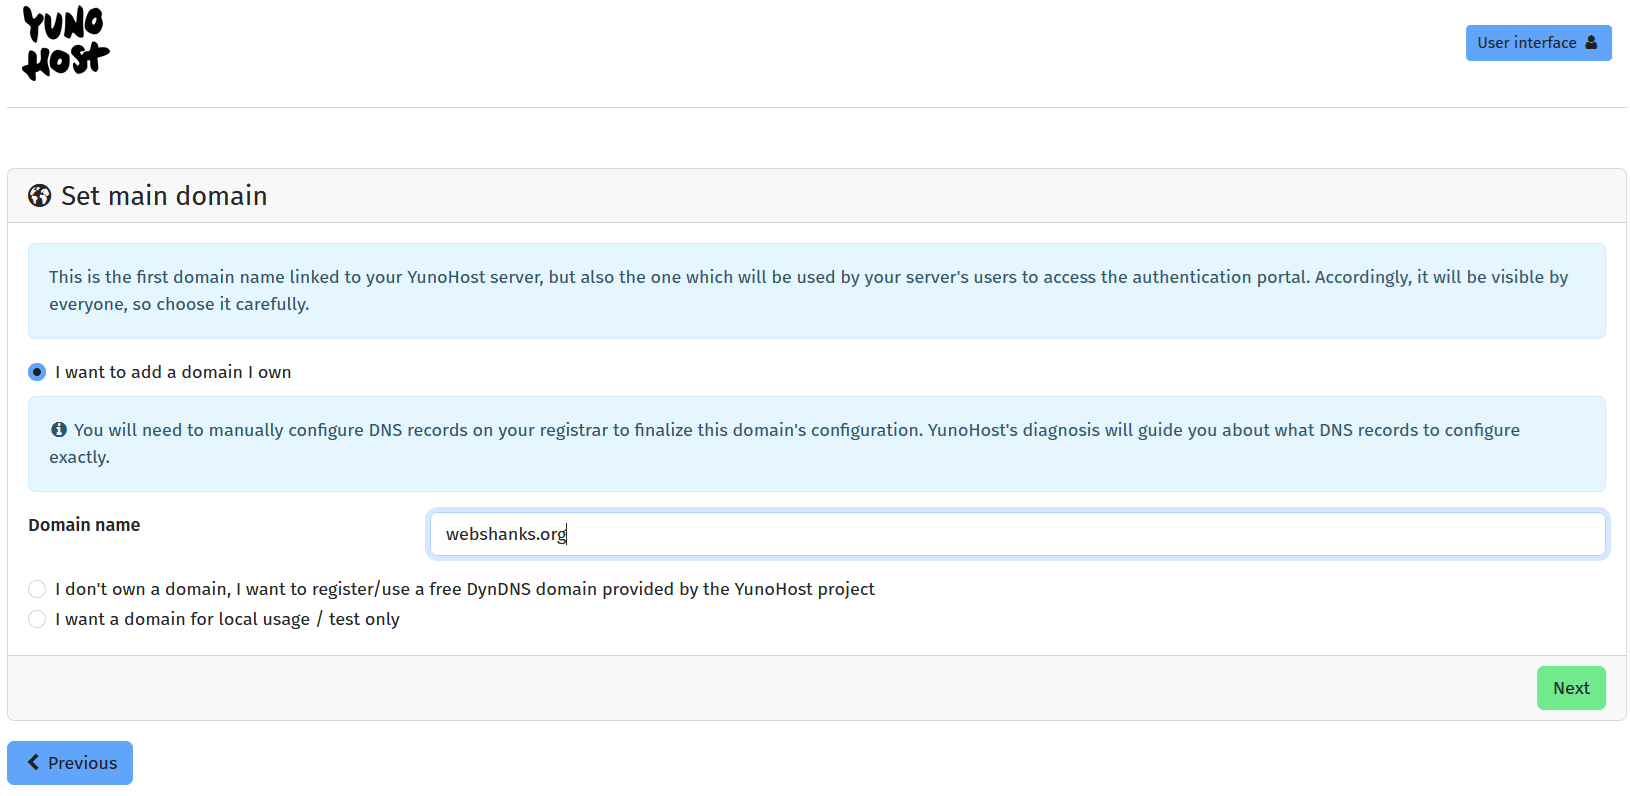
Set your domain.
Create the first admin user.
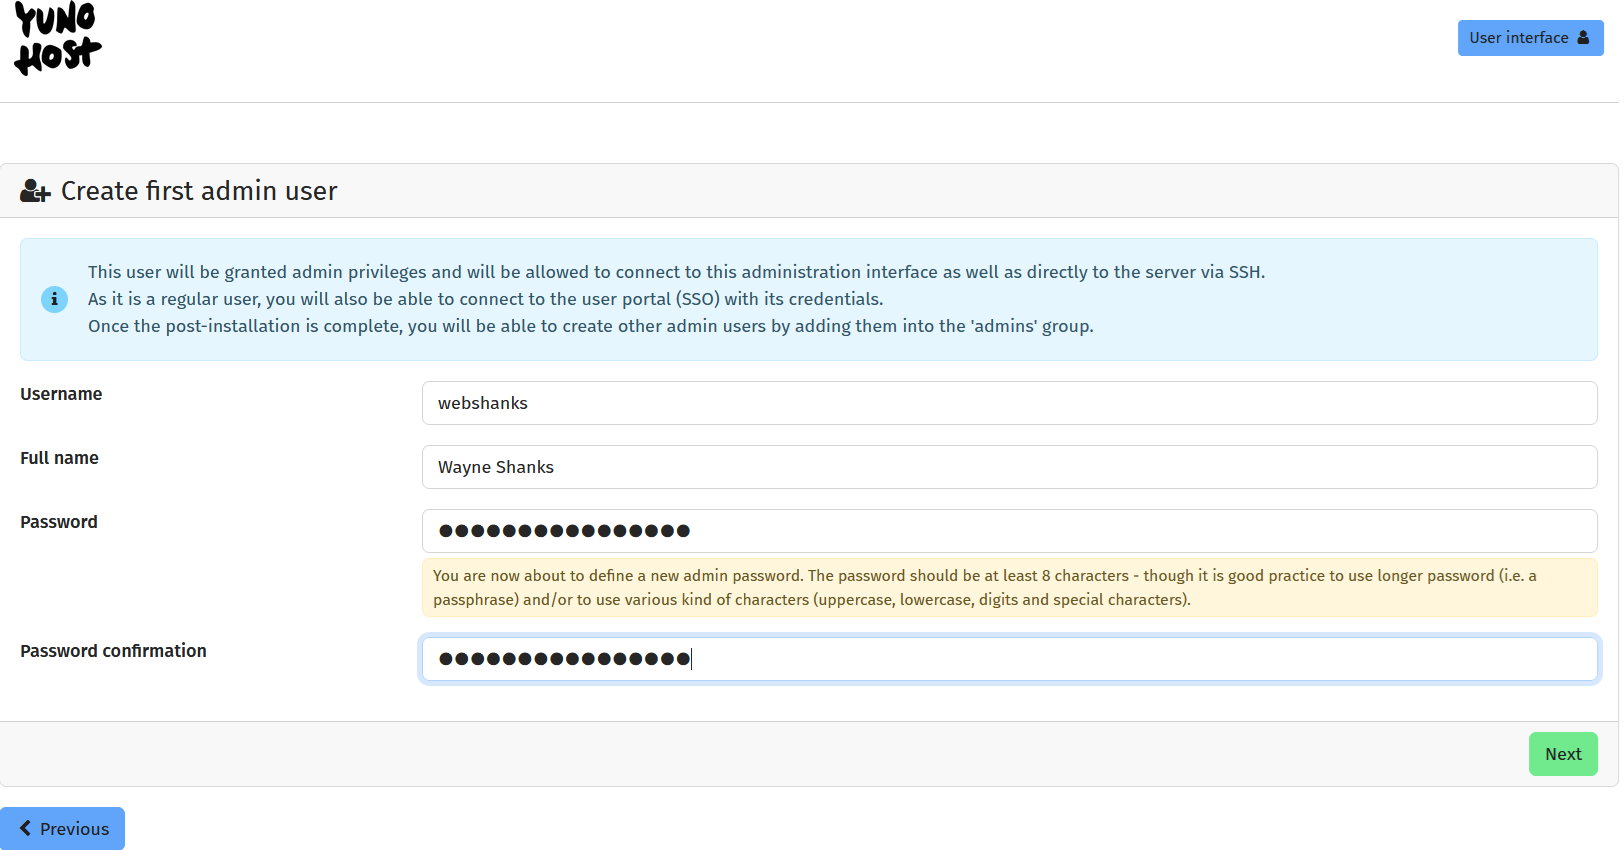
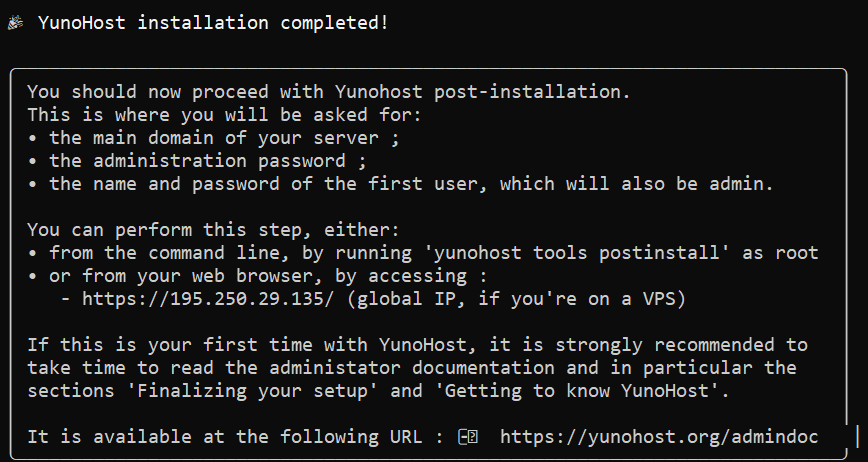
You are about to launch the post-installation process on the domain webshanks.org. It may take a few minutes, *do not interrupt the operation*.
Then just click OK to proceed with the post-installation.
You will now need to login using your registered account.
We will issue a Let’s Encrypt first so that we can access our YunoHost using a domain instead of an IP address.
Go to Domain > choose the main domain > Certificate.
Be sure you have an A record on your main domain to issue a certificate successfully.
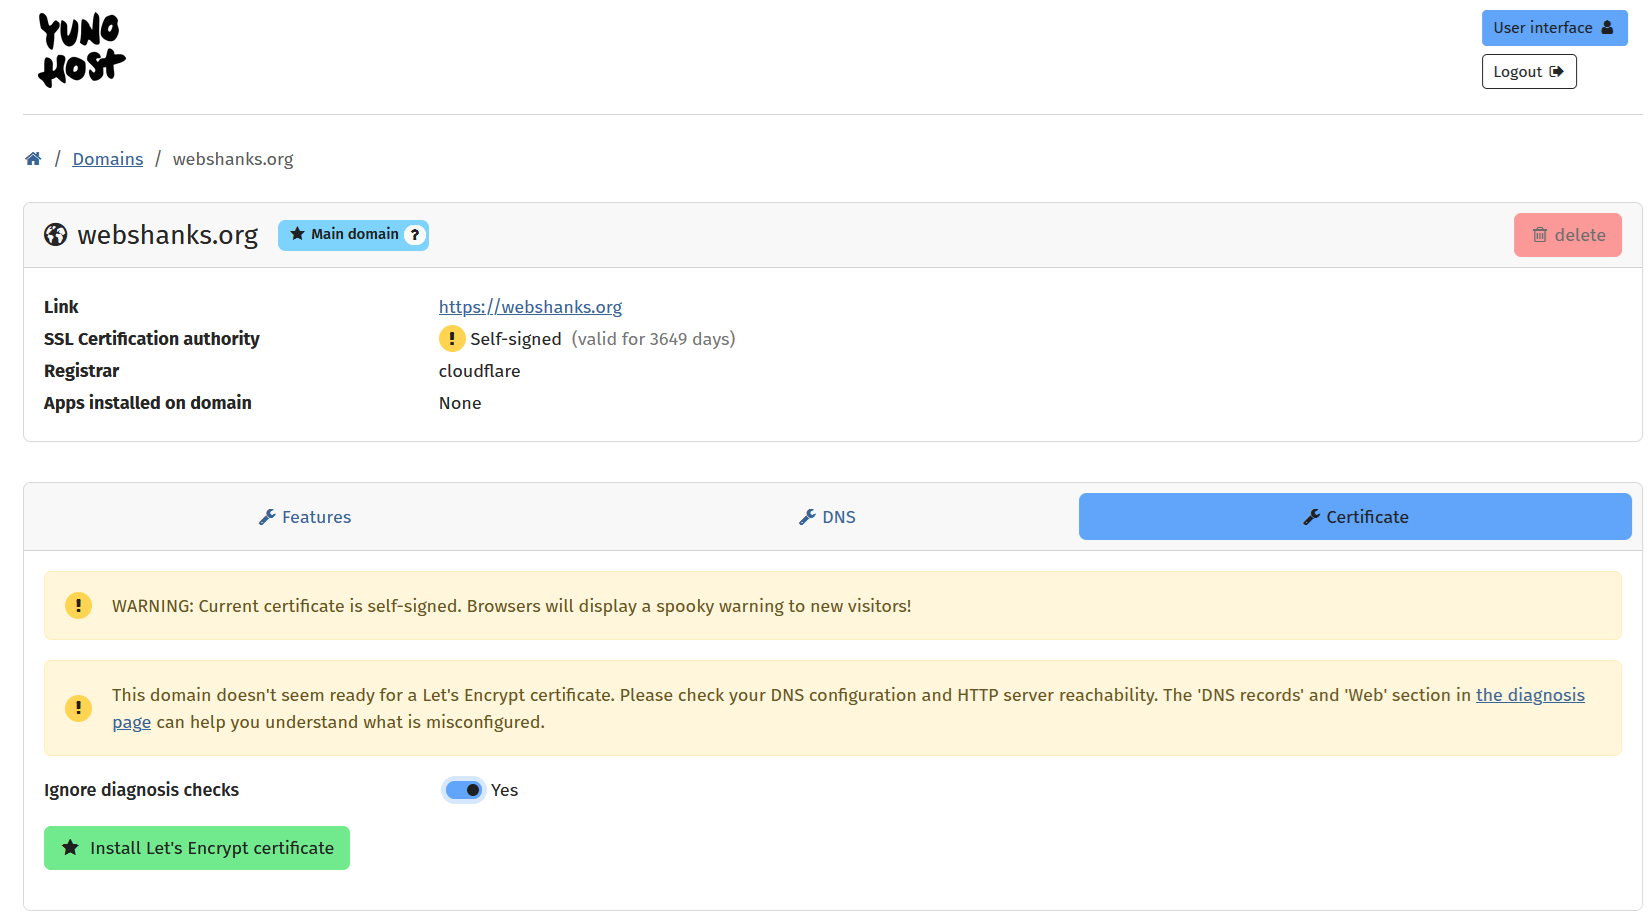
Now we have successfully issued a certificate, and we can now access our YunoHost securely.
Now visit your domain, https://webshanks.org/yunohost/admin in my case.
Next, we will map our DKIM.
Go to DNS > Disable Use automatic DNS feature > Save.
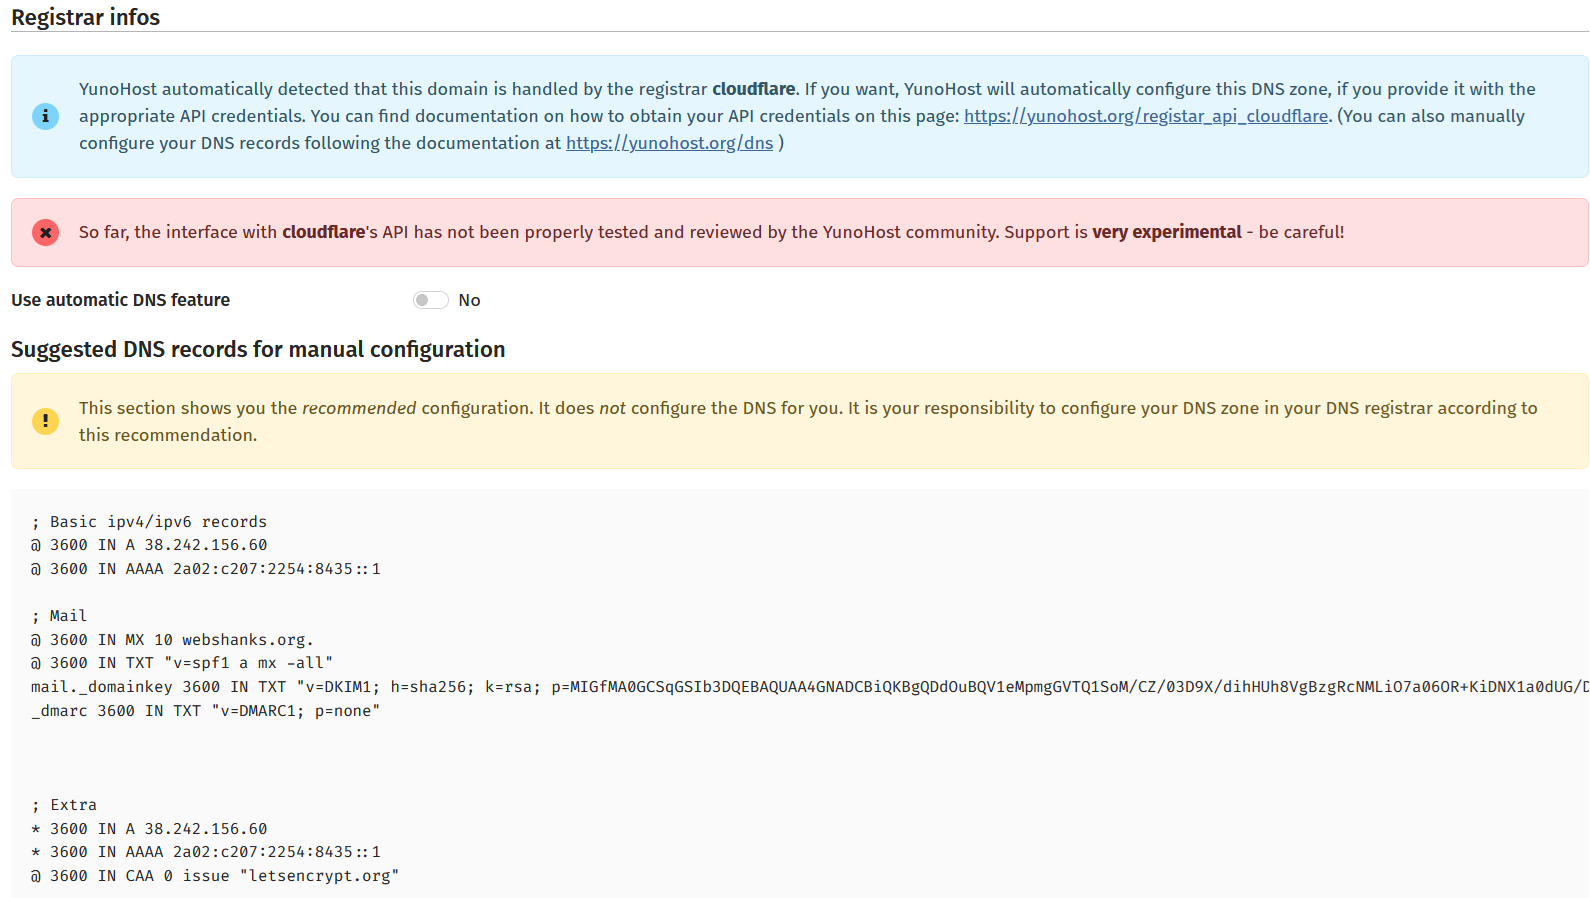
Map the DKIM in your domain registrar.
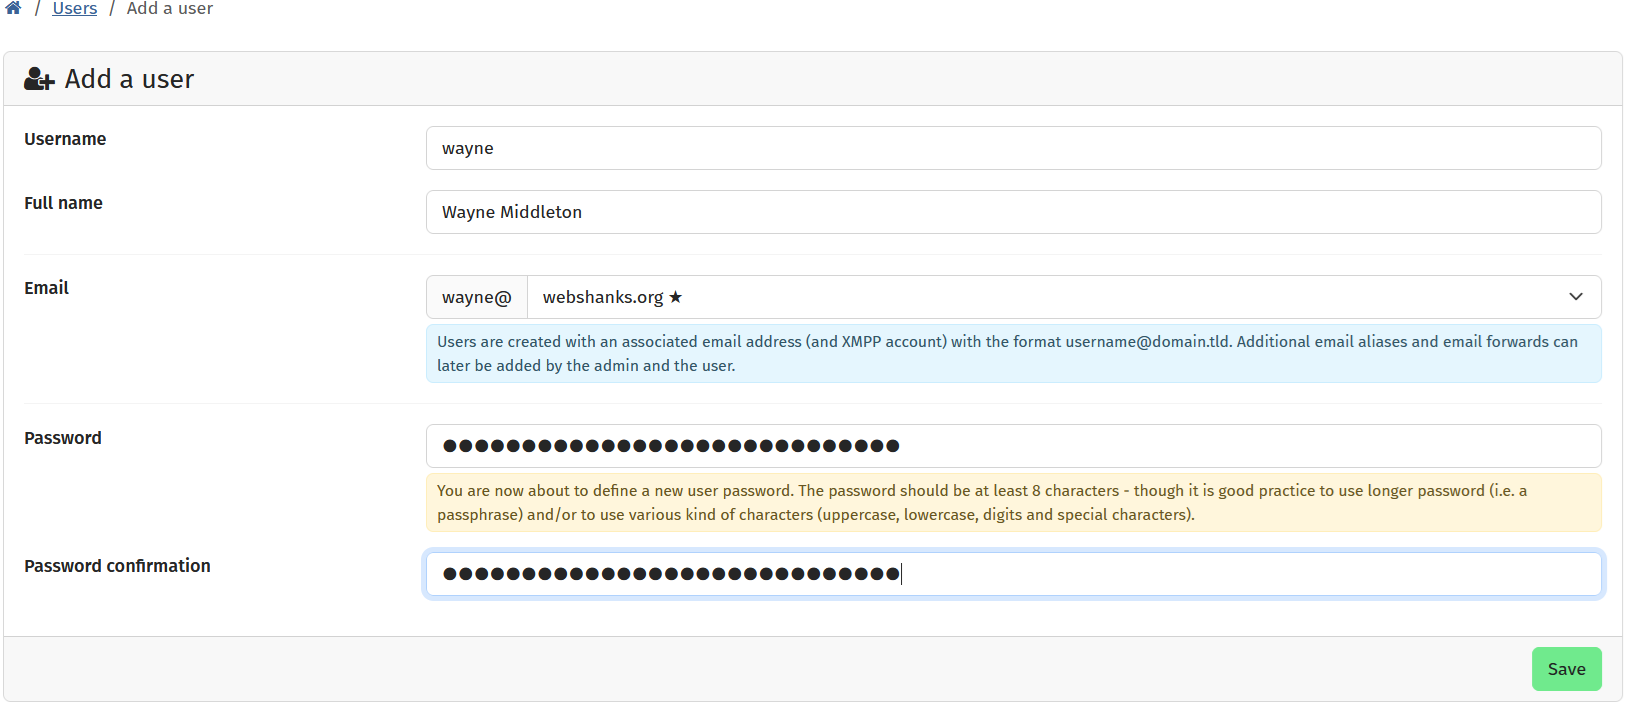
Step 6. Add a User and Install Webmail
Let’s create a test user.
From your YunoHost dashboard, go to Users > Add a user.
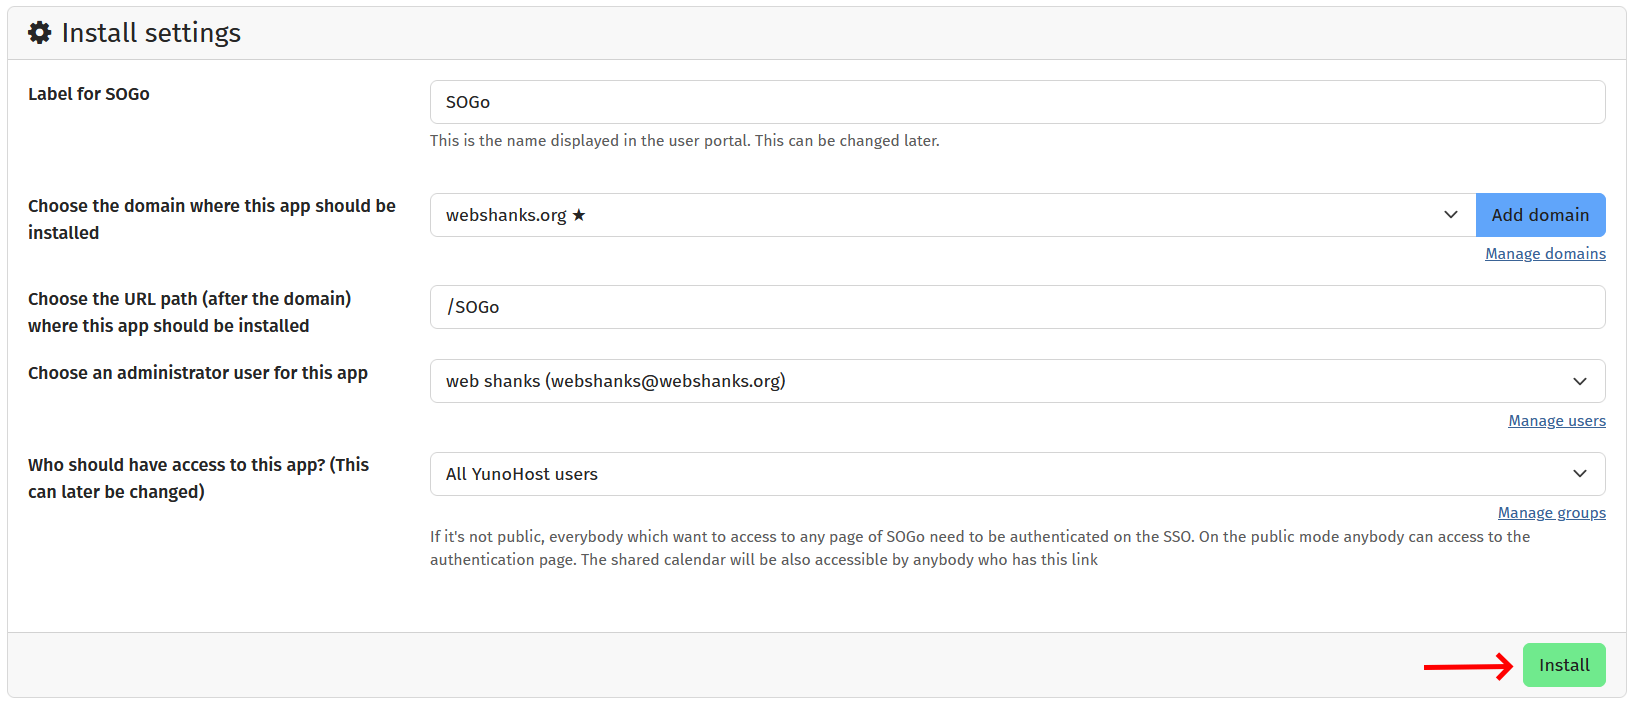
We will proceed to install a webmail. In this tutorial, we will install SOGo.
Head on to Applications > search SOGo.
Step 7. Test Email Deliverability
We’ll send a test email to see if our email server is ready.
Go to the URL of your webmail, in my case it’s https://webshanks.org/SOGo
Send a test email.

Perfect, our email server is now functional.
Configure Email Client
Your YunoHost server supports IMAP and SMTP for use with email clients.
Incoming Mail (IMAP):
- Server: yourdomain.com
- Port: 993
- Encryption: SSL/TLS
Outgoing Mail (SMTP):
- Server: yourdomain.com
- Port: 587
- Encryption: STARTTLS
Authentication: Normal password
Username: full email (e.g., [email protected])
Password: your user’s password
Troubleshooting Common Issues
Emails Going to Spam
Solution:
- Verify all DNS records (MX, SPF, DKIM, DMARC) are correct.
- Check your IP isn’t blacklisted at MXToolbox.
- Test your setup with Mail-Tester.
- Don’t send links/HTML/images just yet.
Check for configuration errors and verify:
- Ports aren’t already in use
- SSL certificates are valid
- The configuration file syntax is correct
Connection Timeouts
Solution:
Check your firewall rules:
sudo ufw allow 25,587,993,465/tcp
- Verify your VPS provider isn’t blocking ports
- Test connectivity from outside your network
Conclusion
Setting up your own email server with YunoHost gives you complete control over your communications while avoiding the privacy concerns of major email providers. While the initial setup requires careful attention to DNS and configuration details, the result is a private, secure email server tailored to your needs.
For those looking to expand their self-hosted services, consider our guides like this on:
Have questions or run into issues? Leave a comment below and I will help you troubleshoot!