 Tired of pricey control panels like cPanel that limit your freedom? Imagine running your own email server with full control, no shared risks, and top-notch security. KeyHelp steps in as a free option that handles web hosting and email like a pro.
In this guide, you’ll learn how to install KeyHelp on a dedicated server and set up a reliable email system. We’ll cover every step, from server prep to testing emails, so you can build a setup that works for your sites and messages.
What You’ll Need
- An EUGameHost VPS (I’ll use Ubuntu 24.04). They have open port 25. Check your ports using our Port Checker.
- A domain name from Namecheap (any domain you like).
- Basic comfort with copy/pasting commands into a terminal.
Make an Email Server Using KeyHelp and EUGameHost
Step 1: Get a EUGameHost VPS
Start with the right base for your self-hosted email.
I can recommend EUGameHost VPS.
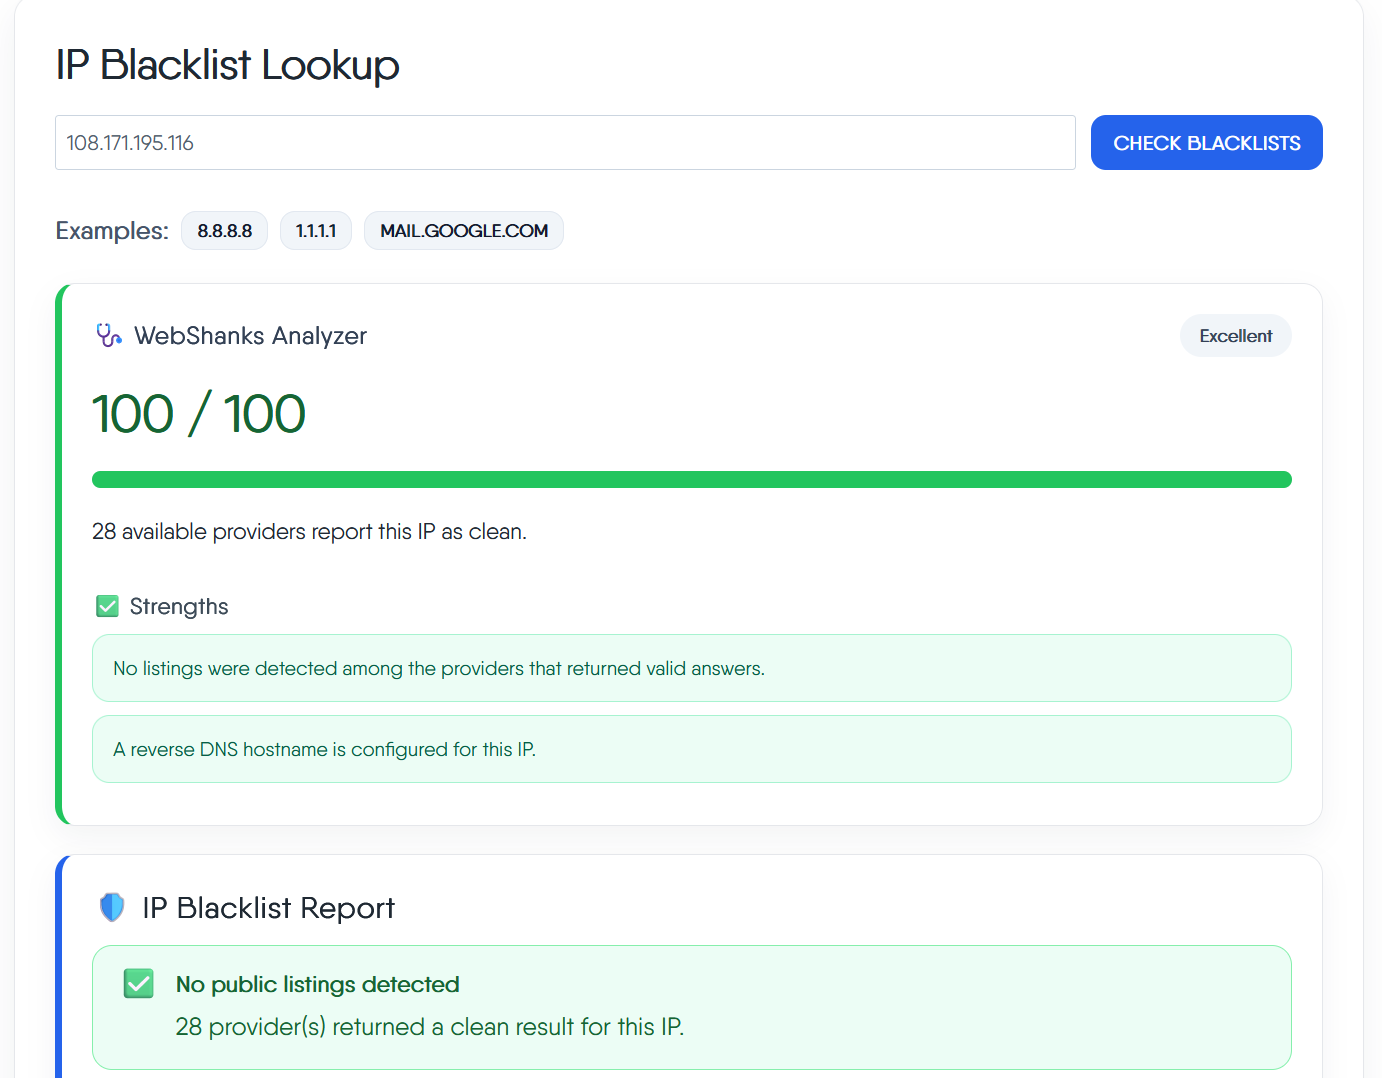
Then check your IP for blacklist using our Blacklist Checker.
Step 2: Configure PTR Records and Initial DNS Records
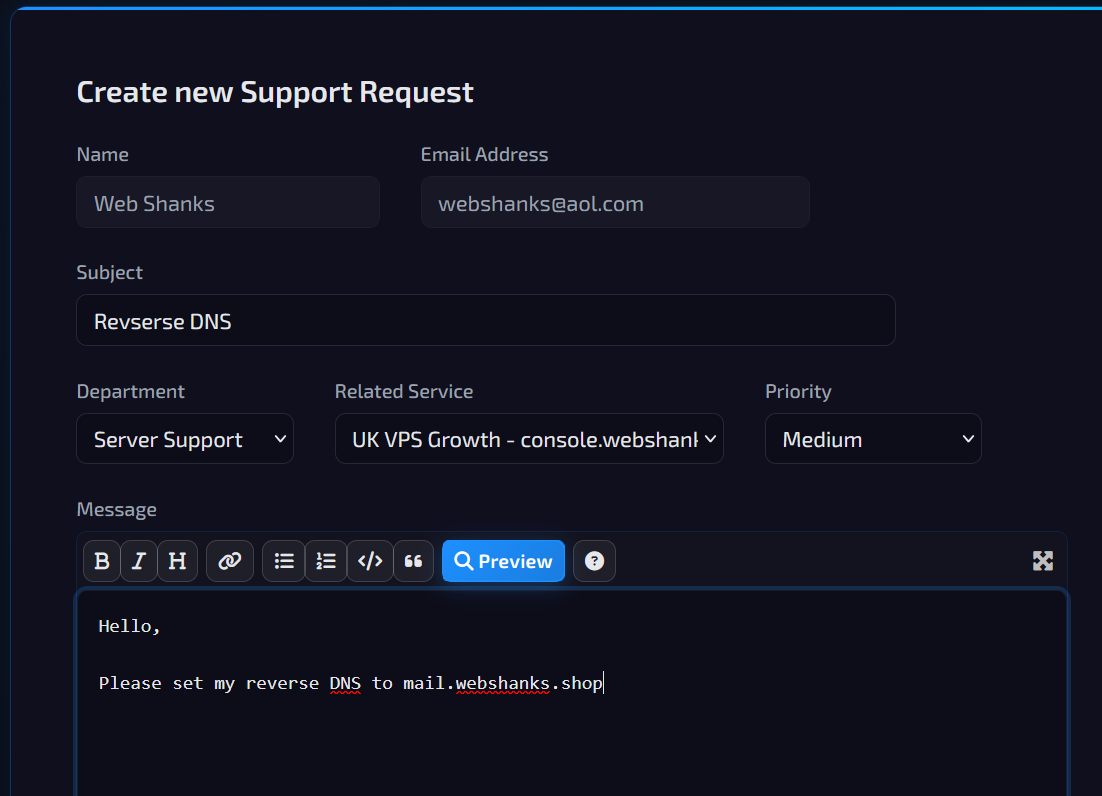
Head to your EUGameHost and open a ticket. They handle PTR records manually. Just let them know that you want to set your reverse DNS and they’ll gladly do it for you.
Point it to your mail hostname, such as ‘mail.yourdomain.com’, for both IPv4 and IPv6 (optional).
This step verifies your IP matches your domain. Providers like EUGameHost let you update it fast.
PTR records cut spam flags by 30% in many cases—key for new servers. Set them early to avoid delivery woes. Both IP versions cover modern networks, so emails flow to inboxes everywhere.
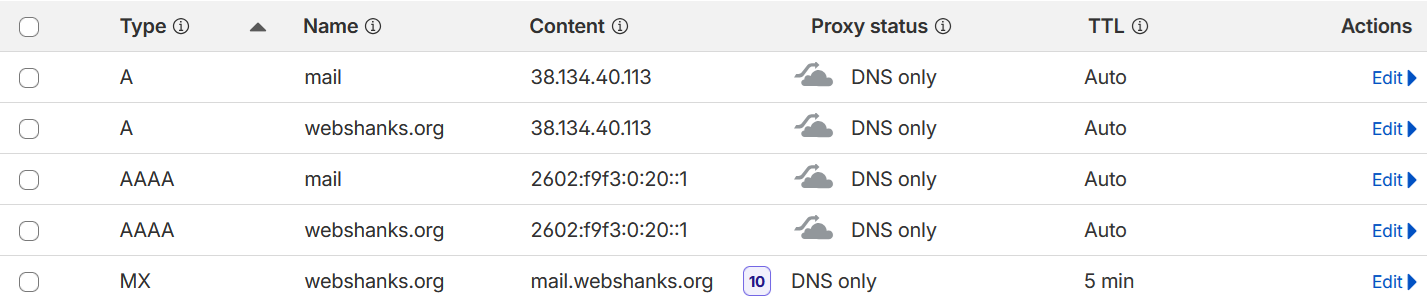
Next map, A and MX records. If you have IPv6, choose AAAA record.
Go to your domain registrar and map the DNS. Refer to the image below.
Step 3: Connect to Your Server via SSH
Connect to your server first via SSH for secure access. Use a free tool like Bitvise, PuTTY, or the provider’s console—it’s simple and quick. Enter your server IP, accept the host key, and type in your password to open a terminal.

Once inside, update your system right away. Run the command to grab the latest packages. This step fixes bugs and preps Ubuntu for KeyHelp without surprises.
sudo apt update && sudo apt upgrade- y
Step 4: KeyHelp Installation Workflow and Initial Configuration
Now, let’s install KeyHelp with a single command from their site. Paste it into your terminal and hit enter—the script starts asking questions.
wget https://install.keyhelp.de/install_keyhelp.sh -O install_keyhelp.sh ; bash install_keyhelp.sh ;
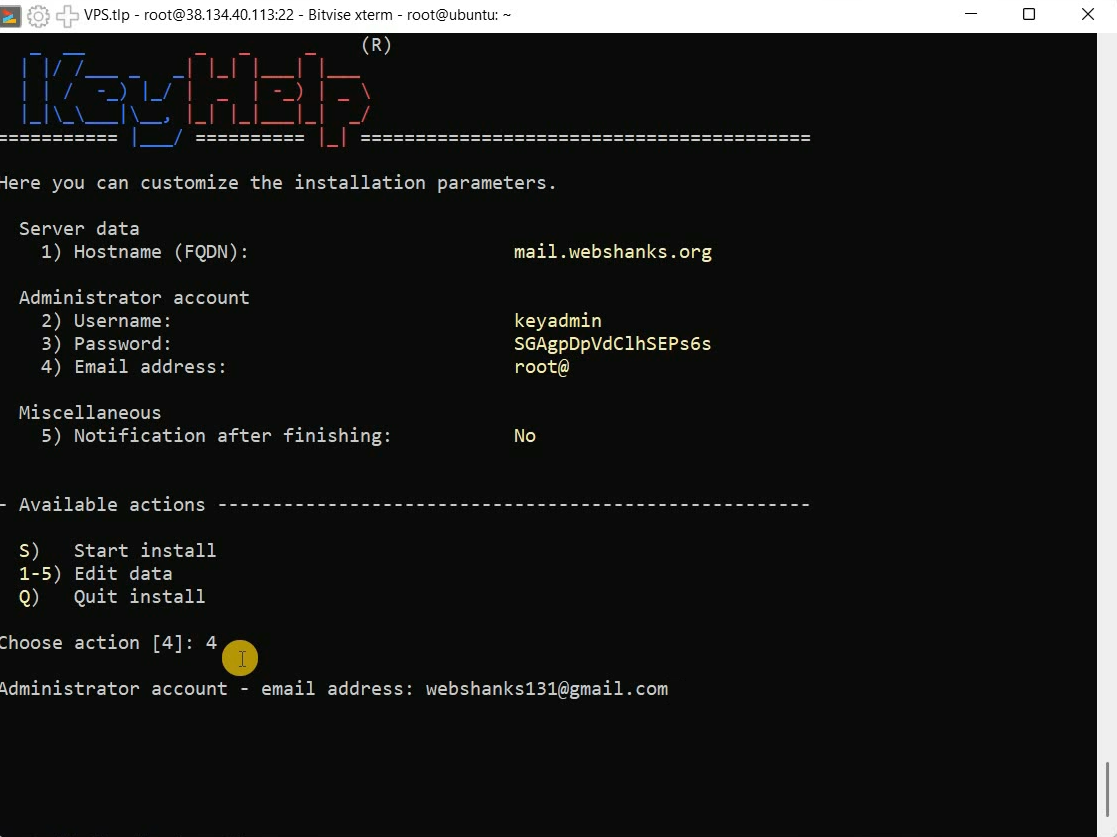
Then choose 1 to set your hostname.
Set a clear hostname like ‘server.yourdomain.com’.
Next, add your admin email too—this handles alerts. Just enter 2.
Finally, type S to start the install.
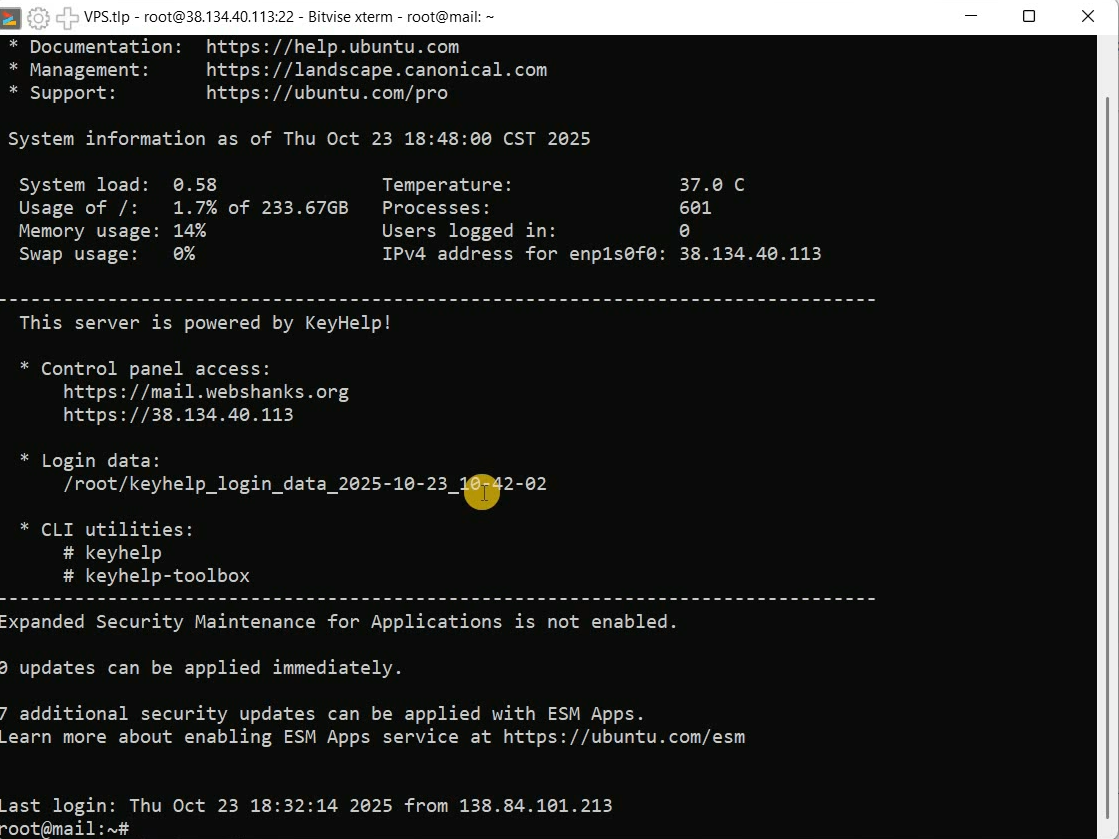
After it finishes, reboot your server to lock in changes. Open a new terminal to check if everything loads. KeyHelp now runs as your main control panel, ready for email tweaks.
Step 5: Login to KeyHelp
Grab the KeyHelp login URL from your terminal—it’s often your server’s IP with a port.
Paste it into a browser and enter the username and password from the install. Click login to see the dashboard greet you.
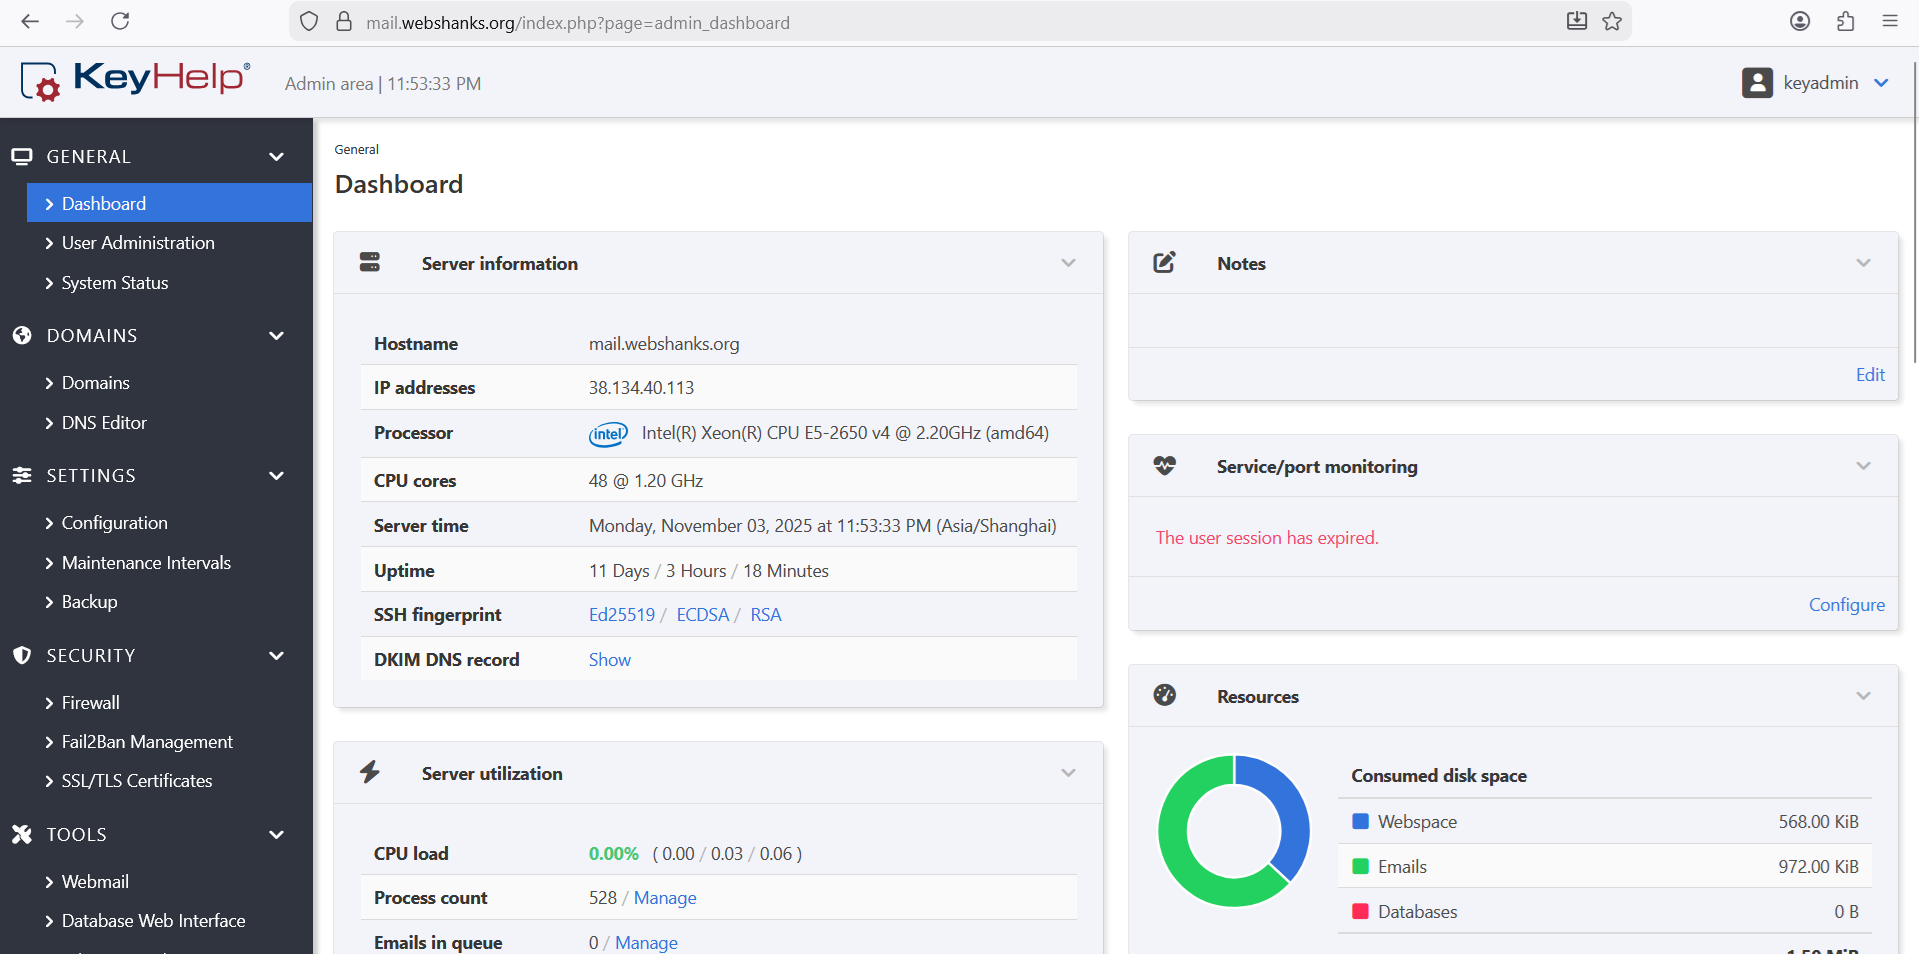
The interface looks clean, with tabs for users, domains, and more. Close the welcome popup and head to user administration. This is where you build accounts for your sites.
Take a moment to explore—it’s user-friendly but packed with options. You’ll spend most time here managing emails and web stuff. If it feels new, the layout follows common panels like cPanel.
Step 6: Add New Client and Domain
Go to User Administration and click Add client. Pick a username and an email for notifications. Then, generate a secure password—copy it somewhere safe, but skip sending it by email.
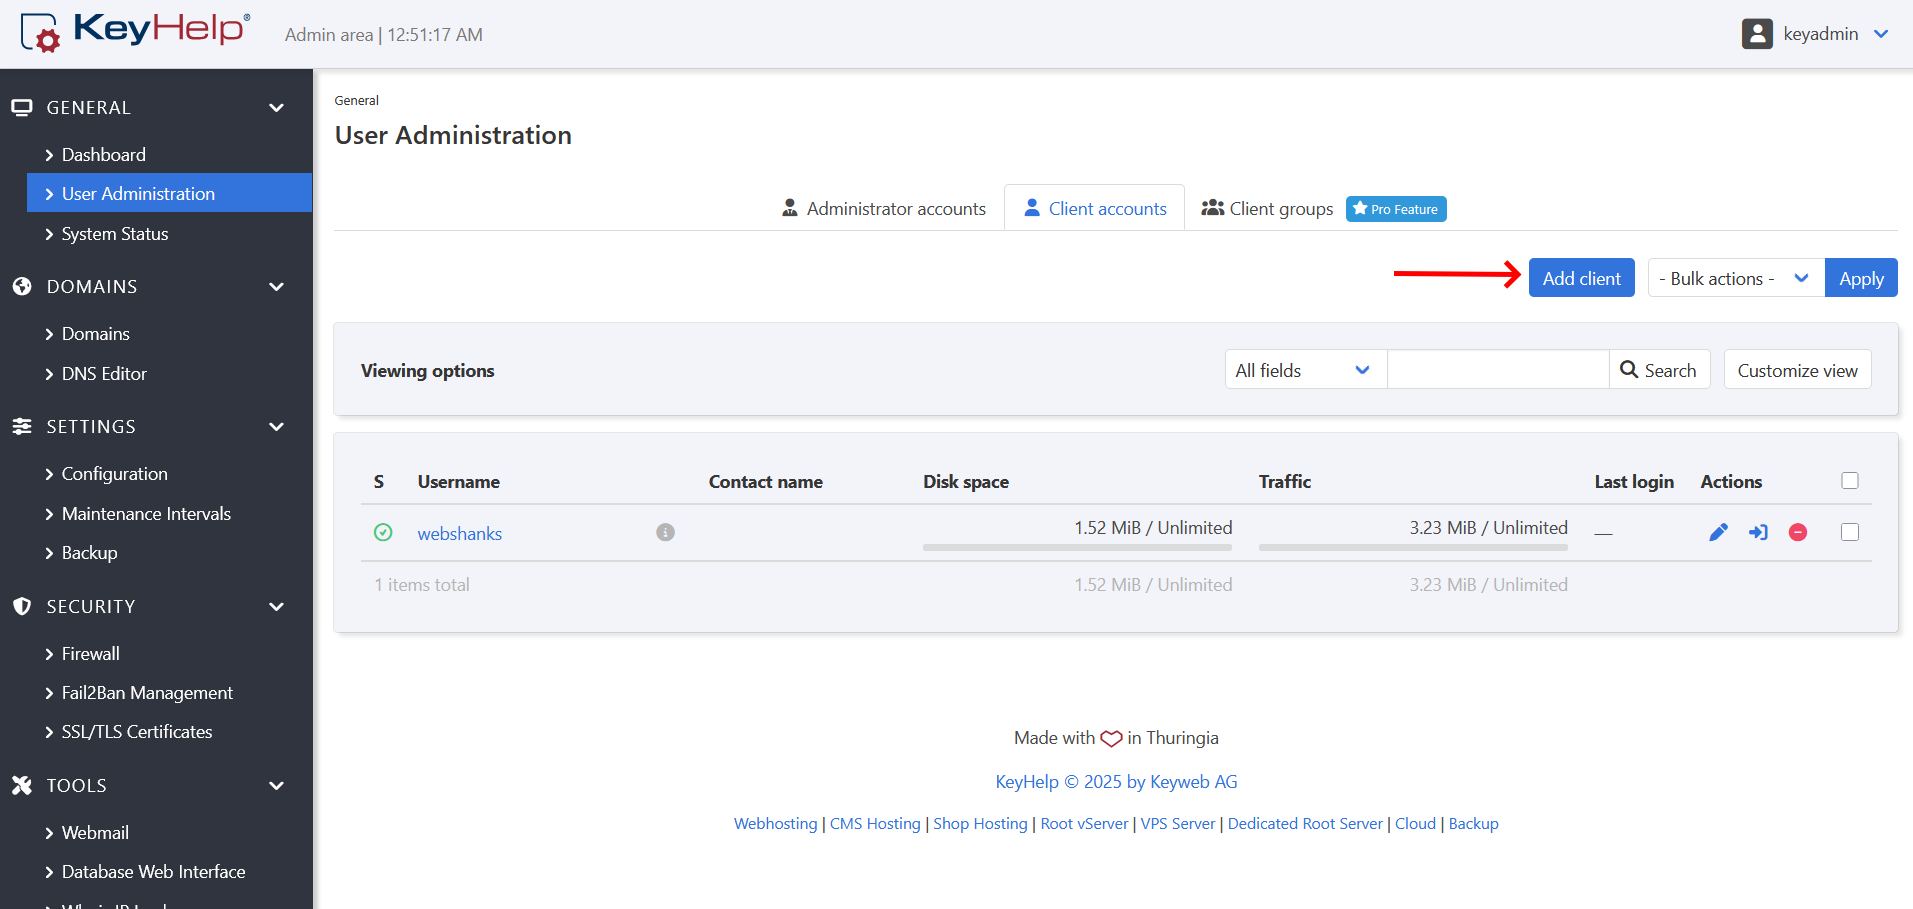
Opt out of creating a system domain for now. Choose the ‘unlimited’ template for no limits on space or features. Add contact info and set permissions, then save.
This client acts as your main manager. It lets you add as many domains as needed without caps. Secure passwords here keep hackers out—change them often.
Step 7: Add Primary Domain and Let’s Encrypt
Switch to the domains tab and add a new one. Select your client, then enter the main domain like ‘webshanks.org’—no www needed. Set storage to local directory for full control.
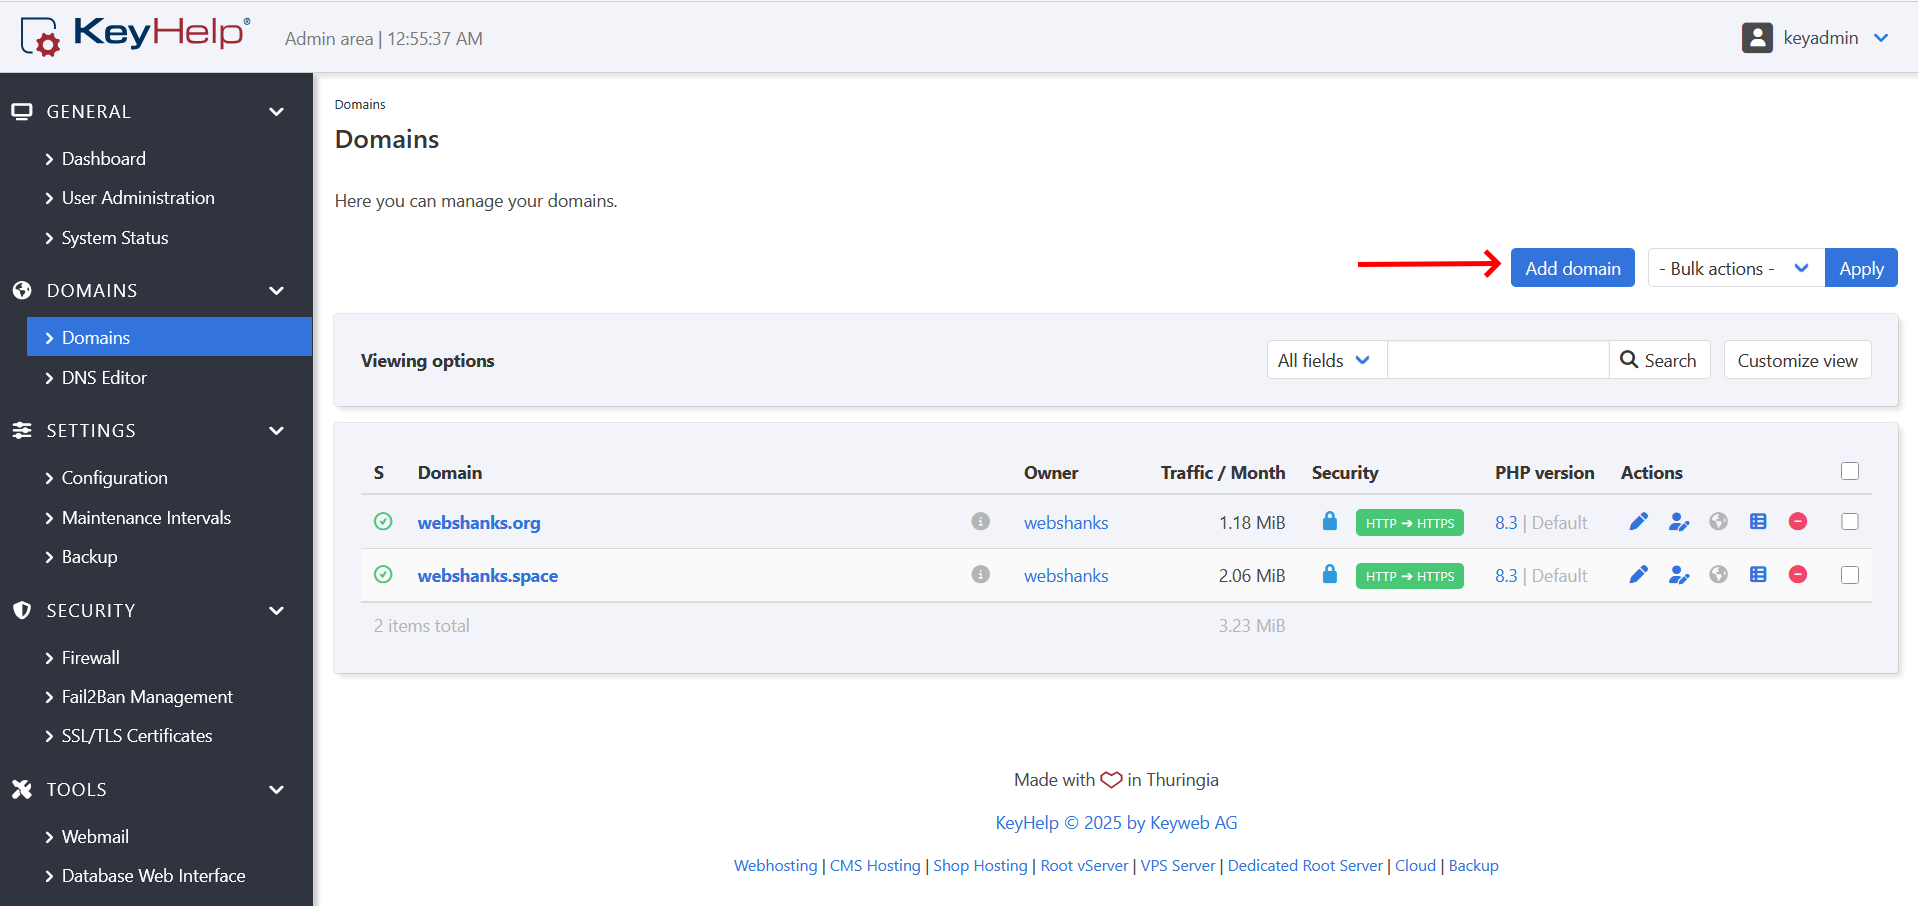
In the Security tab, pick Let’s Encrypt for free SSL. It secures your site and emails with HTTPS. Save only after adding DNS records outside KeyHelp.
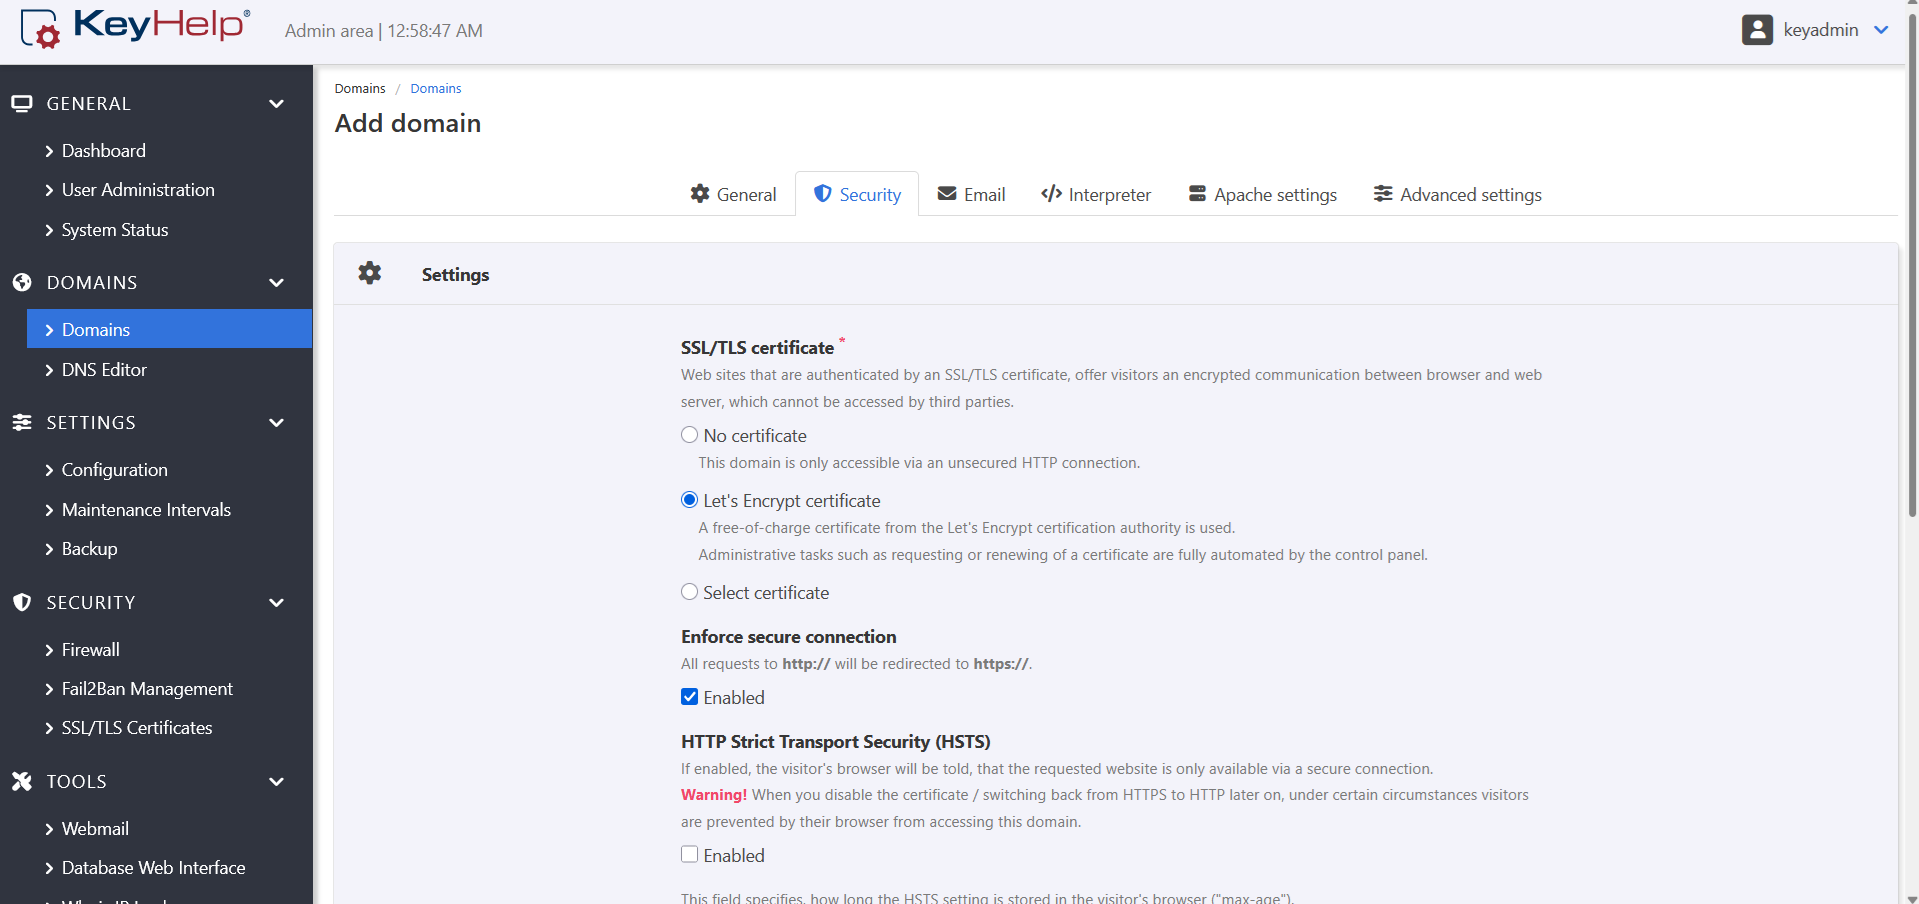
Processing takes a bit—watch for the success message. SSL installs auto, shielding data from snoops. This combo makes your setup pro-level secure.
Step 8: Add DKIM, SPF and DMARC
DNS isn’t done yet—add auth records to prove your emails are legit. This fights spam filters head-on. Services like Google check these before accepting messages.
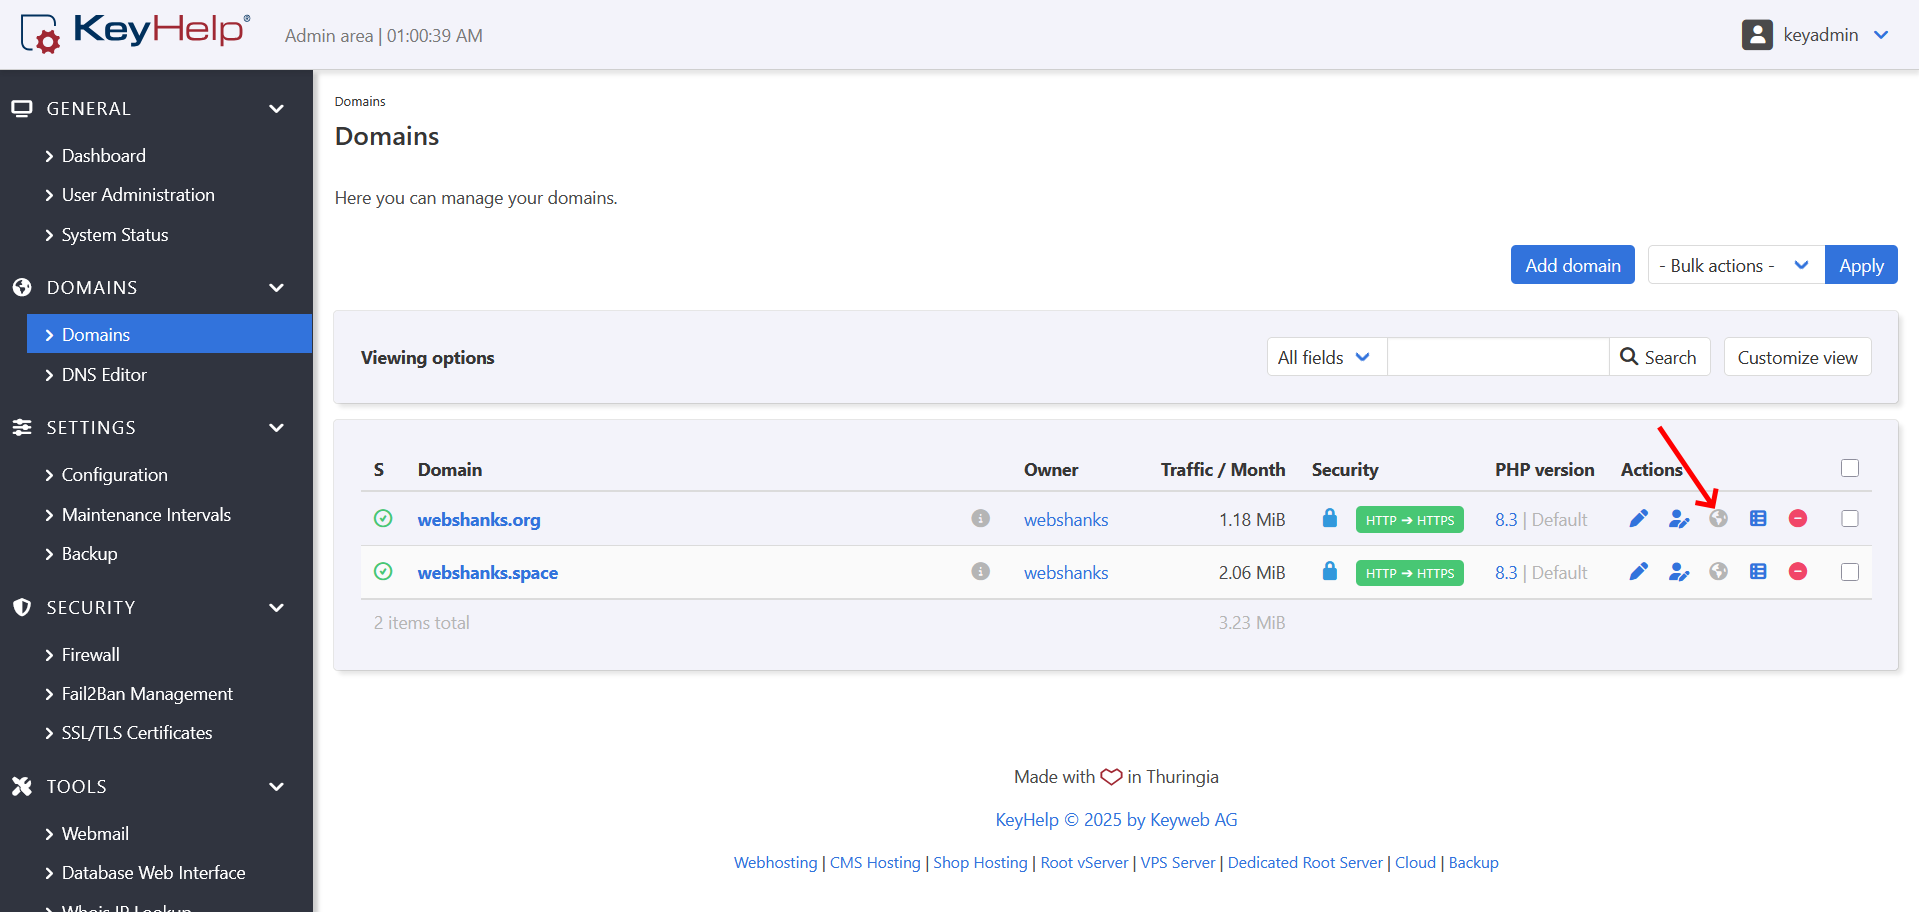
In KeyHelp, go to the domain’s DNS section—click the globe icon.
Show the DKIM record and copy the text value, no quotes. Add it as a TXT record in your external DNS with the selector host.
For SPF, create a TXT at your root domain. Include ‘v=spf1 ip4:YOURIPV4 ip6:YOURIPV6 -all’. This lists approved senders—copy from KeyHelp.
DMARC comes last: another TXT like ‘v=DMARC1; p=none; rua=mailto:[email protected]‘. Paste the full string. These three block fakes and lift scores—aim for full coverage.
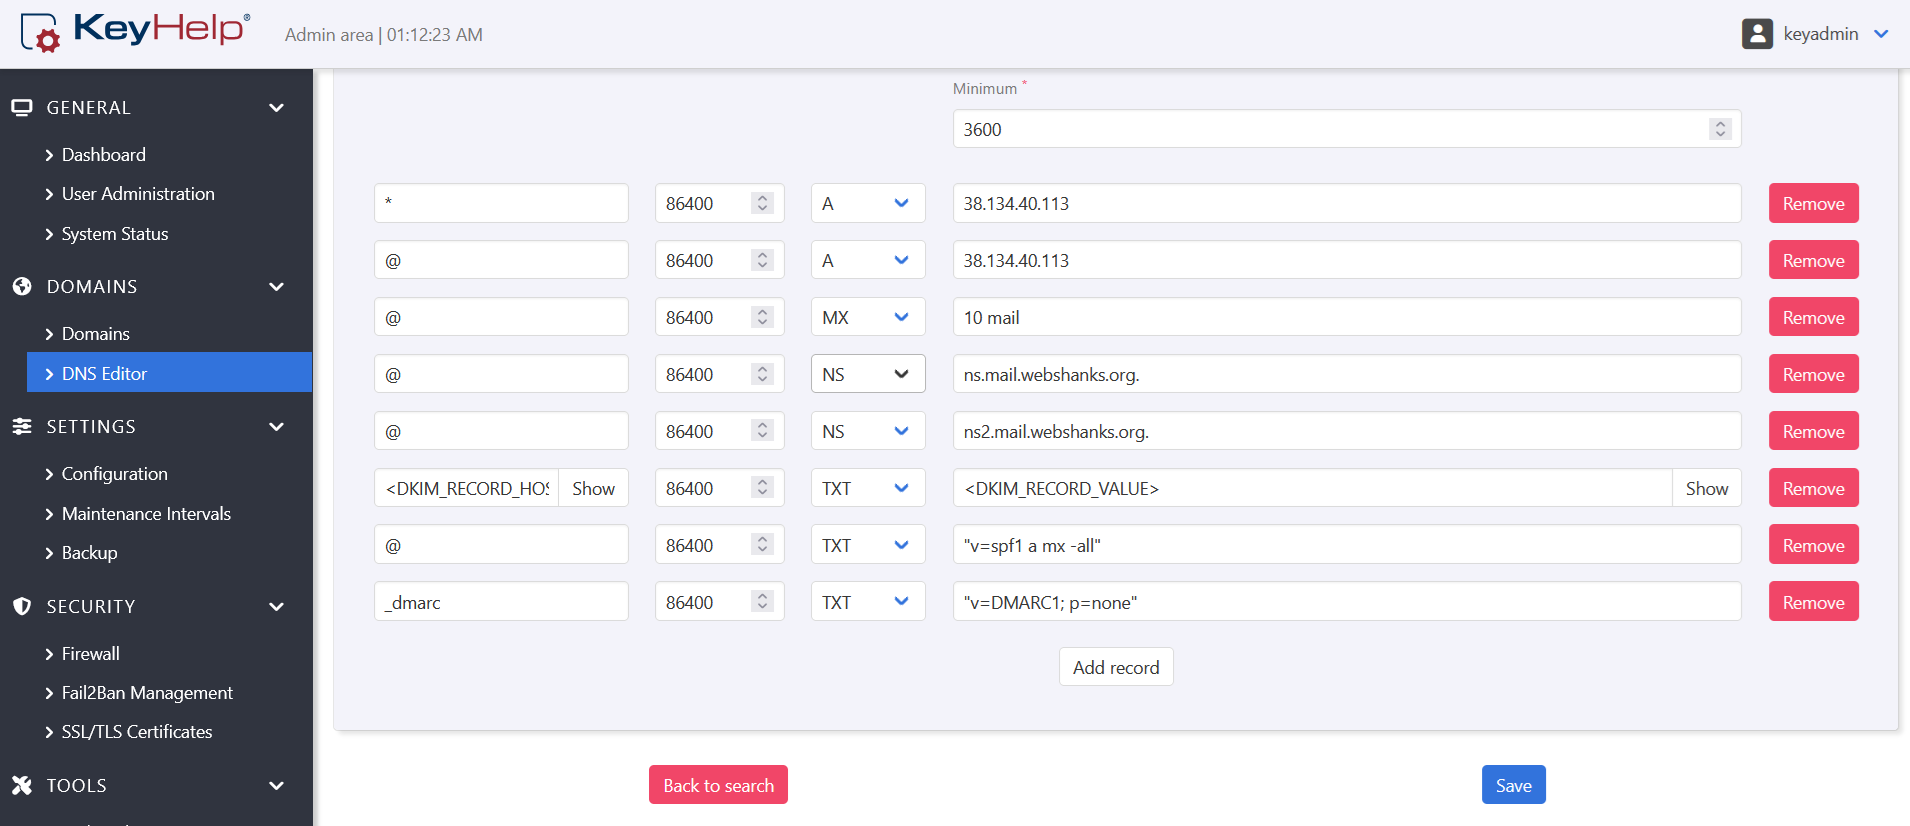
With them in place, your DNS locks down auth. Check with our Email Checker for errors. This step turns average emails into trusted sends.
Step 9: Add Email Accounts
To add email accounts, go to Domain and under Owner, click the user.

Set mailbox size, say 1GB, to control space.
Add aliases if needed—like forward ‘info’ to ‘frankie’. Or set forwards to other addresses. Save and it’s ready.
Multiple boxes? Repeat for team needs. Limits keep storage in check. Aliases save time without extra accounts.
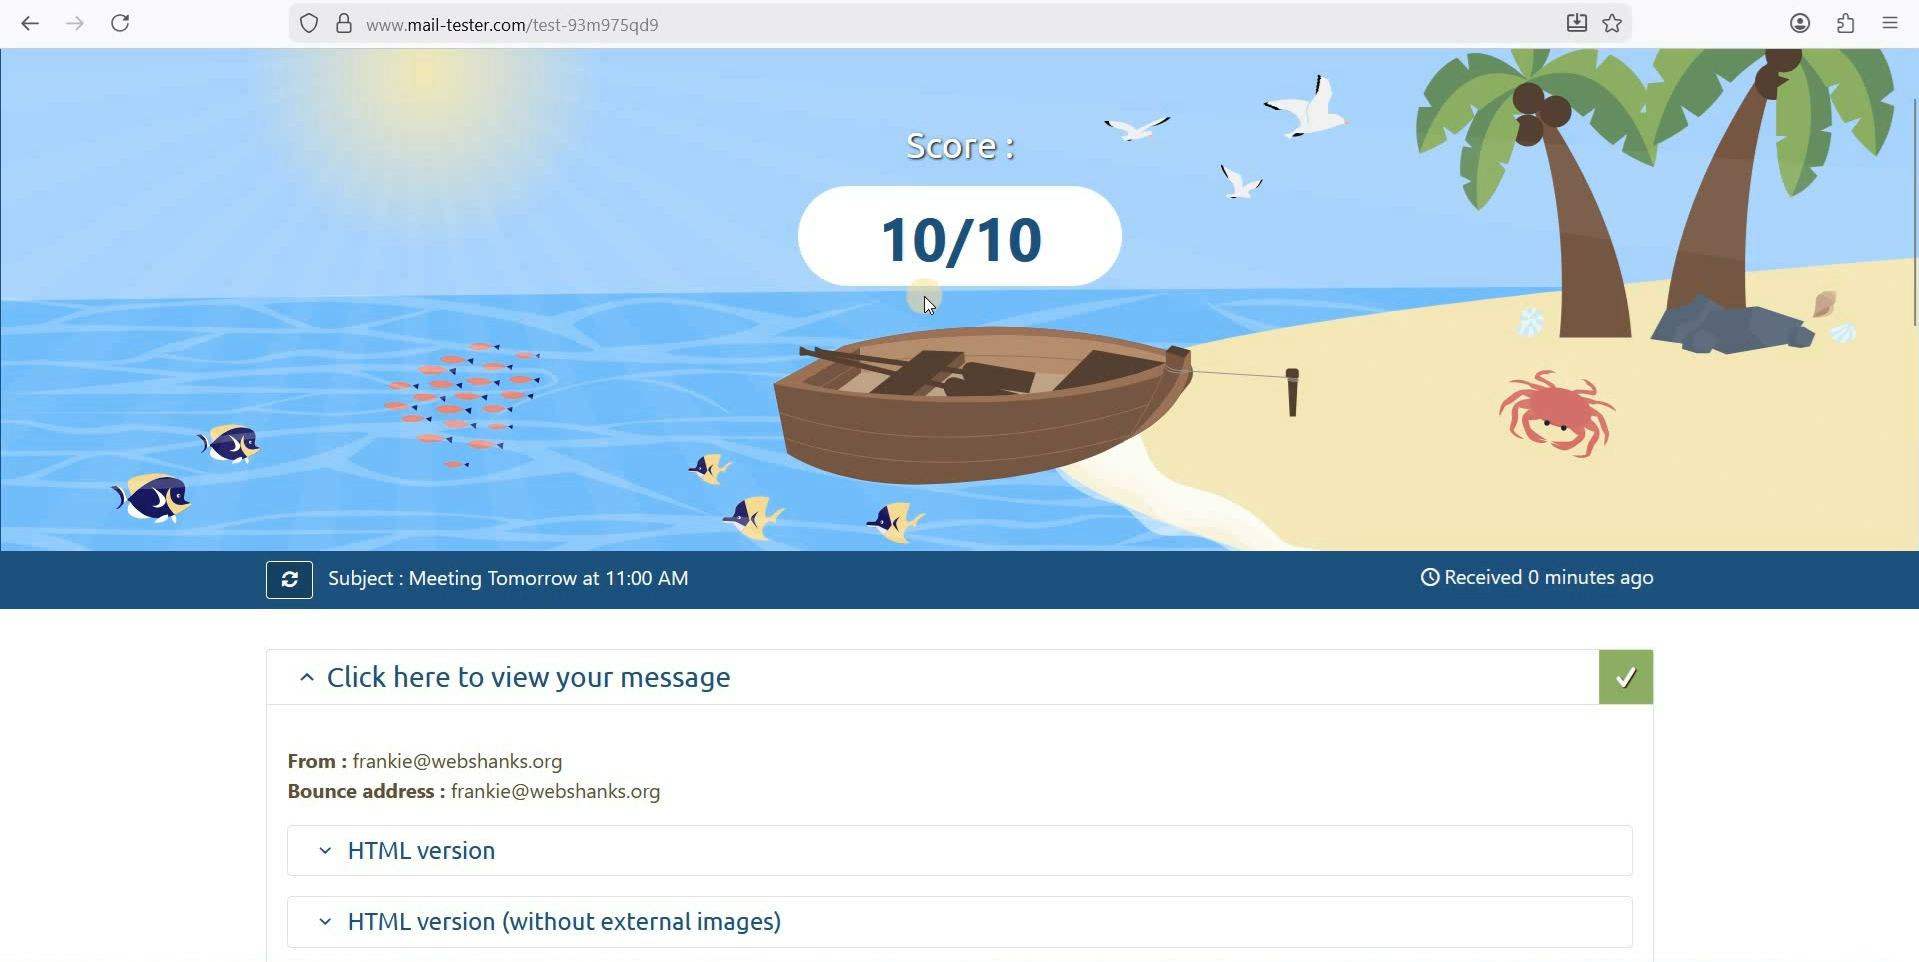
Step 10. Email Testing Using Mail-Tester
Go to Tools > Webmail and log using your new email and password.
Copy a unique code from mail-tester.com. Paste it into a new RoundCube compose and send. Head back to the site for your score.
A 10/10 shows a perfect setup—SPF, DKIM, and DMARC all pass. SpamAssassin gives thumbs up too. Auth checks confirm no spam risks.
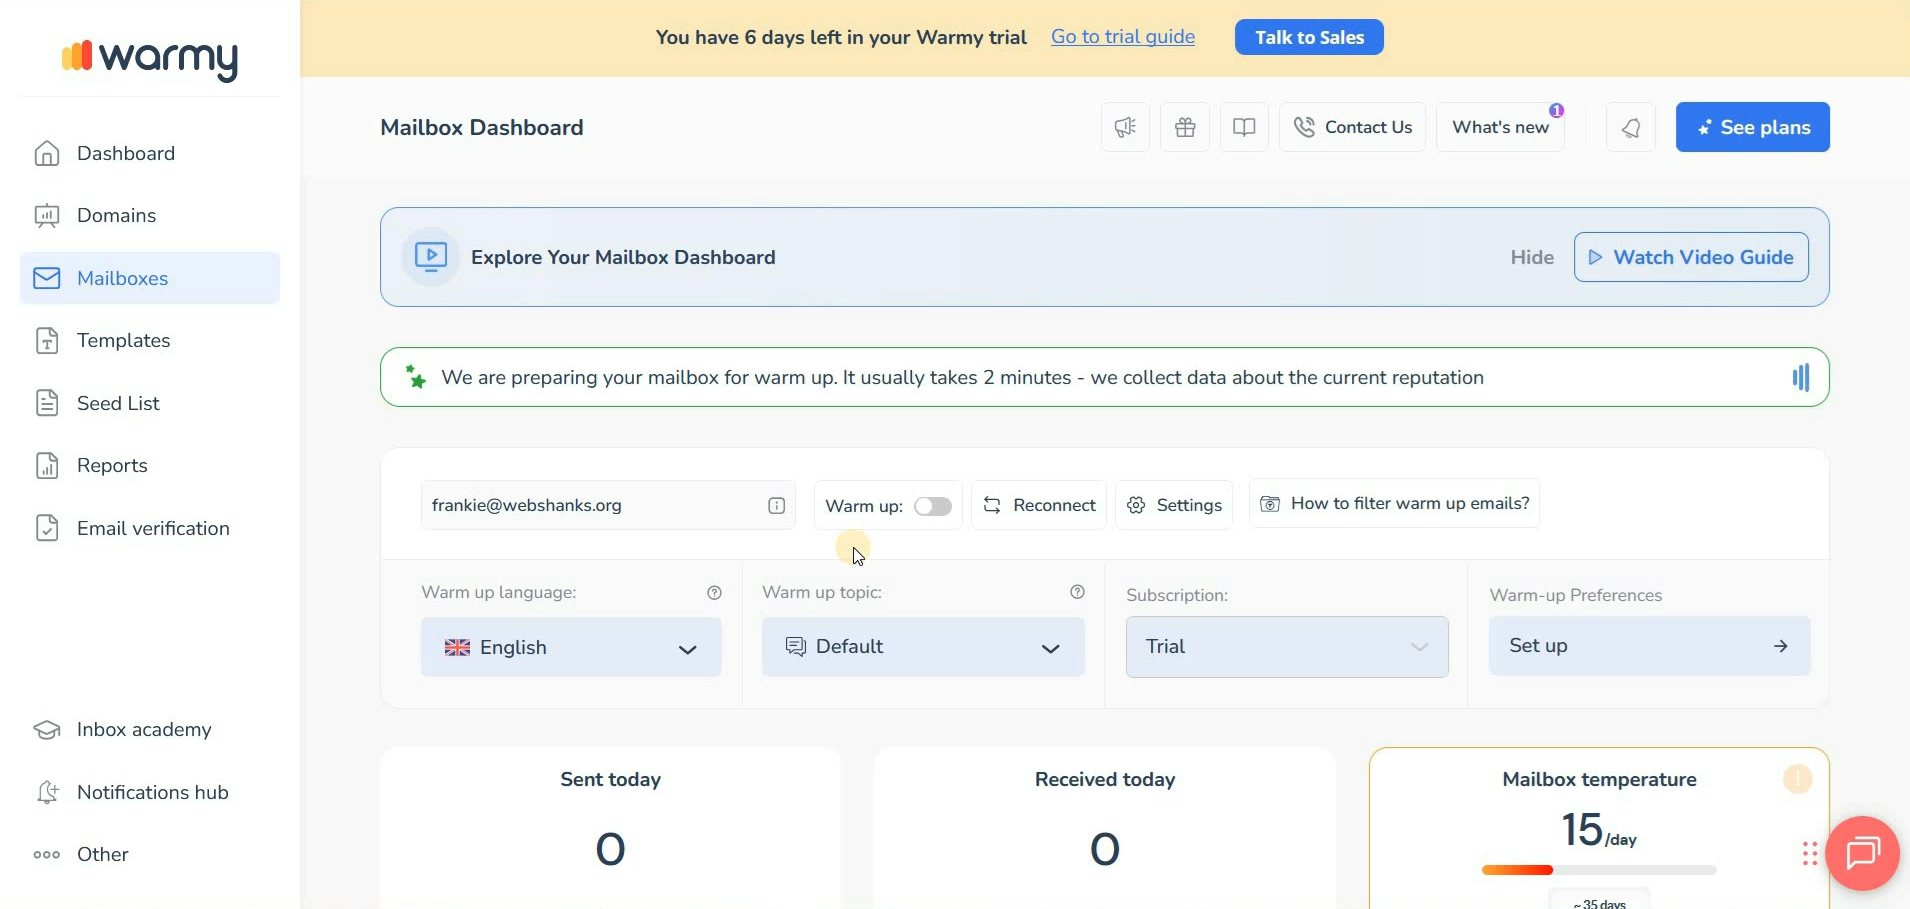
Step 11: Warming Up Your New Mail Server
New servers need time to earn trust. Warm-up builds reputation slowly. Rush it, and providers flag you.
Services like Warmy.io help by sending gradual volumes. Sign up for a trial—use your email for verification. Pick plans under 1K sends if starting small.
It mimics real use to train filters. Your IP learns good habits. Skip this, and cold starts hurt delivery.
Watch on YouTube
Conclusion
You’ve built a solid KeyHelp email server on dedicated hardware—full control at last. Remember, dedicated beats shared for privacy and speed. Reverse DNS and auth records like SPF make or break delivery—don’t skip them.
Scale by adding domains and boxes as needed. Warm-up keeps things steady for growth. Questions on tweaks or fixes? Drop them in the comments—I’ll help sort it out.