
 Axigen is a powerful email, calendaring, and collaboration server. Its easy-to-use web interface, high security, and flexibility make it a great choice for businesses of all sizes.
Follow this step-by-step guide on how to install and setup Axigen email server on UltaHost VPS running Debian 11. This guide ensures your email server is ready for professional use.
What you will need:
- VPS: UltaHost with Debian 11 installed. Learn how to set up UltaHost VPS.
- Domain: A registered domain name with DNS management.
- Open Ports: Ensure ports 25, 465, 587, 143, 993, 110, 995, and 443 are open. Check this post for the list of VPS with open port 25.
How to Setup Axigen Email Server
Step 1. Set Up UltaHost VPS
If you haven’t already, set up your UltaHost VPS. Ensure Debian 11 is installed as the operating system.

Step 2. Get Domain and Set Up Initial DNS
- Register a Domain: Use a registrar like Namecheap to register your domain.
- Set DNS Records:
- A Record: Point your domain to the VPS IP address.
- MX Record: Add an MX record for your domain pointing to
mail.example.com. - SPF Record: Include your server’s IP in an SPF record.
Follow the guide below for detailed DNS setup:
| Record Type | Name | Content | Priority | TTL |
| A | webshanks.shop | YourServerIP | Auto | |
| A | YourServerIP | Auto | ||
| MX | webshanks.shop | mail.webshanks.shop | 10 | Auto |
| TXT | _dmarc | v=DMARC1; p=none; | Auto | |
| TXT | webshanks.shop | v=spf1 a mx ip4:181.214.152.68 ~all | Auto |
Now go back to your UltaHost and create a support ticket that you want to set your rDNS to mail.yourdomain.com and your hostname.

Step 3. Connect to your VPS
You can use PuTTY or Bitvise to connect to your VPS. Check out this guide on how to SSH to Windows.
Once you are logged in, ensure your server is up to date:
sudo apt update && sudo apt upgrade -y
Step 4. Install Axigen
Download the Installer:
wget https://www.axigen.com/mail-server/download/deb/latest/axigen_10.5.30-1_amd64.deb
Run the Installer:
apt install <path>/axigen_10.5.30-1_amd64.deb

Step 5. Login to your Axigen
Access your Axigen using https://<IP_OF_YOUR_SERVER>:9443/
Thank you for installing AXIGEN Mail Server
In order to configure AXIGEN for the first time, please connect
to WebAdmin by using one of the URLs below:
https://181.214.152.68:9443/
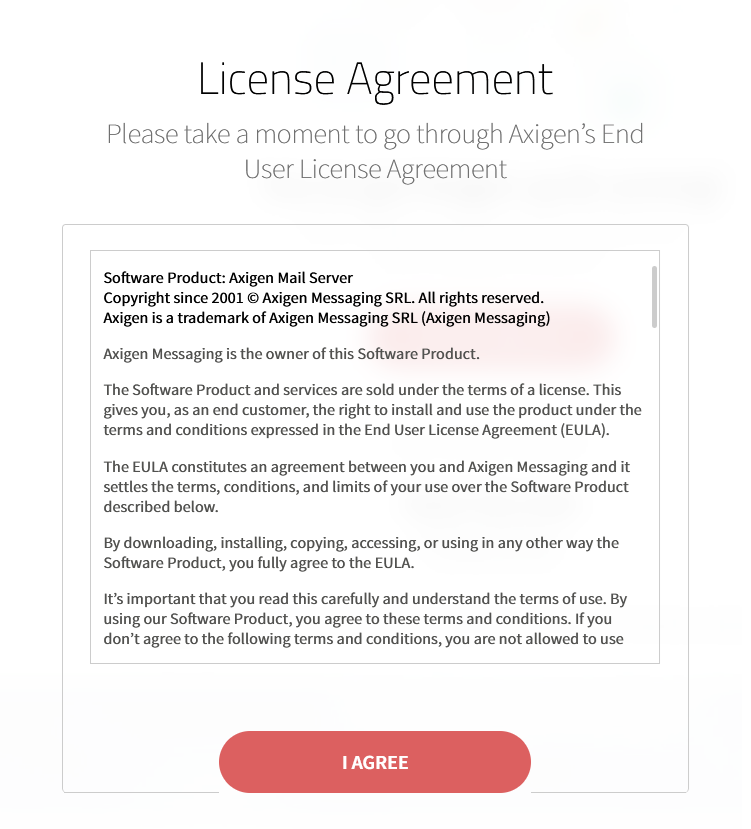
If you face Warning: Potential Security Risk Ahead, just Accept the Risk and Continue.
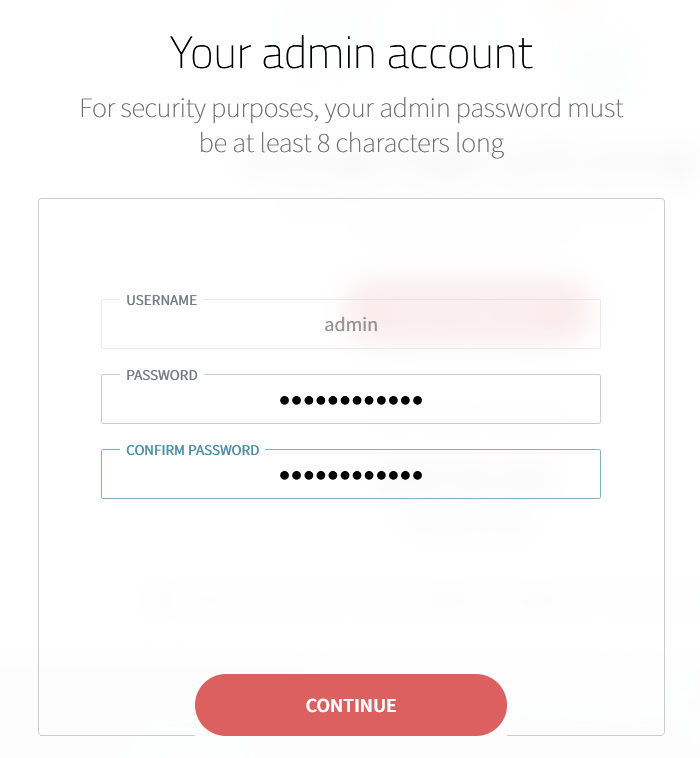
Set a password for admin.
Request a license. We’ll be using a free license for this tutorial.
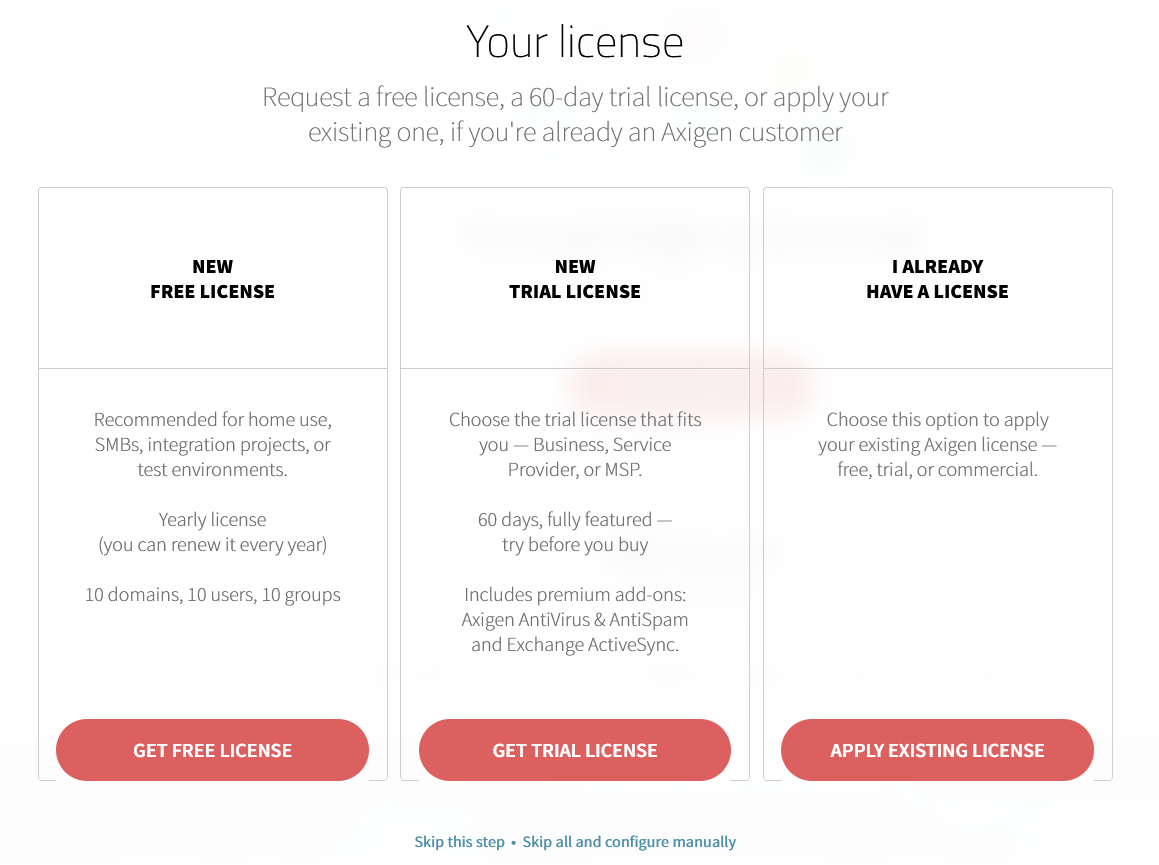
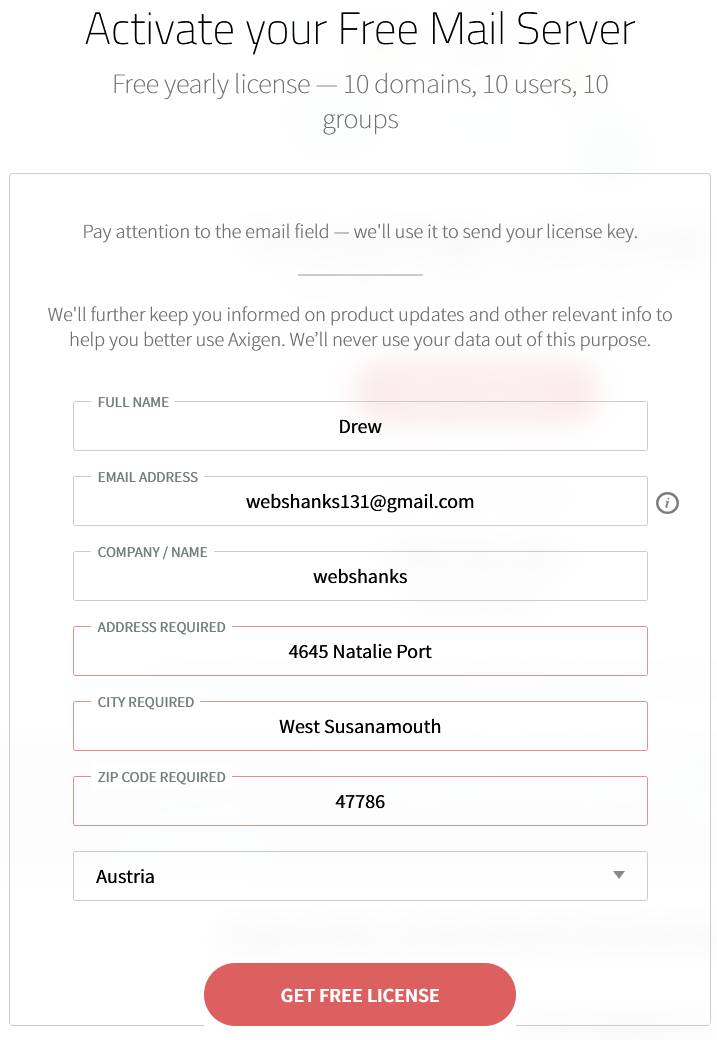
Get a free license.
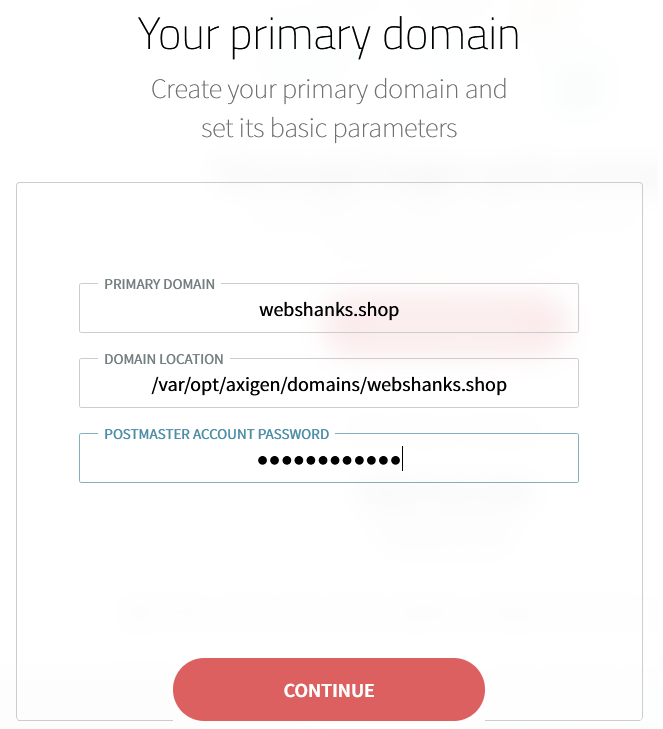
Add your domain.
Step 6. Setup SSL
Now we need to setup an SSL to use with our webmail and web admin.
From your dashboard, go to Security & Filtering > SSL Certificates > Add.
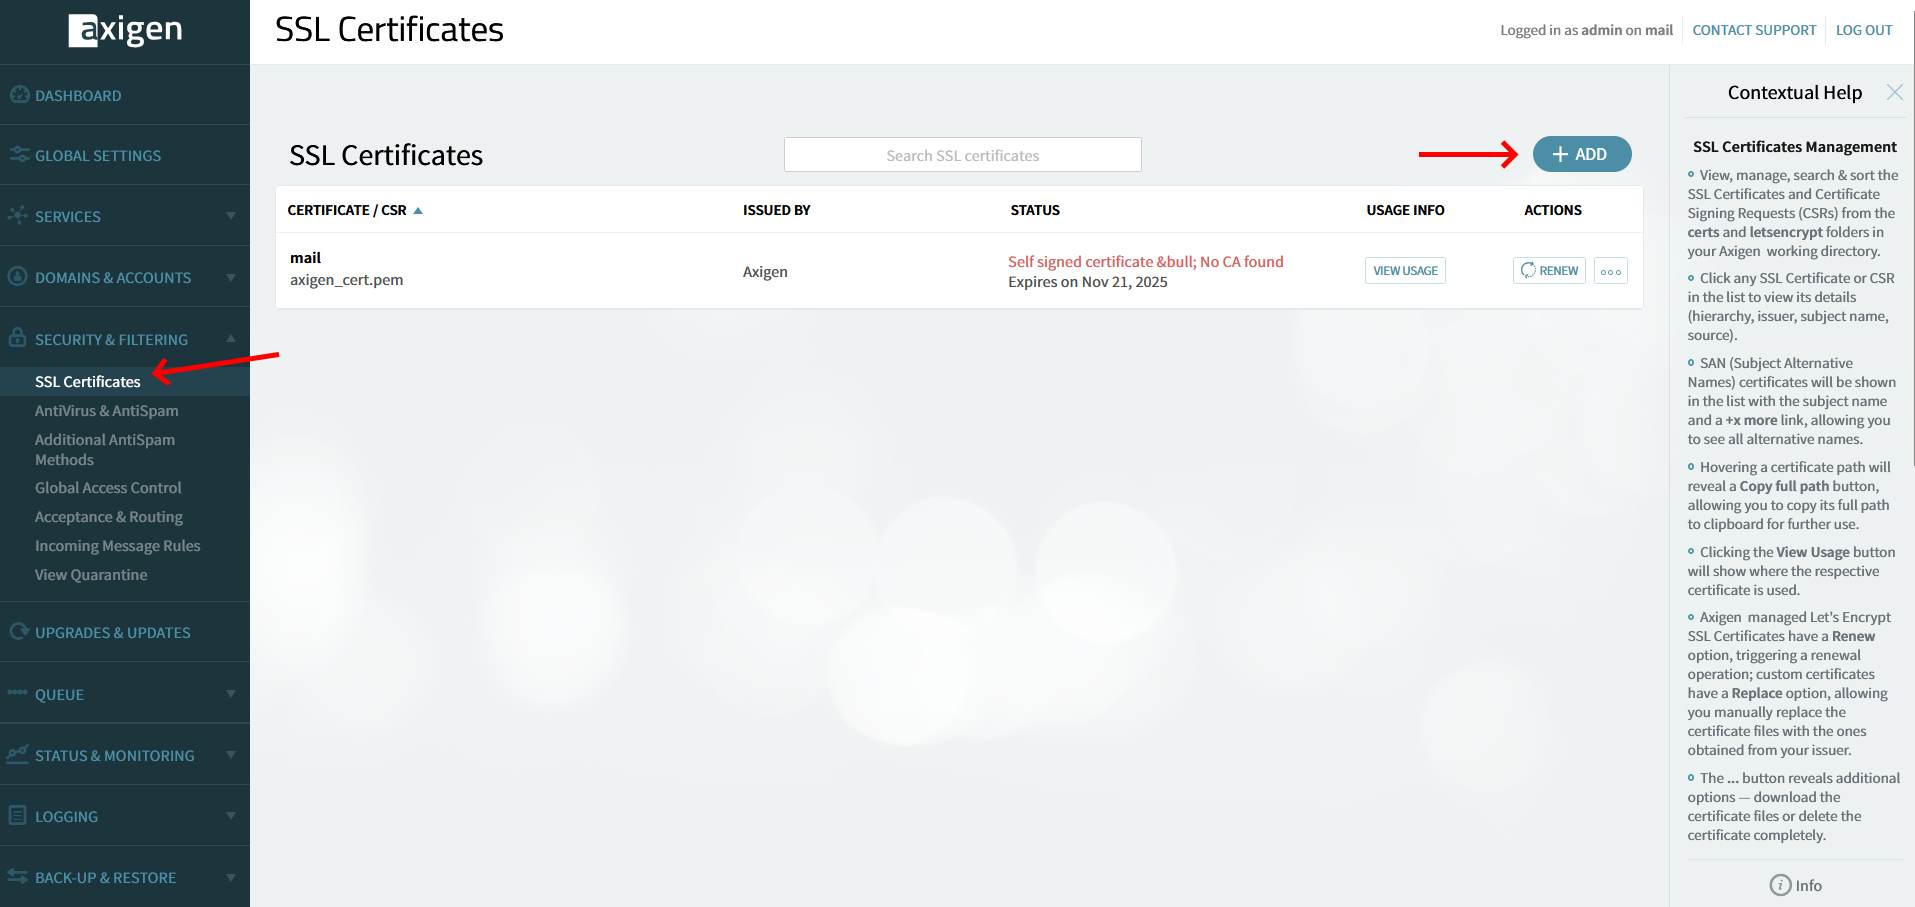
Add your hostname and agree to the terms. We will use Let’s Encrypt.
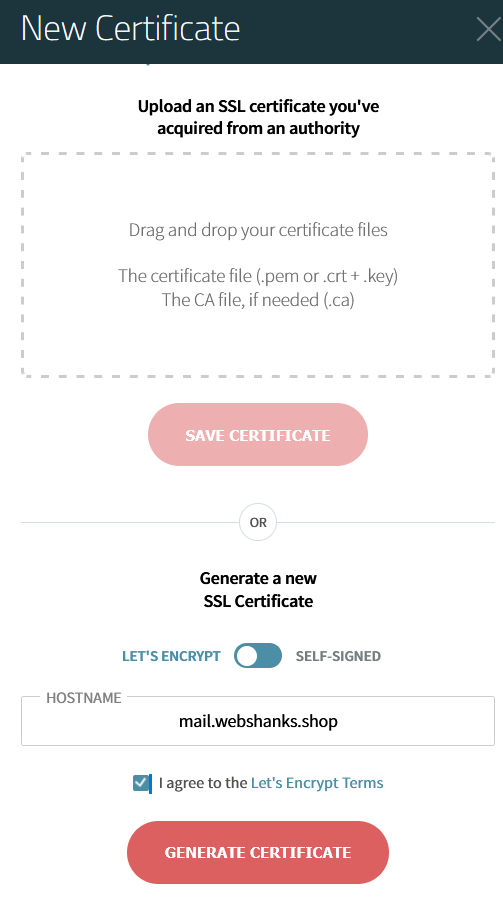
You should be able to get a valid SSL certificate.

Step 7. Configure WebMail and WebAdmin
Now it’s time to access our webmail and web admin using our domain.
From the left side menu, go to Services > Webmail > Add Virtual Host.
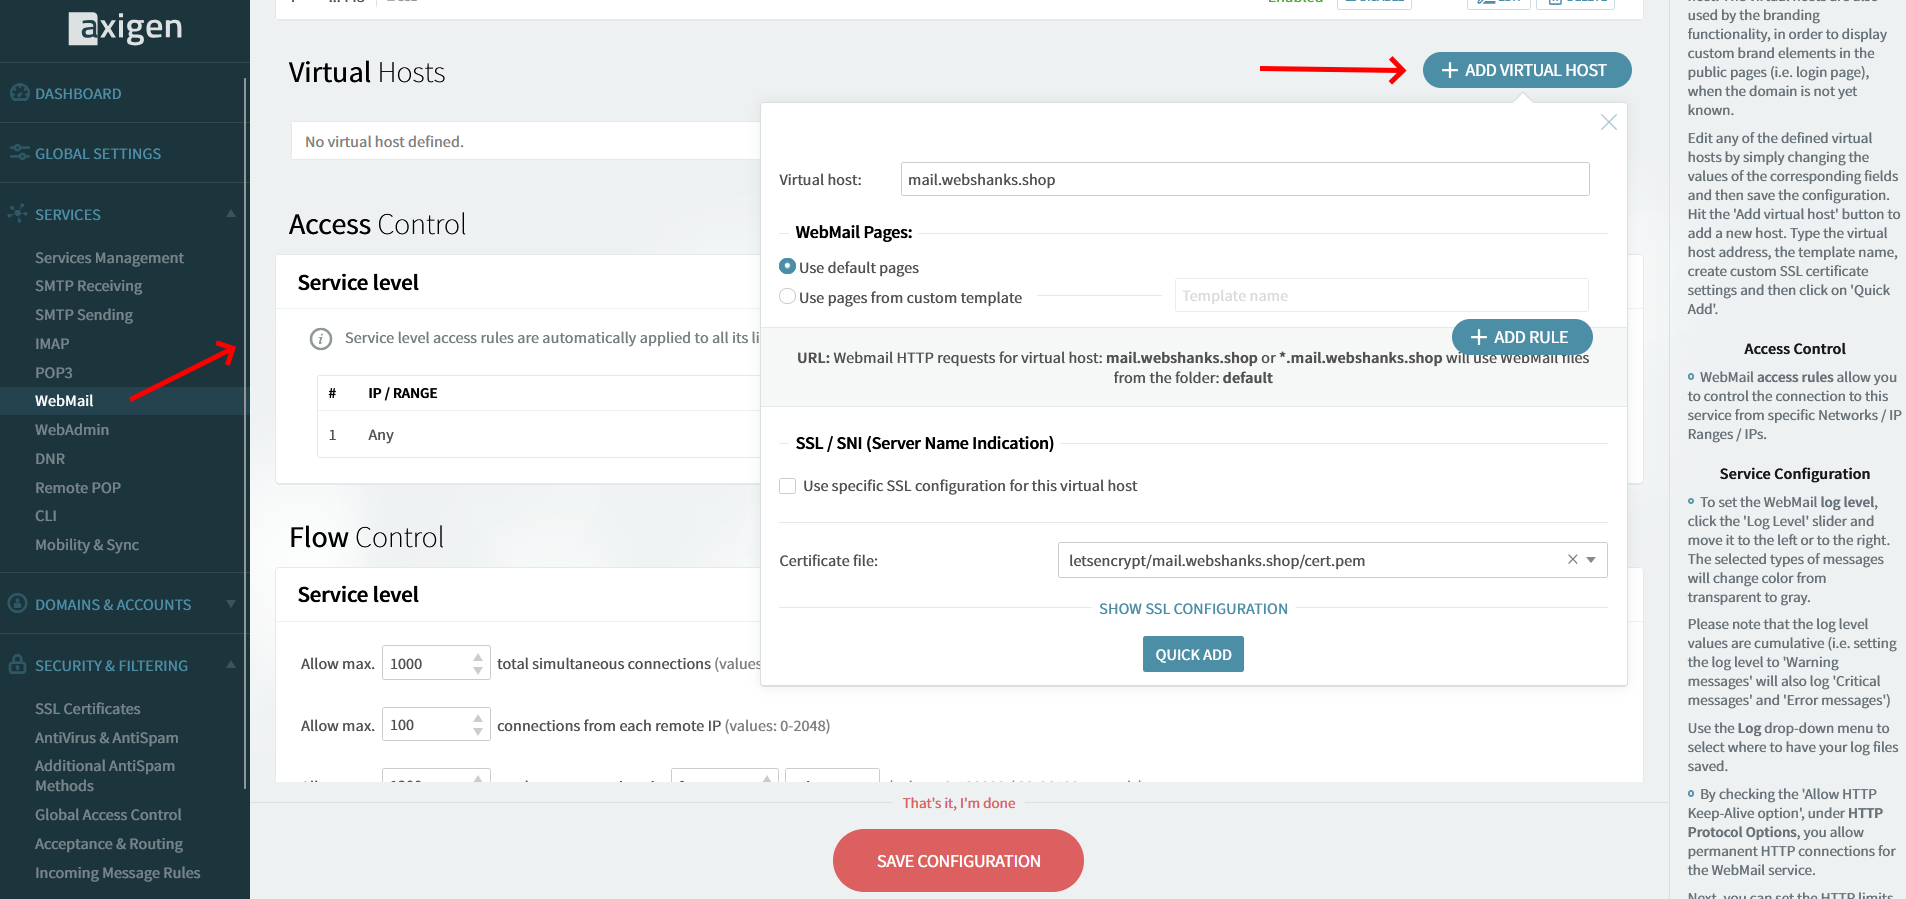
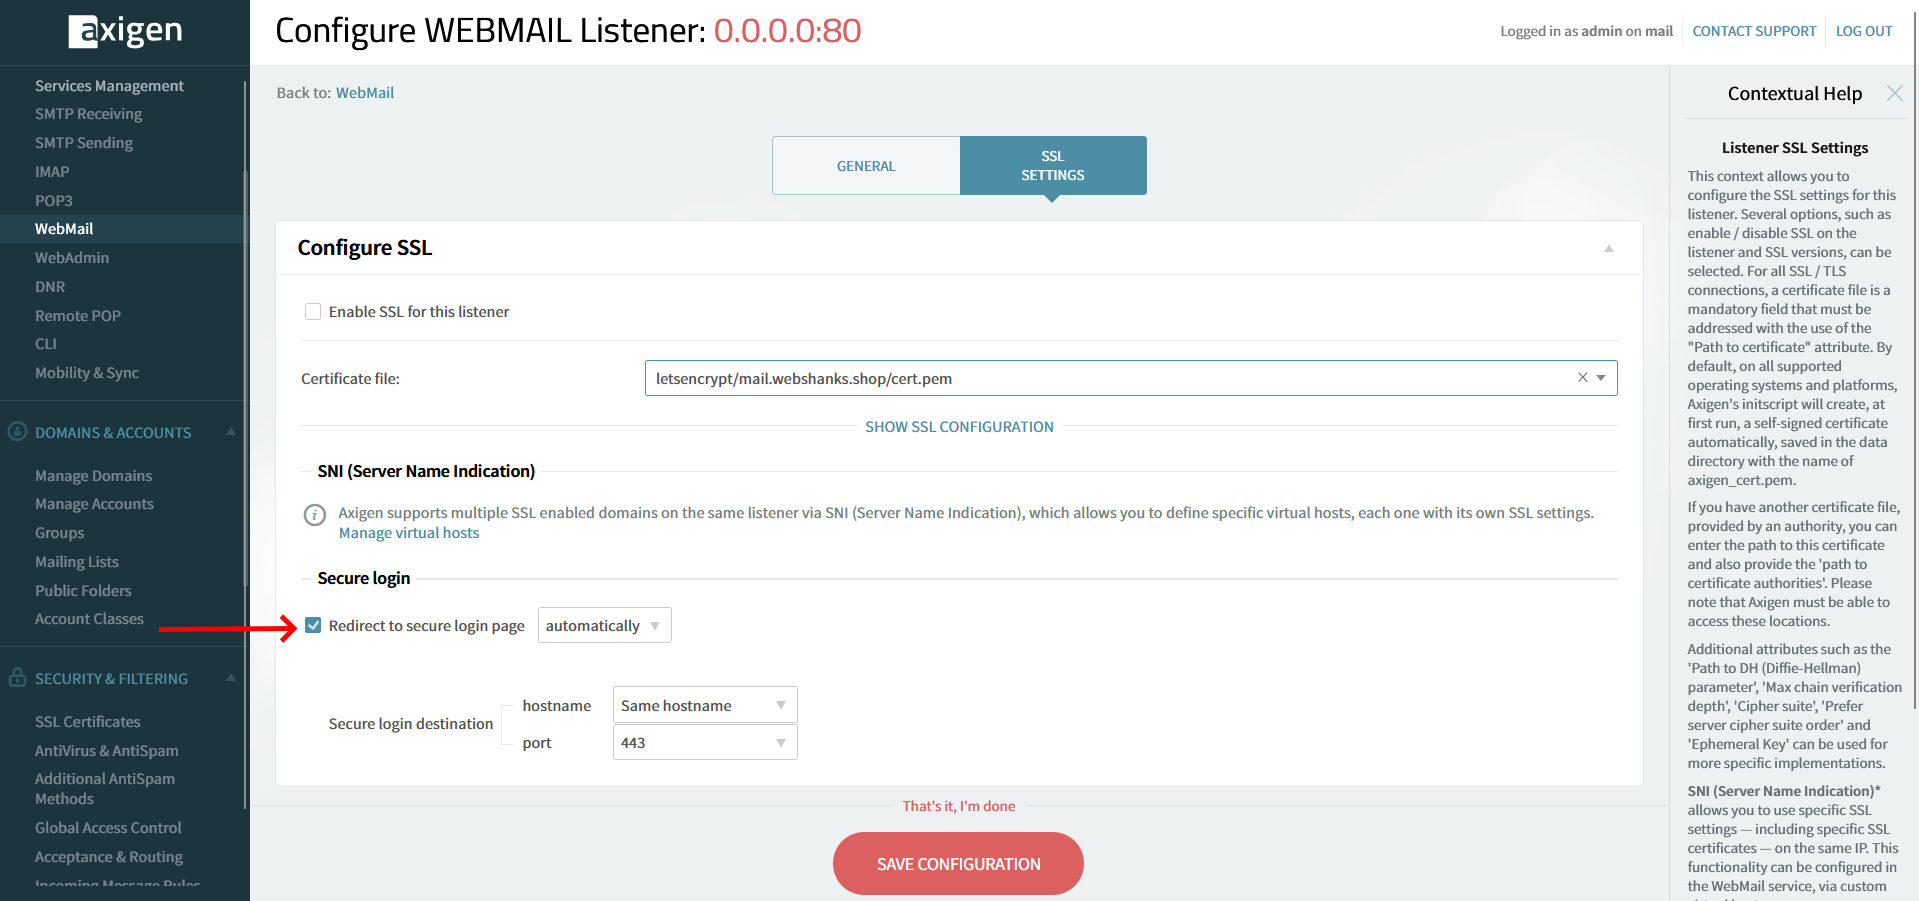
Next, we will set our virtual host to listen to port 443. From the Listeners table, click the 0.0.0.0:443 to edit.
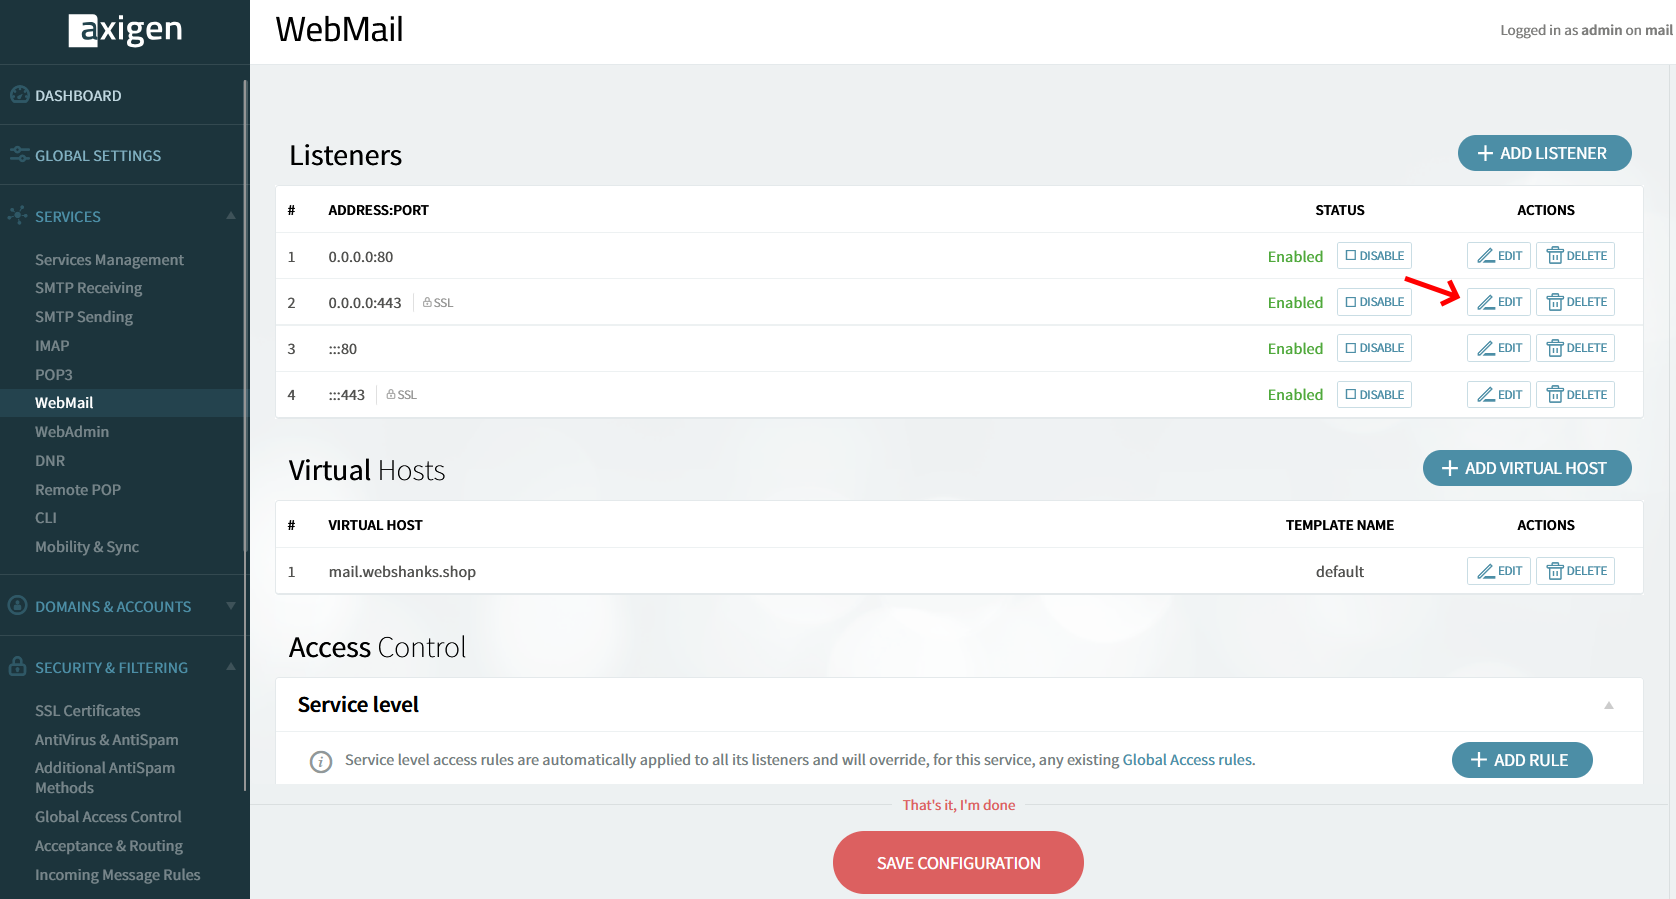
Choose the SSL Settings tab and from the dropdown menu, choose the SSL we created earlier.

Then click Save Configuration.
We will also want to set the redirection of http to https.
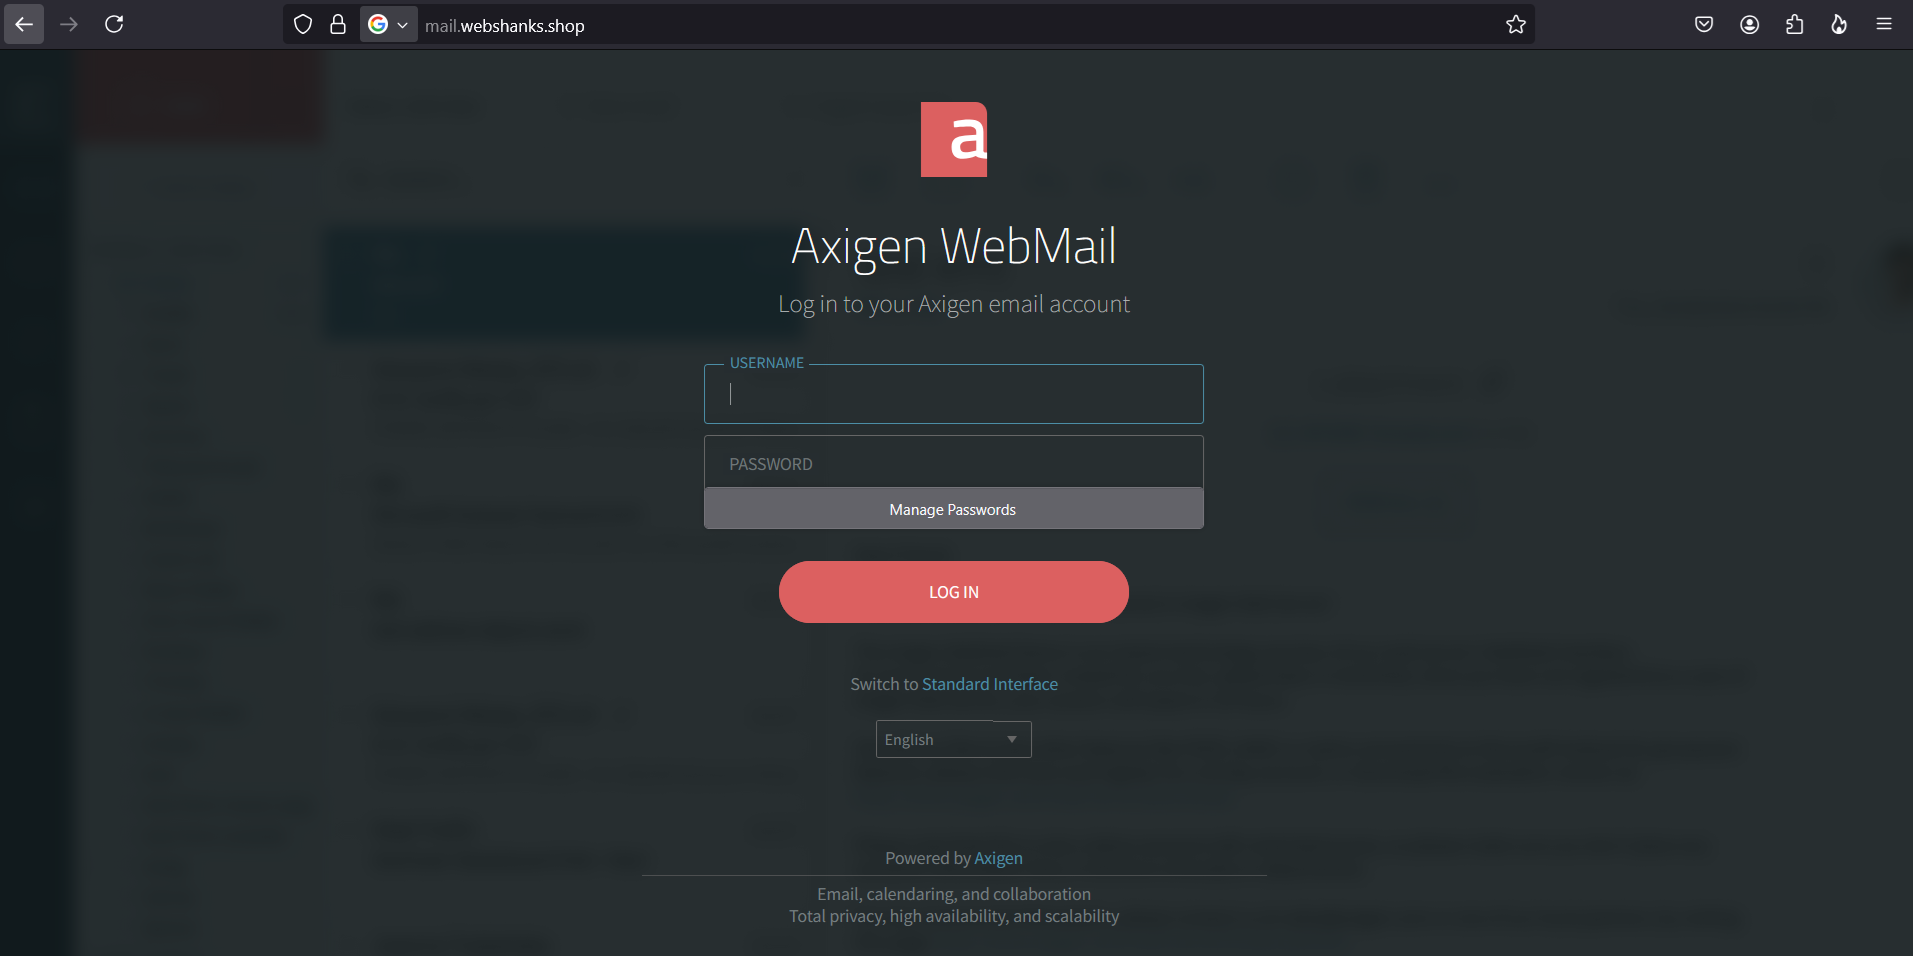
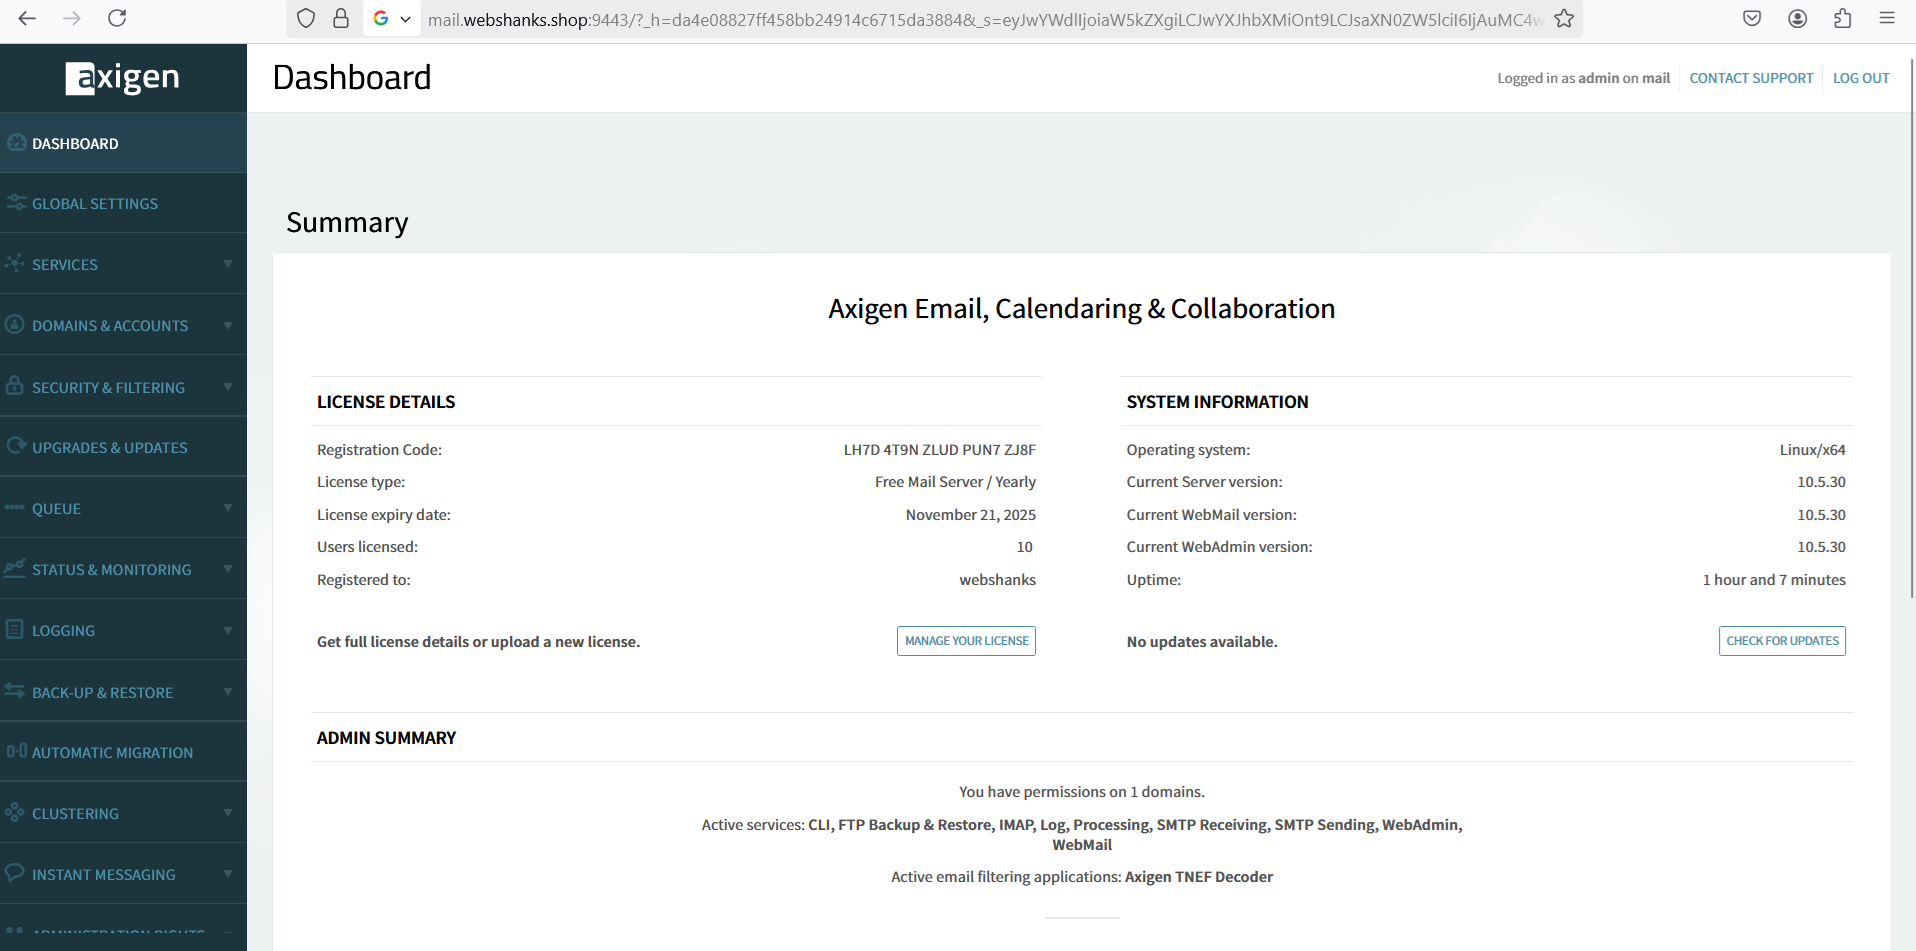
Now you can access your webmail!
Next is for the WebAdmin.
Under the Services page, click WebAdmin and edit 0.0.0.0:9443.
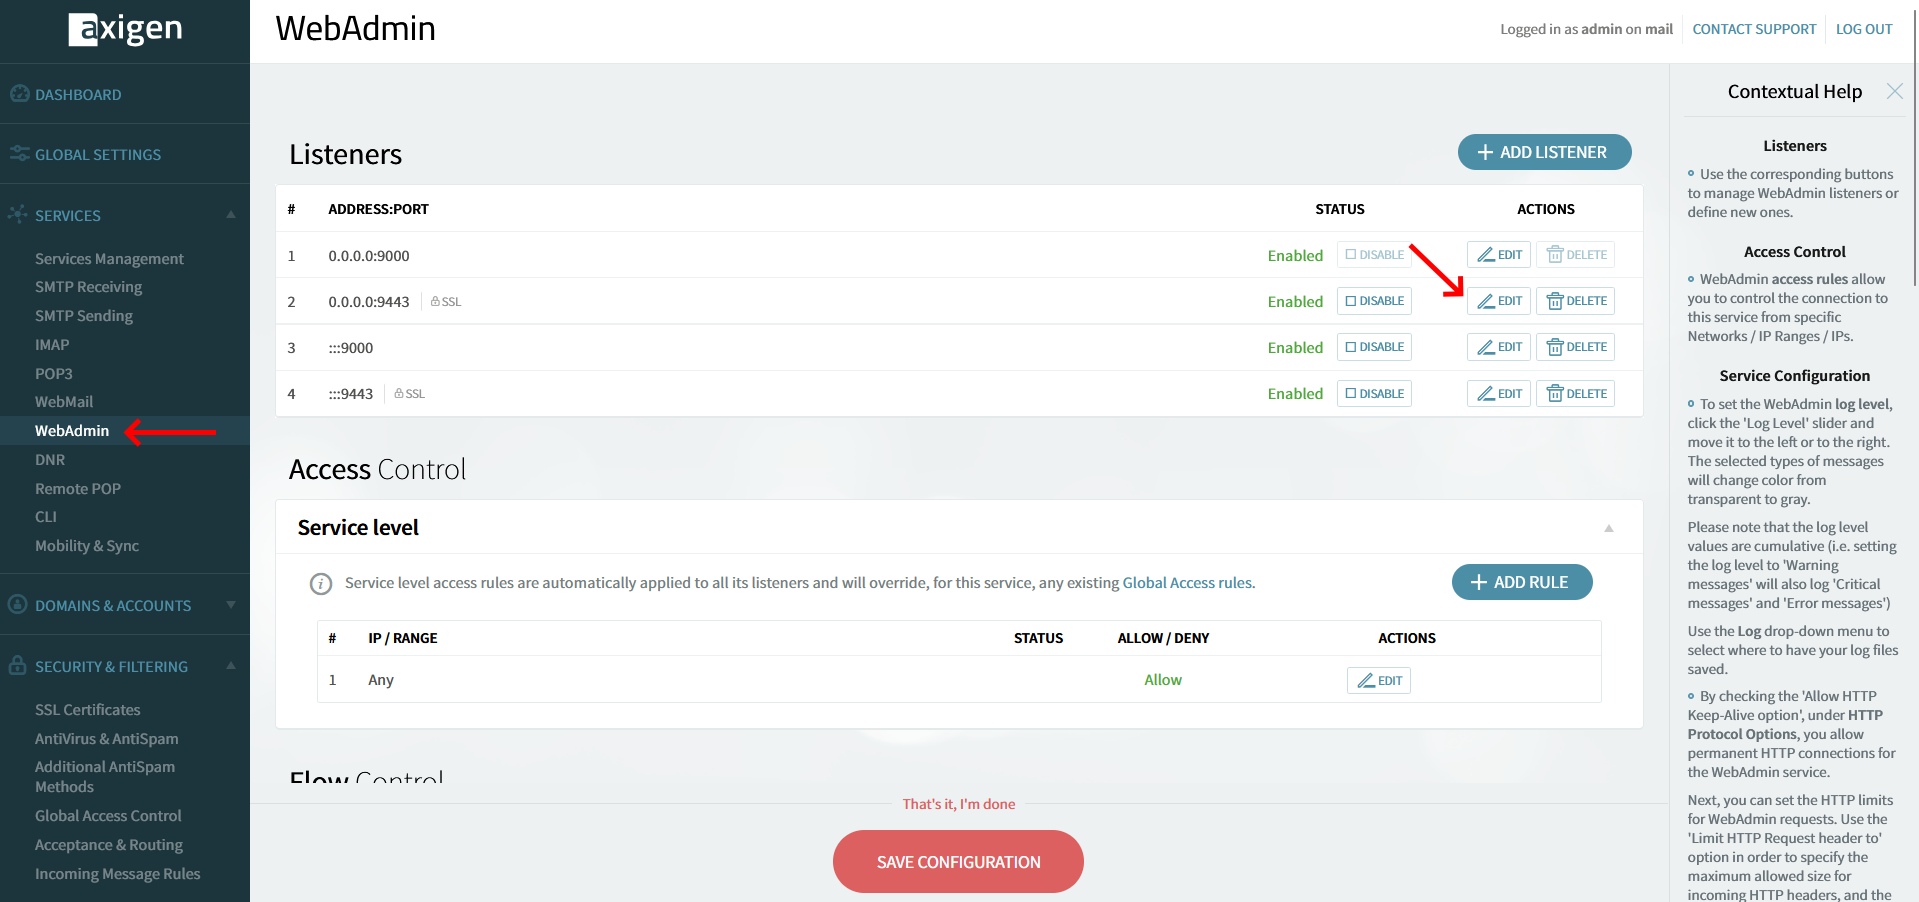
Then click on SSL Settings Tab on the dropdown menu and choose the SSL we setup earlier.
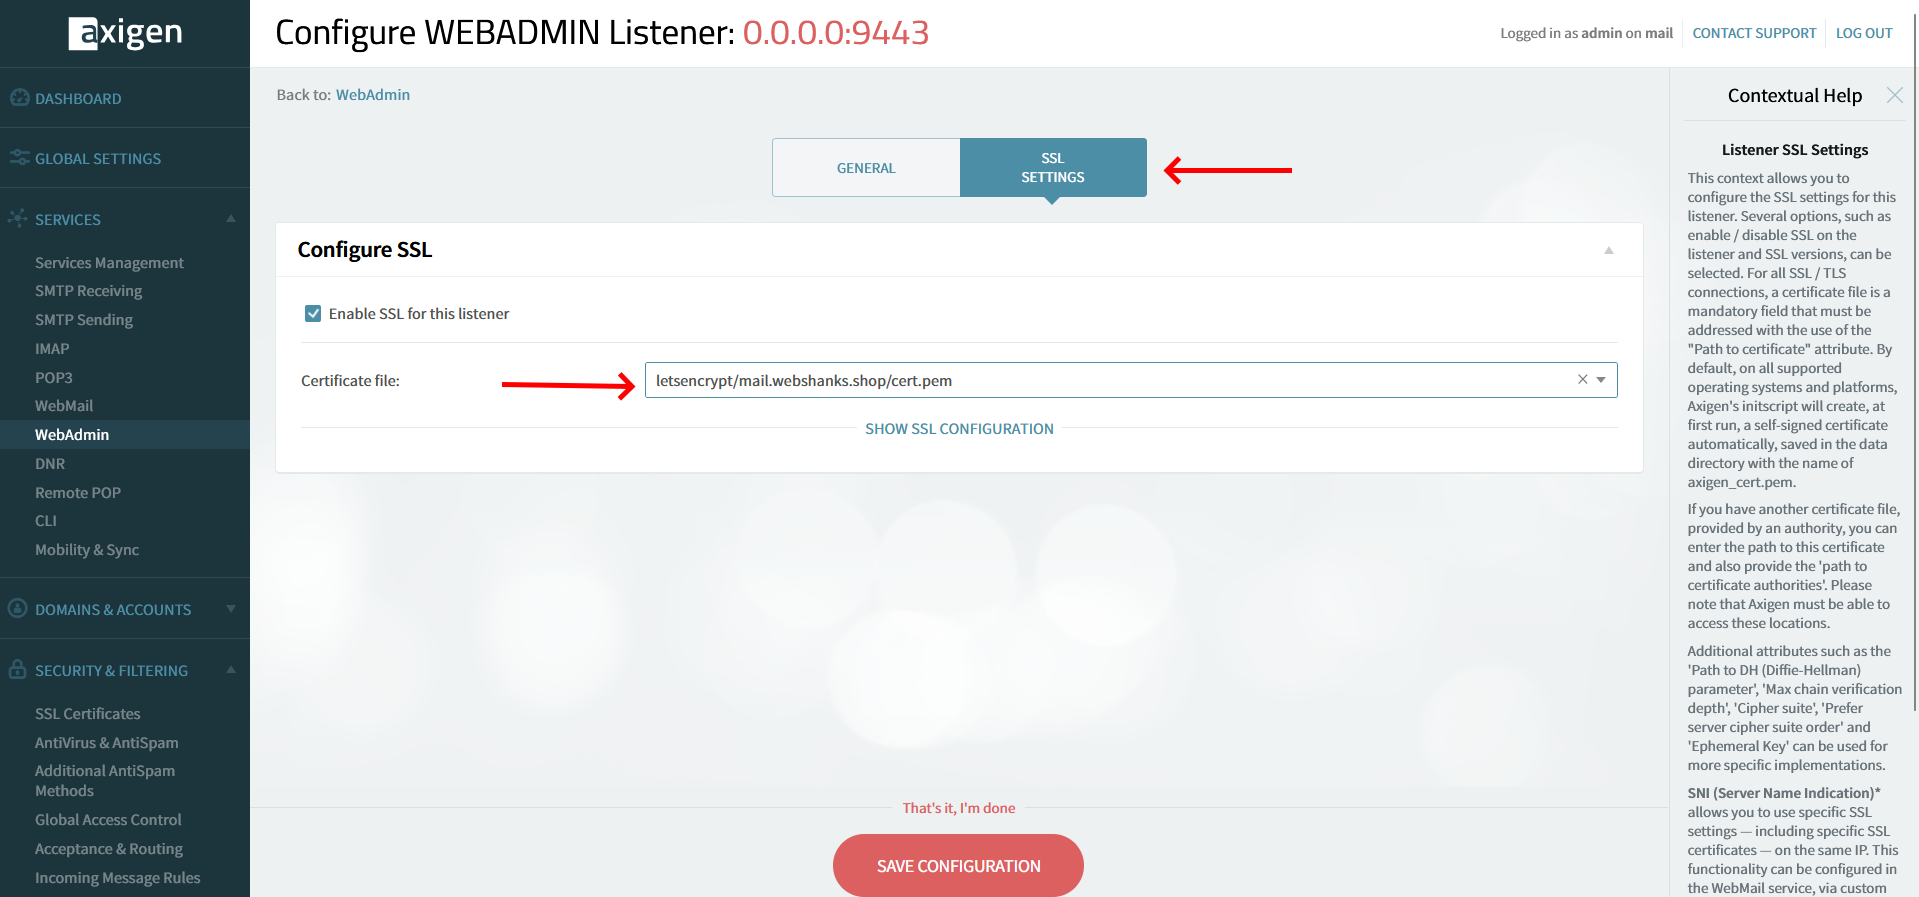
Save the configuration.
Now we can securely access our WebAdmin at port 9443!
Step 8. Configure DKIM
Next, we need to add our DKIM to complete our authentication methods. Without DKIM, your emails risk being marked as spam or spoofed by attackers.
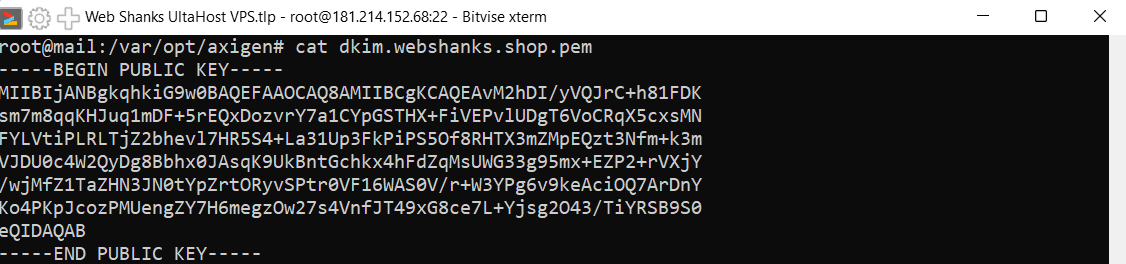
Generate DKIM Key: Use the command line to generate a DKIM key for your domain.
cd /var/opt/axigen
openssl genrsa -out dkim.privkey.webshanks_shop.pem 2048
openssl rsa -in dkim.privkey.webshanks_shop.pem -outform PEM -pubout -out dkim.pubkey.webshanks_shop.pem
chmod 600 dkim.*.pem
chown axigen:axigen dkim.*.pem
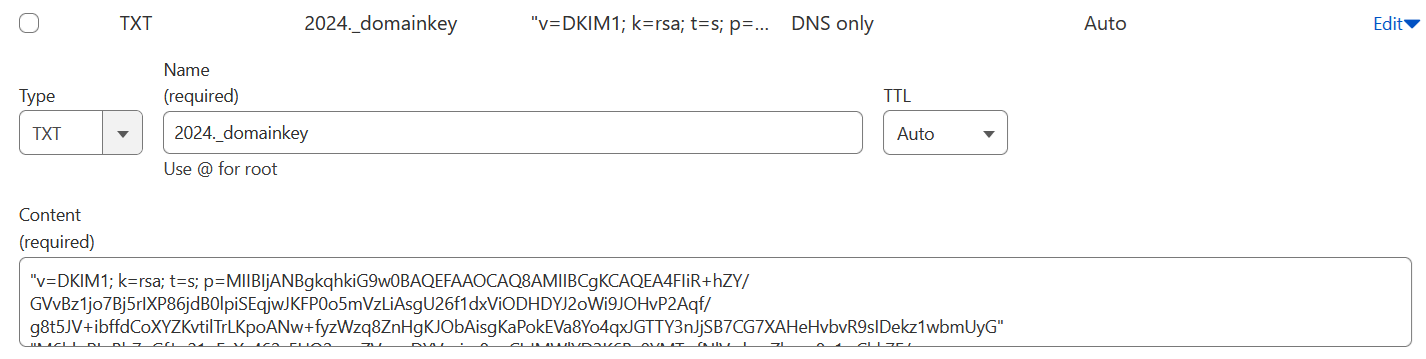
Add DKIM Record: Copy the key to your domain’s DNS settings as a TXT record.
Run the following command to get your DKIM public key.
cat dkim.pubkey.webshanks.shop.pem
Verify Configuration: Use tools like MXToolBox to verify the DKIM setup.
This is what your DKIM looks like on your DNS.
Finally, we will bind our DKIM with our sending domain.
For Incoming Messages
Security & Filtering > Acceptance & Routing > Advanced Settings Rule name: “Check_DomainKeys_and_DKIM”
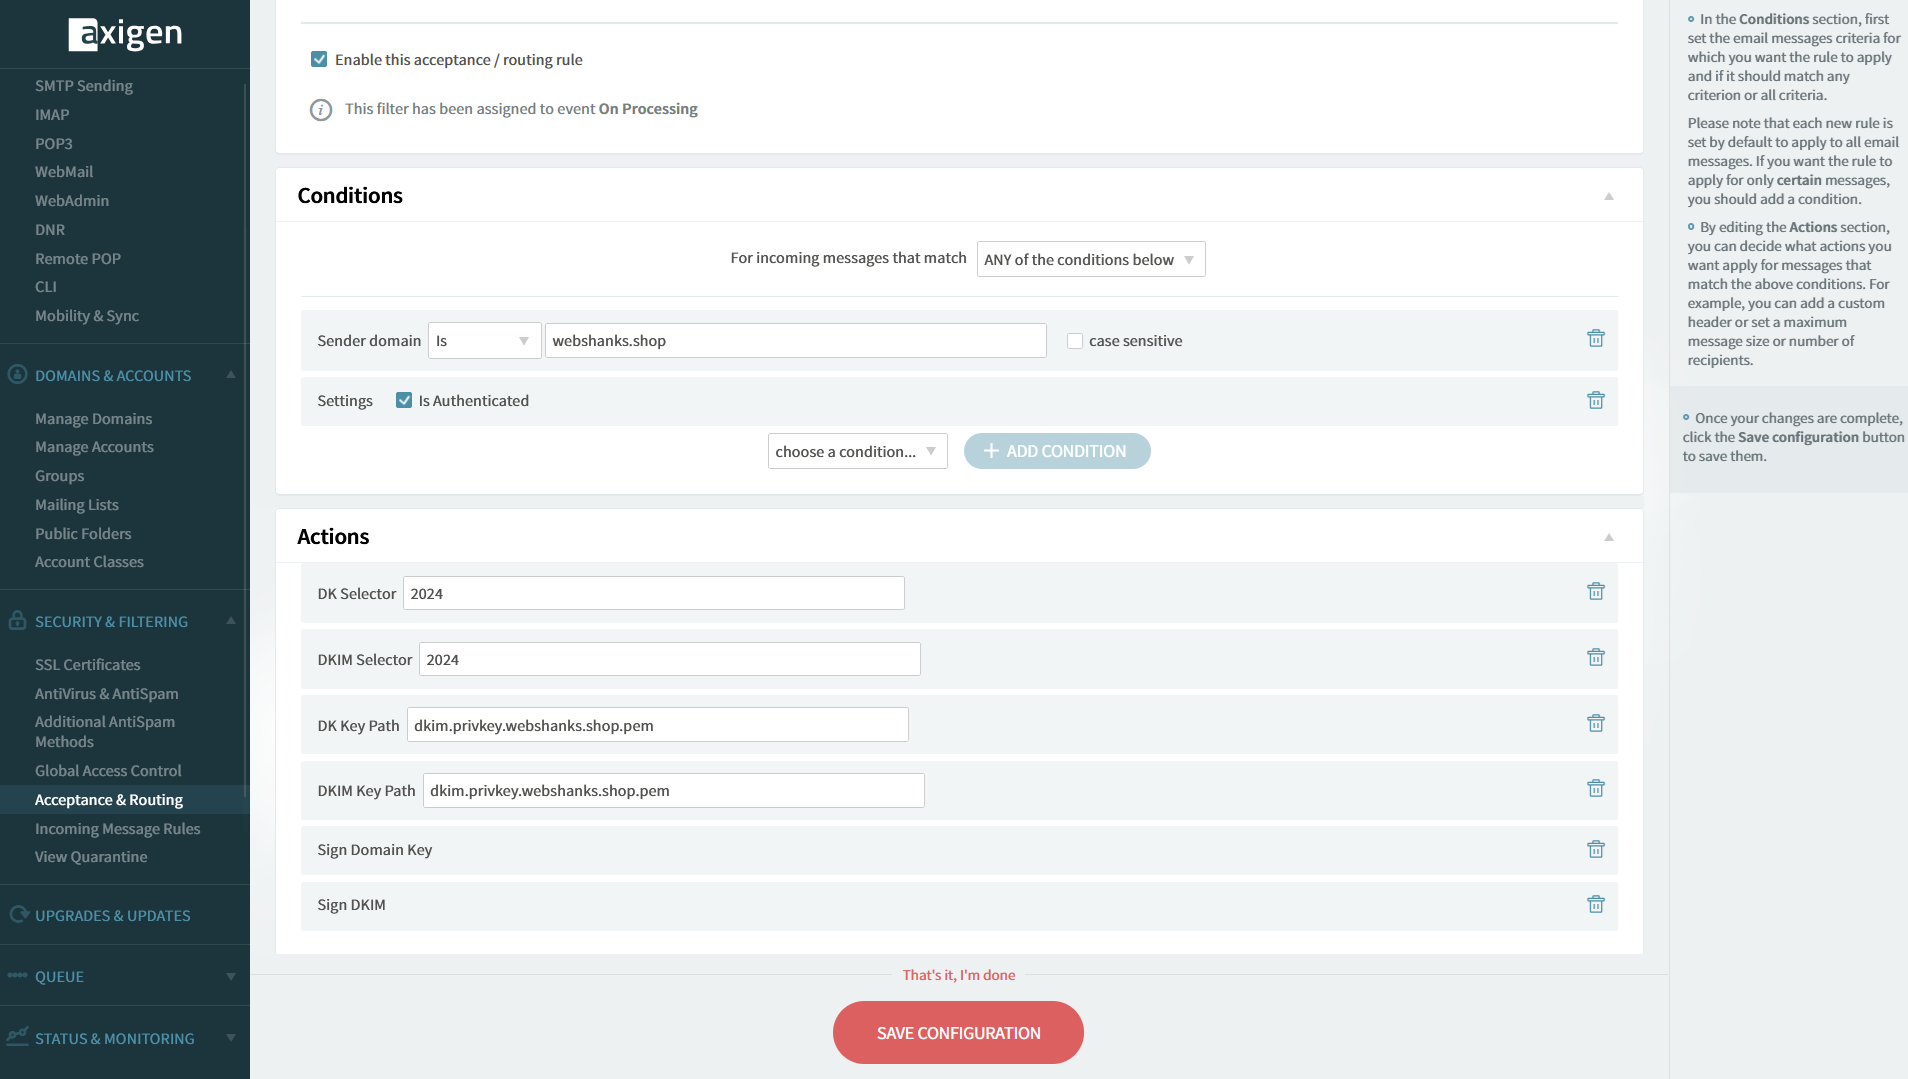
For Signing Outgoing Messages
Security & Filtering > Acceptance & Routing > Advanced Settings Rule name: “DomainSign-webshanks”
Conditions (ALL):
Sender domain is domain.com
Connection is authenticated (ticked)
Actions:
DK Selector: 2024
DKIM Selector: 2024
DK Key Path: dkim.privkey.domain.com.pem
DKIM Key Path: dkim.privkey.domain.com.pem
Sign Domain Key
Sign DKIM
Be sure to change domain.com to your own domain.
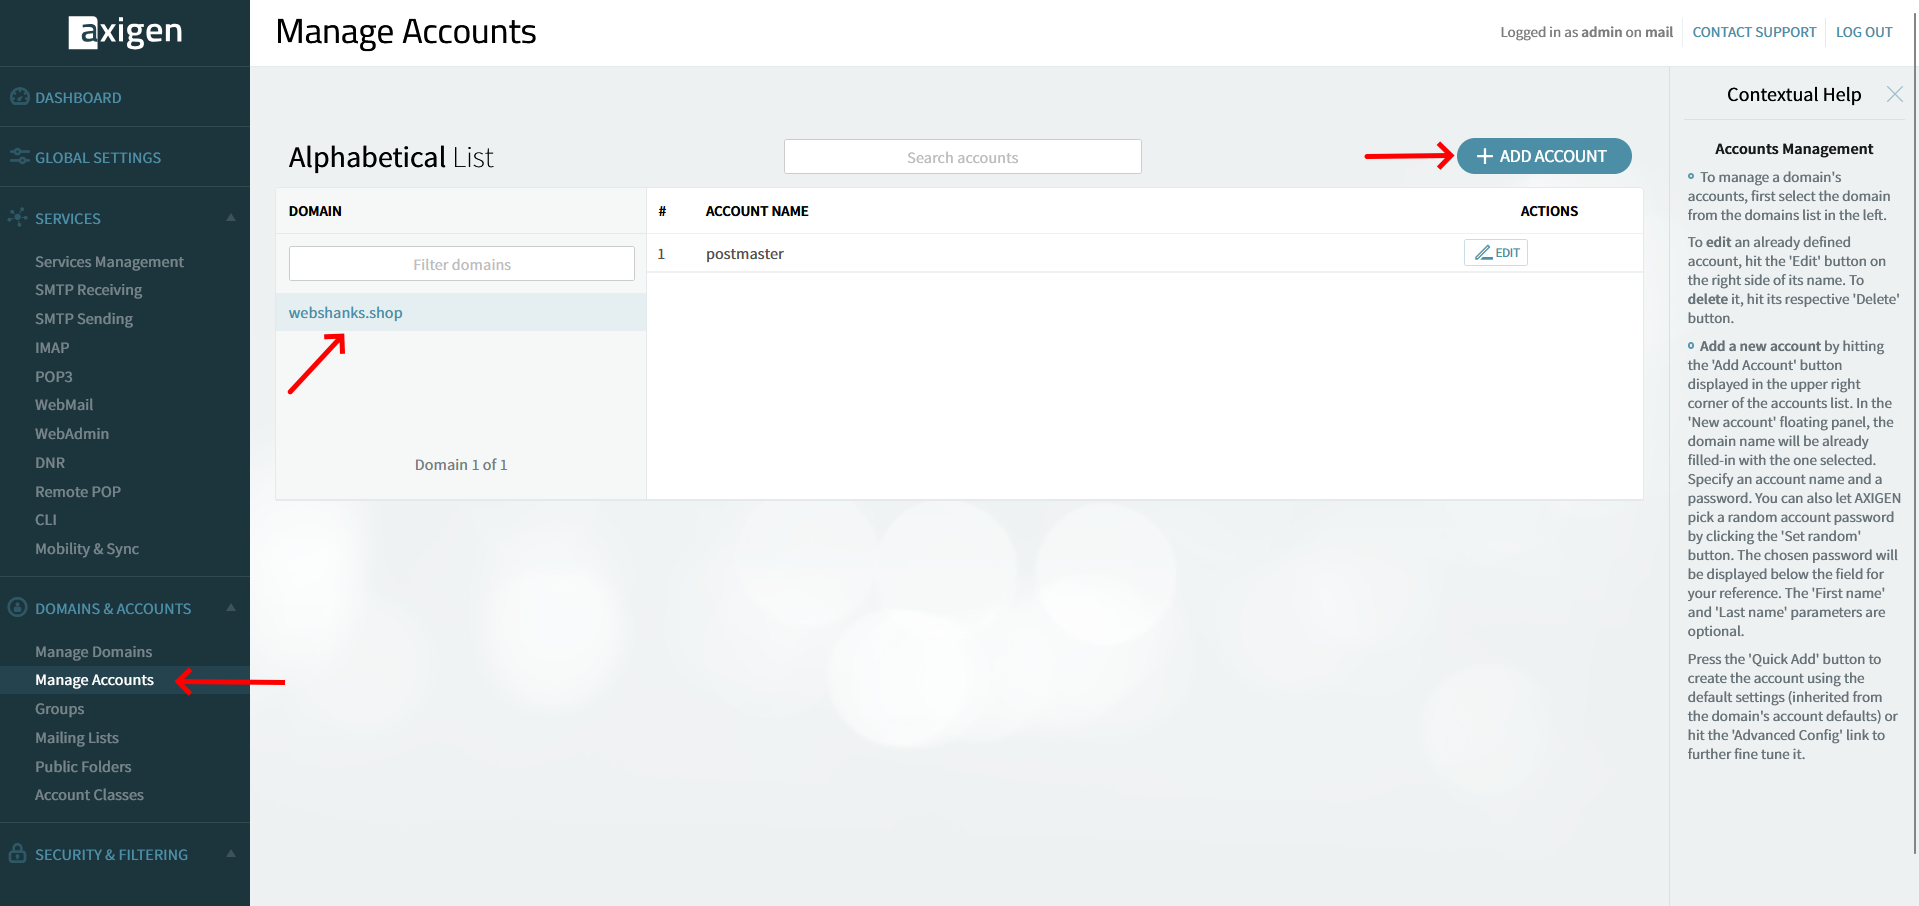
Step 9. Add User
Let’s add an email user.
Go to Domains & Accounts > Manage Accounts > Click your Domain > Add Account
- Fill in the required information:
- First and Last Name
- Account Name
- Account Password
Click Quick Add to add your email account.
By default, Axigen adds a message to your email with a link. We will disable this to improve our deliverability rate.
Go to Domains & Accounts > Manage Domains > Message Appender
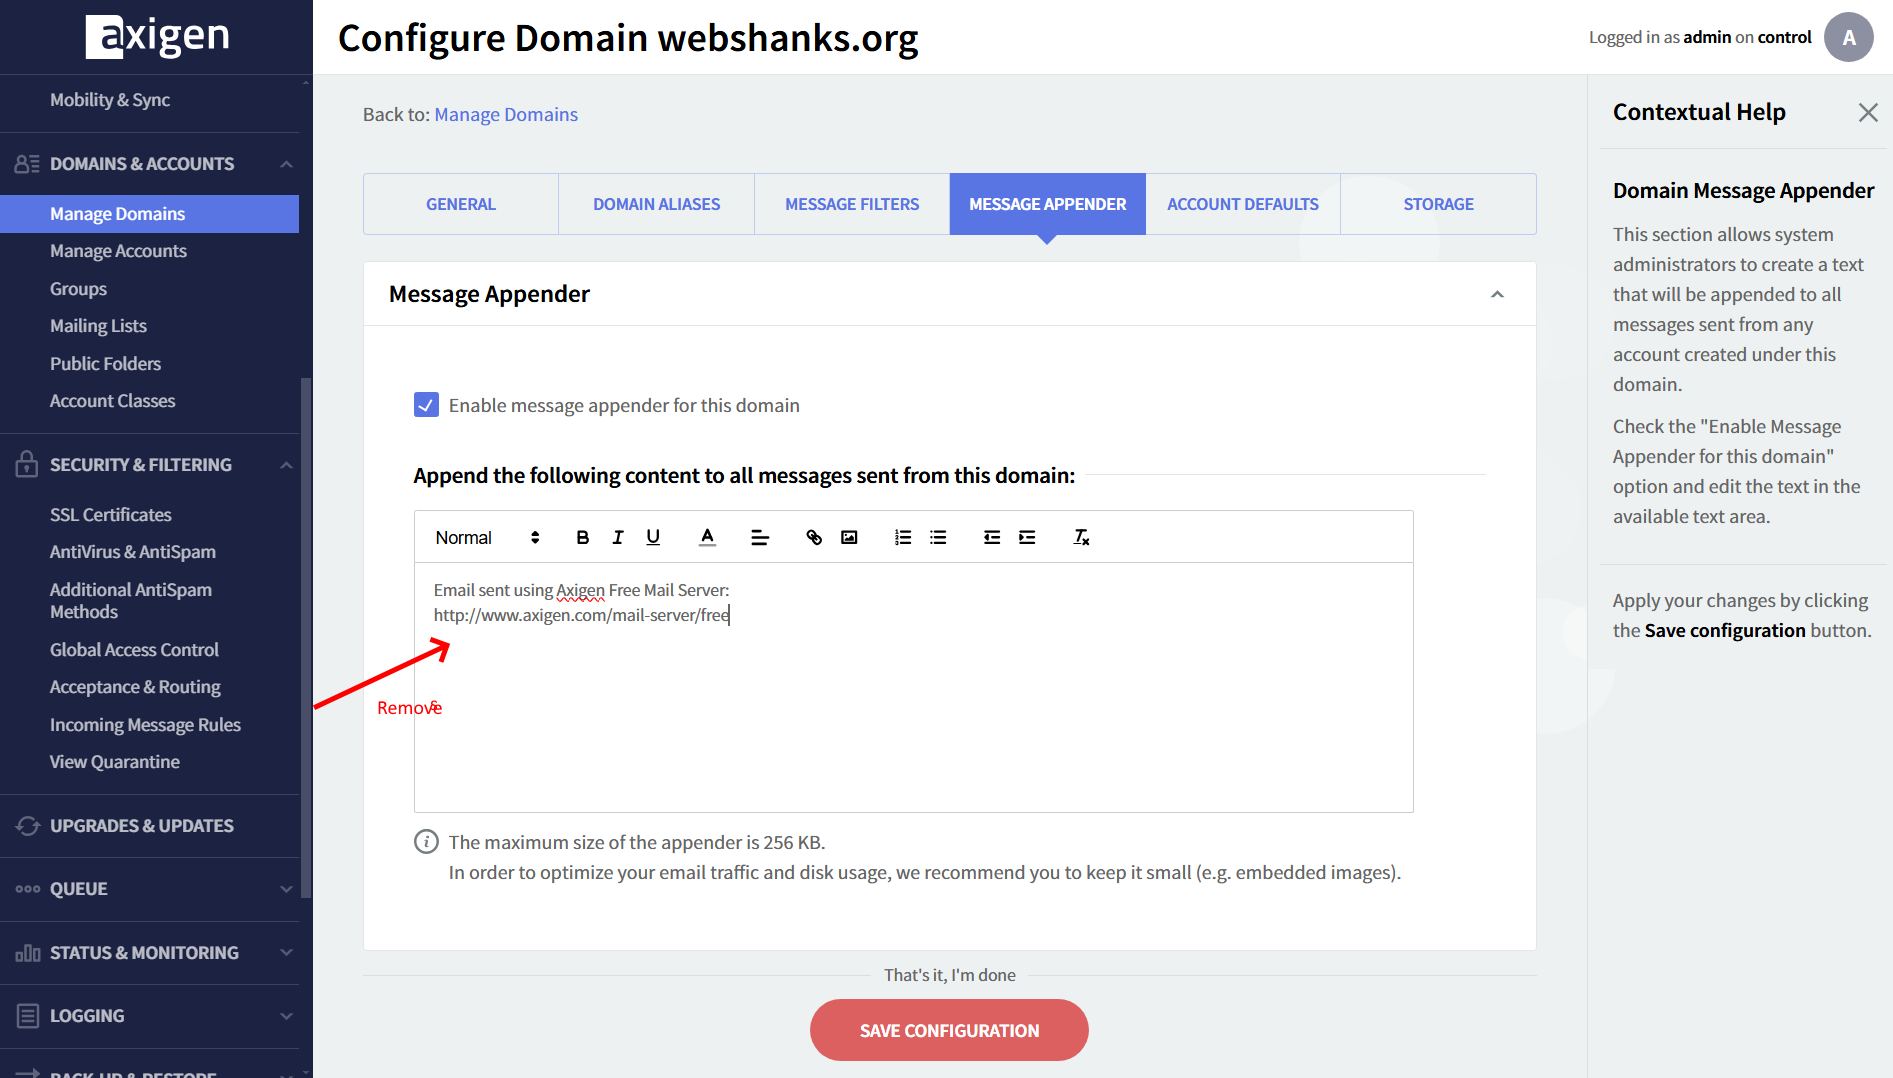
Be sure to save your configuration.
Step 10. Test Email Deliverability
Now that we have added an account, it’s time to check our email deliverability.
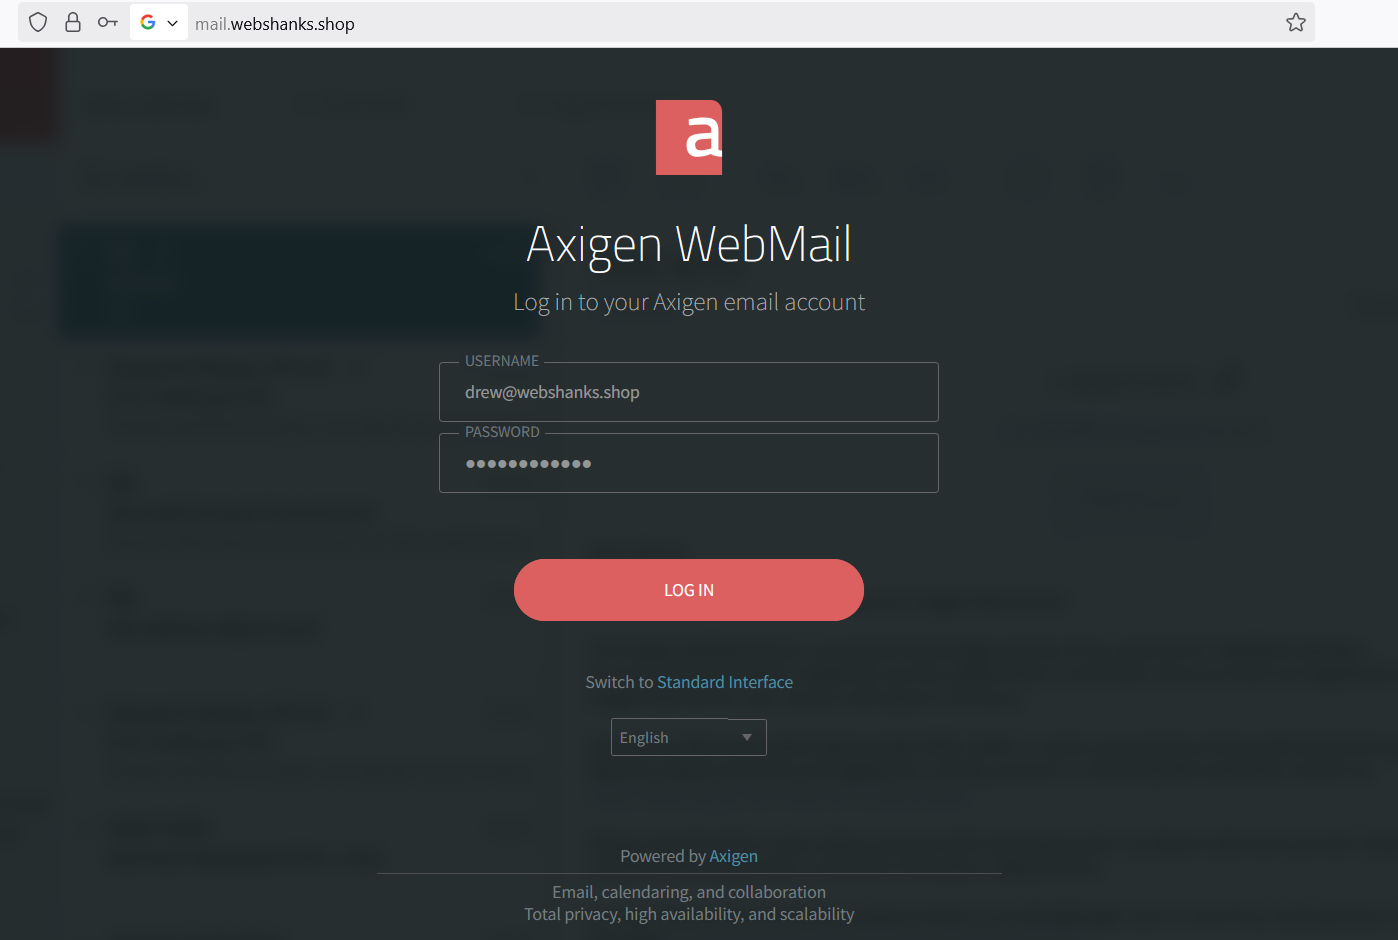
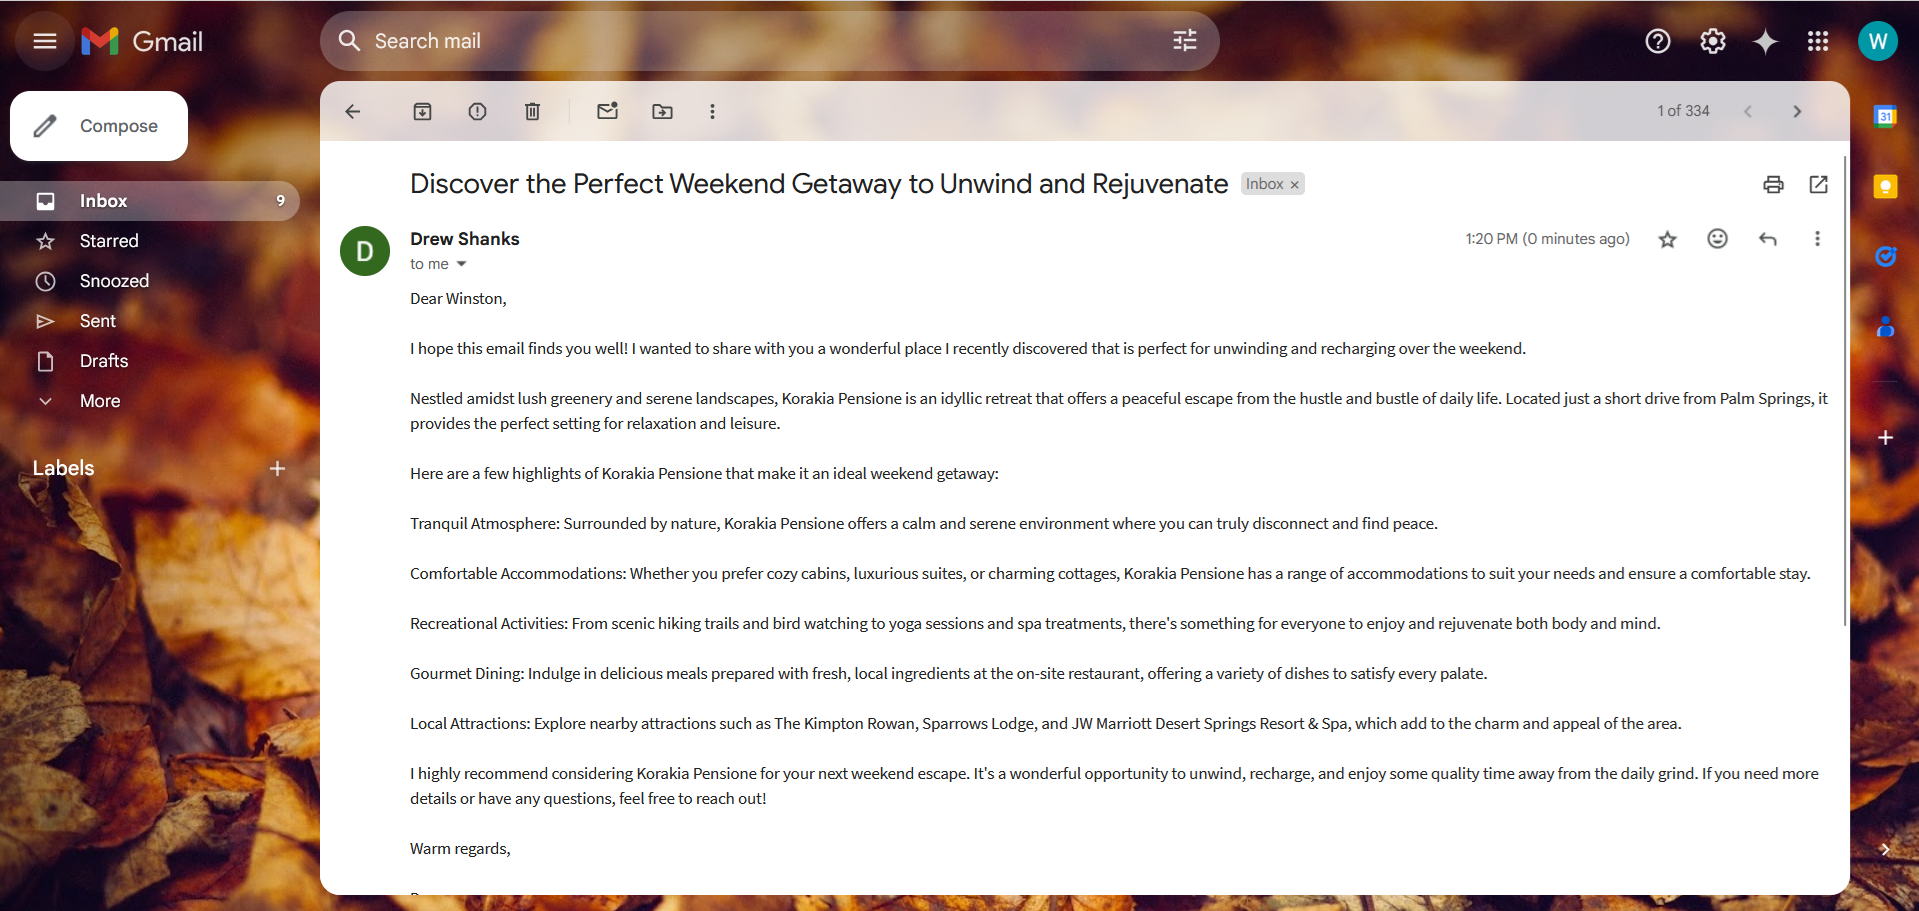
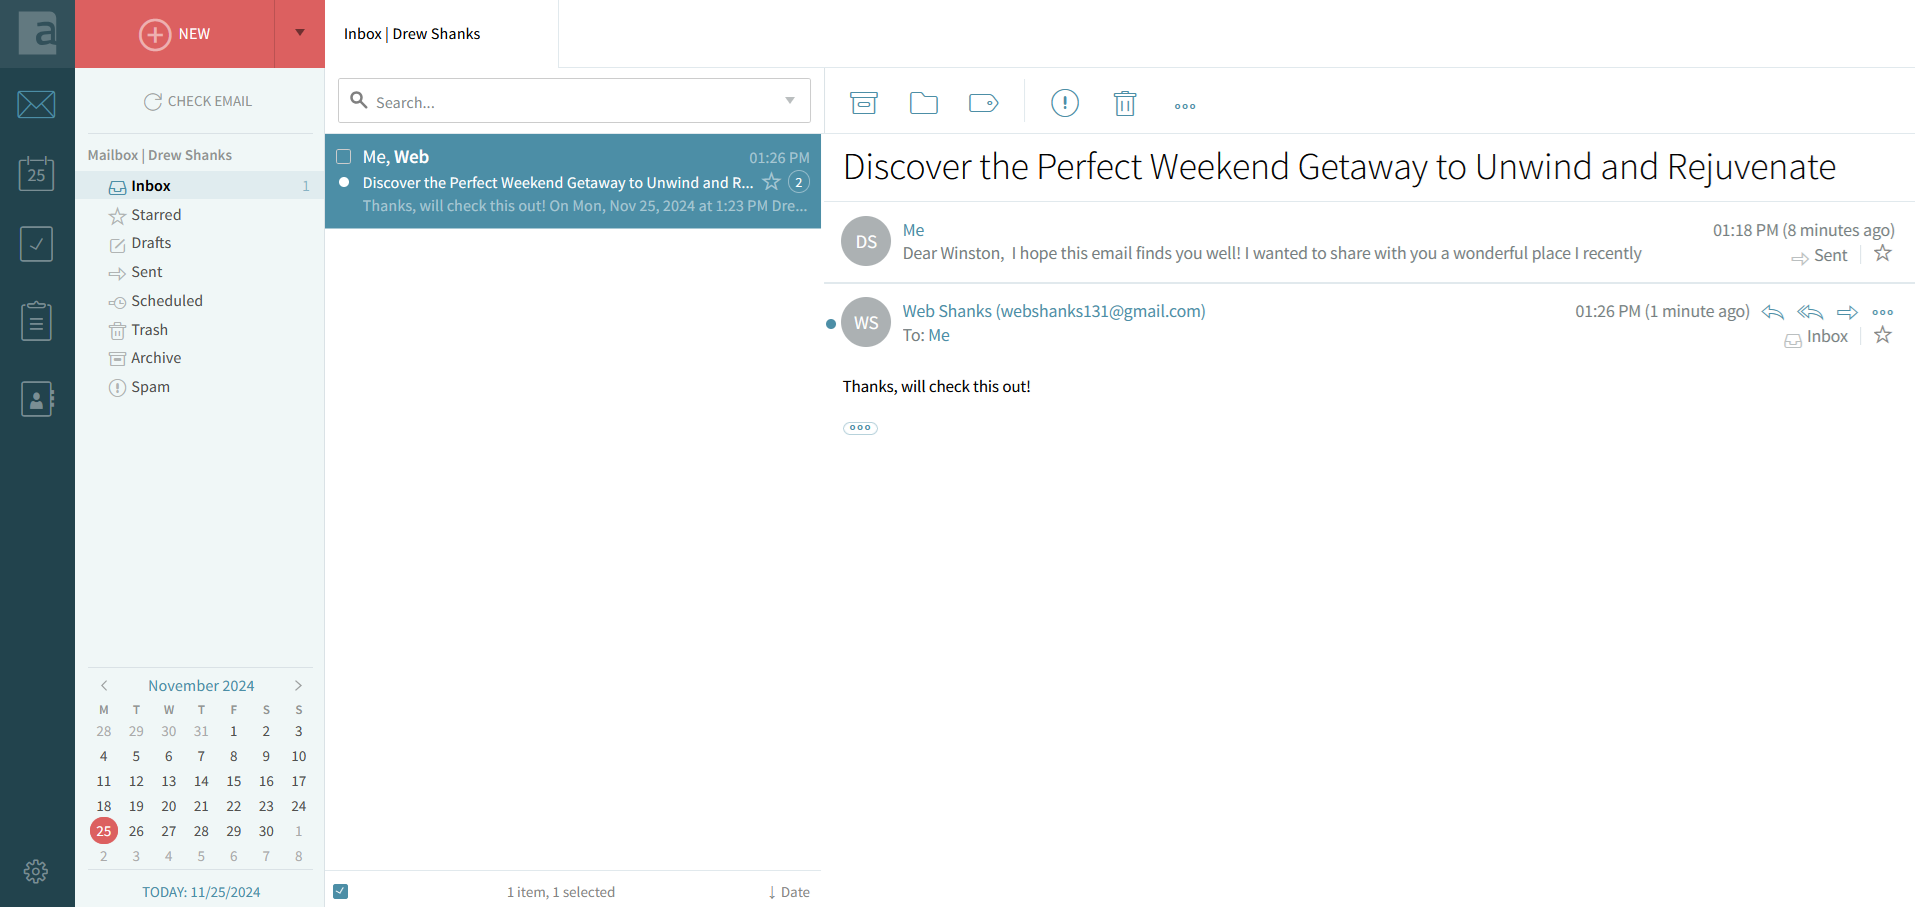
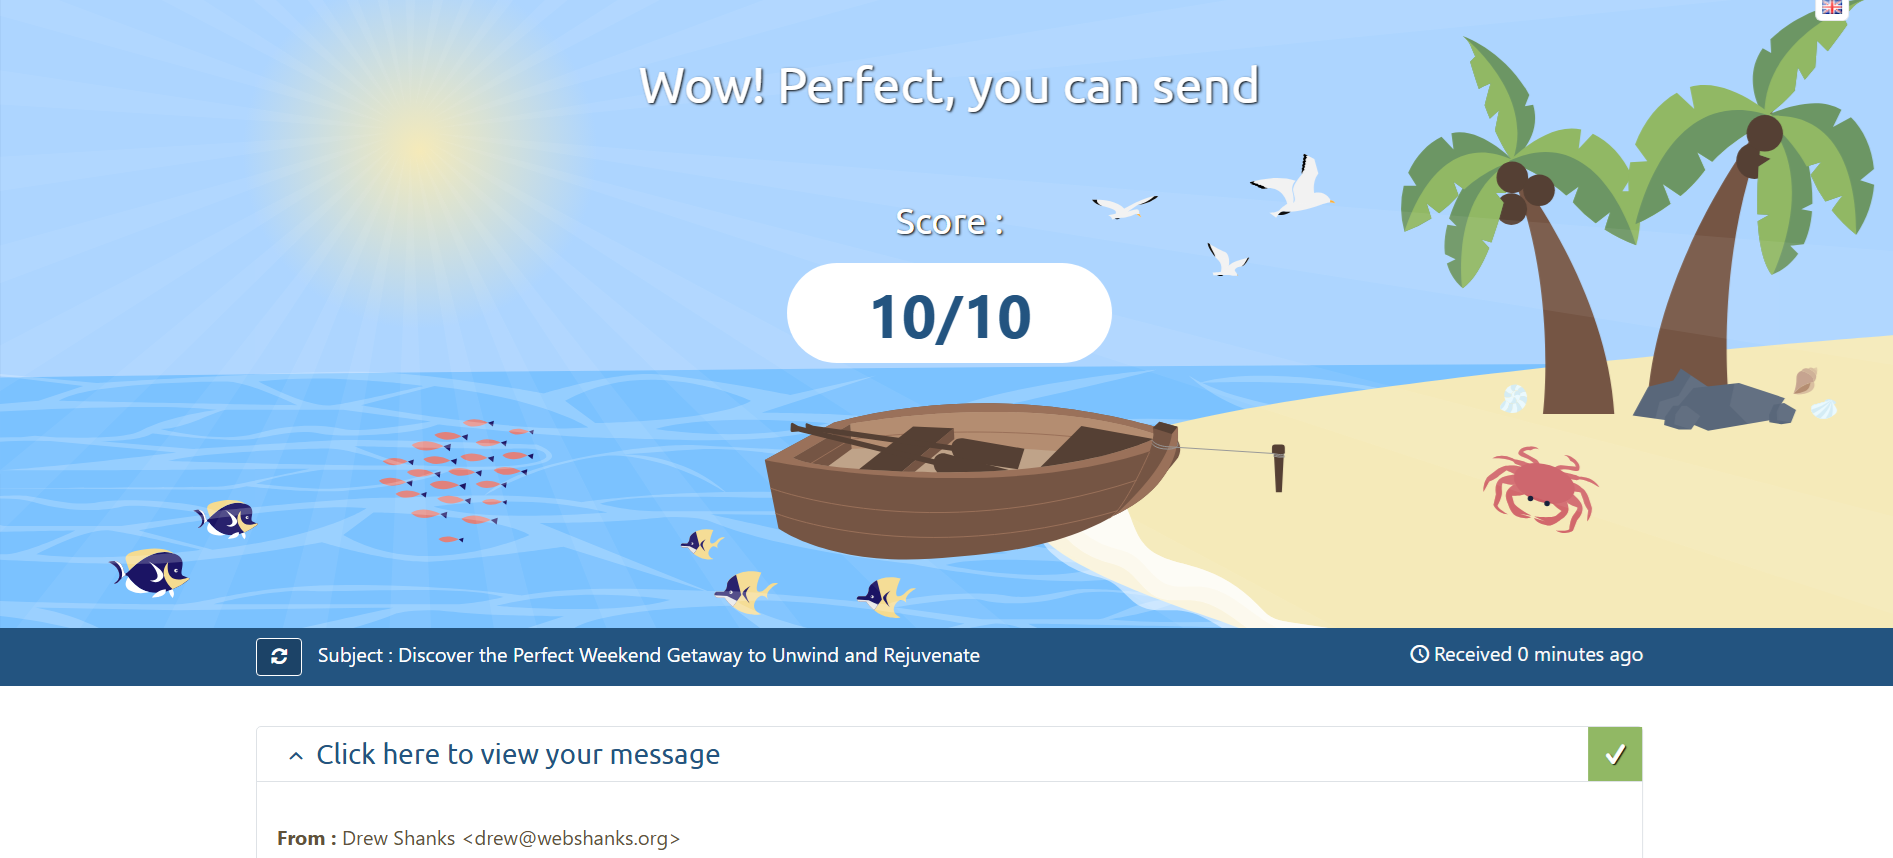
Send a Test Email: Use WebMail to send an email to an external address. Your webmail is located at mail.yourdomain.com
Let’s check our score. Use Mail Tester to assess spam risk.
Verify Incoming Mail: Send an email to your Axigen account and confirm receipt.
FAQs
Can I use Axigen with other operating systems?
Yes, Axigen supports multiple Linux distributions and Windows.
How do I secure my Axigen installation?
Use SSL/TLS certificates and strong passwords. Refer to this guide for SSL setup.
How do I back up my Axigen data?
Use Axigen’s built-in backup tools or create VPS snapshots.
Conclusion
Setting up Axigen on UltaHost VPS with Debian 11 is a straightforward process that provides robust email services for personal or business use. By following the steps outlined in this guide, you’ll have a fully functional email server in no time.
Explore more about VPS setups in our tutorial library.
please i can generate dkim with command line
You can follow the command I listed.
Thanks for the great tutorial. Is there any limits applied for sending volume like per minute, per day, etc.
It really depends on the VPS you are using.