In this step-by-step guide, I will walk you through how to add a website in CyberPanel, a free and open-source control panel for web hosting.
This tutorial will provide you with all the information you need to get your website up and running in no time. So, grab a cup of coffee, sit back, and let’s get started!
What you’ll need:
- A running server with CyberPanel installed. (My server is Contabo VPS running Ubuntu 22.04 LTS)
How to Add a Website in CyberPanel
Step 1: Login to Your CyberPanel
First, you need to login to your CyberPanel. You can login as a either an administrator or a user that has a full access on Website Management.
Step 2: Create a Website
From your dashboard, go to Websites > Create Website
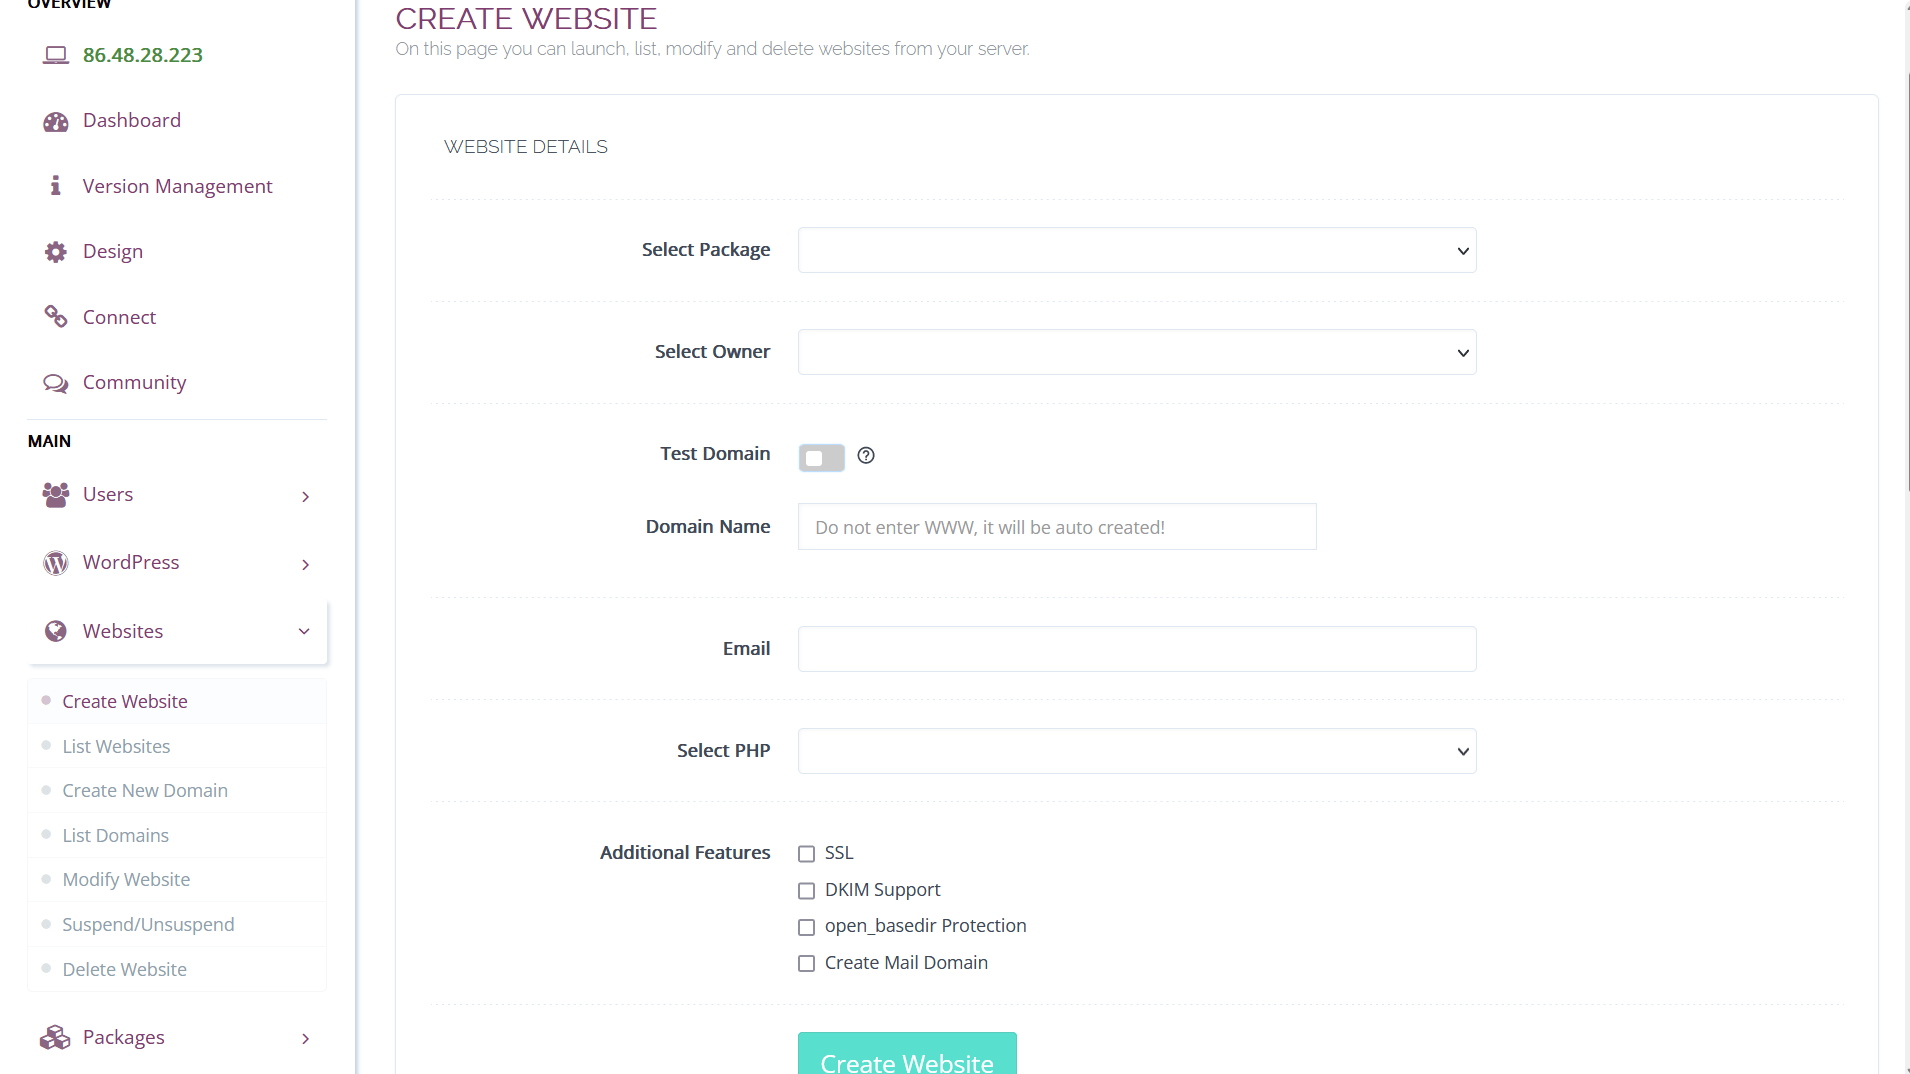
Fill in the required fields.
- Select Package – Default or your desired package (Default disk size is 5GB; Bandwidth 5GB) Learn more.
- Select Owner – Select the owner of the website you want to create
- Test Domain – Toggle off unless you have an active WordPress Manager subscription
- Email – Your active email
- Select PHP – PHP version you want to install
- Additional Features – Select SSL, DKIM Support and open_basedir Protection
After filling out the required fields, click Create Website.

Wait for the process to be completed.

Now we successfully created website in CyberPanel! Regardless of what CMS you will be using, these steps are required.
Afterwards, you may install WordPress, Joomla, PrestaShop, Magento, Drupal and other CMS you like. You can also migrate from your hosting to your Cyberpanel.
YouTube Version
Conclusion
Congratulations! You have successfully learned how to add a website in CyberPanel. With the easy-to-use interface and powerful features, CyberPanel is an excellent choice for managing your web hosting for free.
By following these step-by-step instructions, you can create a new website, set up domains and email accounts, and manage your files and databases with ease.
I hope this guide has been helpful, and if you have any questions or feedback, feel free to leave a comment below.
Please bro, i need your assistance, i uploaded a php website on my cyberpanel but my website is not working but html website works perfectly, please how do I solve the issue so my php website can work
Maybe your php is not working. Have you tried it on localhost? or it requires certain php version?