 If you want to host a large amount of data, setting up a storage VPS on DartNode is a good choice. You can pick a plan that fits your needs, with options like HDD and SSD storage.
In this tutorial, I will show you how to buy and setup DartNode Storage VPS and use it for your project.
Step 1. Get a DartNode Storage VPS Plan
Picking the Right Storage Setup

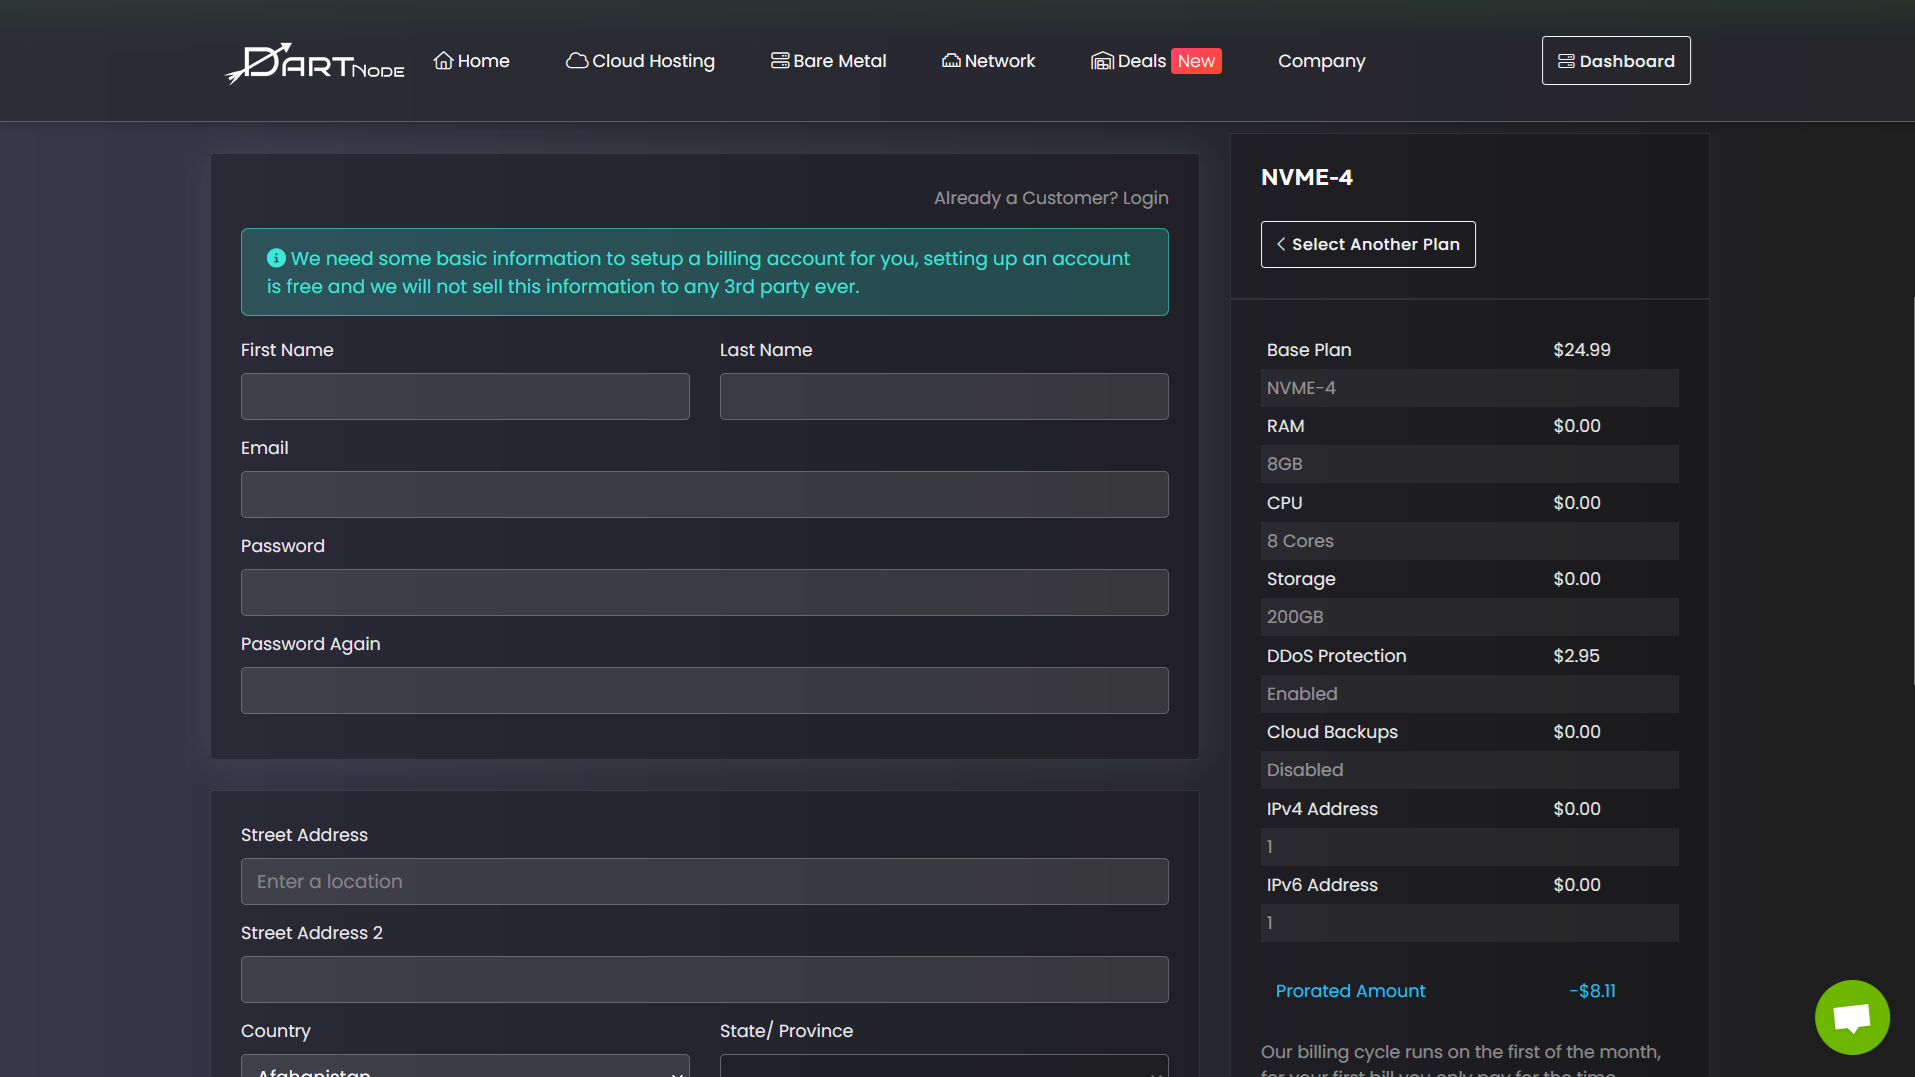
When you pick your storage plan on DartNode, you have options like HDD storage up to 32 TB and SSD storage around 450 GB. For beginners, starting with something like VPS1 is a good choice. You can also add extra block storage if you need more space later. Remember to name your host and pick the system you want, like the latest Alma Linux.
You can add protections against attacks by turning on D protection. If you want, you can also enable cloud backups, but this is optional. You get to choose IPv4 and IPv6 addresses as well.
Knowing Prices and How to Save
DartNode offers discounts that you can claim, so keep an eye out to save money. When you finish setting up your server, the payment can be made with PayPal, debit cards, cryptocurrencies, or services like Alipay. After payment, wait for your confirmation email to know when your VPS is ready.
Make sure to check your VPS IP address for any blacklist issues after setup. You can manage your block storage right from your dashboard, attach or detach it when needed, and customize your setup easily.
Step 2. Configuring VPS Specifications

Naming Your Server
Start by setting a clear and unique name for your VPS. This helps you identify it easily later on. For example, use something like cp.yourwebsite.org or a simple label you prefer.
Choosing Your Operating System
Pick the operating system you want to use. You can select from the latest versions available. AlmaLinux is a good choice for stability and easy updates.
Turning On DDoS Protection
If you want to keep your server safe from denial-of-service attacks, enable DDoS protection. This will help block harmful traffic before it reaches your VPS.
Activating Cloud Backup
You have the option to enable cloud backups. This ensures your data is saved in the cloud regularly. You can turn this off if you prefer to handle backups on your own.
Expanding Storage Capacity
You can add extra storage to your VPS by attaching block storage. For instance, include up to 32 TB of HDD and additional SSD storage. Manage your attached storage easily through your dashboard.
Setting Up Extra IP Addresses
Customize your network by adding both IPv4 and IPv6 addresses. This allows your VPS to handle more traffic or different services separately. You can add or remove IPs as needed.
Step 3. Setting Up Your Account and Paying
Signing In or Registering Your Account
To start, either log in if you already have a DartNode account or fill out the sign-up form to create a new one. Logging in lets you move directly to your order, while creating an account takes a few steps to get you ready. Make sure you enter the needed info correctly to avoid delays.
Checking Your Payment Methods
Once logged in, choose from several payment options. You can pay using PayPal, debit cards, cryptocurrencies, or other services like Alipay. Select the method that suits you best. The payment process is straightforward—just follow the prompts to complete it.
Finalizing Your Order and Confirming
After payment, watch for a confirmation email that tells you when your VPS is ready. You can also check your DartNode dashboard to see the status. When your storage VPS is active, verify the IP address is clear of blocklists before using your server. This ensures smooth operation from the start.
Step 4. Managing Your DartNode VPS
Logging Into Your Control Panel
To start managing your VPS, go to DartNode’s website and log into your dashboard. From there, you can see all your active services and check the status of your VPS. This is where you will access settings and control features for your storage VPS.
Verifying Your IP Status
Always check your VPS’s IP address to make sure it’s not blacklisted or blocked. You can use an IP check tool like our Blacklist Checker tool. If the IP is clean, your VPS will be ready for use without network issues.
Reviewing Your Storage Usage
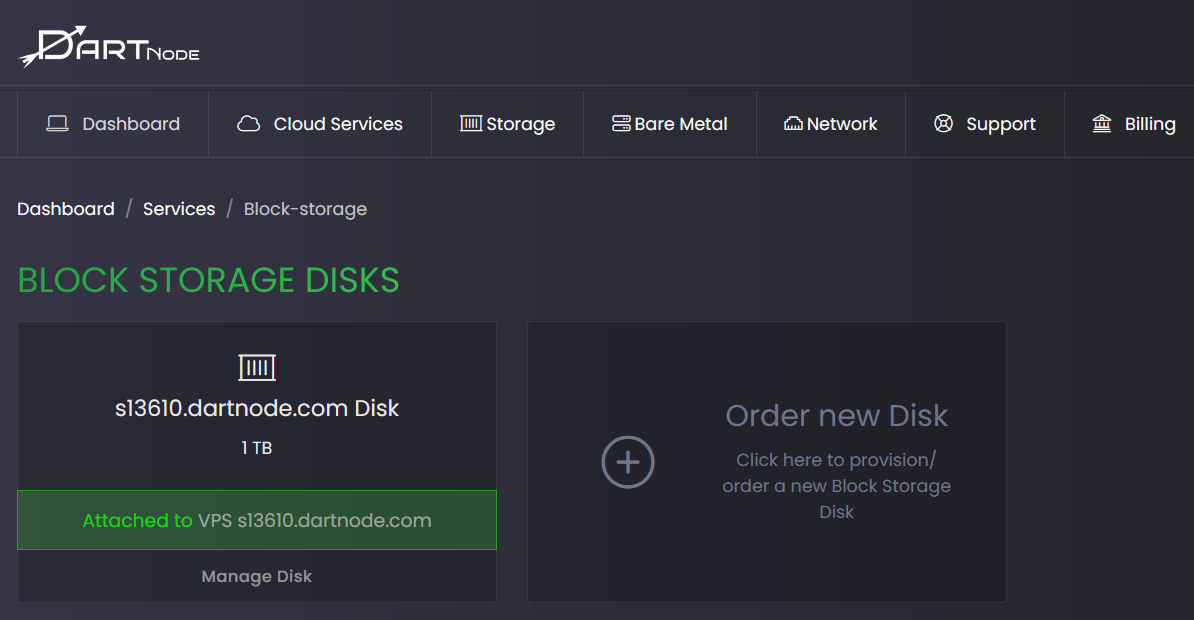
Within the dashboard, look under the storage section to see how much space you have. Your VPS will show both the main SSD storage and any attached block storage HDDs. You can manage and detach storage if needed, especially if you have multiple VPS accounts.
Step 5. Connecting to the VPS Using Bitvise
Inputting Your Server Details

Start by opening Bitvise and entering the IP address of your VPS in the “Host” field. Use port 22 for the connection. For the username, type root. Then, paste your VPS password into the password field. Before connecting, make sure to save the password for easier access next time.
Making a Secure Link
Click the Login button to establish the connection. When prompted, accept the server’s SSH key and save it to avoid repeated warnings. Once connected, open a new terminal window inside Bitvise to start managing your server securely.
Step 6. Setting Up and Mounting Block Storage
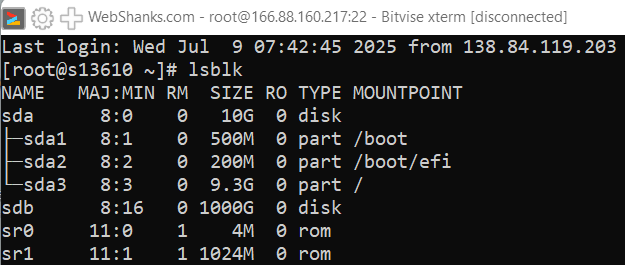
Verifying Your Storage Devices
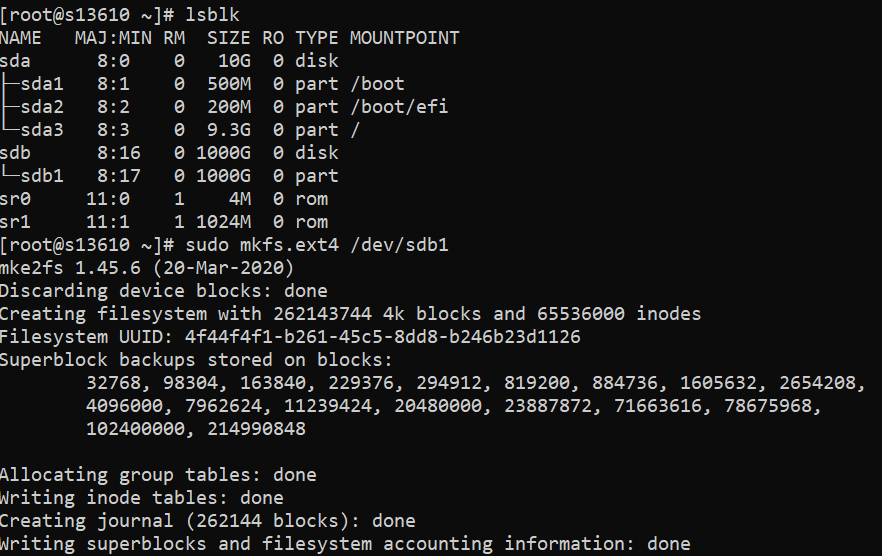
Use the command to list your storage devices.
lsblk
You should see your SSD and your block storage HDD listed, typically named something like sda for SSD and sdb for the additional block storage.
Dividing the Hard Drive into Partitions
To prepare the HDD for use, you need to create a partition.
Run
sudo fdisk /dev/sdb
Inside the fdisk prompt:
-
Press
n→ new partition -
Press
p→ primary -
Press
1→ partition number -
Press
Entertwice to use the full space -
Press
w→ write and exit
Welcome to fdisk (util-linux 2.32.1).
Changes will remain in memory only, until you decide to write them.
Be careful before using the write command.

Device does not contain a recognized partition table.
Created a new DOS disklabel with disk identifier 0x4ae5e56e.

Command (m for help): n
Partition type
p primary (0 primary, 0 extended, 4 free)
e extended (container for logical partitions)
Select (default p): p
Partition number (1-4, default 1): 1
First sector (2048-2097151999, default 2048):
Last sector, +sectors or +size{K,M,G,T,P} (2048-2097151999, default 2097151999):

Created a new partition 1 of type 'Linux' and of size 1000 GiB.

Command (m for help): w
The partition table has been altered.
Calling ioctl() to re-read partition table.
Syncing disks.
Setting Up the Filesystem Format
Next, format the new partition to prepare it for data. Use the command:
sudo mkfs.ext4 /dev/sdb1
This creates an ext4 filesystem on your partition, which is suitable for most Linux setups.
Making a Directory to Mount Storage
Create a folder where the partition will be mounted:
sudo mkdir -p /mnt/blockstorage
This is the directory where you will access your new storage.
Mounting Your Partition to the Directory
Mount the partition to your folder with:
sudo mount /dev/sdb1 /mnt/blockstorage
To keep this mount after reboot, edit the /etc/fstab file:
sudo nano /etc/fstab
Add this line at the bottom:
/dev/sdb1 /mnt/block_storage ext4 defaults 0 2
This line tells the system to mount the partition /dev/sdb1 to the folder /mnt/blockstorage using the ext4 file system. Save and exit the editor to apply this change.
Save and exit. Your partition will now mount automatically when your server starts.
Verifying Storage Mounts After Reboot
After editing fstab, reboot your VPS to test if the storage mounts correctly. Once the system restarts, run:
mount | grep /mnt/blockstorage
If the storage shows up, it means the mount is persistent. If not, check your fstab entry for errors or typos. You can also unmount manually with umount /mnt/blockstorage if needed and remove the line from fstab to undo persistence.
Step 7. Managing and Unmounting Storage
Removing Attached Block Storage
To remove block storage from your VPS, first go to your storage management section. Find the block storage you want to detach and click the option to disconnect it from your VPS.
Make sure the storage is not in use before detaching to avoid data loss.
Detaching the Mounted Drive
Before detaching storage, you need to unmount the partition. Use the command:
umount /mnt/blockstorage
After unmounting, open the file system table (fstab) and delete the line for the storage partition. This prevents it from mounting automatically on reboot.
Save the changes, and your storage will be fully unmounted and ready to detach safely.
Wrapping Up Your Storage VPS Setup
Follow these key steps to get your storage VPS ready on DartNode:
- Choose your storage plan and set your hostname.
- Pick Alma Linux with the latest version.
- Enable extra features like D protection or cloud backups if needed.
- Complete the order and payment through your preferred method.
- Check your VPS status and IP address for any blocklists.
- Connect to your VPS using an SSH client like Bitvise.
- Format and mount your block storage so it becomes usable.
- Edit the fstab file to make the storage mount persistent after reboot.
Use the mount and unmount commands to manage the storage when necessary. If you set everything right, your VPS will be ready for storing large amounts of data efficiently.