 SlickStack is a powerful and lightweight Nginx stack that simplifies the process of setting up WordPress. In this guide, we’ll walk through the steps to install SlickStack on a RackNerd VPS and create a WordPress website.
Prerequisites
Before you begin, ensure you have the following:
- A RackNerd VPS with a fresh installation of Ubuntu 22.04 LTS.
- SSH access to your VPS.
- A domain name for your WordPress website (try Namecheap), with DNS configured to point to your VPS.
- A free Cloudflare account.
SlickStack System Requirements:
- Ubuntu 22.04 LTS
- 2GB+ RAM
- 2 CPU Cores
Install SlickStack on a RackNerd VPS and Create a WordPress Website
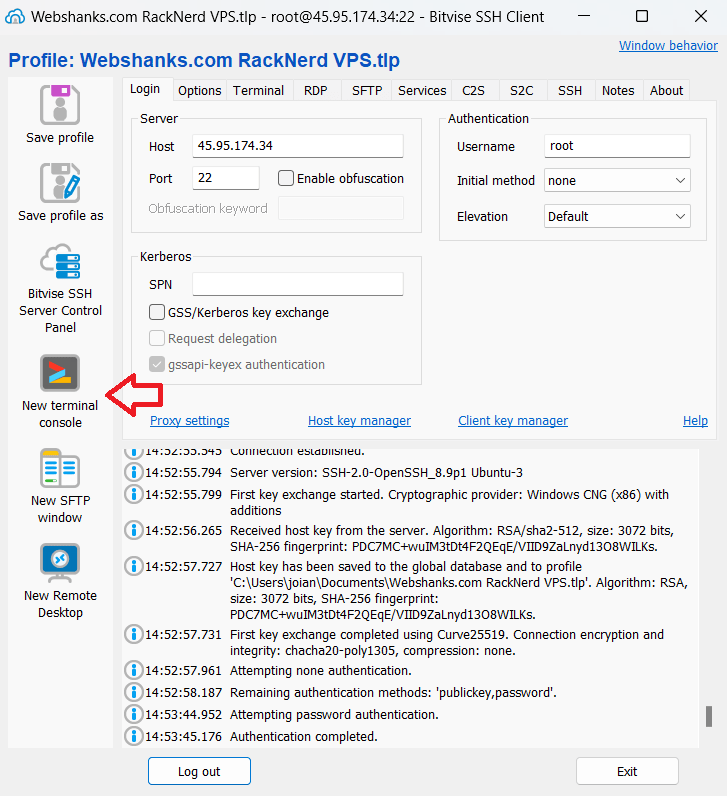
Step 1: Connect to Your VPS
Use your preferred SSH client to connect to your RackNerd VPS. You’ll need the IP address of your VPS and the SSH credentials provided by RackNerd.
We’ll be using a free SSH client called Bitvise.
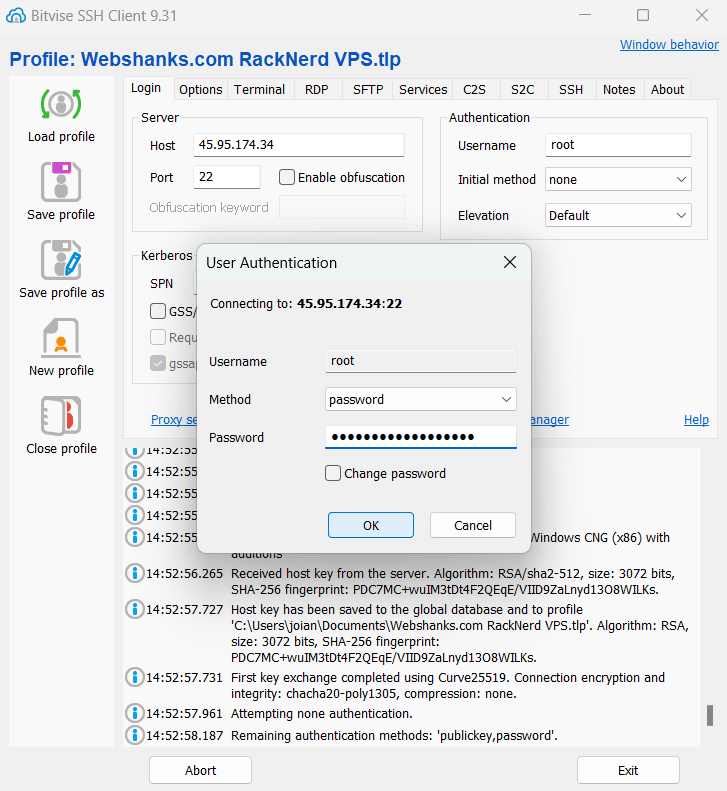
After connecting to your server successfully, click New terminal console.
If you don’t want to use Bitvise, you can use Windows Terminal and connect to your server using the command.
ssh username@your_vps_ip
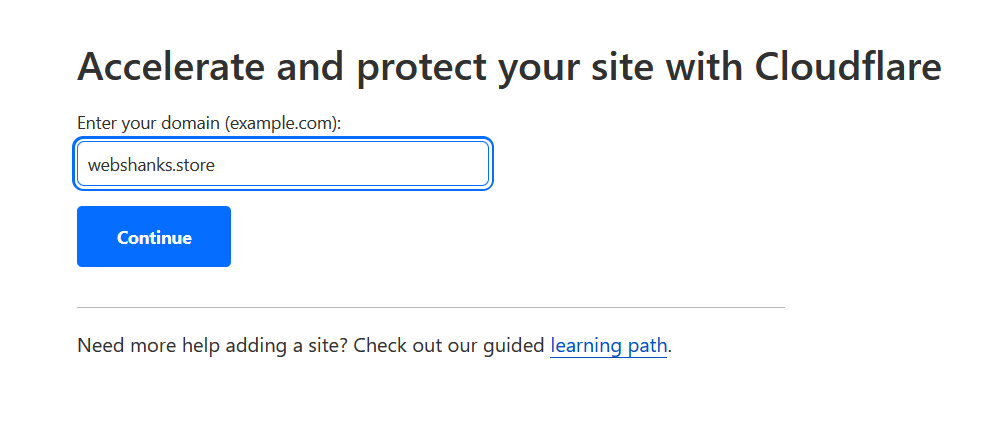
Step 2: Add Domain on Cloudflare
Create an account on Cloudflare. Then add a website.
Choose the free plan if you don’t want to upgrade your Cloudflare. Then add Cloudflare DNS to your domain name registrar.
Wait for the DNS to propagate (usually 24 hours).
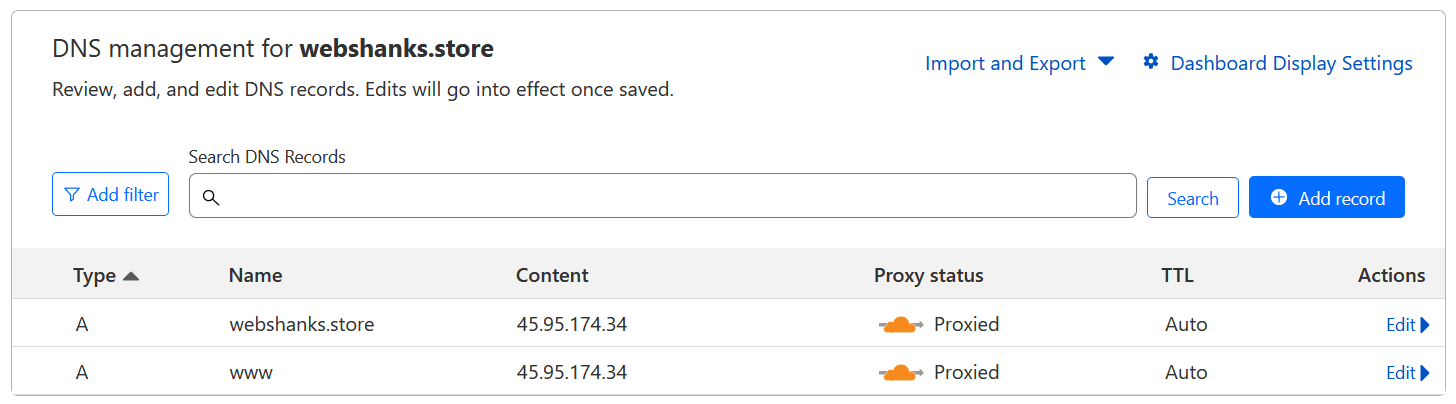
Once it’s propagated, add two A records, one for non-www and one for www version.
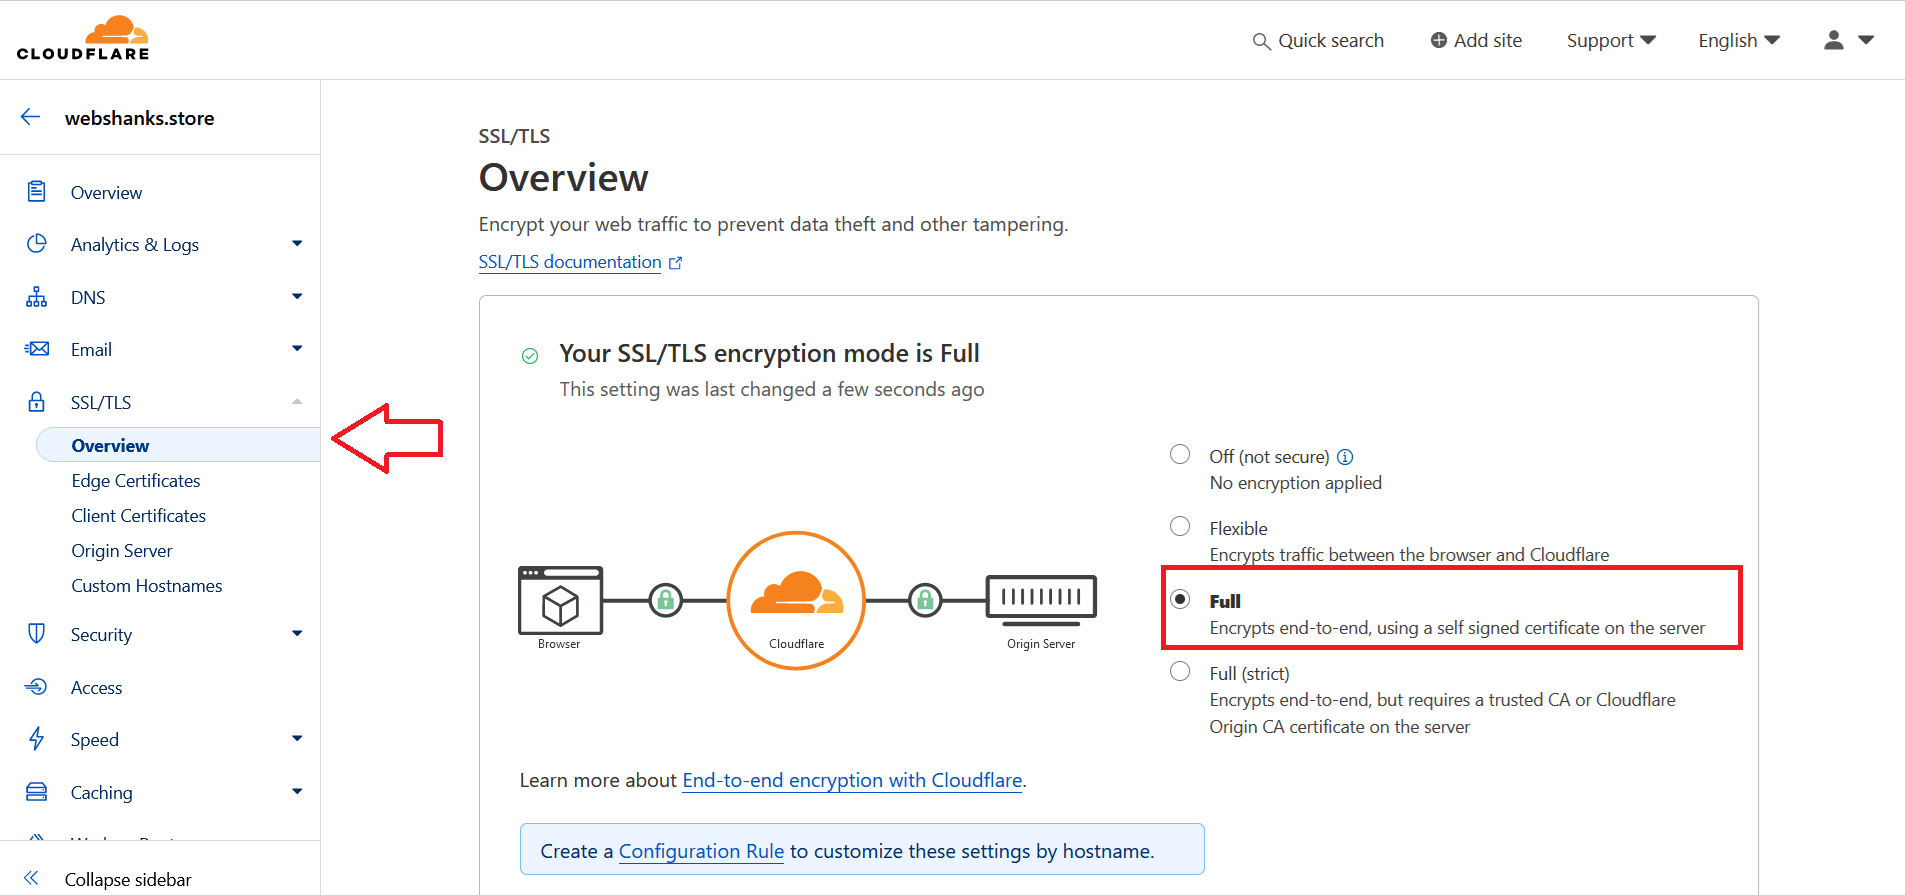
Next, set your SSL to full. Go to SSL/TLS and select to Full.
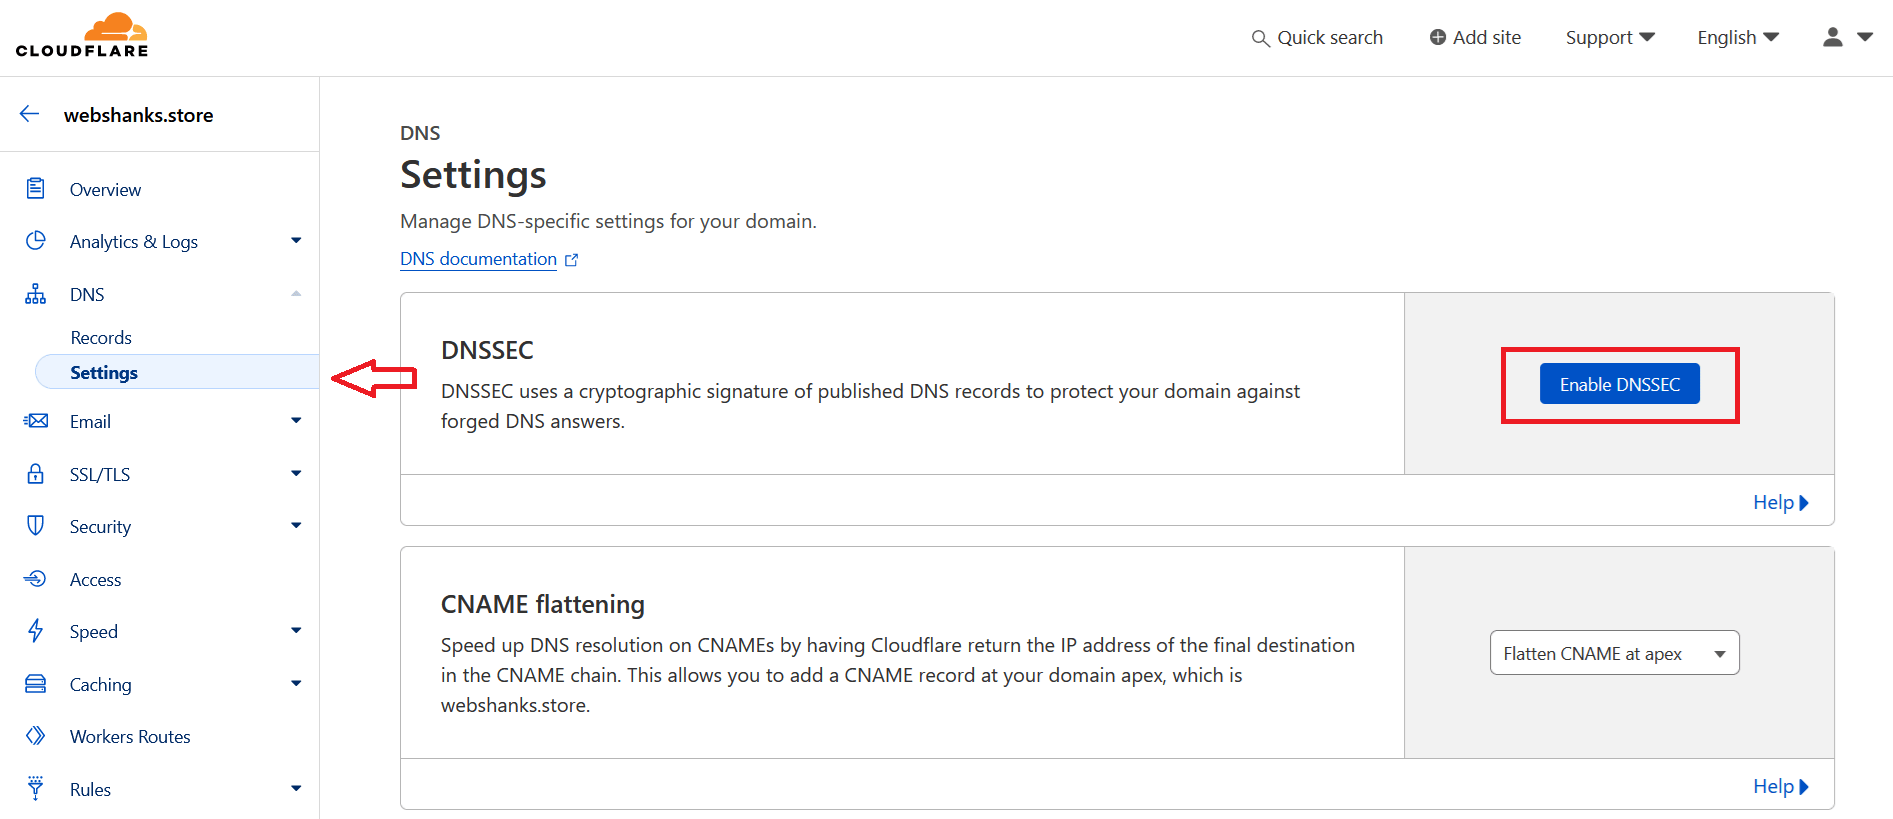
Next, we will enable DNSSEC for our domain. Go to DNS>DNSSEC.
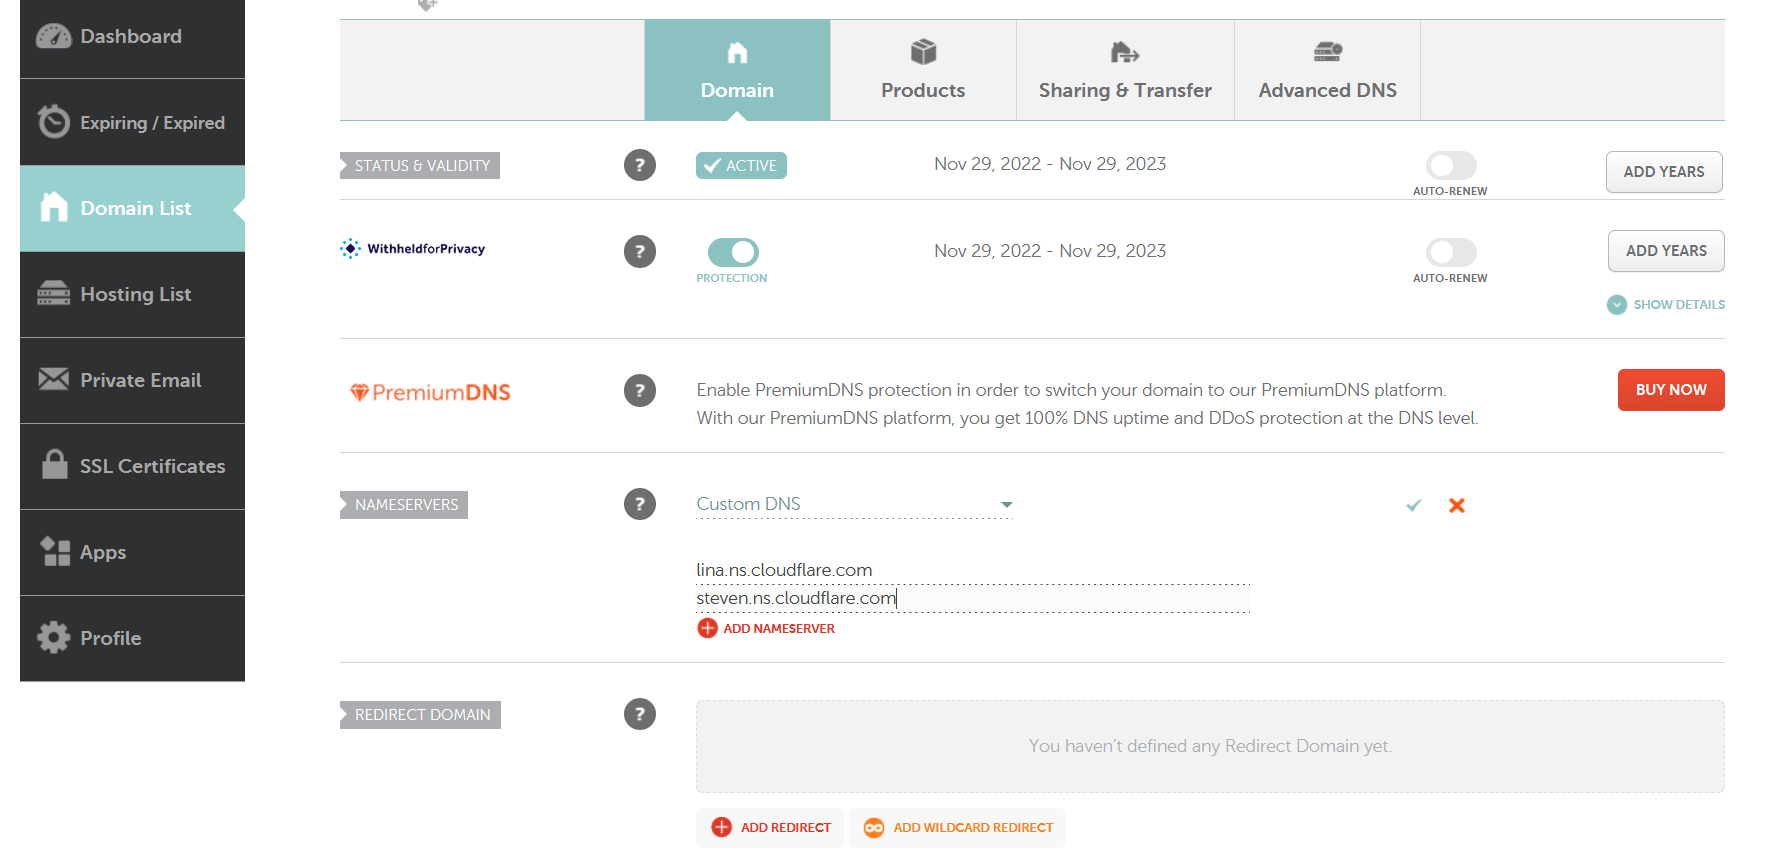
Then copy these settings to your domain registrar. I’m using Namecheap so just go to Domain > Advanced DNS and enable Status.
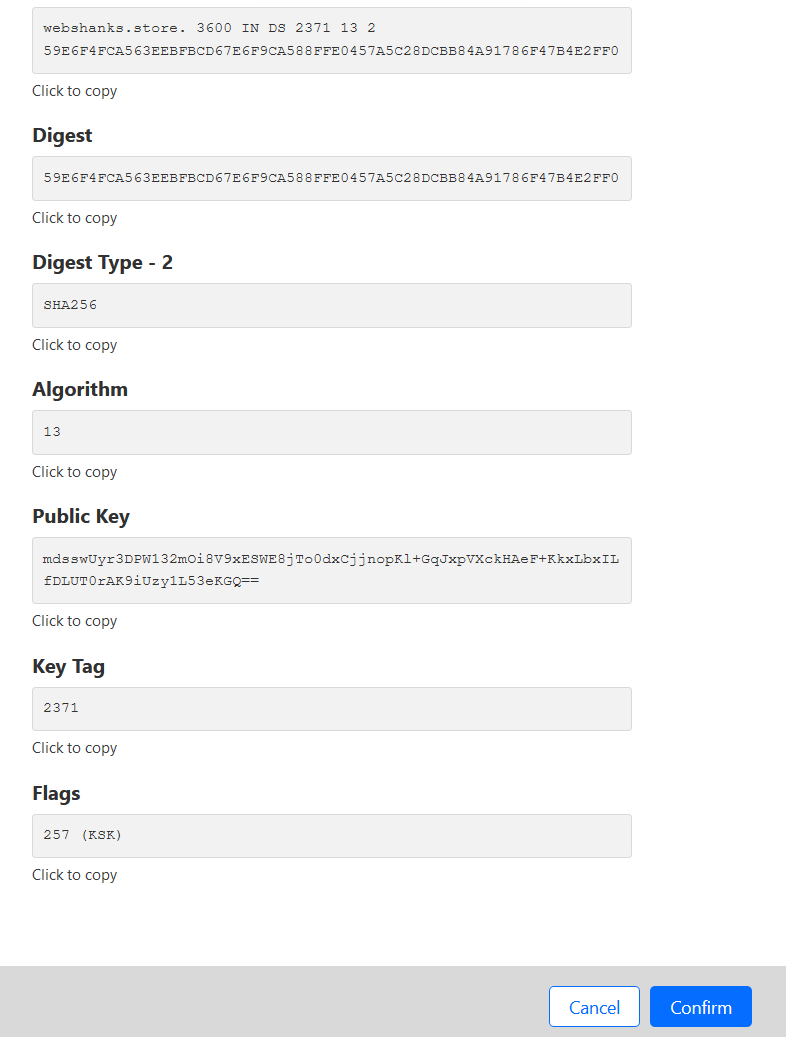
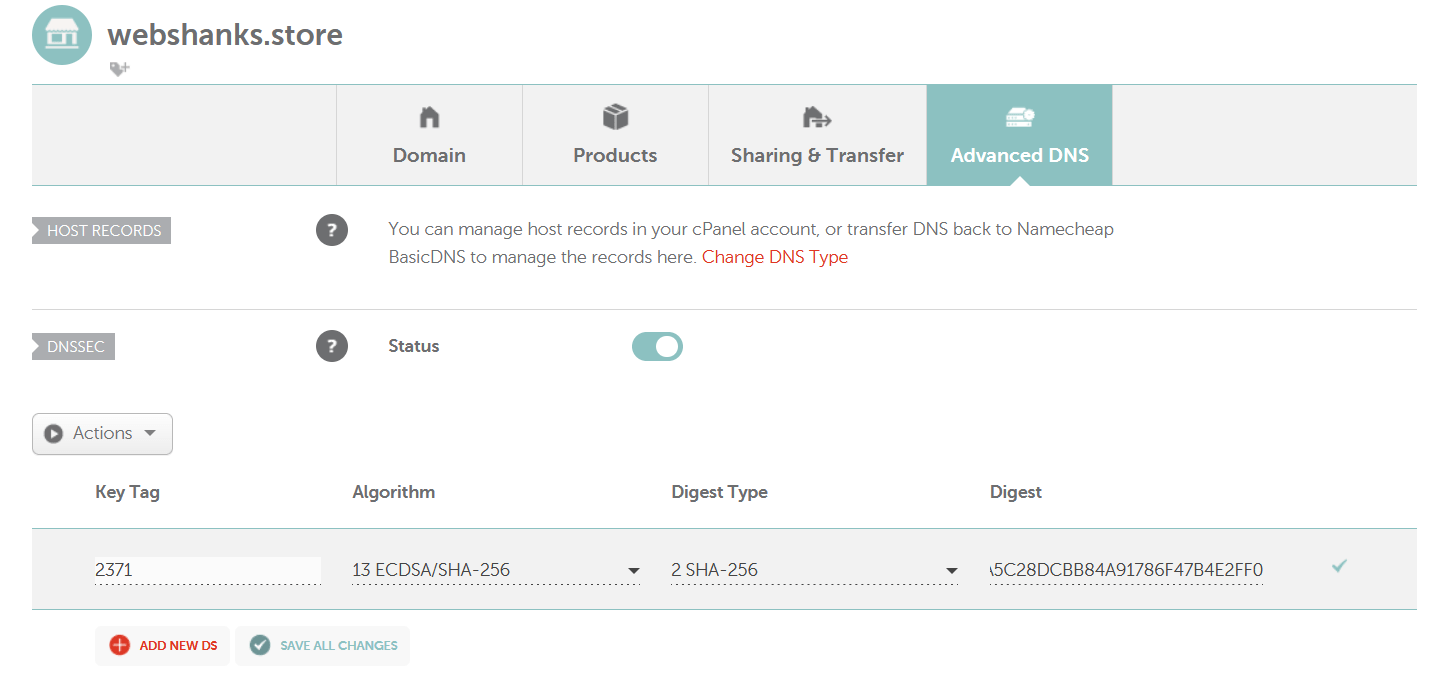
It will take at least 10 minutes for the changes in DNSSEC to come into effect.
Step 3: Download and Install SlickStack
Upgrade your server first and foremost.
sudo apt update
sudo apt upgrade
Once your server is upgraded, you can use the following commands to download and install SlickStack:
wget -O ss slick.fyi/ss && bash ss

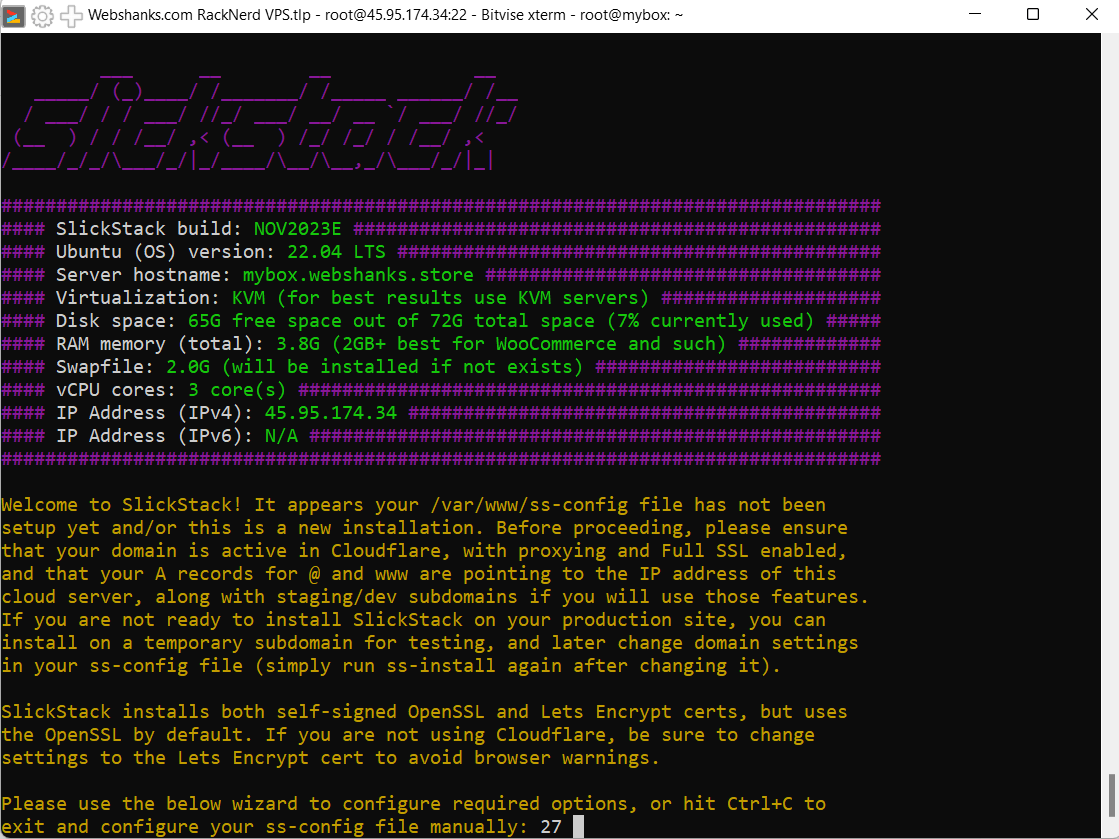
Now you will be asked to fill the necessary details using SlickStack interactive wizard.
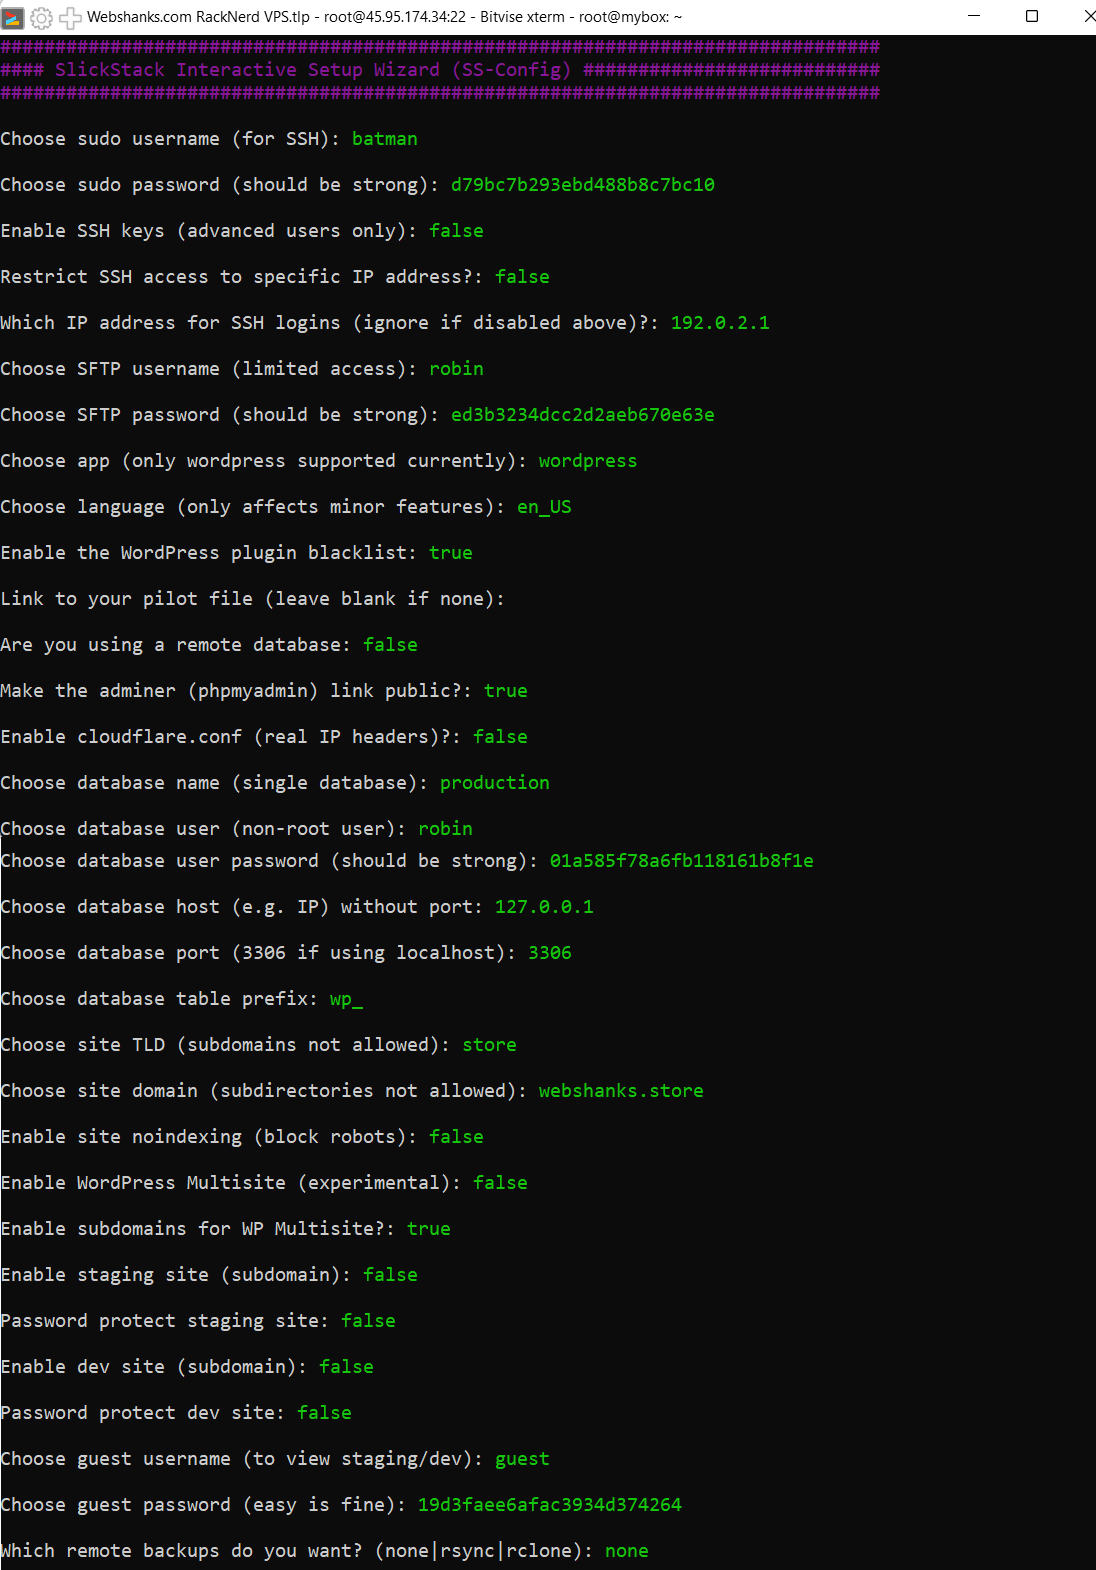
This is the complete setup:
Choose sudo username (for SSH): batman
Choose sudo password (should be strong): d79bc7b293ebd488b8c7bc10
Enable SSH keys (advanced users only): false
Restrict SSH access to specific IP address?: false
Which IP address for SSH logins (ignore if disabled above)?: 192.0.2.1
Choose SFTP username (limited access): robin
Choose SFTP password (should be strong): ed3b3234dcc2d2aeb670e63e
Choose app (only wordpress supported currently): wordpress
Choose language (only affects minor features): en_US
Enable the WordPress plugin blacklist: true
Link to your pilot file (leave blank if none):
Are you using a remote database: false
Make the adminer (phpmyadmin) link public?: true
Enable cloudflare.conf (real IP headers)?: false
Choose database name (single database): production
Choose database user (non-root user): robin
Choose database user password (should be strong): 01a585f78a6fb118161b8f1e
Choose database host (e.g. IP) without port: 127.0.0.1
Choose database port (3306 if using localhost): 3306
Choose database table prefix: wp_
Choose site TLD (subdomains not allowed): store
Choose site domain (subdirectories not allowed): webshanks.store
Enable site noindexing (block robots): false
Enable WordPress Multisite (experimental): false
Enable subdomains for WP Multisite?: true
Enable staging site (subdomain): false
Password protect staging site: false
Enable dev site (subdomain): false
Password protect dev site: false
Choose guest username (to view staging/dev): guest
Choose guest password (easy is fine): 19d3faee6afac3934d374264
Which remote backups do you want? (none|rsync|rclone): none
Important: Be sure to save your settings/credentials after the installation in a safe place. SlickStack will also disable root login so from now on you will login using the sudo user.
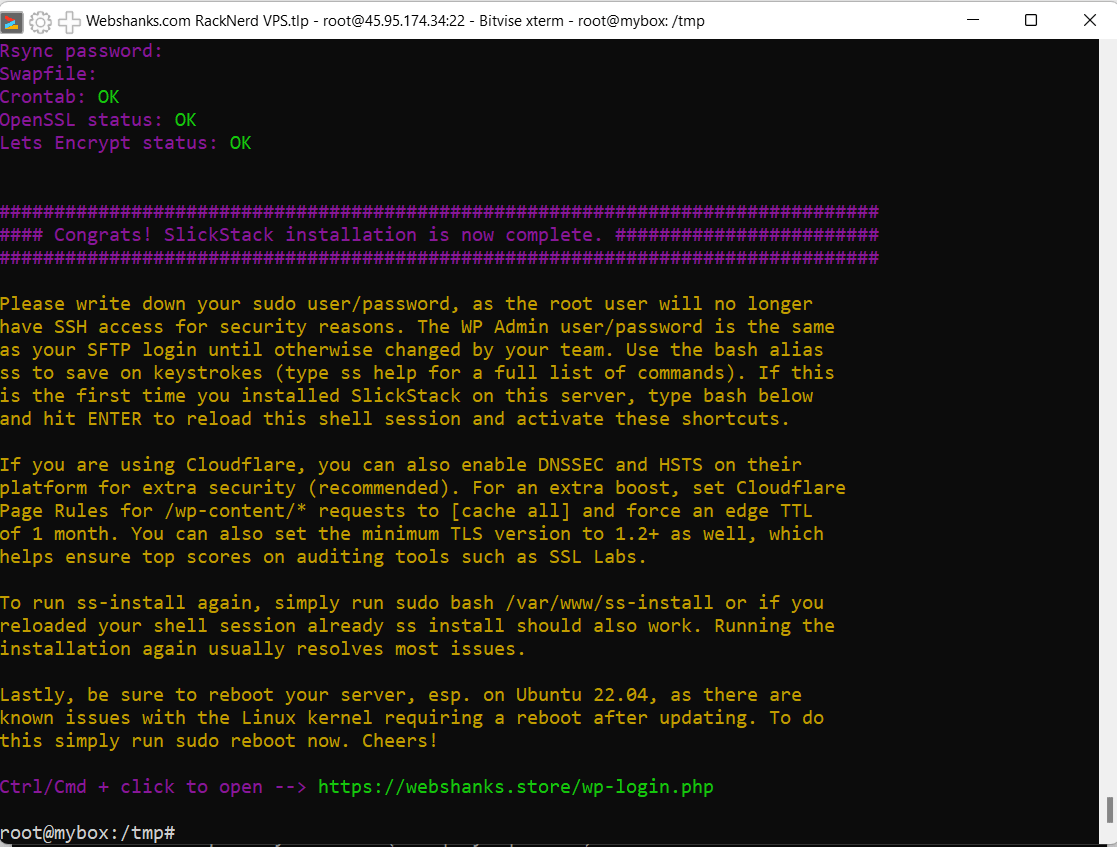
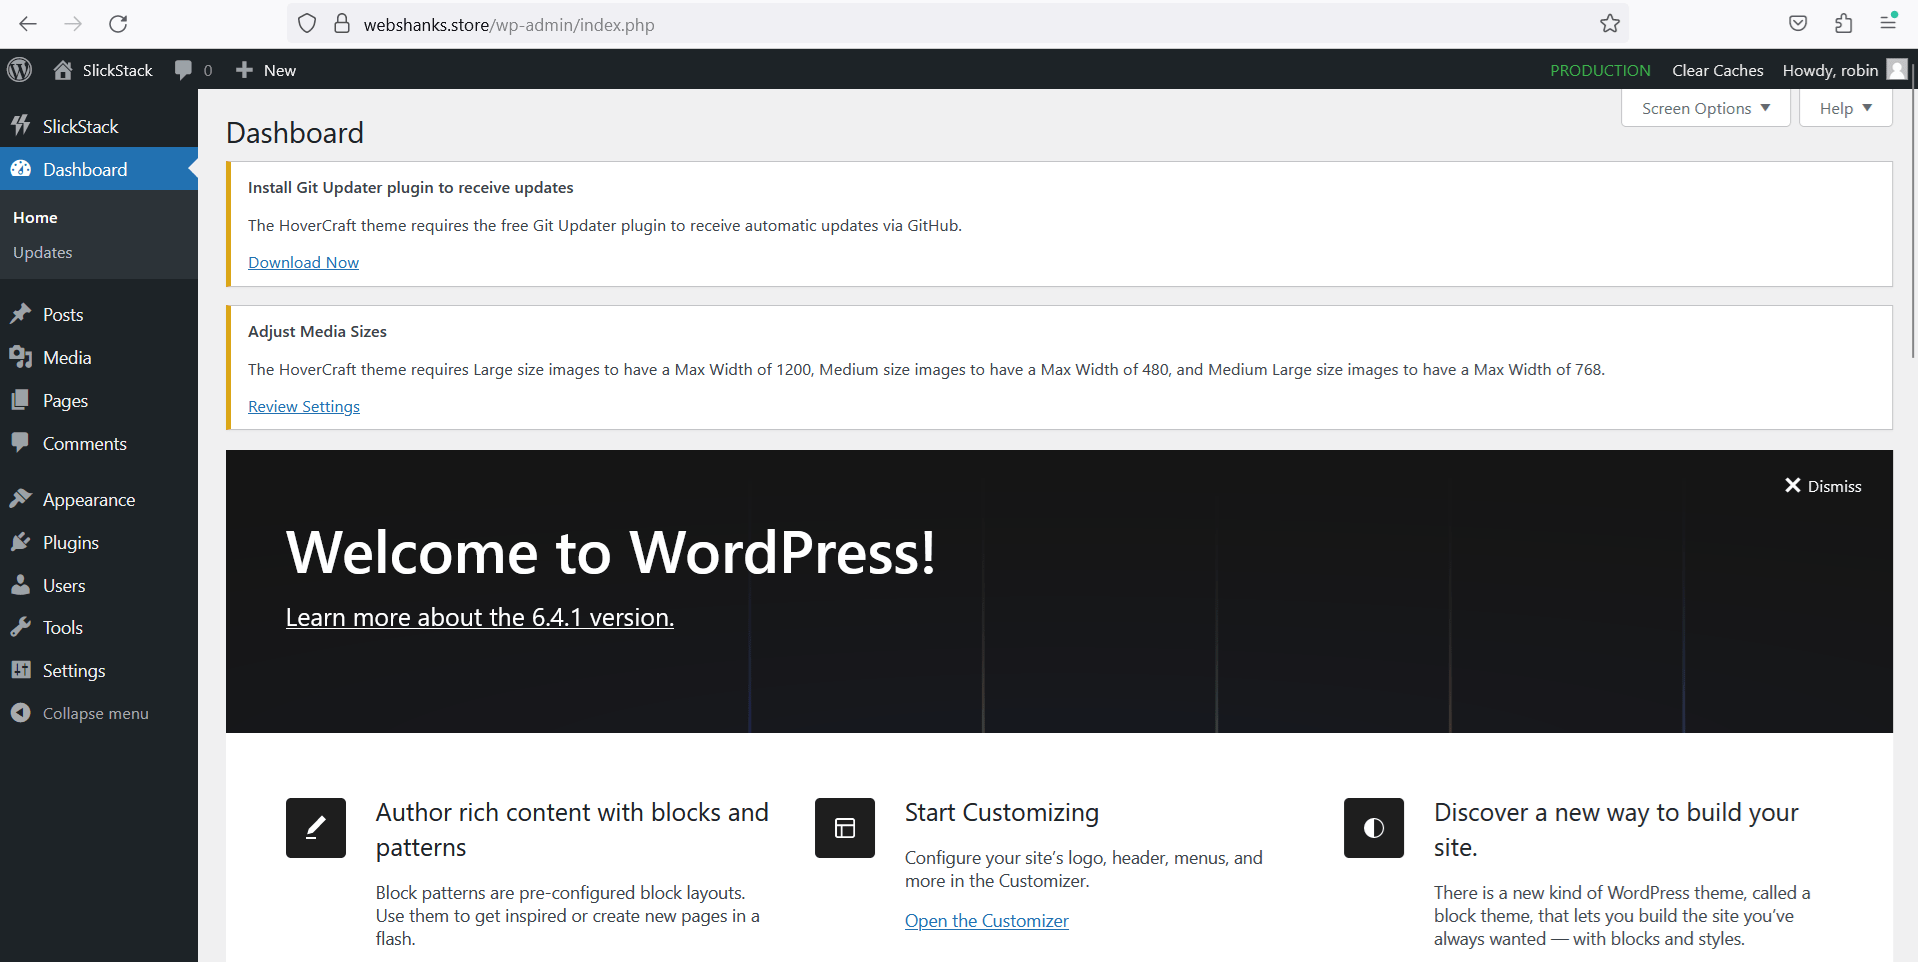
Step 4: Access Your WordPress Website
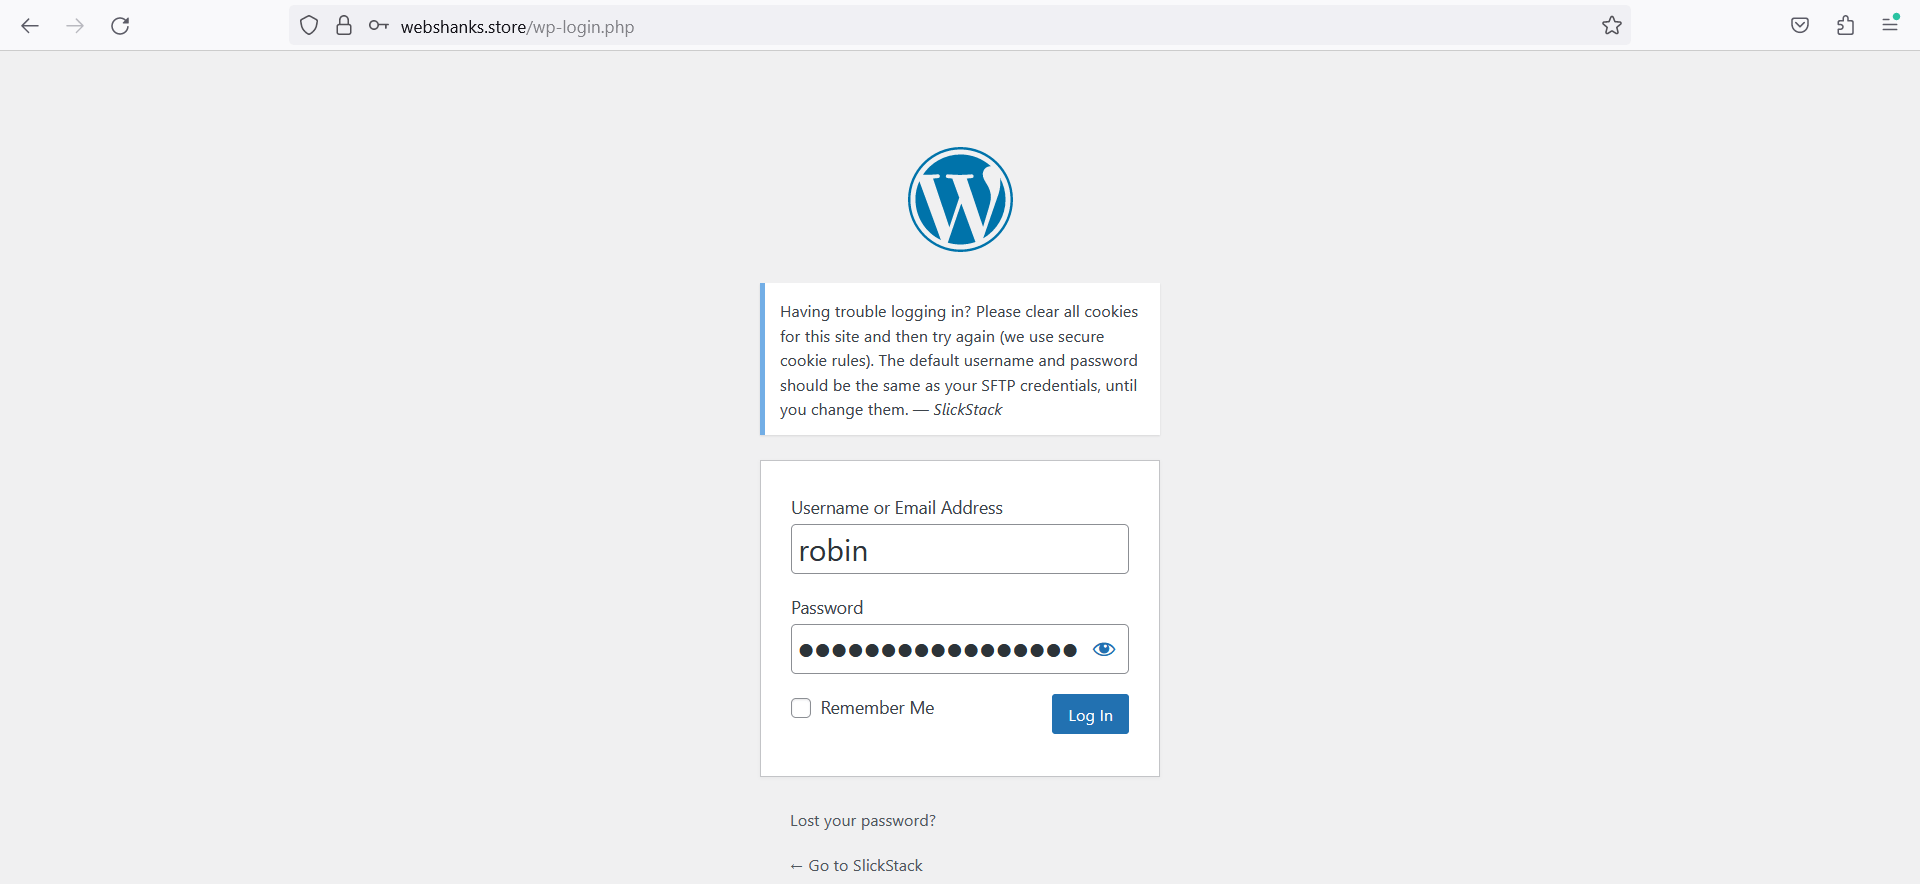
Once the installation is complete, you can access your WordPress website by navigating to https://yourdomain.com in a web browser. Replace yourdomain.com with your actual domain name.
Log in to the WordPress admin dashboard using the same SFTP credentials you set during the installation.
In case you ran into 403 Forbidden error, just run sudo bash /var/www/ss-install. Or instead of using https://yourdomain.com/wp-login.php you replace it with https://yourdomain.com/wp-admin.
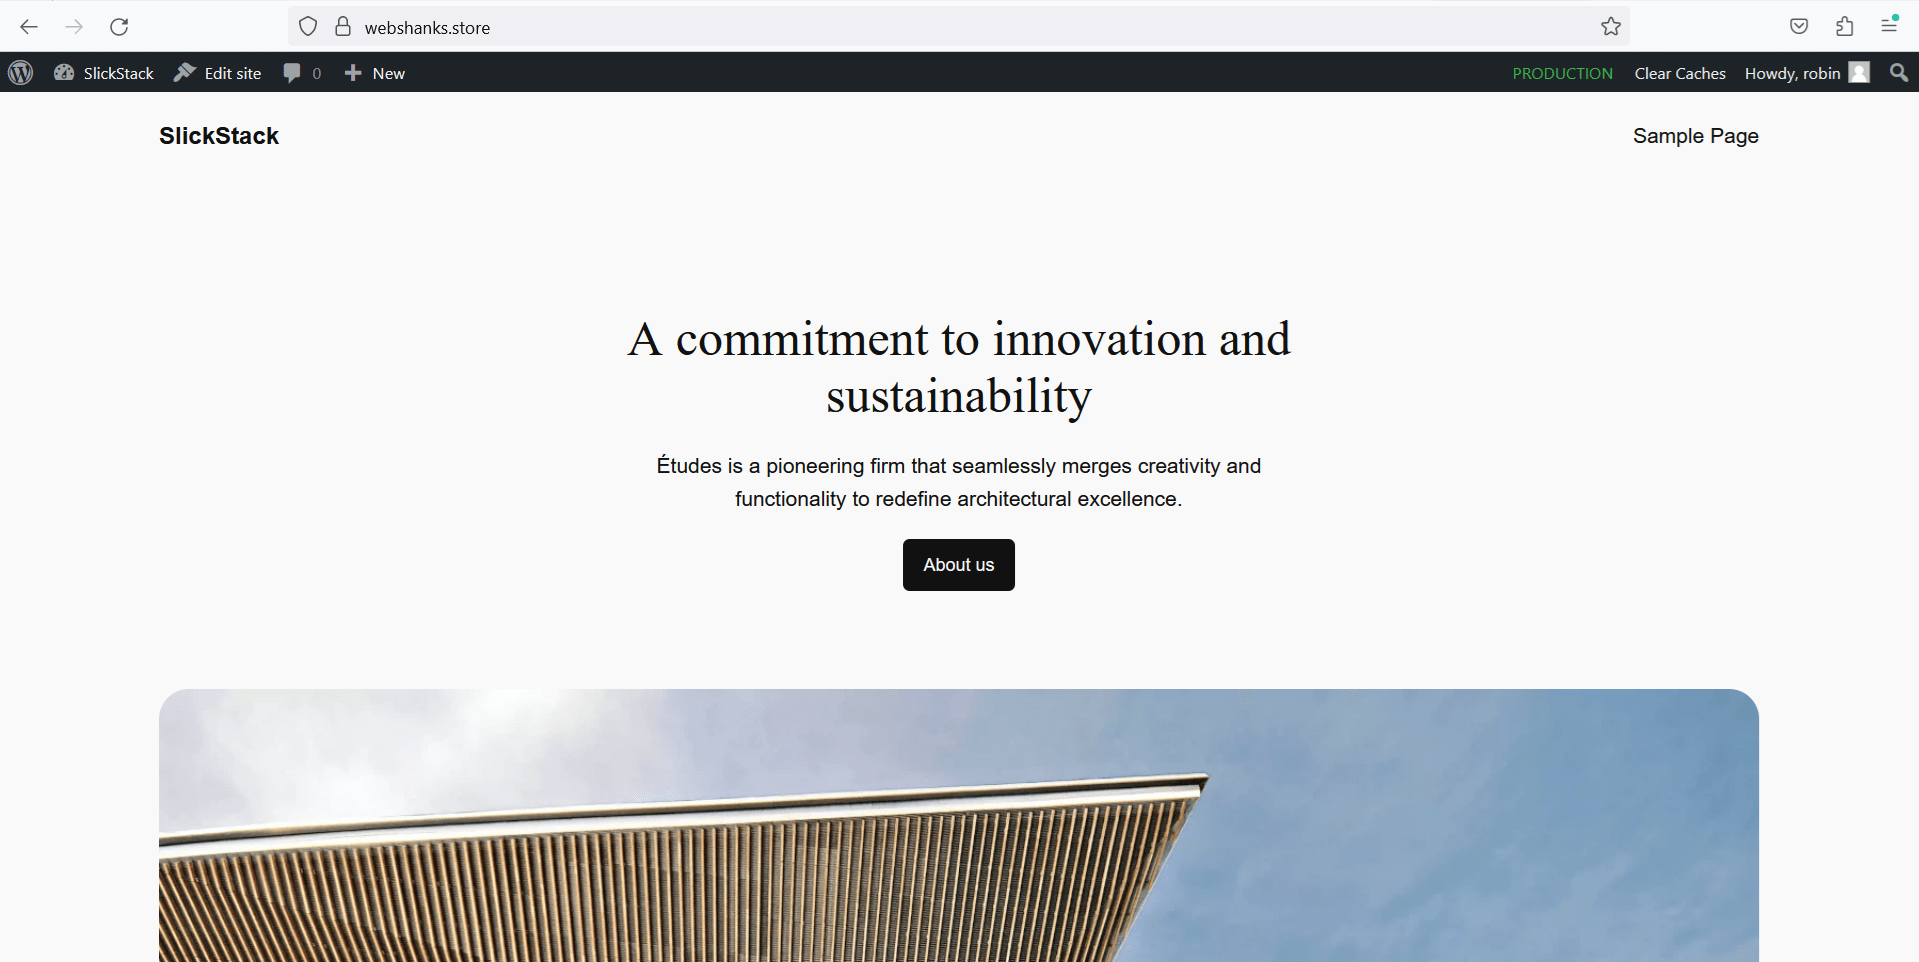
Let’s access our main site with a new WordPress theme.
Watch on YouTube
Frequently Asked Questions (FAQs) – SlickStack on RackNerd VPS for WordPress
1. What is SlickStack?
SlickStack is an optimized stack designed for easy deployment of WordPress websites on Nginx web servers. It focuses on simplicity and performance, providing an optimized environment for WordPress hosting.
2. Why Choose RackNerd VPS?
RackNerd offers Virtual Private Servers (VPS) with robust performance and reliability. Their VPS solutions are suitable for hosting websites and applications, providing users with control and flexibility over their server environment.
3. Can I Install SlickStack on a Different Linux Distribution?
SlickStack is optimized for Ubuntu, and while it may work on other distributions, it is recommended to use Ubuntu 22.04 for the best compatibility and performance.
4. How Do I Access the WordPress Admin Dashboard?
After a successful installation, you can access the WordPress admin dashboard by navigating to https://yourdomain.com/wp-login, replacing yourdomain.com with your actual domain name. Log in using the credentials you set during the installation.
5. How Do I Update SlickStack?
To update SlickStack, run the following command:
sudo bash /var/www/ss-update
6. Can I use other servers other than RackNerd?
Absolutely. You can use Knownhost or Contabo.
Conclusion
You’ve successfully installed SlickStack on your RackNerd VPS and created a WordPress website. SlickStack streamlines the server setup process, making it easier to manage your WordPress site.
Feel free to explore additional features and optimizations that SlickStack offers to enhance the performance and security of your WordPress installation.
Really helpful tutorial, thank you. Does Contabo have KVM servers?
Yes, their VPS are KVM.