 If you’ve been looking for a modern, easy-to-use hosting control panel for your VPS, 1Panel might just be your new favorite tool. Paired with EUGameHost VPS, it offers a smooth and powerful way to set up and manage your WordPress websites without getting lost in the command line.
In this guide, I’ll walk you through the entire process — from ordering your EUGameHost VPS to launching your brand-new WordPress site — in a clear, step-by-step way.
What You’ll Need
Before we start, make sure you have:
-
An EUGameHost VPS (Ubuntu 24.04 LTS is recommended)
-
A domain name (from Namecheap or any registrar)
-
An SSH client (like Bitvise or PuTTY) to connect to your VPS
-
Basic familiarity with VPS logins and DNS settings
How to Install WordPress Websites on Any VPS Using 1Panel
Step 1: Get Your EUGameHost VPS
Go to EUGameHost and choose a VPS plan that suits your needs.
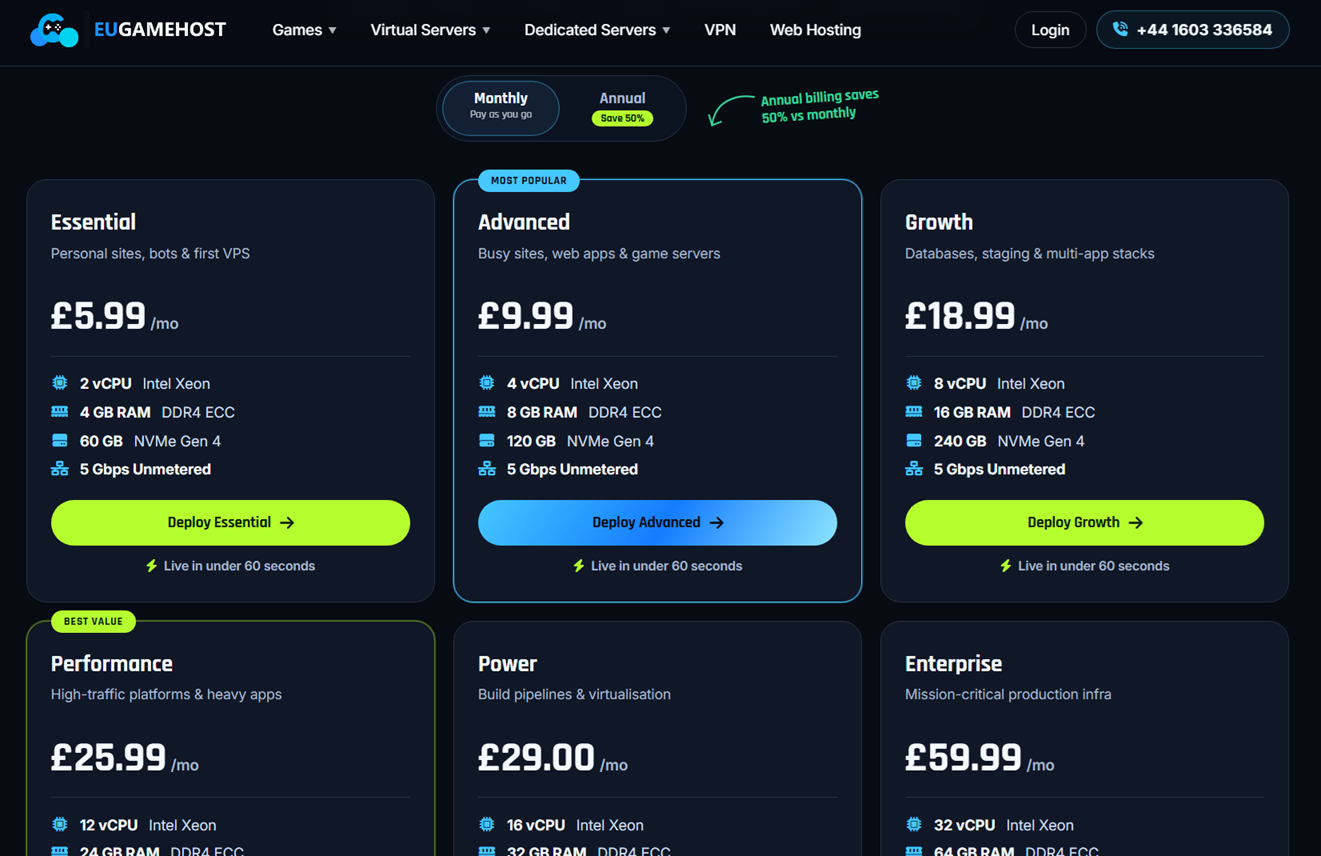
For a single WordPress site, 4 GB RAM / 2 vCPU is fine.
If you’re hosting multiple sites, go for 8 GB RAM or more.
Choose Ubuntu 24.04 LTS or newer as your operating system.
Complete your purchase and take note of your IP address, root username, and password.
For other budget-friendly VPS options, check out my guide on Cheap Yearly VPS Deals.
Step 2: Connect to Your VPS via SSH
Using Bitvise, PuTTY, or your terminal:
ssh root@your_server_ip
Enter your root password when prompted. If this is your first login, you’ll be asked to change it.
If you’re new to SSH, here’s my Beginner’s Guide to SSH from Windows to Linux.
Step 3: Update Your Server
Always start fresh with updates:
apt update && apt upgrade -y
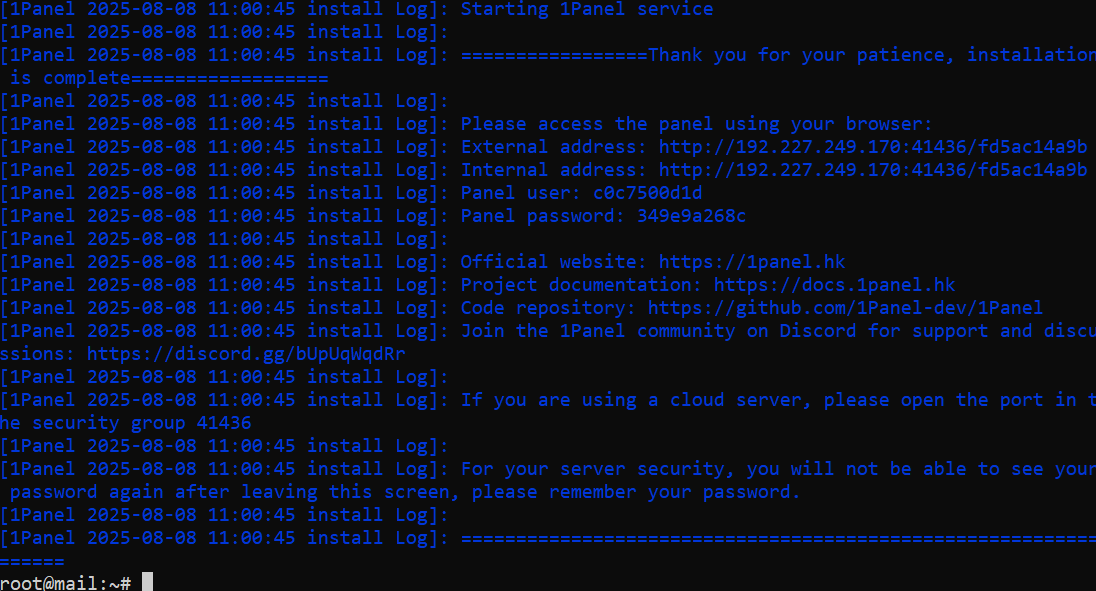
Step 4: Install 1Panel
1Panel provides a simple script installer. Run:
bash -c "$(curl -sSL https://resource.1panel.pro/quick_start.sh)"
-
The installer will prompt for a port for the admin panel (default: 9999)
-
Choose a secure admin username and password
-
Wait until installation completes
Choose your language when prompted:
Select a language:
1. English
2. Chinese 中文(简体)
3. Persian
4. Português (Brasil)
5. Русский
Enter the number corresponding to your language choice: 1
Select installation directory:
Set 1Panel installation directory (default is /opt): /opt
Set panel port, security entrance, user and password:
Set 1Panel port (default is 41436): <hit enter for default>
Set 1Panel secure entrance (default is fd5ac14a9b): <hit enter for default>
Set 1Panel panel user (default is c0c7500d1d):
Set 1Panel panel password, press Enter to continue after setting (default is 349e9a268c):
If you’re curious about other modern control panels, see Best Free Control Panel for VPS.
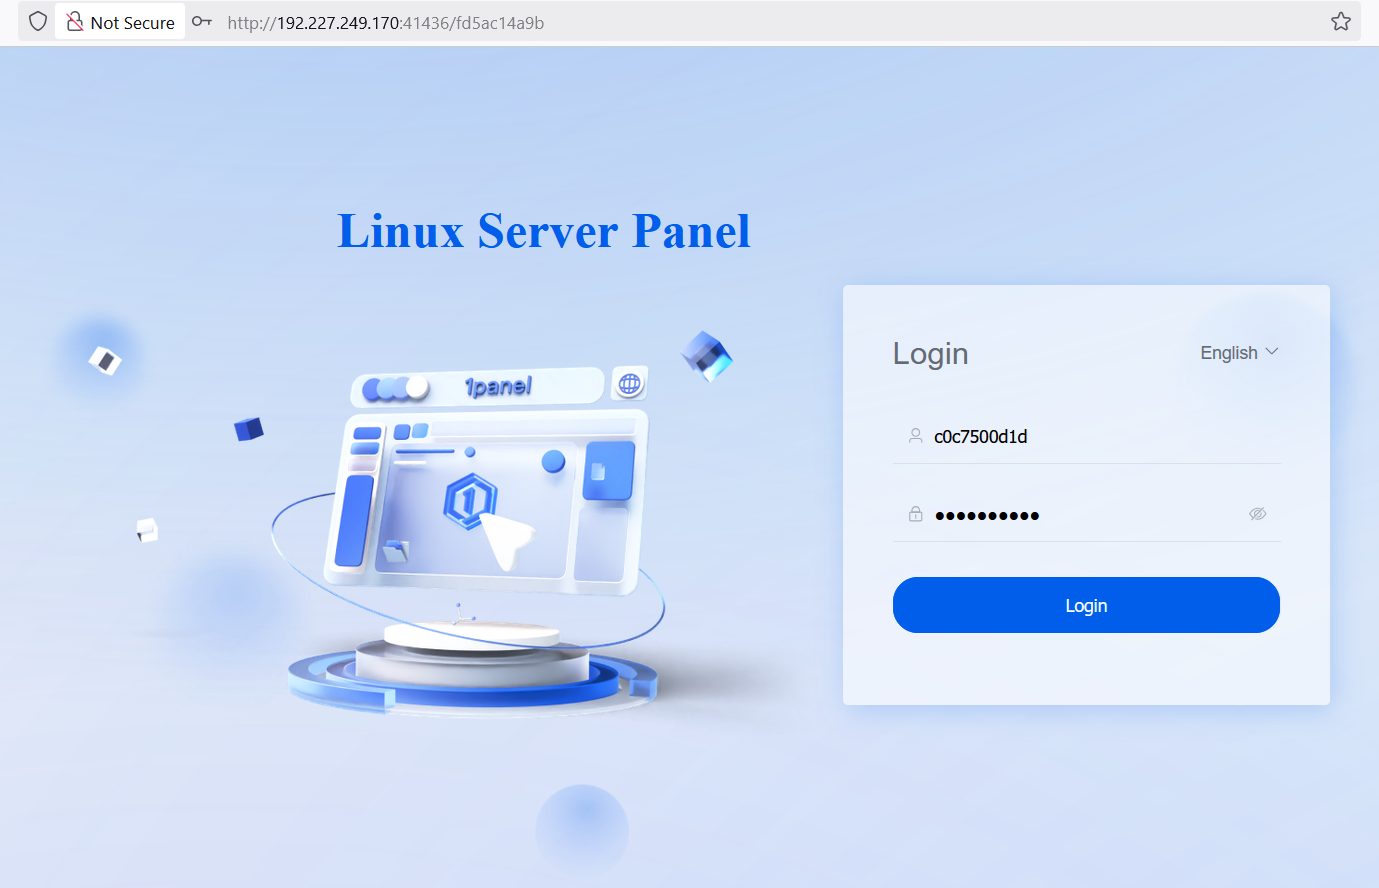
Step 5: Access the 1Panel Dashboard
Open your browser and visit the external address.
Log in using the credentials you created.
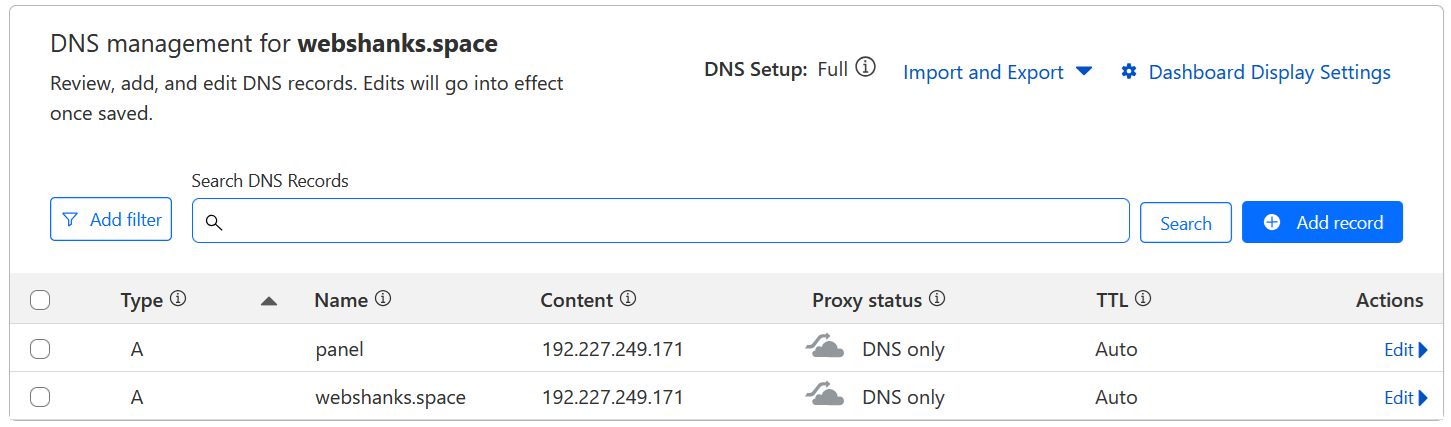
Step 6: Point Your Domain to the VPS
Go to your domain registrar’s DNS settings.
Create an A record:
- Name: @ (or your subdomain, e.g., www)
- Value: Your EUGameHost VPS IP
Wait for DNS propagation (usually 5–30 minutes).
Next, let’s bind our subdomain so that we can access our panel with it.
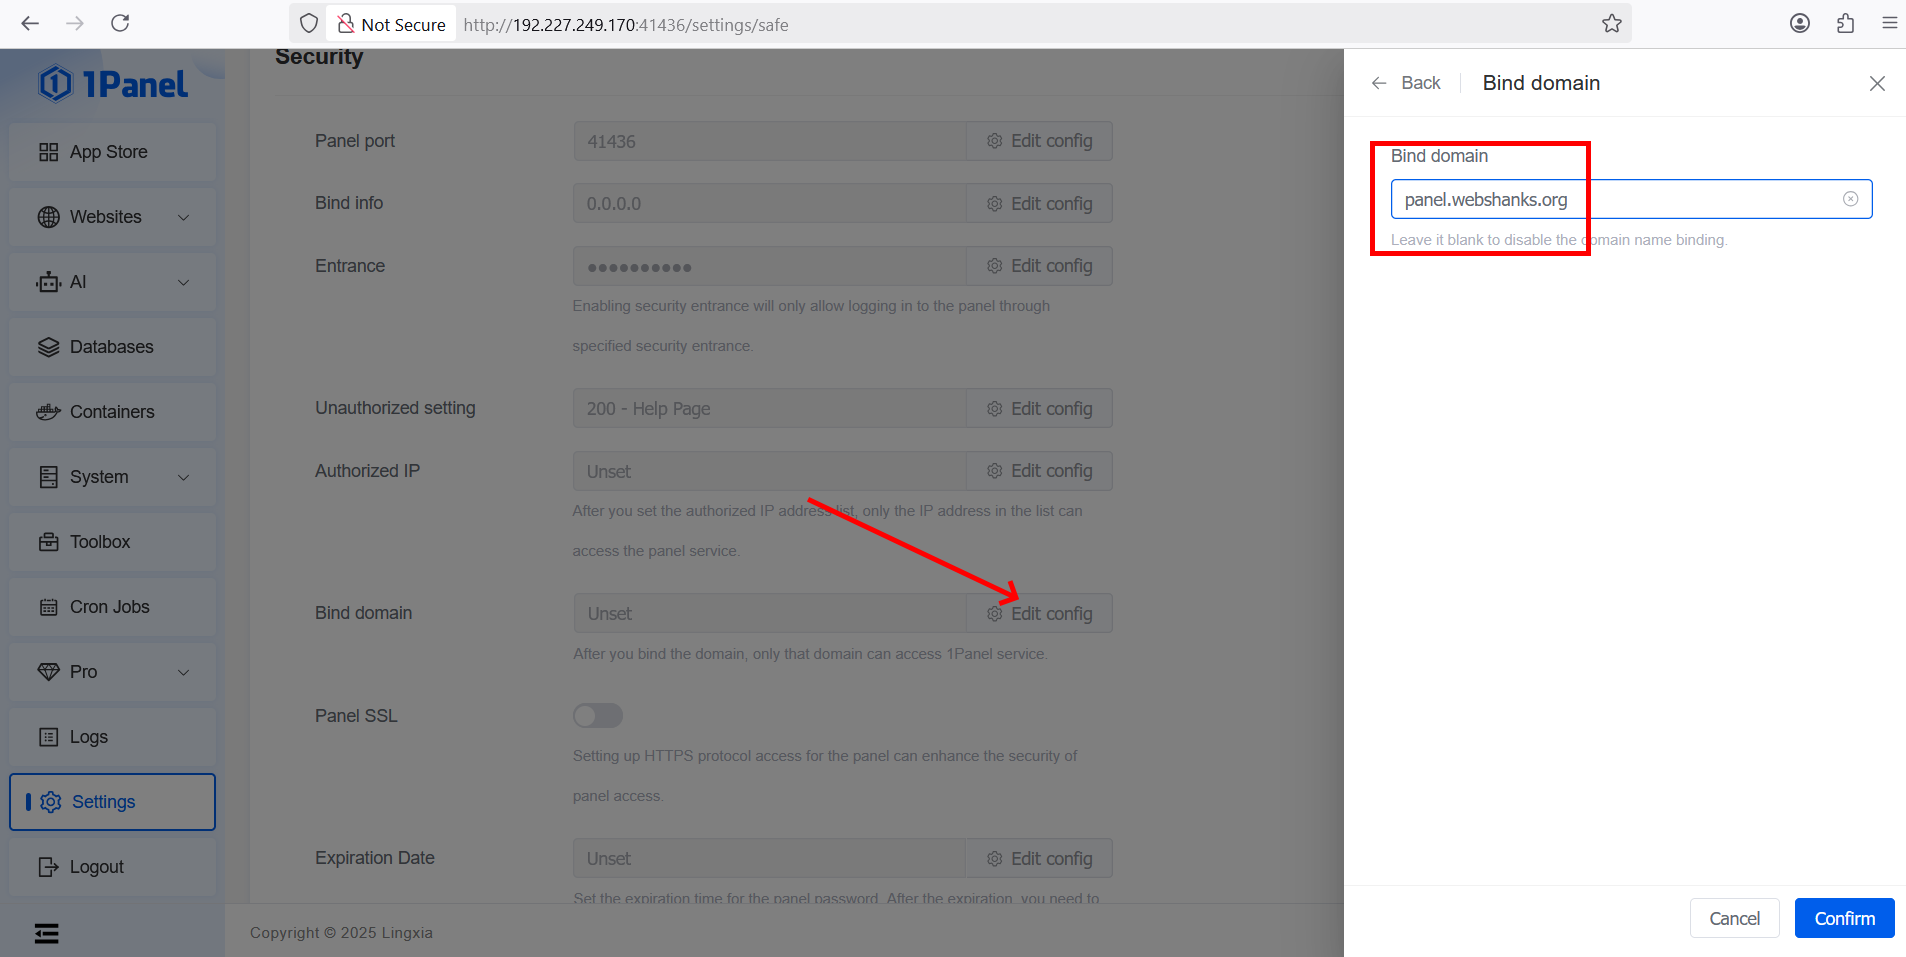
Bind domain

After domain binding, you will be logged out and can only access 1Panel service through the domain name specified in the settings. Do you want to continue?
Login using the subdomain together with the port and security entrance.
https://panel.webshanks.space:41436/fd5ac14a9b
We still don’t have SSL for our panel, so let’s get a certificate.
Signup with SSL for Web to get a free SSL.
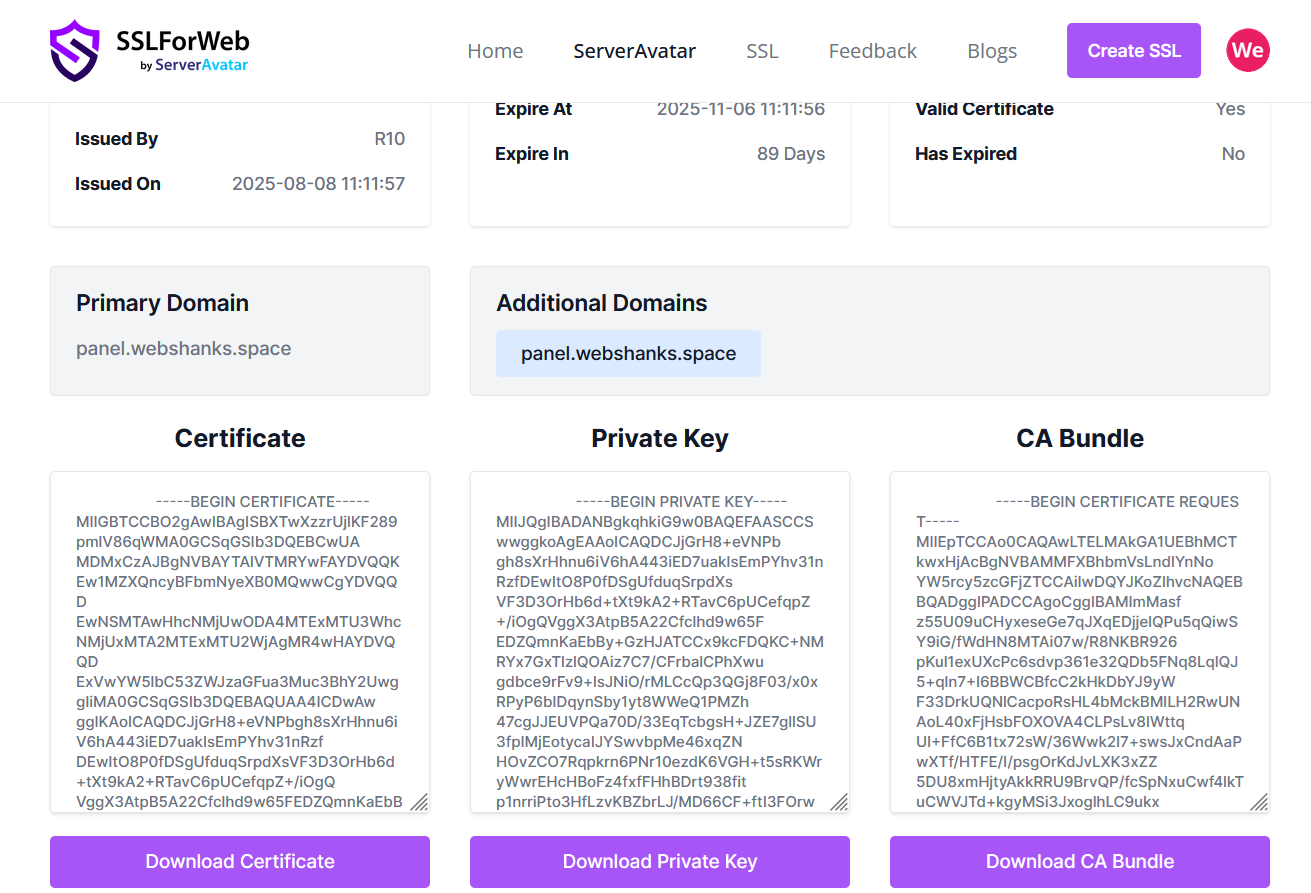
Copy the certificate and private key to the panel SSL.
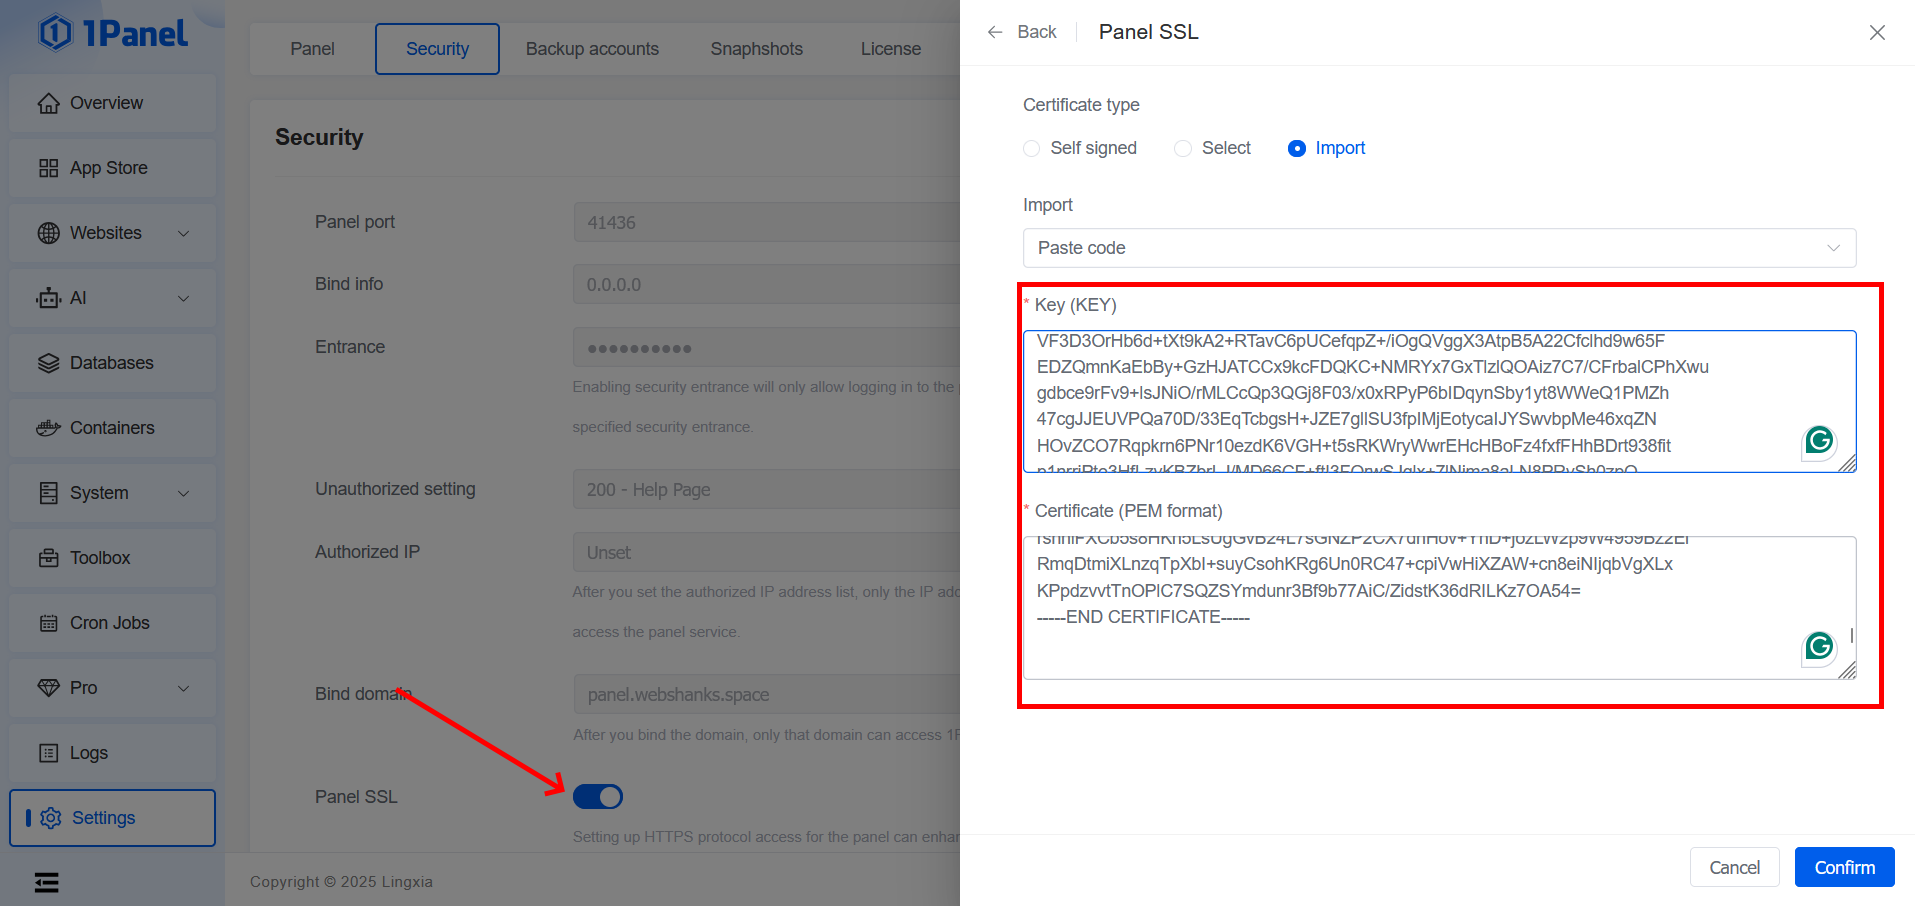
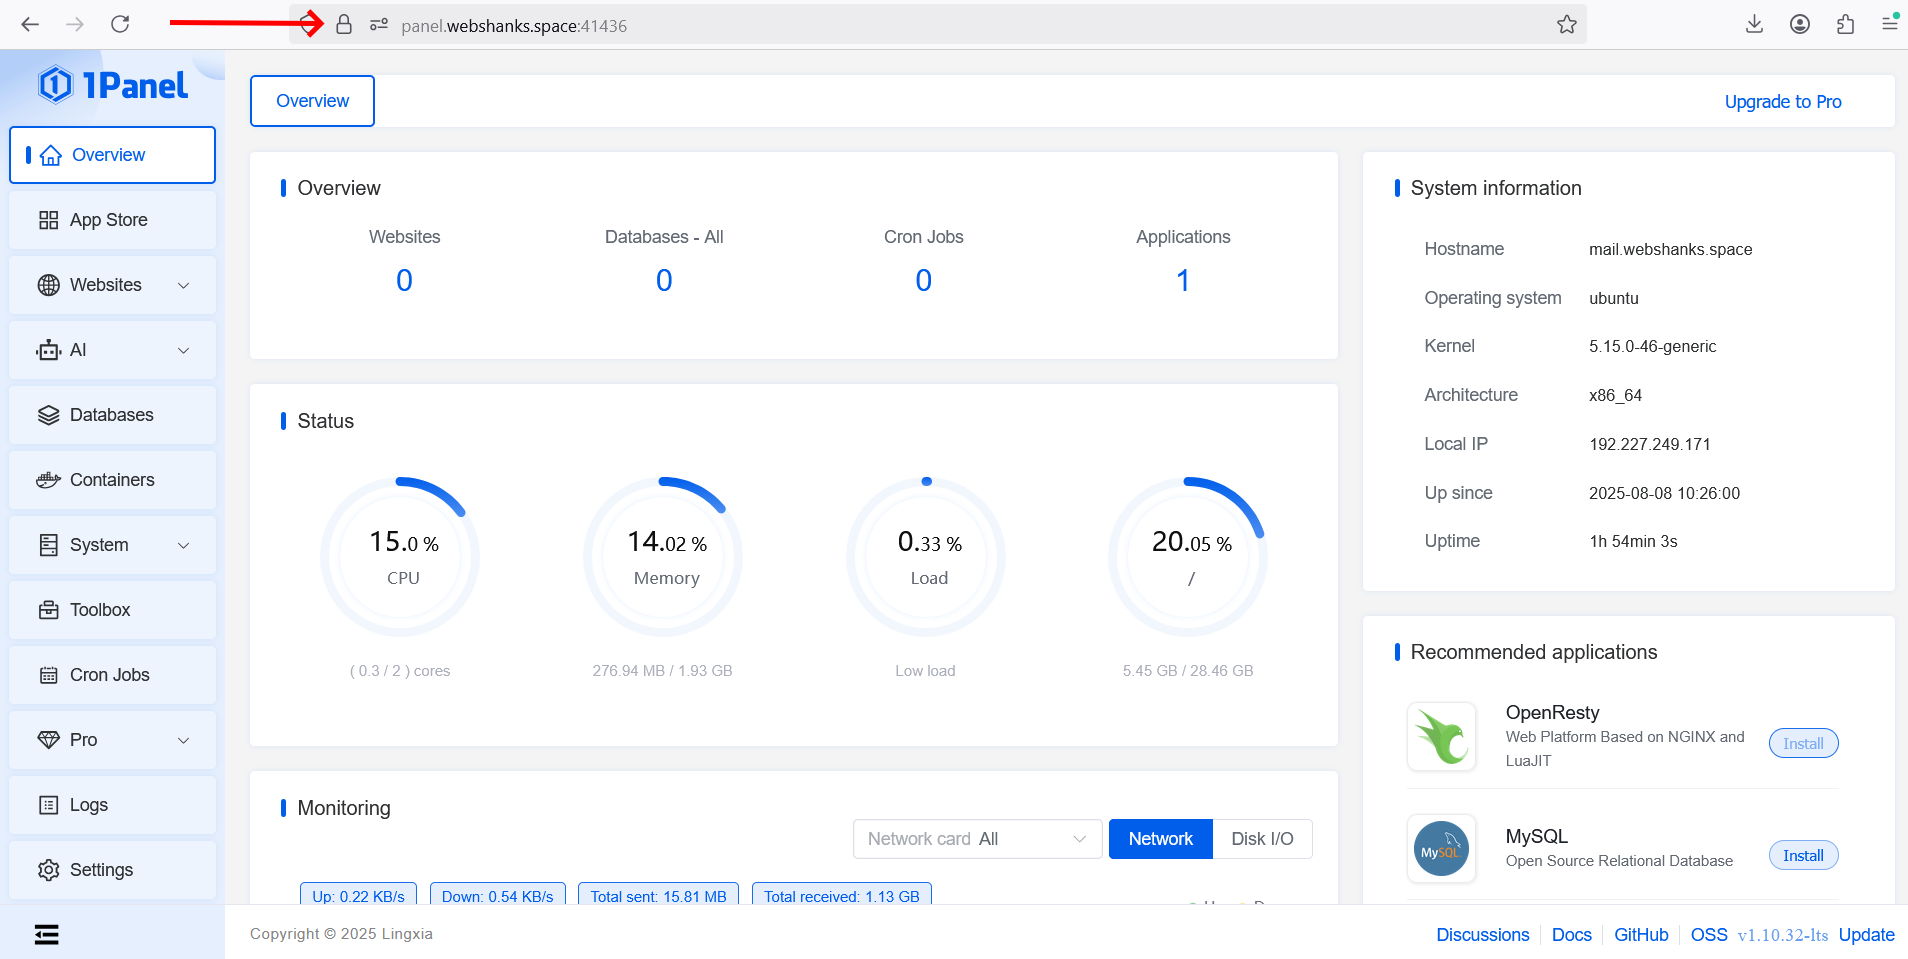
Now we can access our 1Panel securely!
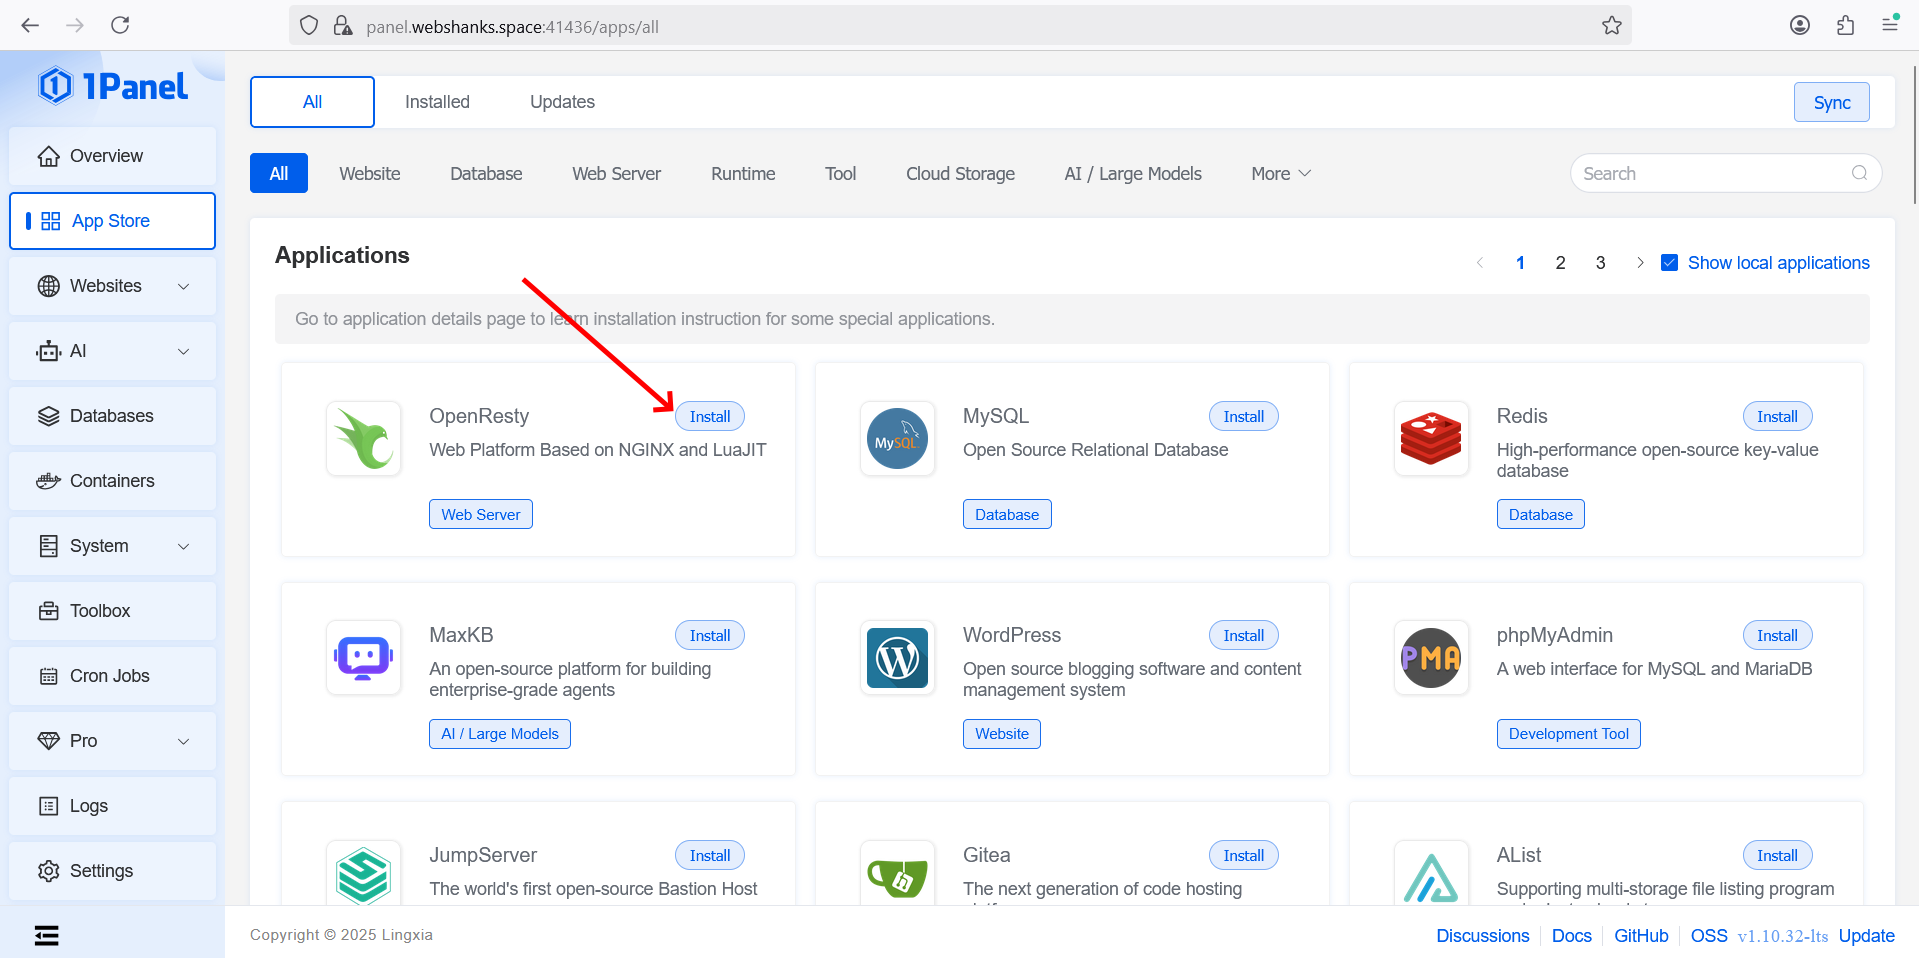
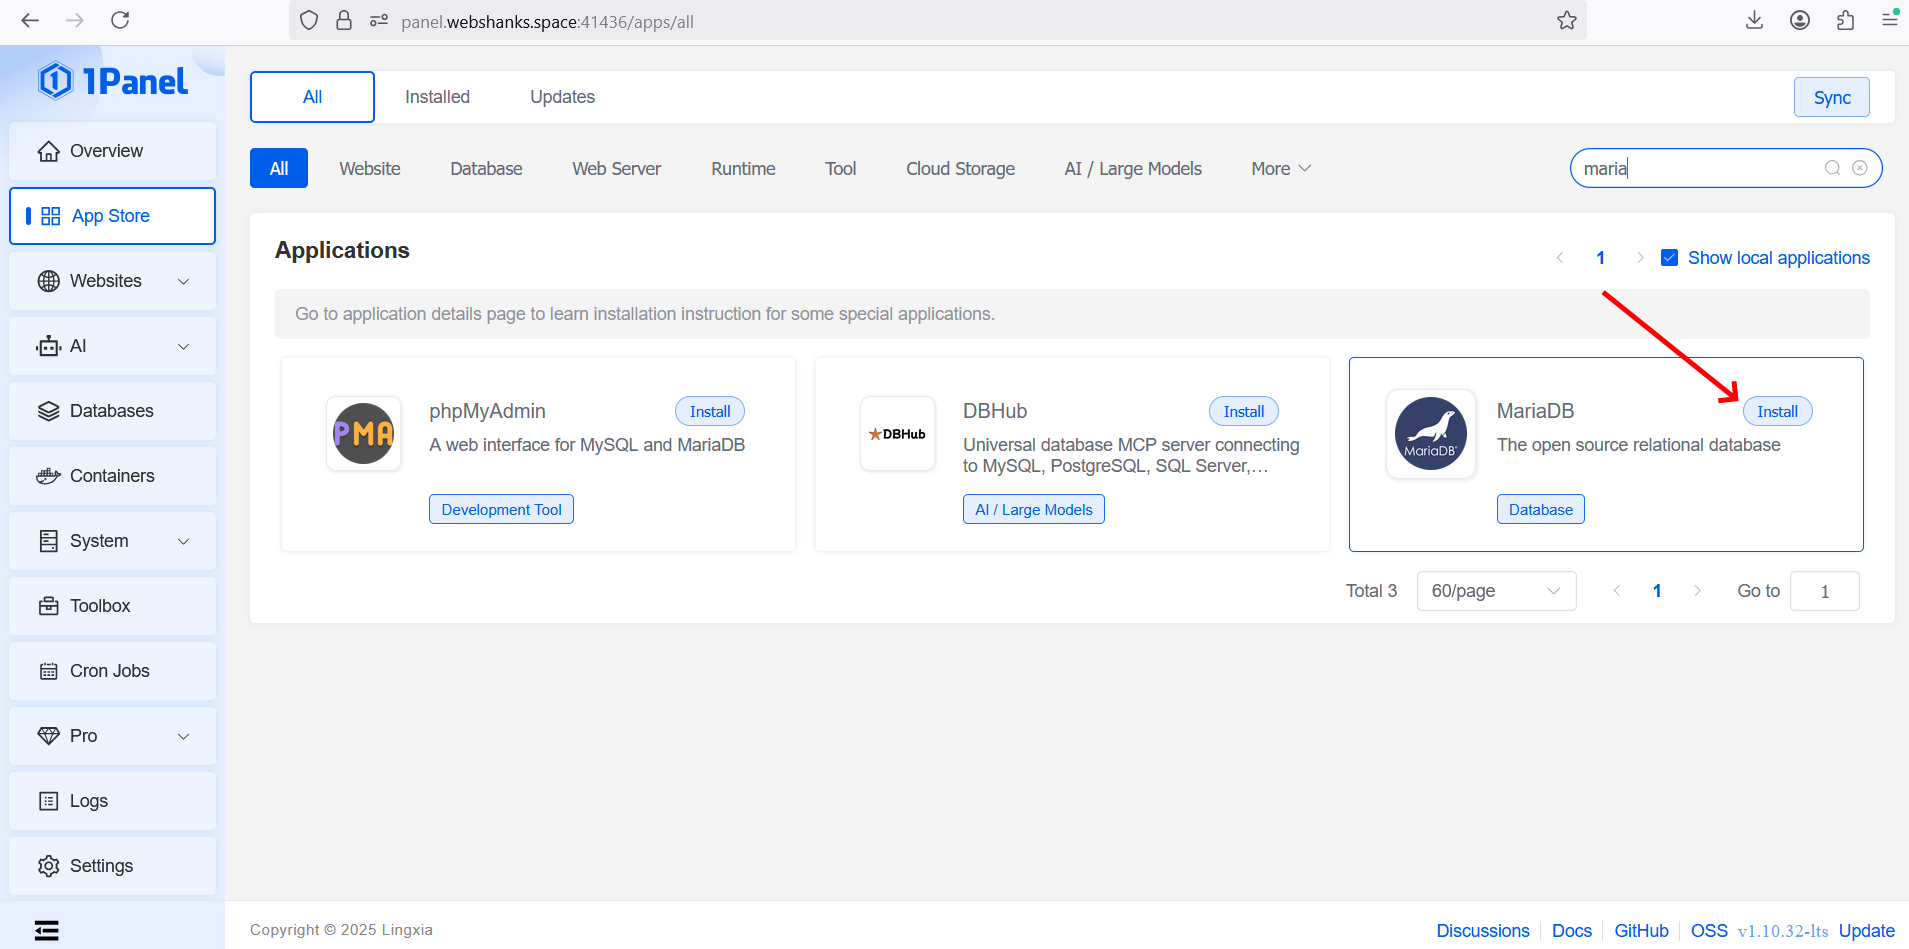
Step 7. Install OpenResty and MariaDB
Go to App Store > Select OpenResty.
Next, find MardiaDB.
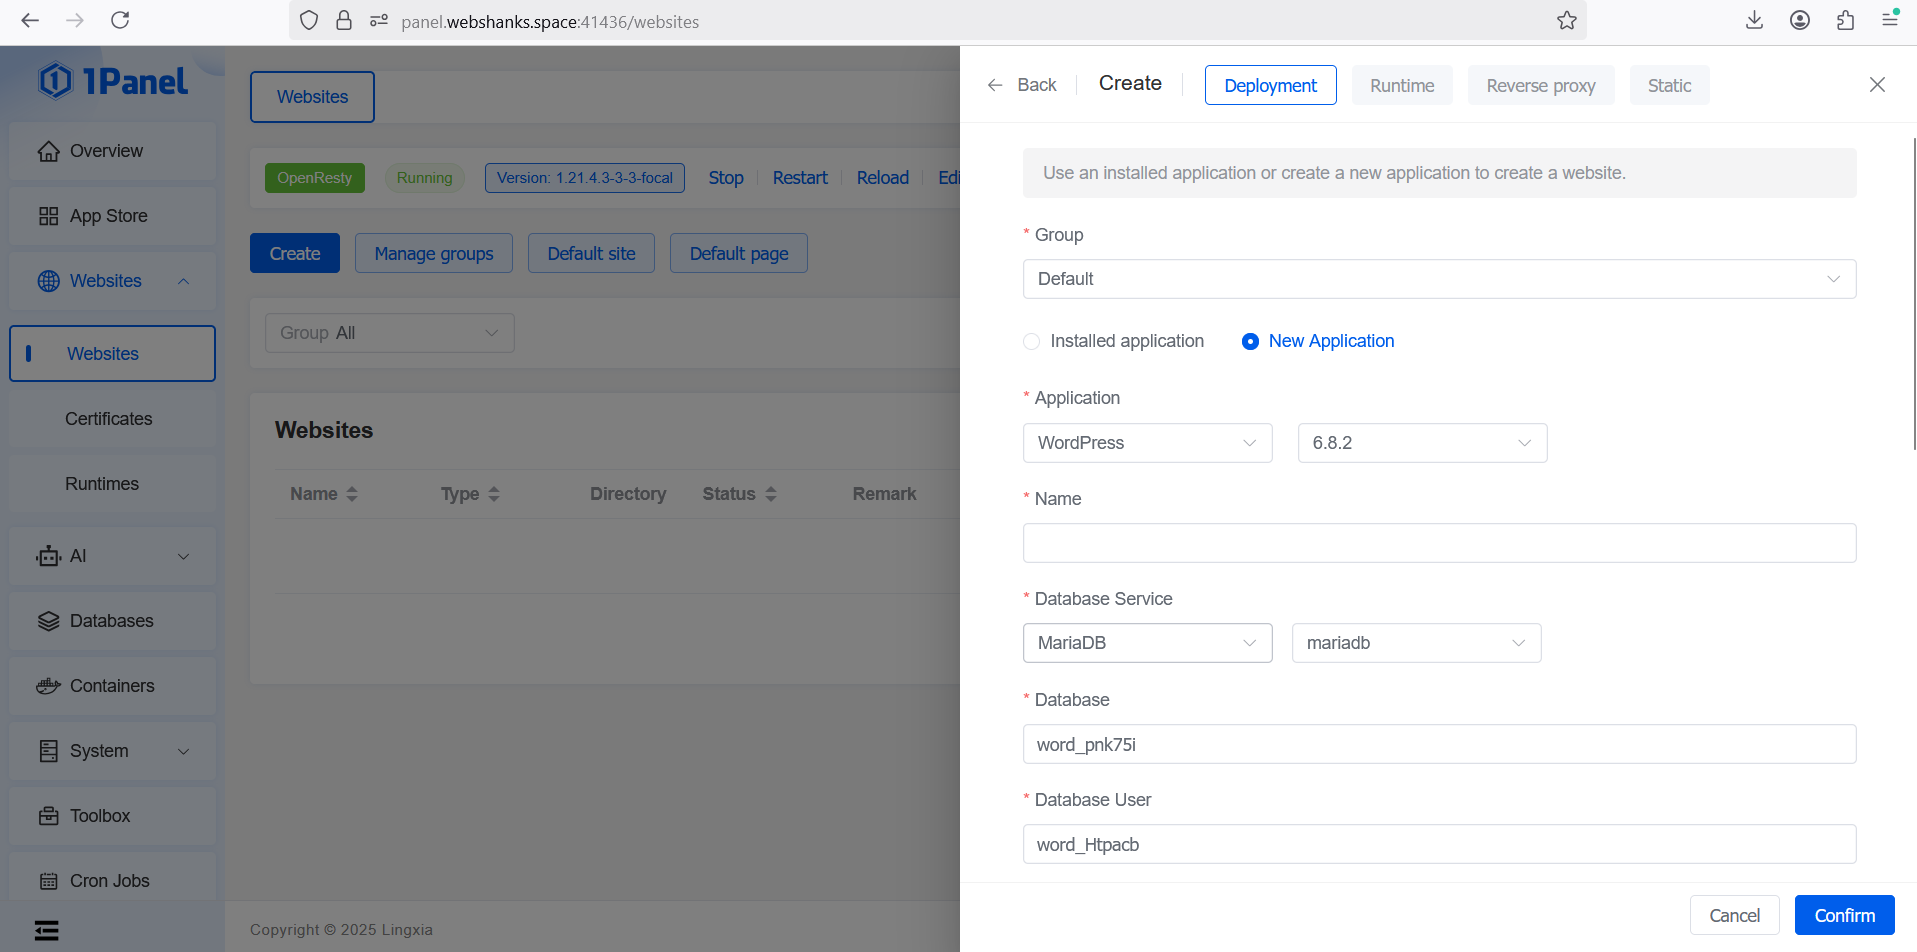
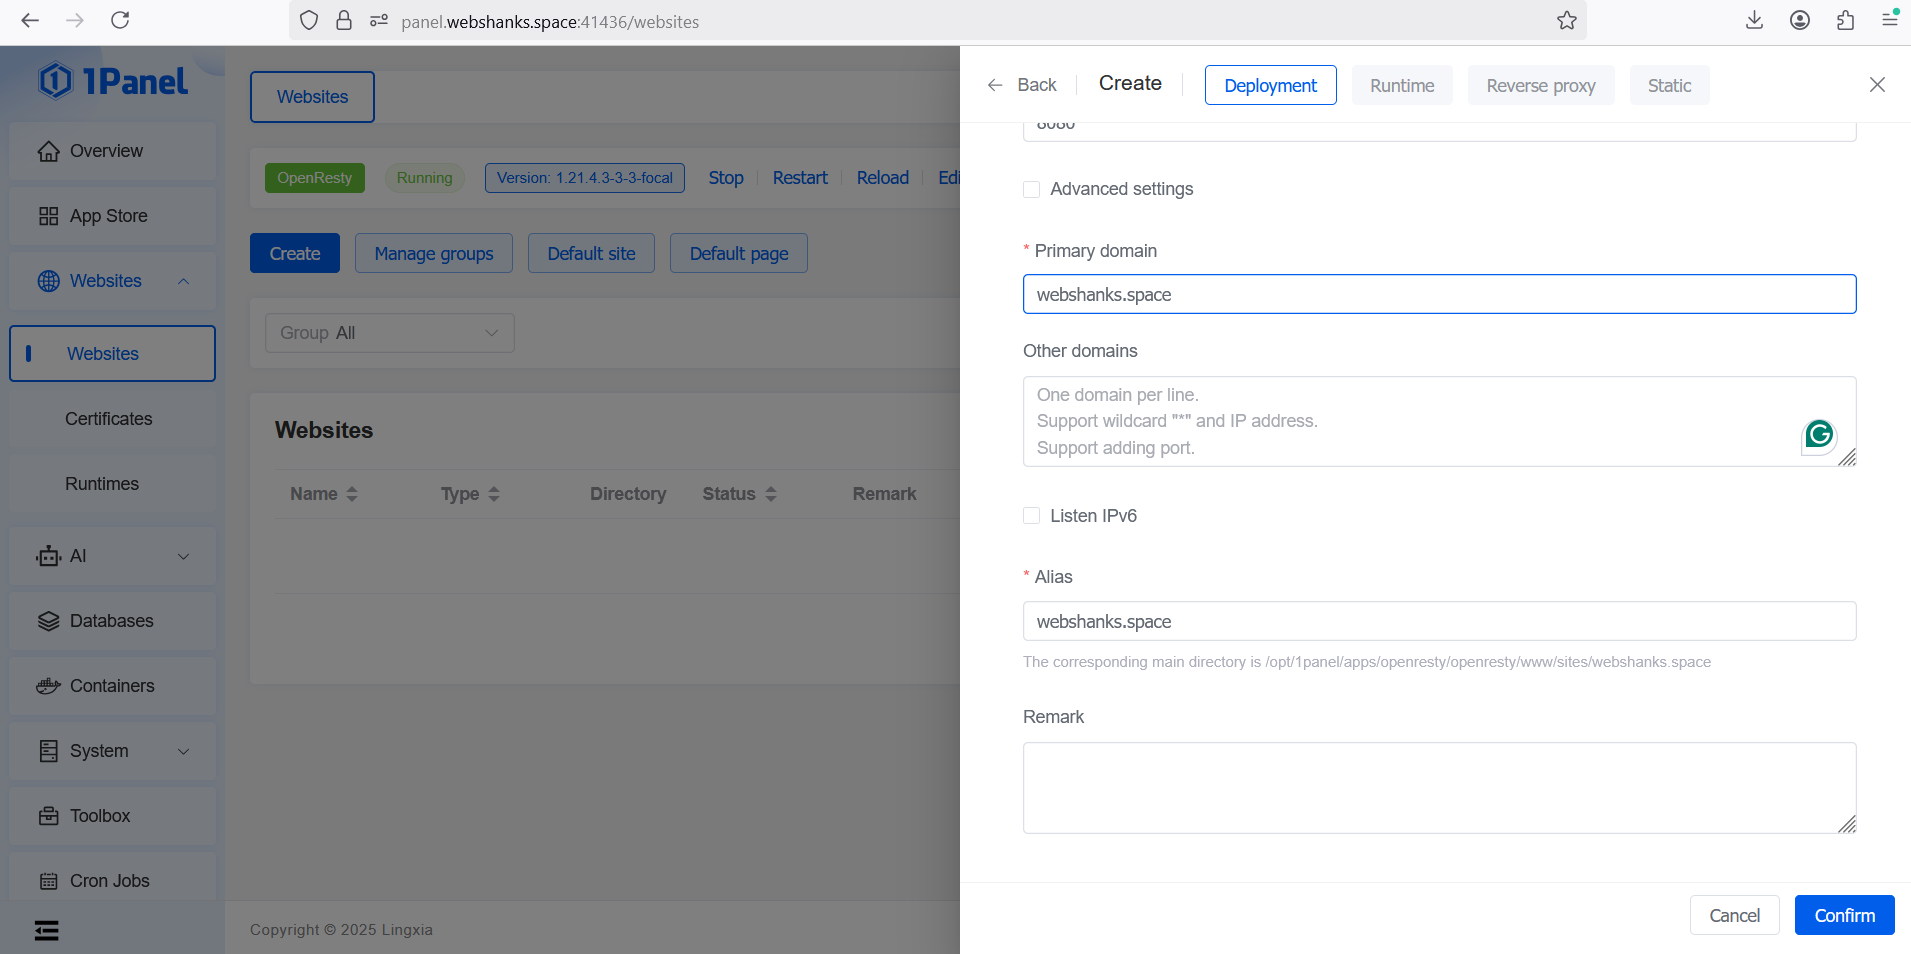
Step 8. Install WordPress
Now it’s time to install WordPress.
Go to Websites > Create > Deployment
Let’s create certificates to use for our WordPress.
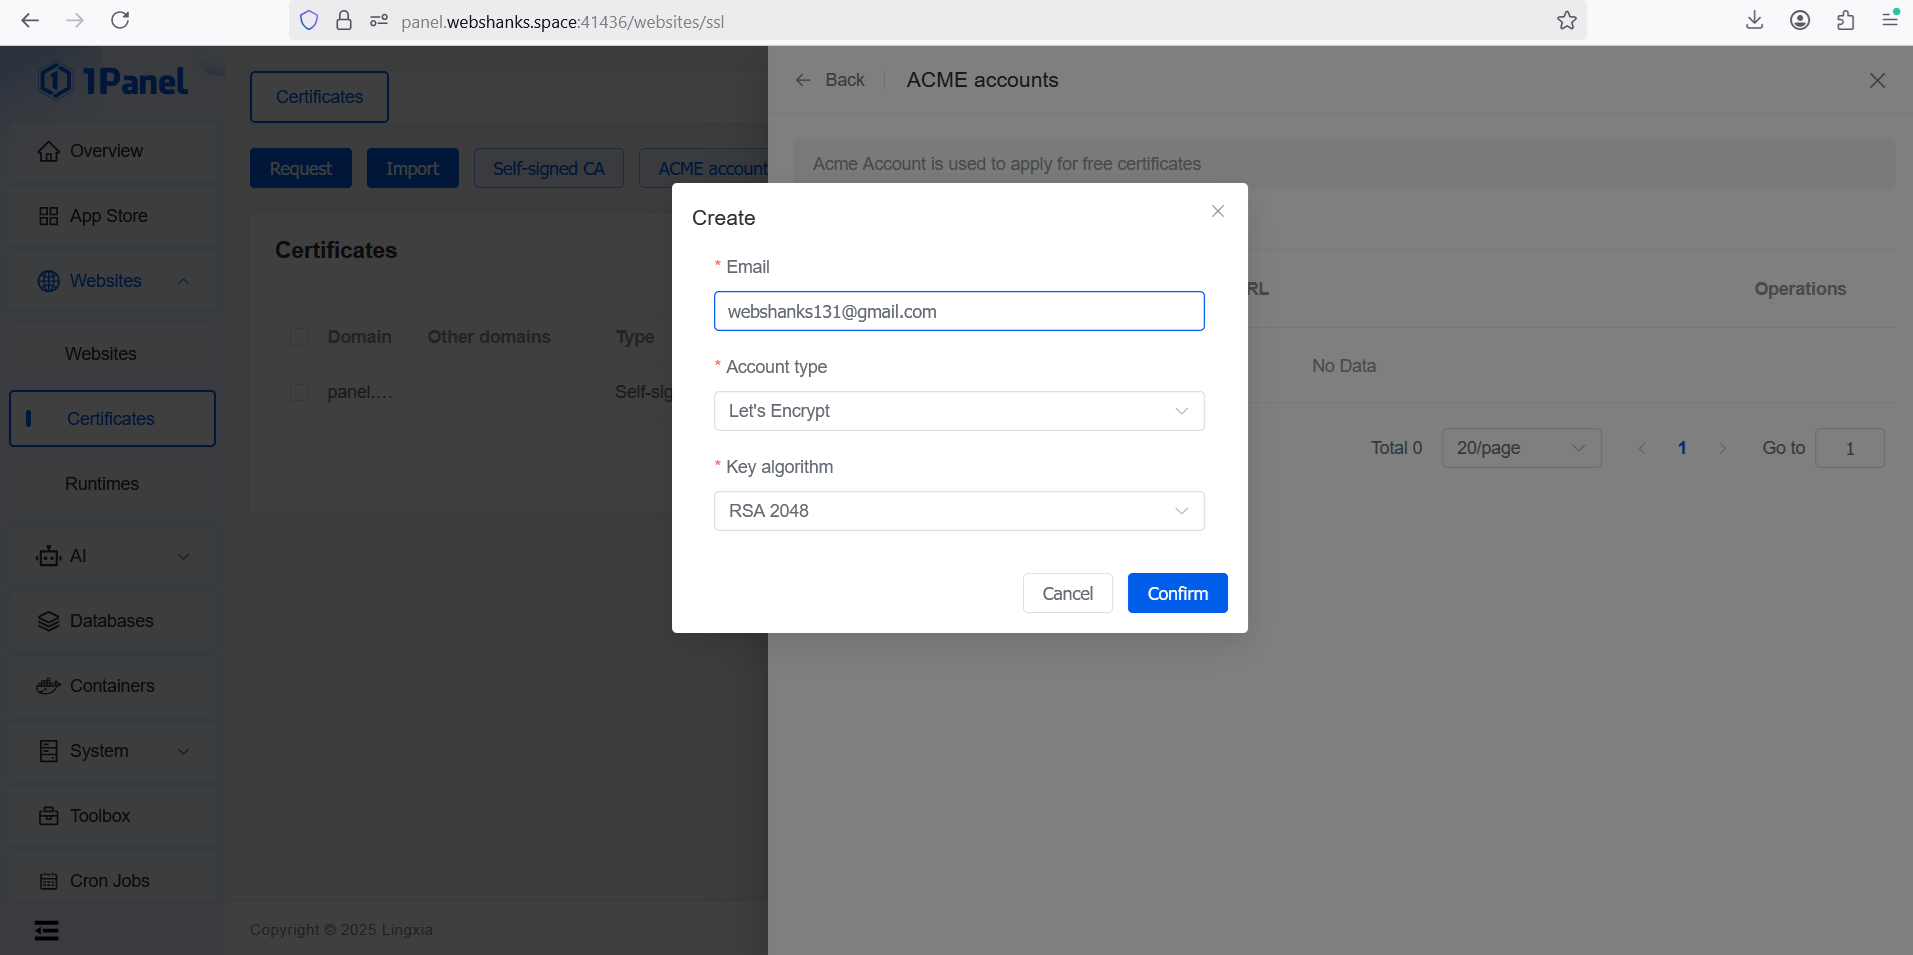
Go to Certificates > ACME accounts and create an account.
Then create an API token in Cloudflare. Don’t use the Global API.
Then add a DNS provider with Cloudflare.

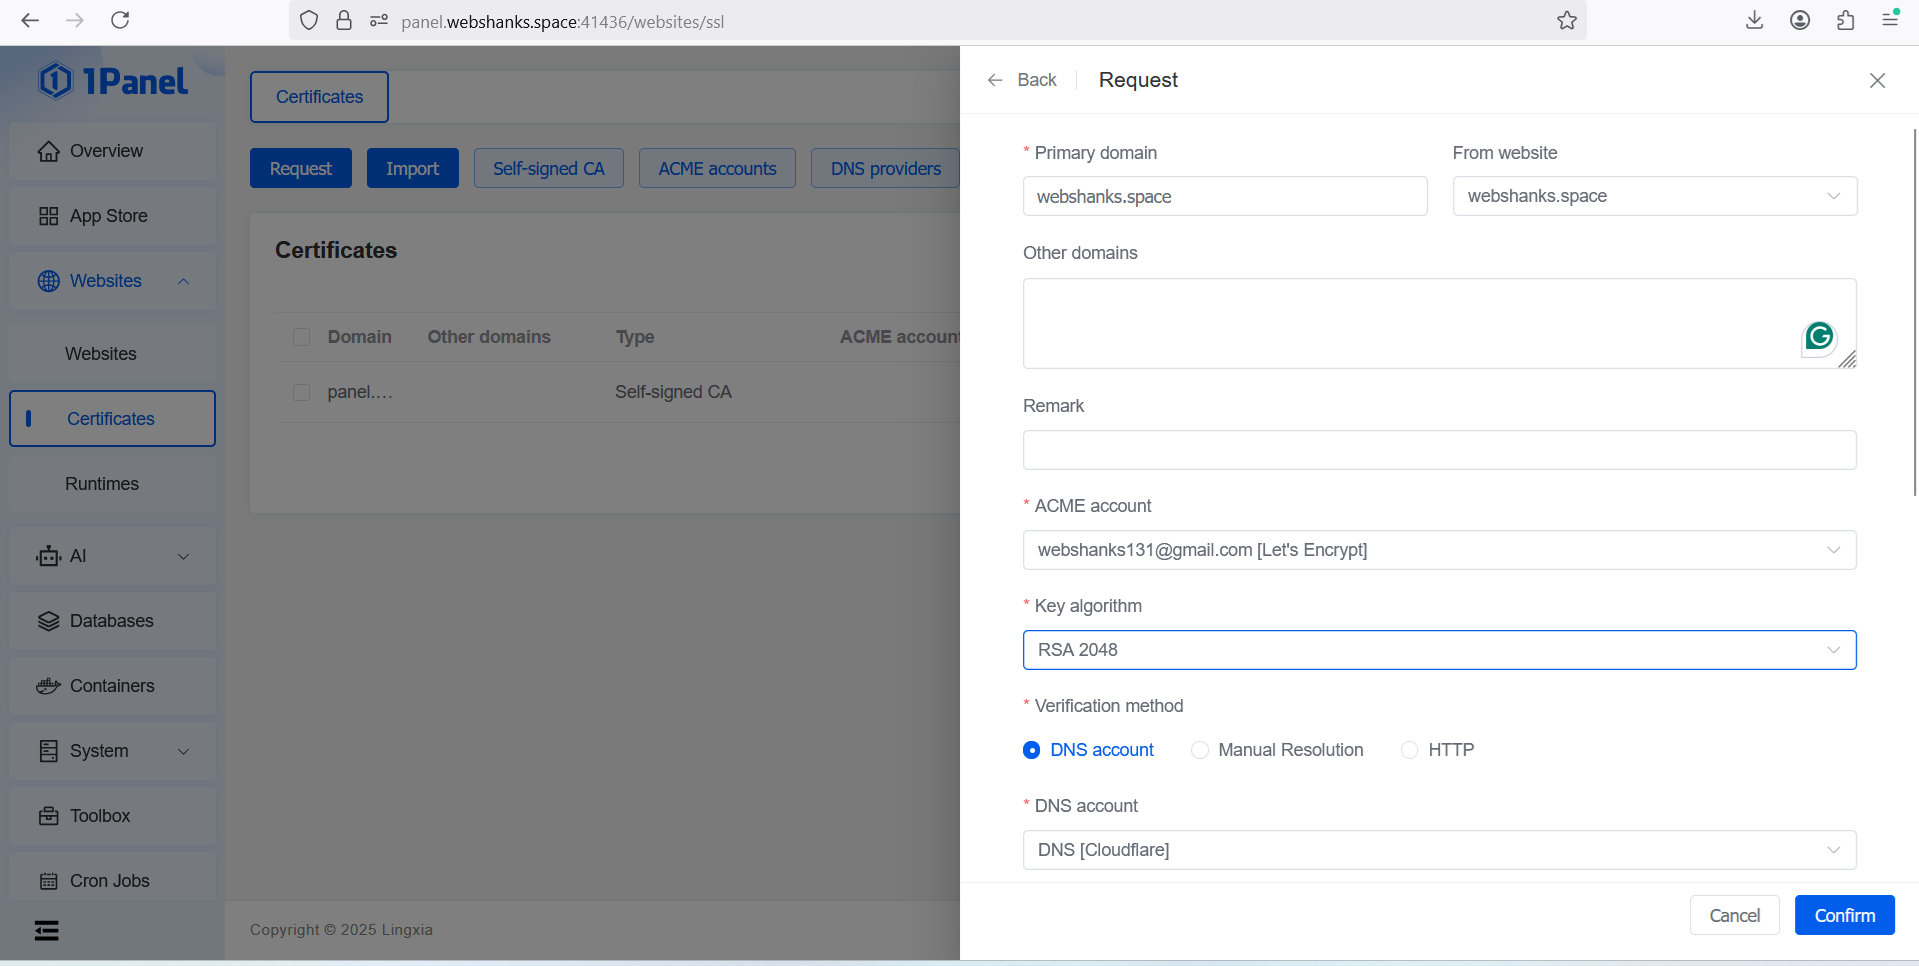
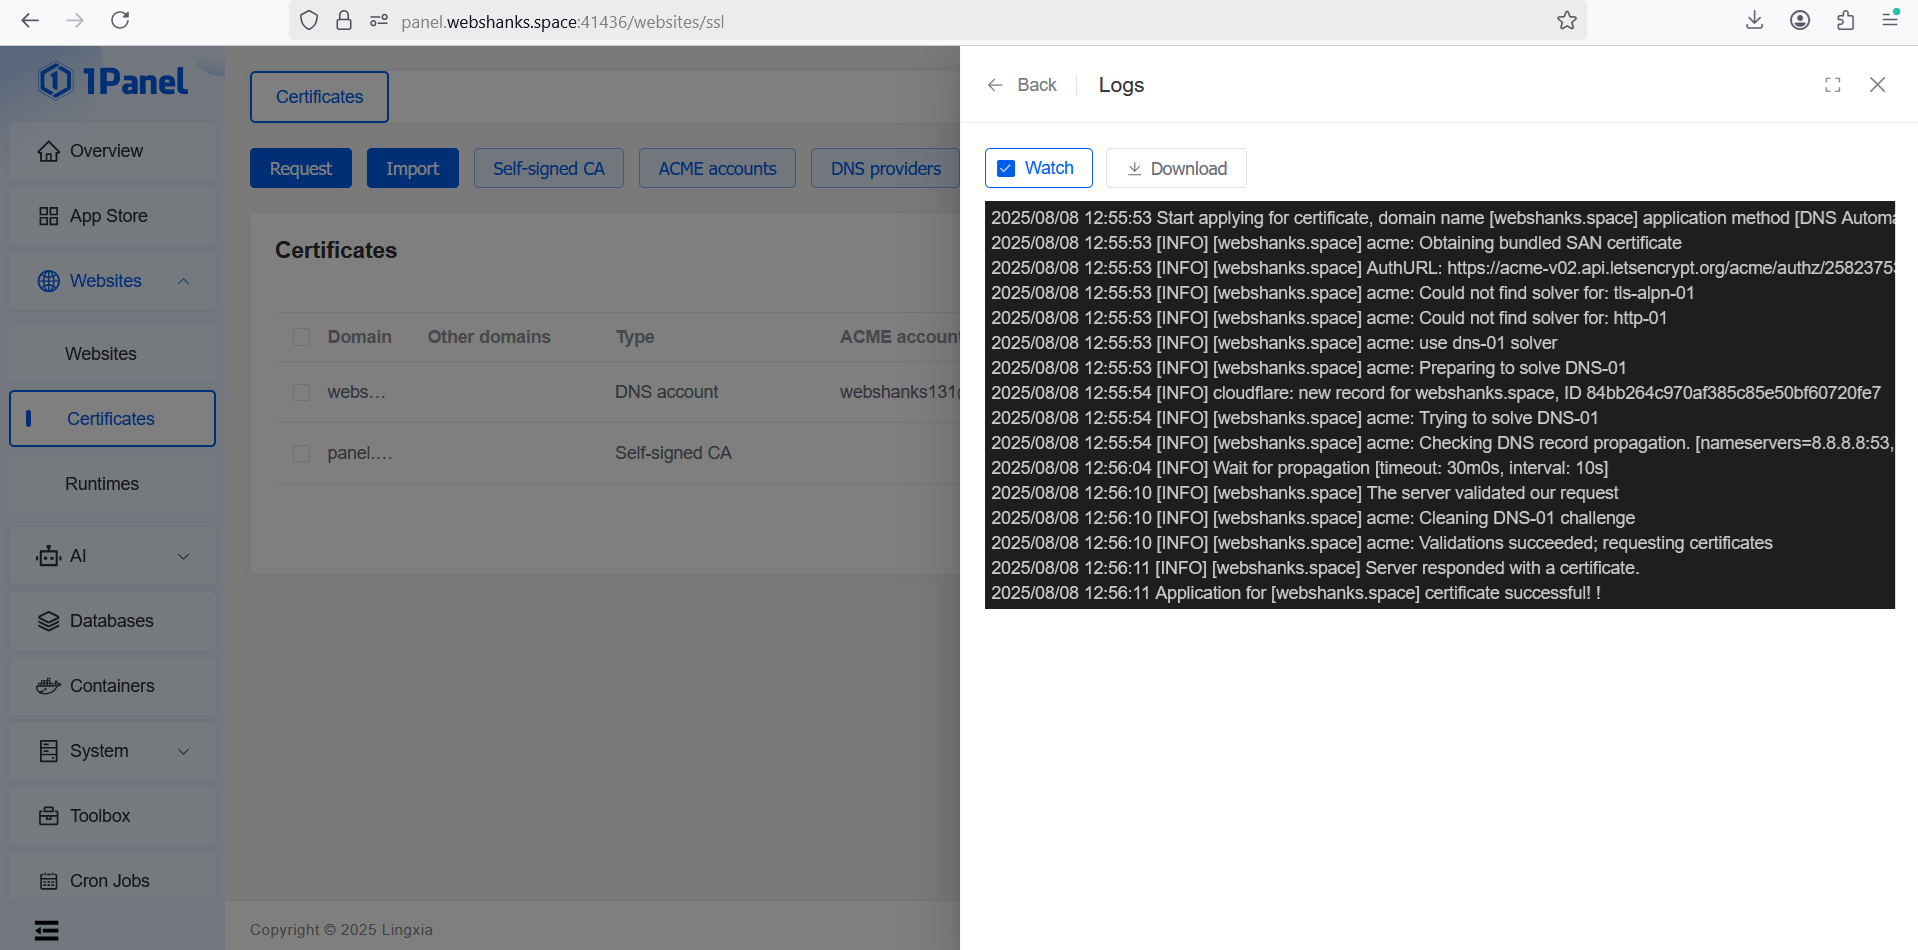
Then let’s request a certificate.
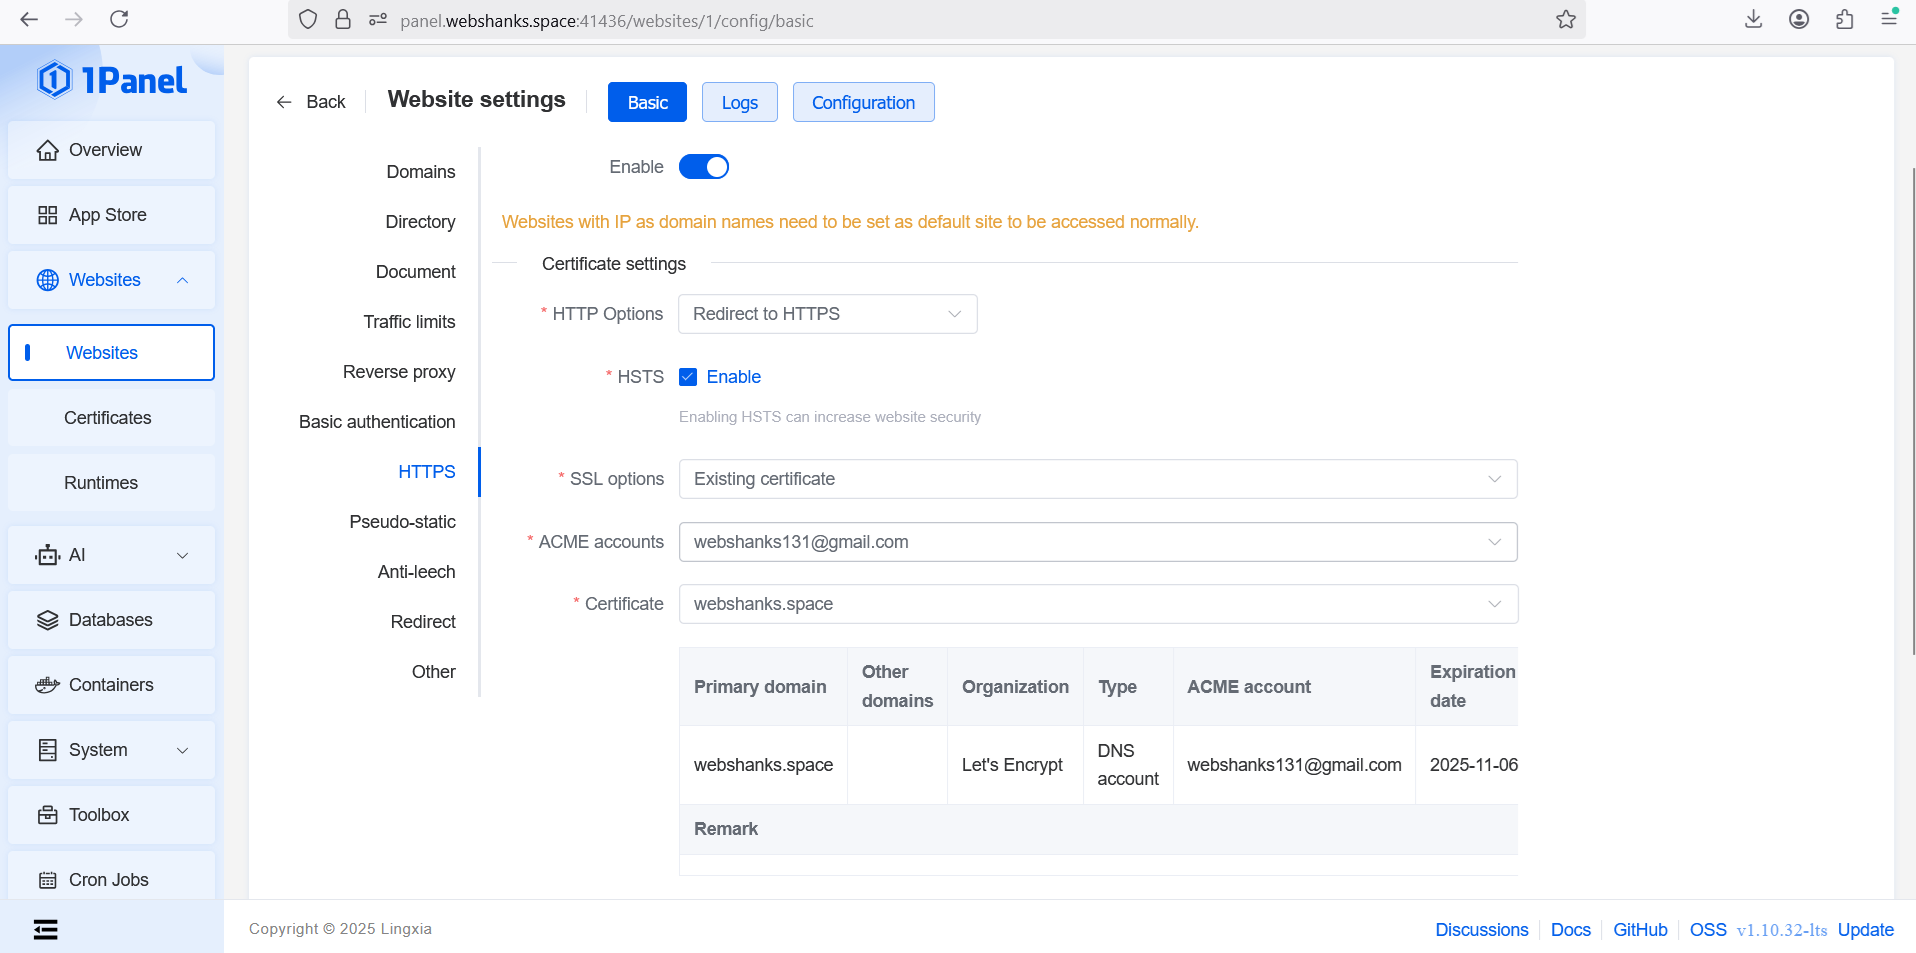
Then we will set it to redirect to HTTPS.
Go to Websites > Edit > HTTPS > Enable HTTPS.
Now let’s install WordPress.
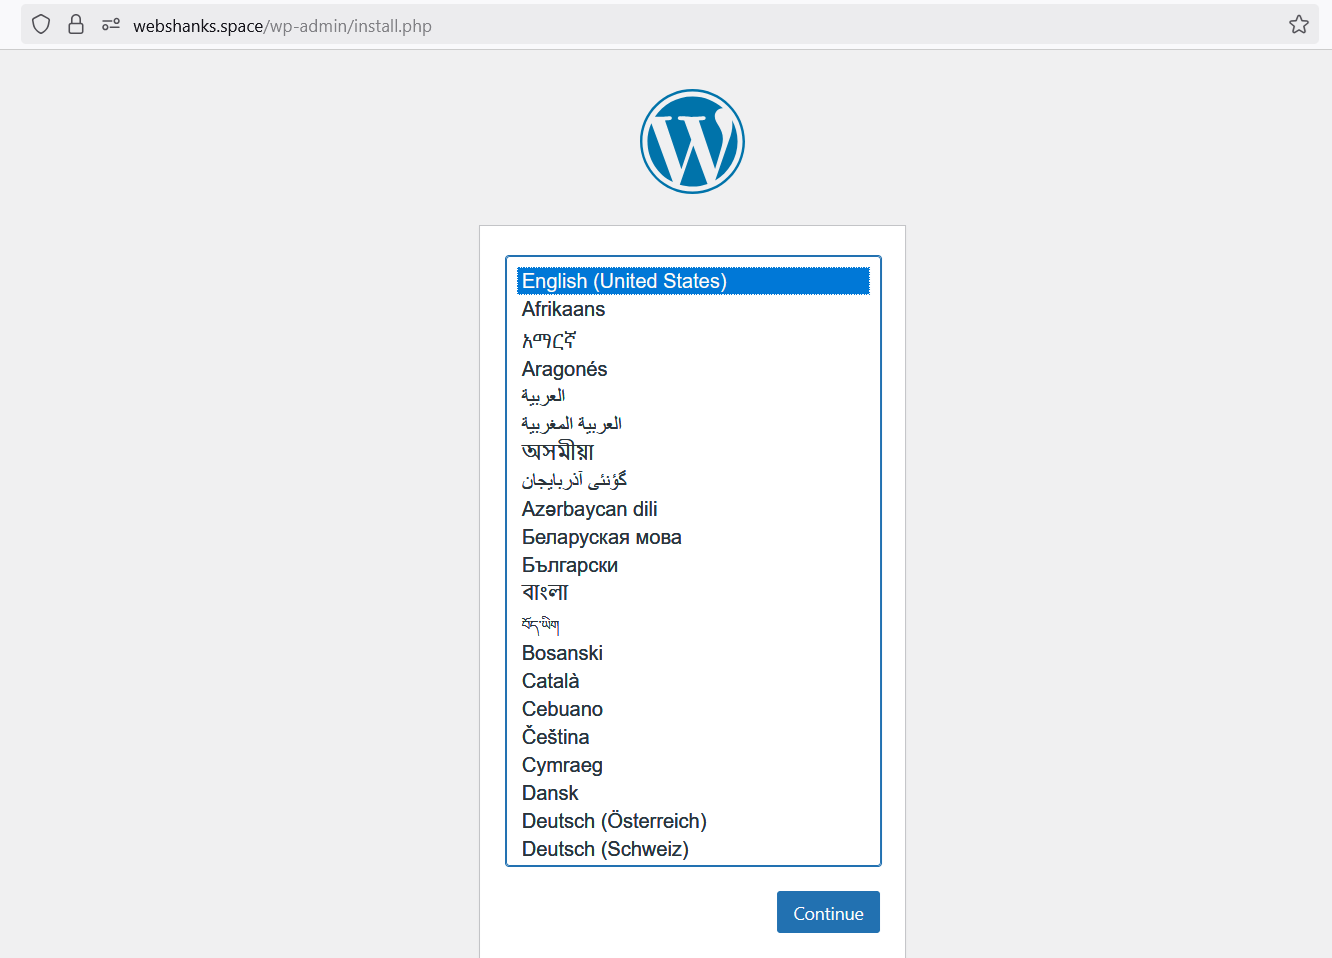
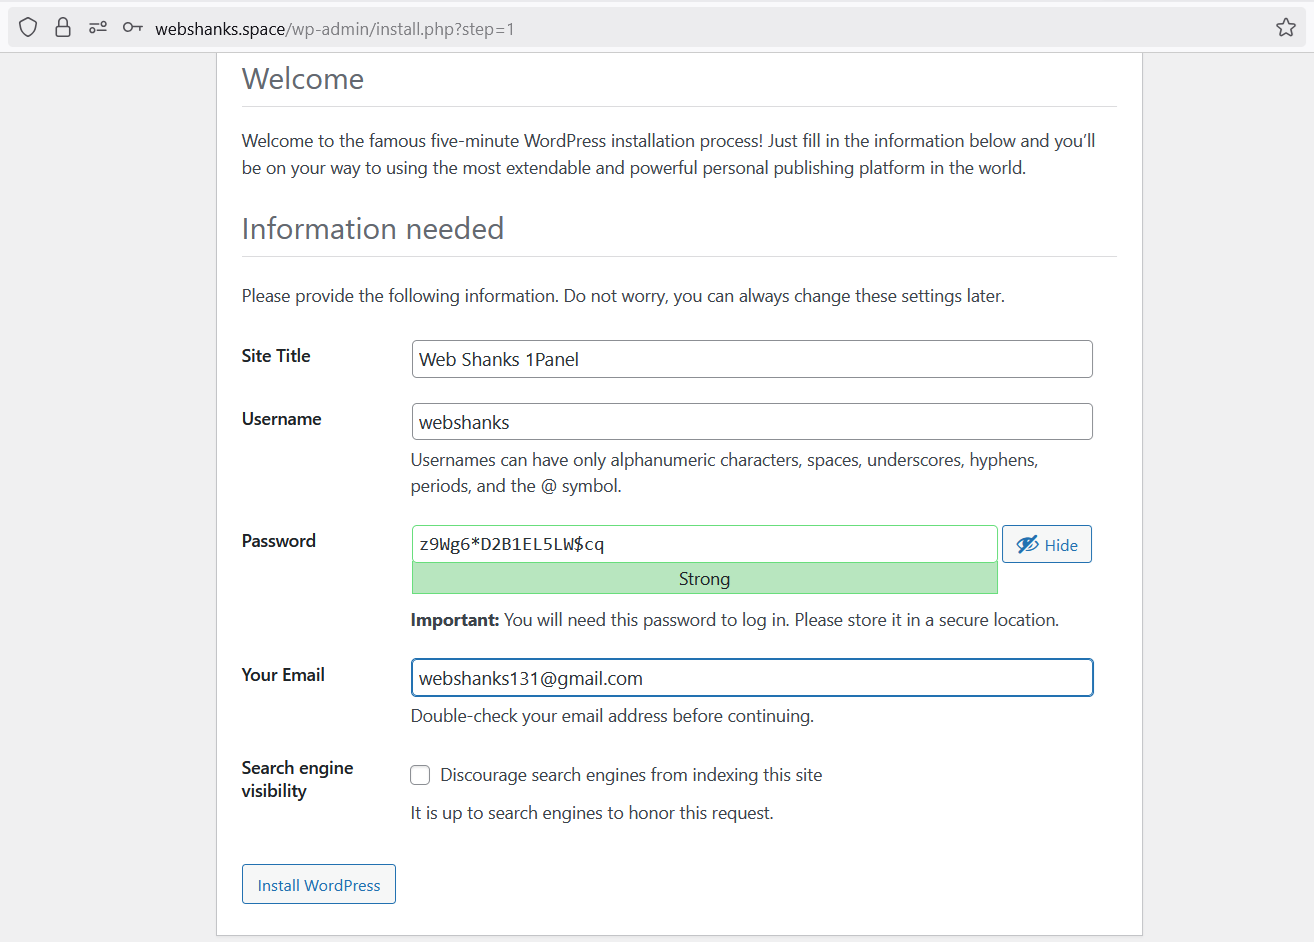
You’ll see the WordPress installation wizard:
-
Select your language
-
Enter your site title, username, password, and email
-
Click Install WordPress
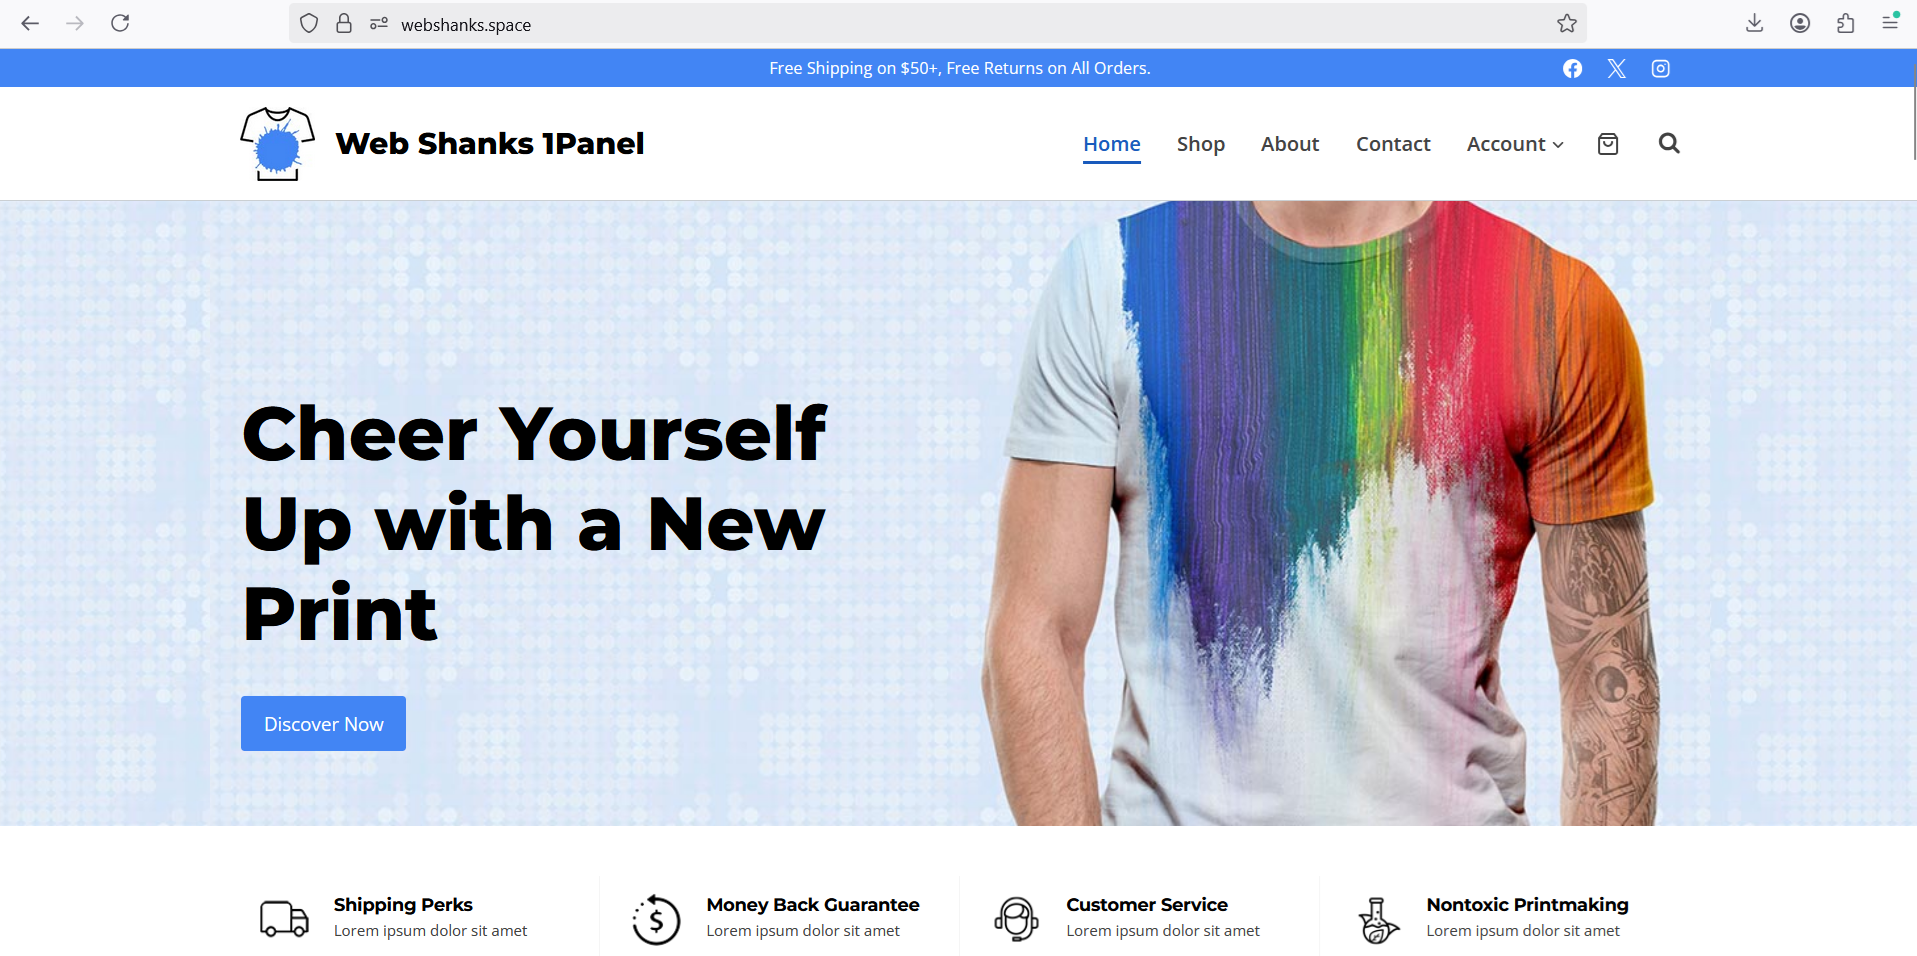
Now we have a functional WordPress website in 1Panel!
Step 9: Start Customizing
You now have a working WordPress site!
-
Install your favorite theme
-
Add essential plugins like Rank Math SEO, WP Rocket, and UpdraftPlus
-
Create your first post and enjoy your new VPS-powered site
Why Choose 1Panel on EUGameHost VPS?
-
Modern UI: No more clunky old control panels
-
One-click WordPress install
-
Built-in SSL management
-
Docker & advanced tools for developers
-
Affordable VPS plans with good performance
Final Thoughts
Setting up WordPress on EUGameHost VPS with 1Panel is surprisingly quick and painless. In just a few steps, you can have a fast, secure, and easy-to-manage website ready to go — whether for a blog, portfolio, or business.
With this setup, you have complete control over your WordPress installation while benefiting from 1Panel’s simplified management interface. Your site will be ready to handle traffic while remaining secure and performant.