 Running your own mail server can feel intimidating at first, but with the right steps it becomes straightforward. In this guide, we’ll go from renting a DartNode dedicated server, to registering a domain on Namecheap, to configuring DNS records, and finally adding the domain in BillionMail.
What You’ll Need
-
A DartNode Dedicated Server (I’ll use Debian 12 for stability).
-
A domain name from Namecheap (any domain you like).
-
Basic comfort with copy/pasting commands into a terminal.
How to Set Up BillionMail on a DartNode Dedicated Server
Step 1: Order Your Dedicated Server (DartNode)

Go to DartNode and choose a Dedicated Server.
You can start with Dual Xeon E5-2650 v4. Pick Debian 12 (Bookworm) as your operating system.
After setup, note your server IP address — you’ll need it for DNS.
💡 Why this matters: Your server is the “home” where BillionMail will run and send emails.
Watch how I setup DartNode Dedicated Server:
Step 2: Set Hostname & Reverse DNS
Log into your server with SSH. I’ll be using Bitvise.

You can also use your server’s IPMI to connect.
First, update your system.
apt update && apt upgrade -y
Then, set your mail server name (hostname) and reboot:
hostnamectl set-hostname mail.example.com
Then go to your DartNode panel > Network > Reverse DNS and set your IP’s PTR record to mail.example.com.

Step 3. Buy Your Domain (Namecheap) & Add DNS Records
Add your DNS records. Follow these DNS guides.
| Record Type | Name | Content | Priority | TTL |
| A | YourServerIP | Auto | ||
| A | webshanks.org | YourServerIP | Auto | |
| AAAA | YourServerIPv6 | Auto | ||
| AAAA | webshanks.org | YourServerIPv6 | Auto | |
| MX | webshanks.org | mail.webshanks.org | 10 | Auto |
| TXT | _dmarc | v=DMARC1; p=quarantine; pct=100 | Auto | |
| TXT | webshanks.org | v=spf1 a mx ip4:yourIPv4 ip6:yourIPv6 ~all | Auto |
These records tell the internet, “this server is allowed to send email for my domain.”
Step 4. Install BillionMail
Now run BillionMail:
cd /opt && git clone https://github.com/aaPanel/BillionMail && cd BillionMail && bash install.sh
If there’s no git, install using the command:
apt install git -y
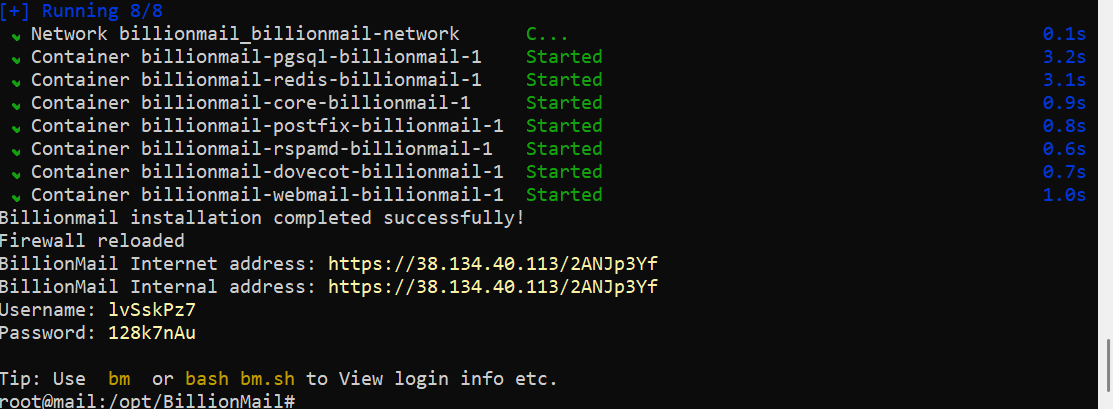
Go to that address to access your BillionMail.
If you see Warning: Potential Security Risk Ahead, just click Advanced and Proceed.
Login using the credentials provided.
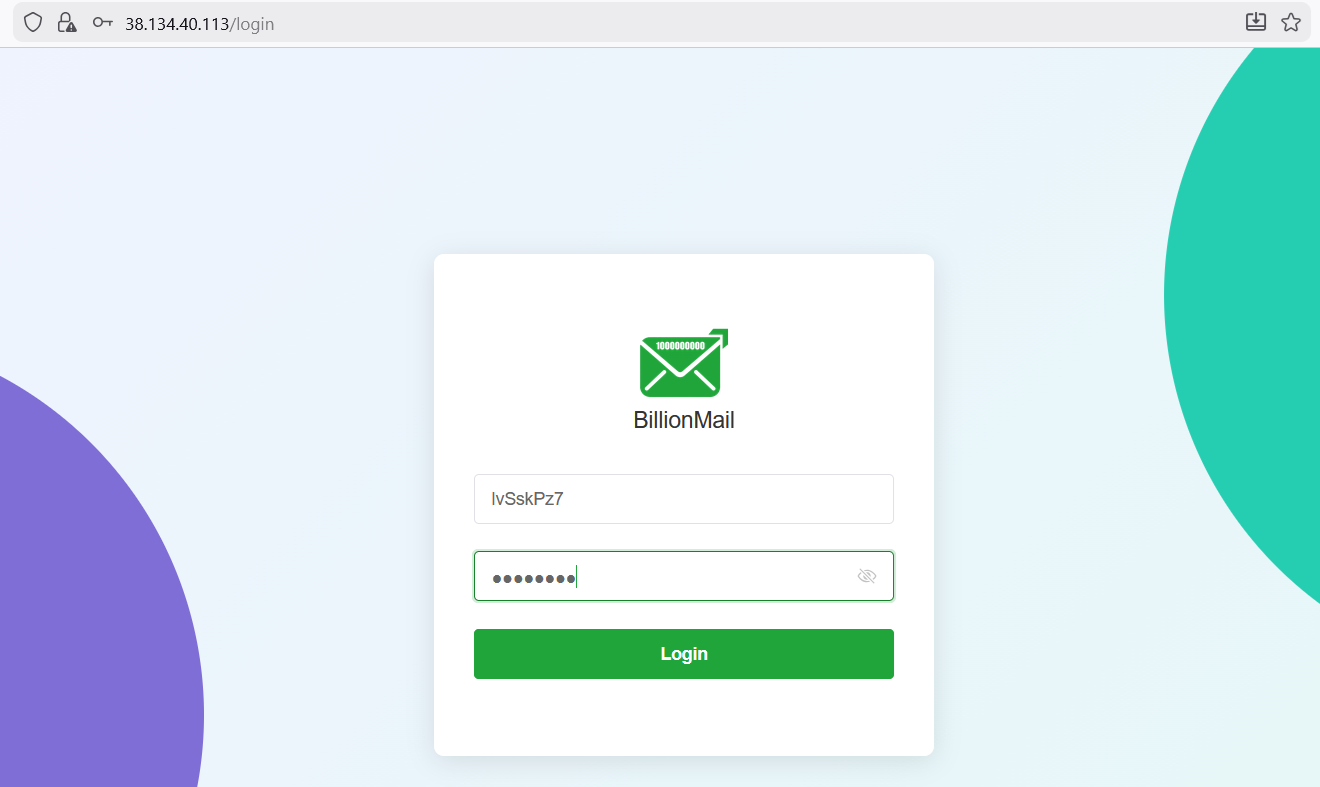
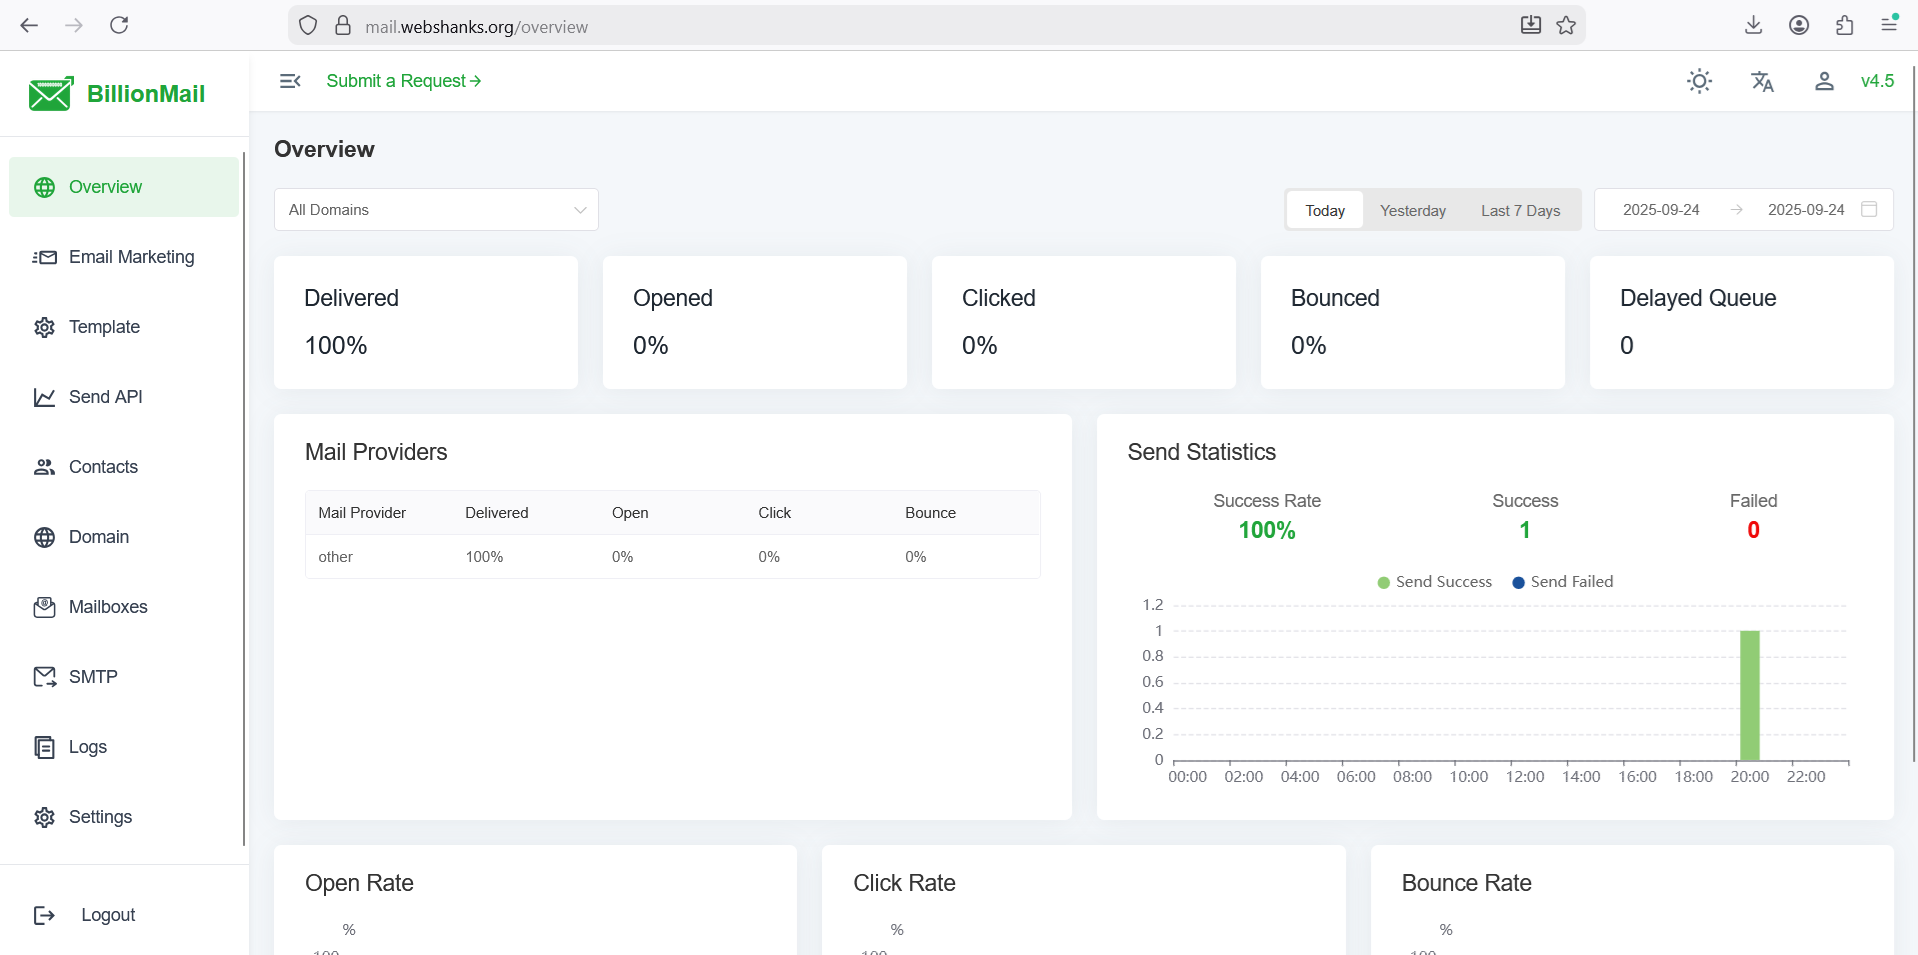
And welcome to your BillionMail dashboard!

To access your BillionMail securely, go to https://mail.yourdomain.com/securitytokens.
Step 5. Configure BillionMail
Now let’s configure BillionMail to send and receive email messages.
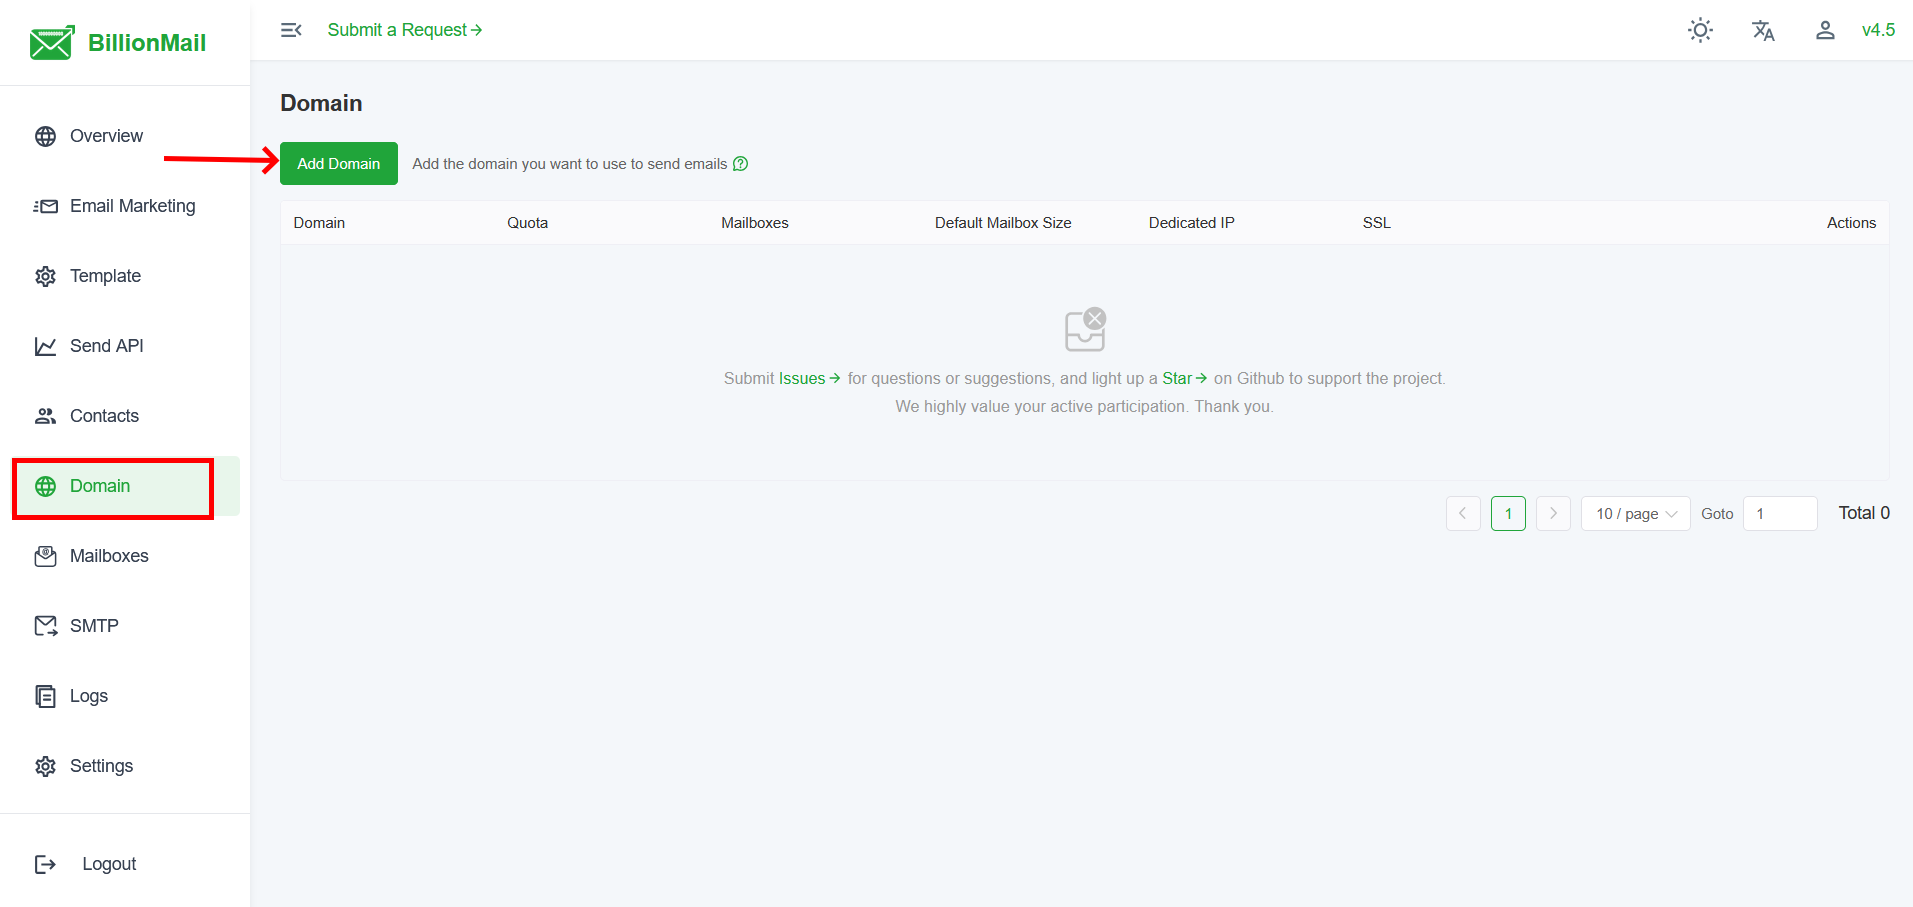
Let’s add a domain.
Go to Domain > Add Domain.
.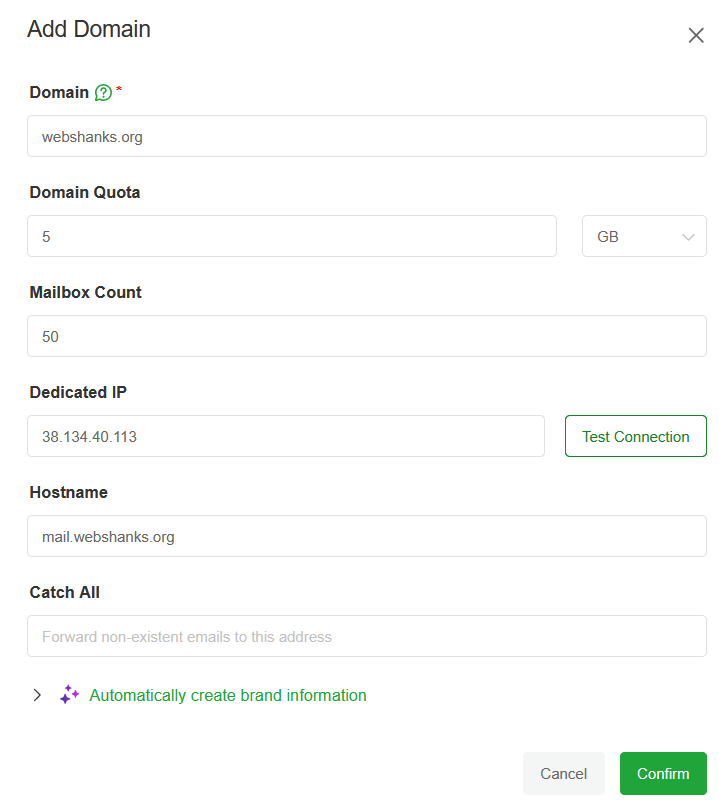
Set your domain and important fields.
- Domain: webshanks.org ✅
- Dedicated IP: 38.134.40.113 ✅ (make sure this is really your server’s main IP)
- Hostname: mail.webshanks.org ✅ (this must match your server’s hostnamectl setting and DNS records)
Be sure to change it with your own domain and IP.
Next, we will set an SSL.
Just click SSL.

Then click Apply Free Certificate.
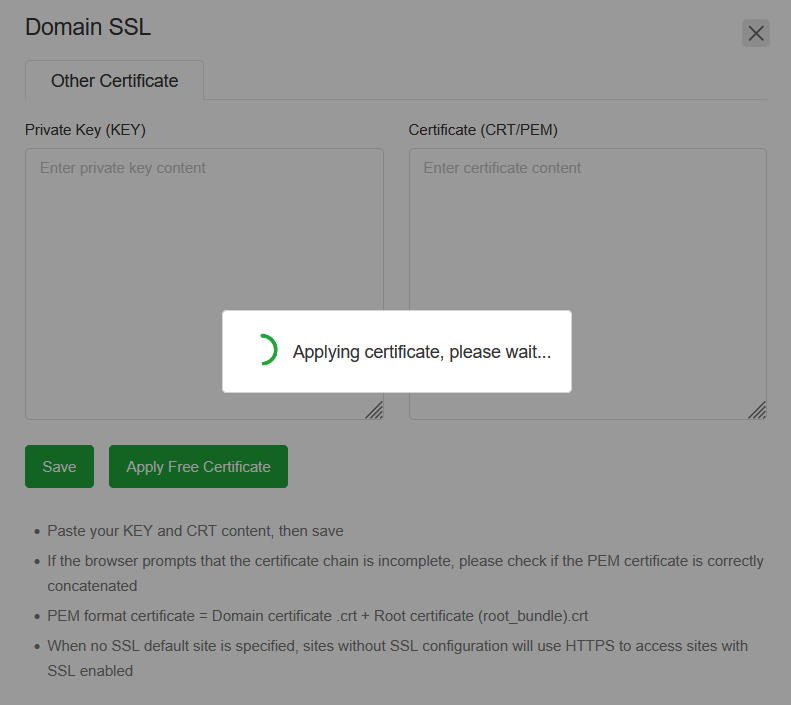
Note: If the application takes long, just open BillionMail on a new tab.
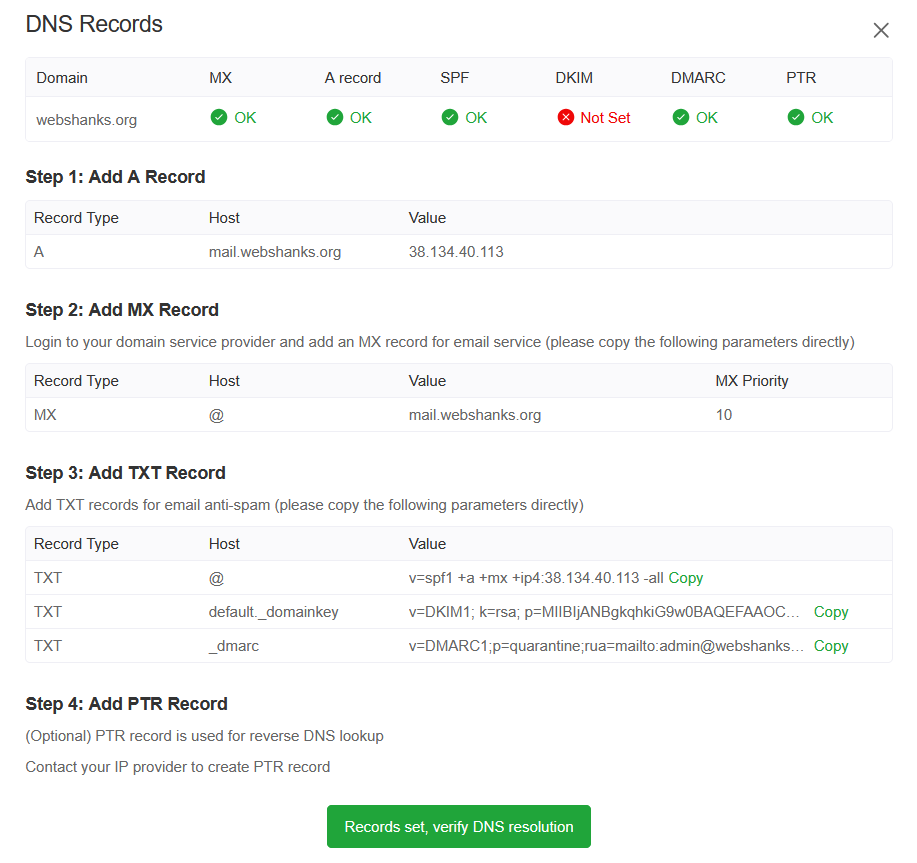
Now we will set the remaining DNS records. Click DNS Records.

So we only have DKIM remaining. Let’s add the DKIM to our domain registar.
Once you’ve added the DKIM key, click Records set, verify DNS resolution.
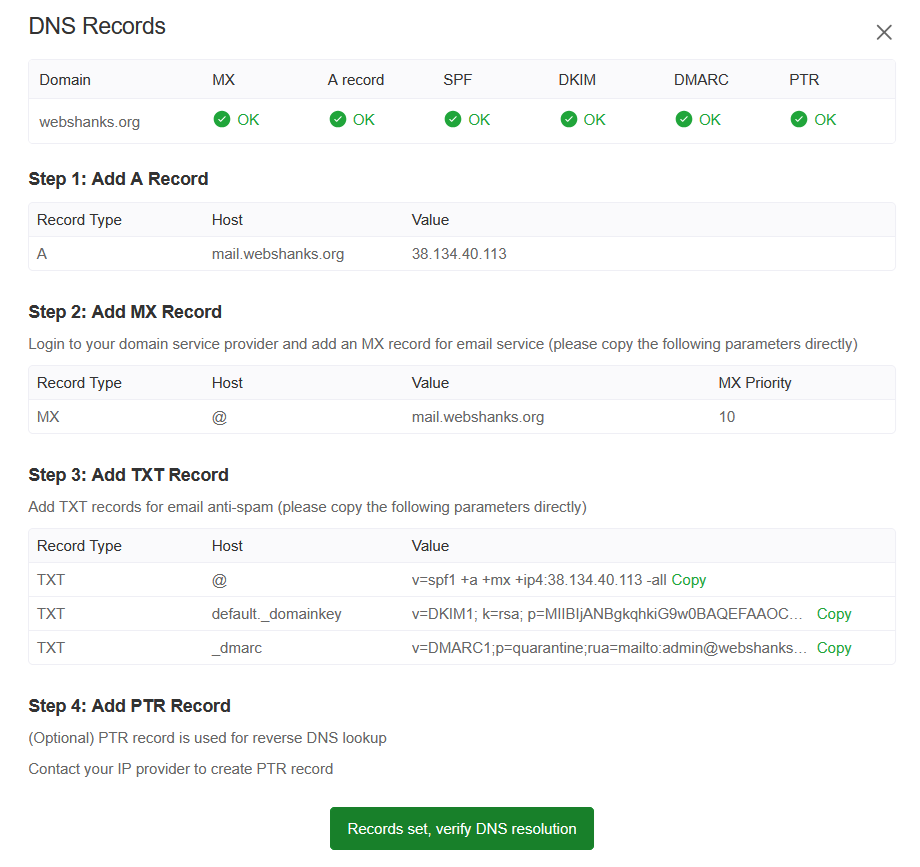
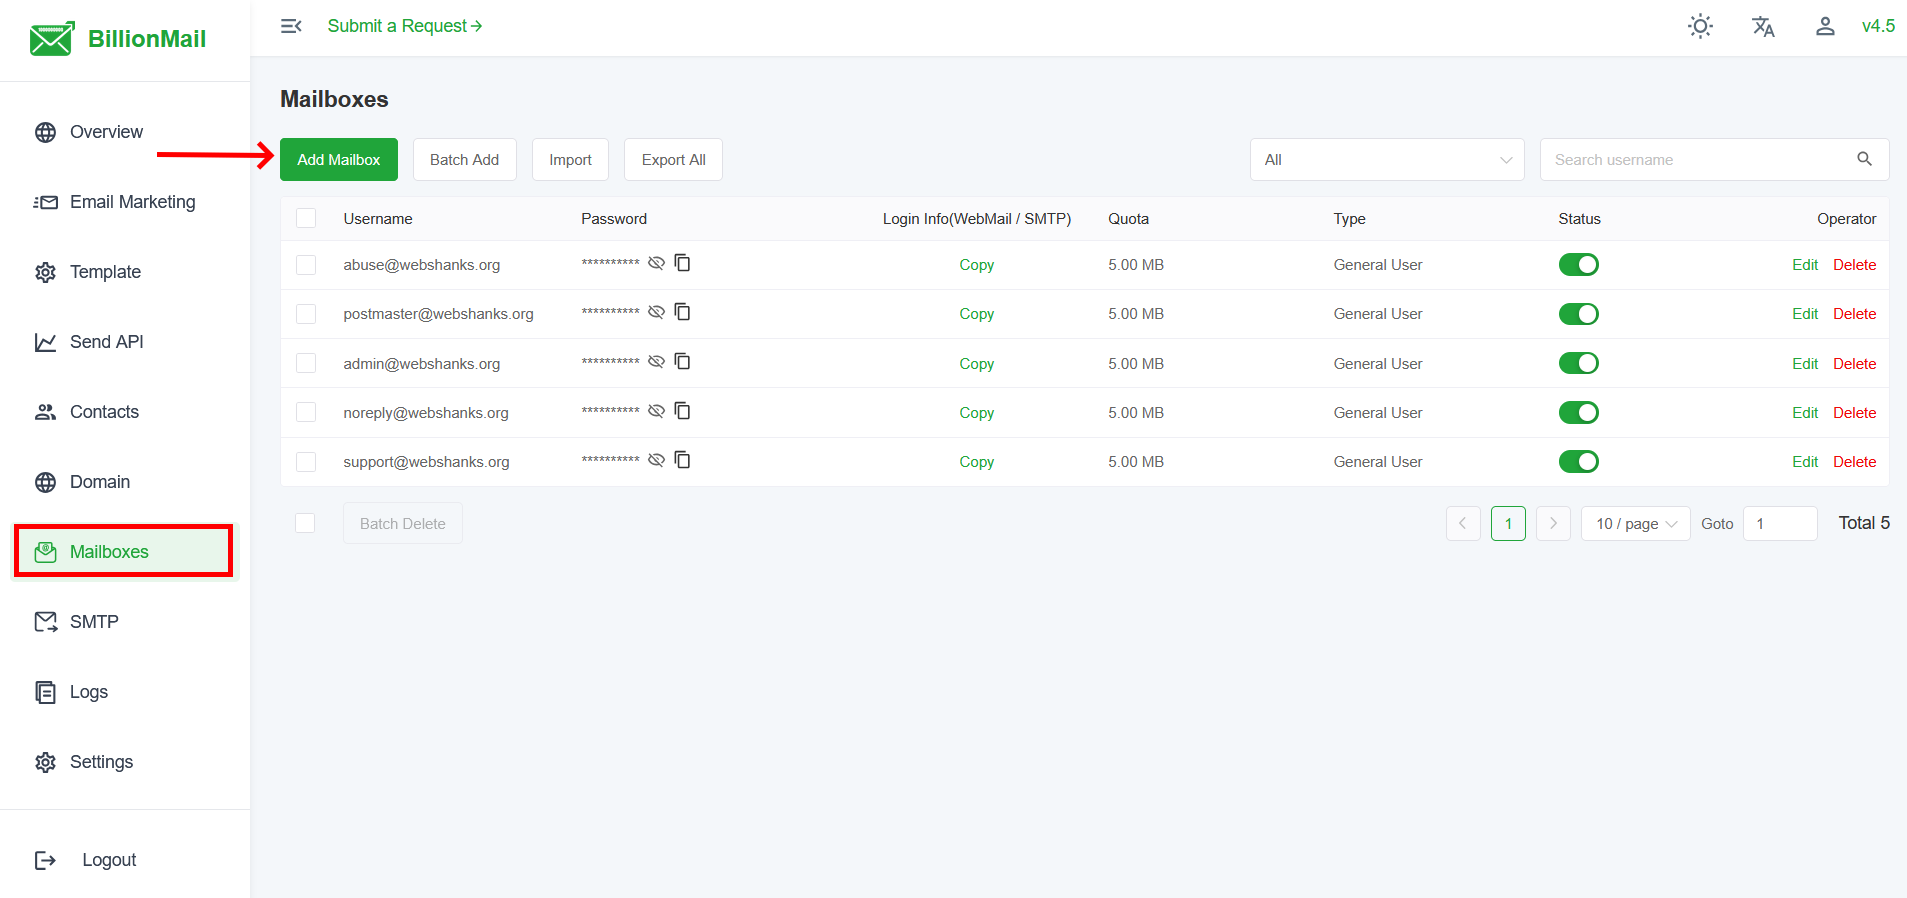
All set! Now we need to add mailbox to test our email server.
Go to Mailboxes > Add Mailbox.
Step 6: Test Your Email
BillionMail has Roundcube webmail. You can access it on /roundcube/.
We’ll send a test email to Mail-Tester.
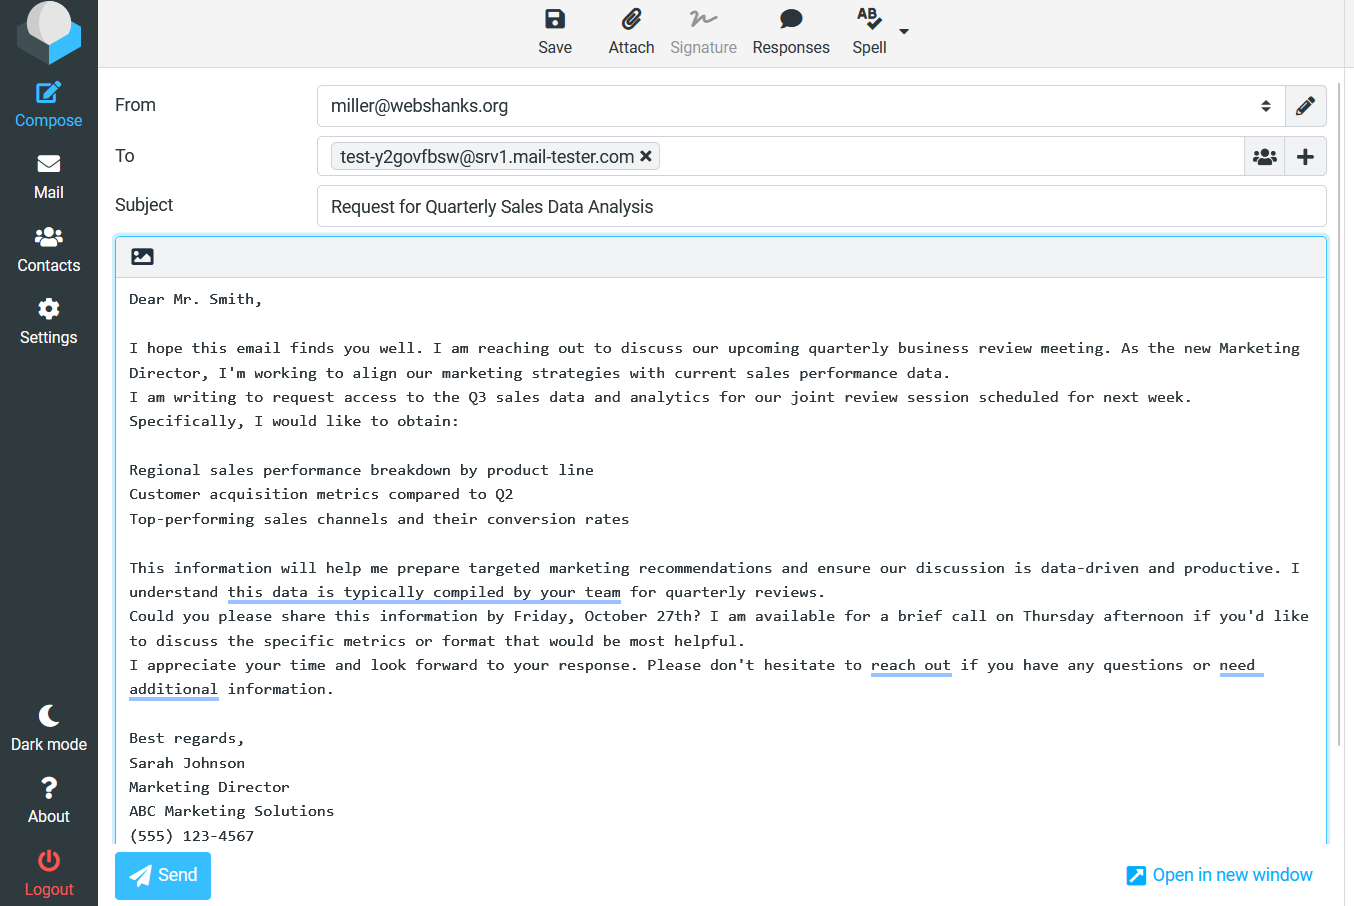
And we have a 10/10 Score!

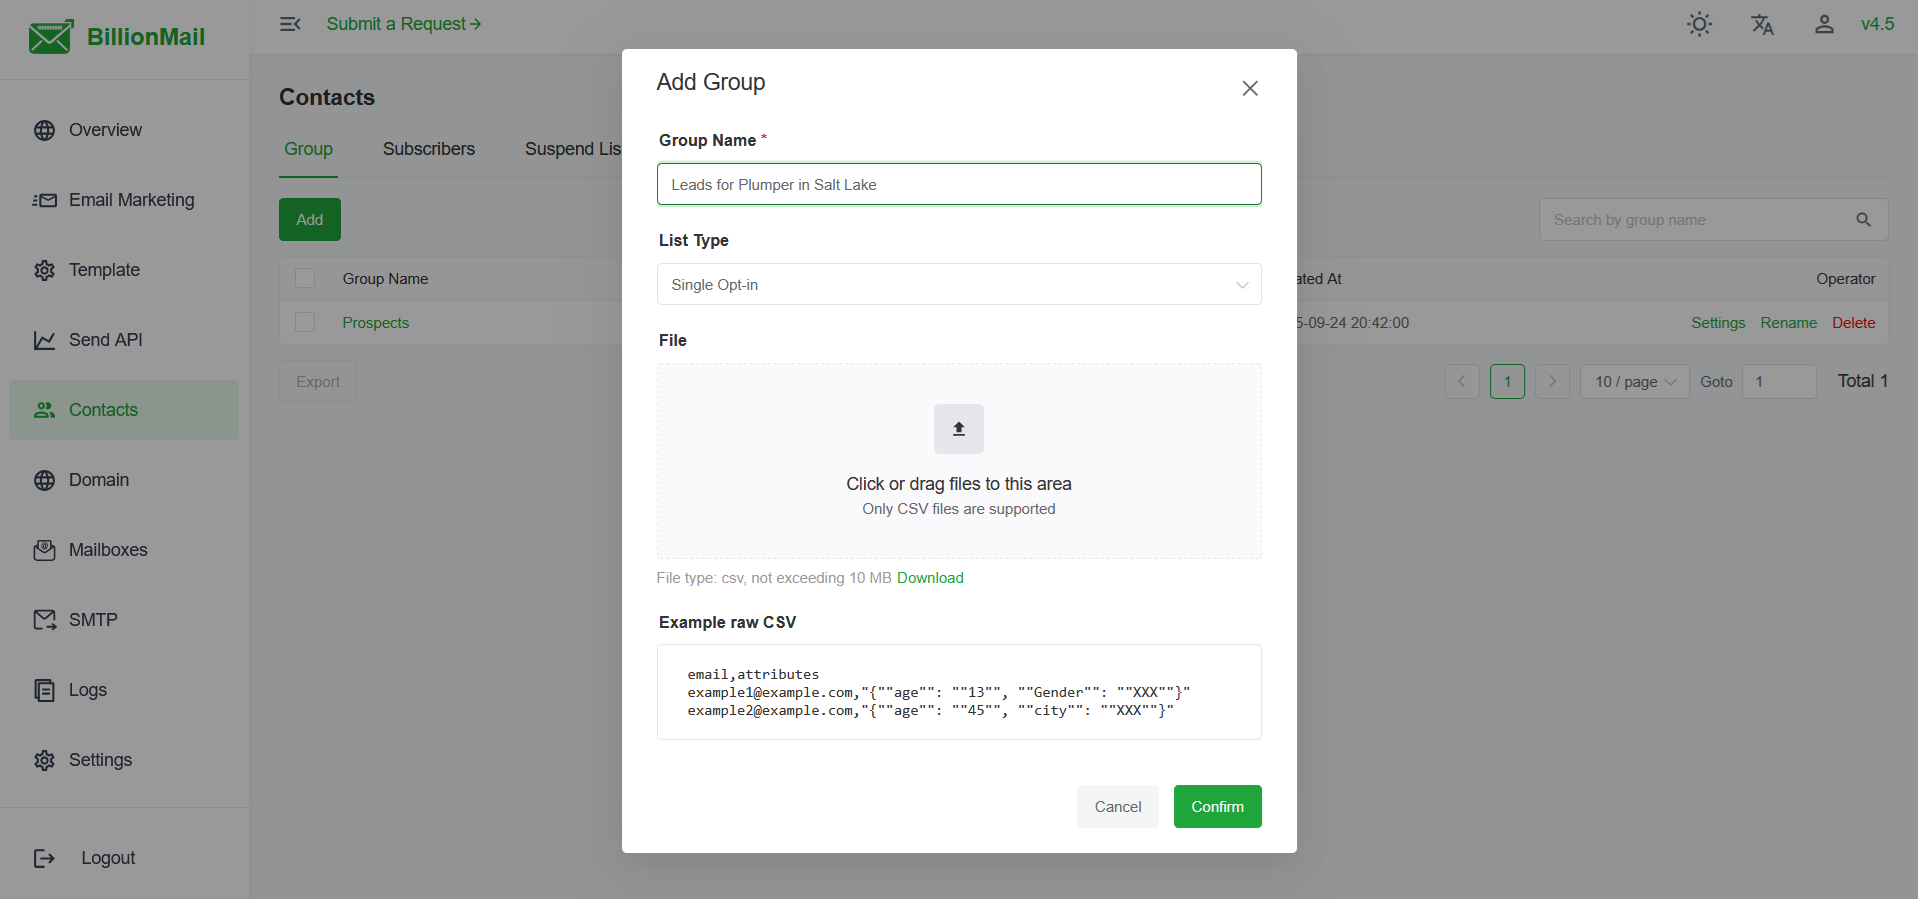
To start email marketing, upload your email lists or leads if you are using cold email marketing.
Just go to Contacts > Add Group.
Step 7: Warm Up Your IP
Don’t send thousands of emails on Day 1. Start with a few dozen per day and increase slowly. This builds your IP reputation. Check out my warmup guide here.
Troubleshooting
Hostname not updating?
Run hostnamectl again, then reboot.
Test Connection fails in BillionMail?
Ensure your A/MX records are correct and firewall ports (25, 465, 587, 993, 995) are open.
PTR not set?
Go to DartNode dashboard > Networking > rDNS > set it to mail.example.com.
FAQ
Do I need a dedicated IP?
Yes. Shared IPs often get blocked.
Can I run this on a small VPS?
Yes, for testing, but production needs more RAM/CPU. Also, check to see if your server opens port 25.
What ports should I open?
22 (SSH), 80/443 (web/SSL), 25 (SMTP), 465/587 (submission), 993 (IMAP).
Is BillionMail really free?
Yes — it’s open source. Your only costs are the server + domain.
Summary
With this setup, you’ll have full control of your email system, better deliverability, and a professional-looking mail server running on your own infrastructure.
sir how many emails can i send daily?
It depends on your provider.
tested the connection it did not receive at mailtester
Check your server if it has an open port 25