
 As many of you know, CloudPanel has no email feature, unlike CyberPanel, HestiaCP and aaPanel. This guide aims to walk you through the process of setting up mailcow within the CloudPanel environment, providing step-by-step instructions and essential information to get you up and running quickly.
Let’s dive in and empower you to harness the full potential of mailcow in your CloudPanel hosting environment.
But first…
Prerequisites
Before diving into setting up mailcow in CloudPanel, ensure you have the following prerequisites:
- A VPS or Dedicated Server – We need to be able to send emails with a server with open port 25. We will be using RackNerd VPS running Ubuntu 22.04 LTS.
- A domain – We need a domain to access CloudPanel and mailcow. Get a domain on Namecheap.
- Server Requirements – Ensure your server meets the minimum requirements for running CloudPanel and mailcow. Have at least 1vCore, 6GB RAM, and 20GB Disk space.
Once you have these prerequisites in place, you’re ready to proceed with setting up mailcow in CloudPanel.
How to Setup mailcow in CloudPanel Complete Guide
Step 1. Install CloudPanel on Ubuntu 22.04
Connect to your Ubuntu 22.04 server via SSH using a terminal or an SSH client.
Update the package index and upgrade existing packages:
apt update && apt -y upgrade && apt -y install curl wget sudo
Download and run the CloudPanel installer script:
curl -sS https://installer.cloudpanel.io/ce/v2/install.sh -o install.sh; \
echo "85762db0edc00ce19a2cd5496d1627903e6198ad850bbbdefb2ceaa46bd20cbd install.sh" | \
sha256sum -c && sudo DB_ENGINE=MARIADB_10.11 bash install.sh

If the installer doesn’t work, go here.
Wait for the installation to finish.

Step 2. Access and Create User for CloudPanel
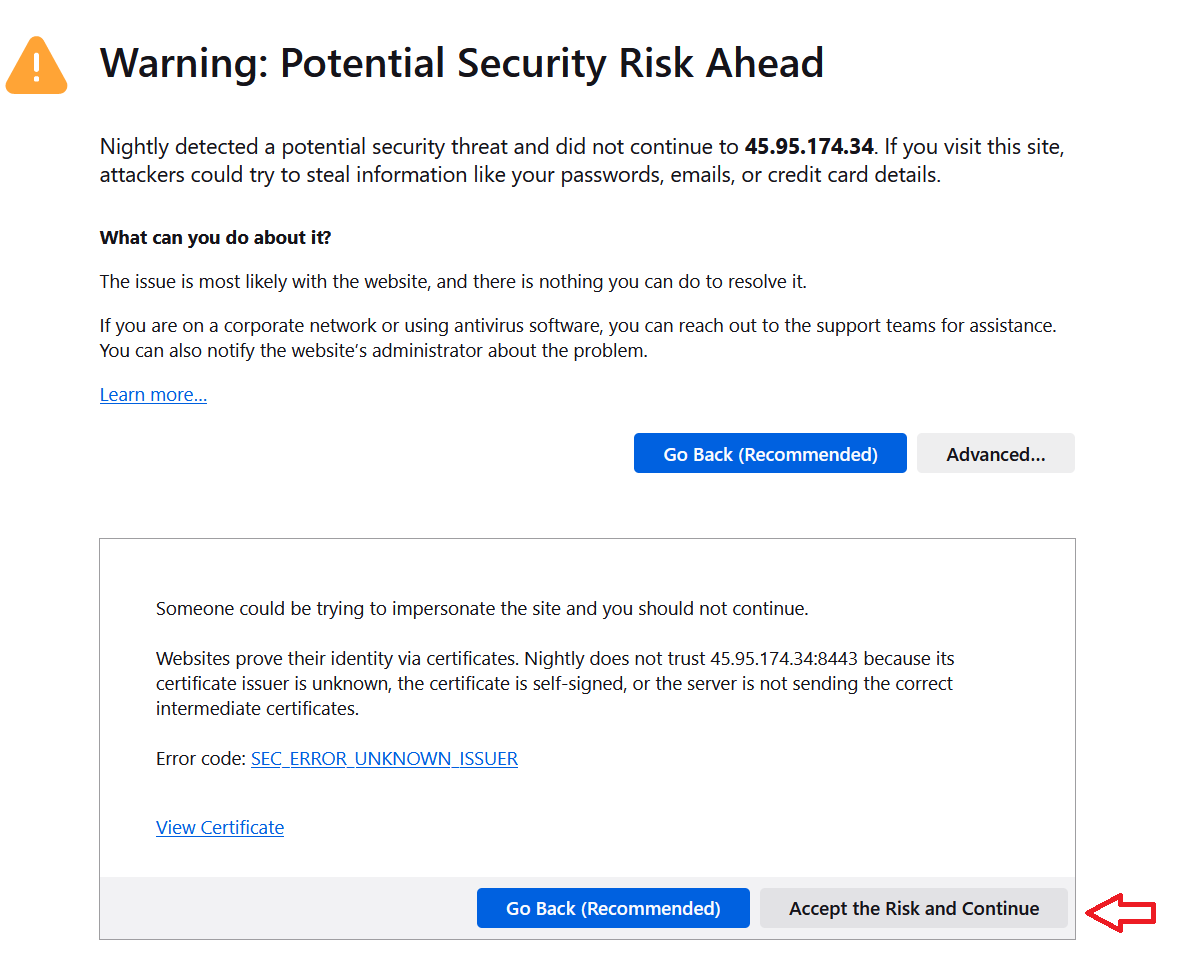
Access CloudPanel using the IP address.
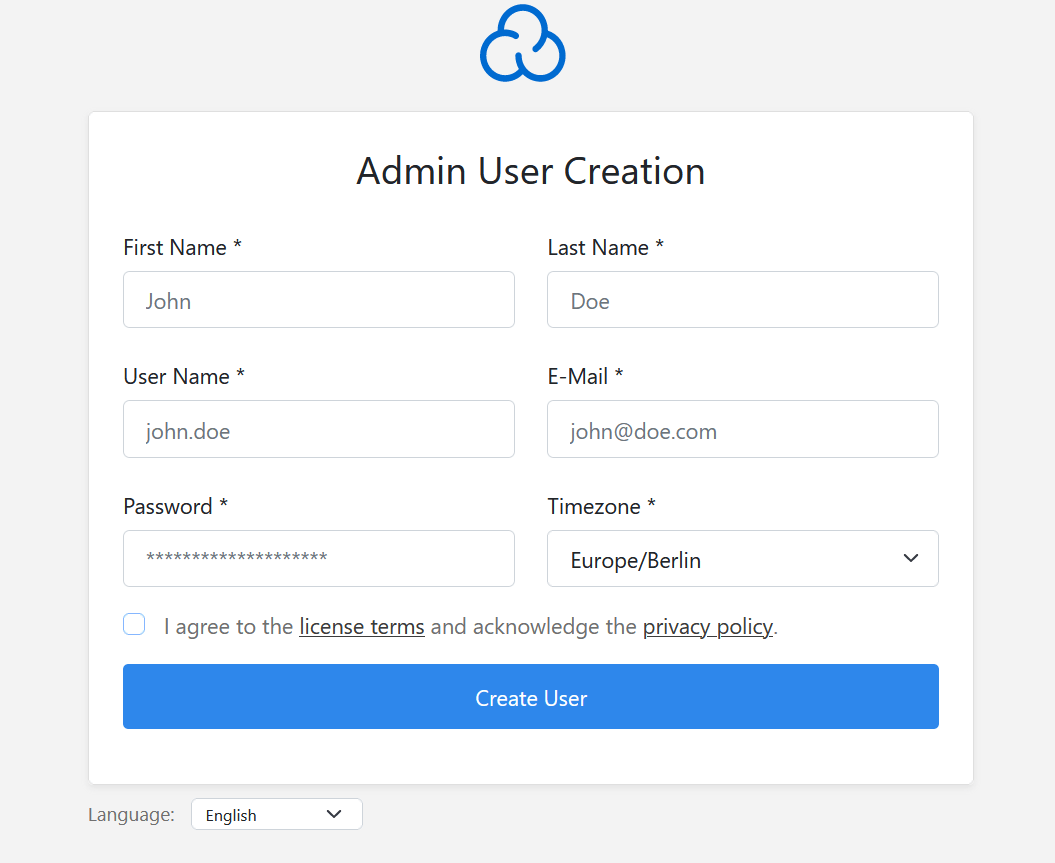
Then create Admin user.
Then login using the Admin account created.
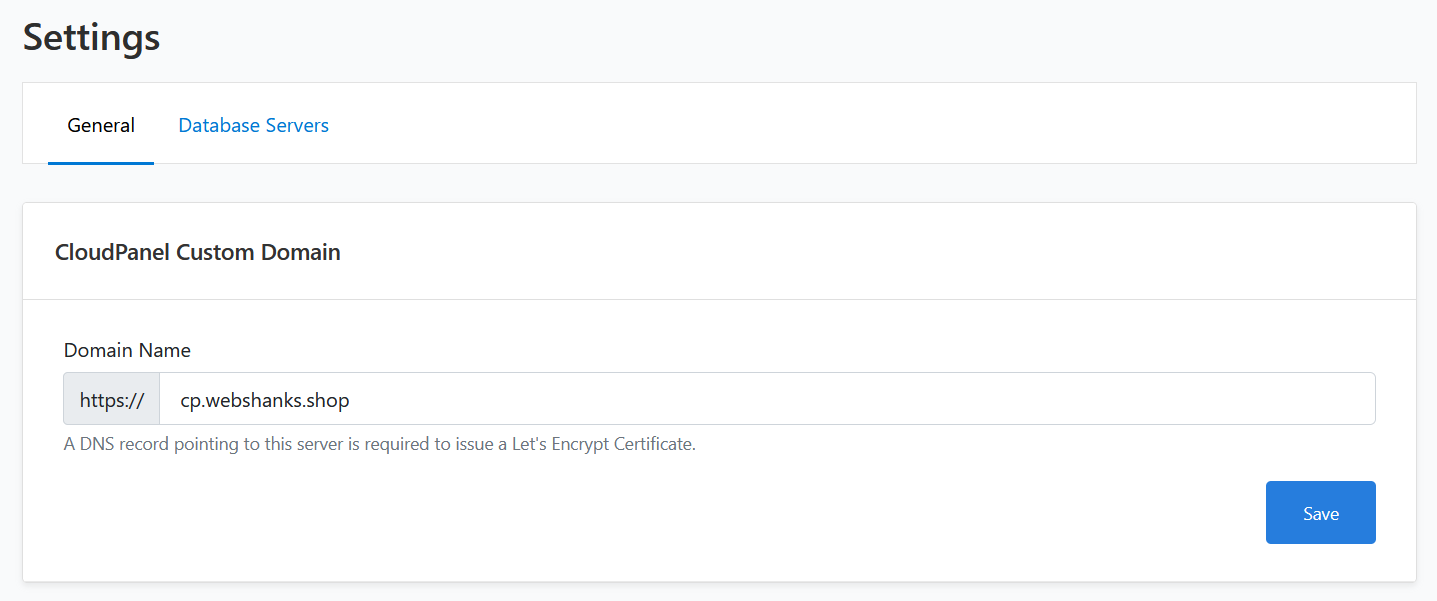
We will use a custom domain for our CloudPanel.
Login to your domain registrar and we’ll add an A record for our custom domain cp.webshanks.shop so we can access our CloudPanel through it. I’ll be using Cloudflare.
| Host | Record | Value |
| cp | A | Server IP |
Then navigate to Admin Area > Settings in CloudPanel and change the custom domain.
Step 3. Install Docker
After installing CloudPanel, let’s go back to our SSH client. First, we will enable IPv6. Go to /etc/sysctl.conf and set the values to zero. Some servers have IPv6 disabled by default.
nano /etc/sysctl.conf

Then reboot your server.
Test your IPv6 by running:
ping6 google.com
Now let’s install Docker with Docker Compose.
Install Docker and the Docker Compose plugin.
curl -sSL https://get.docker.com/ | CHANNEL=stable sh && apt install docker-compose-plugin
Step 4. Install mailcow
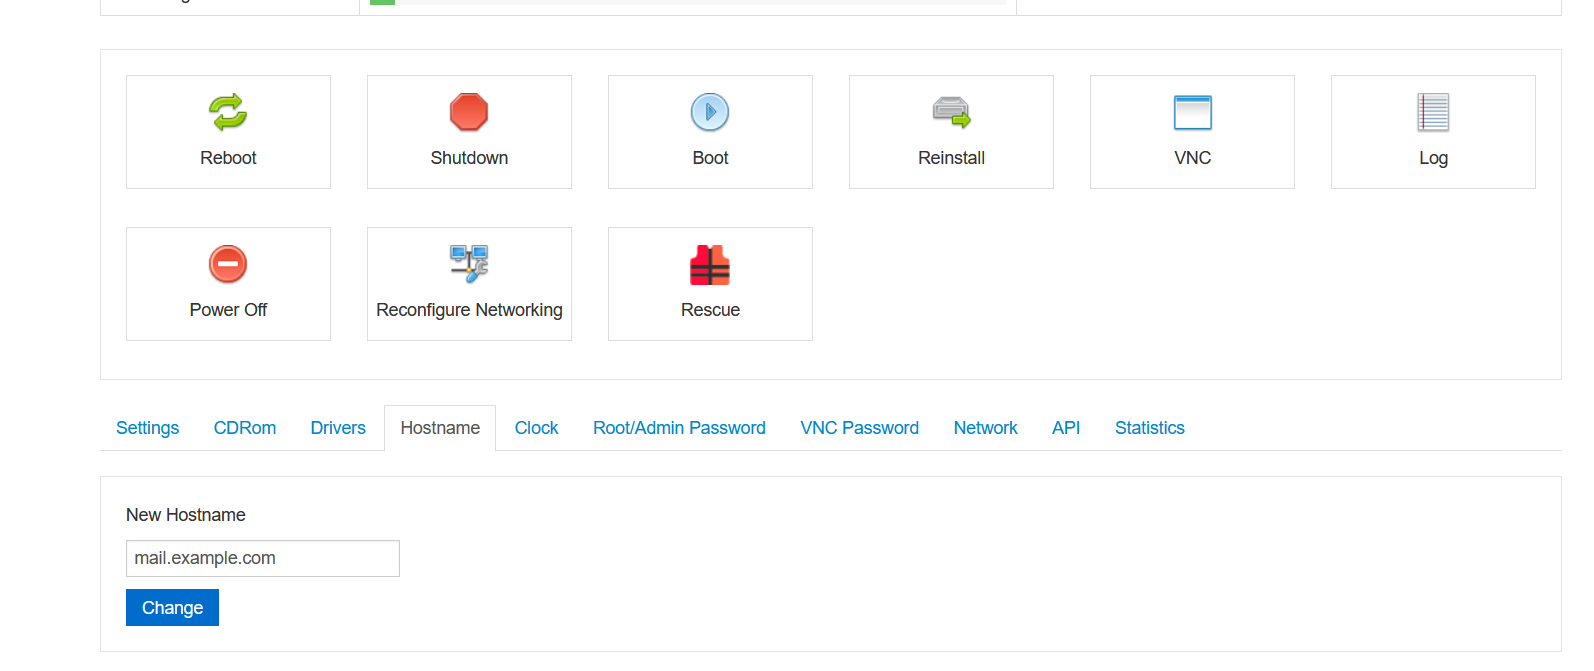
Before proceeding, we will set our hostname, A record and MX record. Let’s head back to RackNerd and domain registrar and map our records.
Note: If you want to install a standalone mailcow, check out this tutorial.
Add A records.
| Host | Record | Value |
| @ | A | Server IP |
| A | Server IP | |
| @ | MX | mail.example.com priority 10 |
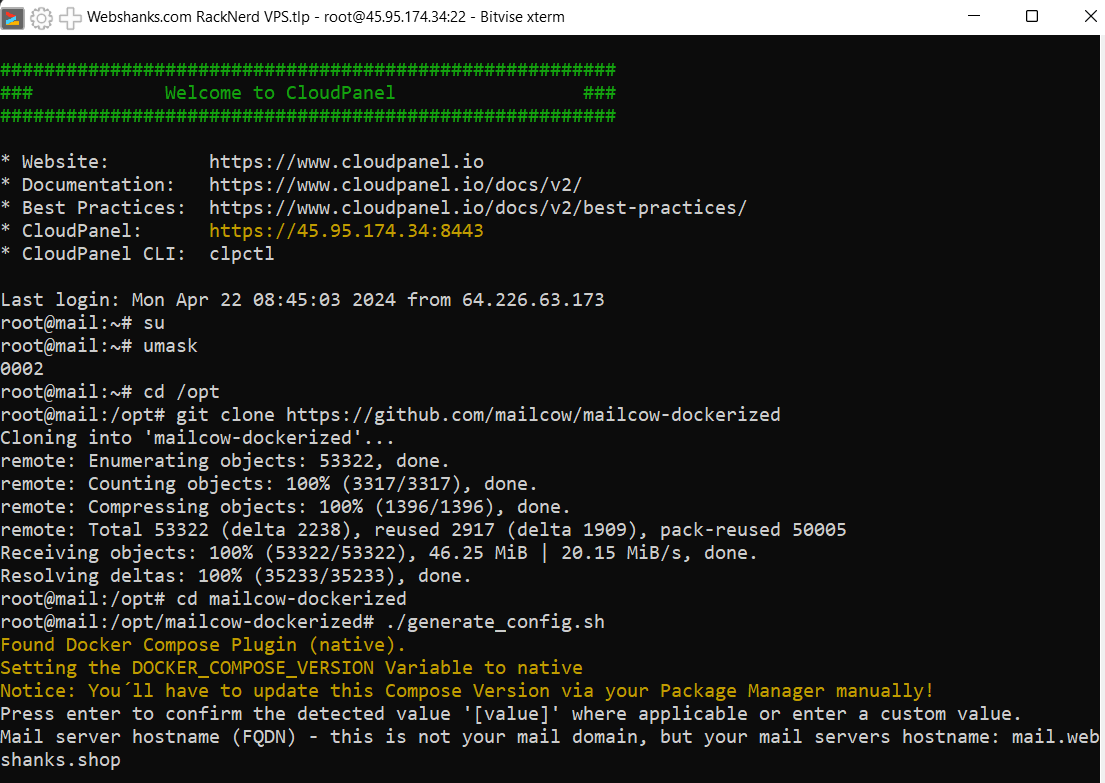
Let’s now install mailcow.
$ su
# umask
0022 # <- Verify it is 0022
# cd /opt
# git clone https://github.com/mailcow/mailcow-dockerized
# cd mailcow-dockerized
Initialize mailcow.
./generate_config.sh
You will also be asked for the Timezone and branch of mailcow to install.
Stop and disable the postfix service because it is being used by CloudPanel.
systemctl stop postfix && systemctl disable postfix

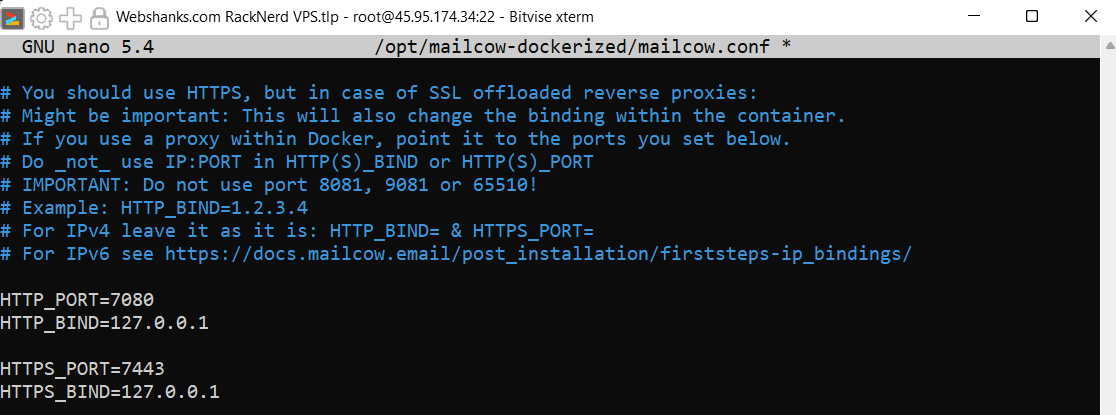
Next let’s go to /opt/mailcow-dockerized/mailcow.conf and change the values for HTTP_PORT, HTTP_BIND, HTTPS_PORT, HTTPS_BIND.
nano /opt/mailcow-dockerized/mailcow.conf
HTTP_PORT=7080
HTTP_BIND=127.0.0.1
HTTPS_PORT=7443
HTTPS_BIND=127.0.0.1
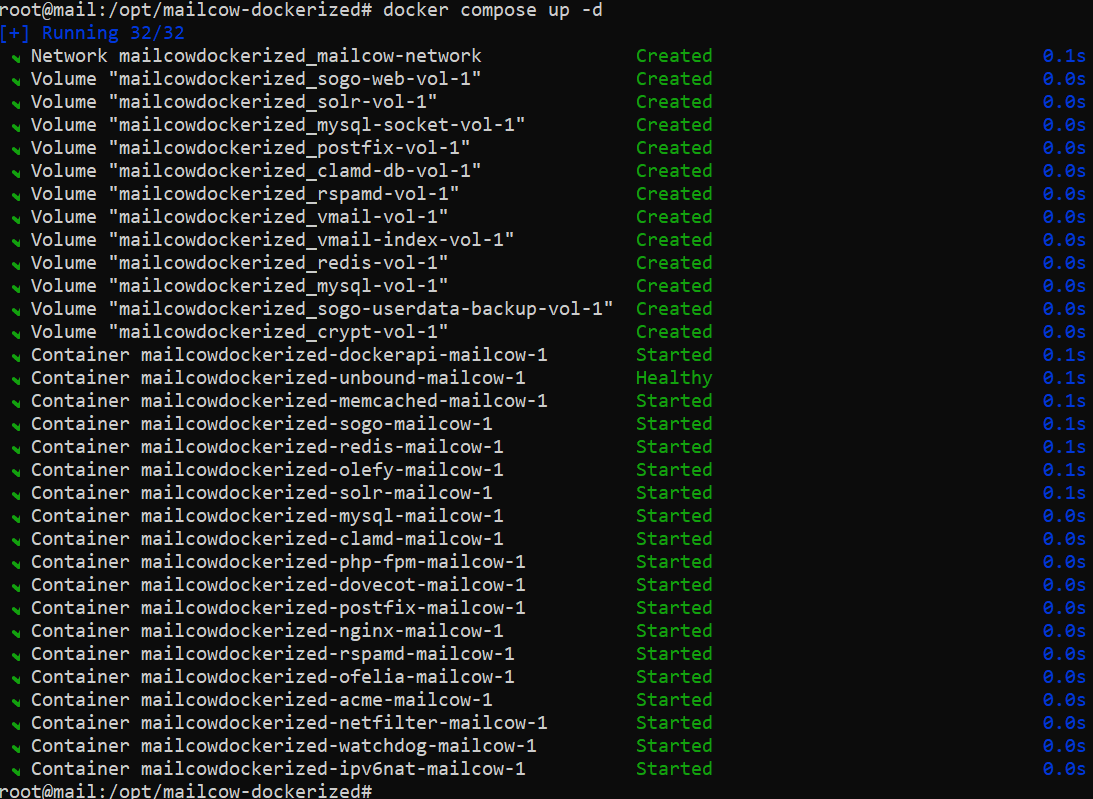
Let’s start mailcow.
docker compose pull && docker compose up -d

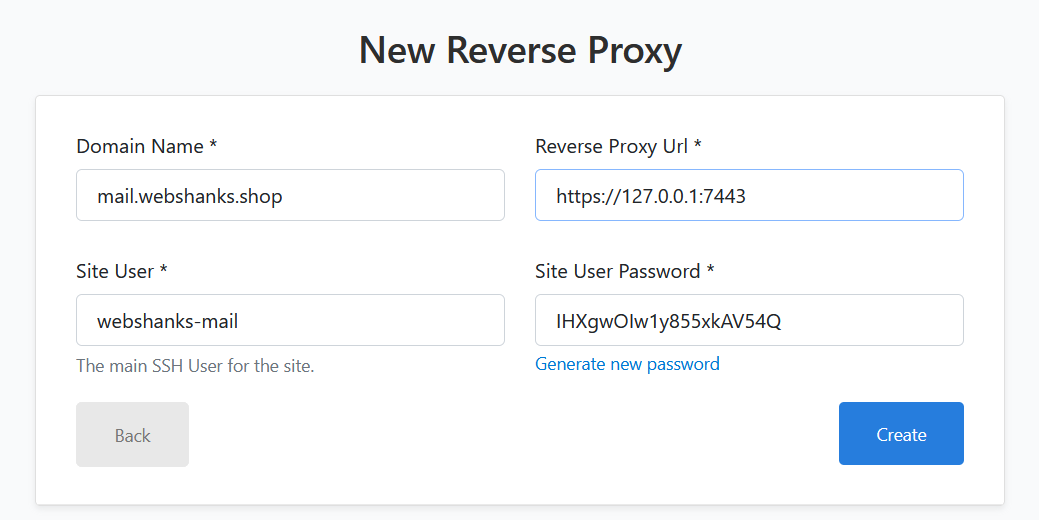
Step 5. Create Reverse Proxy
We will create a reverse proxy and forward the traffic to port 7443.
Go to Add Site > Create Reverse Proxy.

Then add the following:
- Domain Name: mail.webshanks.shop
- Reverse Proxy Url: https://127.0.0.1:7443
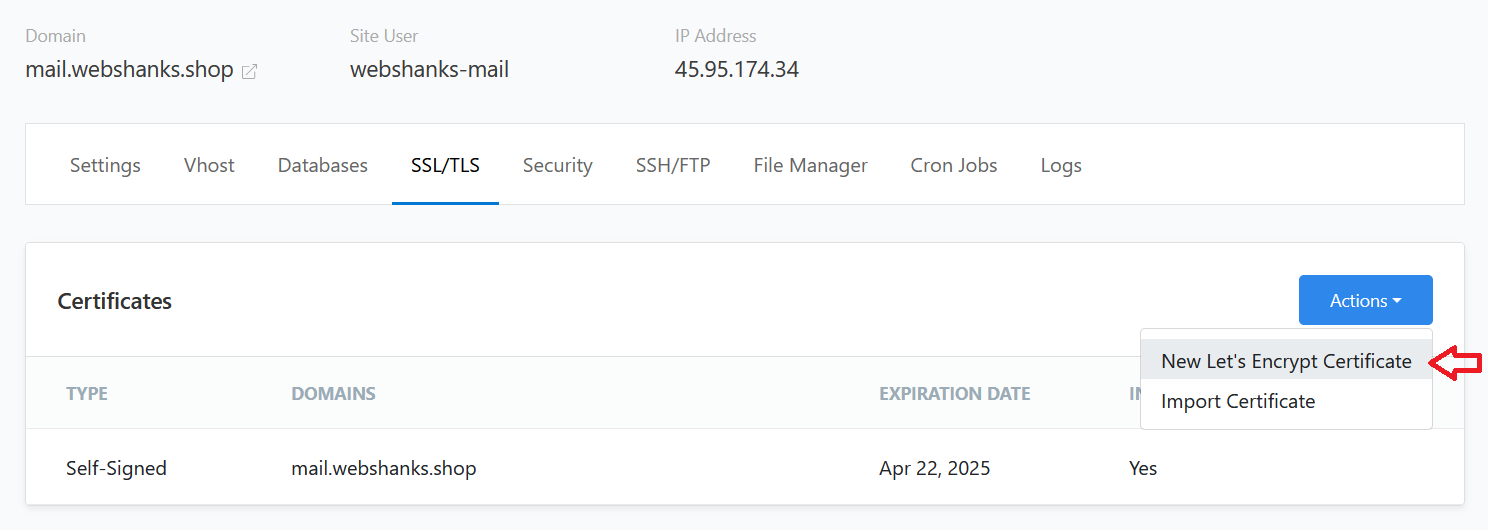
Next, we will add a New Let’s Encrypt Certificate so that we can securely access our mailcow.
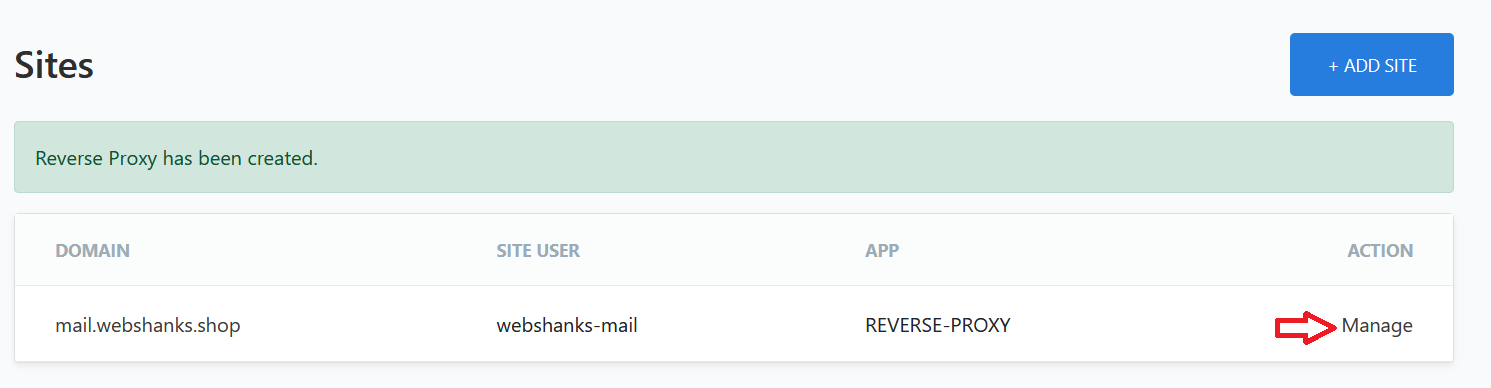
Click on Actions > New Let’s Encrypt Certificate.

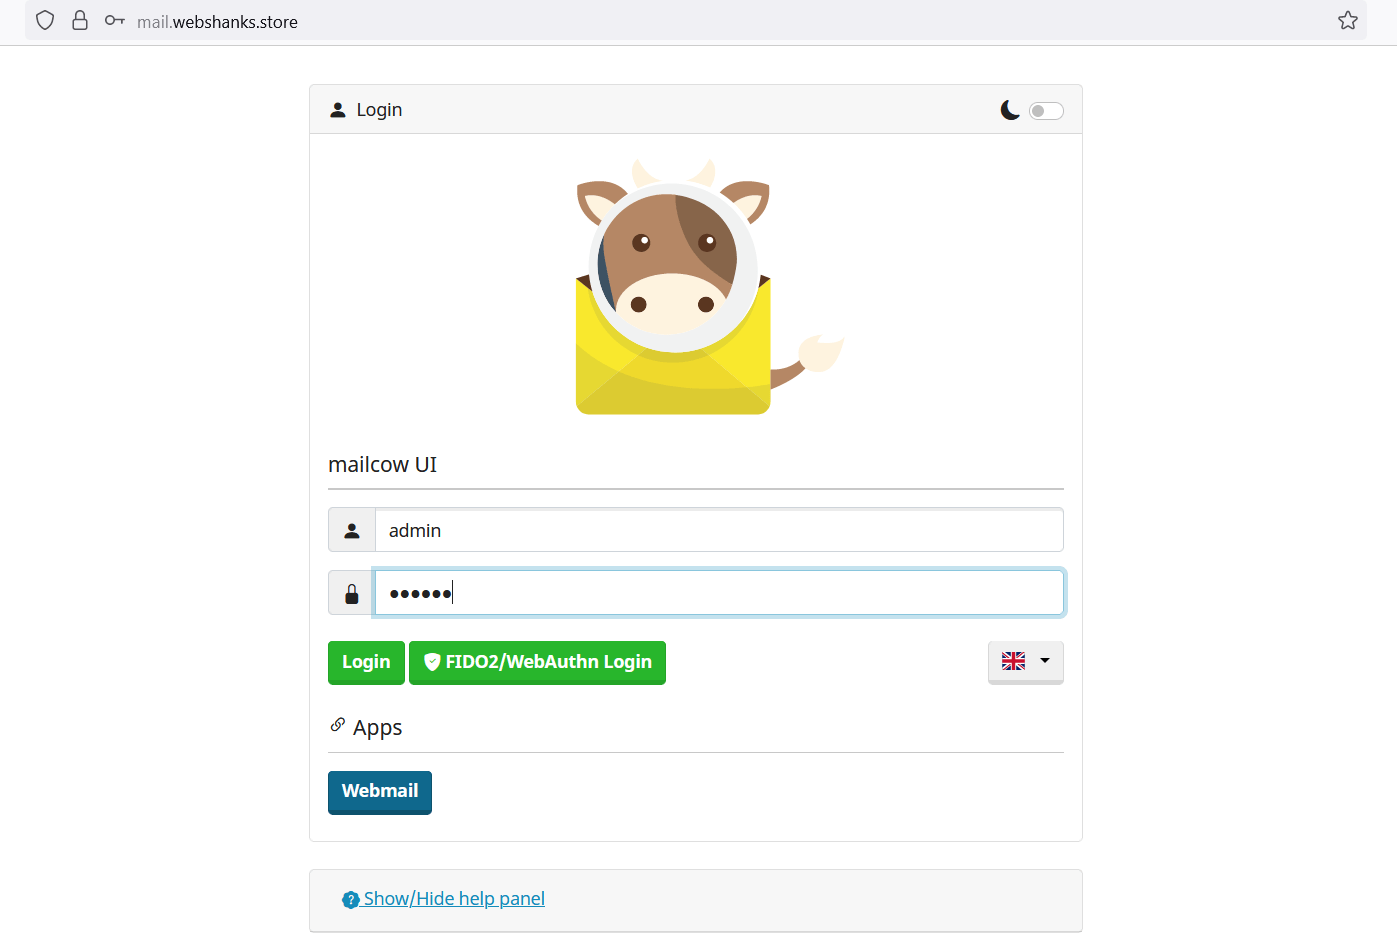
Then access mailcow using mail.yourdomain.com using admin as username and moohoo as password.
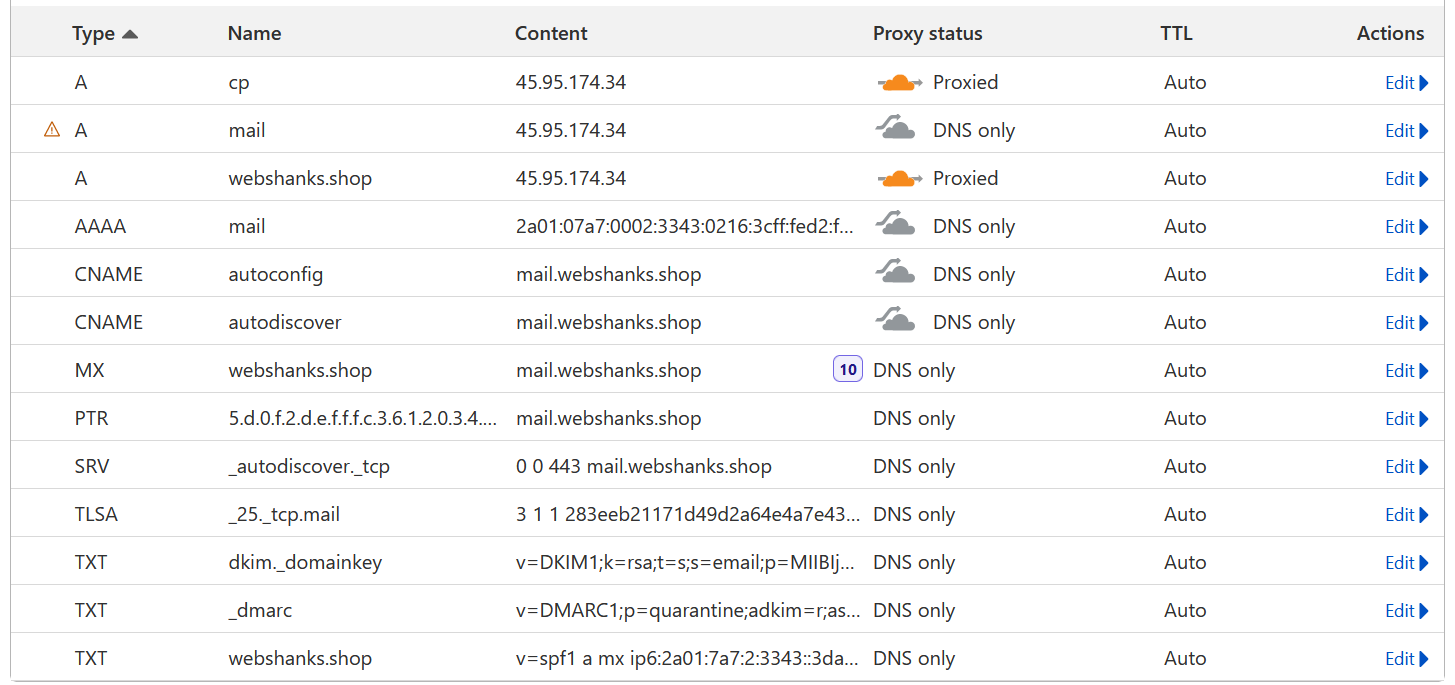
Step 6. Map Remaining DNS Records
Add a domain. Go to Email > Configuration > Add Domain.
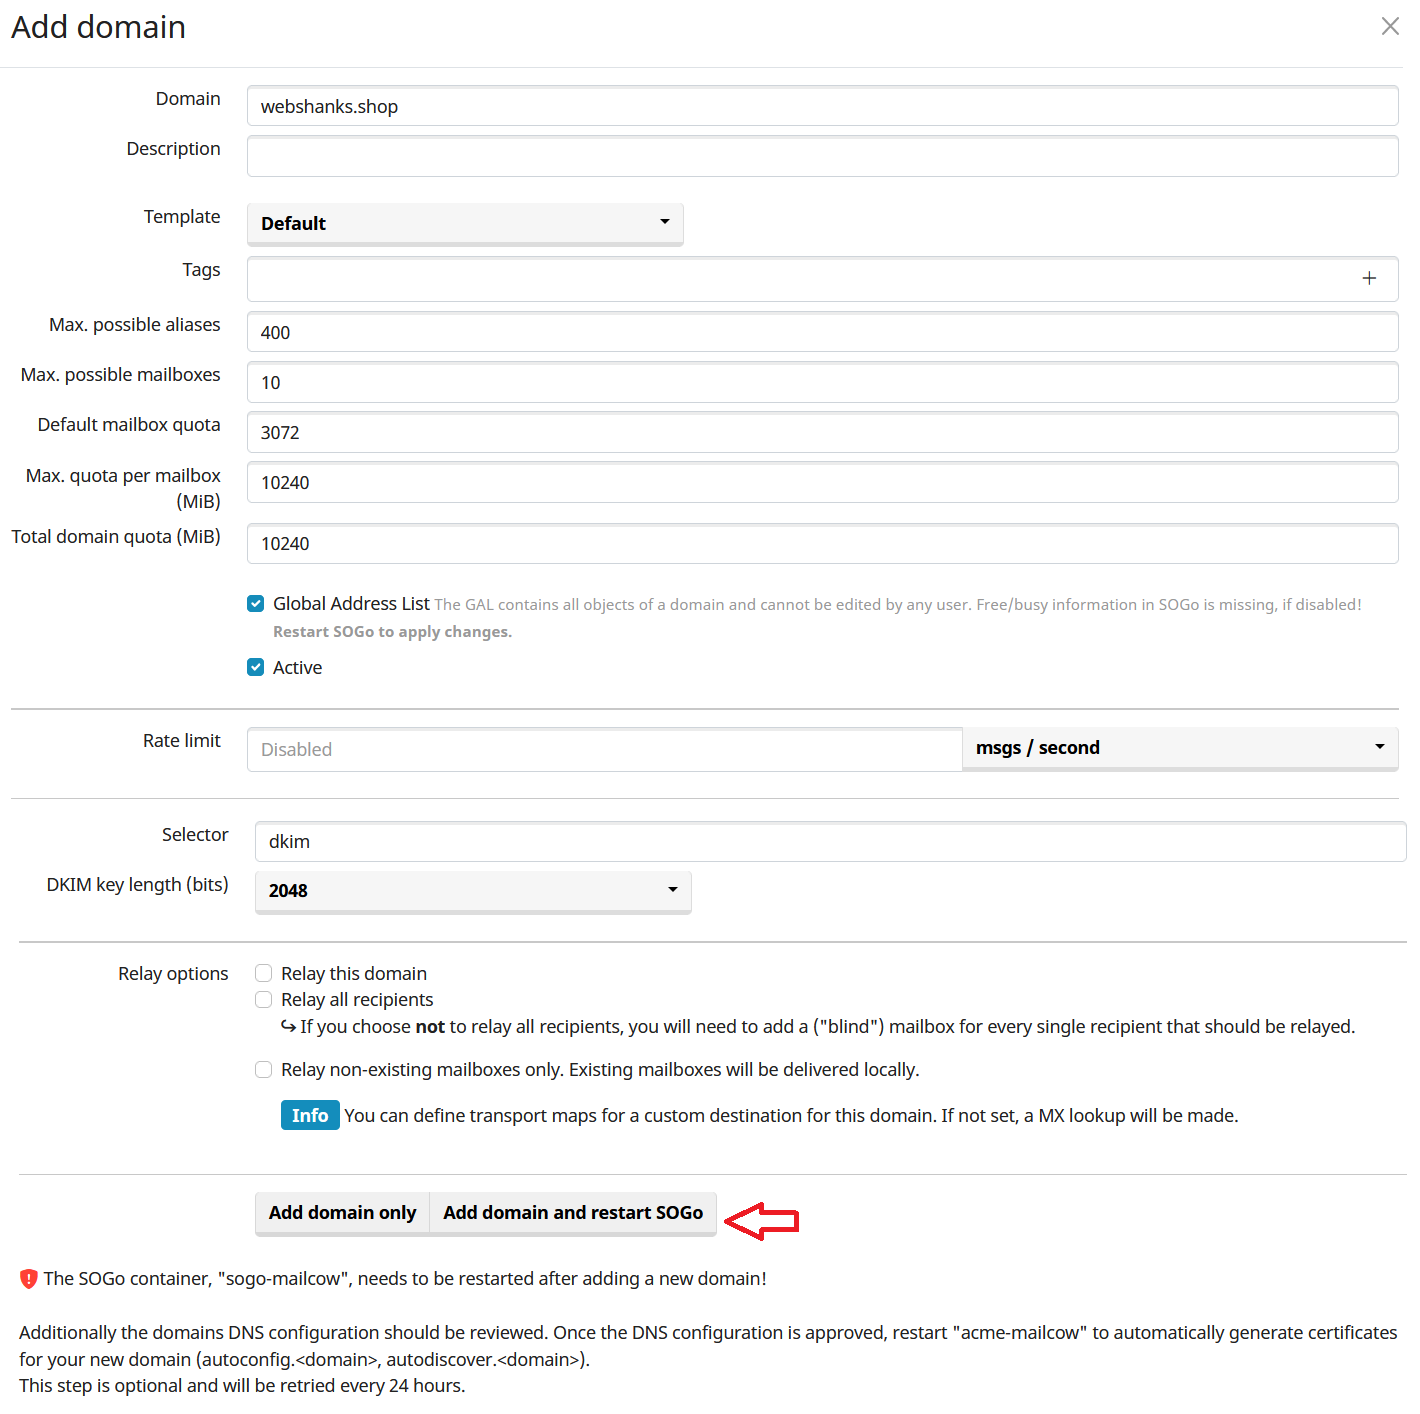
Once added, click the DNS button and you will see the DNS records you need to map in your domain registrar. If you correctly added these DNS you should see a green check mark under Current State.
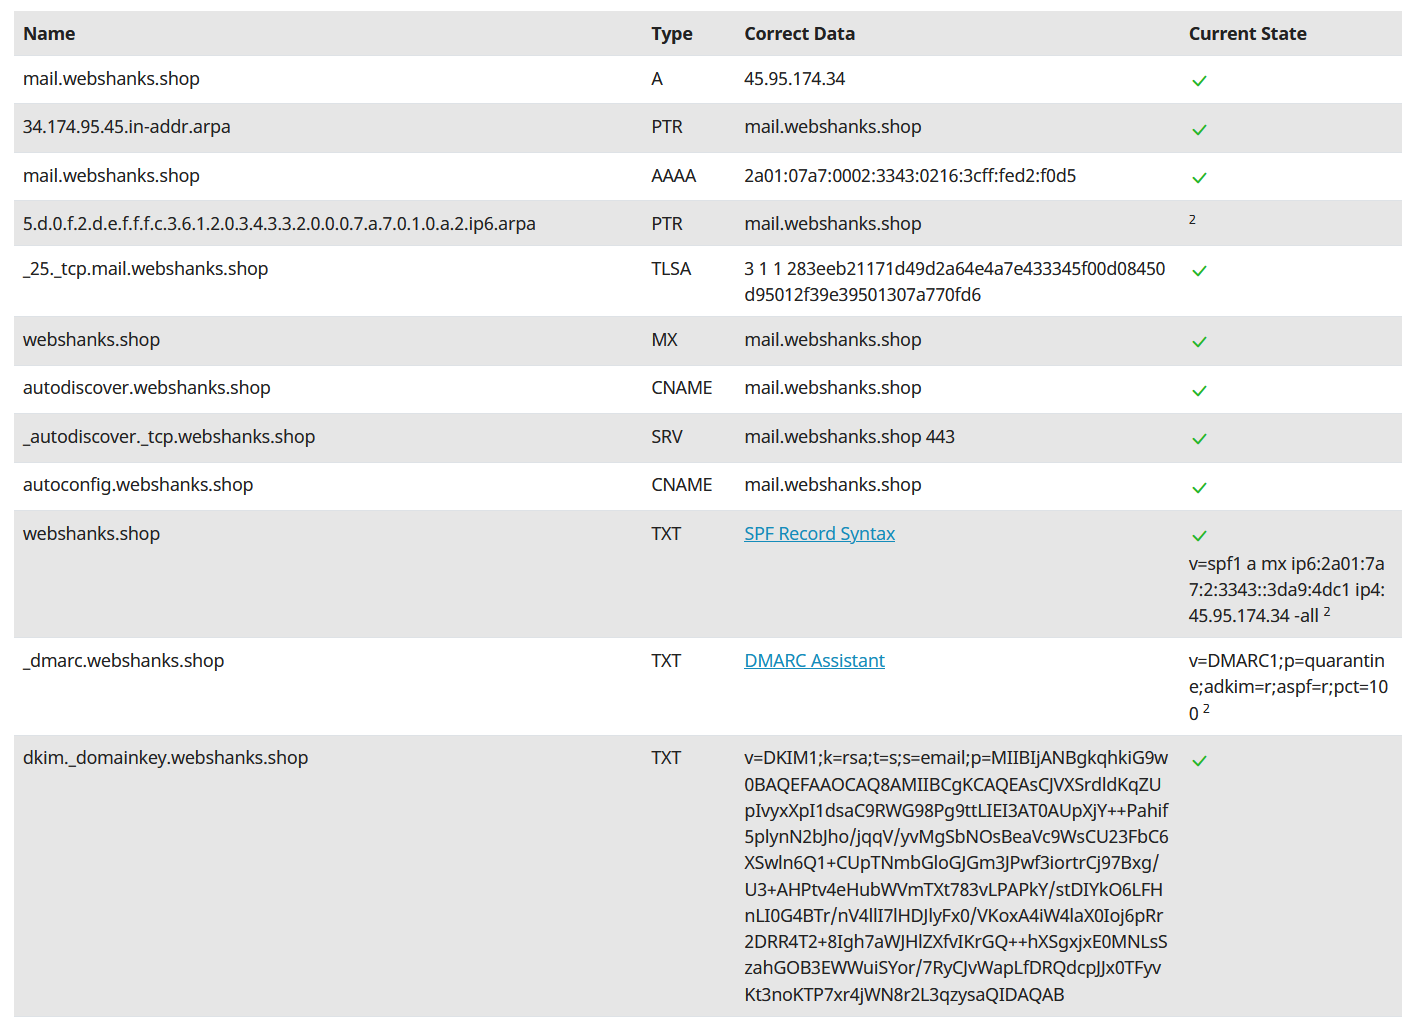
For SPF and DMARC, follow the link to create records or you can use my guides below.
For SPF, use the following I have crafted:
v=spf1 a mx ip6:2a01:7a7:2:3343::f67:30f7 ip4:45.95.174.34 -all
Be sure to change ip6 and ip4 with your server’s IPv6 and IPv4 respectively.
For DMARC, use the following:
v=DMARC1; p=quarantine; adkim=r; aspf=r; pct=100
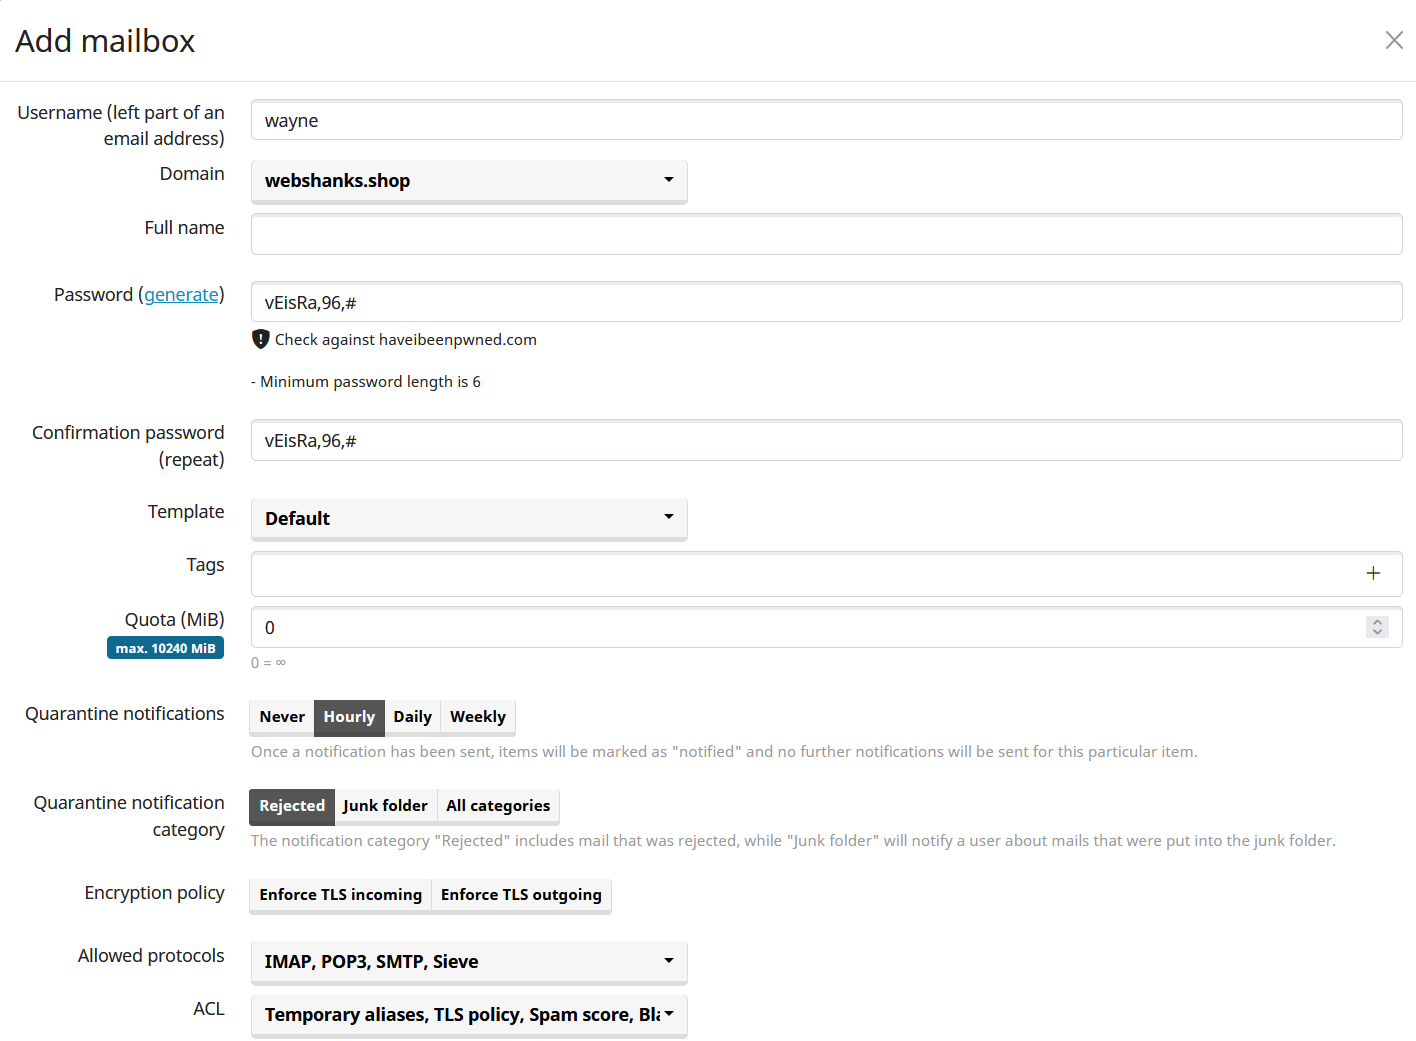
Step 7. Create Inbox and Test Email Deliverability
Finally, we will create an inbox or inboxes to test our email.
Go to Mailboxes and add mailbox.
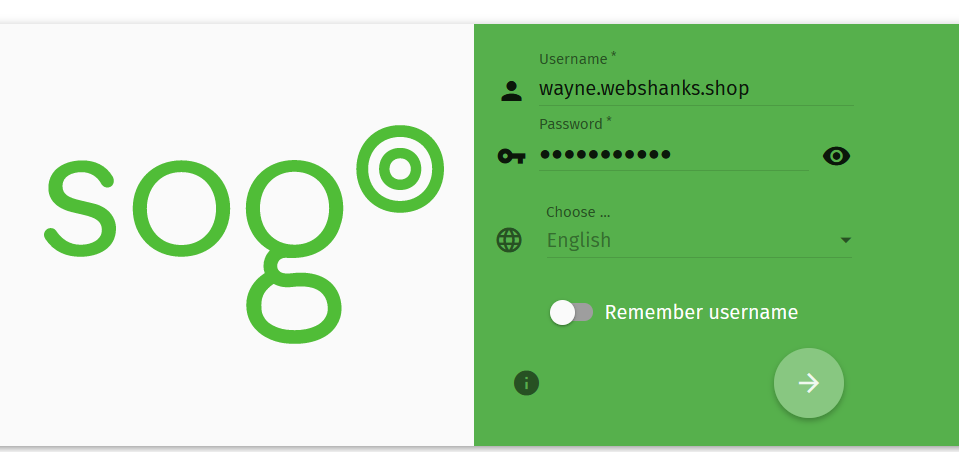
After creating the mailbox, we will login in SOGo. Go to Apps > Webmail.
Login using your newly created mailbox.
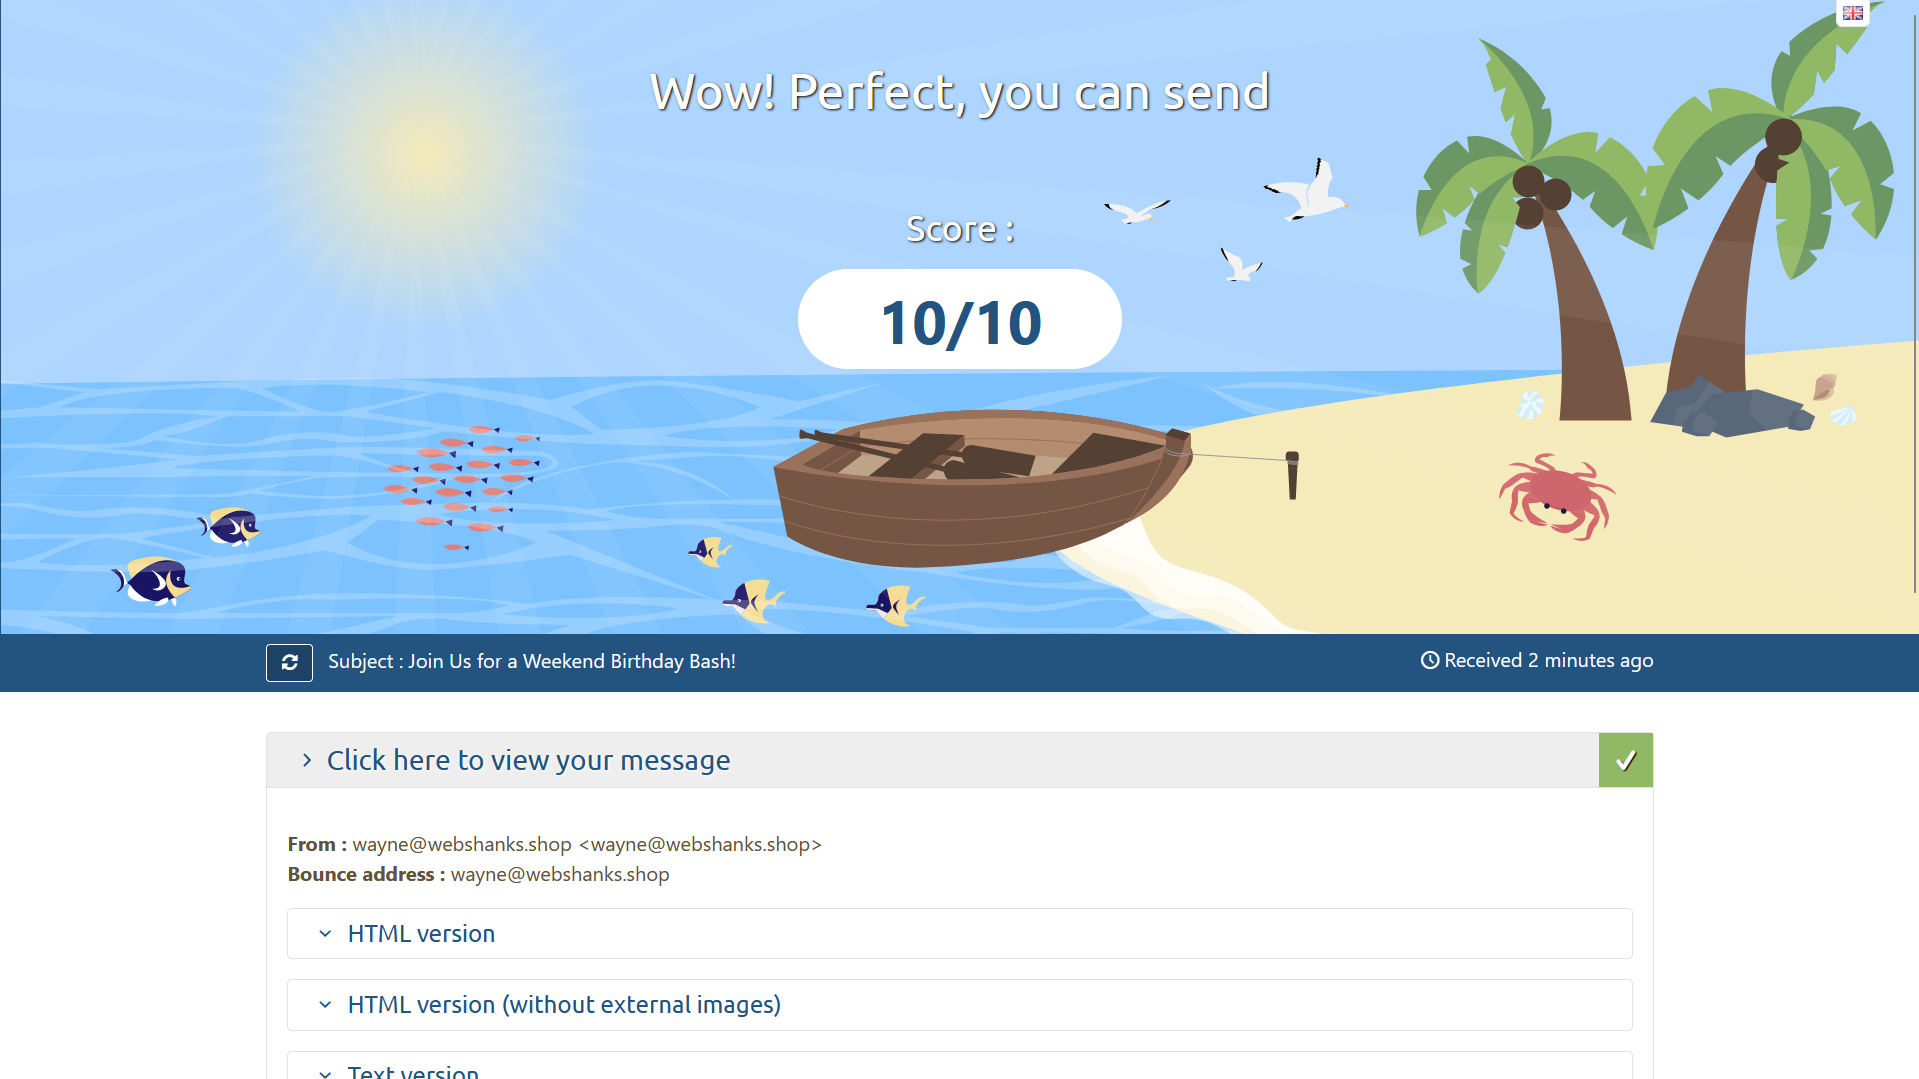
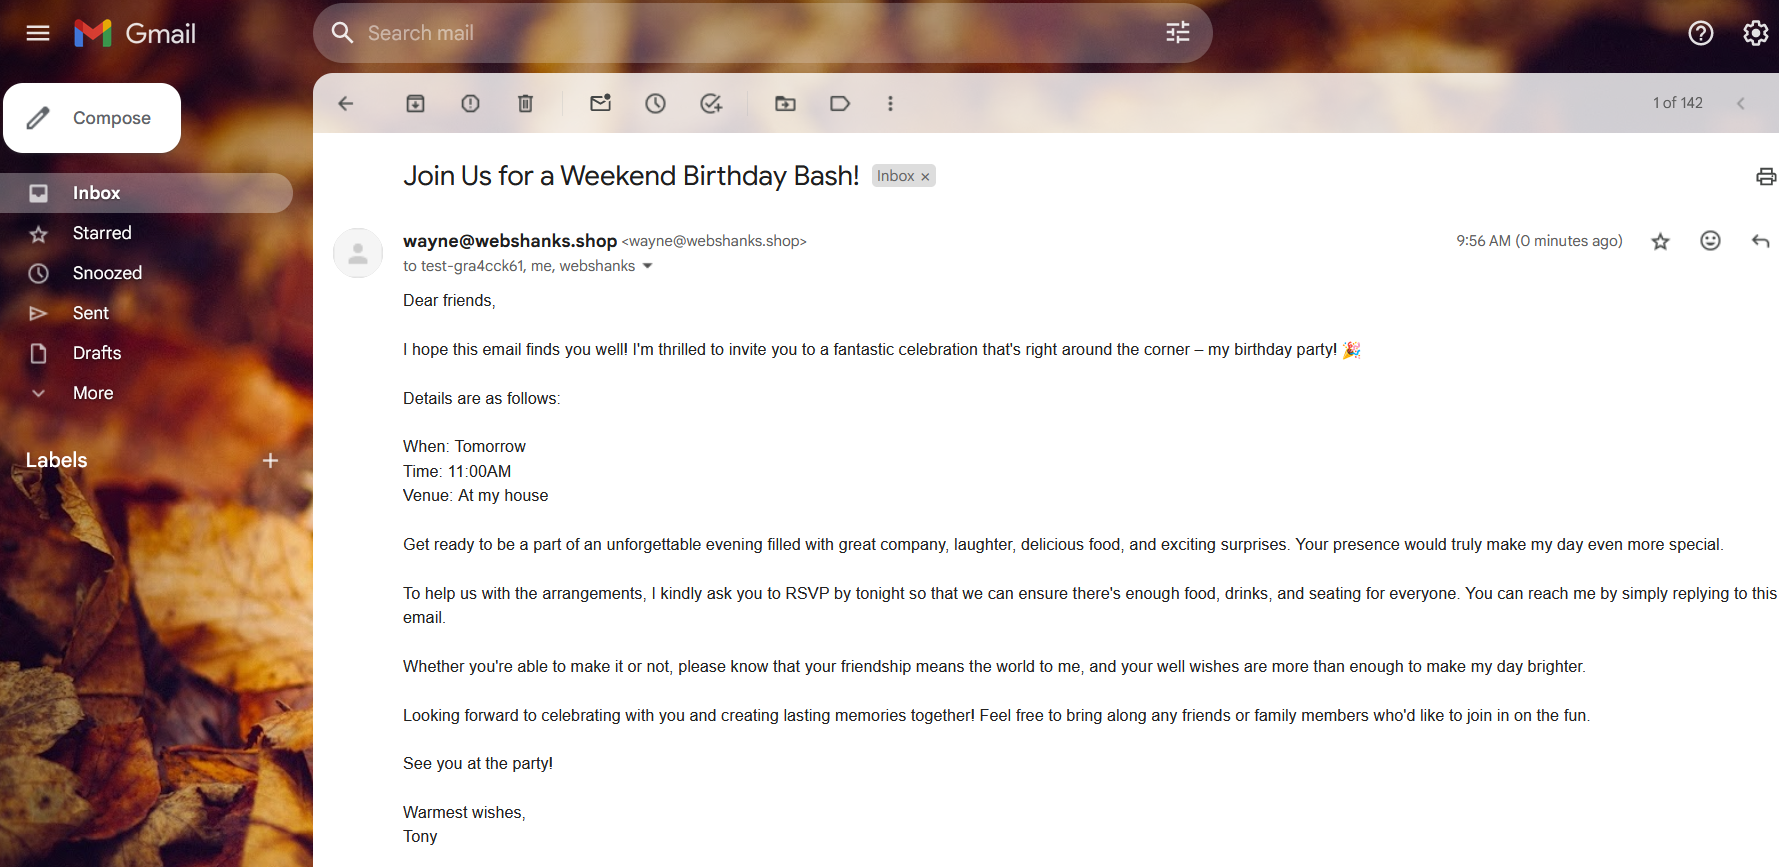
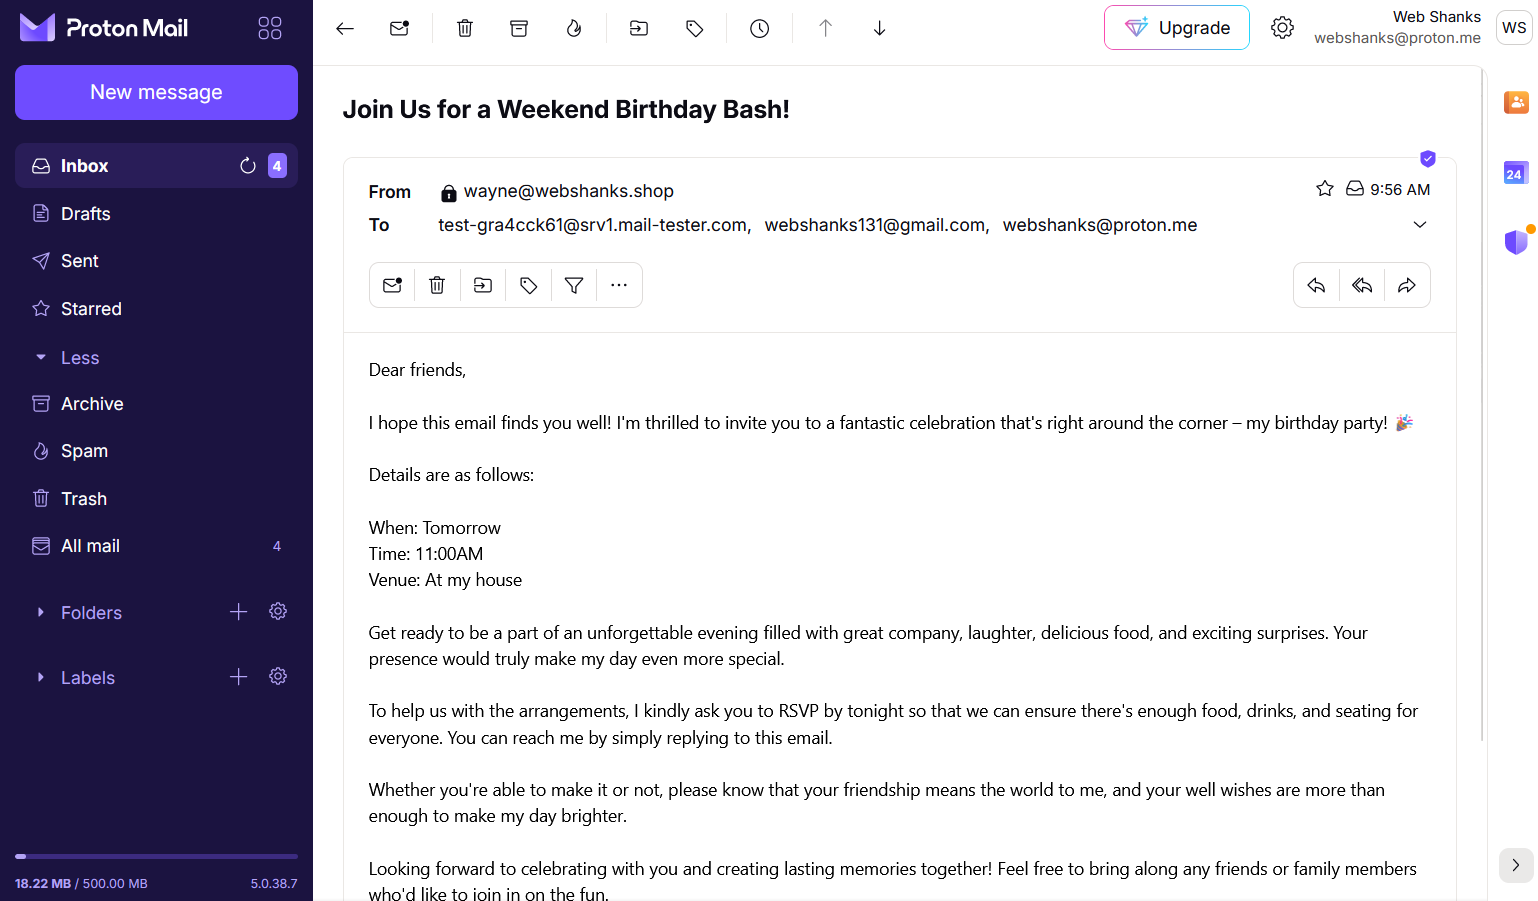
We will send a test email to Mail-Tester, Gmail and Proton Mail.
We did it! We managed to integrate mailcow with CloudPanel to achieve the best hosting alternative to cPanel!
Troubleshooting
400 Bad Request. The plain HTTP request was sent to HTTPS port
Be sure your Reverse Proxy URL is pointed to https://127.0.0.1:7443
TLSA 110: Operation timed out
Run the following command to add a rule to release tcp at port 25.
ufw allow 25/tcp
Securing mailcow
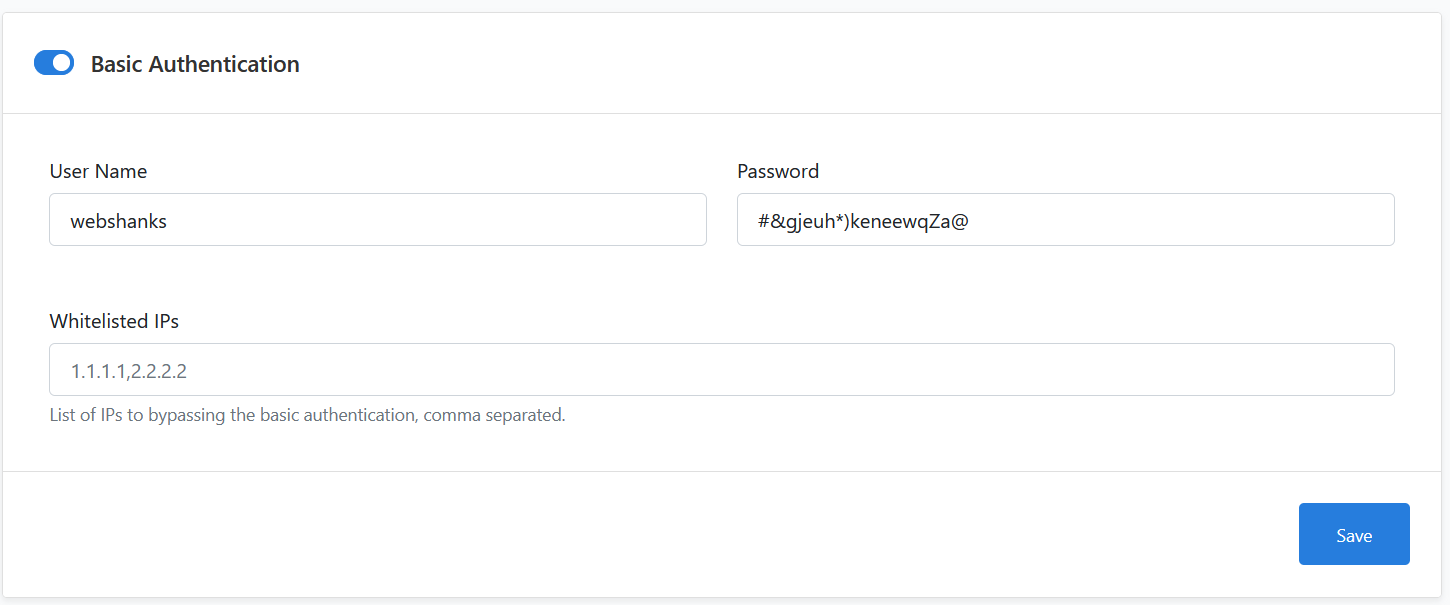
The best way to secure your mailcow from CloudPanel is to add Basic Authentication.
Navigate to Security and enable Basic Authentication.
Also, enable DNSSEC in Cloudflare for an additional security layer against spoofing.
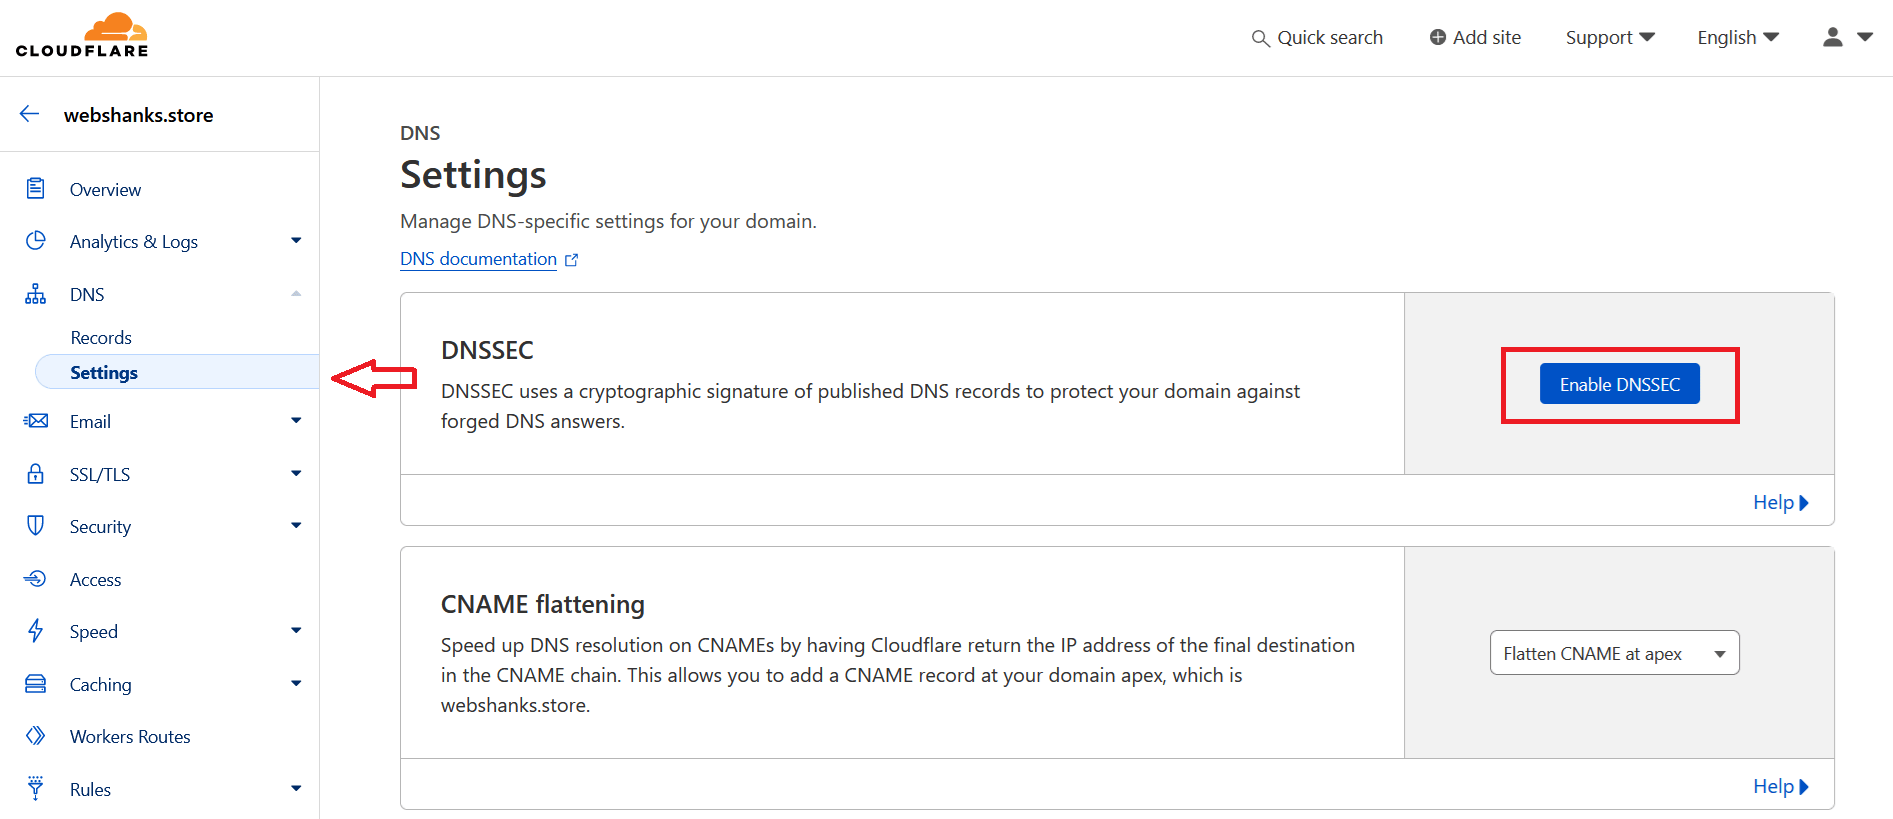
Add these settings to your domain registrar which in my case Namecheap.
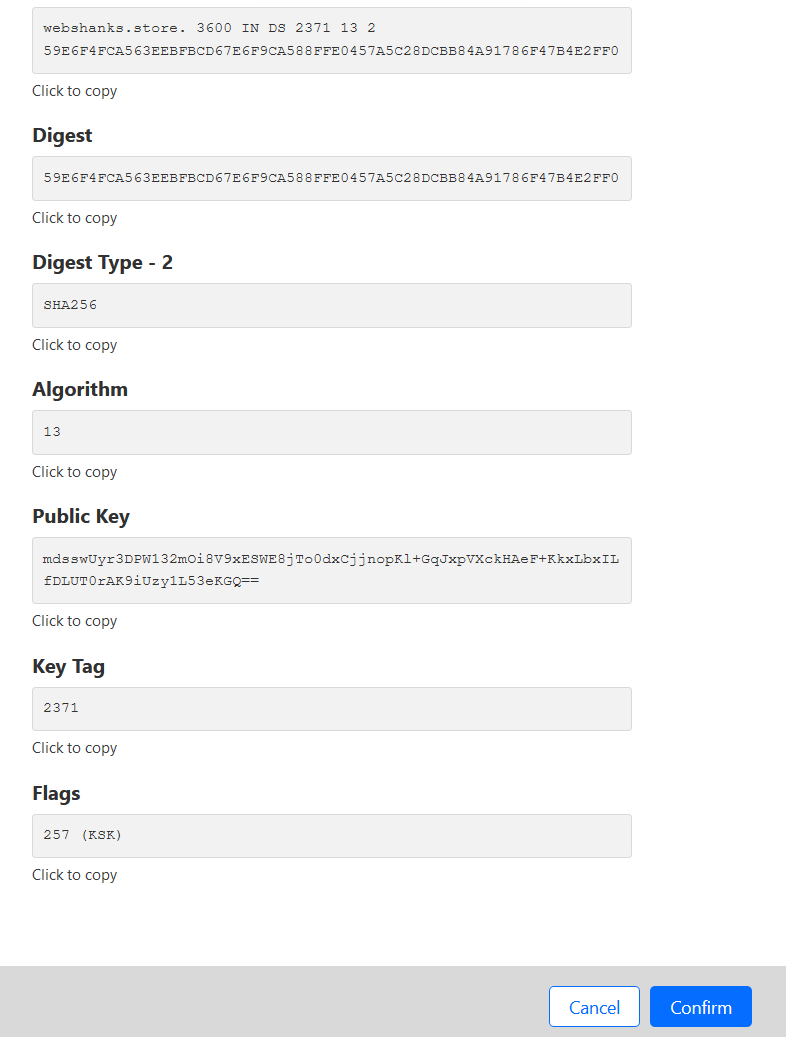
Check out this guide from Namecheap on how to add DNSSEC.
Do not enable Cloudflare traffic because it will block port 25.
You can enable TFA for a more secure login.
Also, create a new Admin user and remove the user mohoo.
Finally, always enforce secure passwords.
Frequently Asked Questions
What is Mailcow?
Mailcow is a self-hosted, Dockerized email platform that provides a complete solution for managing email services, including SMTP, IMAP, POP3, webmail, and more. It offers features like spam filtering, virus scanning, and DKIM/DMARC authentication.
What is CloudPanel?
CloudPanel is a web hosting control panel designed for managing cloud servers and web applications. It offers features such as server management, website hosting, DNS management, and more.
How to update mailcow?
You need to run the script on the command line.
./update.sh
How to update CloudPanel?
Just like mailcow, you need to update through command line using the following command:
clp-update
Do I need to have a separate server to install mailcow?
While mailcow is a stand-alone email server solution, you don’t need a separate server to install mailcow. CloudPanel and mailcow can be setup in one server as long as your server has the necessary hardware requirements for mailcow and CloudPanel.
Can I use Mailcow with multiple domains?
Yes, Mailcow supports multiple domains. You can add additional domains through the Mailcow admin panel and configure DNS accordingly.
Conclusion
CloudPanel doesn’t have an email feature but thanks to mailcow, it is possible to have a functional email just like cPanel.
Now that we have successfully installed mailcow in CloudPanel, we can send and receive email messages within our server without getting a separate server.
Did you face a roadblock? Comment them down.👇