 Virtualmin is one of the most popular free cPanel alternatives. It provides a robust email server platform along with hosting websites and managing domains.
Today, I’ll show you how to add multiple domains and setup emails on Virtualmin so you can send more emails.
Prerequisites
Before we begin, ensure you have the following:
- A server with Virtualmin installed and configured for email delivery (see our guide on how to make an email server with a VPS)
- Administrative access to your Virtualmin panel
- Domain names you want to add (ensure you own or have the right to use these domains)
- Basic understanding of DNS management
How to Add Multiple Domains and Setup Emails on Virtualmin
Adding Domains
Before we begin, take note that we will be using the configured mail hostname mail.webshanks.shop in order for the new domains to send emails.
Follow these steps to add a new domain to your Virtualmin server:
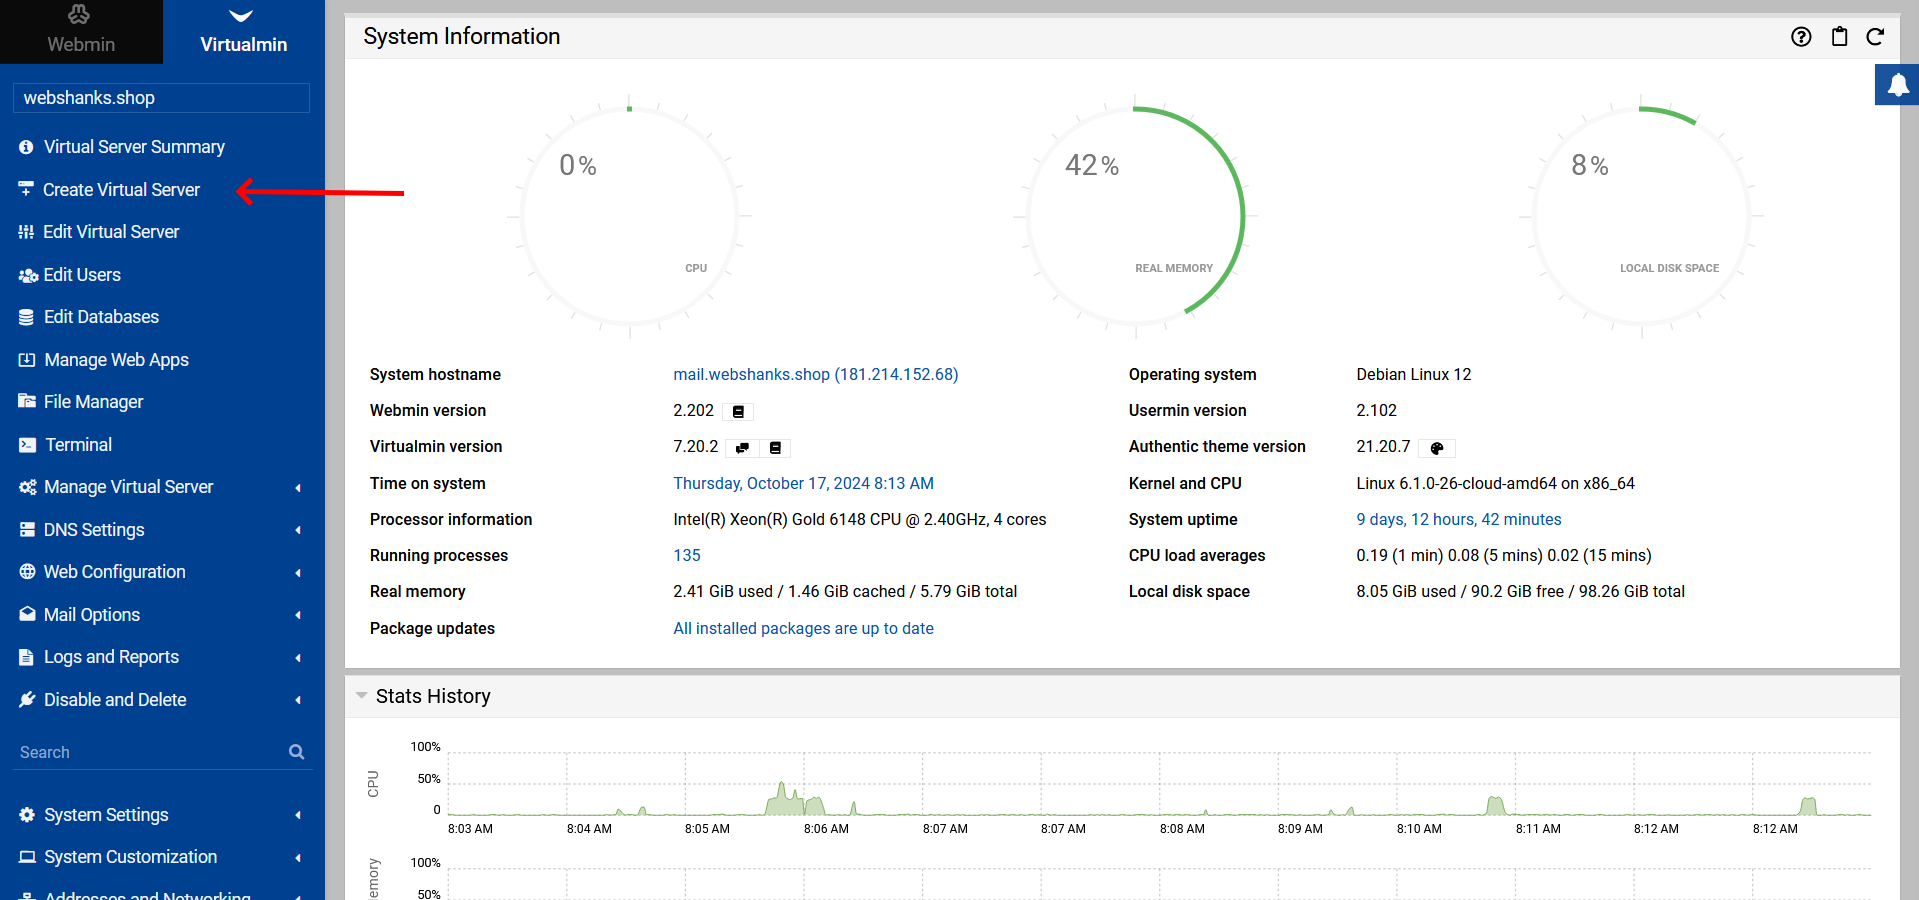
Log in to your Virtualmin control panel.
In the left sidebar, click on Create Virtual Server.
Enter the domain name in the Domain name field.
Choose the appropriate server template.
Set up the administration account details.
Configure additional options as needed (e.g., SSH key, email forwarding).
Click Create Server to finalize the domain creation.

After creating the domain, update your DNS records to point the domain to your server’s IP address.
Adding Emails
To create email accounts for your domain:
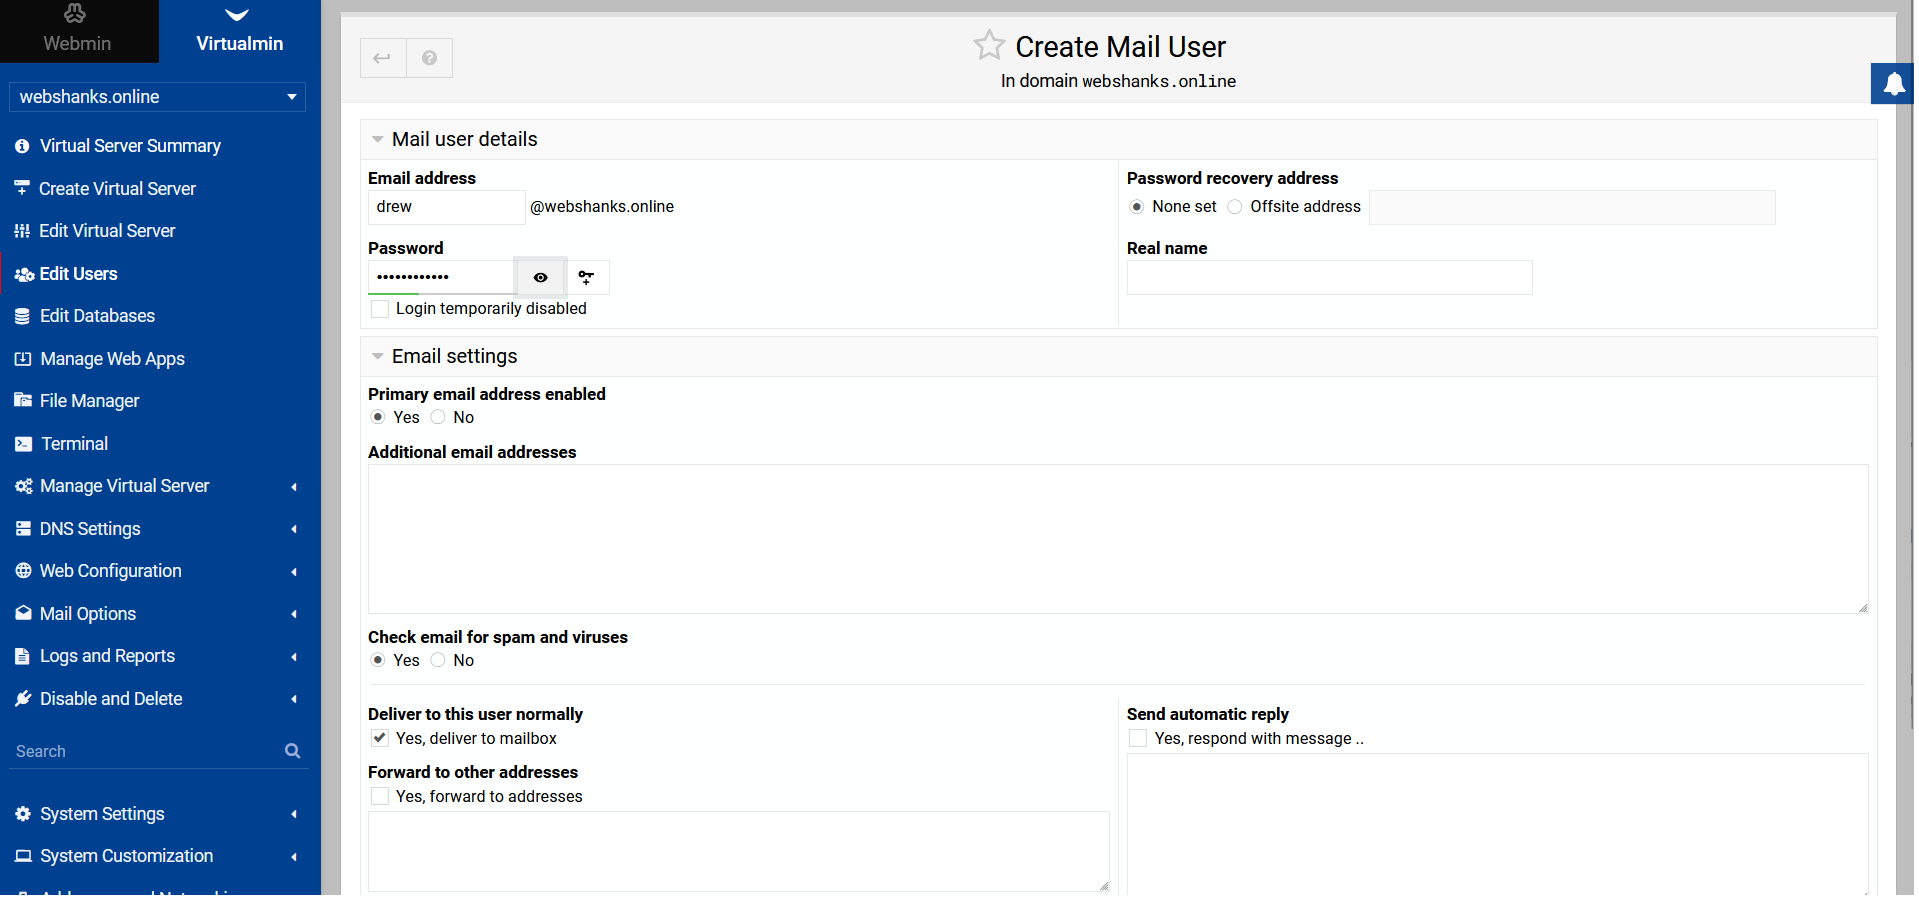
In Virtualmin, select the domain you want to add emails to.
Click on Edit Users in the left sidebar.
Choose Add mail user to this server.
Fill in the required information:
Username (this will be the part before @ in the email address)
Password (use a strong, unique password).
Click Create to set up the email account.
Map the DNS records
Proper DNS configuration is crucial for email functionality. Add these DNS records at your domain registrar or DNS provider (like Cloudflare):
Essential DNS Records
# MX Record
Type: MX
Host: @
Priority: 10
Value: mail.webshanks.shop ( we will use our mail hostname)

# A Record for Mail Server
Type: A
Host: mail
Value: YOUR-SERVER-IP

# SPF Record
Type: TXT
Host: @
Value: v=spf1 a mx ip4:YOUR-SERVER-IP ~all

# DKIM Record (Get this from Virtualmin)
Type: TXT
Host: [value for DKIM on Virtualmin]
Value: [Your DKIM value from Virtualmin]

# DMARC Record
Type: TXT
Host: _dmarc
Value: v=DMARC1; p=none; rua=mailto:[email protected]
Steps to Configure DNS Records:
- MX Record Setup:
- Points incoming mail to your mail server
- Priority 10 is standard for single mail server setups
- A Record for Mail Server:
- Creates mail.yourdomain.com subdomain
- Points to your server’s IP address
- SPF Record Setup:
- Prevents email spoofing
- Specifies authorized IP addresses for sending mail
- Replace YOUR-SERVER-IP with your actual server IP
- DKIM Record Setup:
- In Virtualmin, go to DNS Settings → DNS DKIM Record
- Look for DKIM DNS records section
- Copy the provided DKIM record to your DNS
- DMARC Record Setup:
- Provides instructions for receiving mail servers
- Helps prevent email spoofing
- Replace [email protected] with your monitoring email
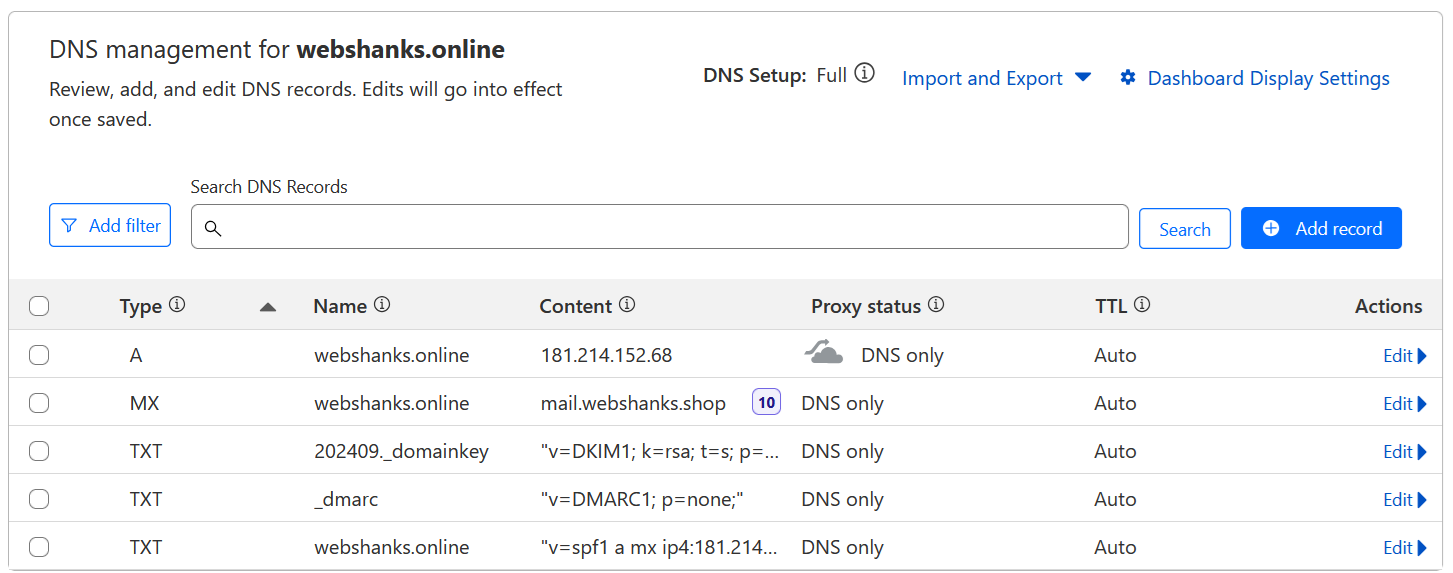
This is how your DNS records would look like.
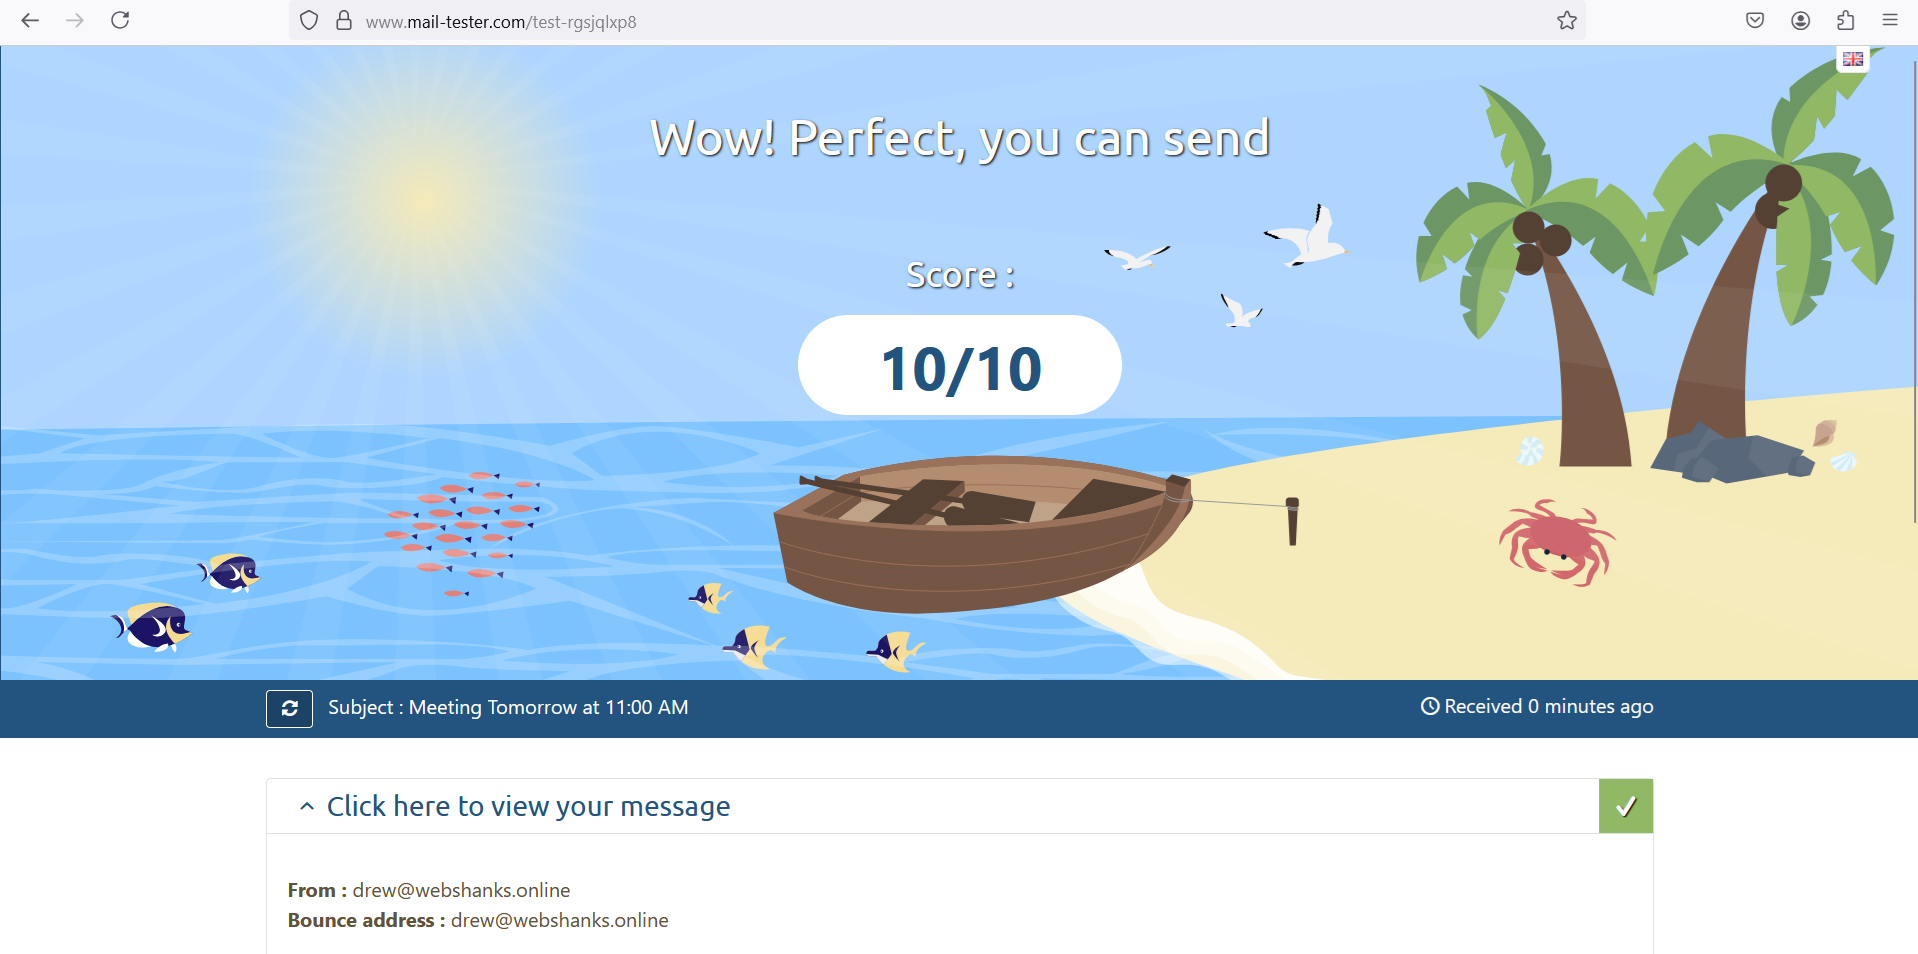
Test Email Deliverability
The most exciting part: email deliverability testing.
Login to your webmail.
Go to Mail-Tester and copy the email recipient.
We will use an email template.
And we can also send it to Gmail!
You can also use email clients like Thunderbird to access your emails on Virtualmin.
For setting up email clients, go to Edit Users > Show Email Client Settings.
Troubleshooting
If you encounter issues, try these troubleshooting steps:
- Verify DNS settings: Ensure your domain’s DNS records are correctly pointing to your server
- Check server logs: Look for error messages in Virtualmin’s logs
- Restart services: Sometimes restarting web and email services can resolve issues
- Verify SSL certificates: If using HTTPS, make sure your SSL certificates are valid and properly installed
- Check our guide on how to disable IPv6 on Ubuntu if you’re experiencing network-related issues
FAQ
Q: Can I add subdomains in Virtualmin?
A: Yes, you can add subdomains by creating a new virtual server and selecting the parent domain as the parent server.
Q: How many domains can I add to Virtualmin?
A: The number of domains you can add depends on your server resources and any licensing limitations. Virtualmin itself doesn’t impose a strict limit.
Q: Can I use catch-all email addresses?
A: Yes, Virtualmin supports catch-all email addresses. You can set this up in the domain’s email options.
Q: How do I access Virtualmin using a domain name instead of an IP address?
A: While we don’t have a specific guide for Virtualmin, you can refer to our article on how to access Virtualmin using a domain name for general principles that may apply.
Conclusion
Adding domains and emails in Virtualmin is a straightforward process that gives you full control over your hosting environment. By following this guide, you should be able to efficiently manage your domains and email accounts.
Remember to keep your Virtualmin installation updated and regularly backup your data to ensure smooth operation of your websites and email services.
If you’re looking to explore other control panel options, you might be interested in our guides on installing CloudPanel or setting up Control Web Panel. These alternatives offer different features and might suit your needs depending on your specific requirements.
For more advanced email server setups, consider checking out our guides on setting up iRedMail or creating a mail server using Mailcow.
If you need further assistance or have more questions about Virtualmin or other hosting solutions, don’t hesitate to explore our other articles or reach out to the respective support communities.