 ISPConfig stands as one of the most robust and user-friendly open-source hosting control panels available today, offering comprehensive mail server capabilities that rival commercial solutions.
Unlike simpler mail server setups, ISPConfig provides a complete web-based interface for managing every aspect of your mail server, from basic email accounts to advanced spam filtering and server monitoring.
Why Choose ISPConfig?
What sets ISPConfig apart is its integrated approach to server management. Rather than cobbling together different tools and interfaces, you get a unified control panel that manages not just email, but also:
- Web hosting services
- DNS management
- Database administration
- System monitoring
This makes it particularly attractive for businesses and organizations that need professional-grade email services without the complexity of managing multiple separate systems.
Technical Foundation
The ISPConfig mail server implementation is built on proven open-source technologies:
| Component | Purpose | Function |
|---|---|---|
| Postfix | Mail Transfer Agent | Routing and delivering emails |
| Dovecot | IMAP/POP3 Server | Mail retrieval and storage |
| SpamAssassin | Spam Filter | Advanced spam filtering |
| ClamAV | Antivirus | Virus protection |
| MySQL/MariaDB | Database | Configuration storage |
Prerequisites
Before diving into the ISPConfig email server setup, ensure you have the following prerequisites in place:
Server Requirements
- isHosting VPS or Dedicated Server: Minimum 2GB RAM, 20GB storage, and 1 CPU core. For production environments, consider 4GB+ RAM for optimal performance.
- Operating System: Ubuntu 20.04/22.04 LTS or Debian 11/12 (recommended for stability)
- Root Access: Full administrative privileges required for installation and configuration
- Static IP Address: Essential for proper email delivery and DNS configuration
Network Requirements
- Open Ports: Port 25 (SMTP), 587 (submission), 993 (IMAPS), 995 (POP3S), 80 (HTTP), 443 (HTTPS)
- Reverse DNS (PTR): Configure reverse DNS for your IP address pointing to your mail server hostname
- Clean IP Reputation: Ensure your IP address isn’t blacklisted on major spam databases
Domain and DNS
- Registered Domain: A domain name you control with access to DNS management like Namecheap
- DNS Control: Ability to create and modify A, MX, TXT, and CNAME records
- SSL Certificate: Let’s Encrypt integration available in ISPConfig for free SSL certificates
Steps in Configuring ISPConfig Mail Server
Step 1: Get a VPS with Open Port 25 – isHosting VPS
Before setting up ISPConfig, ensure your VPS provider allows outbound traffic on port 25. This is essential for sending emails. I will use isHosting VPS Medium Plan.
I recommend checking this guide for VPS providers with an open port 25. Personally, I’ve had success using isHosting, which reliably supports email traffic on default SMTP ports.

Step 2. Register a Domain
Your email server requires a proper domain configuration. If you haven’t already acquired a domain, choose a reputable registrar like Namecheap and ensure you have full DNS control (point it to Cloudflare). The domain will serve as the foundation for your email addresses (e.g., [email protected]).

Step 3. Set Up Initial DNS Records and Hostname
Once you have your domain, you’ll need to:
- Point the domain’s A record to your server’s IP address
- Create a subdomain for your mail server (e.g., mail.yourdomain.com)
- Ensure reverse DNS (PTR record) is configured by your hosting provider
For a detailed guide, visit this email authentication tutorial.
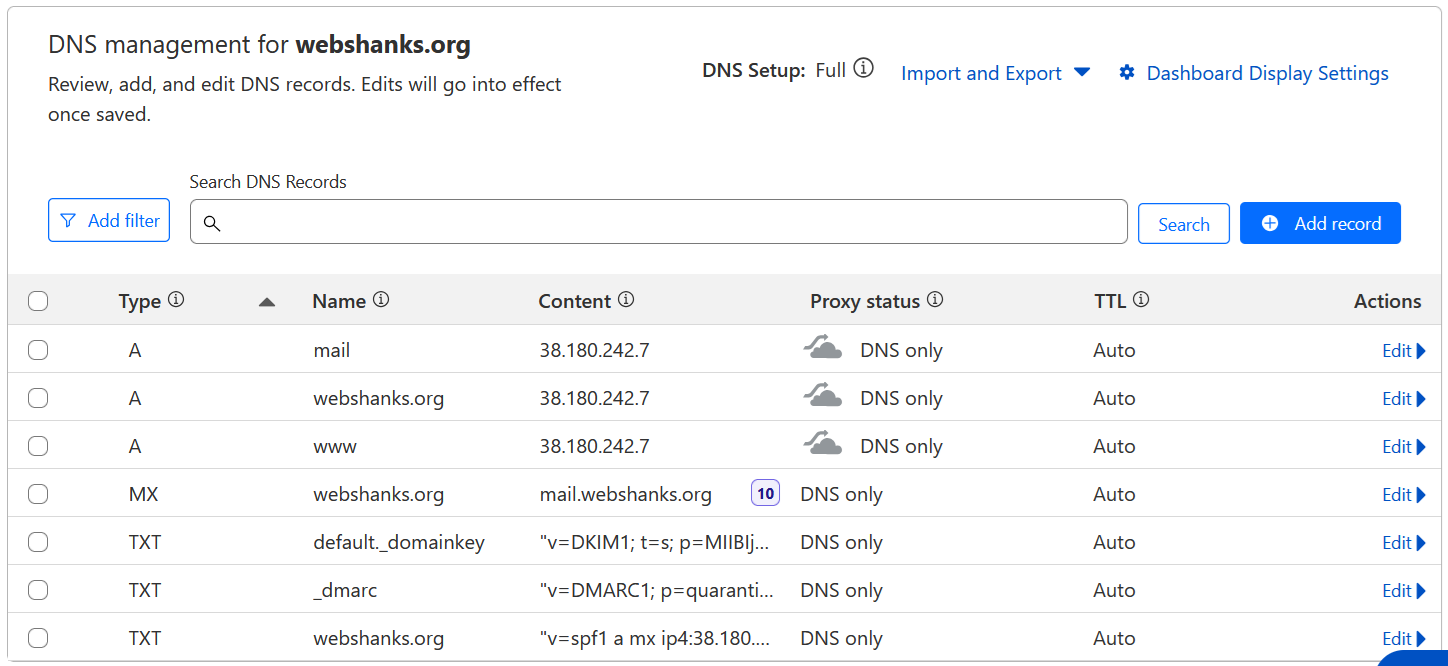
Essential DNS Records
| Record Type | Name | Content | Priority | TTL |
| A | YourServerIP | Auto | ||
| A | webshanks.org | YourServerIP | Auto | |
| AAAA | YourServerIPv6 | Auto | ||
| AAAA | webshanks.org | YourServerIPv6 | Auto | |
| MX | webshanks.org | mail.webshanks.org | 10 | Auto |
| TXT | _dmarc | v=DMARC1; p=quarantine; pct=100 | Auto | |
| TXT | webshanks.org | v=spf1 a mx ip4:yourIPv4 ip6:yourIPv6 ~all | Auto |
Note: If IPv6 is not available, you can use IPv4 alone. Be sure to change the domain above with yours.
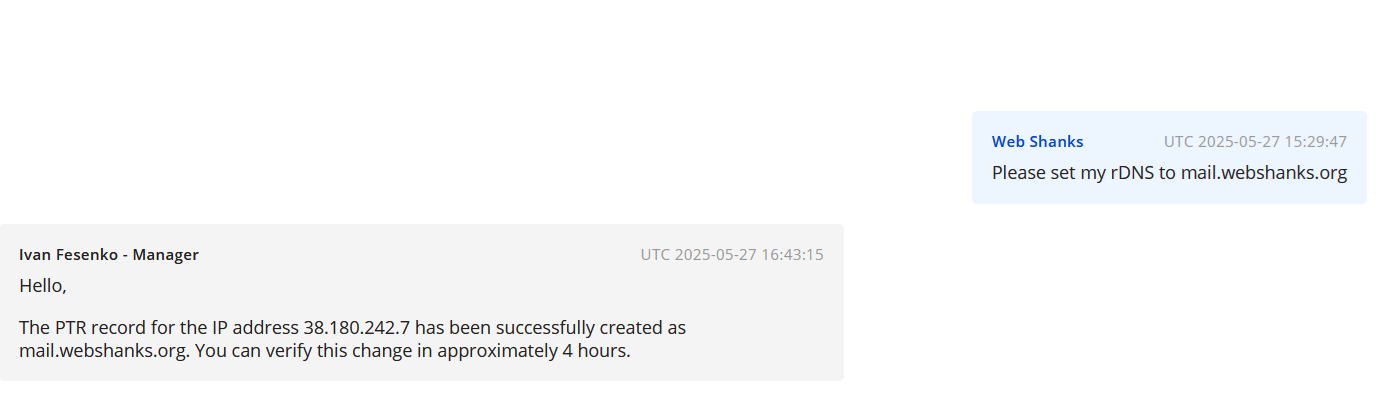
For our rDNS on isHosting, you can contact their support to set it up for you.
For setting up a hostname, login to your VPS via SSH and run the command:
nano /etc/hostname
Set it to like mail.domain.com and reboot your server.
systemctl reboot
Step 4. Install ISPConfig
Update your system first:
apt update && apt upgrade -y
Next, run the ISPConfig auto installer with Nginx:
wget -O - https://get.ispconfig.org | sh -s -- --use-nginx --use-ftp-ports=40110-40210 --unattended-upgrades
When it prompts:
WARNING! This script will reconfigure your complete server!
It should be run on a freshly installed server and all current configuration that you have done will most likely be lost!
Type 'yes' if you really want to continue:
Just type ‘yes‘ to continue.
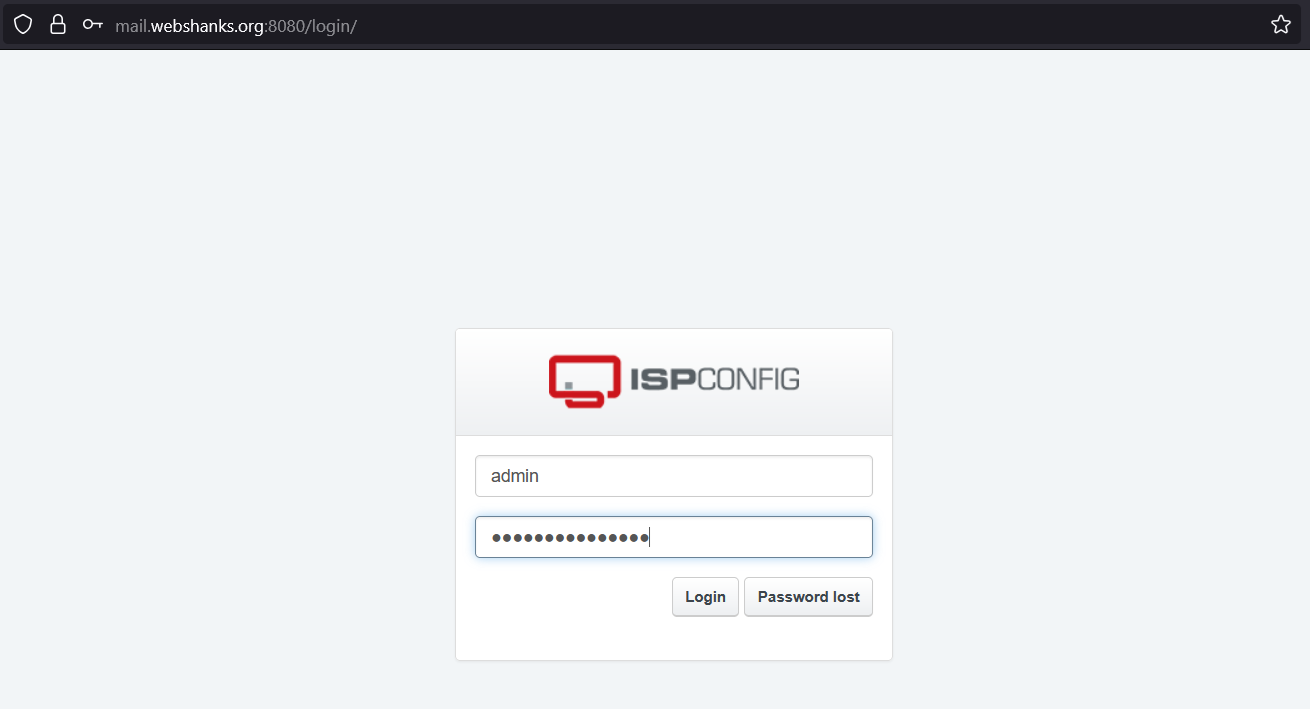
Access ISPConfig Panel
Navigate to https://your-server-ip:8080 and log in with your admin credentials. The ISPConfig interface provides a user-friendly way to manage all aspects of your email server.
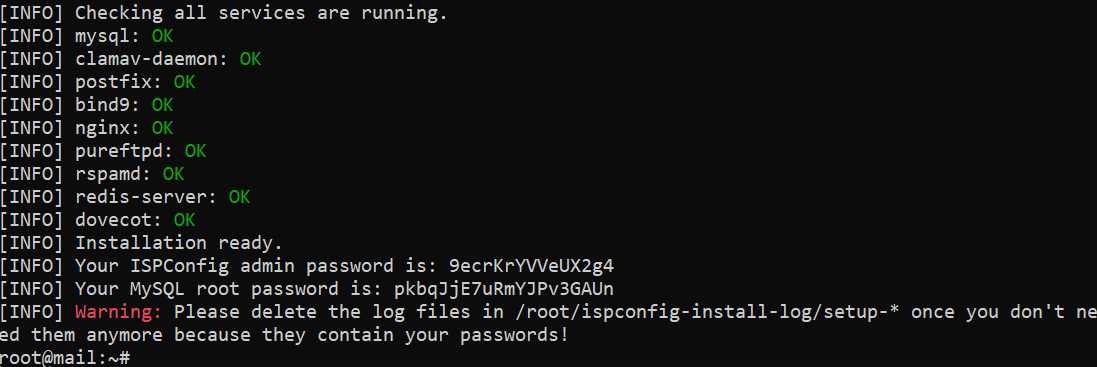
You can now login securely using the given credentials.
Step 5. Configure the Mail Server
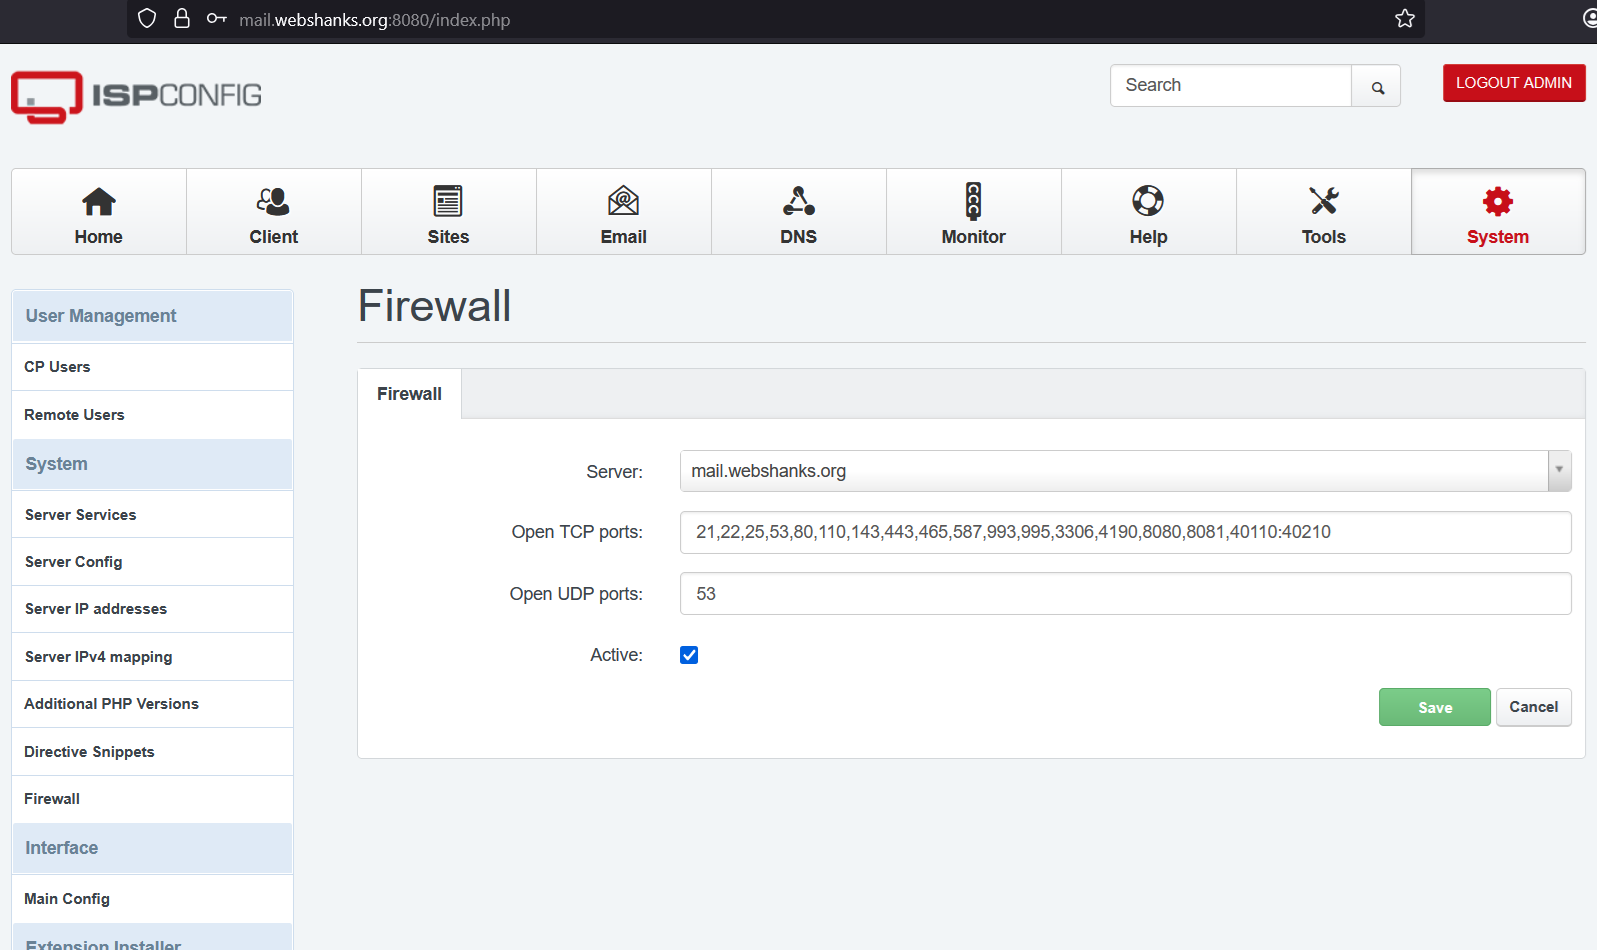
Once you are logged in, go to System > Firewall. Then click Add new firewall record.
Add TCP:
20,21,22,25,80,443,40110:40210,110,143,465,587,993,995,53,8080,8081
and UDP:
53
Next, create Email Domain.
- Go to Email → Domain in the ISPConfig panel
- Click Add new Domain
- Enter your domain name (e.g., yourdomain.com)
- Enable DKIM signing for enhanced email authentication
- Configure spam filter settings according to your requirements

Be sure to click DomainKeys Identified Mail (DKIM).
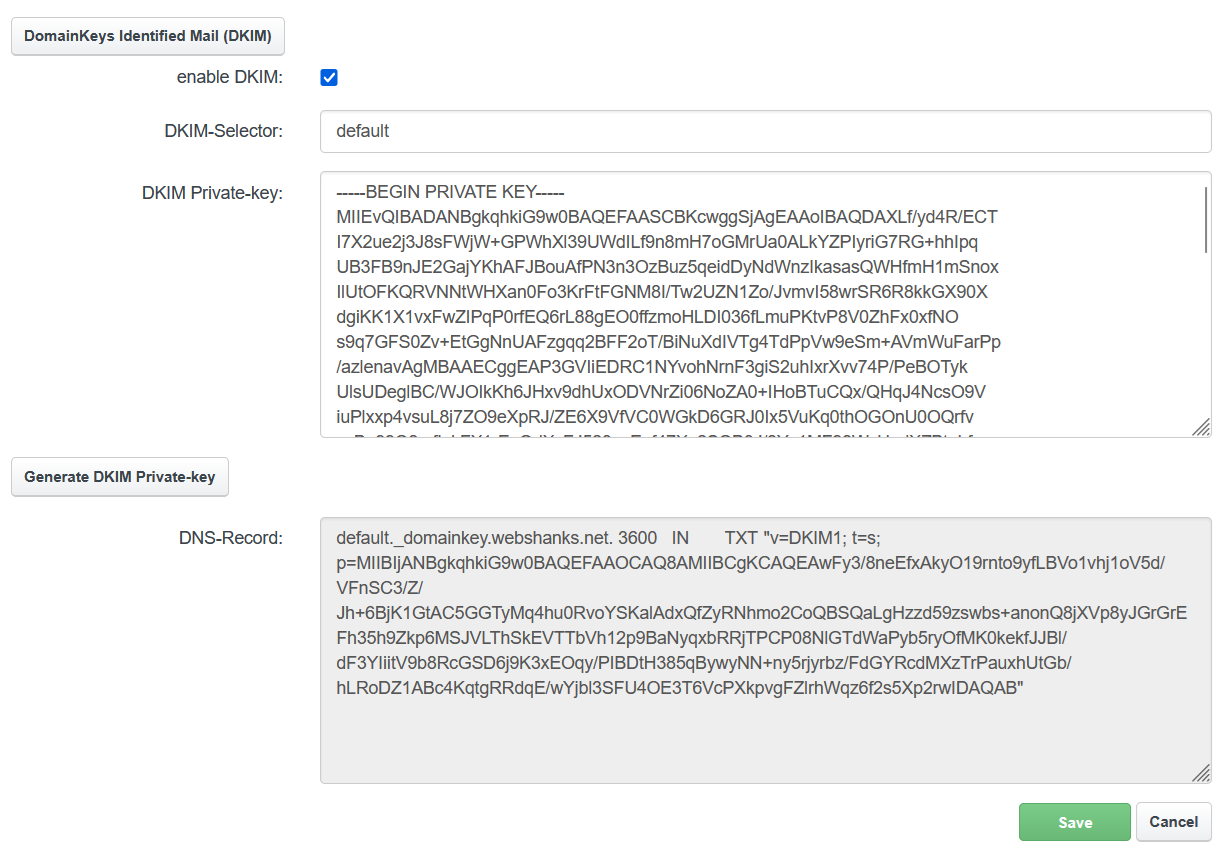
Add the DKIM to your DNS and click Save.
ISPConfig automatically generates DKIM keys when you enable DKIM for a domain. Copy the public key from the DNS records section and add it to your domain’s DNS zone.
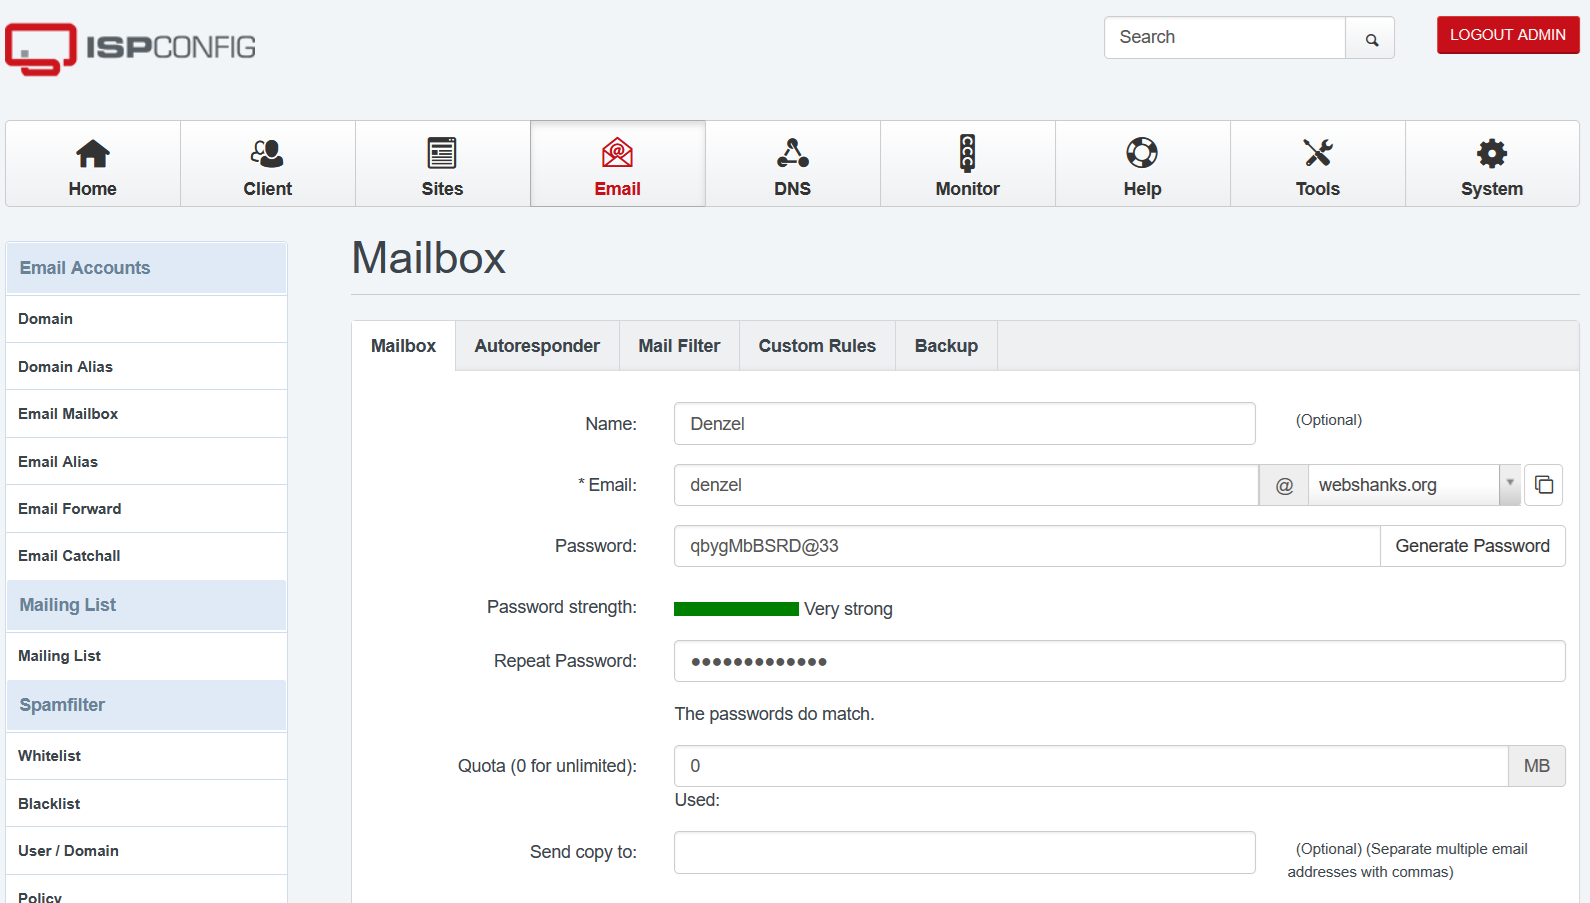
Now our DNS is complete, let’s create an email user.
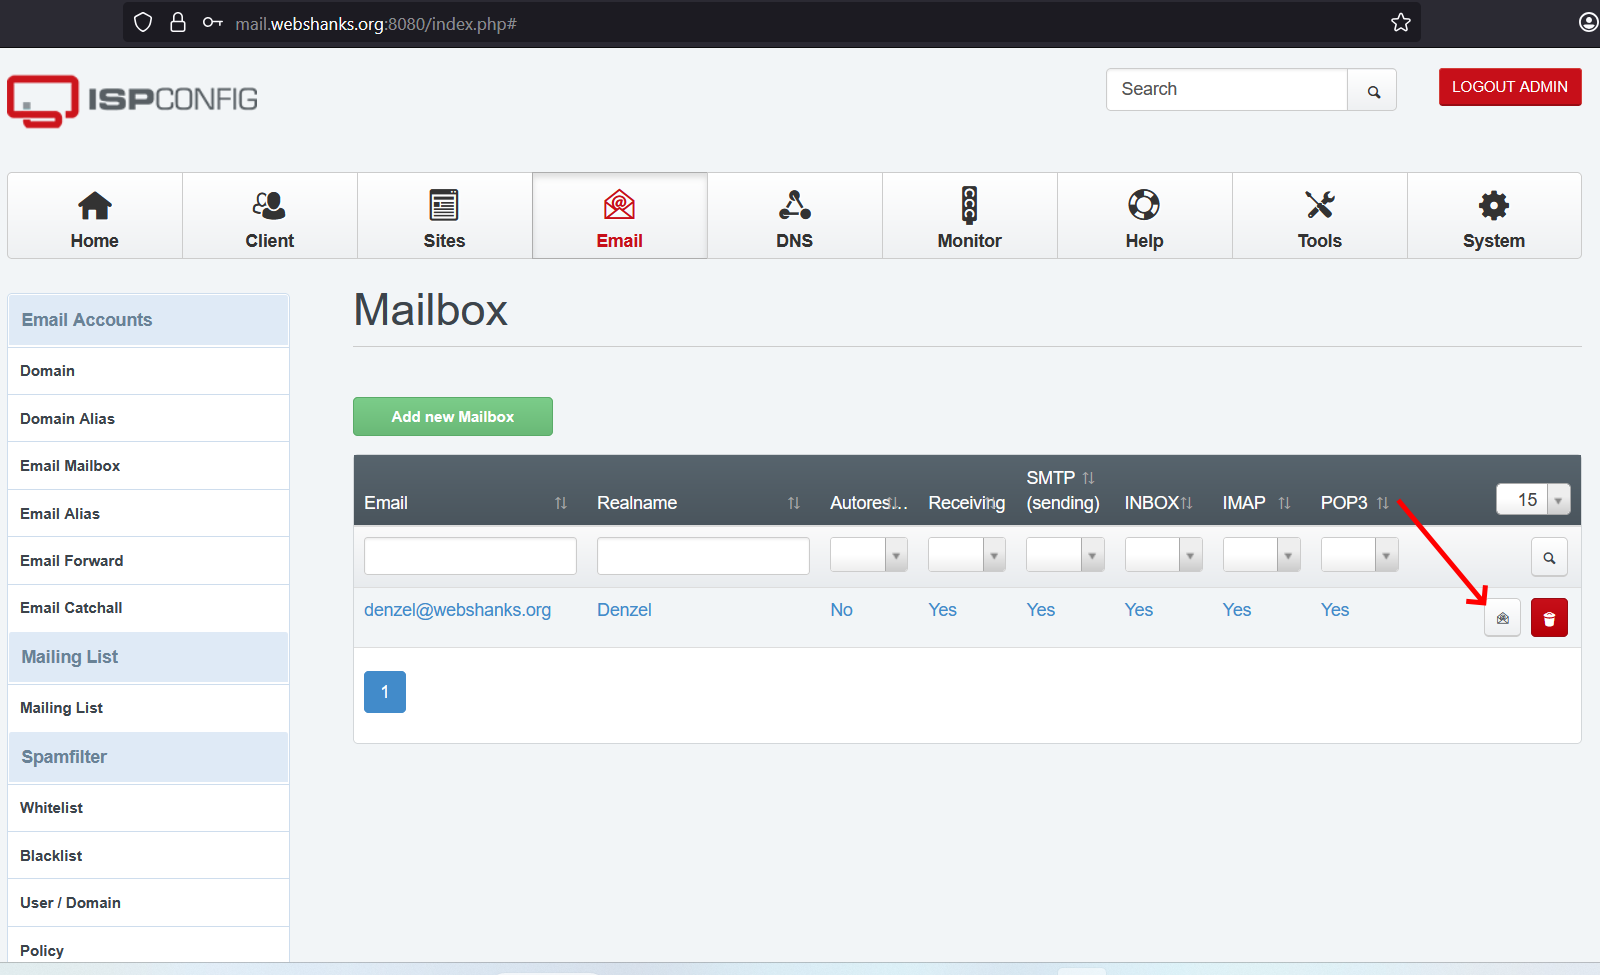
- Navigate to Email → Mailbox
- Click Add new Mailbox
- Configure the email address, password, and quota settings
- Enable email forwarding if needed
- Set up autoresponder messages for out-of-office replies
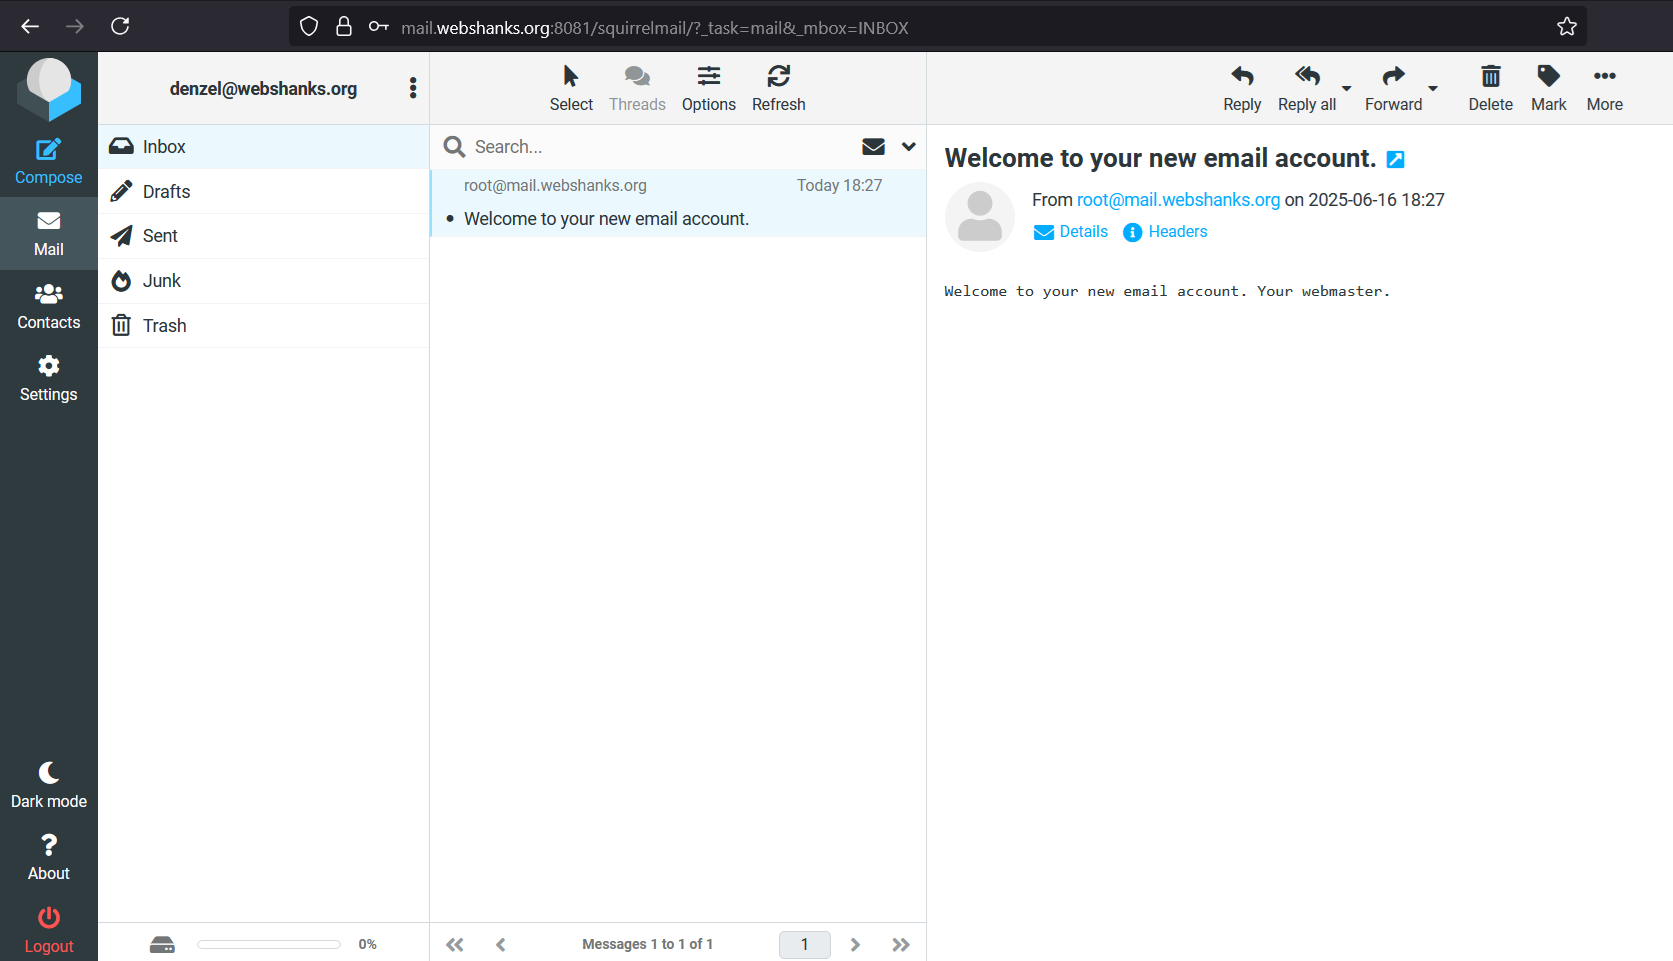
Then let’s login to our webmail.
Beside the user, you will see an email icon. Click it to proceed to your webmail.
Login using the email user we created earlier.
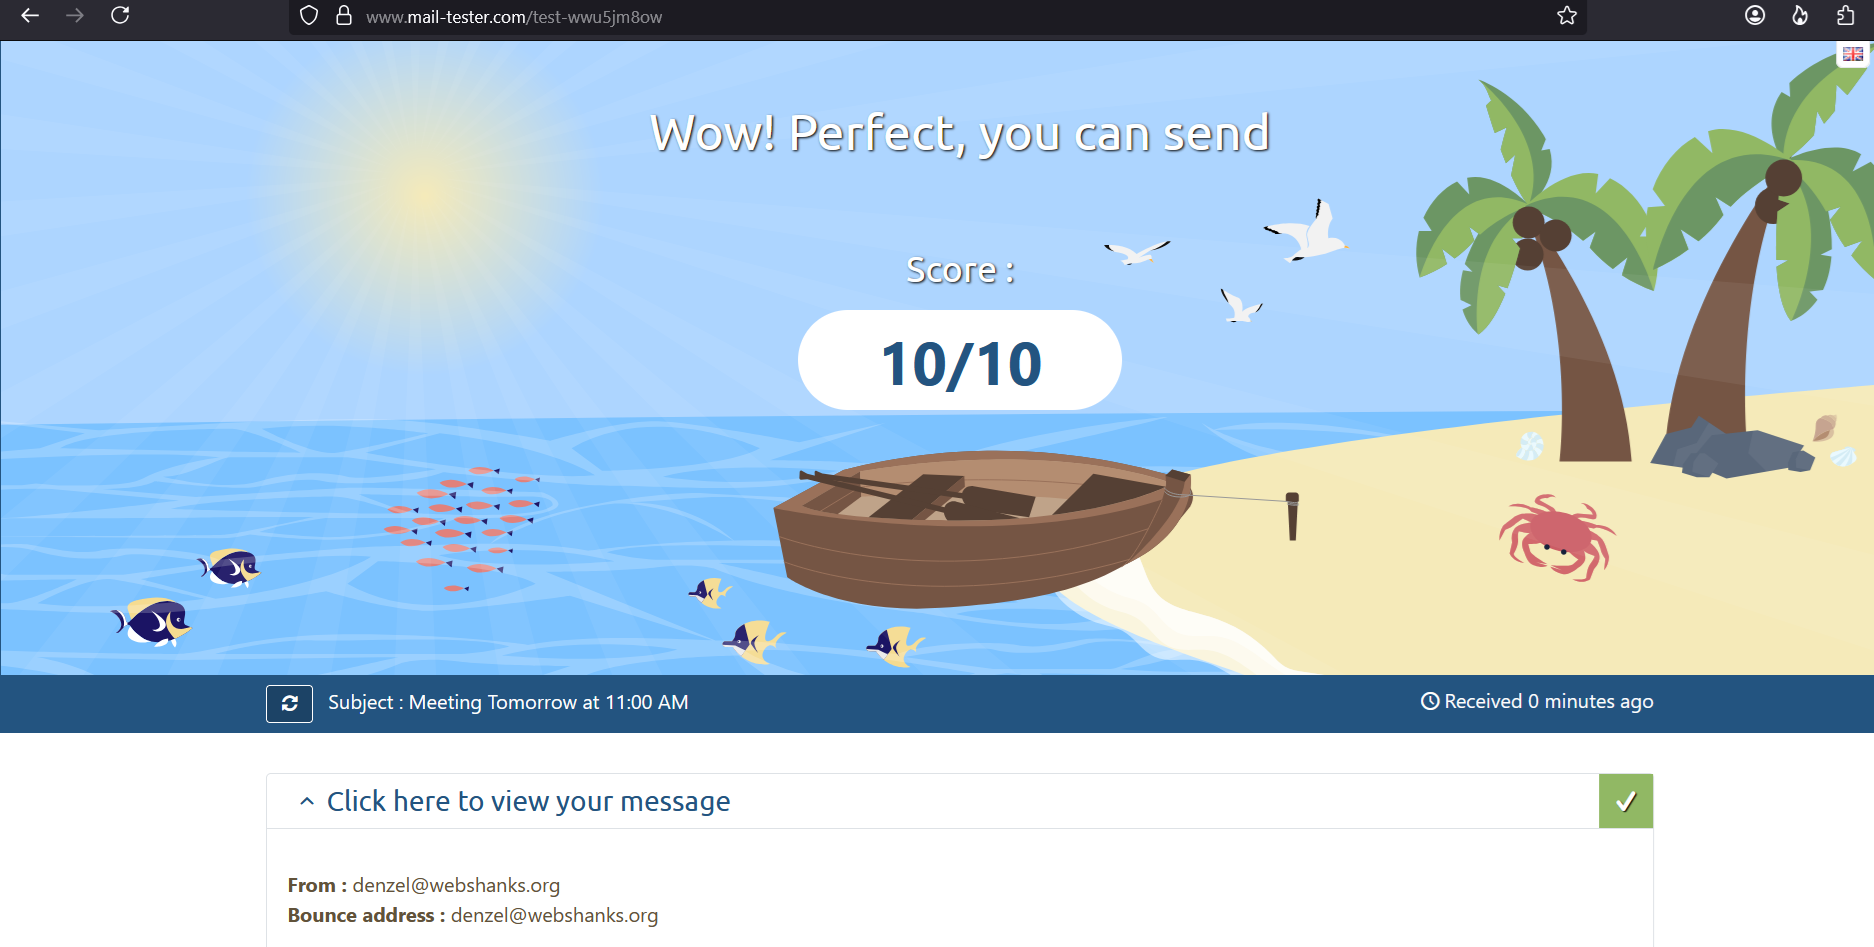
Step 6. Testing
Now it’s time to test our mail server.
Voila! We got a 10/10 score!
Let’s try to send to Gmail.
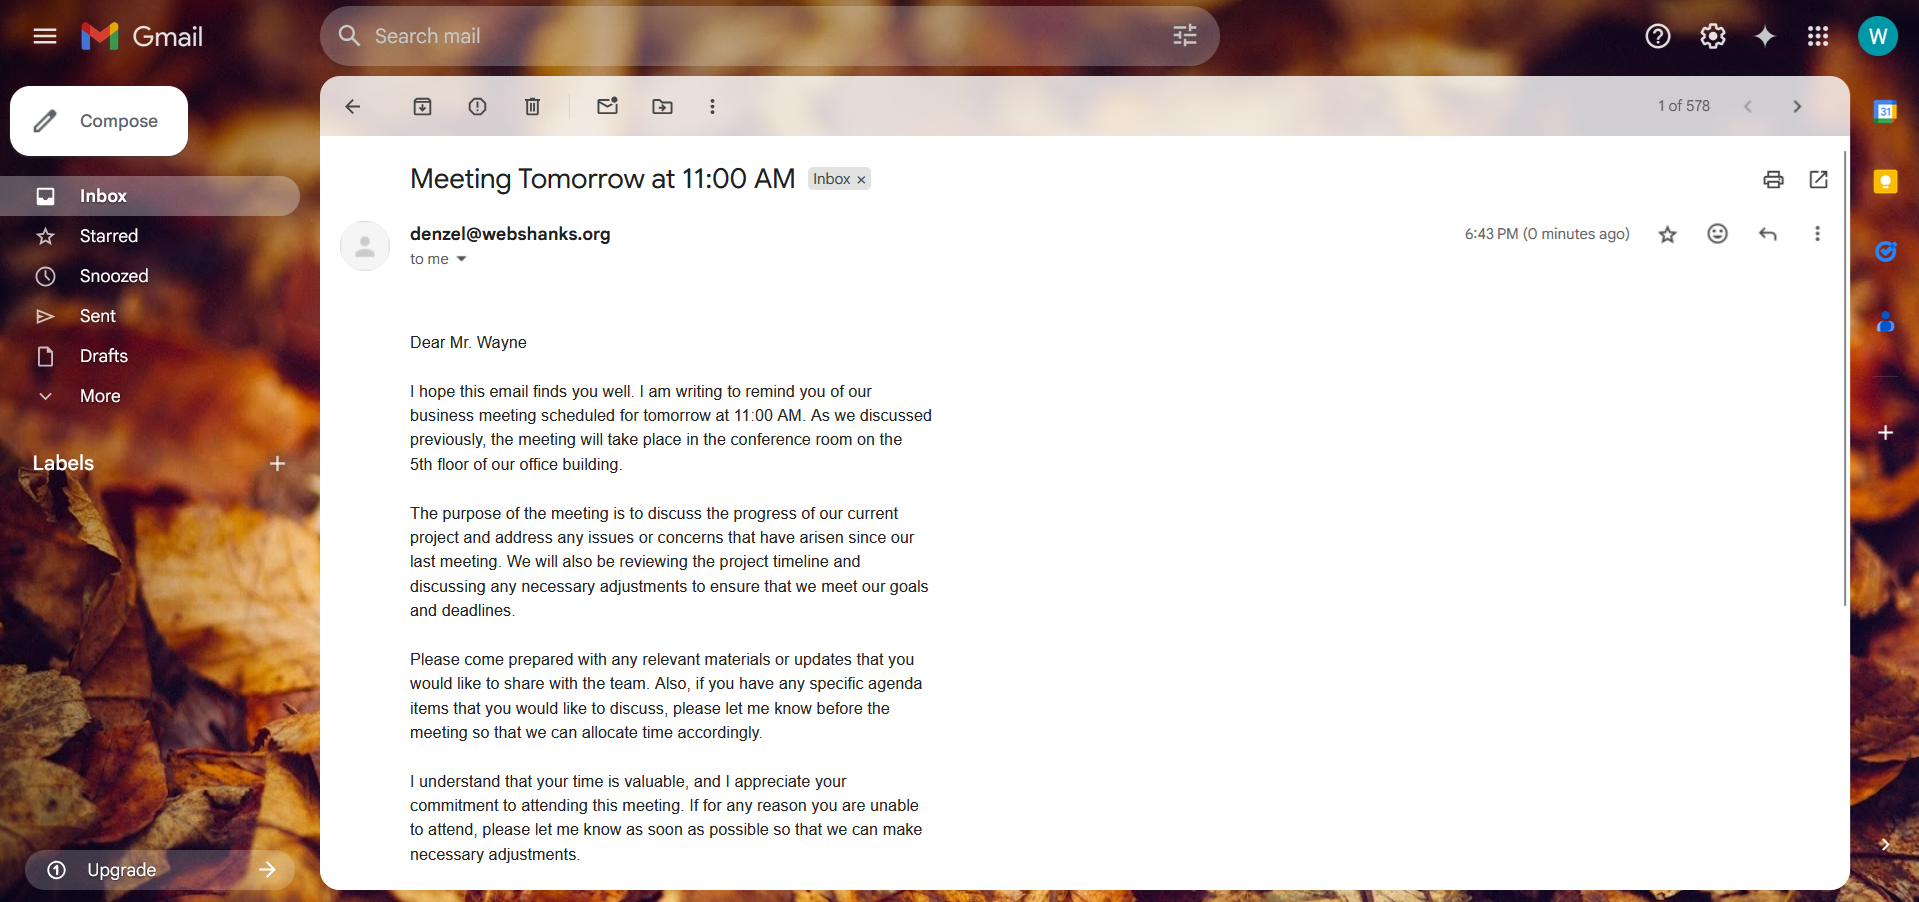
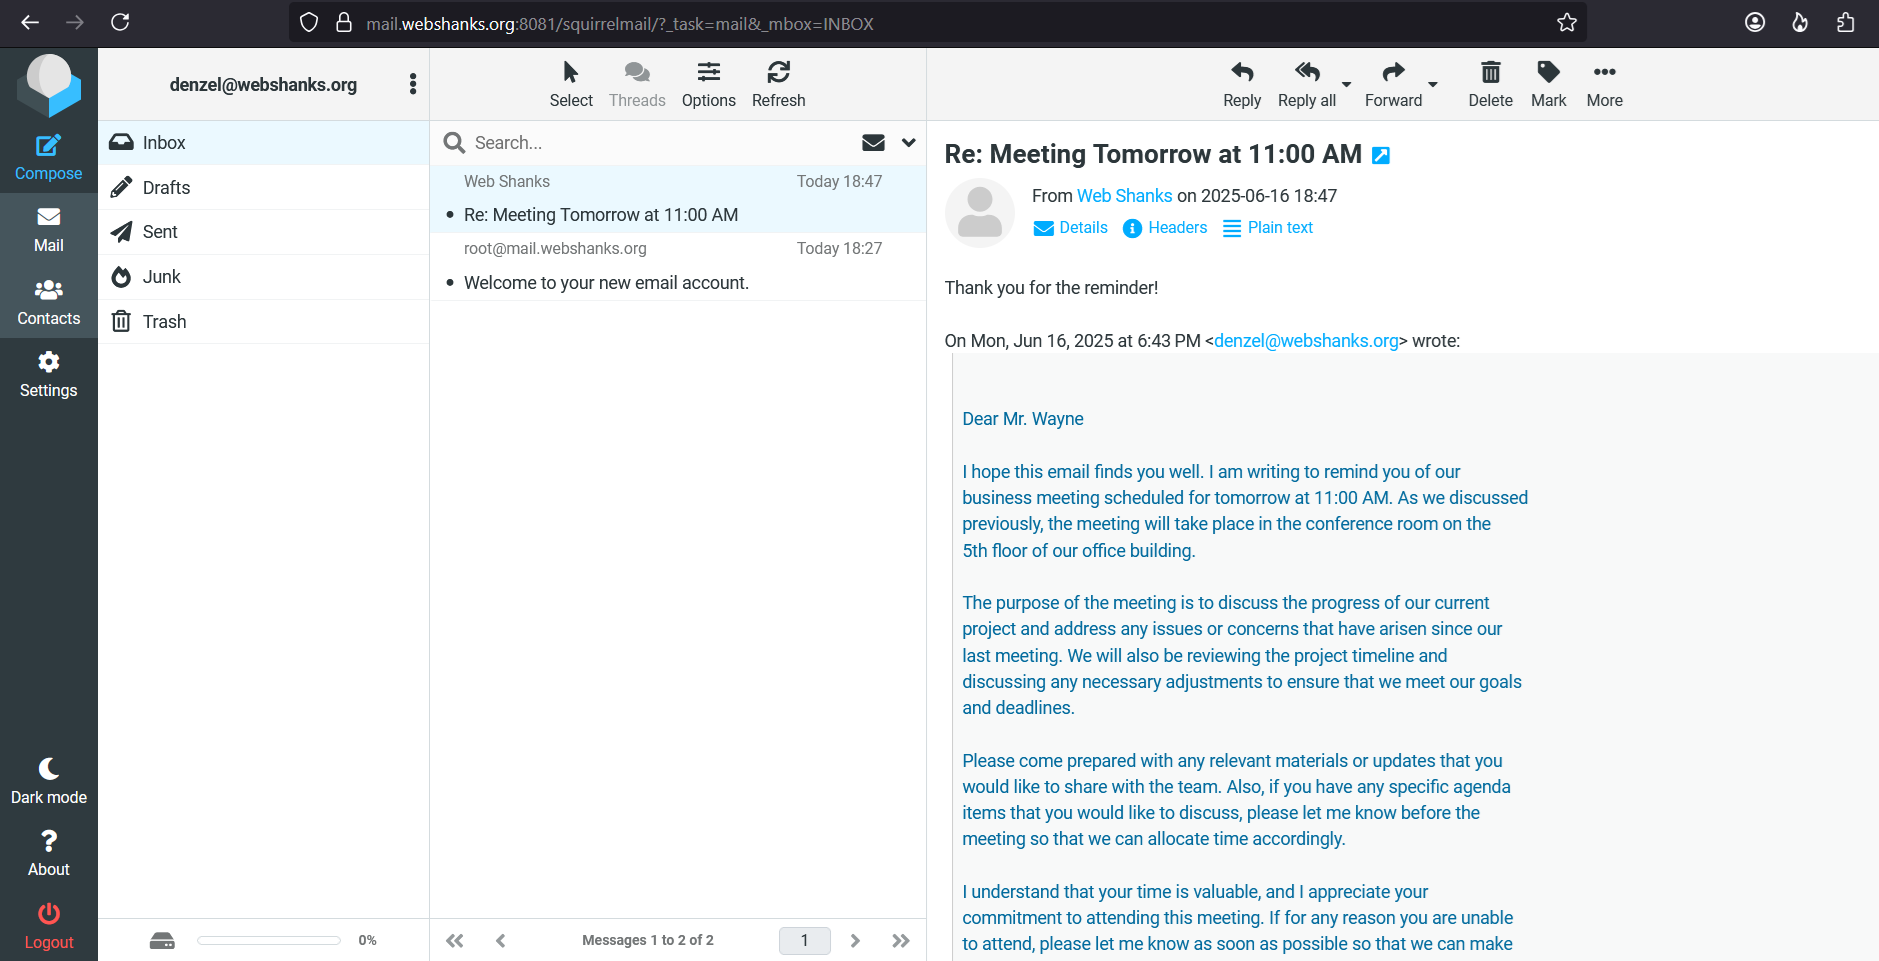
We’ll reply to see if we are able to receive email messages on our mail server.
Email Client Configuration
Once your ISPConfig email server is operational, you’ll need to configure email clients to access your mailboxes. ISPConfig supports both IMAP and POP3 protocols, with IMAP being the recommended choice for modern email management.
Incoming Mail Server (IMAP):
- Server: mail.yourdomain.com
- Port: 993 (SSL/TLS) or 143 (STARTTLS)
- Security: SSL/TLS or STARTTLS
- Authentication: Normal password
Outgoing Mail Server (SMTP):
- Server: mail.yourdomain.com
- Port: 587 (STARTTLS) or 465 (SSL/TLS)
- Security: STARTTLS or SSL/TLS
- Authentication: Normal password
Thunderbird Configuration
Mozilla Thunderbird offers excellent compatibility with ISPConfig email servers.
For Thunderbird-specific configuration, refer to our tutorial on configuring Thunderbird with custom mail servers.
Outlook Configuration
- Open Outlook and go to File → Add Account
- Choose Manual setup or additional server types
- Select POP or IMAP
- Enter the server settings as specified above
- Test the connection and save the configuration
Mobile Device Setup
Most modern smartphones support automatic email configuration. Simply enter your email address and password, and the device will attempt to detect the server settings automatically. If automatic setup fails, manually enter the IMAP and SMTP settings provided above.
Troubleshooting
Even with careful setup, email servers can encounter various issues. This troubleshooting section covers the most common problems and their solutions.
Emails Going to Spam
If your emails are consistently marked as spam, check the following:
- SPF Record: Verify your SPF record is correctly configured and published
- DKIM Signature: Ensure DKIM signing is enabled and the public key is in DNS
- DMARC Policy: Implement a proper DMARC policy starting with “p=none” for monitoring
- IP Reputation: Check if your IP is blacklisted using tools like MXToolbox
- Reverse DNS: Confirm your PTR record points to your mail server hostname
Email Bounce Back
When emails bounce back, examine the bounce message for specific error codes:
- 550 Errors: Usually indicate recipient address issues or policy violations
- 451/452 Errors: Temporary failures, often due to rate limiting or storage issues
- 553 Errors: Authentication or configuration problems
Conclusion
Setting up an ISPConfig email server provides you with complete control over your email infrastructure while maintaining professional-grade functionality. Throughout this comprehensive guide, we’ve covered every aspect from initial server preparation to advanced troubleshooting techniques.
The key to a successful email server deployment lies in attention to detail, particularly in DNS configuration and security implementation. By following the steps outlined in this guide, you’ve established a robust foundation for reliable email communication.
Key Takeaways:
- Proper DNS configuration is crucial for email deliverability and authentication
- Security measures like SSL/TLS encryption and firewall configuration protect your email infrastructure
- Regular monitoring and maintenance ensure optimal performance and reliability
- Understanding troubleshooting techniques helps resolve issues quickly when they arise
Remember that email server administration is an ongoing responsibility. Regular updates, security patches, and monitoring are essential for maintaining a secure and efficient email service. Consider implementing automated backup solutions and monitoring systems to proactively address potential issues.
Related Email Server Guides
Expand your email server knowledge with these additional resources:
- Complete VPS Email Server Setup
- Docker Mailserver on Debian 12
- Mailcow Email Server Setup
- Modoboa Mail Server Configuration
- Stalwart Email Server Setup
- Mail-in-a-Box Ubuntu Setup
- YunoHost Email Server
- iRedMail Server
- SetupAxigen Email Server Configuration
For VPS hosting recommendations that work excellently with ISPConfig, check out our guides on isHosting VPS or UltaHost VPS Setup and explore affordable yearly VPS deals.