 Are you looking to host your own email server on a Linux-based system?
Setting up an Ubuntu mail server using RackNerd VPS and Mail-in-a-Box is a cost-effective solution. Why RackNerd? Because it has an open port 25 to send outbound emails and there’s no limit in sending emails.
In this comprehensive guide, we’ll walk you through the entire process, from choosing the right VPS provider to configuring your email server step by step.
Gain full control over your email today! Let’s start!
Why Host Your Own Mail Server?
Hosting your own mail server offers several advantages:
- Privacy: Your emails are not stored on third-party servers, giving you more control over your data.
- Customization: You can tailor the email server to your specific needs, including security settings and email quotas.
- Learning Experience: Managing a mail server is a valuable skill in the world of IT and can be a great learning opportunity.
Prerequisites
1. RackNerd VPS Account Setup
Before you can begin, you’ll need to create an account with RackNerd and select a VPS plan that suits your needs. Make sure to choose an Ubuntu-based image for your VPS and France as your location because it has free IPv6. We need IPv6 for our email not going to spam especially to Gmail.
RackNerd does not close port 25 for send outbound emails and doesn’t have sending limitations.
2. Domain Name Registration
You’ll need a domain name (e.g., yourdomain.com) for your email server. If you don’t have one, you can register it through a domain registrar like Namecheap. Avoid top-level domains like .xyz .top .click .icu .loan .work .click
Ensure you have access to your domain’s DNS settings, as you’ll need to configure various DNS records later in the setup process.
Make an Ubuntu Mail Server Using RackNerd VPS and Mail-in-a-Box
Mail-in-a-Box system requirements:
- Ubuntu 22.04 LTS
- 1GB RAM
- 1vCore
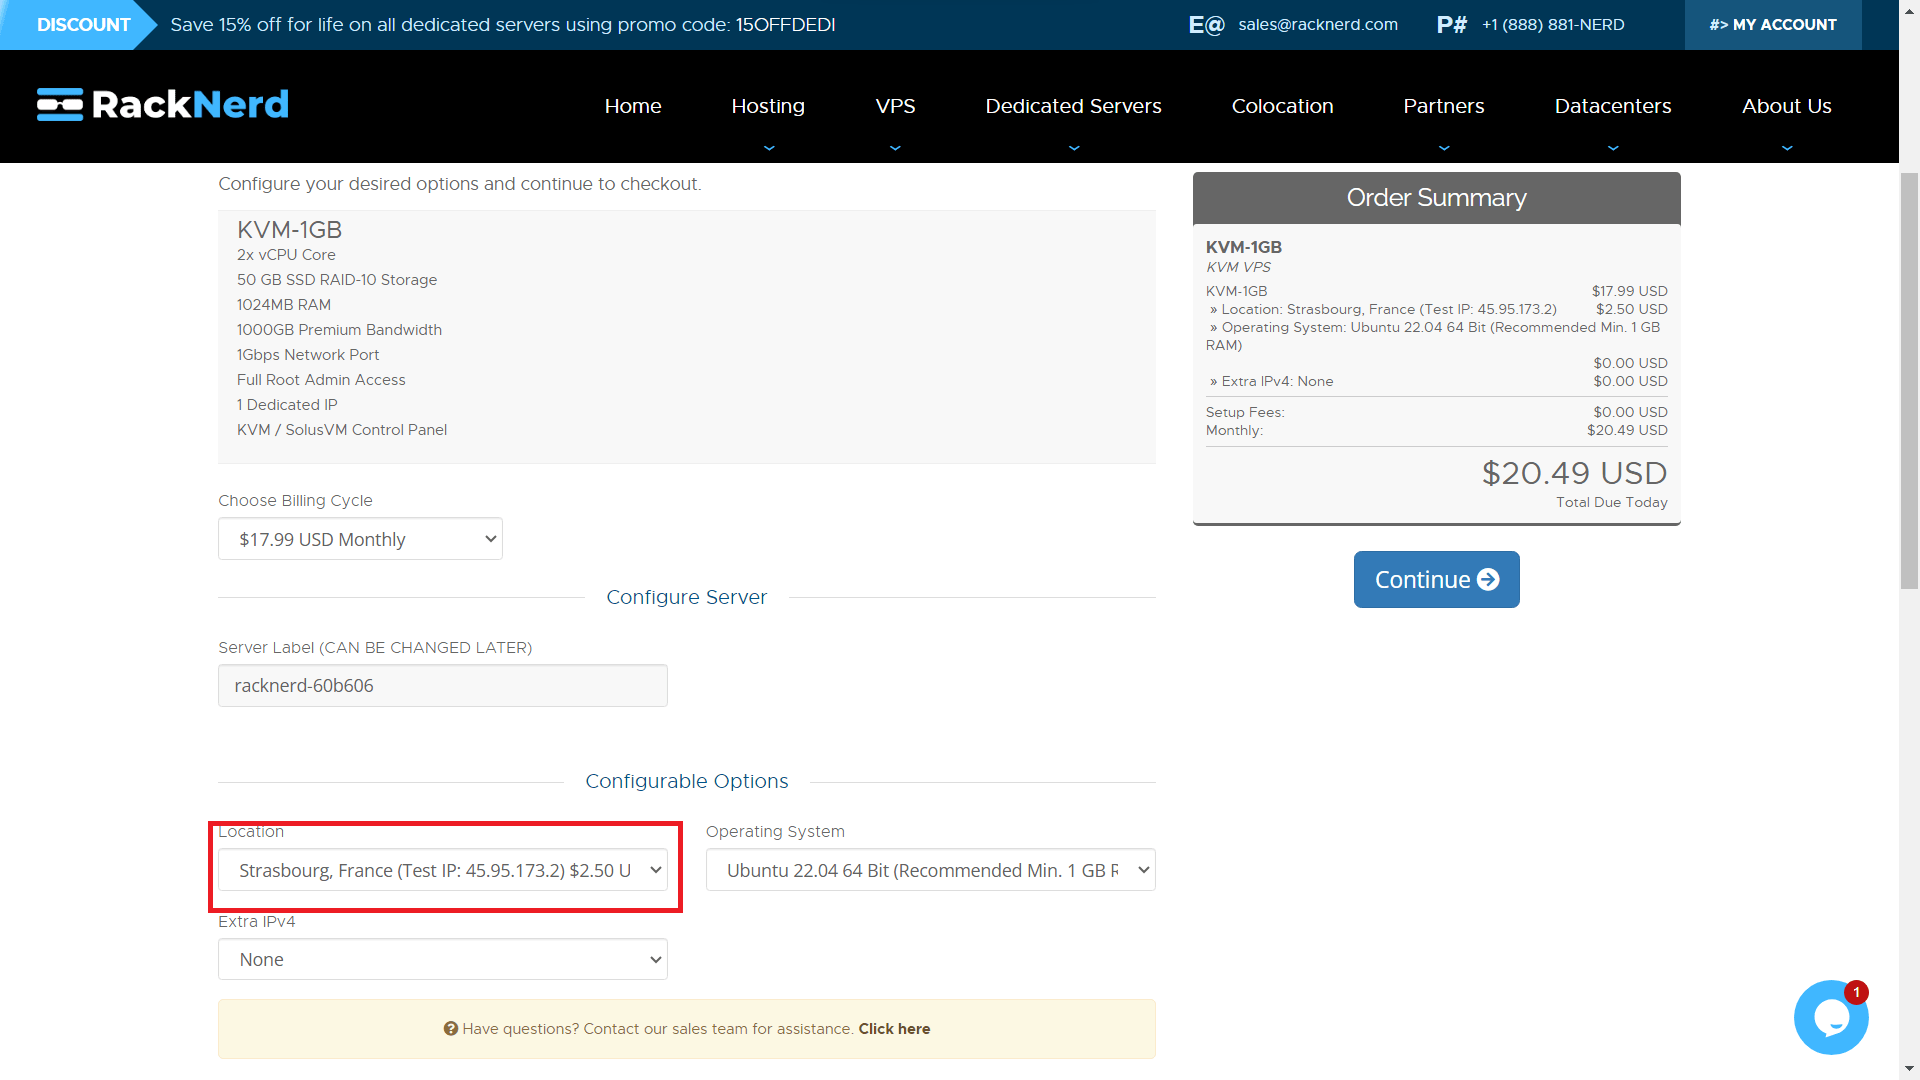
Step 1. Signup with RackNerd VPS
Be sure to follow this step by step guide in setting up RackNerd VPS. Don’t skip this step.
Check out RackNerd Deals France location (2x vCPU Cores, 50 GB Pure SSD, 4 GB RAM) at $44.59 per year! Yes, it’s per year (that’s $3.72 per month, lifetime)!
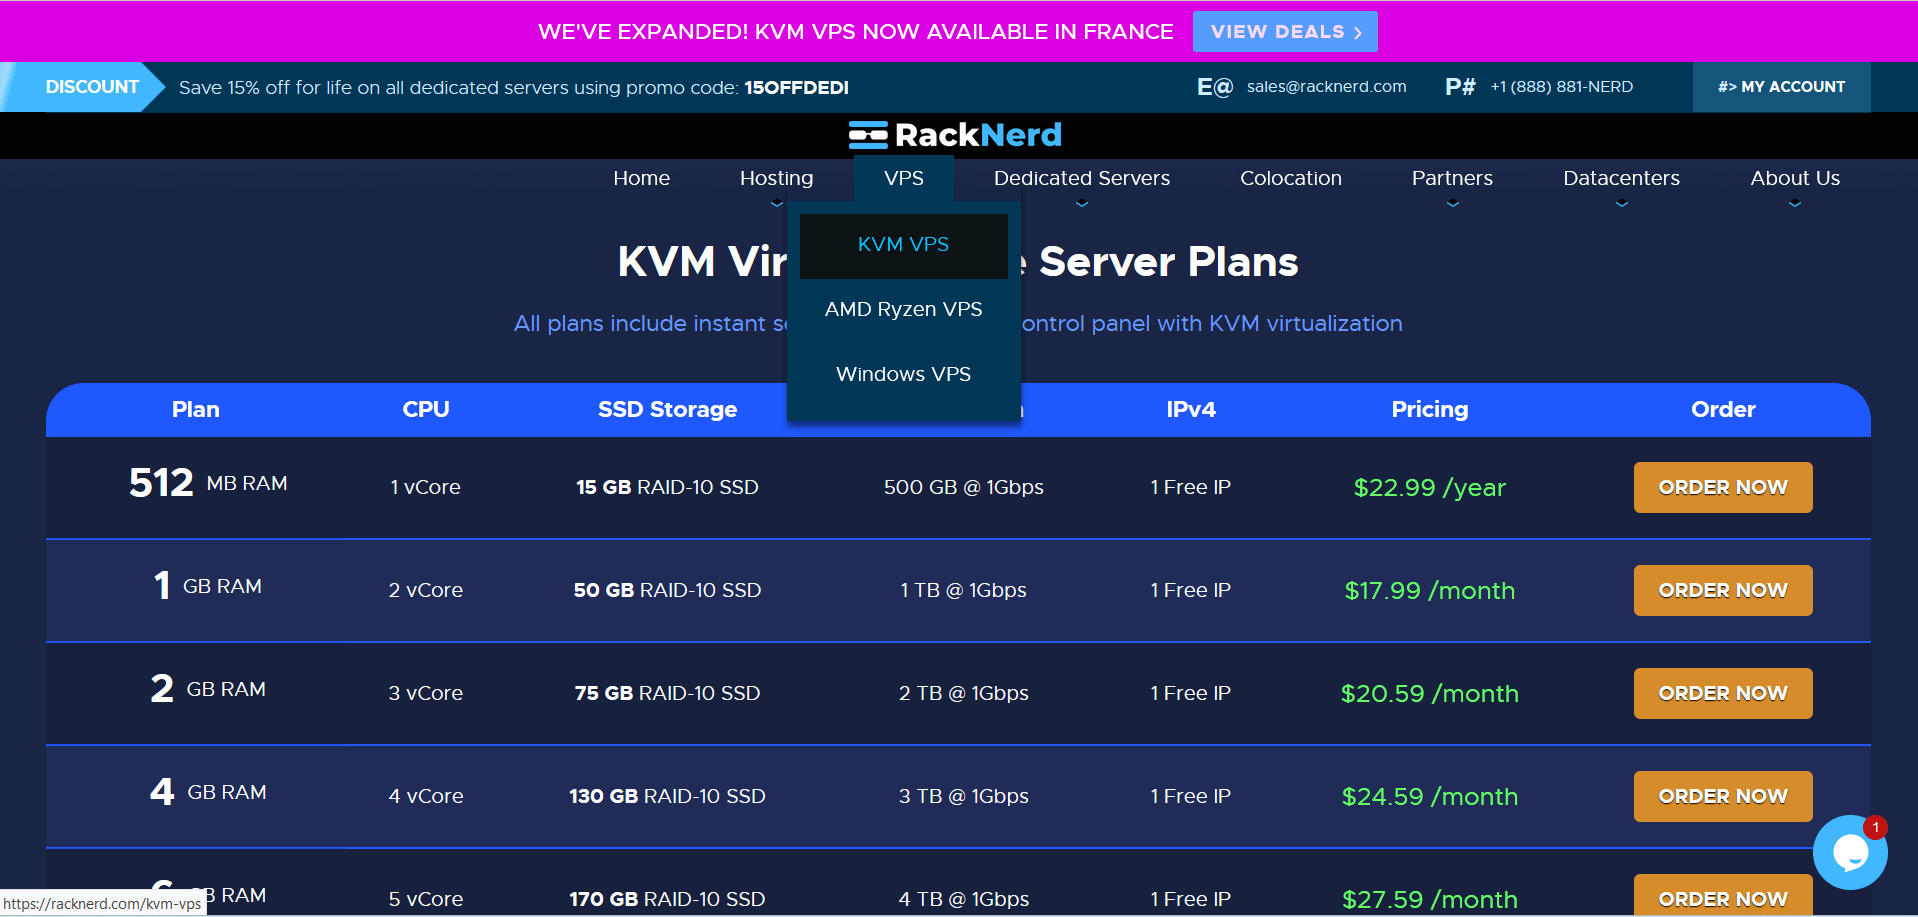
Be sure to choose France as your location and Ubuntu 22.04 LTS as your operating system. As of this writing, Racknerd only offers IPv6 in Los Angeles, Utah and France. Unfortunately, all of these locations are out of stock except for France.
After signing up with RackNerd, open a support ticket that you would like to have an IPv6 for your VPS. RackNerd support will reply in minutes. You will receive on how to bind your IPv6 with your server together with your IPv6 and gateway address.
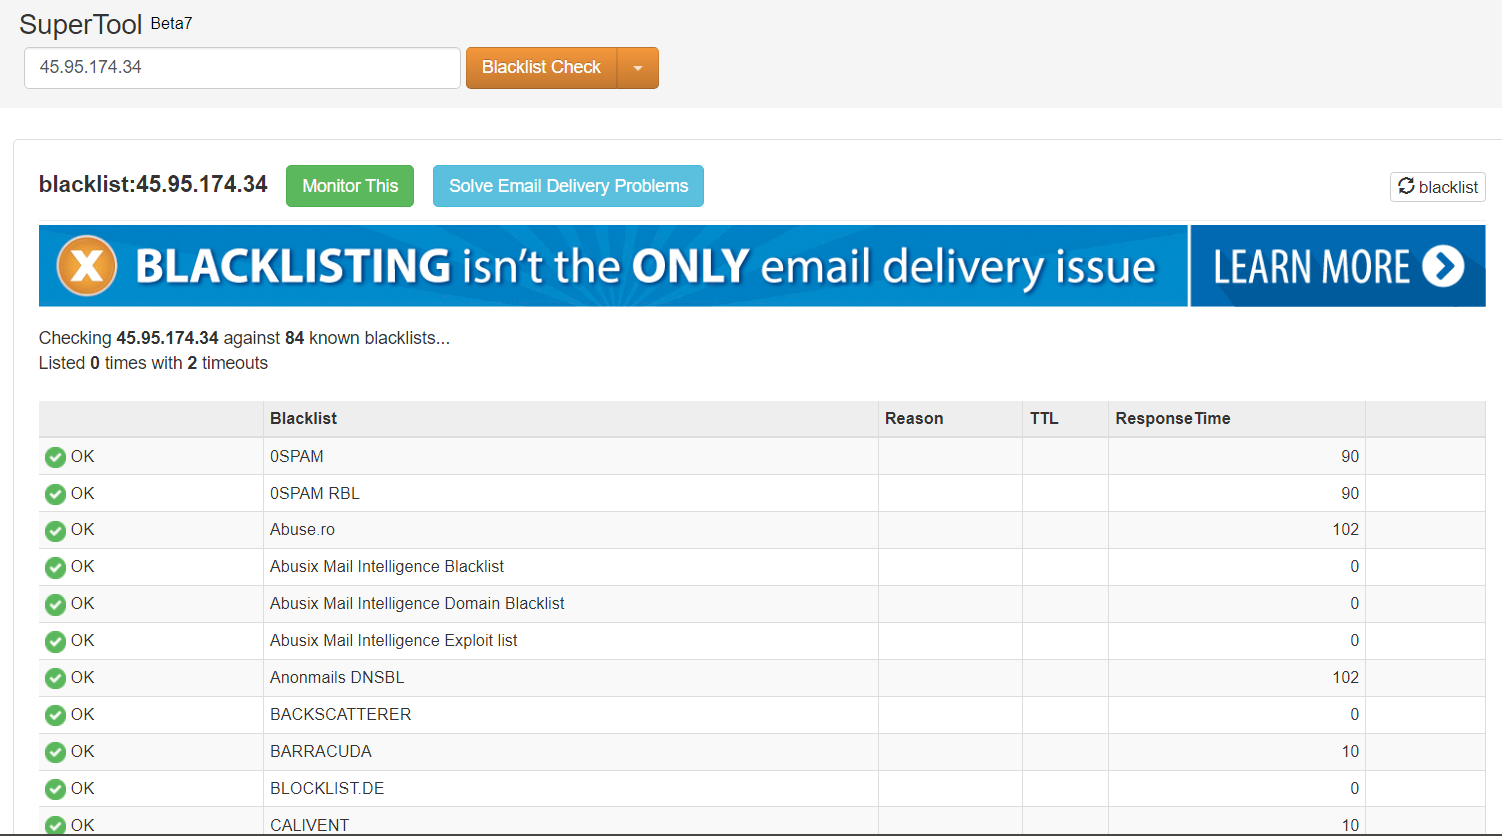
Pro tip: After receiving your IPv4, look it up for potential blacklist using https://mxtoolbox.com/blacklists.aspx. I got 0 blacklist.
Step 2. Bind Your IPv6 with Your VPS
Connect to your server using putty or Windows CMD.
ssh username@your_server_ip
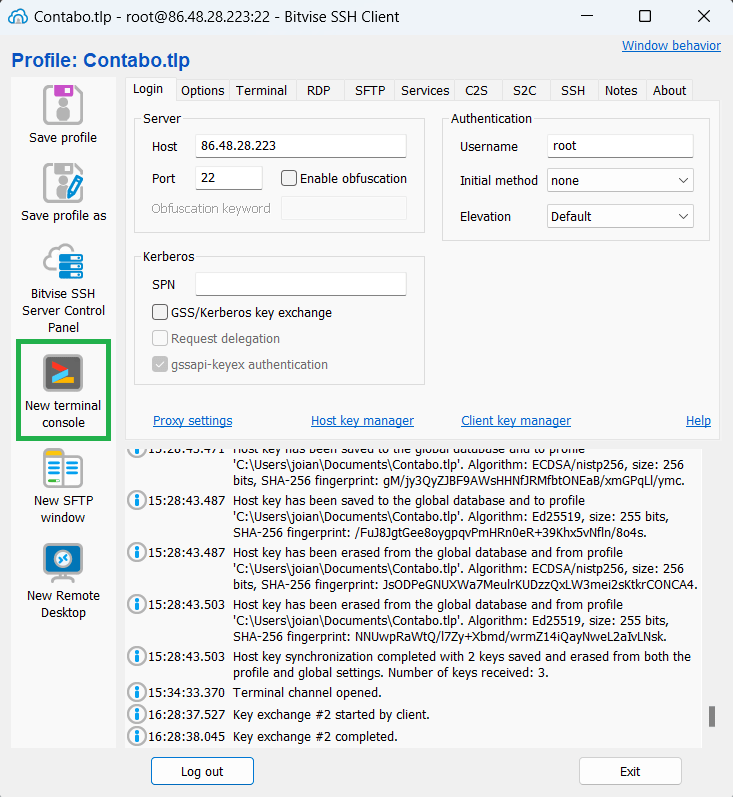
Or install a free SSH client called Bitvise. You can login using your password.
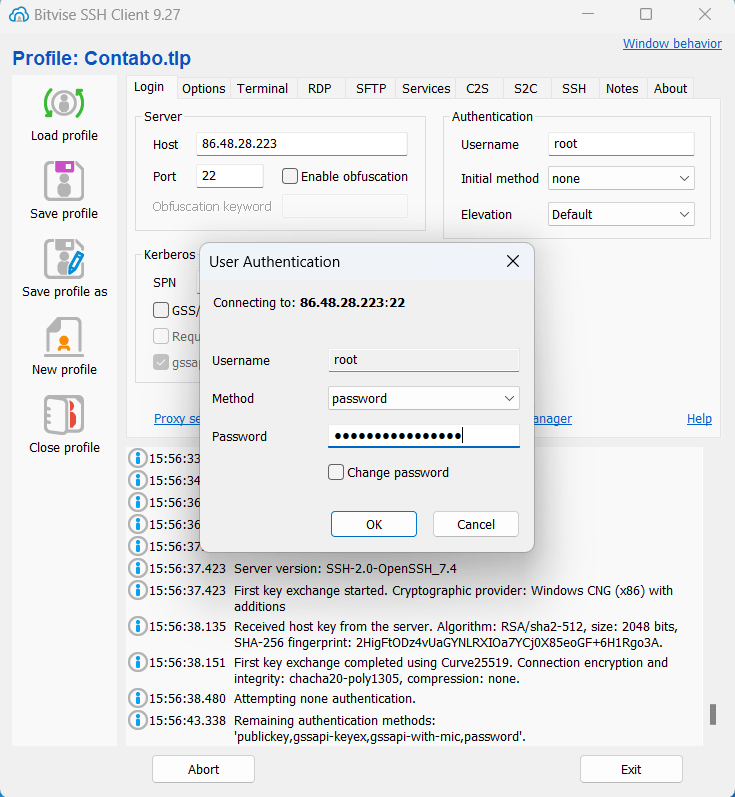
Then click New terminal console.
Next, update system packages by running the following command.
sudo apt update && sudo apt upgrade -y
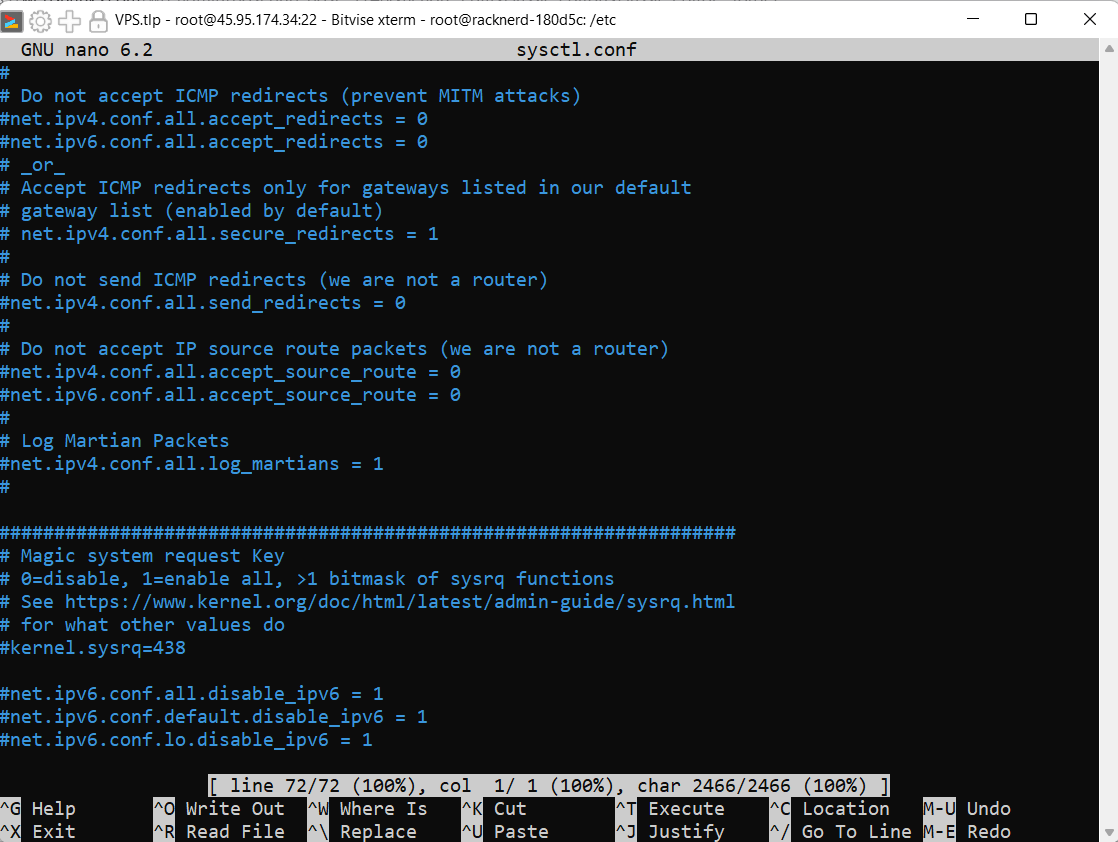
Next we will enable IPv6 on sysctl.conf. Go to /etc/sysctl.conf and edit with your favorite editor. There are two methods. Choose the method that’s easy for you to implement.
Method 1
Add the following to /etc/sysctl.conf

net.ipv6.conf.all.autoconf = 0
net.ipv6.conf.all.accept_ra = 0
net.ipv6.conf.eth0.autoconf = 0
net.ipv6.conf.eth0.accept_ra = 0
And make all values of the following to 0.
net.ipv6.conf.all.disable_ipv6 = 0
net.ipv6.conf.default.disable_ipv6 = 0
net.ipv6.conf.lo.disable_ipv6 = 0
Be sure to reboot your server. Run ping6 google.com to check if you enabled IPv6.
Method 2
Disable these values by adding # before each value. Then save by ctrl + X and choose Y.
#net.ipv6.conf.all.disable_ipv6 = 1
#net.ipv6.conf.default.disable_ipv6 = 1
#net.ipv6.conf.lo.disable_ipv6 = 1
Now we have enabled IPv6 in our server and we will restart our settings by rebooting our VPS. Use sudo reboot.
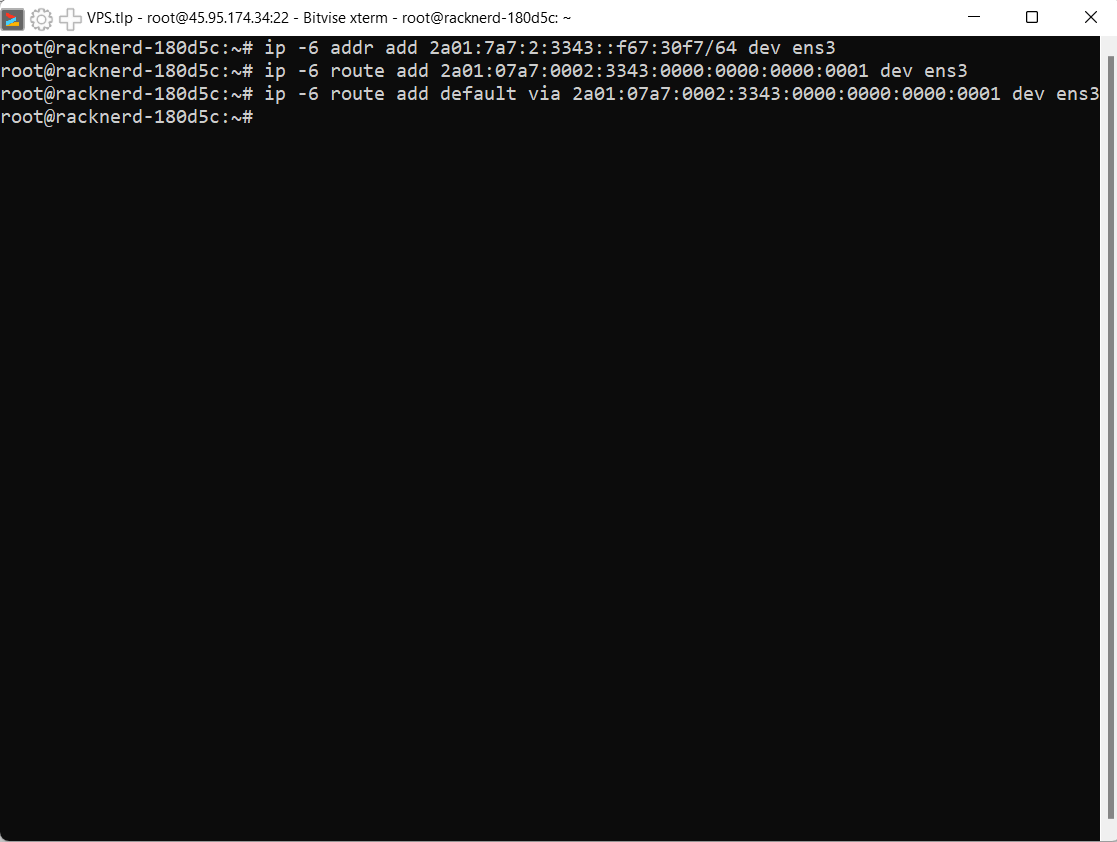
Once you received your IPv6, it’s time to bind it with your VPS. To do that run the following commands.
ip -6 addr add IPv6/64 dev ens3
ip -6 route add GW dev ens3
ip -6 route add default via GW dev ens3
Replace IPv6 with your server IPv6.
Replace GW with your gateway address.
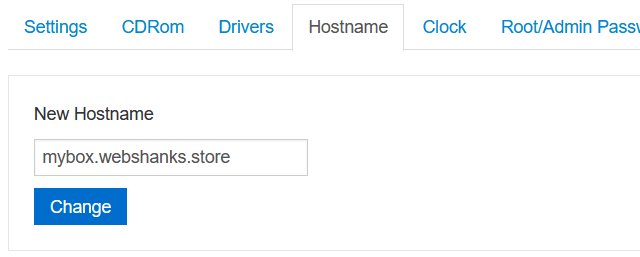
Step 3. Set Hostname
Login to your VPS control panel using the credentials RackNerd provided you with.
Go to Hostname and enter your desired hostname. It should not be your root domain. We will be using mybox.webshanks.store as our hostname.
Step 4. Setup Glue Records and Reverse DNS
Go to your domain name registrar and create glue records. For Namecheap, go to Advanced DNS and scroll down to Personal DNS Server.
Click Add Nameserver and add our DNS.
We will use ns1 and ns2 respectively. That would be:
- ns1.mybox.webshanks.store
- ns2.mybox.webshanks.store
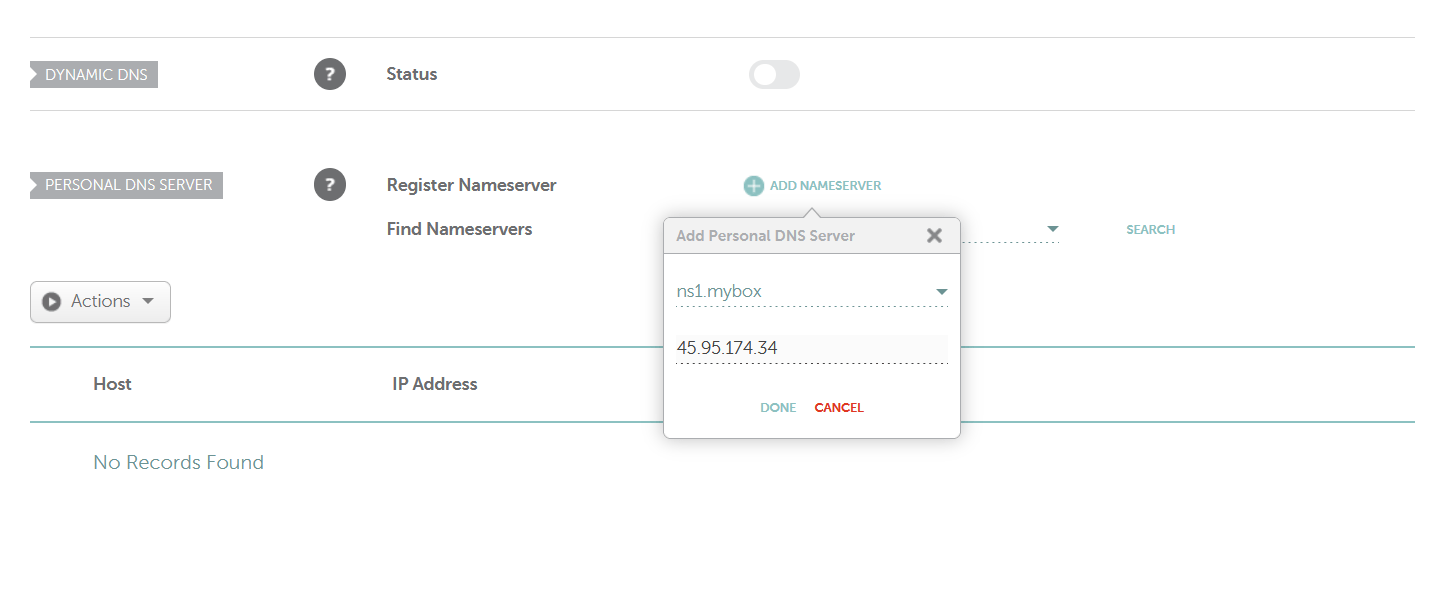
After adding these nameservers, click Search to see how your nameservers look.

Then go back to to Domain tab of Namecheap and we’ll use our newly created personal DNS as our custom DNS.

Now go back to your VPS control panel and head on to Network.
Change your IPv4 and IPv6 rDNS to your hostname mybox.webshanks.store.
You need to request to RackNerd support that you want to change rDNS for your IPv4 and IPv6. It will take at least 24 hours for the changes to propagate.
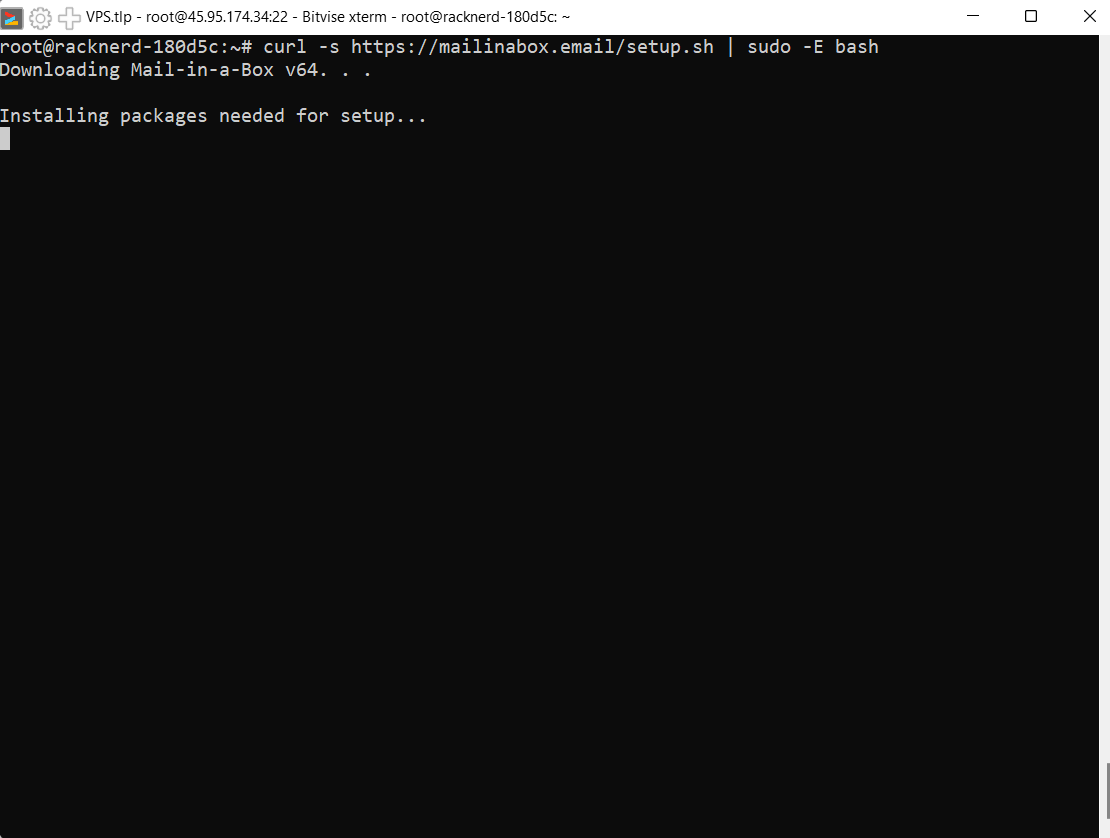
Step 5. Install Mail-in-a-Box
Go back to your terminal.
Install Mail-in-a-Box using the following command.
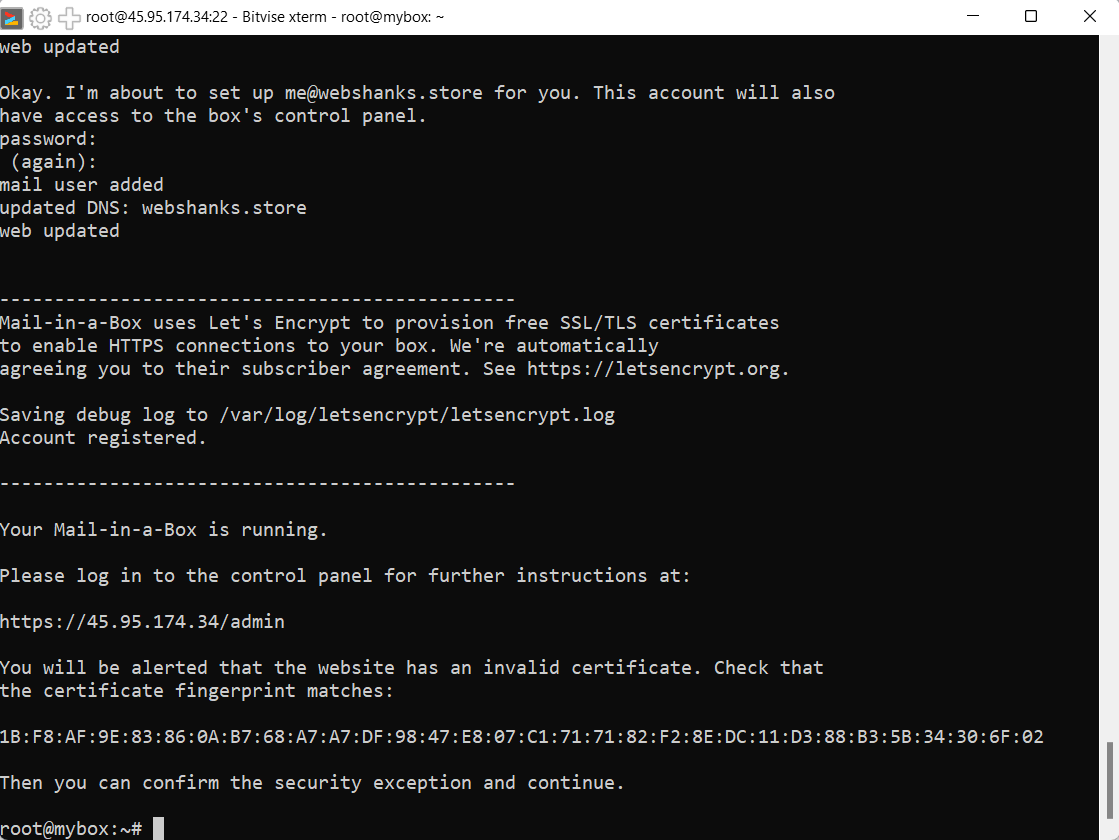
curl -s https://mailinabox.email/setup.sh | sudo -E bash
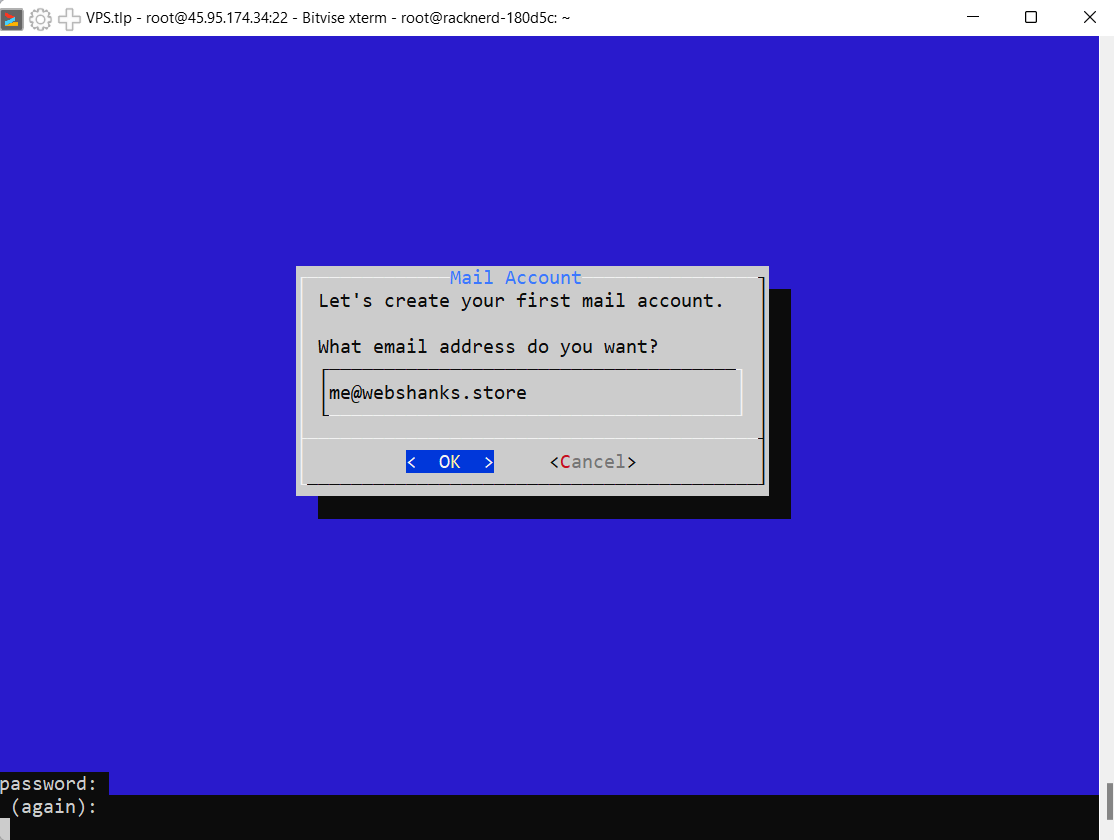
Mail-in-a-Box will ask a few questions. As for email you can use pre-created email like [email protected].
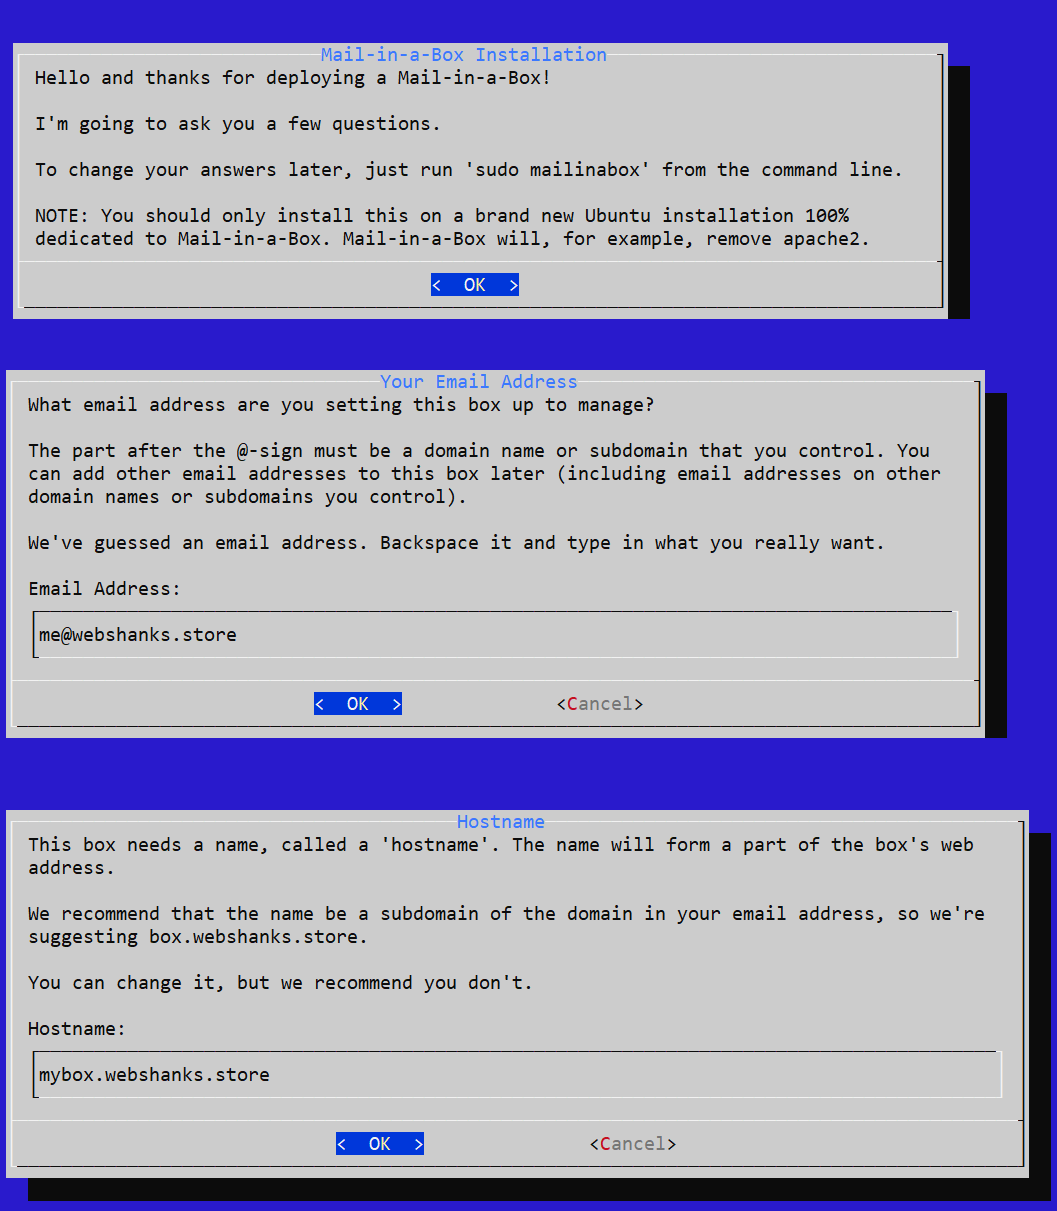
Next add an email address and assign a secure password.
Step 6. Access Mail-in-a-Box Admin Panel
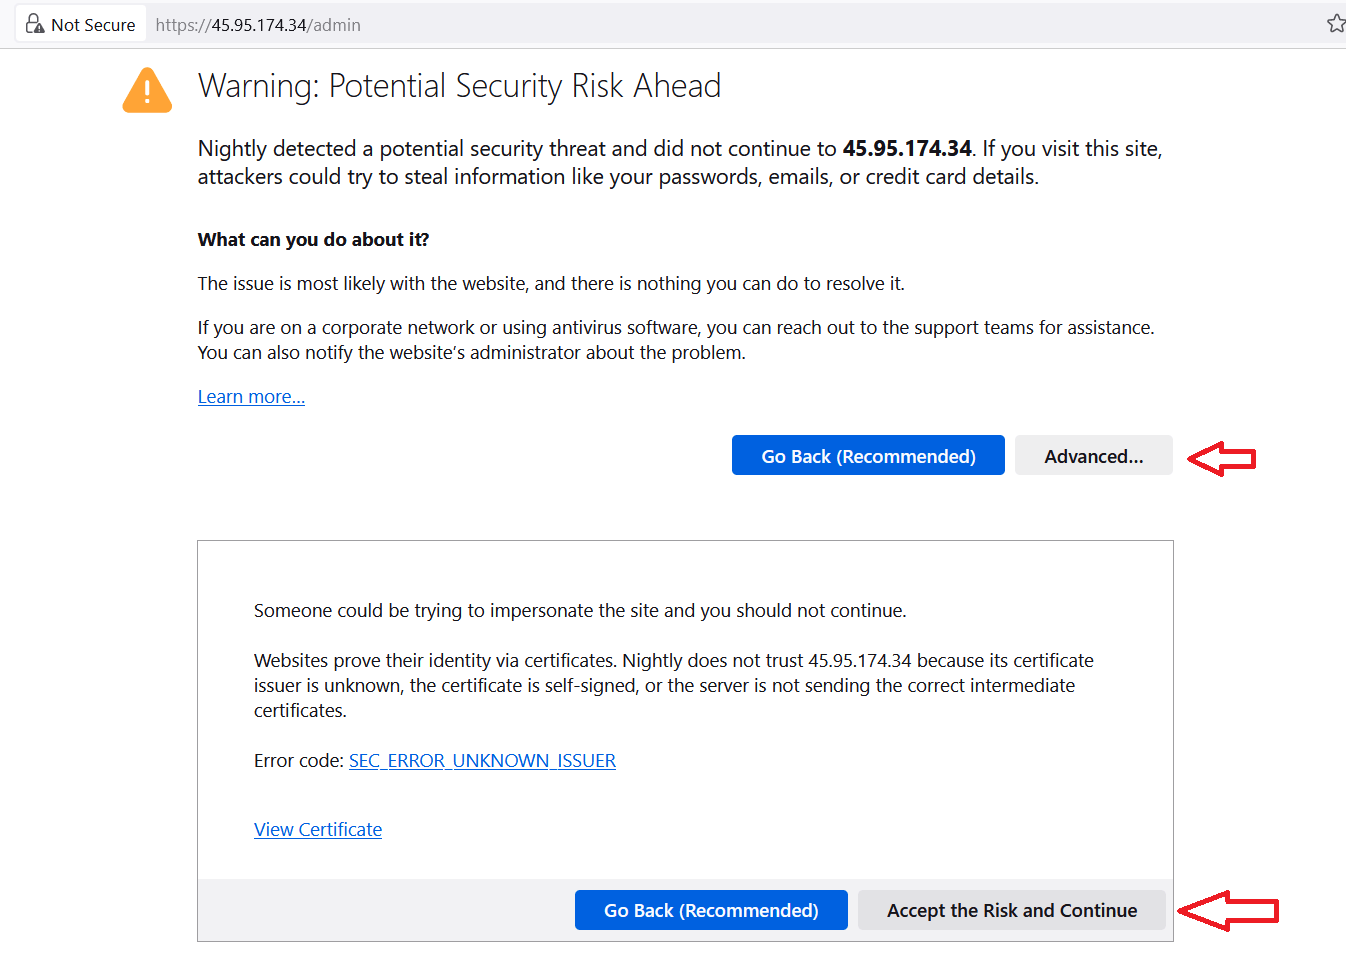
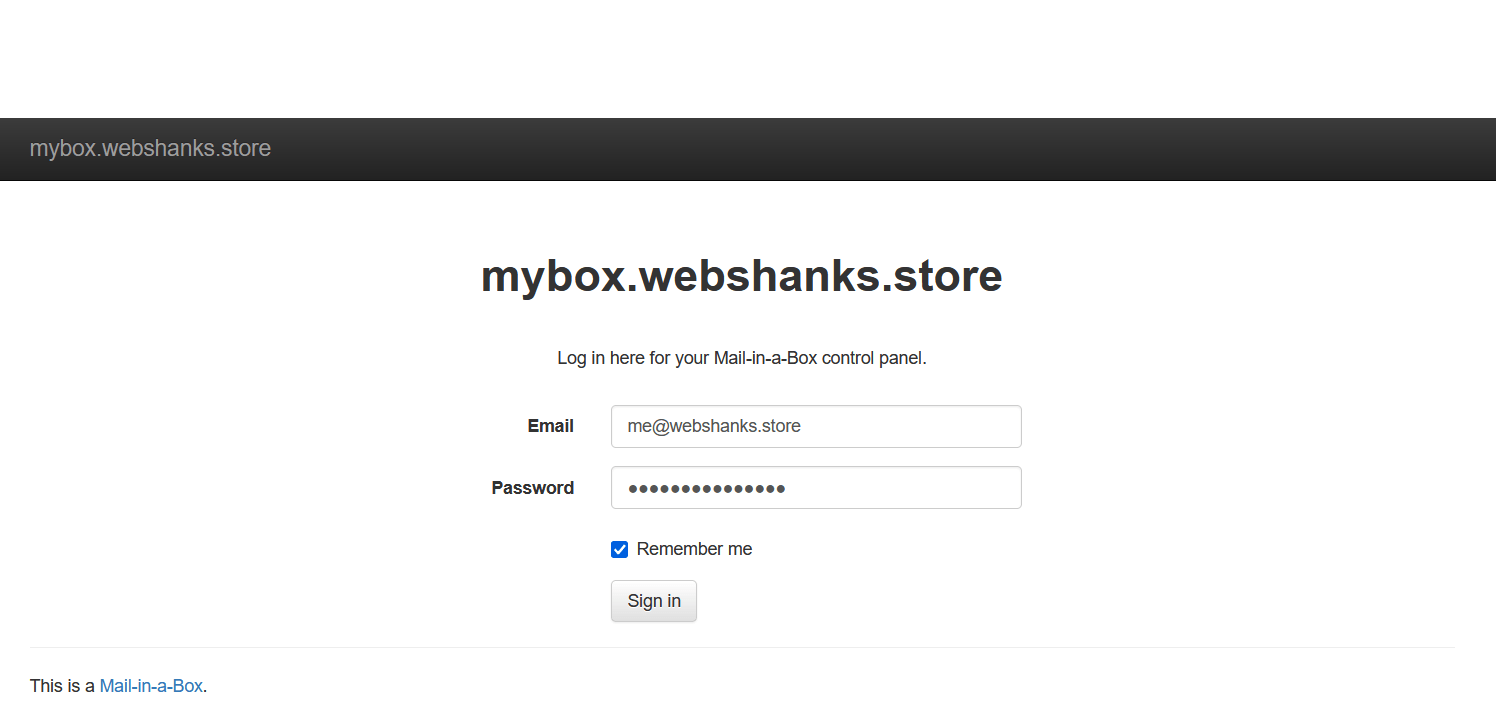
You can access the Mail-in-a-Box admin panel by visiting https://ServerIP/admin, replacing ServerIP with your server IP address. You can also use your hostname mybox.webshanks.store.
Just choose Advanced > Accept the Risk and Continue.
Log in using the admin email address and password you provided during the installation.
Step 7. Configure Mail-in-a-Box
Install certificates.
Go to System > TLS (SSL) Certificates > click Provision.
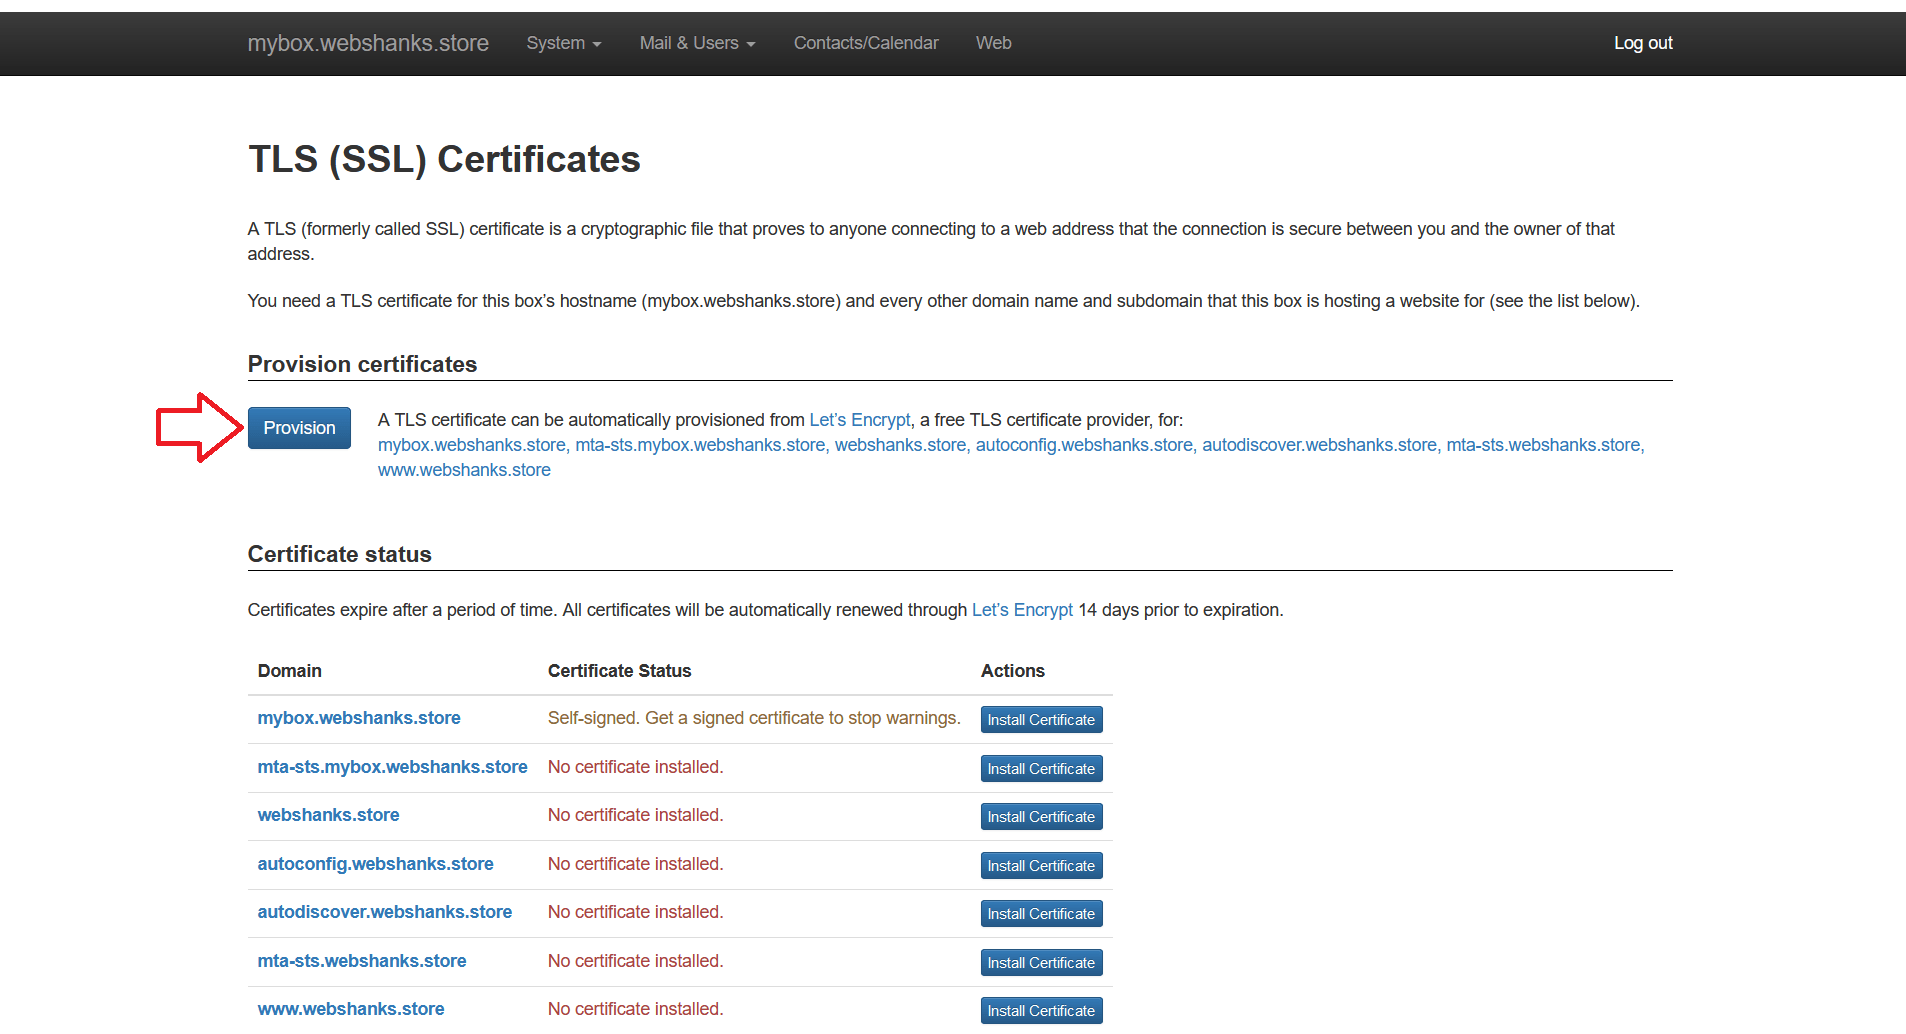
You might encounter that the first two values under Domain has not issued a certificate. Click Provision again to install Certificates. If you face an error, refresh your web browser.
Once you have installed the certificates, it will appear like this.
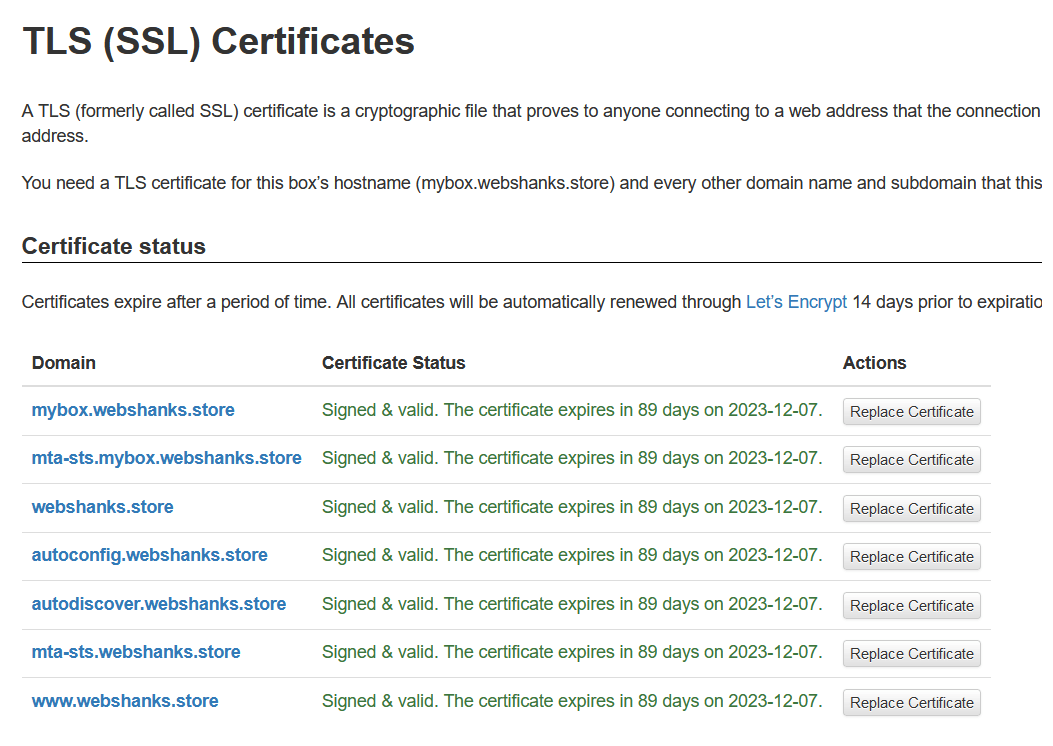
Now you can login using mybox.webshanks.store/admin with a secure connection.
Set DNSSEC
Go back to Namecheap.
Go to Advanced DNS and enable DNSSEC.
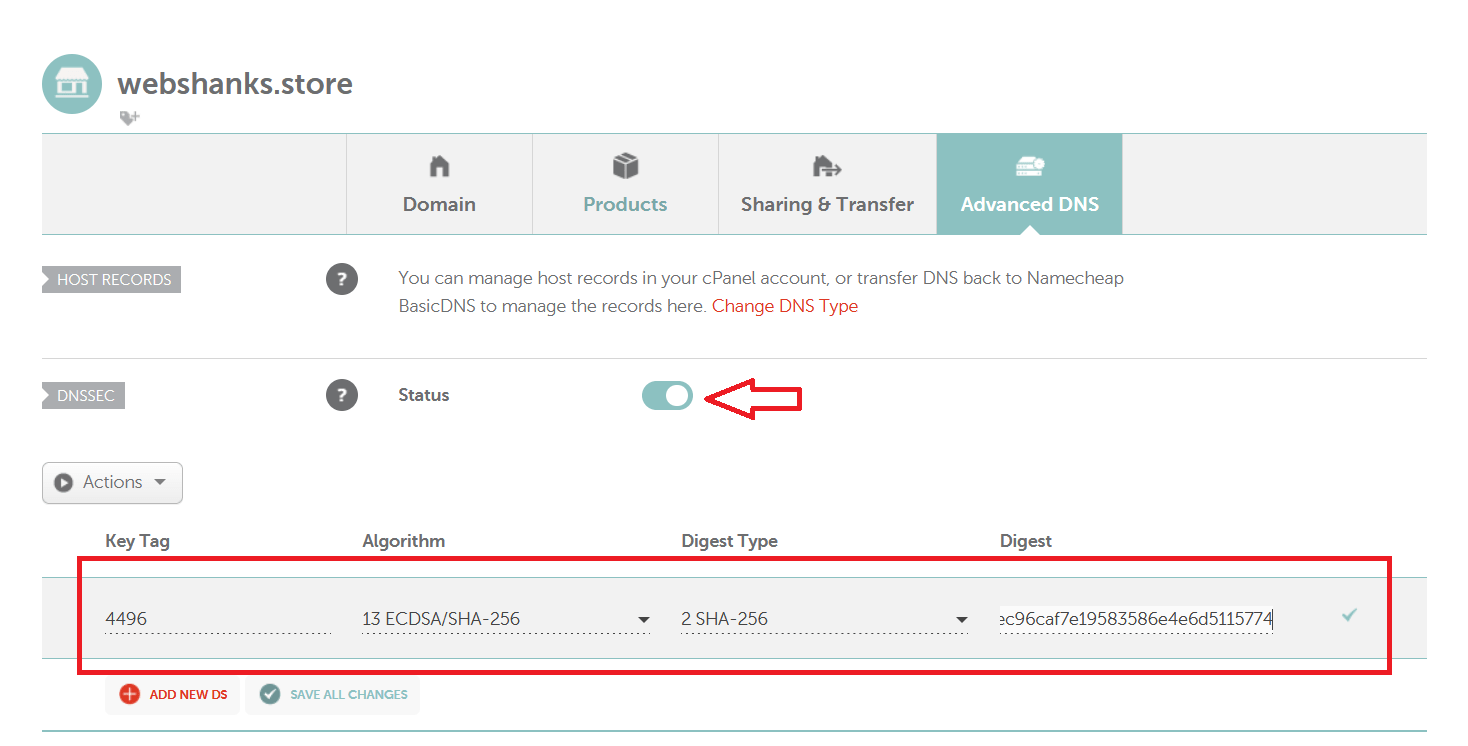
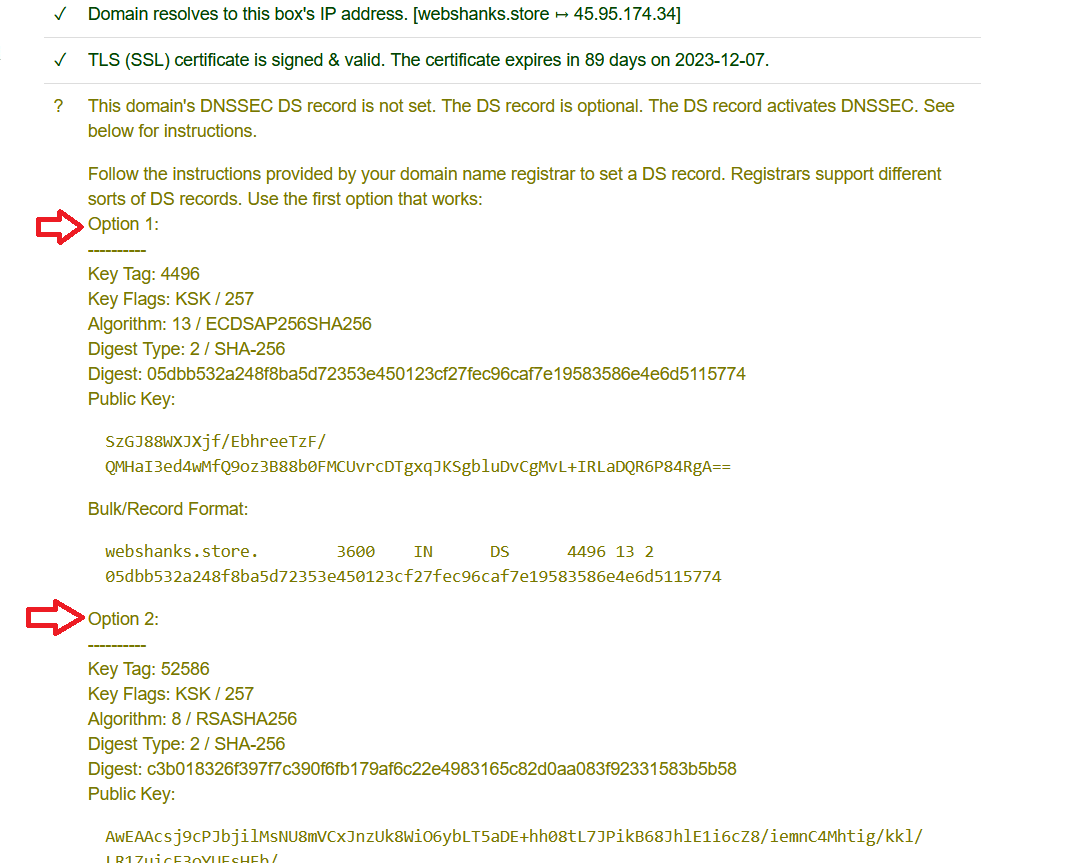
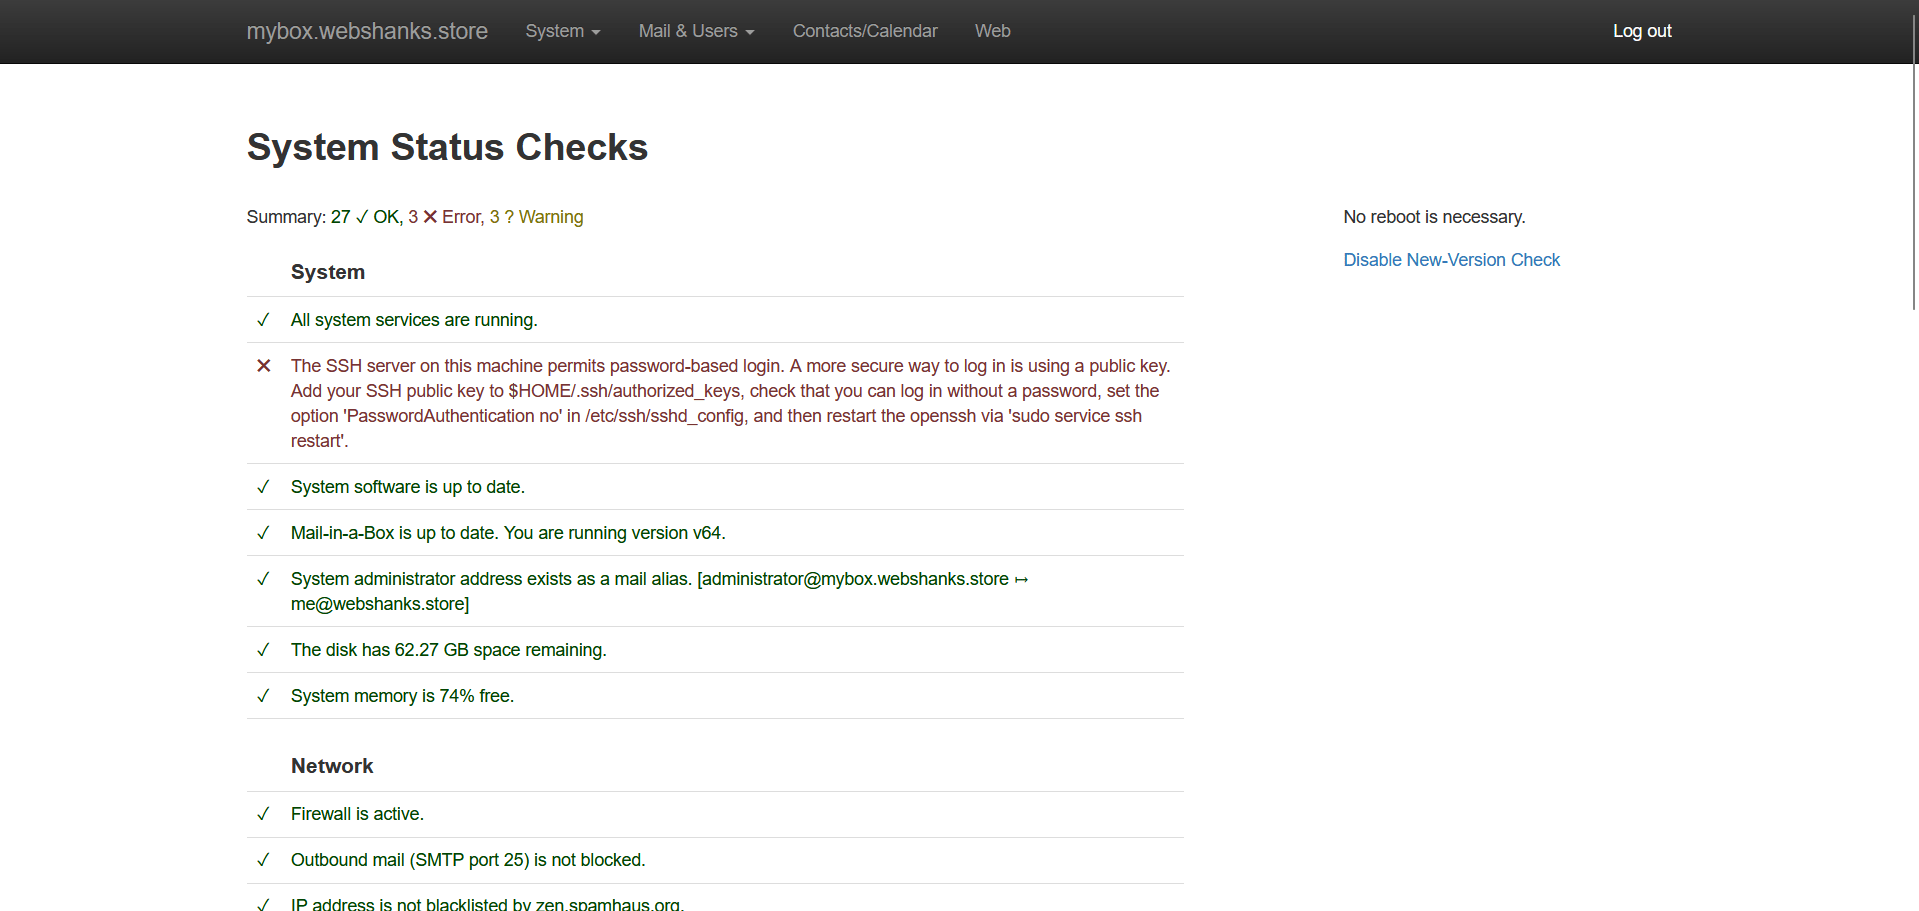
You can find the values for DNSSEC under System > Status Checks.
Wait for at least 60 minutes for this to take into effect. Check the Status once 60 minutes have passed. You can choose Option 1 or Option 2.
You can then the status of your Mail-in-a-Box to see which part needs correcting.
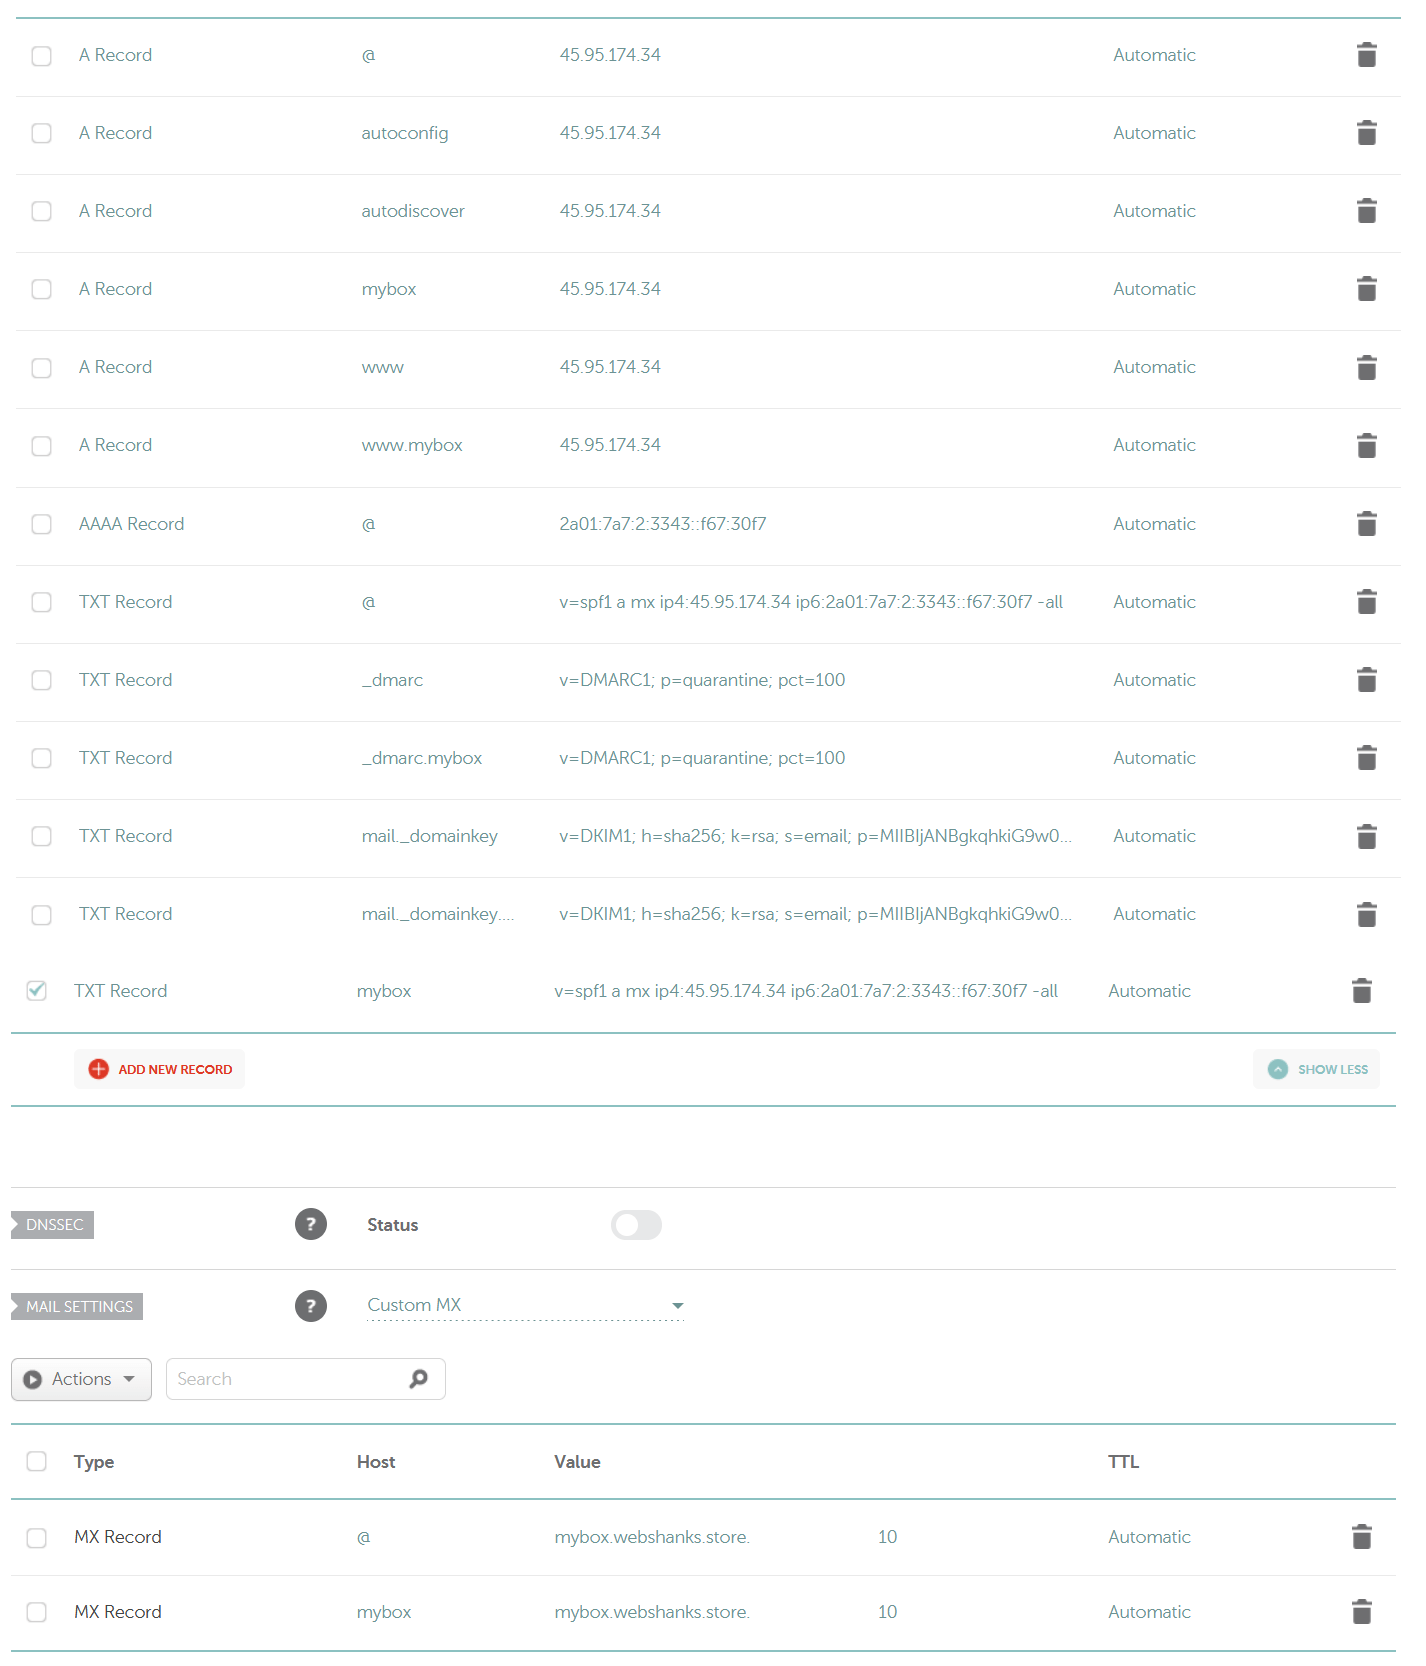
You can also use Mail-in-a-Box external DNS to manually add each records. The problem I have with using glue records is my emails sent to AOL Mail went to spam. Therefore I need to use external DNS records instead of the glue records.
I used Namecheap Basic DNS and added important DNS records. Now this is how it looks like.
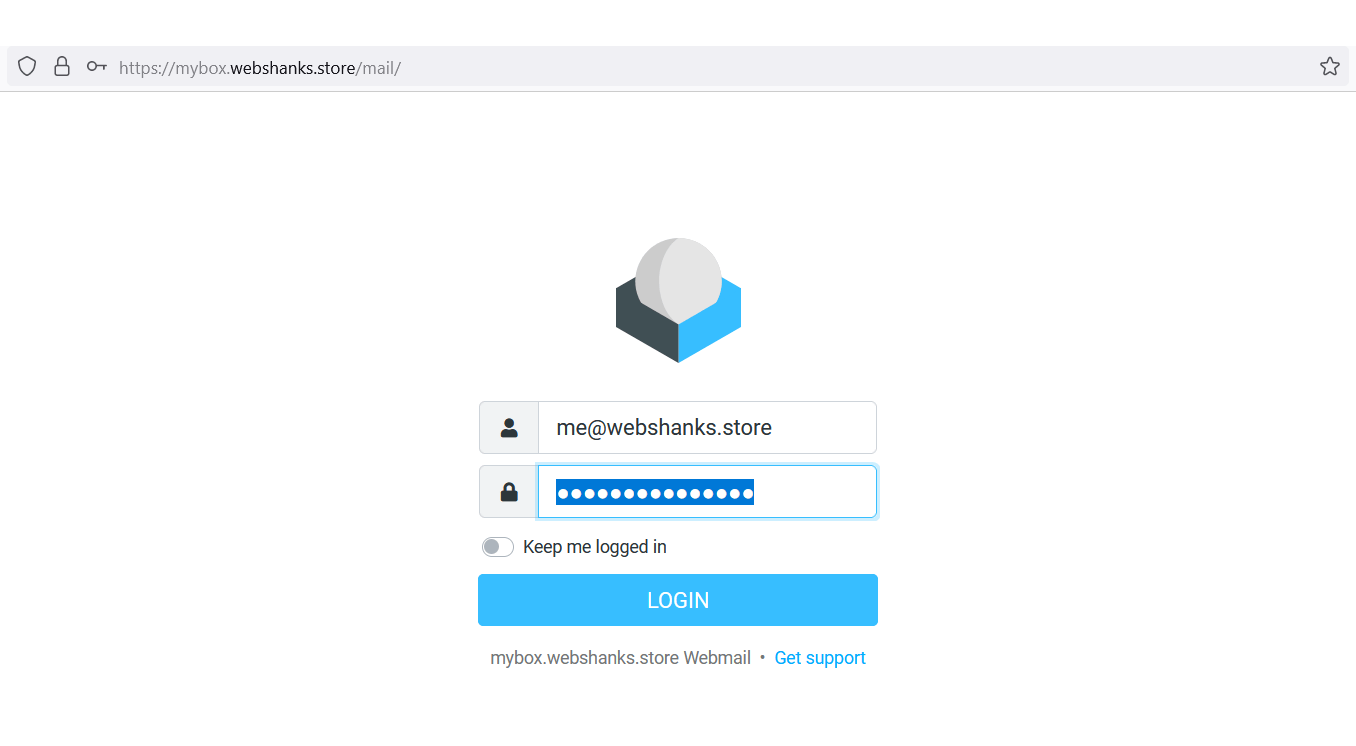
Step 8. Login to Webmail
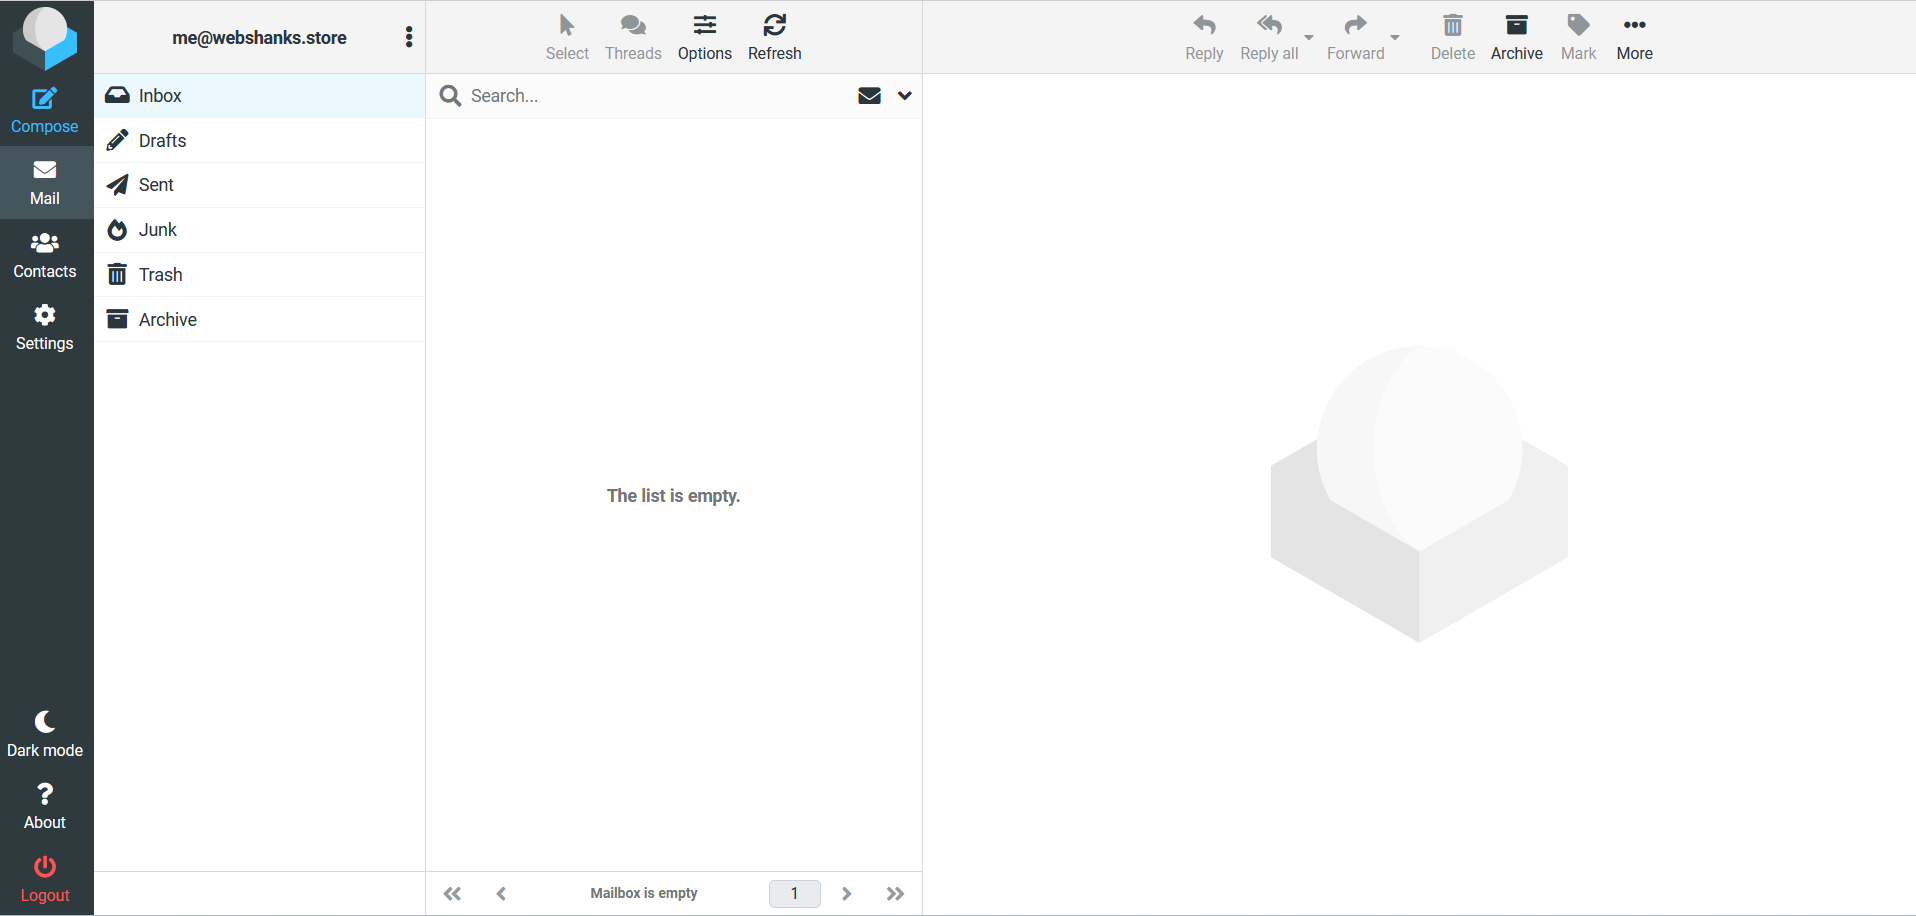
Go to mybox.webshanks.store/mail to access Roundcube webmail.
And welcome to your webmail!
Step 9. Testing
Finally, we need to test our email server. We will use an email template instead of plain boring 1-2 sentences message.
But first we will test our email deliverability using Mail-Tester.
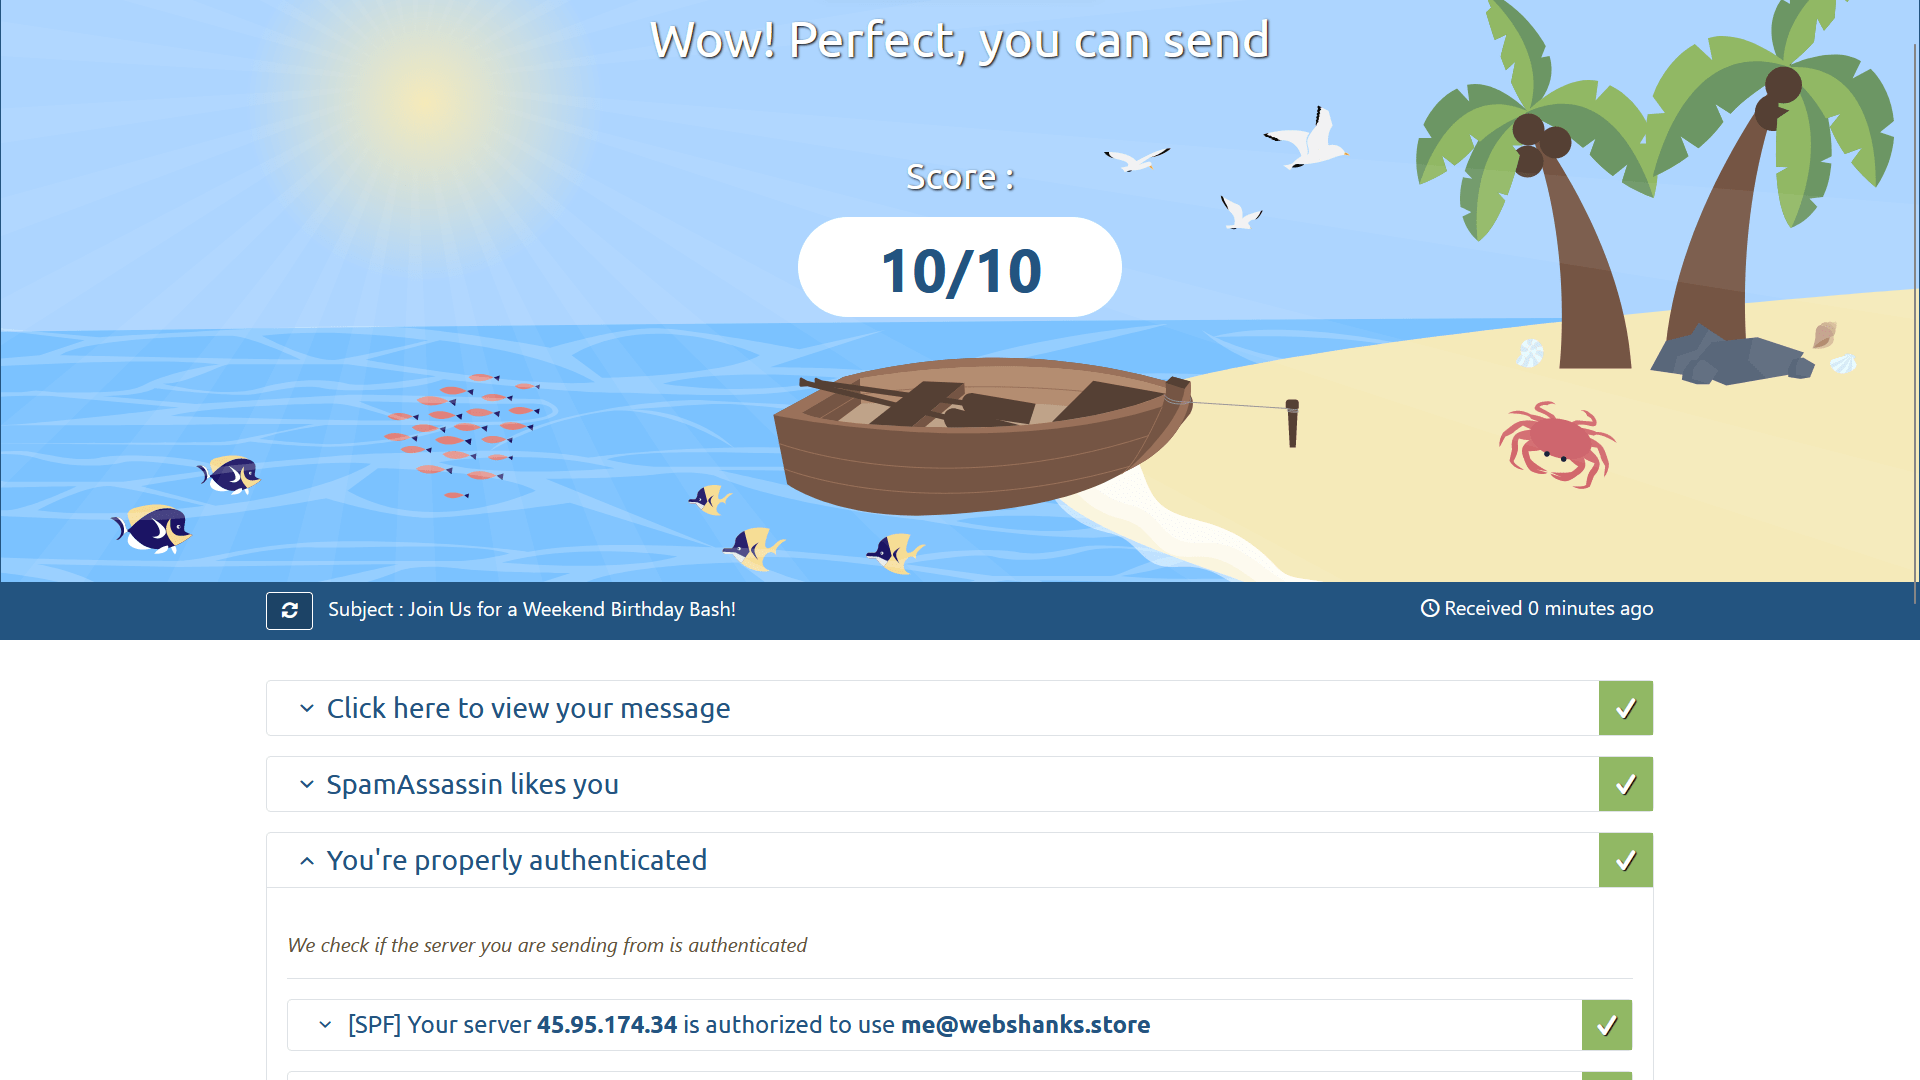
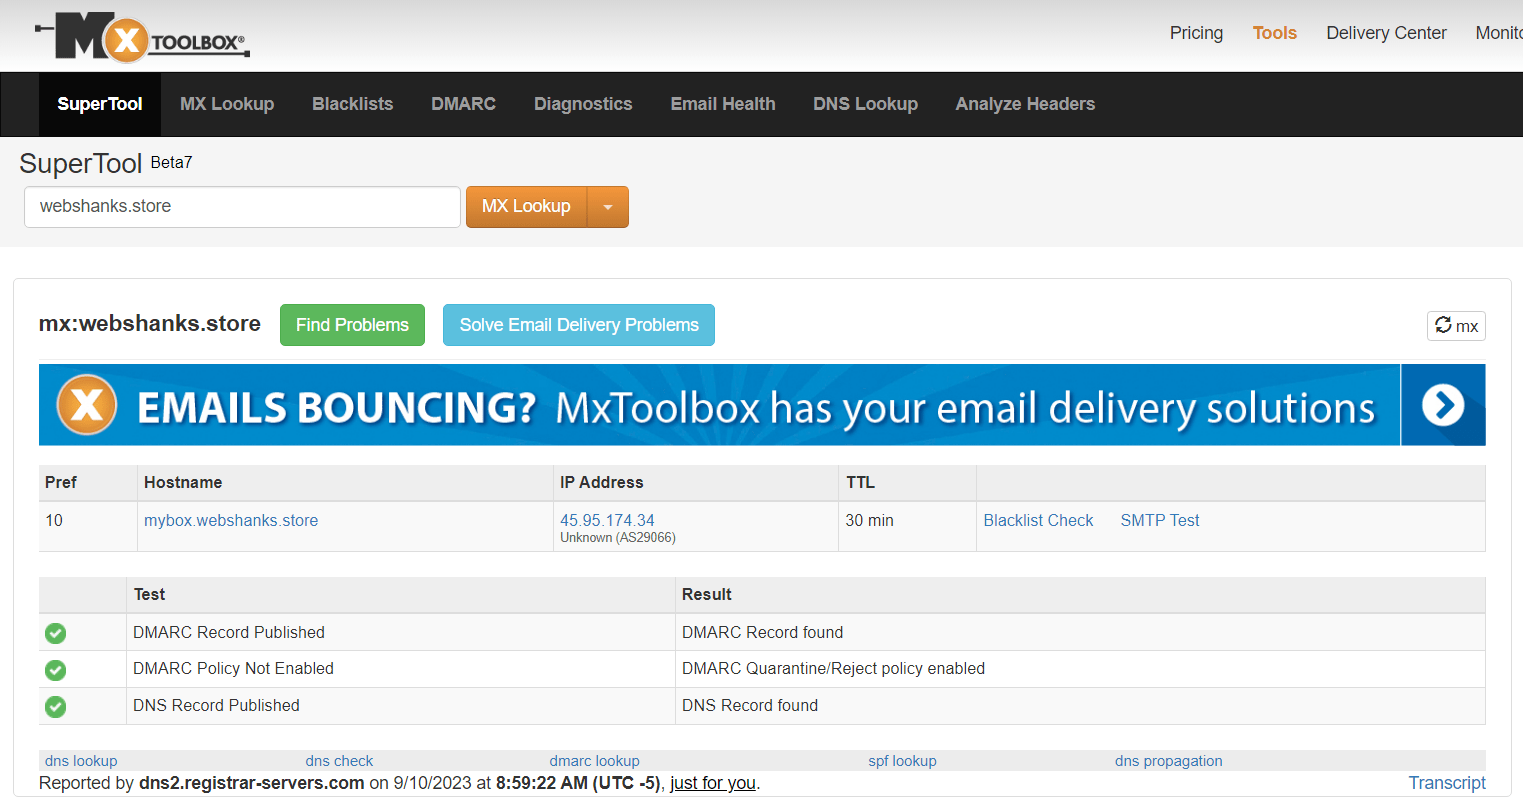
Then I’ll have it also checked in mxtoolbox.
Then we are good to go.
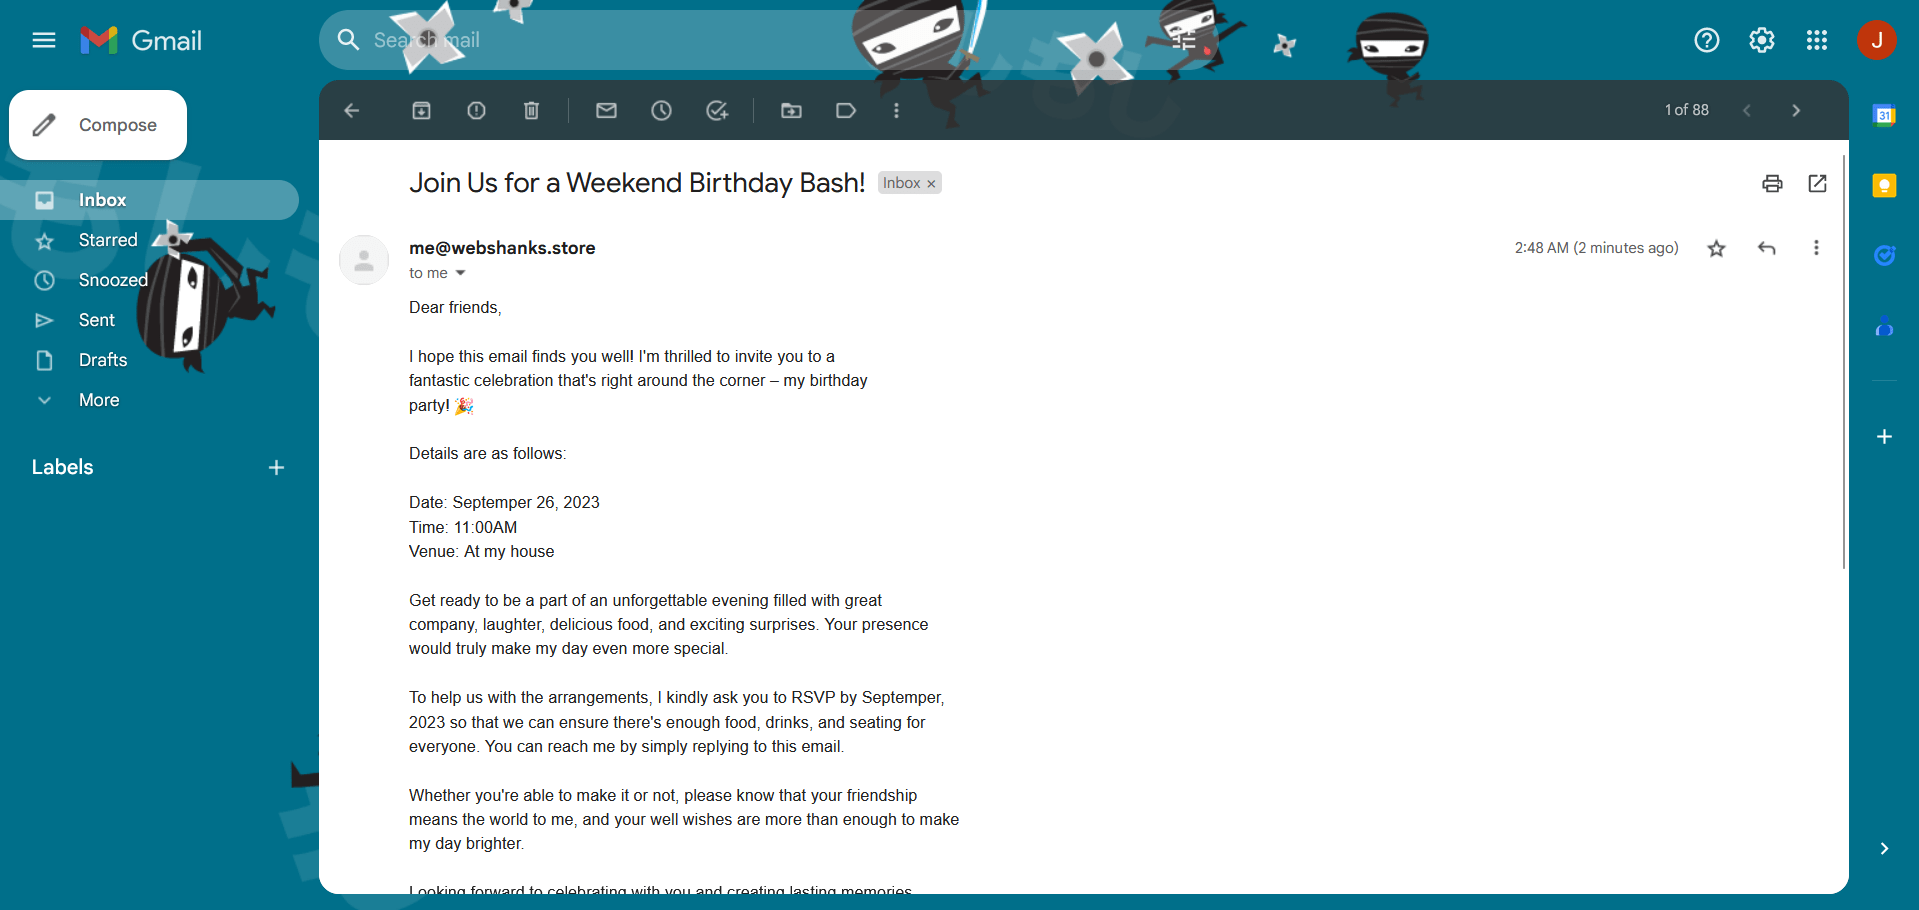
We will send a test message in Gmail and Proton Mail.
Success! We have received the test email in Gmail.
Let’s try to reply “Count me in.”
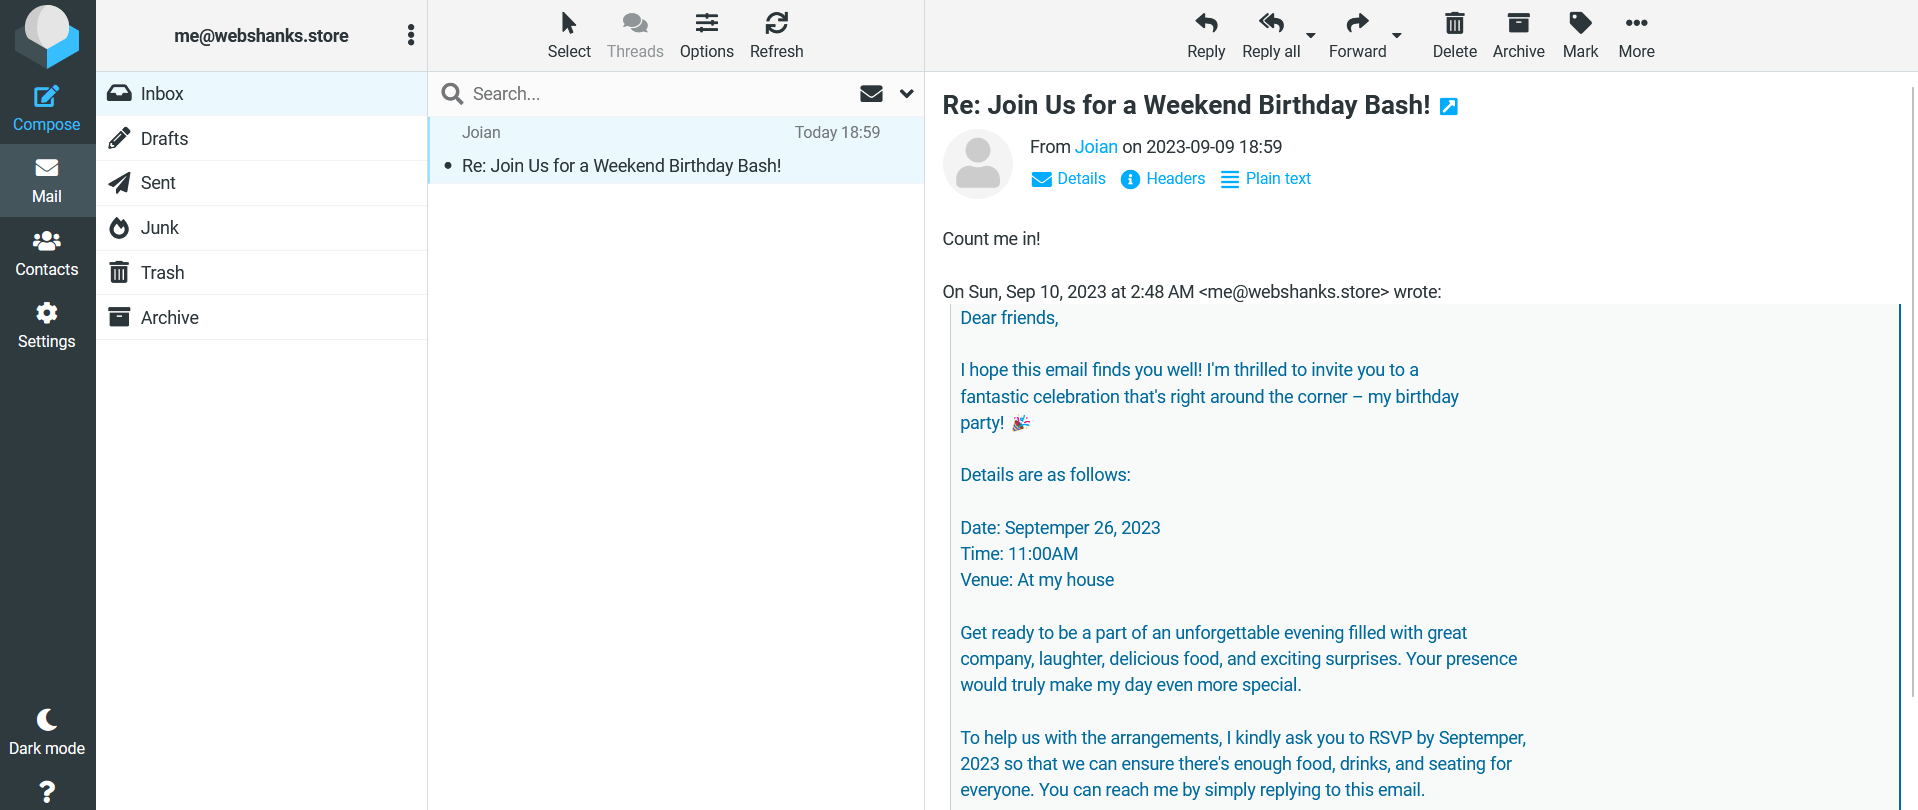
Next we’ll send an email to Proton.
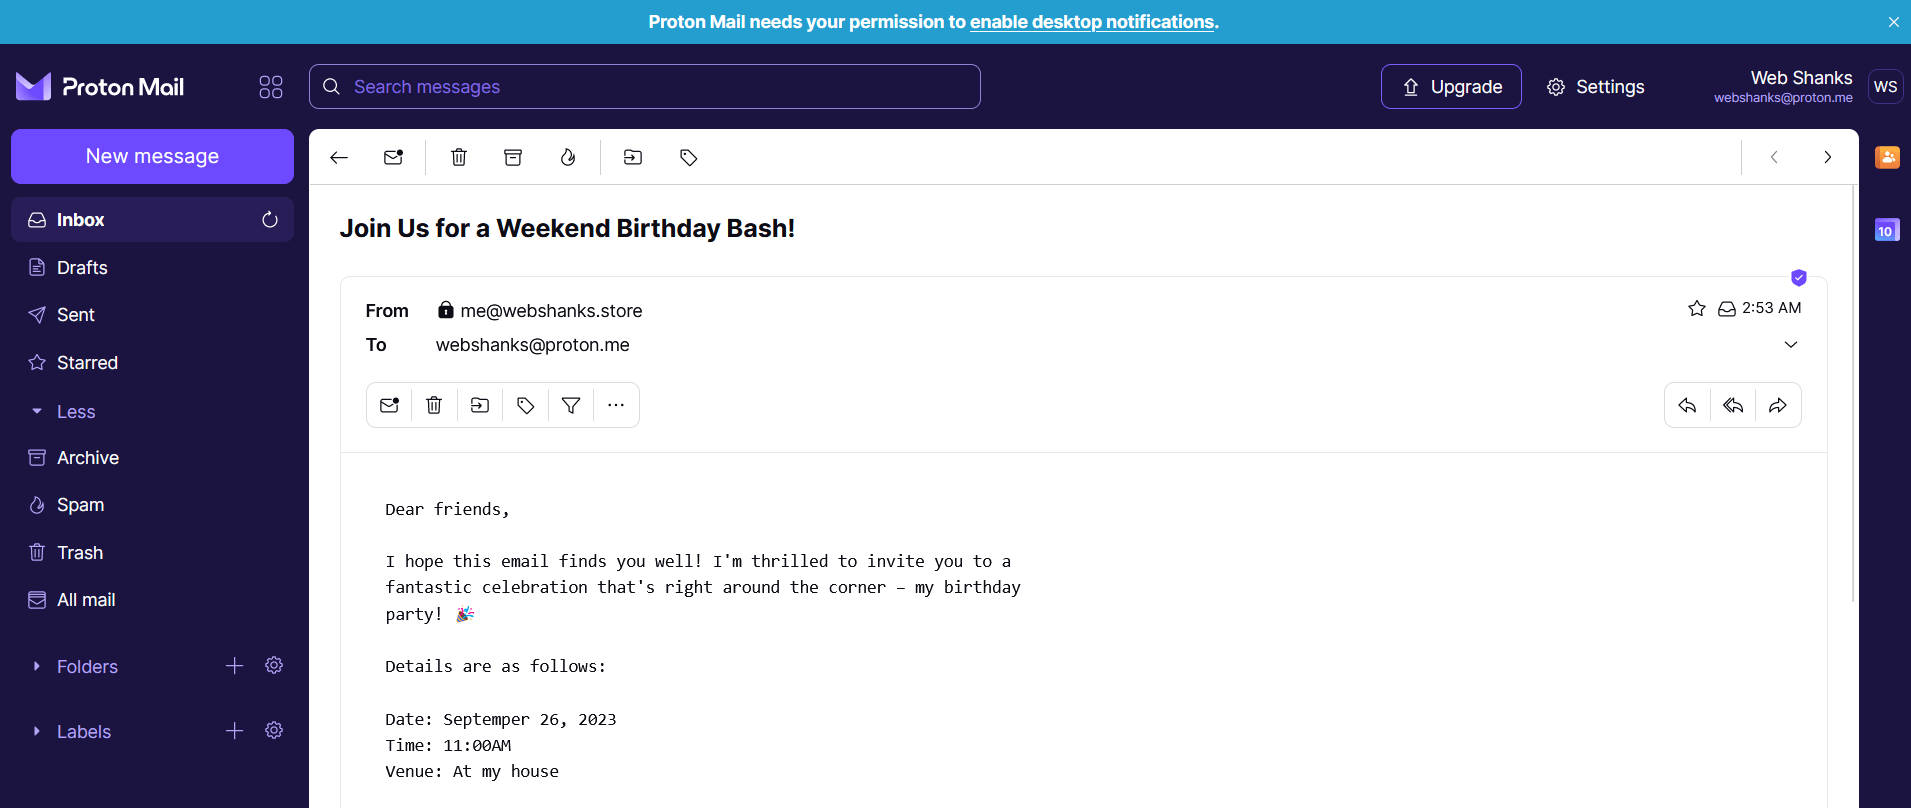
Success! Now we have a running mail server using Mail-in-a-Box.
Troubleshooting
1. If you face a 500 internal server error.
Solution: Rerun the installation using sudo mailinabox command.
2. Emails went to spam
Solution: Warm your IP using this method. Or you can use external DNS records provided by Mail-in-a-Box for more flexible DNS records options.
Best Practices
Before sending out mass emails from your Mail-in-a-Box server, it’s crucial to follow best practices to ensure that your emails are delivered successfully and that you maintain a positive reputation as a sender.
If you’re using a new IP address, start with a low volume of emails and gradually increase it over time. This process, known as IP warming, helps establish a positive sender reputation.
Racknerd Offers
💰 RackNerd Deals France
1GB KVM VPS Special (France) $17.98/Year
Check it here
2GB KVM VPS Special (France) $24.89/Year
Check it here
4GB KVM VPS Special (France) $44.59/Year
Check it here
Frequently Asked Questions (FAQ)
What is Mail-in-a-Box?
Mail-in-a-Box is an open-source email server solution that simplifies the process of setting up your email server. It includes essential components like SMTP, IMAP, webmail, and spam filtering.
Is it really free?
Mail-in-a-Box is free to use, but keep in mind that you will incur costs for your VPS hosting and domain registration.
Can I use other platforms together with Mail-in-a-Box?
No. Mail-in-a-Box should be dedicated to one server alone. However you can create static HTML/CSS website. If you want WordPress website, you should find an alternative to Mail-in-a-Box like Cloudron, aaPanel or HestiaCP.
Can I use my existing domain for the email server?
Yes, you can use an existing domain for your email server as long as you have access to its DNS settings.
How do I add additional email accounts?
You can add additional email accounts through the Mail-in-a-Box admin panel. Simply navigate to Mail & Users > Users section and create new mail users.
How can I secure my email server?
Mail-in-a-Box configures SSL certificates by default, which helps secure your email traffic. Additionally, you should regularly update your server, use strong passwords, and follow best security practices.
Watch on YouTube
Conclusion
Setting up a free email server on Ubuntu 22.04 with Mail-in-a-Box is a great way to gain control over your email communications.
With the right prerequisites and following the steps outlined in this guide, even beginners can establish a secure and functional email server.
Remember to keep your server and Mail-in-a-Box software up-to-date to ensure the best performance and security for your email services.
Enjoy your newfound email server control and privacy!
which is better to manage email server cyberpanel or mail in box or mailcow?
Cyberpanel for starters, miab or mailcow for intermediate-advanced users.
can you run email server for me and i will pay for the service
Yes sure! Please contact me on my email: [email protected]